When you click on links to various merchants on this site and make a purchase, this can result in this site earning a commission. Affiliate programs and affiliations include, but are not limited to, the eBay Partner Network.
Its been a while since this post so hopefully someone answers. Lol I can't get the duat cover to go back on the hub. I bolted the hub already but the dust cover is a pain. Any tips?? I have already tried forcing it in, but it bent and had to go buy a new one.
Thought I'd add to this thread since I just replaced by left rear wheel hub over the past couple weekends. Why did it take a couple of weekends you ask? Well, my IS250 is my winter car, (I live in Canada) and the corrosion was insane! I had to take a few different approaches to replacing the wheel hub:
Approach 1: I watched a few Youtube videos that make it look easy - undo the four bolts holding the hub assembly, put on the wheel, or use a slide hammer and pull the hub out. I discovered two issues with this method. 1) It would be extremely difficult when putting the new hub back in to get the deflector to line up, the tolerance is crazy tight. Which would lead to the question issue above. 2) When the deflector and hub are extremely corroded, this happens: Actually separated the wheel bearing. *note, yes i removed the axle nut before trying to remove the bearing, i put it back on to avoid damaging any threads while working around it
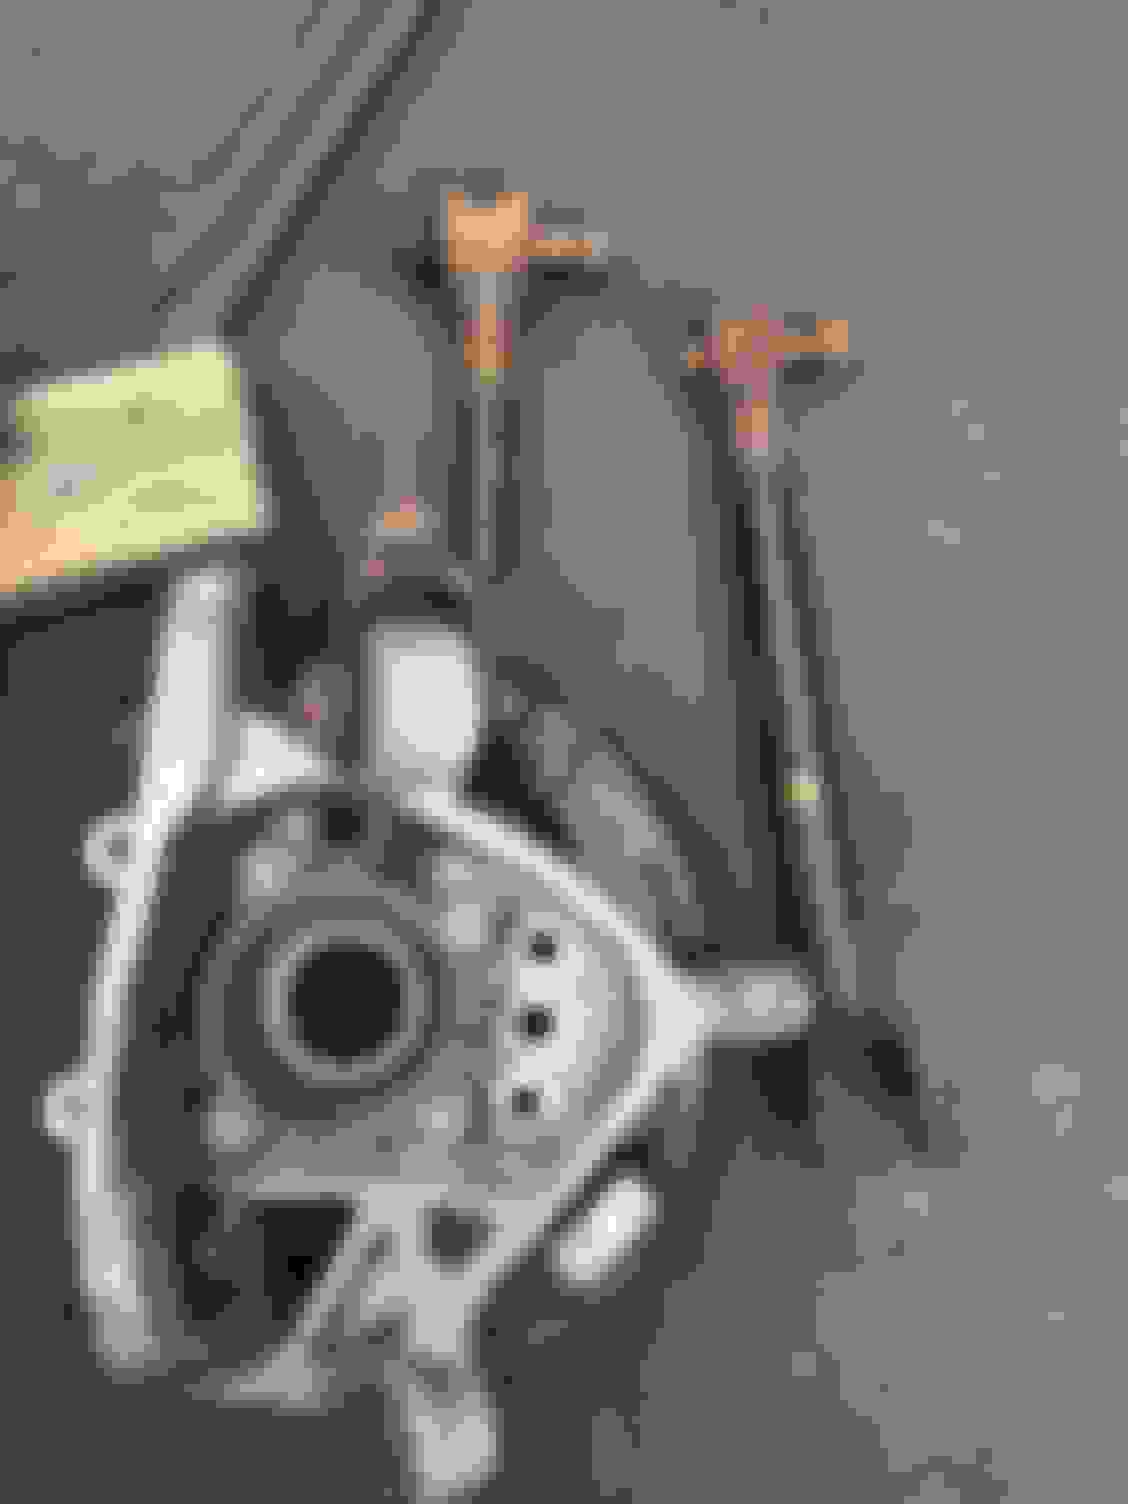
Approach 2: Follow TIS method for replacing the hub which involves removing the whole knuckle assembly. Even this wasn't easy due to the corrosion. i ended having to cut a lot of the bolts out, and even cut one of the upper control arms:
I ended up getting a used knuckle and control arms of eBay, but the challenge wasn't over. Pressing the deflector onto the new hub was a huge PIA. There is a Toyota SST for doing it, but I used a 4 x 4 block of wood and a hammer, and eventually got it.
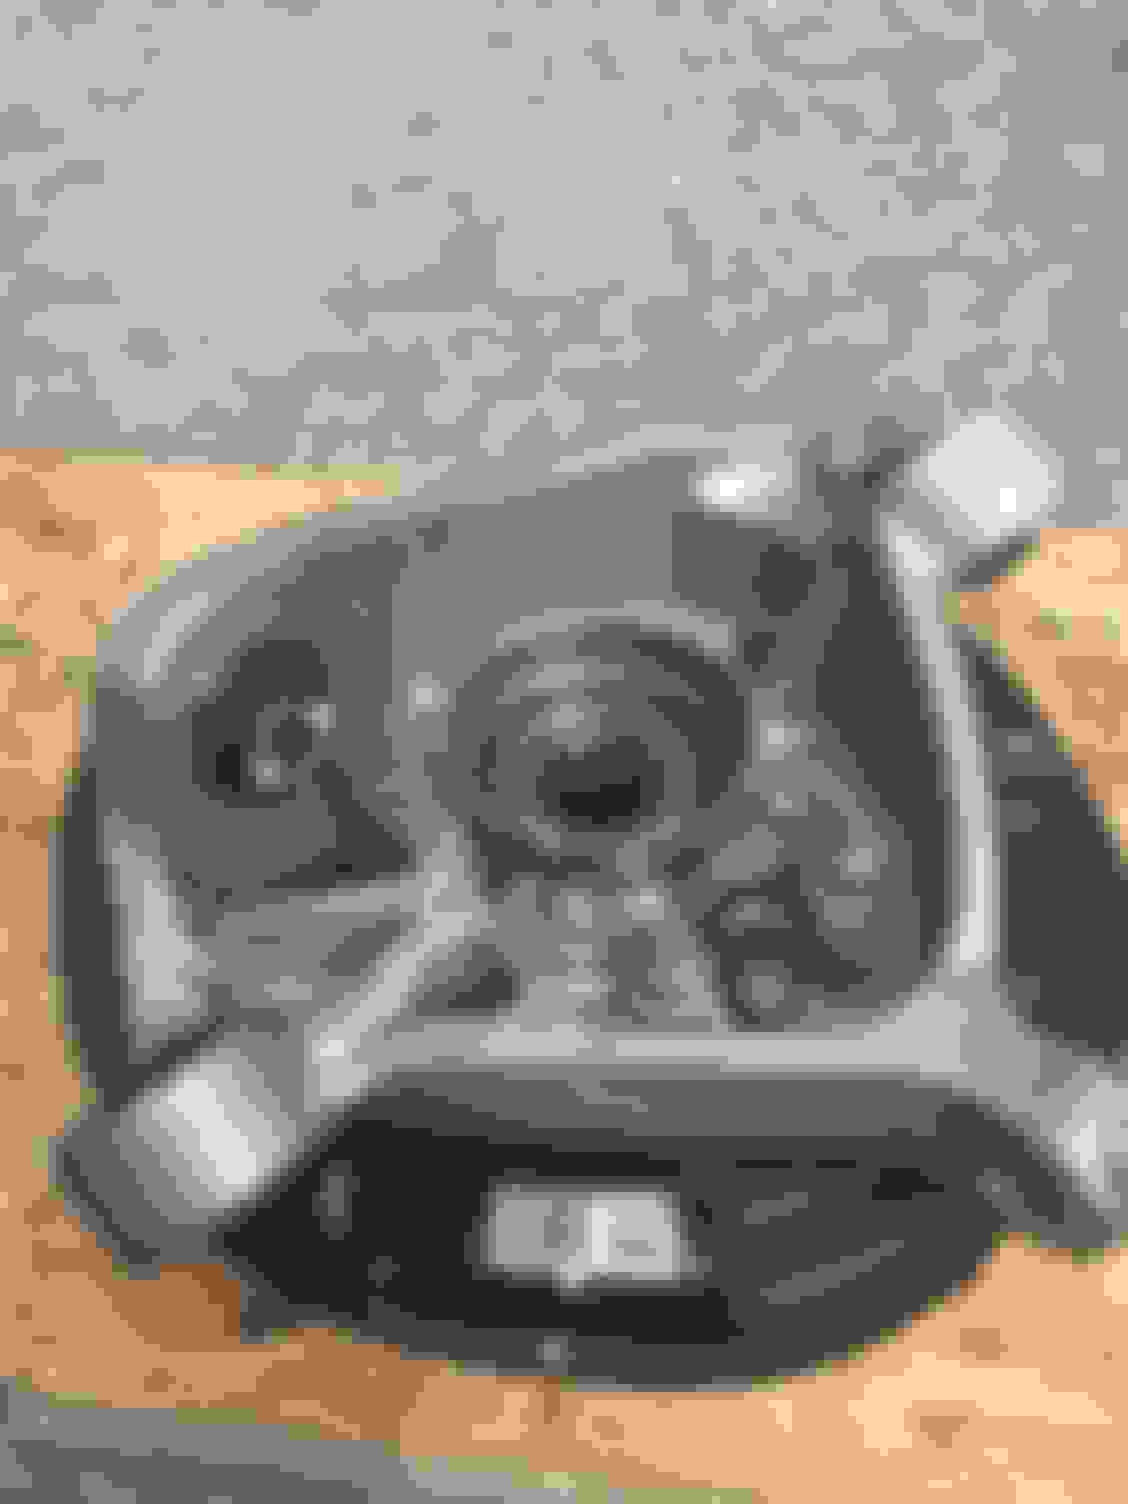
New (used) knuckle with new hub and new deflector installed
I also had to replace the speed sensor because I broke the tip trying to get the hub out originally, and even once the old hub was removed, the speed sensor was fused into the aluminum knuckle.
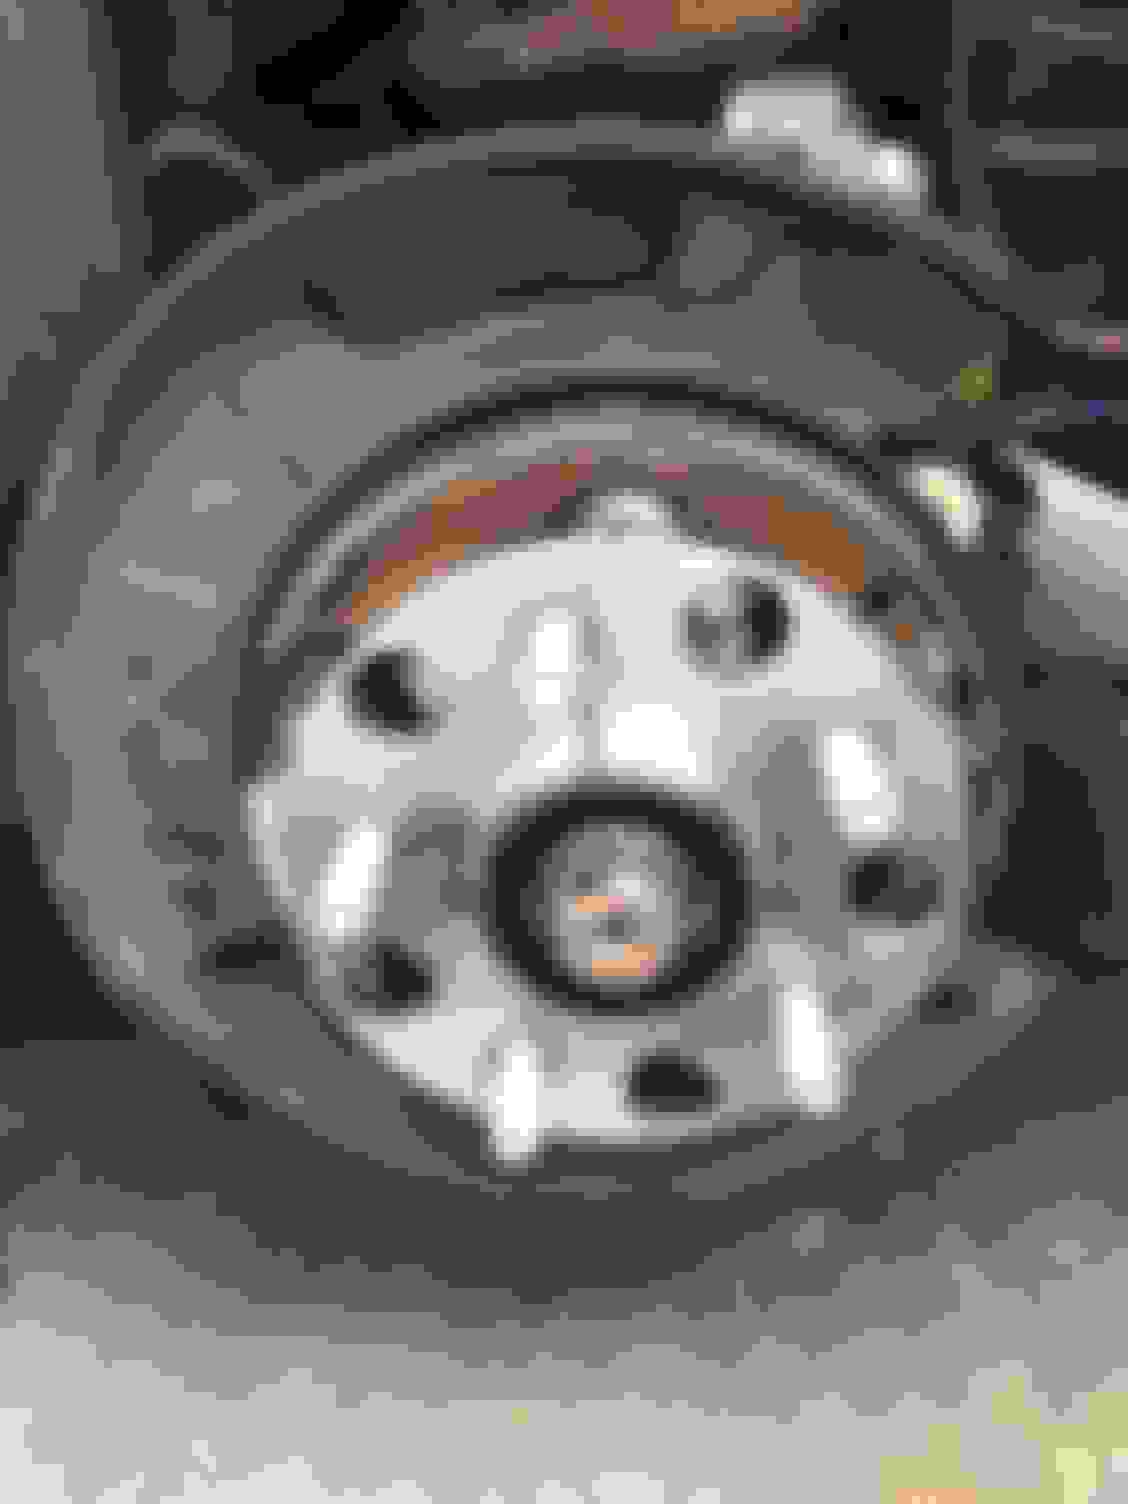
Finally got everything back together: New hub. And yes, I did stake the axle nut after this pic was taken
Before tightening all of the control arms, I stabilized the suspension, torqued everything down to spec, and added shiny new rotors and pads to my not so shiny calipers.
Moral(s) of the story:
i. Working on corroded Canadian cars sucks!
ii. If doing it again, corrosion or not, I would follow the TIS procedure, instead of just trying to pull the hub. Not sure how you can properly/accurately seat the deflector otherwise. If you can easily remove the control arm bolts attaching the knuckle, this whole process wouldn't take more than a few hours. It took me several weekends because I had to order the used hub and control arms, and wait for them to arrive.
Yeah, I just did this as well on the driver's side rear. My car is from NJ, so it had a bit of "rust". The only component I had a problem with was oddly was the speed sensor. It was "fused" like yours to the hub. I didn't need the slide hammer, though I rented one from my local auto parts store. I ended up taking off the entire hub just to be able to remove that sensor. It made the process easier, but more costly, as my sensor was > $200. YIkes! I had no idea before I started this project that they were soooo pricey.
Thought I'd add to this thread since I just replaced by left rear wheel hub over the past couple weekends. Why did it take a couple of weekends you ask? Well, my IS250 is my winter car, (I live in Canada) and the corrosion was insane! I had to take a few different approaches to replacing the wheel hub:
Approach 1: I watched a few Youtube videos that make it look easy - undo the four bolts holding the hub assembly, put on the wheel, or use a slide hammer and pull the hub out. I discovered two issues with this method. 1) It would be extremely difficult when putting the new hub back in to get the deflector to line up, the tolerance is crazy tight. Which would lead to the question issue above. 2) When the deflector and hub are extremely corroded, this happens:
Actually separated the wheel bearing. *note, yes i removed the axle nut before trying to remove the bearing, i put it back on to avoid damaging any threads while working around it
Approach 2: Follow TIS method for replacing the hub which involves removing the whole knuckle assembly. Even this wasn't easy due to the corrosion. i ended having to cut a lot of the bolts out, and even cut one of the upper control arms:
I ended up getting a used knuckle and control arms of eBay, but the challenge wasn't over. Pressing the deflector onto the new hub was a huge PIA. There is a Toyota SST for doing it, but I used a 4 x 4 block of wood and a hammer, and eventually got it.
New (used) knuckle with new hub and new deflector installed
I also had to replace the speed sensor because I broke the tip trying to get the hub out originally, and even once the old hub was removed, the speed sensor was fused into the aluminum knuckle.
Finally got everything back together:
New hub. And yes, I did stake the axle nut after this pic was taken
Before tightening all of the control arms, I stabilized the suspension, torqued everything down to spec, and added shiny new rotors and pads to my not so shiny calipers.
Moral(s) of the story:
i. Working on corroded Canadian cars sucks!
ii. If doing it again, corrosion or not, I would follow the TIS procedure, instead of just trying to pull the hub. Not sure how you can properly/accurately seat the deflector otherwise. If you can easily remove the control arm bolts attaching the knuckle, this whole process wouldn't take more than a few hours. It took me several weekends because I had to order the used hub and control arms, and wait for them to arrive.
-R
Originally Posted by Gville350
Yeah, I just did this as well on the driver's side rear. My car is from NJ, so it had a bit of "rust". The only component I had a problem with was oddly was the speed sensor. It was "fused" like yours to the hub. I didn't need the slide hammer, though I rented one from my local auto parts store. I ended up taking off the entire hub just to be able to remove that sensor. It made the process easier, but more costly, as my sensor was > $200. YIkes! I had no idea before I started this project that they were soooo pricey.
Looking good now! Good work!
Did either of you happen to snap a picture of the tone ring? Is it pressed on the outer axle joint?
That sensor almost sounds like a PM thing that should be removed and treated with anti seize if in the saltier location. Dang.
I'll keep our west coast climate!
Did either of you happen to snap a picture of the tone ring? Is it pressed on the outer axle joint?
That sensor almost sounds like a PM thing that should be removed and treated with anti seize if in the saltier location. Dang.
I'll keep our west coast climate!
Just curious...
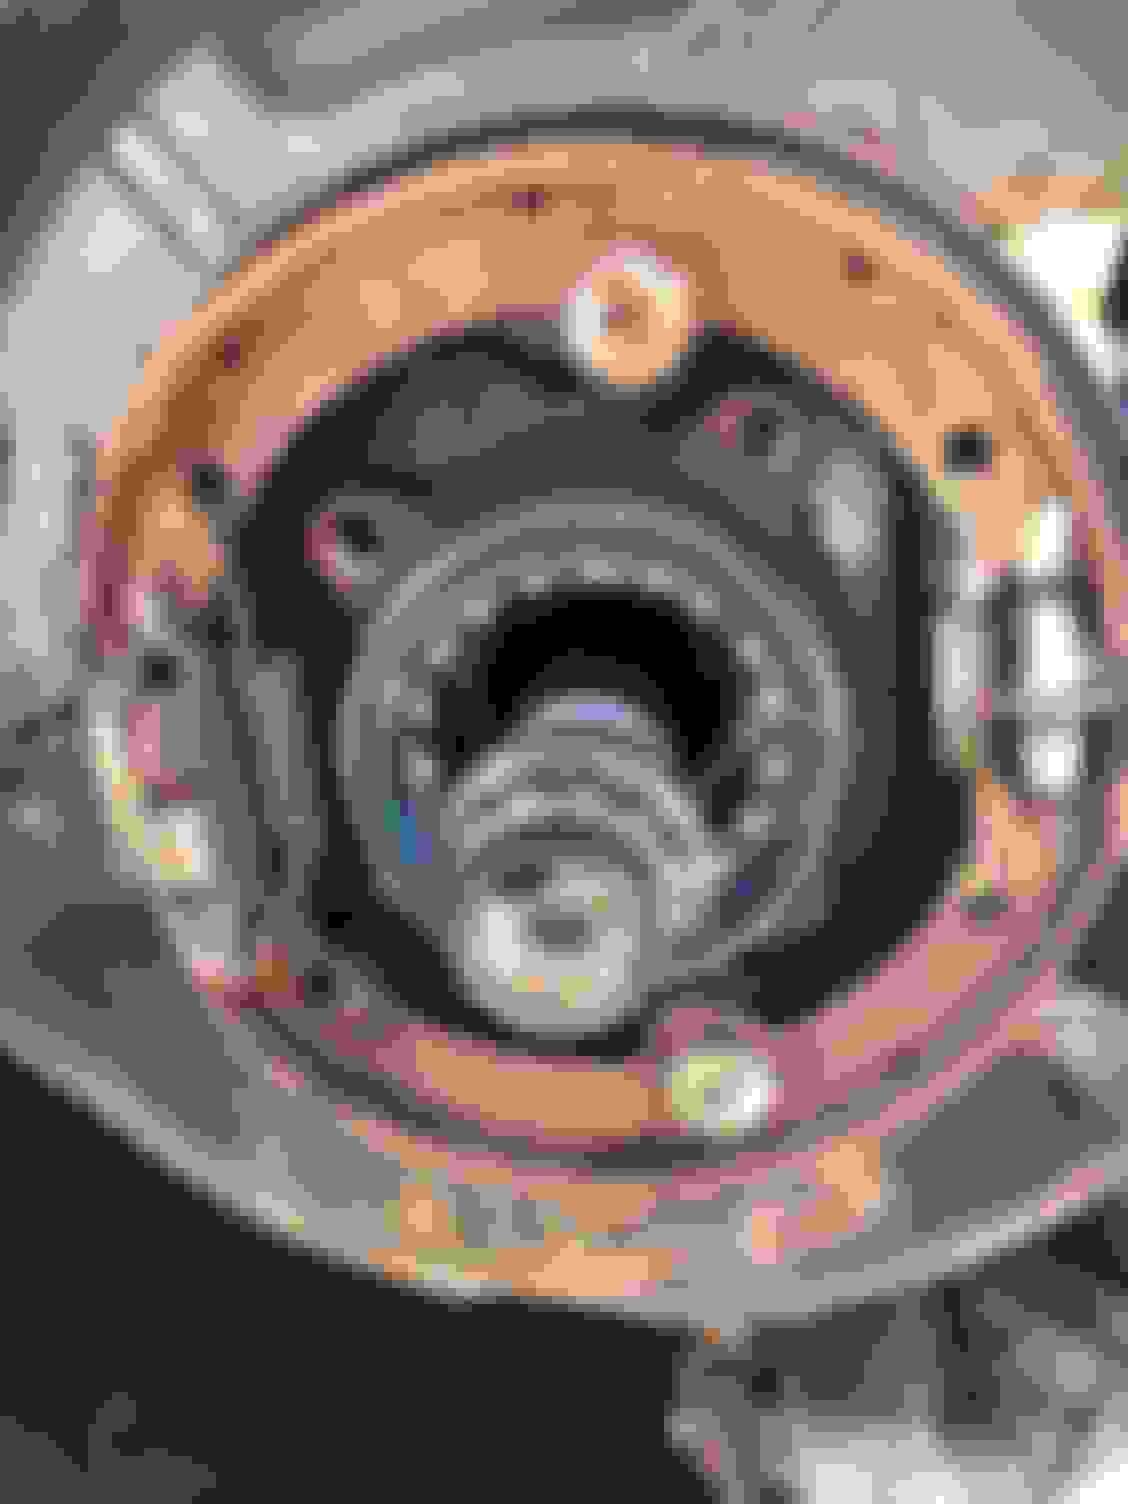
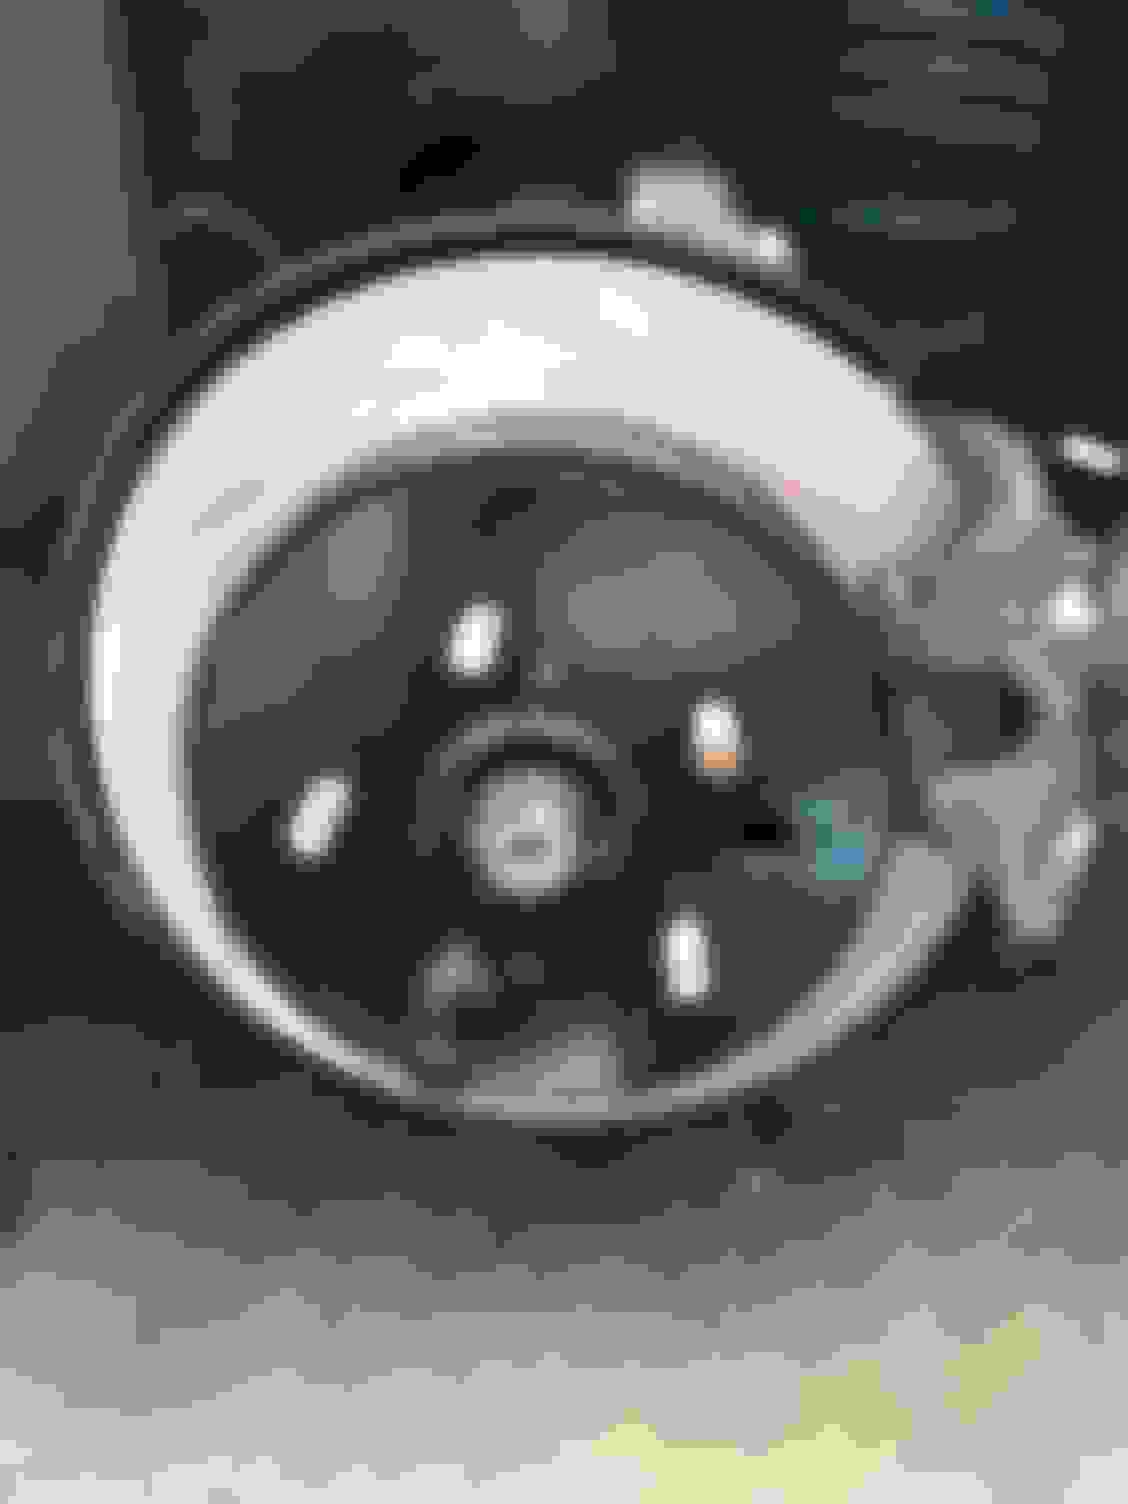
Is this aluminum "cup" thing the "tone ring"?
If so, that is pressed onto the back lip of the wheel bearing itself after it is fully seated into the hub. It just floats above the half shaft stub end and doesn't actually touch it. Others called it a "dust cap" online I think.
Perhaps the tone ring is on the passenger side of the car?
If that's the case, there are no such "ring" on the driver's side rear half shaft stub that enters the hub.
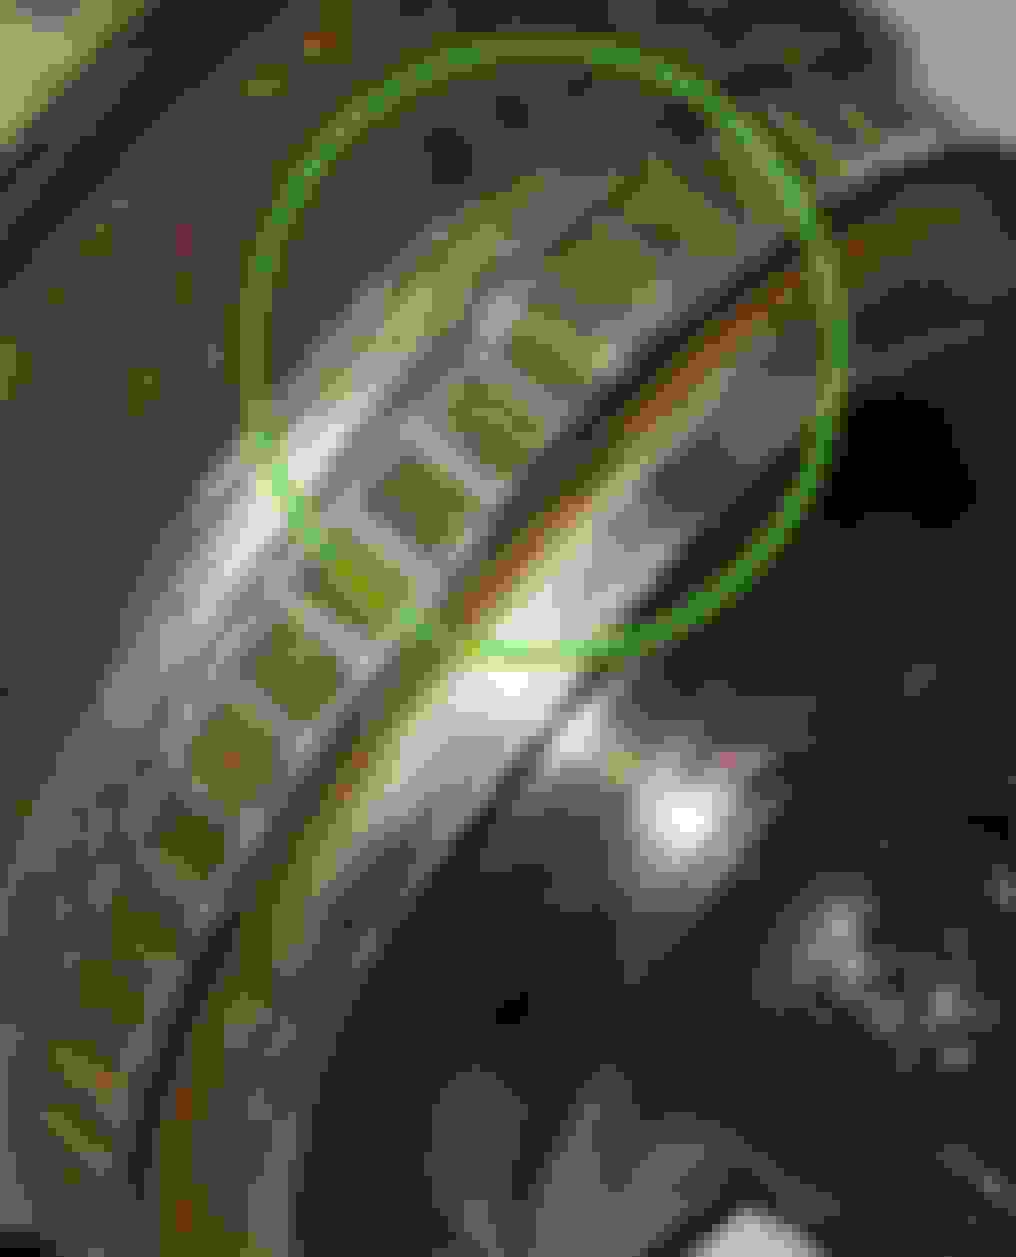
If you zoom in on this pic, its a pretty good shot of the axle, if there is a tone ring on there like other vehicles, its lost under all that rust! Im making the assumption the tone ring is in the hub from how the ABS sensor is designed and lined up - but its really just an educated guess.
If you zoom in on this pic, its a pretty good shot of the axle, if there is a tone ring on there like other vehicles, its lost under all that rust! Im making the assumption the tone ring is in the hub from how the ABS sensor is designed and lined up - but its really just an educated guess.
Yeah, that's a load of rust! Mine was still a black, painted color and clearly no "ring" present. Like you mentioned, I'm fairly certain that due to how closely the tip of the sensor lines up next to the back of the wheel bearing itself, that whatever the sensor reads it actually within the back of that bearing itself OR inside of the cup of that half shaft. But from looking at the old factory bearing I removed, it's probably the bearing.
Guys, thanks for the follow up. The reason I ask is many have replaced rear bearings and the tone ring doesn't line up like it did before the repair and new sensors do not fix the alignment. To help others I wanted to see where they hid it.
Here is a random axle showing what i expected to see but it seems our cars are not set up this way... Historically the the ring is visible to the wheel speed sensor. Because the speed sensor picks up the breaks or peaks in the reluctor ring aka tone ring, it could be hidden under the rubber boot in the axle end but I have a hard time believing it they put it in the bearing.
Man I am so thankful our cars here are not rusted to hell and back like that.
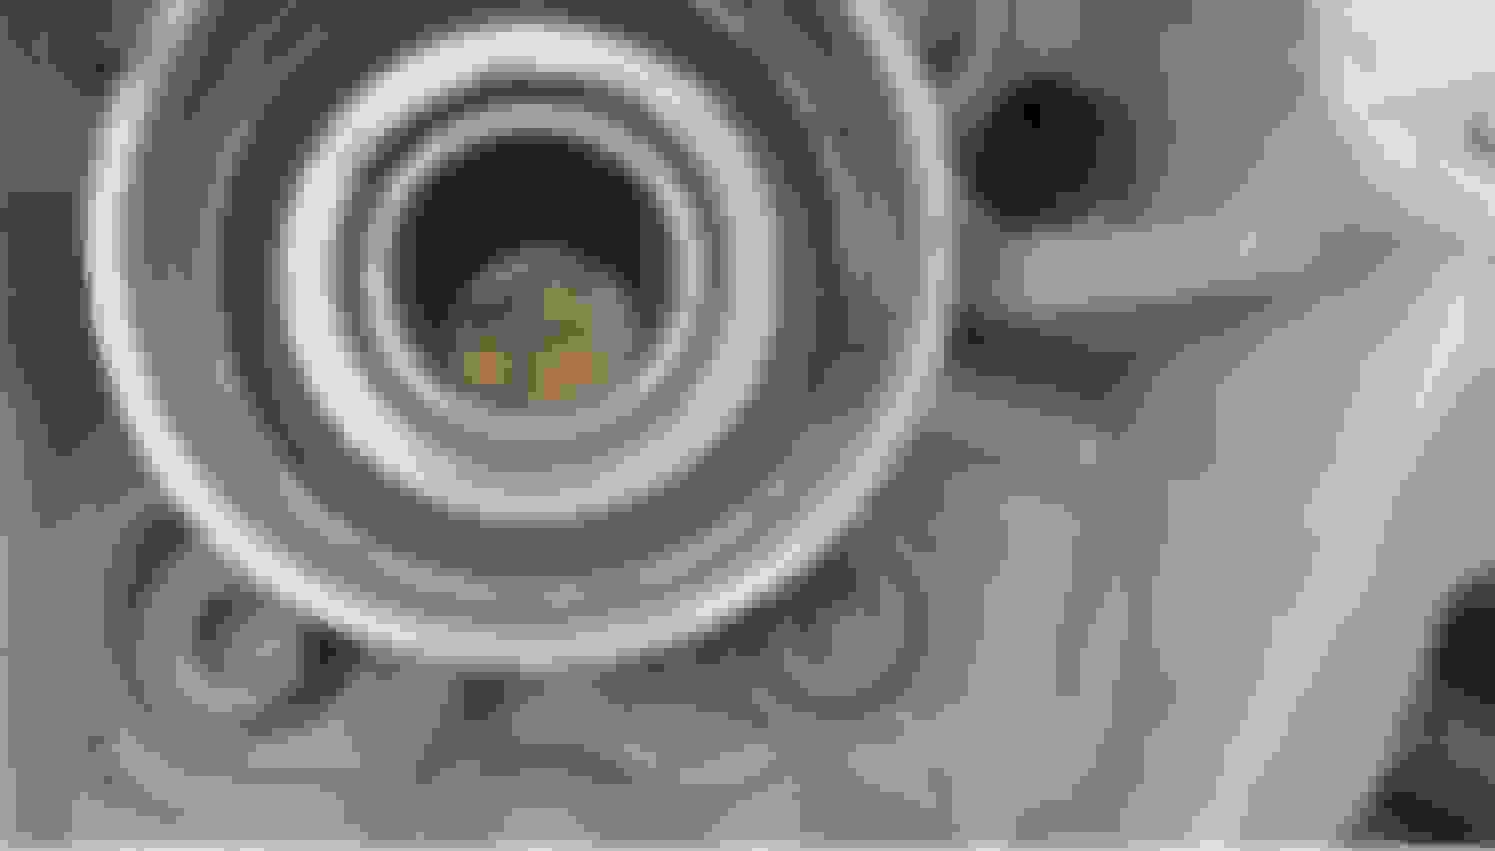
EDIT: adding a picture of the hub. Here you can see where the sensor is located and it seems like it might be picking up data from the bearing but then you look at the bearing and there isn't much going on there either OR on the axle. What the heck?? Anyone peal the seal out of the bearing to see if it is in there?
Look to the right, see where the sensor comes in and the clip looking thing at bearing level? We are close but I'm missing something or its not what I expected to see like the screen shot above.
If so, that is pressed onto the back lip of the wheel bearing itself after it is fully seated into the hub. It just floats above the half shaft stub end and doesn't actually touch it. Others called it a "dust cap" online I think.
Perhaps the tone ring is on the passenger side of the car?
Thanks but no. It has to spin with the axle so the sensor can read it. In the photo you can see where the speed sensor is located. Just curious what they used to generate the signal. That said apparently it is right in front of us... lol
Guys, thanks for the follow up. The reason I ask is many have replaced rear bearings and the tone ring doesn't line up like it did before the repair and new sensors do not fix the alignment. To help others I wanted to see where they hid it.
Here is a random axle showing what i expected to see but it seems our cars are not set up this way... Historically the the ring is visible to the wheel speed sensor. Because the speed sensor picks up the breaks or peaks in the reluctor ring aka tone ring, it could be hidden under the rubber boot in the axle end but I have a hard time believing it they put it in the bearing.
EDIT: adding a picture of the hub. Here you can see where the sensor is located and it seems like it might be picking up data from the bearing but then you look at the bearing and there isn't much going on there either OR on the axle. What the heck?? Anyone peal the seal out of the bearing to see if it is in there?
Look to the right, see where the sensor comes in and the clip looking thing at bearing level? We are close but I'm missing something or its not what I expected to see like the screen shot above.
I think that pic of the bearing you posted answers the question - i'm betting the dark grey lines around the bearing ring are variations in ferrous material that the sensor pics up. As to your earlier question about people having issues with the tone ring lining up - maybe that's the issue they THINK they're having when the get the ABS warning, but that's probably not the issue. If you pulled the hub out without taking the knuckle off the car, the deflector is just going to be floating around loosely over the axle. When they put the new hub in, I'd guess that there is movement in the deflector and it sheers the tip of the speed sensor off. Not to mention they must get some rattling back there if the deflector is not pressed onto the hub.
-R
Anyone peal the seal out of the bearing to see if it is in there?
When I pulled mine, picked at the surface there and it was a composite-type semi-soft layer. Scraped it all off and below was metal I believe. So I just stopped there.
When I pulled mine, picked at the surface there and it was a composite-type semi-soft layer. Scraped it all off and below was metal I believe. So I just stopped there.
Thanks man. After looking over axles, hubs, bearings, there was nothing obvious until you look real close. To your point about poking at the seal, there it is. The tone ring is part of the bearing. In the end I simply didn't expect to find what I found and to the extent that DIY have had issues, you do have to wonder if the spindle came off, if the dust shield was installed correctly or at all, if it was left to bang about on the axle until cut off.... lol
Mystery solved until another unsuspecting person gets caught and we ask them what there process was!
 02-27-19, 01:42 PM