When you click on links to various merchants on this site and make a purchase, this can result in this site earning a commission. Affiliate programs and affiliations include, but are not limited to, the eBay Partner Network.
Found out why our is250, is350 and ISF audio amps fail.
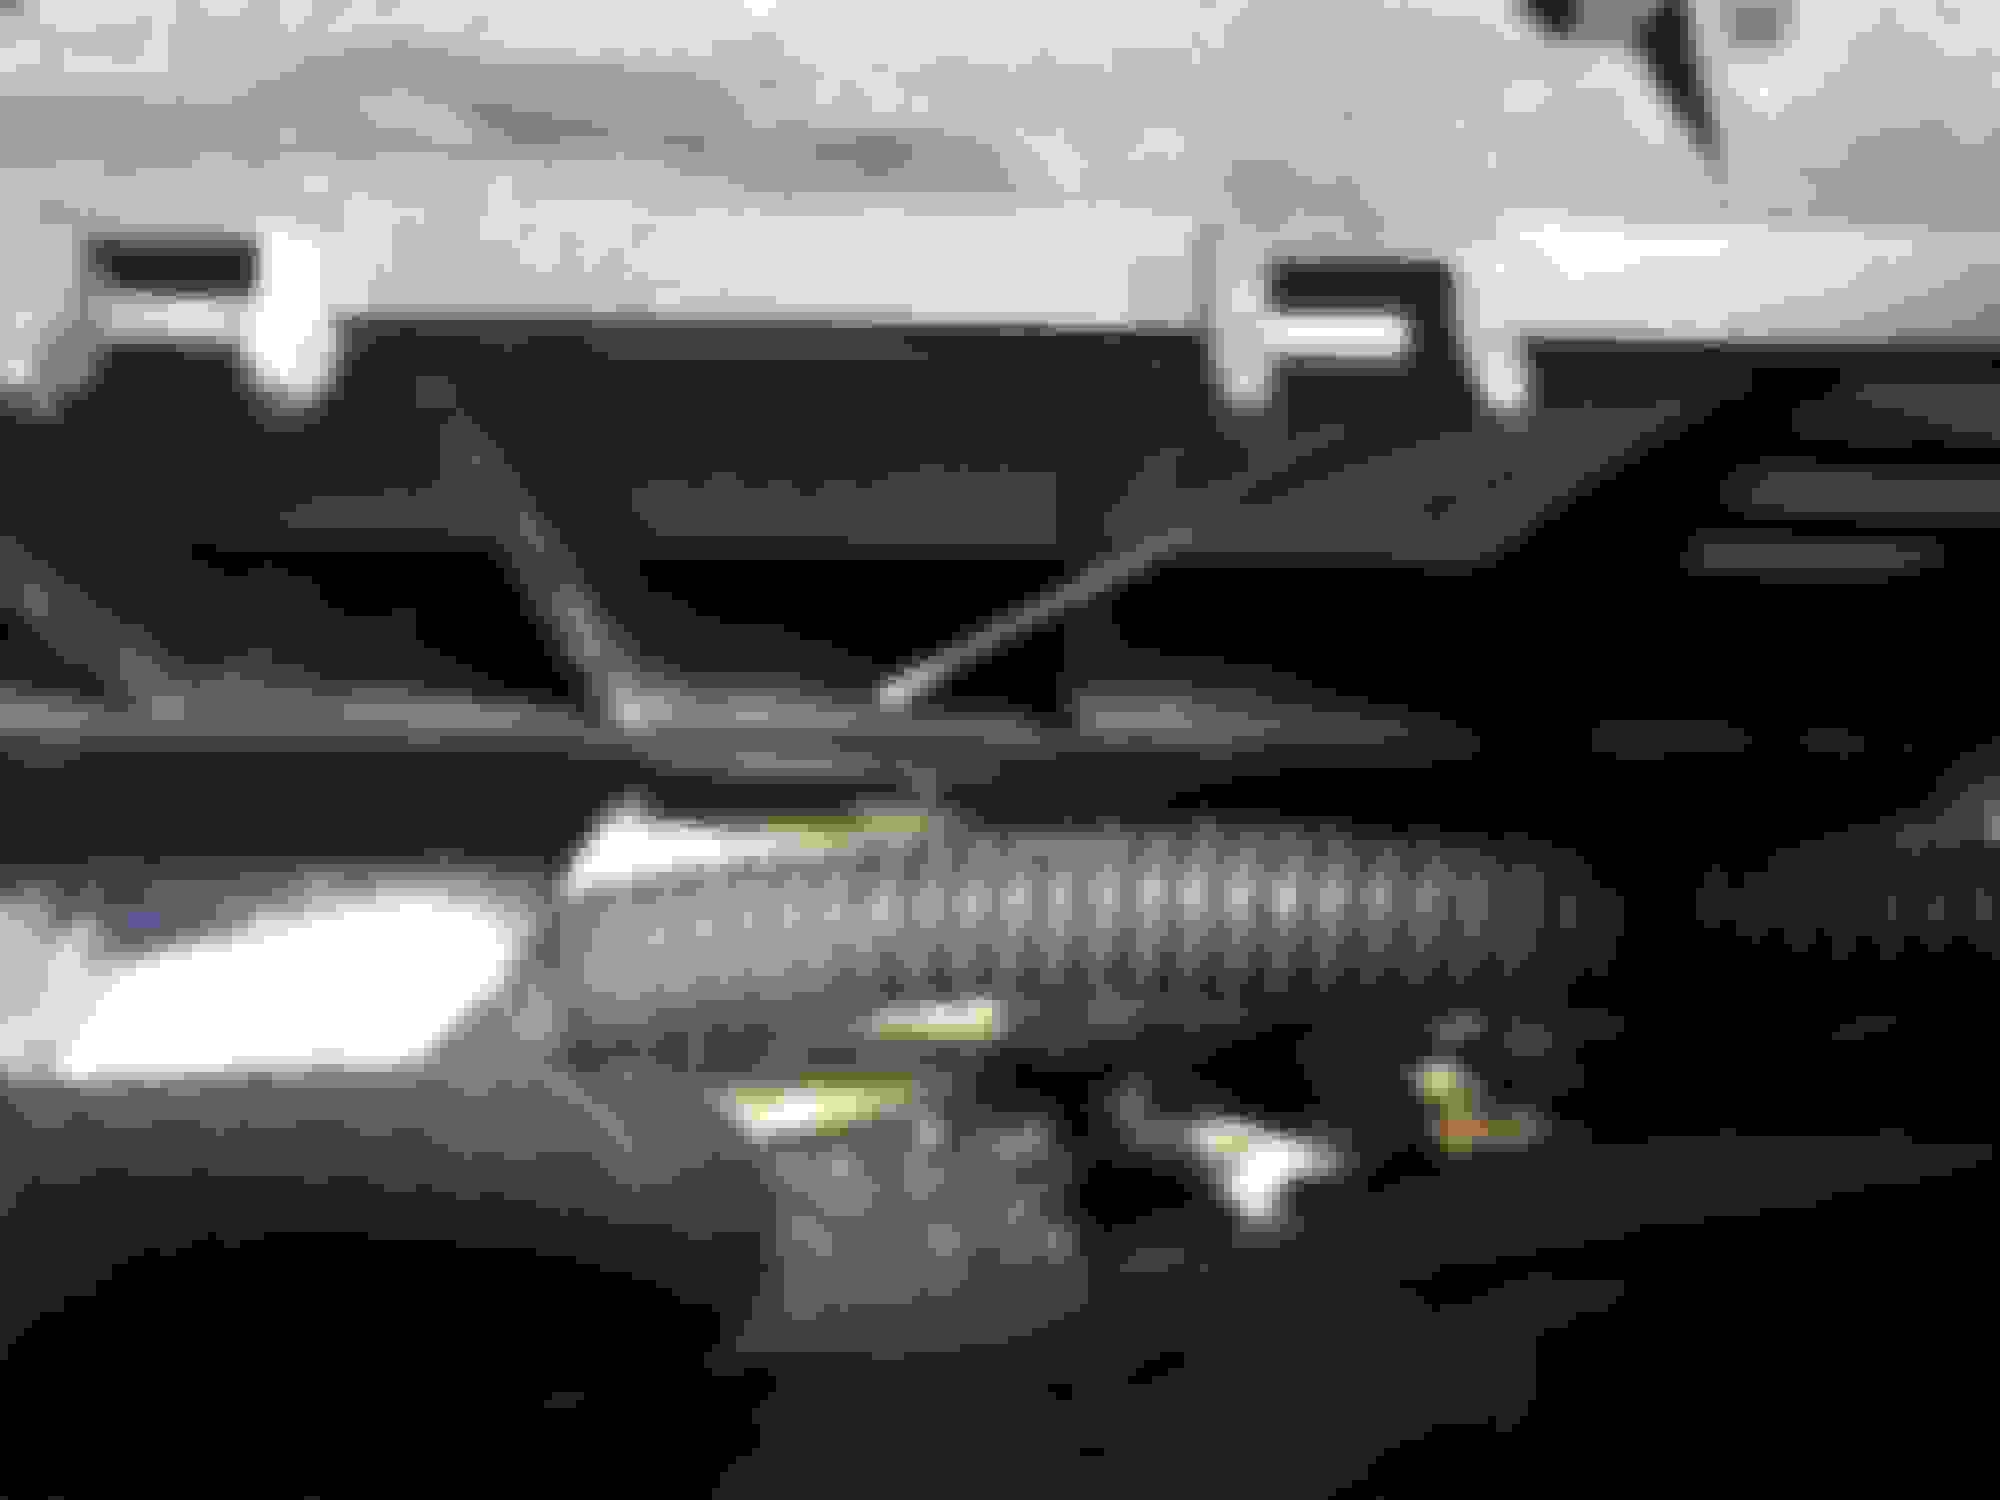
So I had a few guys come in saying that their pioneer amplifiers aren't working. So I really started to do some research and found out that there was moisture on one of them and that's why the framing's were all rusty. There is a pressure vent in the rear quarter panel behind the side of the rear bumper that goes bad after a while, the flap is made out of rubber and ends up drying out and cracking and not sealing allowing water to enter the amp area and causing either the double popping sound or not working at all.
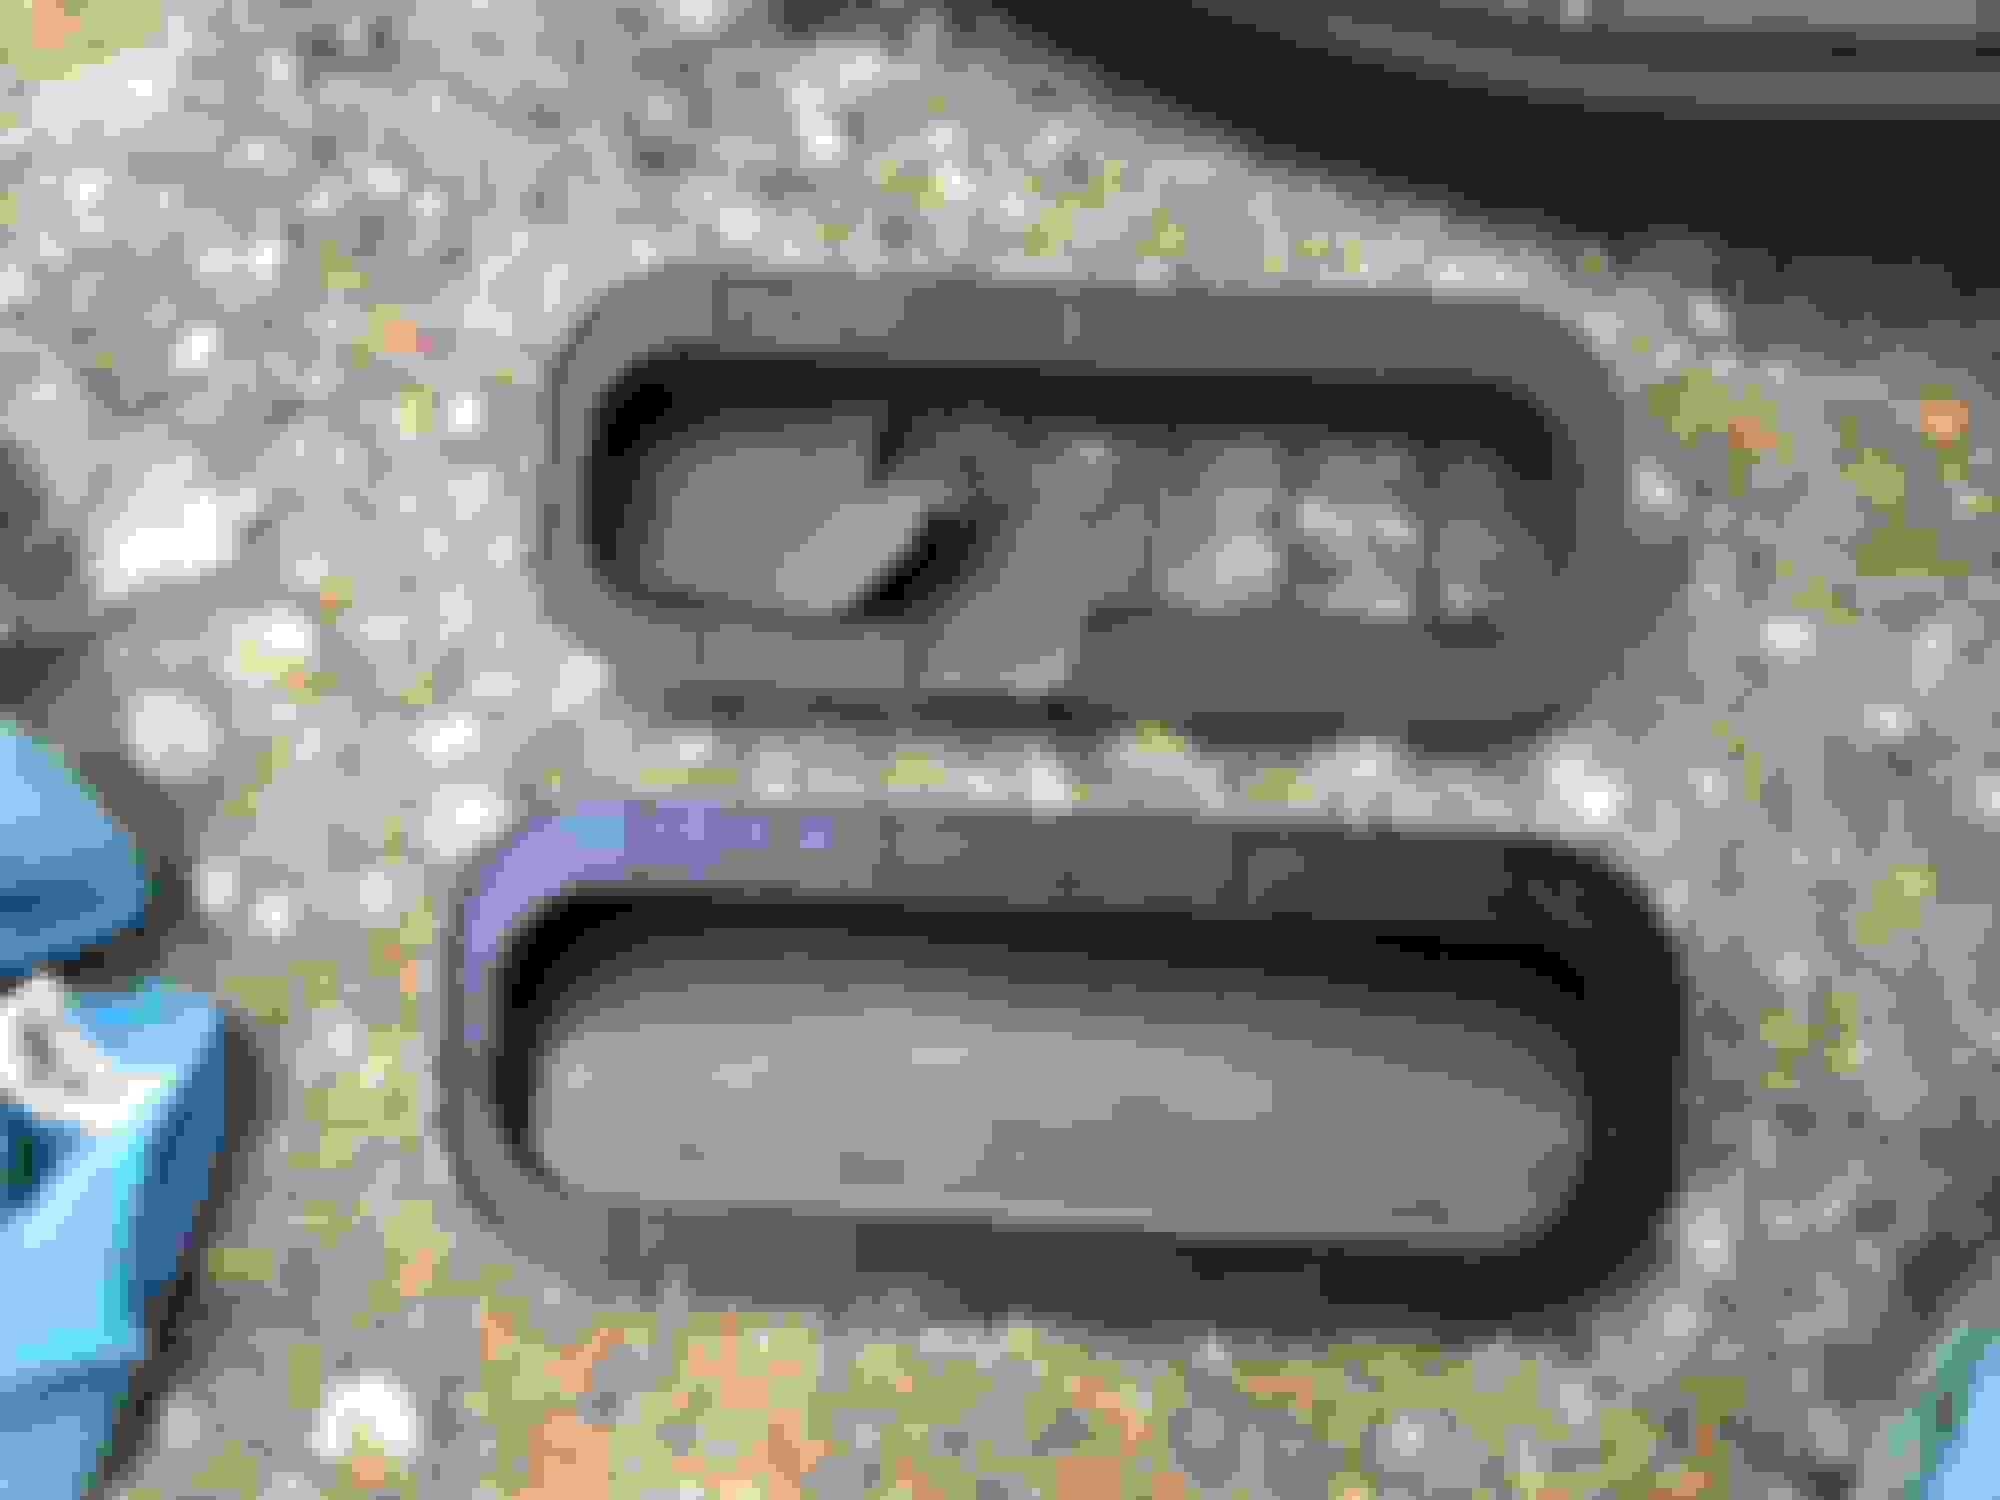
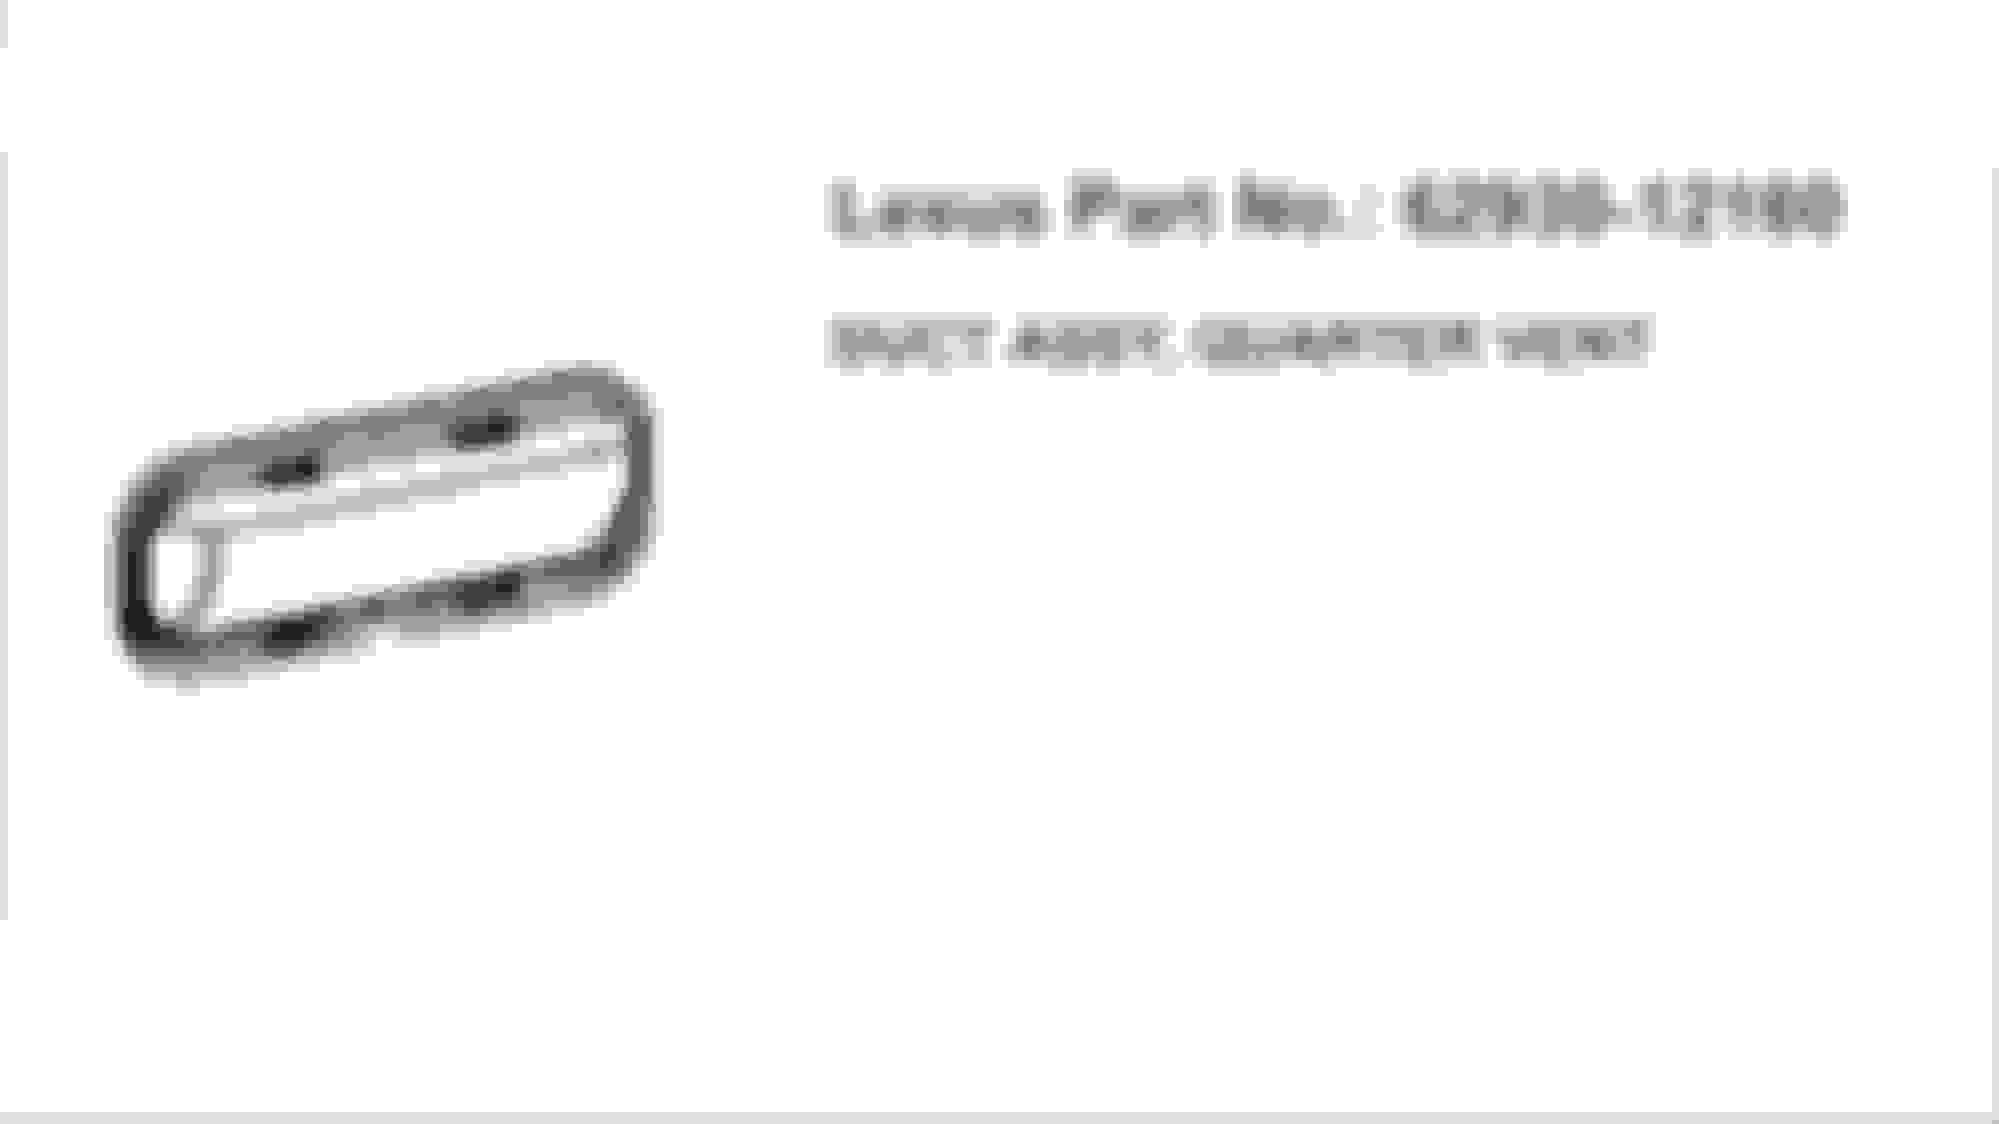
Here is my vent behind the amp the flap is completely gone. Here I found water on the bottom of the amp. This is what I found on the other side of the car. The new one on the bottom next to the old one on top. There are 4 taps you need to pull down. 2 on top and 2 on the bottom. Make sure you clean out the surface good and you are going to need to press them in really good until you hear 4 clicks, some cars I had to remove the rear bumper to get them all the way in. These vehicles all have the same vents. Here is the part number, both sides are the same.
These vents go bad at around 5 years and if you have an ISF you need to check on these asap because the exhaust is behind the bumper and you could be breathing in the carbon fumes while driving.
I was afraid of that being the culprit. Was the uninstall/install of the panel easy with access to it?
Yes it comes right out when you remove part of the rear bumper. I had to remove 2 10mm screws one is right under the bumper next to the wheel and one on the upper part of the bumper also next to the wheel just under the splash guard. Once you have the bumper partly out you can reach in there and squeeze it so the mounting tabs pop out and pull it out. I wouldn't use any metal tools as you don't want to scratch the panel behind it. Getting the new one in is tough as you really have to press it on hard until you hear all 4 tabs click in and I would recommend removing the rear bumper so you don't crack it in the process.
There is but most of it is covered. The best way is by taking the 2 bolts and pulling out the rear bumper cover. But even if they might look good I'm sure they are not blocking water like they would if new.
Originally Posted by bazzle01
Good find. Might be the source of my exh smell. Must investigate. Can you see any of it from the inside?
Hi isfdude
Thanks a lot for finding the problem. How much time would you expect a mechanic should take to remove the rear bumper, and do the job ?
Are theses two parts expensive ?
regards
Hi isfdude
Thanks a lot for finding the problem. How much time would you expect a mechanic should take to remove the rear bumper, and do the job ?
Are theses two parts expensive ?
regards
It shouldn't take more than half an hour. If you remove the rear bumper than an hour most. Parts were not expensive at all both around $80 to $110 from the dealer for both.
These vents go bad at around 5 years and if you have an ISF you need to check on these asap because the exhaust is behind the bumper and you could be breathing in the carbon fumes while driving.
While this is a great write up, it doesn�t address how to fix an amp with intermittent or no sound from speakers. The humidity is certainly the cause but this long exposure to humidity causes the solder joints on the underside of the mother board of the Amp to crack. These cracks is what causes the Amp to stop working. To fix this you need to take out the Amp, and open it up. There is a mother board and a daughter board inside. You need to access the bottom side of the motherboard. There you will see some rust around the board, carefully clean that up. You will also notice a couple of large solder joints with cracks. They are close to the underside of the two large capacitors. They are hard to miss. If you are comfortable with soldering, melt the old solder and try to remove it, then re-solder the joint with new solder. Do this for any joints that are cracking. For extra protection, grab some conformal coating from Amazon and apply on top of the repaired solder joints. This will prevent damage due to moisture in the future. If you don�t know how to solder, take the board to a local electronics shop and they should be able to do it for you for 10-20 bucks. Grab some sand paper and sand away the surface rust on the metal housing at all points where the small screws are used. And Viola! You just saved hundreds of dollars on a new amp.
While this is a great write up, it doesn�t address how to fix an amp with intermittent or no sound from speakers. The humidity is certainly the cause but this long exposure to humidity causes the solder joints on the underside of the mother board of the Amp to crack. These cracks is what causes the Amp to stop working. To fix this you need to take out the Amp, and open it up. There is a mother board and a daughter board inside. You need to access the bottom side of the motherboard. There you will see some rust around the board, carefully clean that up. You will also notice a couple of large solder joints with cracks. They are close to the underside of the two large capacitors. They are hard to miss. If you are comfortable with soldering, melt the old solder and try to remove it, then re-solder the joint with new solder. Do this for any joints that are cracking. For extra protection, grab some conformal coating from Amazon and apply on top of the repaired solder joints. This will prevent damage due to moisture in the future. If you don�t know how to solder, take the board to a local electronics shop and they should be able to do it for you for 10-20 bucks. Grab some sand paper and sand away the surface rust on the metal housing at all points where the small screws are used. And Viola! You just saved hundreds of dollars on a new amp.
Glad someone finally looked and saw the actual fault.
Theae being 2006 and up, manufacturing went to lead free solder to be ROHS compliant. Best practice would be to buy the solder it was made with. Lead free is usually dull in color and as noted, cracks easier. So if these are lead free you also need a solder tip that is lead free. Mixing leaded and lead free can lead to popping and poor filling so if people have trouble soldering, this may be why.
Also observe static precautions and ground yourself before opening and touching the bits inside or you could kill a fixable amp.
Thanks to all for this info
. Mine on my IS250AWD 2009 in november 16 over two years ago started to make a weird popping noise in the rear speaker at engine startup, making the radio silent after that . After the advice to use an hair dryer on this site, luckily the problem disappeared. I can't understand why Lexus is placing the amplifier in the trunk with an unsecured plastic cover without any seals around it. I was carrying 18 liters water bottles without knowing if I ever had spilled water in the drunk this would have grilled it.
The dealer asked me 1600$ cdn not including the installation plus 15.5% taxes.
 09-12-17, 08:22 AM