HOW to RETROFIT: NON NAVIGATION TO NAVIGATION


 05-28-09, 06:04 PM
#17
After breaking one of my center Vent clips...I figured out how to remove the center vent without breaking anything.
those four clips above the vents actually "hook" when you push them down.
here is a before pic of the clip "unhook"

here is the pic of the clip "hook"
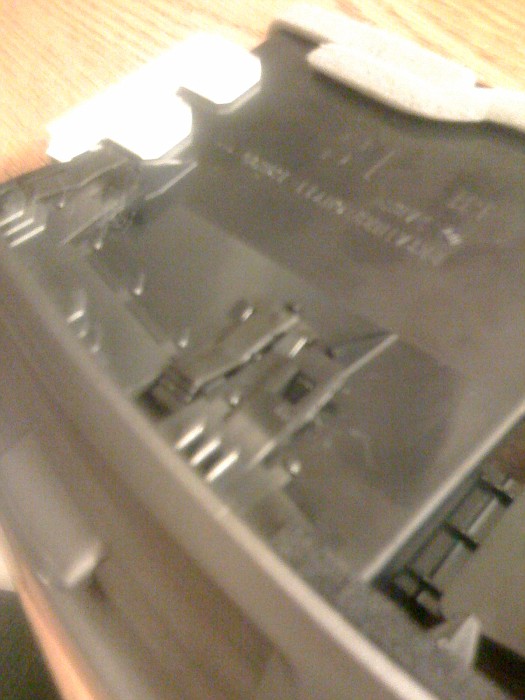
Once you get all 4 "hooked" all you do is pry the vent out and it pulls straight out.
those four clips above the vents actually "hook" when you push them down.
here is a before pic of the clip "unhook"
here is the pic of the clip "hook"
Once you get all 4 "hooked" all you do is pry the vent out and it pulls straight out.
07-15-09, 01:10 AM
#21
Driver School Candidate

Join Date: Mar 2009
Location: CA
Posts: 23
Likes: 0
Received 0 Likes
on
0 Posts
I wanted to give props and a great big thank you to 350 for the great and idiot proof write up! I just got my NAV installed and it is working great!!! let me know when you get the mic and rear camera working =) cant wait to get that set up also. Thank you again and great job!!
07-15-09, 02:56 PM
#23
Driver School Candidate
Join Date: Mar 2009
Location: CA
Posts: 23
Likes: 0
Received 0 Likes
on
0 Posts
hey quick question for you regarding the DVD playback. I am able to get audio to play but I dont see any video from the DVD player. Any idea where to start with the troubleshooing?
 07-17-09, 02:19 AM
#28
Part 1,200,560 I forgot where I left off!
PICTURES COMING SOON!
Supplies:
1. more patience
2. needle nose pliers.
3. ratchet set
4. 4-6 terminals with long wire or short wire, depends if its prewired for voice.
5. eye glass repair kit screwdriver
YOU DO NOT HAVE TO REMOVE THE BACK SEATS AND TRUNK LINING, THIS IS OPTIONAL THERE ARE MANY OTHER PLACES TO RUN THE WIRES, I CHOSE TO DO THIS IN ORDER TO KEEP EVERYTHING LOOKING OEM, ANOTHER PLACE IS THROUGH THE DOOR SILLS WHICH IS A LOT EASIER.
HOW TO INSTALL VOICE GUIDANCE
pretty simple install once the trunk and back seats are removed, that is the time consuming part, the rest is a piece of cake.
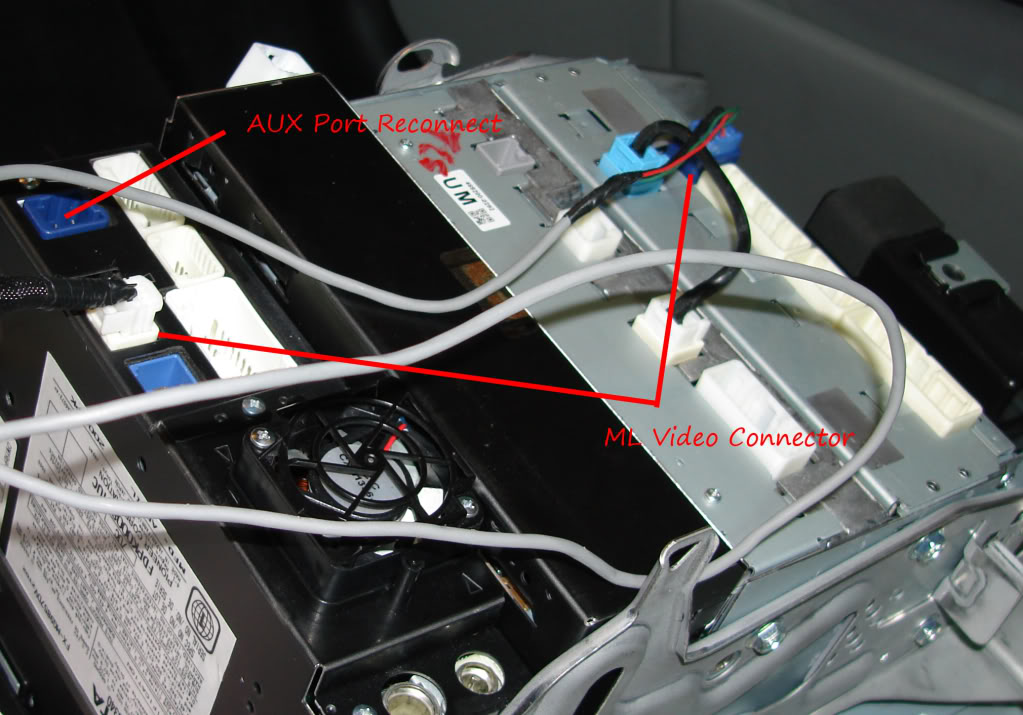
1. To install voice guidance your vehicle may already be prewired. Check the center harness in the trunk hooked up to the amp. If you see a yellow and brown wire connected to pin 14 and 15 of that connector, then you will not have to remove the trunk lining or back seat. LUCKYYY YOU !!
!!
********************PIC*********************
Im telling you this because, i was stupid and didn't realize that until after i had removed the trunk and back seat for no reason, although i went ahead and installed the 4 wires for my cam mod, so i guess it wasn't in vain.
2. You will need to simply connect 3 wires to the JP1 connector found in the center console. This is not that hard to get to, but you have to partially remove the center console which i'll explain.
HOW TO REMOVE THE CENTER CONSOLE TO ACCESS THE JP1
3. first remove the silver triming, ash tray, shift ****, and the center console.
I. after that remove the back seat air vent, it pops off and disconnect the wire harness back there as well. unscrew the two screws.
II. unscrew the two screws located in front of the arm rest, you should be able to see the JP1 connector down there, but you cant get to it just yet.
III. next unscrew the two screws, found under the CD payer, not the screw holding the cd player but the screws found between those sets of screws in the middle.
IV. that's it apply a little force and pull back on the center console, it will come aloose from the dash itself. its all one big piece that slides back, slide it back far enough so you'll have enough space to put the 3 wires into the connector.
V. brown 14 should go to _____ on the J51
yellow 15 should go to _____ on the J51
black tape __ should go to _____ on the J51
VI. youre all set, find a destination and press GUIDE and listen to your car talk to you.
HOW TO MODIFY TERMINALS FROM THE EXISTING CONNECTORS TO FIT INTO THE J51, JP1, AMP CONNECTOR
VI. using the needle nose pliers remove the right tab
VII. using the pliers flaten the bottom of the terminal by pinching it between the pliers.
VIII. remove the botom of the terminal, making the termial one piece of metal thick on all sides.
IX. mold the terminal with the pliers to get as a square as possible.
X. us the small screwdriver to feed the terminal into the connector until its completly inside and appears to look like the other connectors, make sure the terminal is inserted with the overhang piece at the top of the terminal.
PICTURES WILL BE ADDED THAT WILL MAKE THIS A LOT EASIER, IF YOUR SCARED TO DO THIS PART YOUR LOCAL DEALER WILL HAVE THE TERMINALS FOR $10 A PIECE, I KNOW THAT PRETTY EXPENSIVE.
*********Option II, you dont see a yellow and brown wire connected to the middle harness in the trunk. you have to do a little work today!***********
1. remove trunk lining and back seats (OPTIONAL), connect the terminals to existing AMP connector. You will need 3 terminals for this and a lot of wire.
slot 14 should go to _____ on the J51
slot 15 should go to _____ on the J51
slot __ should go to _____ on the J51
2. you can run the wires directly to the unit bypassing the JP1 connector which will make it much easier. you can then run these wires into the cabin from the AMP wire loom and to the center console to the NAV or up the floor boards, through the door sills which is ever is easier for you.
Whenever you install the voice guidance wires go ahead and leave 4 wire disconnected so you will not have to repeat the removal process, they should be ran from the trunk to the headunit as well.
Back Seat Removal for camera. 4 wires total from J51 red, black, white, white black.
PICTURES COMING SOON!
Supplies:
1. more patience
2. needle nose pliers.
3. ratchet set
4. 4-6 terminals with long wire or short wire, depends if its prewired for voice.
5. eye glass repair kit screwdriver
YOU DO NOT HAVE TO REMOVE THE BACK SEATS AND TRUNK LINING, THIS IS OPTIONAL THERE ARE MANY OTHER PLACES TO RUN THE WIRES, I CHOSE TO DO THIS IN ORDER TO KEEP EVERYTHING LOOKING OEM, ANOTHER PLACE IS THROUGH THE DOOR SILLS WHICH IS A LOT EASIER.
HOW TO INSTALL VOICE GUIDANCE
pretty simple install once the trunk and back seats are removed, that is the time consuming part, the rest is a piece of cake.
1. To install voice guidance your vehicle may already be prewired. Check the center harness in the trunk hooked up to the amp. If you see a yellow and brown wire connected to pin 14 and 15 of that connector, then you will not have to remove the trunk lining or back seat. LUCKYYY YOU
!!********************PIC*********************
Im telling you this because, i was stupid and didn't realize that until after i had removed the trunk and back seat for no reason, although i went ahead and installed the 4 wires for my cam mod, so i guess it wasn't in vain.
2. You will need to simply connect 3 wires to the JP1 connector found in the center console. This is not that hard to get to, but you have to partially remove the center console which i'll explain.
HOW TO REMOVE THE CENTER CONSOLE TO ACCESS THE JP1
3. first remove the silver triming, ash tray, shift ****, and the center console.
I. after that remove the back seat air vent, it pops off and disconnect the wire harness back there as well. unscrew the two screws.
II. unscrew the two screws located in front of the arm rest, you should be able to see the JP1 connector down there, but you cant get to it just yet.
III. next unscrew the two screws, found under the CD payer, not the screw holding the cd player but the screws found between those sets of screws in the middle.
IV. that's it apply a little force and pull back on the center console, it will come aloose from the dash itself. its all one big piece that slides back, slide it back far enough so you'll have enough space to put the 3 wires into the connector.
V. brown 14 should go to _____ on the J51
yellow 15 should go to _____ on the J51
black tape __ should go to _____ on the J51
VI. youre all set, find a destination and press GUIDE and listen to your car talk to you
.HOW TO MODIFY TERMINALS FROM THE EXISTING CONNECTORS TO FIT INTO THE J51, JP1, AMP CONNECTOR
VI. using the needle nose pliers remove the right tab
VII. using the pliers flaten the bottom of the terminal by pinching it between the pliers.
VIII. remove the botom of the terminal, making the termial one piece of metal thick on all sides.
IX. mold the terminal with the pliers to get as a square as possible.
X. us the small screwdriver to feed the terminal into the connector until its completly inside and appears to look like the other connectors, make sure the terminal is inserted with the overhang piece at the top of the terminal.
PICTURES WILL BE ADDED THAT WILL MAKE THIS A LOT EASIER, IF YOUR SCARED TO DO THIS PART YOUR LOCAL DEALER WILL HAVE THE TERMINALS FOR $10 A PIECE, I KNOW THAT PRETTY EXPENSIVE.
*********Option II, you dont see a yellow and brown wire connected to the middle harness in the trunk. you have to do a little work today!***********
1. remove trunk lining and back seats (OPTIONAL), connect the terminals to existing AMP connector. You will need 3 terminals for this and a lot of wire.
slot 14 should go to _____ on the J51
slot 15 should go to _____ on the J51
slot __ should go to _____ on the J51
2. you can run the wires directly to the unit bypassing the JP1 connector which will make it much easier. you can then run these wires into the cabin from the AMP wire loom and to the center console to the NAV or up the floor boards, through the door sills which is ever is easier for you.
Whenever you install the voice guidance wires go ahead and leave 4 wire disconnected so you will not have to repeat the removal process, they should be ran from the trunk to the headunit as well.
Back Seat Removal for camera. 4 wires total from J51 red, black, white, white black.
Last edited by 350PsDMeuP; 07-22-09 at 11:50 AM.
 music videos kick ***!!
12-23-09, 09:25 AM
music videos kick ***!!
12-23-09, 09:25 AM
#30
Pole Position
Join Date: Mar 2008
Location: CA
Posts: 280
Likes: 0
Received 0 Likes
on
0 Posts
This is a great write up, but for only 3 hours worth of work and a total of around 2K if you do it yourself, you can have all this and more with the flyaudio system.... Just saying.