
 01-06-15, 04:03 PM
Last edit by: IB Advertising
See related guides and technical advice from our community experts:
Browse all: Exterior Guides
- How to Install JDM LED Turn Signal Mirrors
Step by step instructions for do-it-yourself repairs
Browse all: Exterior Guides

DIY JDM LED Side Signal Mirror Covers *56K Warning*
11-25-08, 01:25 AM
#1
Lexus Champion
Thread Starter
I couldn't have done this without the help of other CL members. Thanks to passnu2 for the first DIY, thanks to XprincoX and blk250 for all their input in this thread which helped me a lot and finally, thanks to pisaykotik for taking most of the pics here. 
With this DIY, your blinkers will function and all wires will be hidden. Please read the previous threads mentioned above as they contain a lot of info and can answer many questions you may have. For those who have done this an easier or better way, please provide your input. Larger pictures are available on request.
Tools needed:

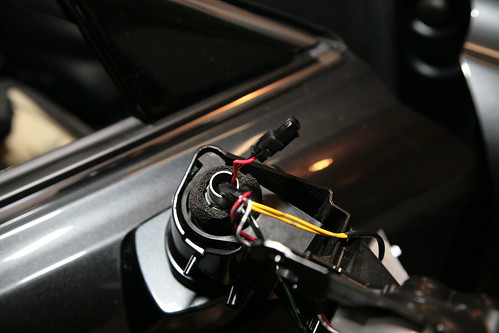
1. Turn your side mirror outwards and remove side mirrors by facing the mirror up as far as possible, and pull out and up from the bottom.

2. Unscrew the 4 screw in the corner.
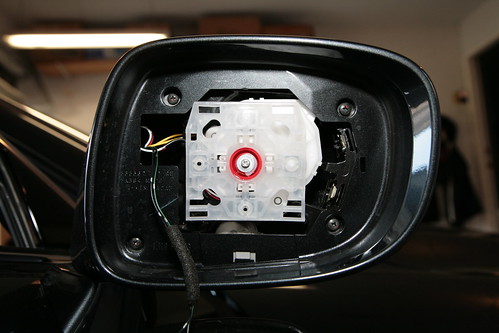
3. Carefully detach the front cover from the rear and remove both pieces.

4. Should look something like this now.
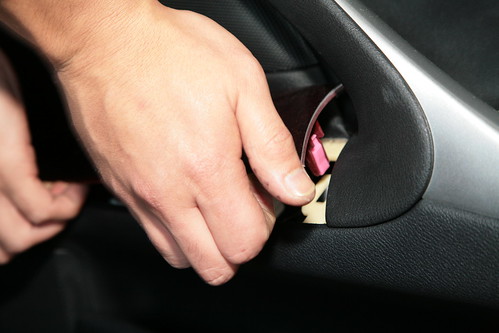
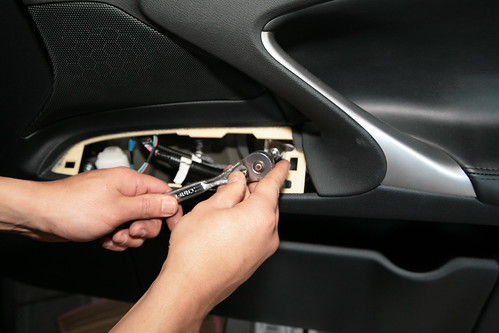
5. Next the door panel needs to be removed by first removing the plasic piece behind the door handle. It pops out easily with a screwdrive.

6. Remove the screw.

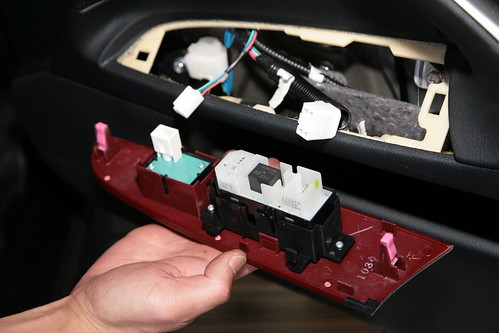
7. Remove the window trim control unit.
8. Disconnect the two wiring harnesses. (NOTE: after reconnecting, the windows need to be rolled up and down a few times for the auto to work)
With this DIY, your blinkers will function and all wires will be hidden. Please read the previous threads mentioned above as they contain a lot of info and can answer many questions you may have. For those who have done this an easier or better way, please provide your input. Larger pictures are available on request.
Tools needed:
- 10mm Socket wrench with 3" extention
- Phillips and Flathead Screwdrivers
- Electrical tape
- Wire Strippers
- Metal coat hanger
1. Turn your side mirror outwards and remove side mirrors by facing the mirror up as far as possible, and pull out and up from the bottom.
2. Unscrew the 4 screw in the corner.
3. Carefully detach the front cover from the rear and remove both pieces.
4. Should look something like this now.
5. Next the door panel needs to be removed by first removing the plasic piece behind the door handle. It pops out easily with a screwdrive.
6. Remove the screw.
7. Remove the window trim control unit.
8. Disconnect the two wiring harnesses. (NOTE: after reconnecting, the windows need to be rolled up and down a few times for the auto to work)
 11-25-08, 01:26 AM
#2
Lexus Champion
Thread Starter
9. Remove the screw behind the panel with the 10mm socket or screwdriver.
10. Now the door panel is only held on by a bunch of tabs. First pull really hard on the bottom portion.

11. With the bottom detached, lift upwards from the outer part of the door to remove the panel.
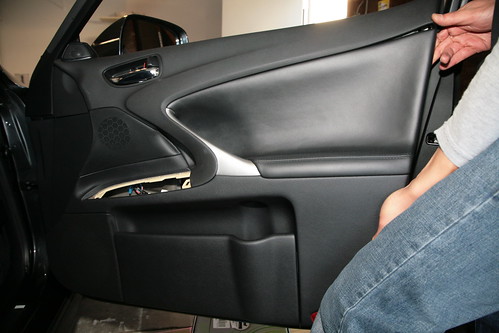
12. The door panel will still be connected to the door with all the wires. I didn't disconnect anything here, I just placed something under the door panel to rest it on.
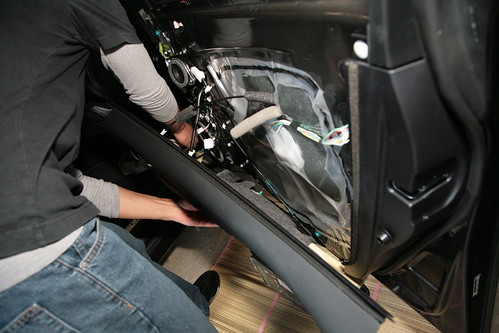
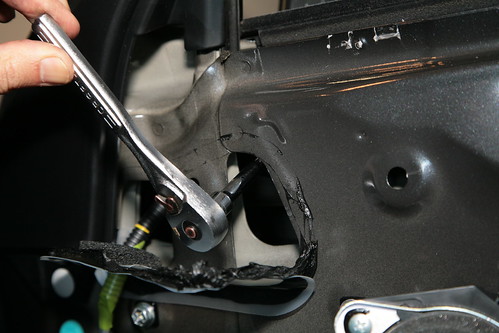
13. Remove the plastic piece behind the door panel directly underneath the side mirror. Gloves recommended.
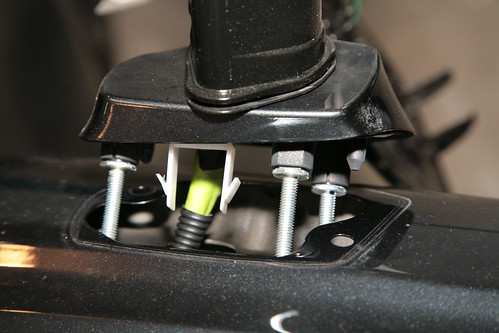
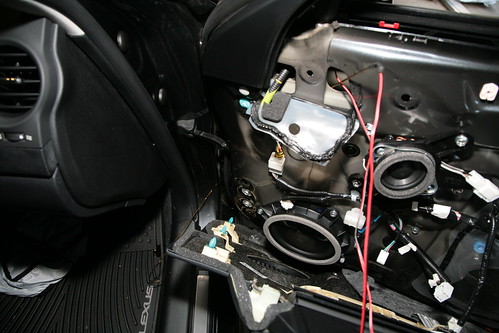
14. Remove the three nuts holding the side mirror. Careful when removing the nuts but if they fall, you need to remove your speaker to get it.
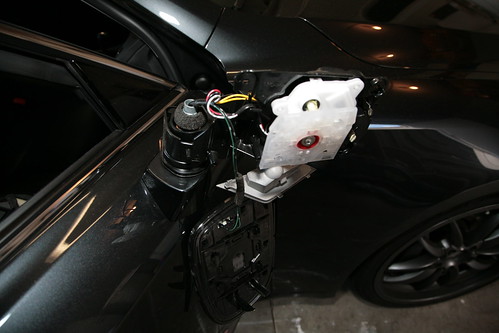
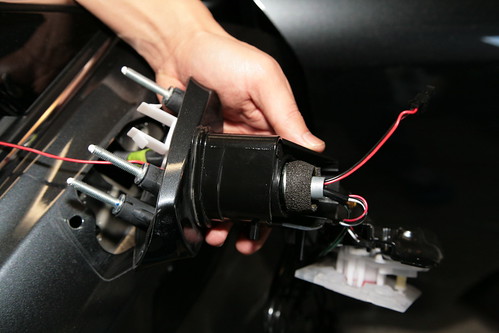
15. Side mirror can now be removed.
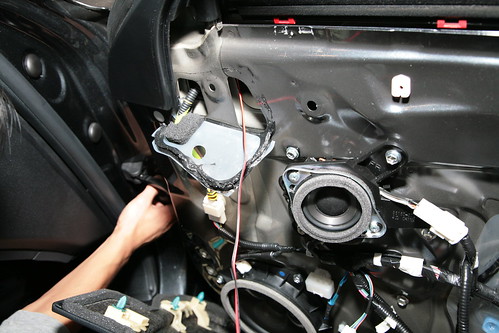
16. Now we can start running the wiring. From the base of the side mirror, use the metal hanger to poke up the bottom thru the rubber and out opening the other end where the wires are. Then I used the electrical tape and attached the wire securely to the hanger.

17. Pull the wire thru with the hanger.
18. Feed the wire thru the door like this.
10. Now the door panel is only held on by a bunch of tabs. First pull really hard on the bottom portion.
11. With the bottom detached, lift upwards from the outer part of the door to remove the panel.
12. The door panel will still be connected to the door with all the wires. I didn't disconnect anything here, I just placed something under the door panel to rest it on.
13. Remove the plastic piece behind the door panel directly underneath the side mirror. Gloves recommended.
14. Remove the three nuts holding the side mirror. Careful when removing the nuts but if they fall, you need to remove your speaker to get it.
15. Side mirror can now be removed.
16. Now we can start running the wiring. From the base of the side mirror, use the metal hanger to poke up the bottom thru the rubber and out opening the other end where the wires are. Then I used the electrical tape and attached the wire securely to the hanger.
17. Pull the wire thru with the hanger.
18. Feed the wire thru the door like this.
The following users liked this post:
machadosl (02-03-24)
11-25-08, 01:26 AM
#3
Lexus Champion
Thread Starter
19. Replace the side mirror and secure it.
20. Remove the rubber hose protecting the wires running between the door and fender.
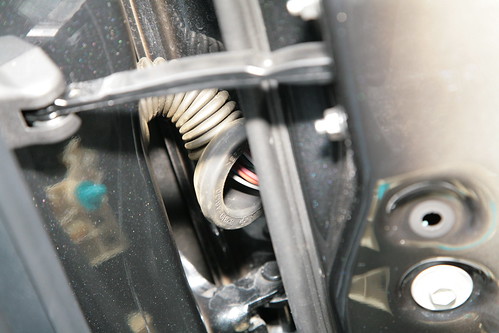
21. Run the hanger thru that hole and up to the opening where the wire is. Tape the wire to the hanger and pull the wire thru.
22. Now we want to run the new wire along with the existing wires thru the rubber hose. Poke the hanger thru the rubber hose from the left side, tape the wire to the hanger and pull it thru.
23. Remove the plasic panel underneath the glove box. It is held in by 4 clips. Pull hard where the panel meets the glove box. Detach it from the footwell LED.

24. Find an opening in the fender from the inside to poke the hanger thru. I used my fingers to feel for a hole I found just under the carpet line so we couldn't get a really good picture of the opening.
25. Once you get the hanger thru to the other end where the wires are, tape the new wire to the hanger securely and pull wire thru the fender. Then replace the rubber hose.
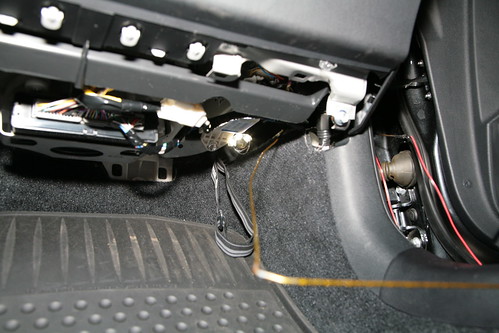
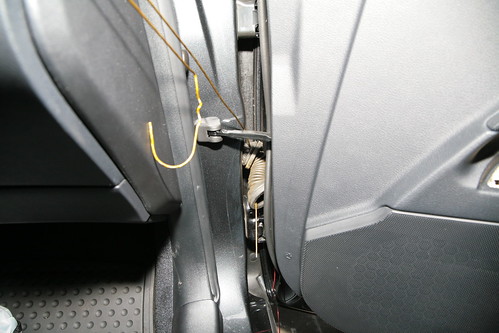
26. Now we need to run the wire under the dash and behind the stereo unit. Feed the hanger thru this opening near the gas pedal.

27. Get the hanger to the passenger side footwell, tape the wire and pull the hanger to the driver side. Tuck the wire behind the carpeting.

20. Remove the rubber hose protecting the wires running between the door and fender.
21. Run the hanger thru that hole and up to the opening where the wire is. Tape the wire to the hanger and pull the wire thru.
22. Now we want to run the new wire along with the existing wires thru the rubber hose. Poke the hanger thru the rubber hose from the left side, tape the wire to the hanger and pull it thru.
23. Remove the plasic panel underneath the glove box. It is held in by 4 clips. Pull hard where the panel meets the glove box. Detach it from the footwell LED.
24. Find an opening in the fender from the inside to poke the hanger thru. I used my fingers to feel for a hole I found just under the carpet line so we couldn't get a really good picture of the opening.
25. Once you get the hanger thru to the other end where the wires are, tape the new wire to the hanger securely and pull wire thru the fender. Then replace the rubber hose.
26. Now we need to run the wire under the dash and behind the stereo unit. Feed the hanger thru this opening near the gas pedal.
27. Get the hanger to the passenger side footwell, tape the wire and pull the hanger to the driver side. Tuck the wire behind the carpeting.
11-25-08, 01:27 AM
#4
Lexus Champion
Thread Starter
***Repeat steps 1-22 for the driver side***
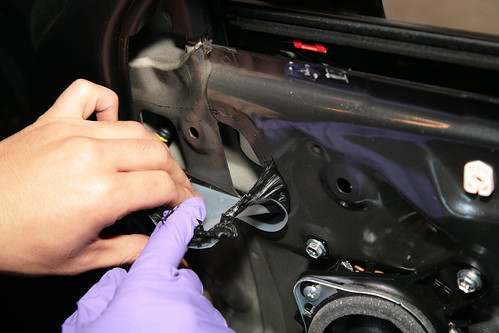
28. At this point you need to get the wire thru the fender. Unlike the passenger side, I found this opening on the inside to run the wire thru the fender. Poke the hanger thru to the outside where the wires are.

29. Tape the wire to the hanger and pull it thru the fender.

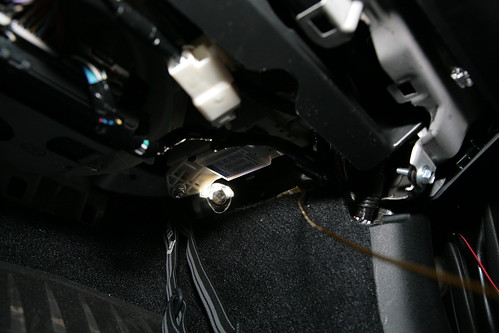
30. Now you need to ground the black wires of the LED mirror covers. Split the black and red wires, join just the black wires and ground it anywhere on the metal car frame. I grounded it here in this screw just above the dead footrest pedal. Hide the wires behind the carpet. (pic looks like red and black wires, but they are both black.)

31. Remove driver side door sill. It's held on by clips so pull hard upwards.

32. Tap into or connect the driver side blinker wire to a medium sized light green wire and the passenger side to a medium sized red wire. I found them both to be near the bottom of the pile of wires. It helps to have a volt meter, but if you don't, you have to use the "trial and error method" with the wire strippers. Try one and test each blinker to ensure proper functionality.

33. Once you got it blinking, neatly re-wrap the cluster of wires and put everything back together.

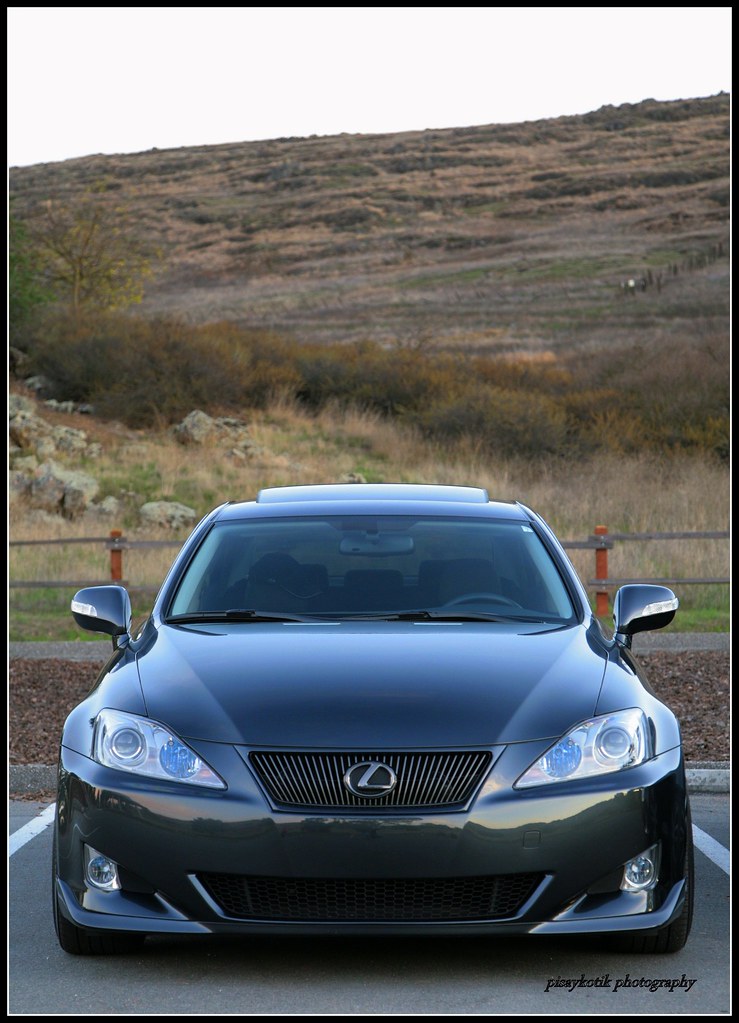
34. And you're done!
Mister T
28. At this point you need to get the wire thru the fender. Unlike the passenger side, I found this opening on the inside to run the wire thru the fender. Poke the hanger thru to the outside where the wires are.
29. Tape the wire to the hanger and pull it thru the fender.
30. Now you need to ground the black wires of the LED mirror covers. Split the black and red wires, join just the black wires and ground it anywhere on the metal car frame. I grounded it here in this screw just above the dead footrest pedal. Hide the wires behind the carpet. (pic looks like red and black wires, but they are both black.)
31. Remove driver side door sill. It's held on by clips so pull hard upwards.
32. Tap into or connect the driver side blinker wire to a medium sized light green wire and the passenger side to a medium sized red wire. I found them both to be near the bottom of the pile of wires. It helps to have a volt meter, but if you don't, you have to use the "trial and error method" with the wire strippers. Try one and test each blinker to ensure proper functionality.
33. Once you got it blinking, neatly re-wrap the cluster of wires and put everything back together.
34. And you're done!
Mister T
Trending Topics
 11-25-08, 08:14 AM
#12
Lexus Champion

Join Date: Dec 2006
Location: NorCal
Posts: 2,596
Likes: 0
Received 0 Likes
on
0 Posts
Now that's what I call an excellent DIY.  It's quite a bit of work but when you see the finished product it is worth all the effort. Total time may be around 3 hours, that's taking it easy and being very careful.
It's quite a bit of work but when you see the finished product it is worth all the effort. Total time may be around 3 hours, that's taking it easy and being very careful.
 . Excellent diy my friend
