When you click on links to various merchants on this site and make a purchase, this can result in this site earning a commission. Affiliate programs and affiliations include, but are not limited to, the eBay Partner Network.
First time posting, but have been reading for a about two years. Picked up a 04 GX470 a couple years ago and have been doing some mods, removed running boards, 2" lift, new roof rack, rear drawers. trying to make a nice camping/overland truck without breaking the bank.
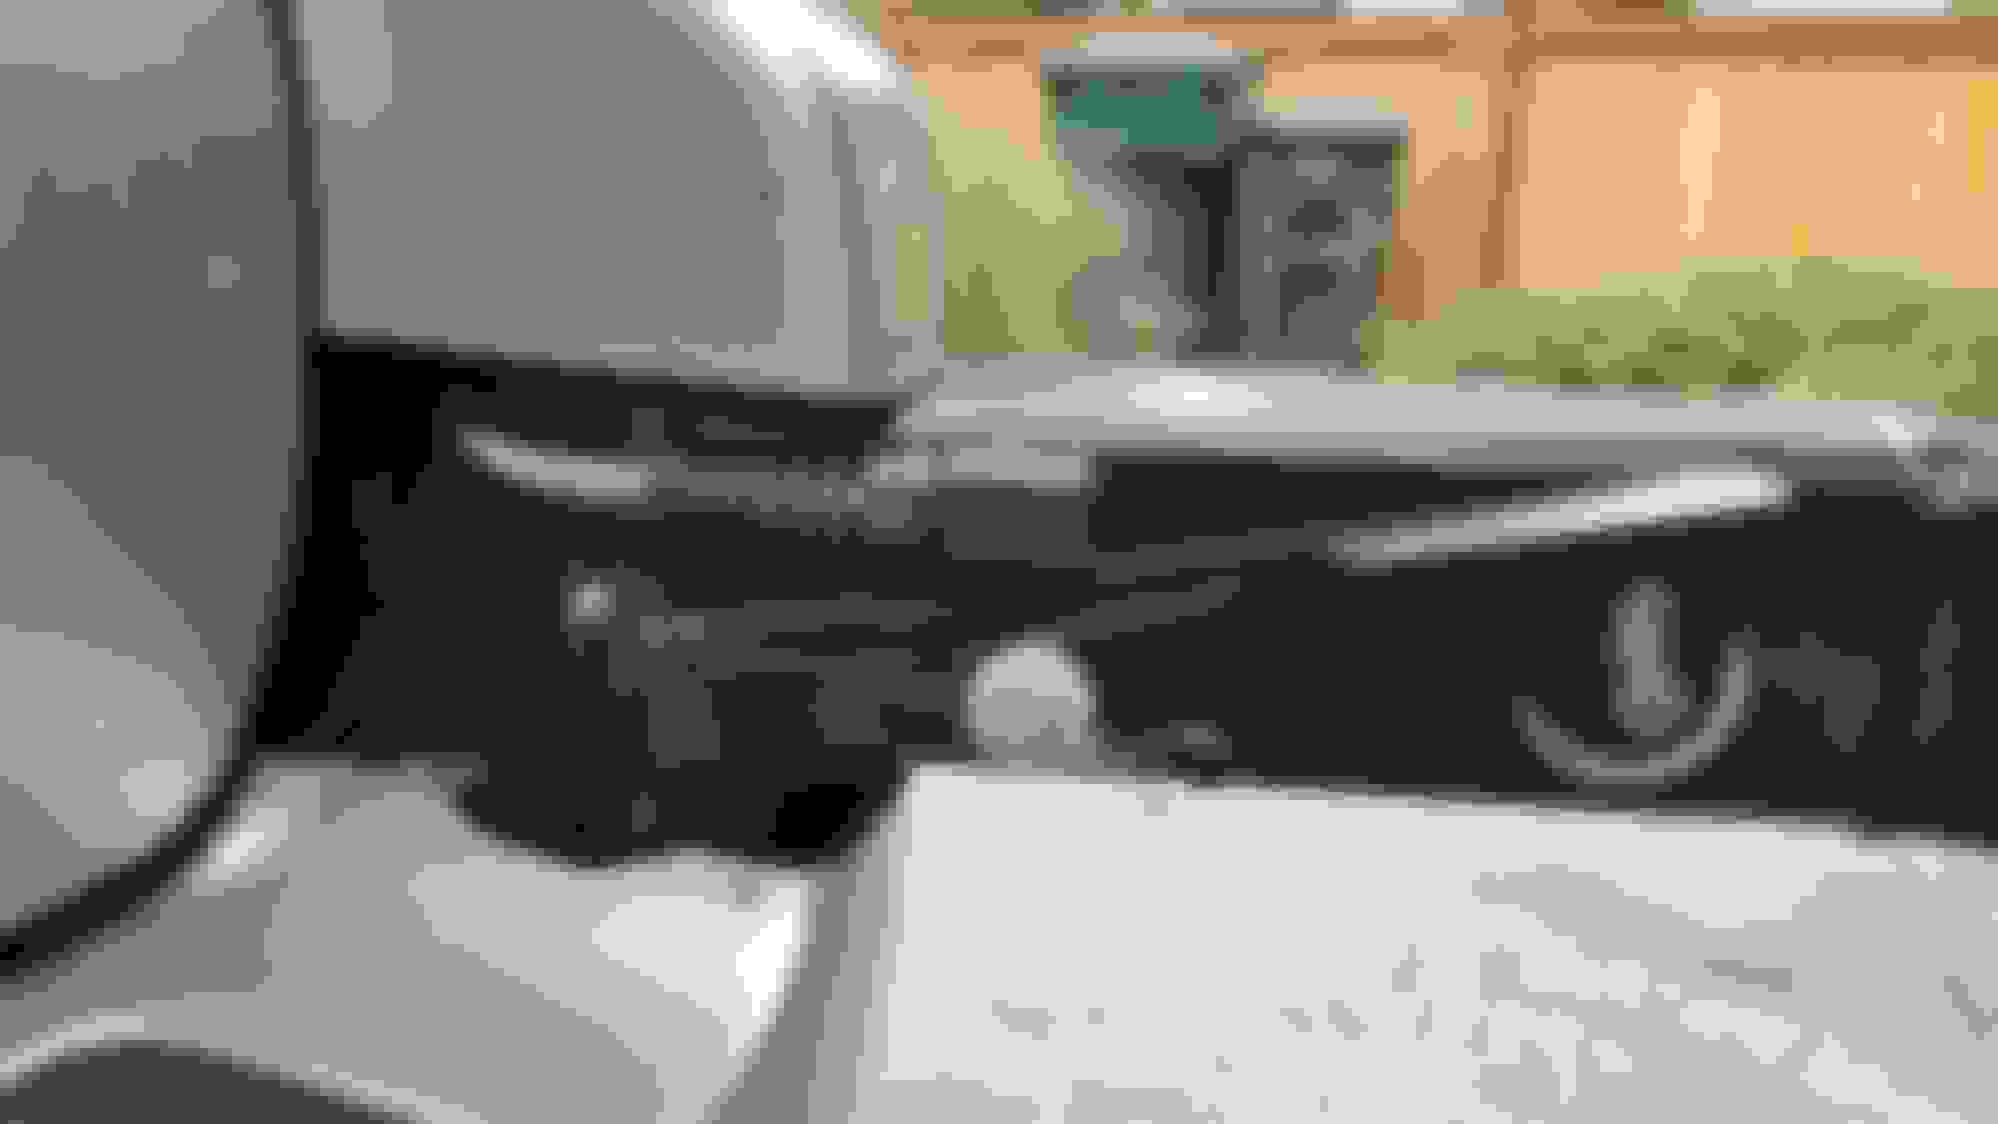
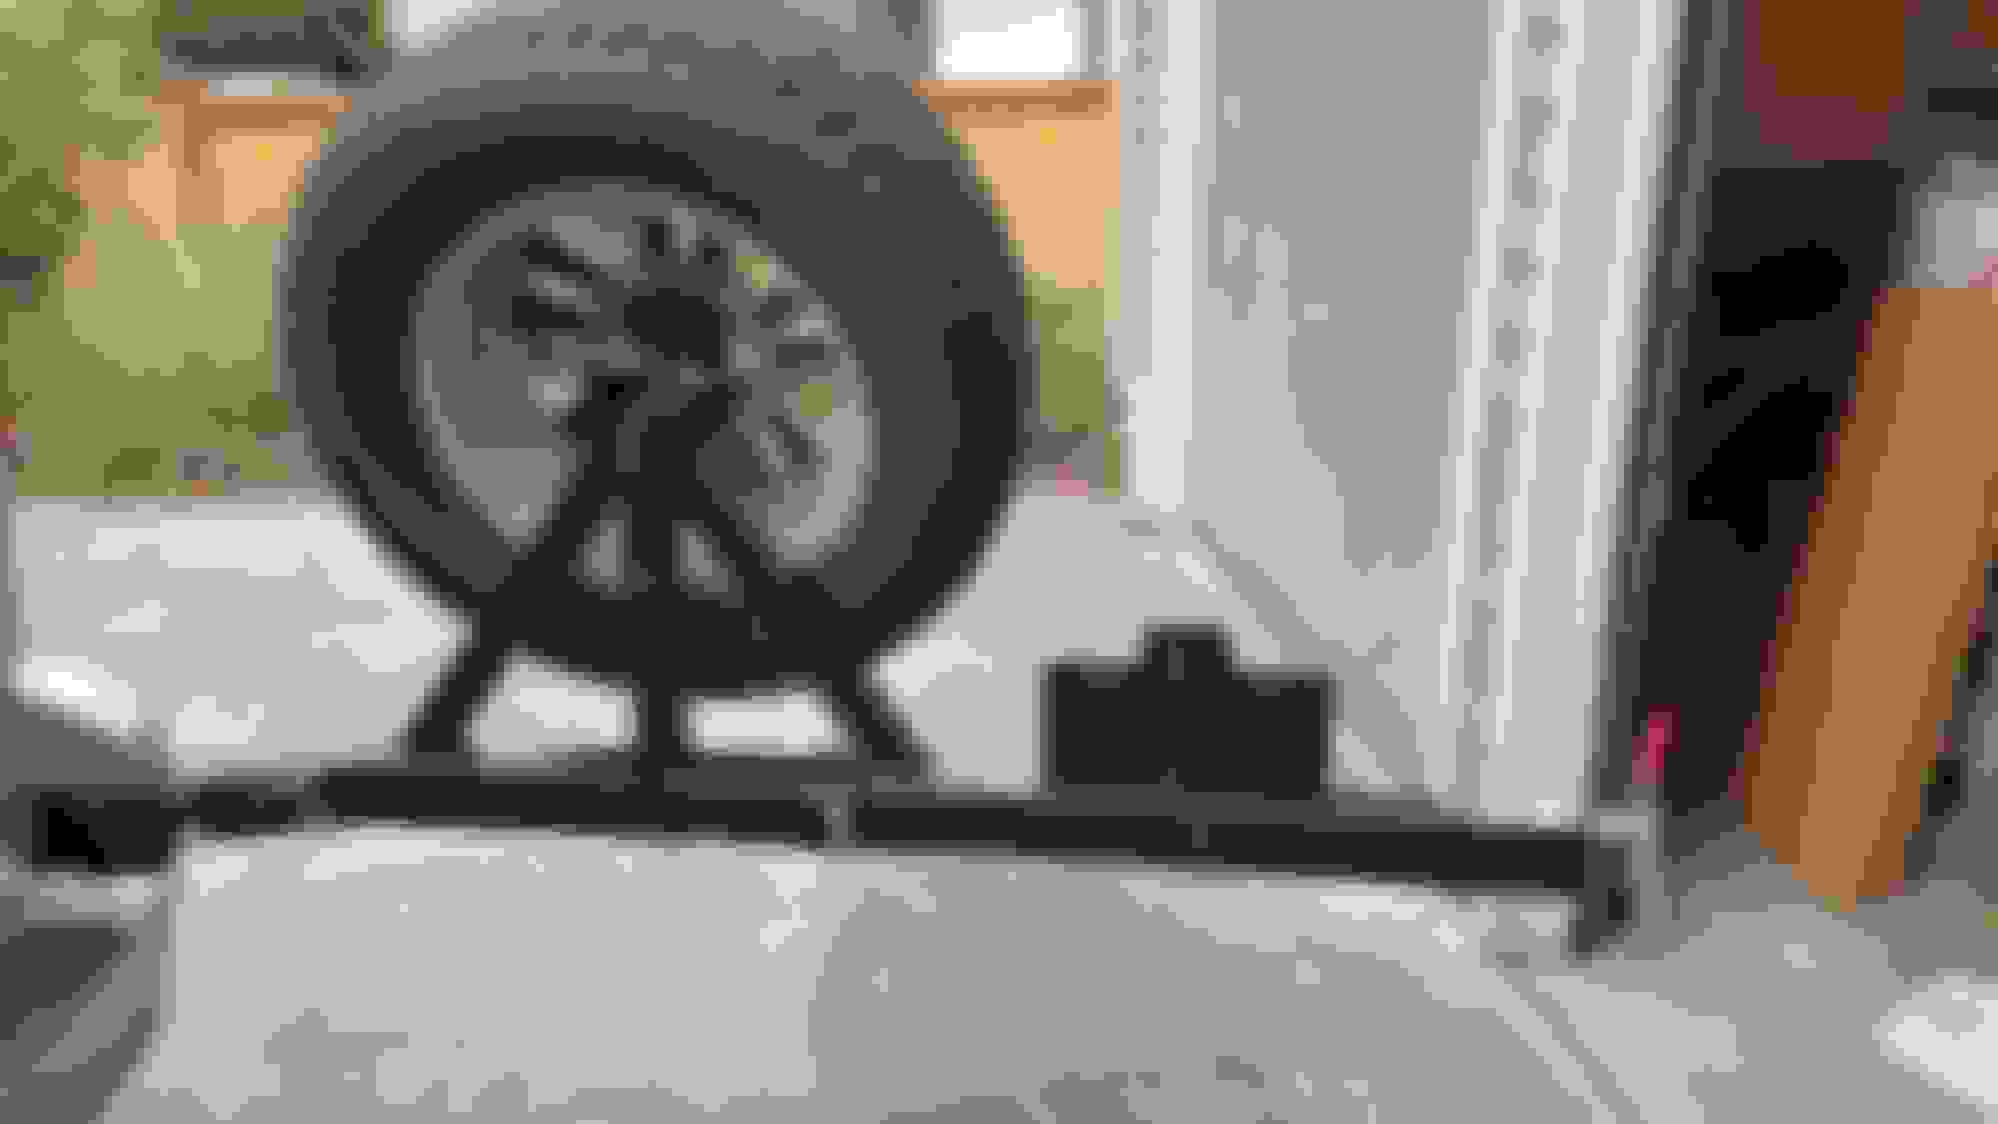
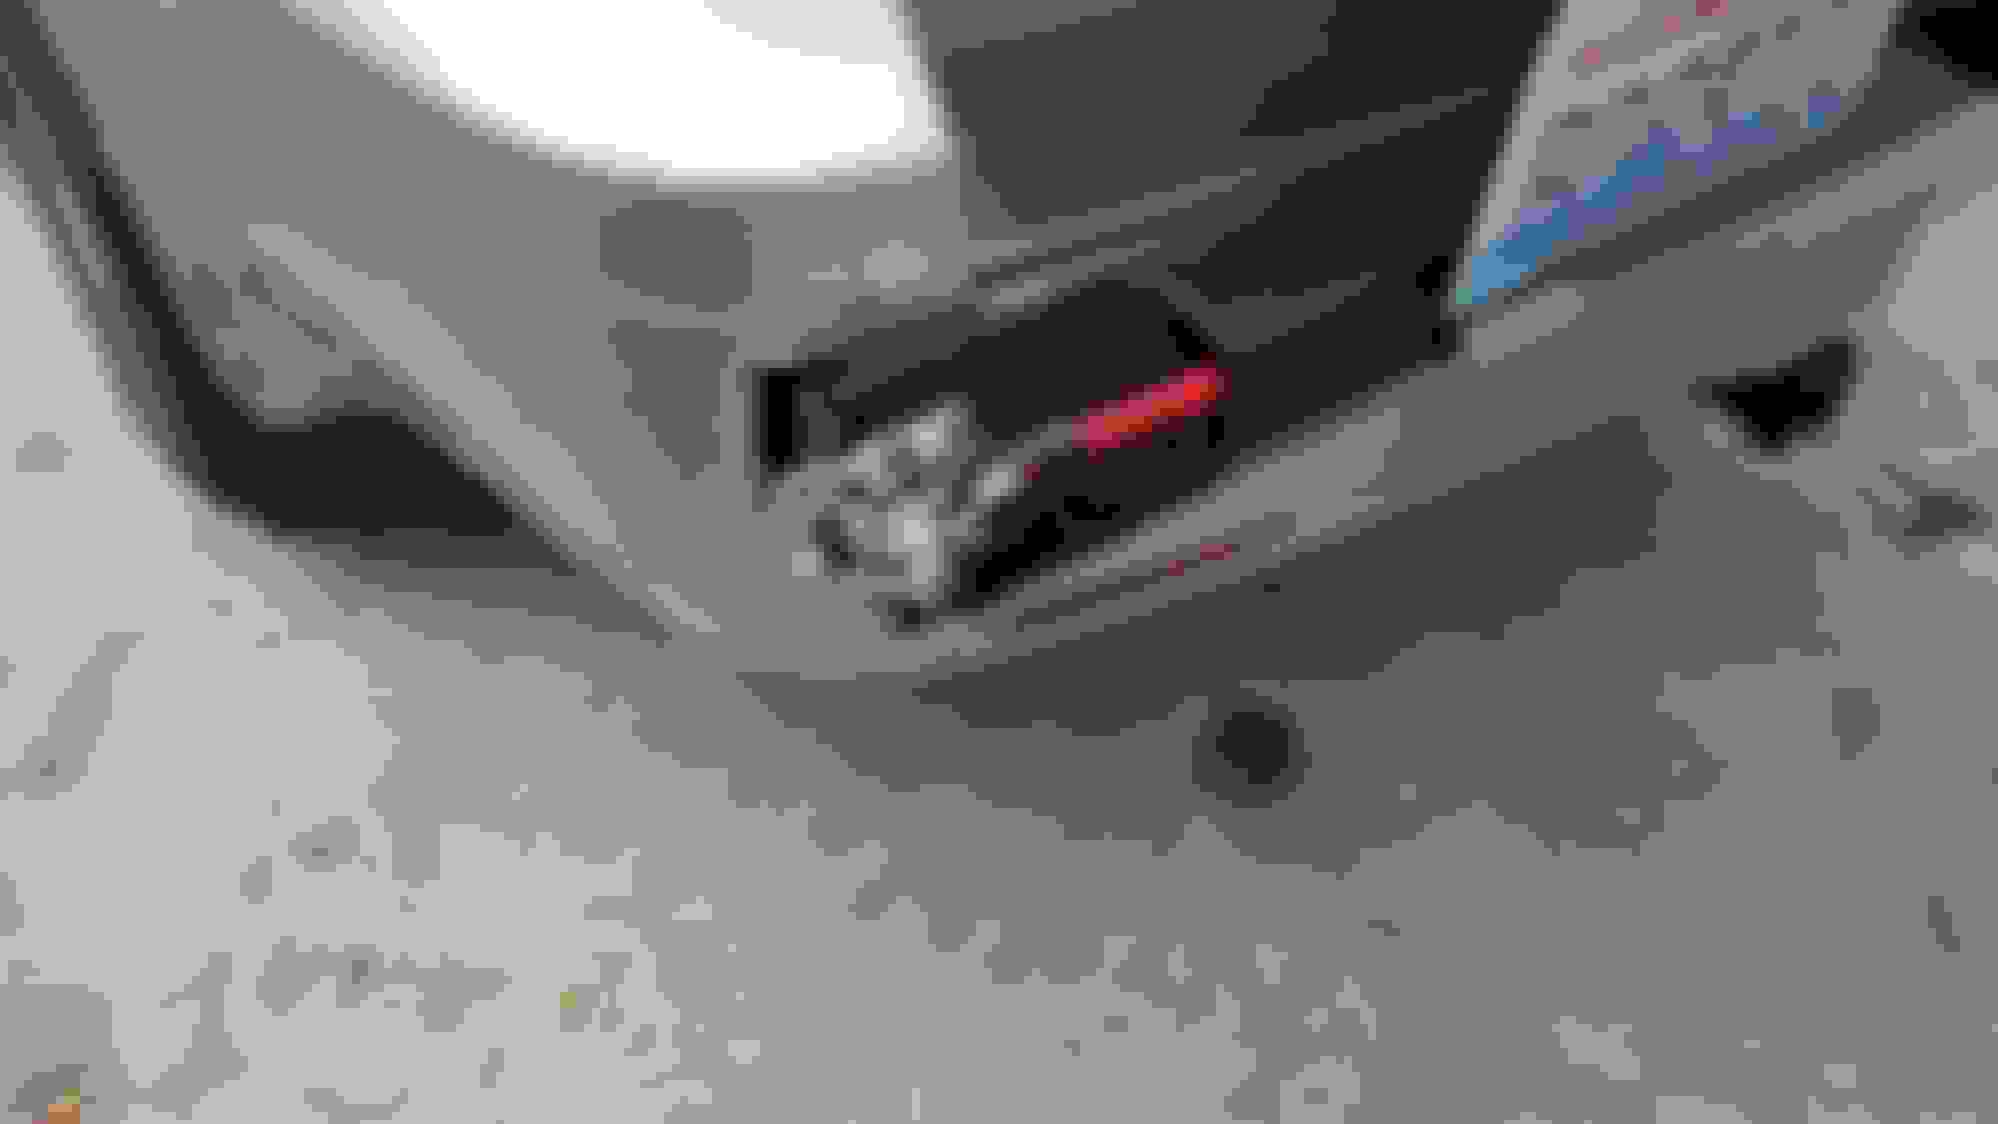
Just finished up a swing out rear tire mount. Its welded to the frame and uses the factory bumper by cutting openings for the arm and mount. Need to make some small adjustments yet, tire has too much tilt, going to back that off a bit.
Spindle is 1.25" with tapered needle bearings. Most of the steel was scrap from work. I fabricated as much of it as I could and only purchased what I could not fabricate, though in hindsight, I should have just purchased a prefab spindle. I built a lock system for the latch, and a spring loaded lever/pin lock for the open position. All wiring (backup light, license plate light, and backup camera) is run internally. I also disconnected the lights on the car. The construction is a bit over kill, but it�s made with what I could get as scrap, and free is good.
Here are the pics. added a 2" receiver for a bike rack.
Could also keep the spare under the truck in case there were two flat tires.
The red handle is nice but stands out too much in my opinion. Could use plastidip black over the red to tone it down a little. The type of plastidip in the can to dip tool handles.
Second receiver is a great idea for the bikes to easily get them out of the way to open the back
Nice work.
Thanks
I didn't think about changing the handle color, but that�s a good idea.
Yes, I could keep an additional spare under the truck too, at least until I get new tires. I�m going bigger, and bigger will not fit underneath. I�m planning to do a water tank underneath where the spare was at some point.
Awesome work looks great.
Question did you add a different runner? If so what about the 6 in piece that has the round plastic tabs on the front fender? I bought mine with rock sliders and the white underneath really stood out. I couldn�t find mud flaps to fit so I painted both sides black. Not perfect but not near as noticeable. Any ideas
I did not add anything new. I hope to do rock sliders someday. I just painted them black as well.
nice! Whats the biggest tire/wheel setup you can fit on it?
The mount is built to allow at least 35" tires, larger could fit. I�m only planning on 33". its adjustable for different wheel offsets and tire widths.
You did great work. Seems solid. Why did you choose to keep the plastic bumper?
Cost mostly, looks and weight some. I could make the swing mount from scrap material from my work. Also I�m not driving anything that a full plate bumper would be needed. I�m going to go larger for my next set of tires, at which point the spare will not fit underneath, I did not want, or have the room, to put it on the roof rack, so back mount became my best choice. Save some cash on this, and put it into tires, wheels, winch, Etc. the stuff I can�t make from scrap material.
Dang. That looks pretty good! Wanna build another one?!?! Seriously. I already have a nice spindle that might work as well as a tire mount plate/surface.
Dang. That looks pretty good! Wanna build another one?!?! Seriously. I already have a nice spindle that might work as well as a tire mount plate/surface.
Thanks for the kind words. Im fortunate to work at a facility that allows me to work on my own projects and use the equipment. But it has to be for own personal use. I can send/post more detail info and photos if there's interest.
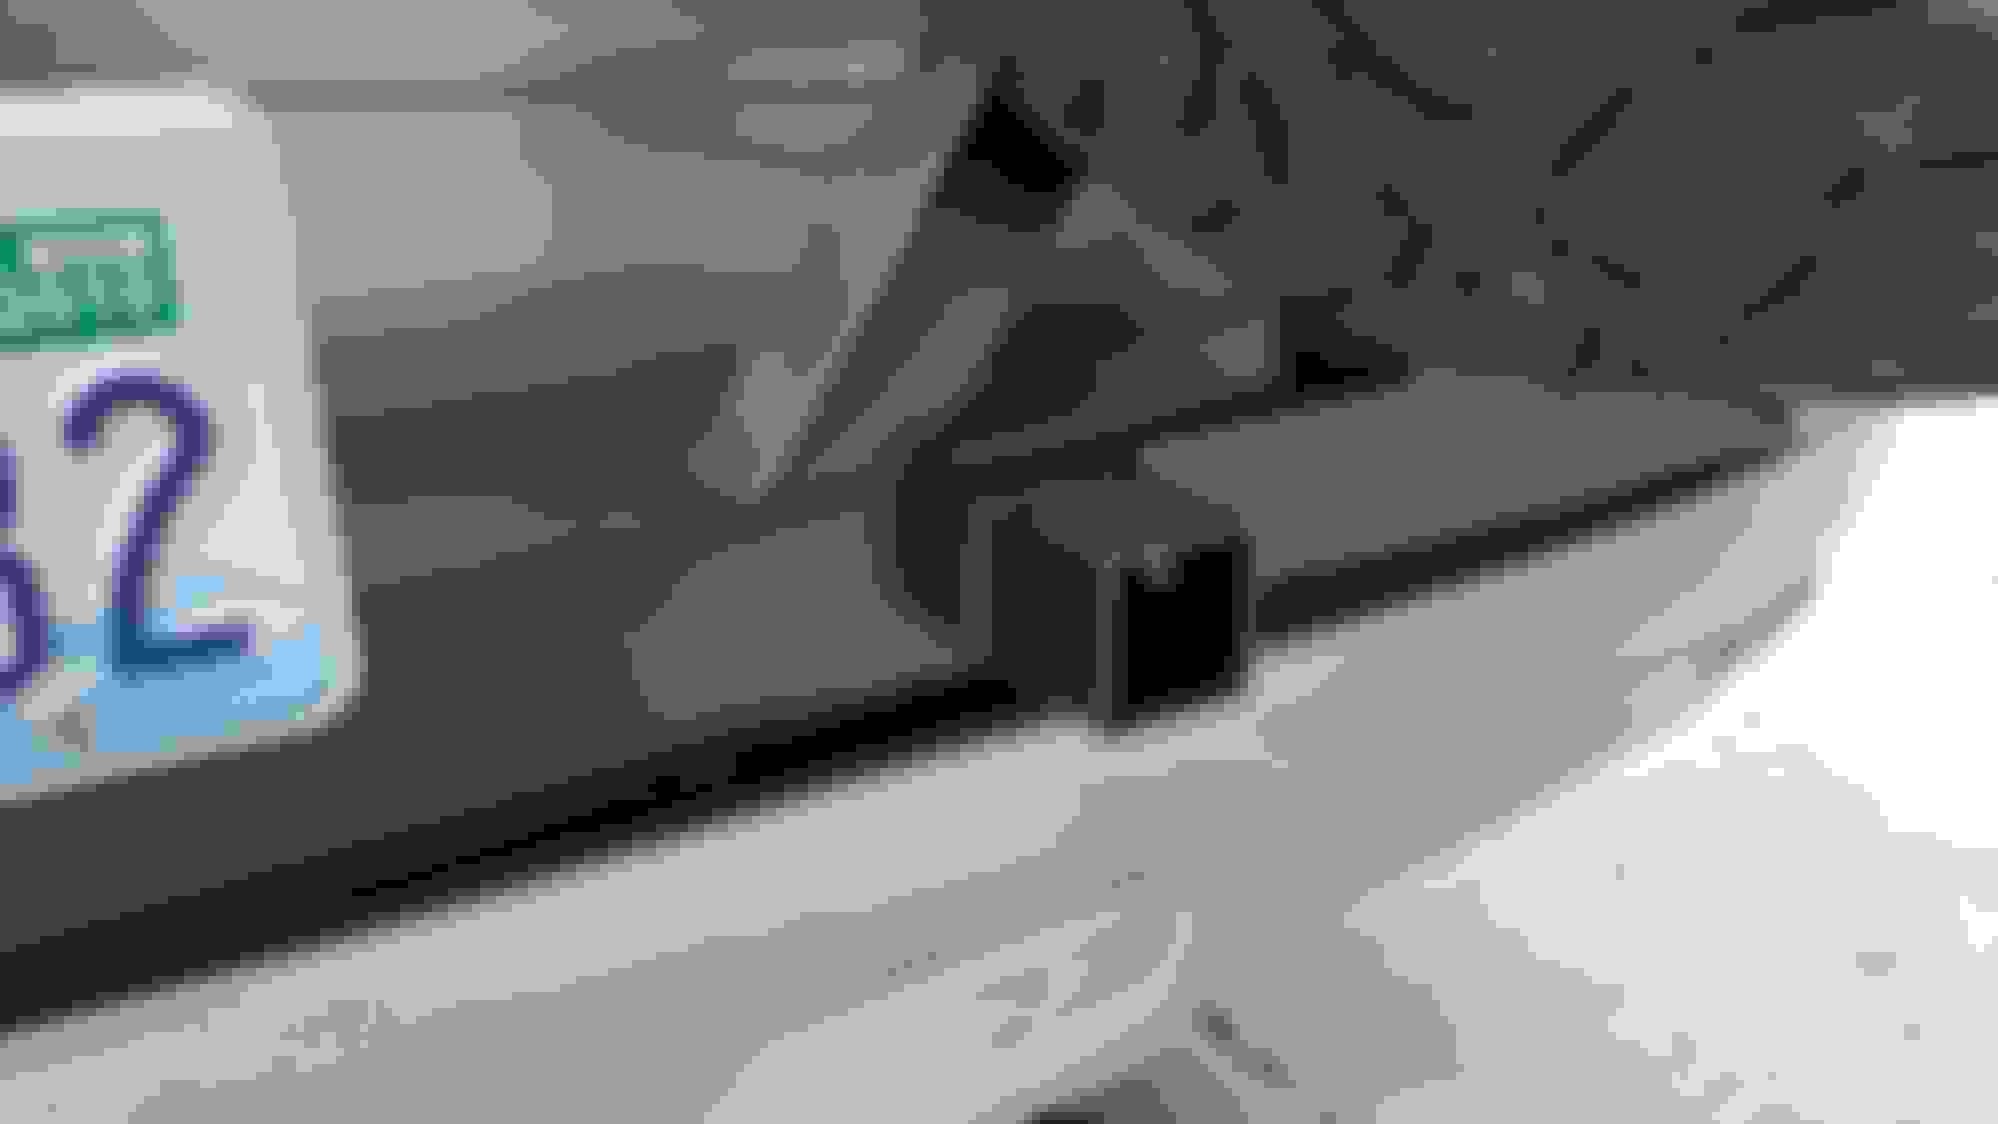
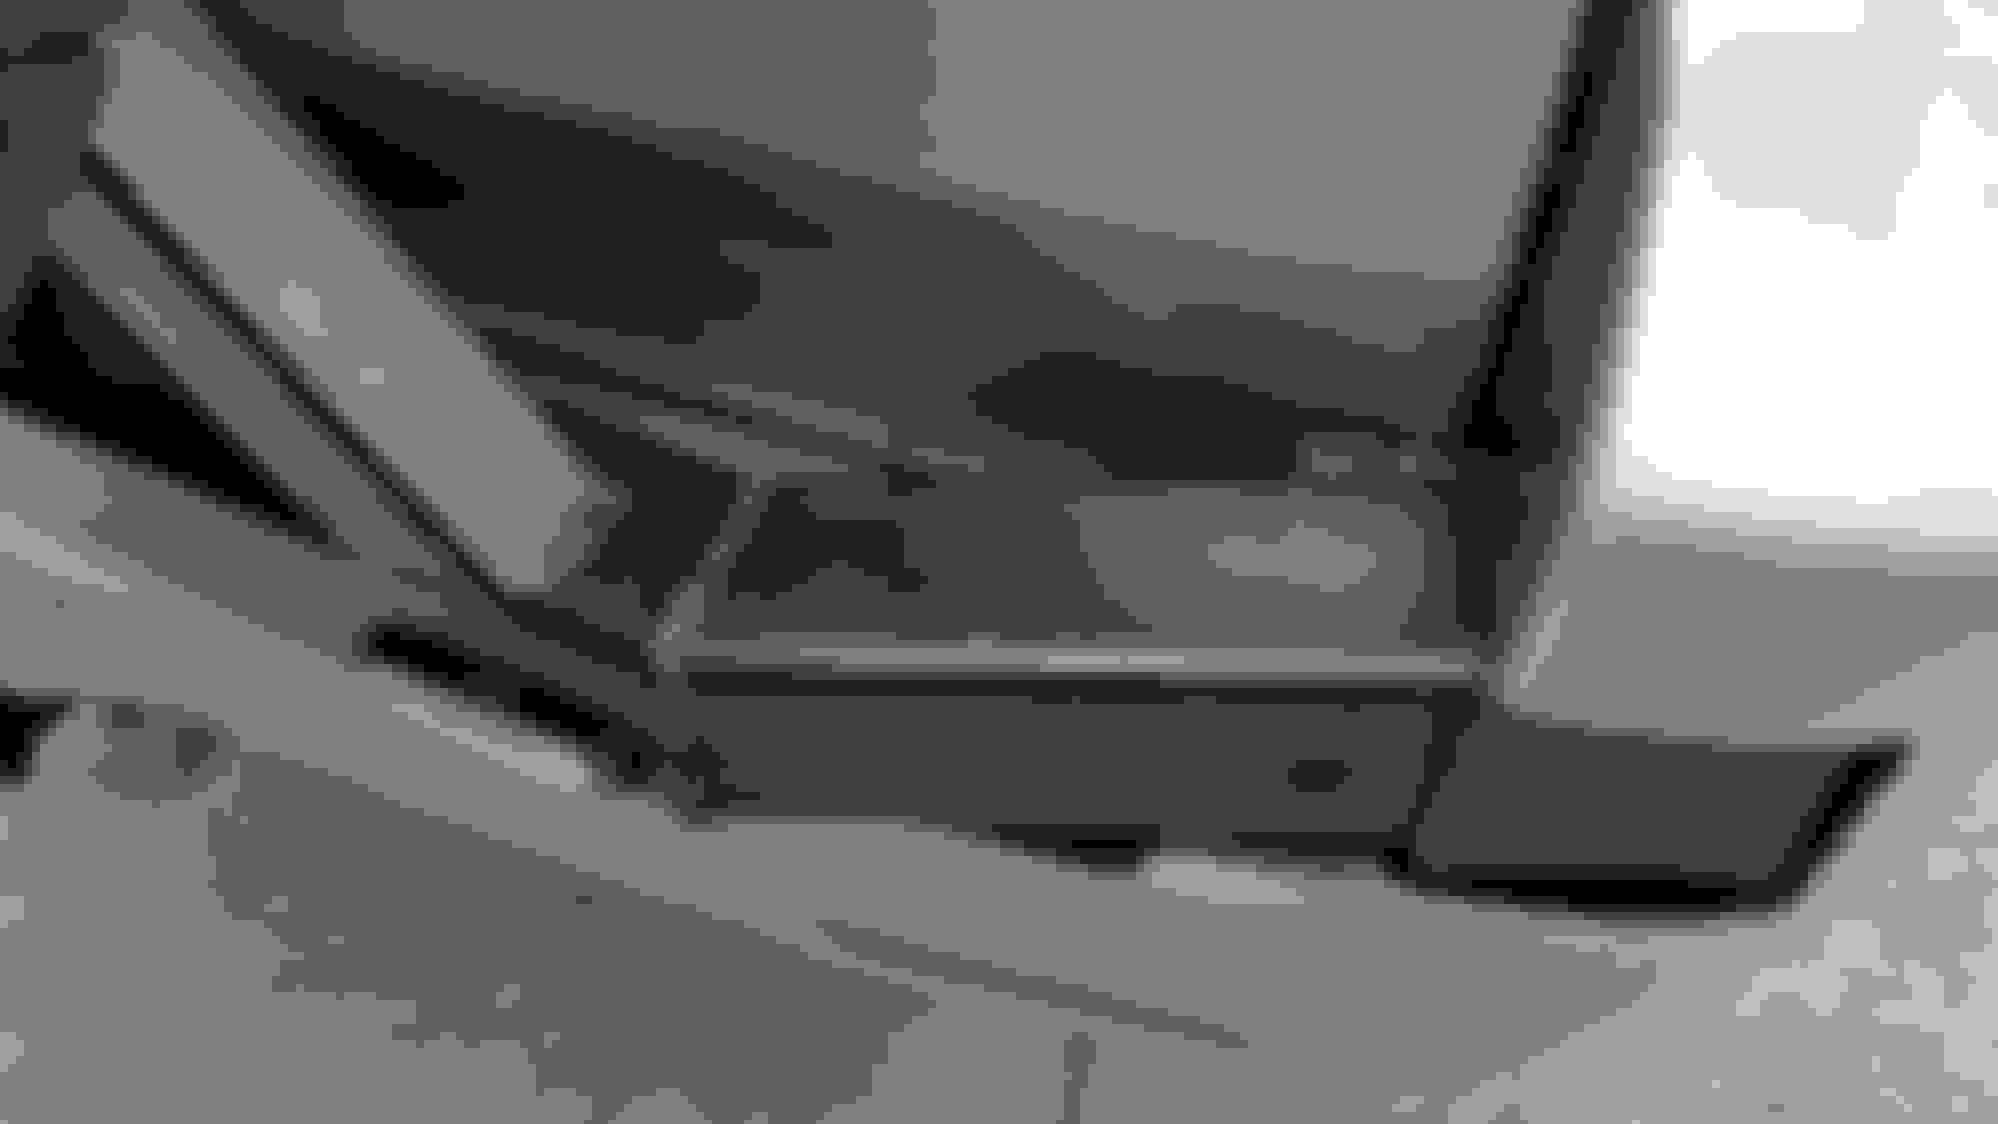
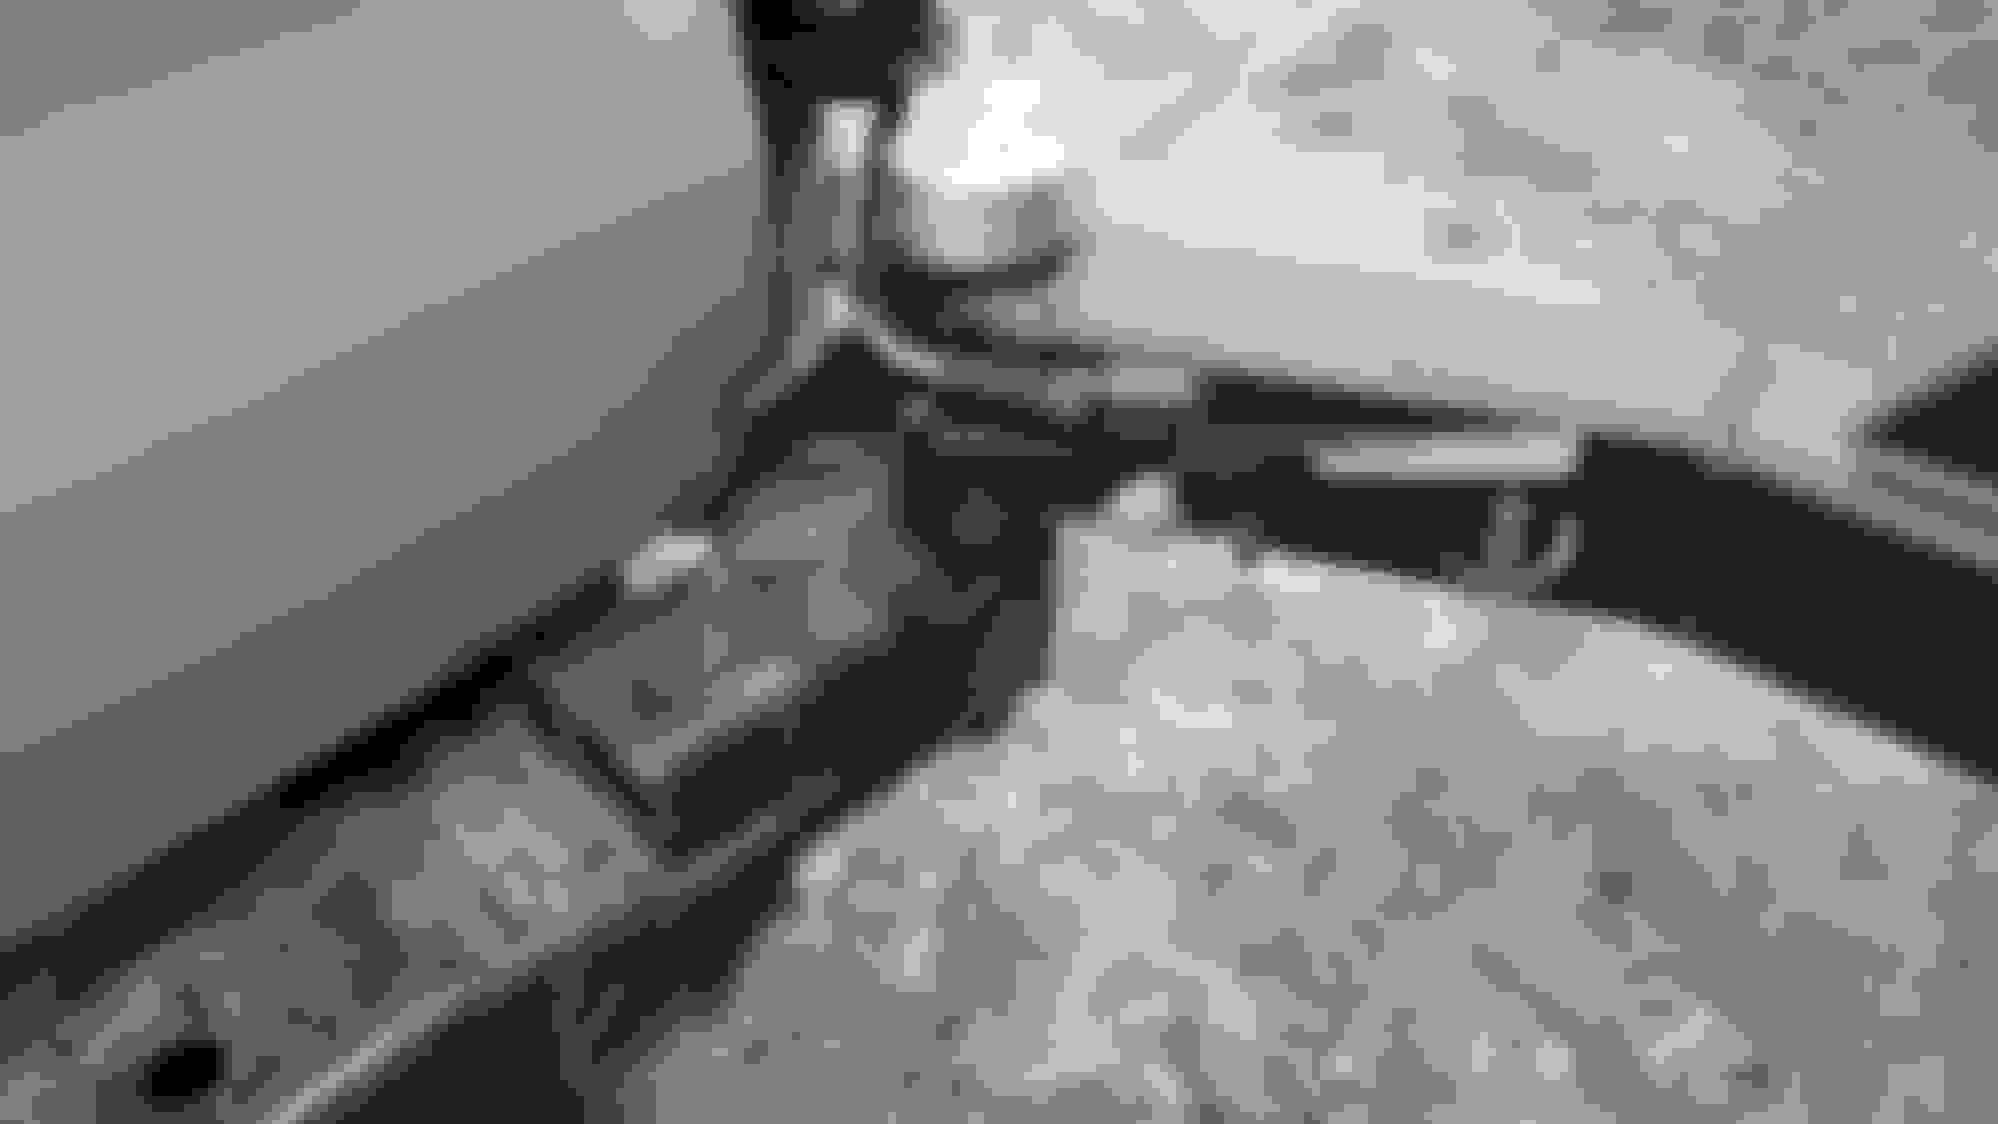
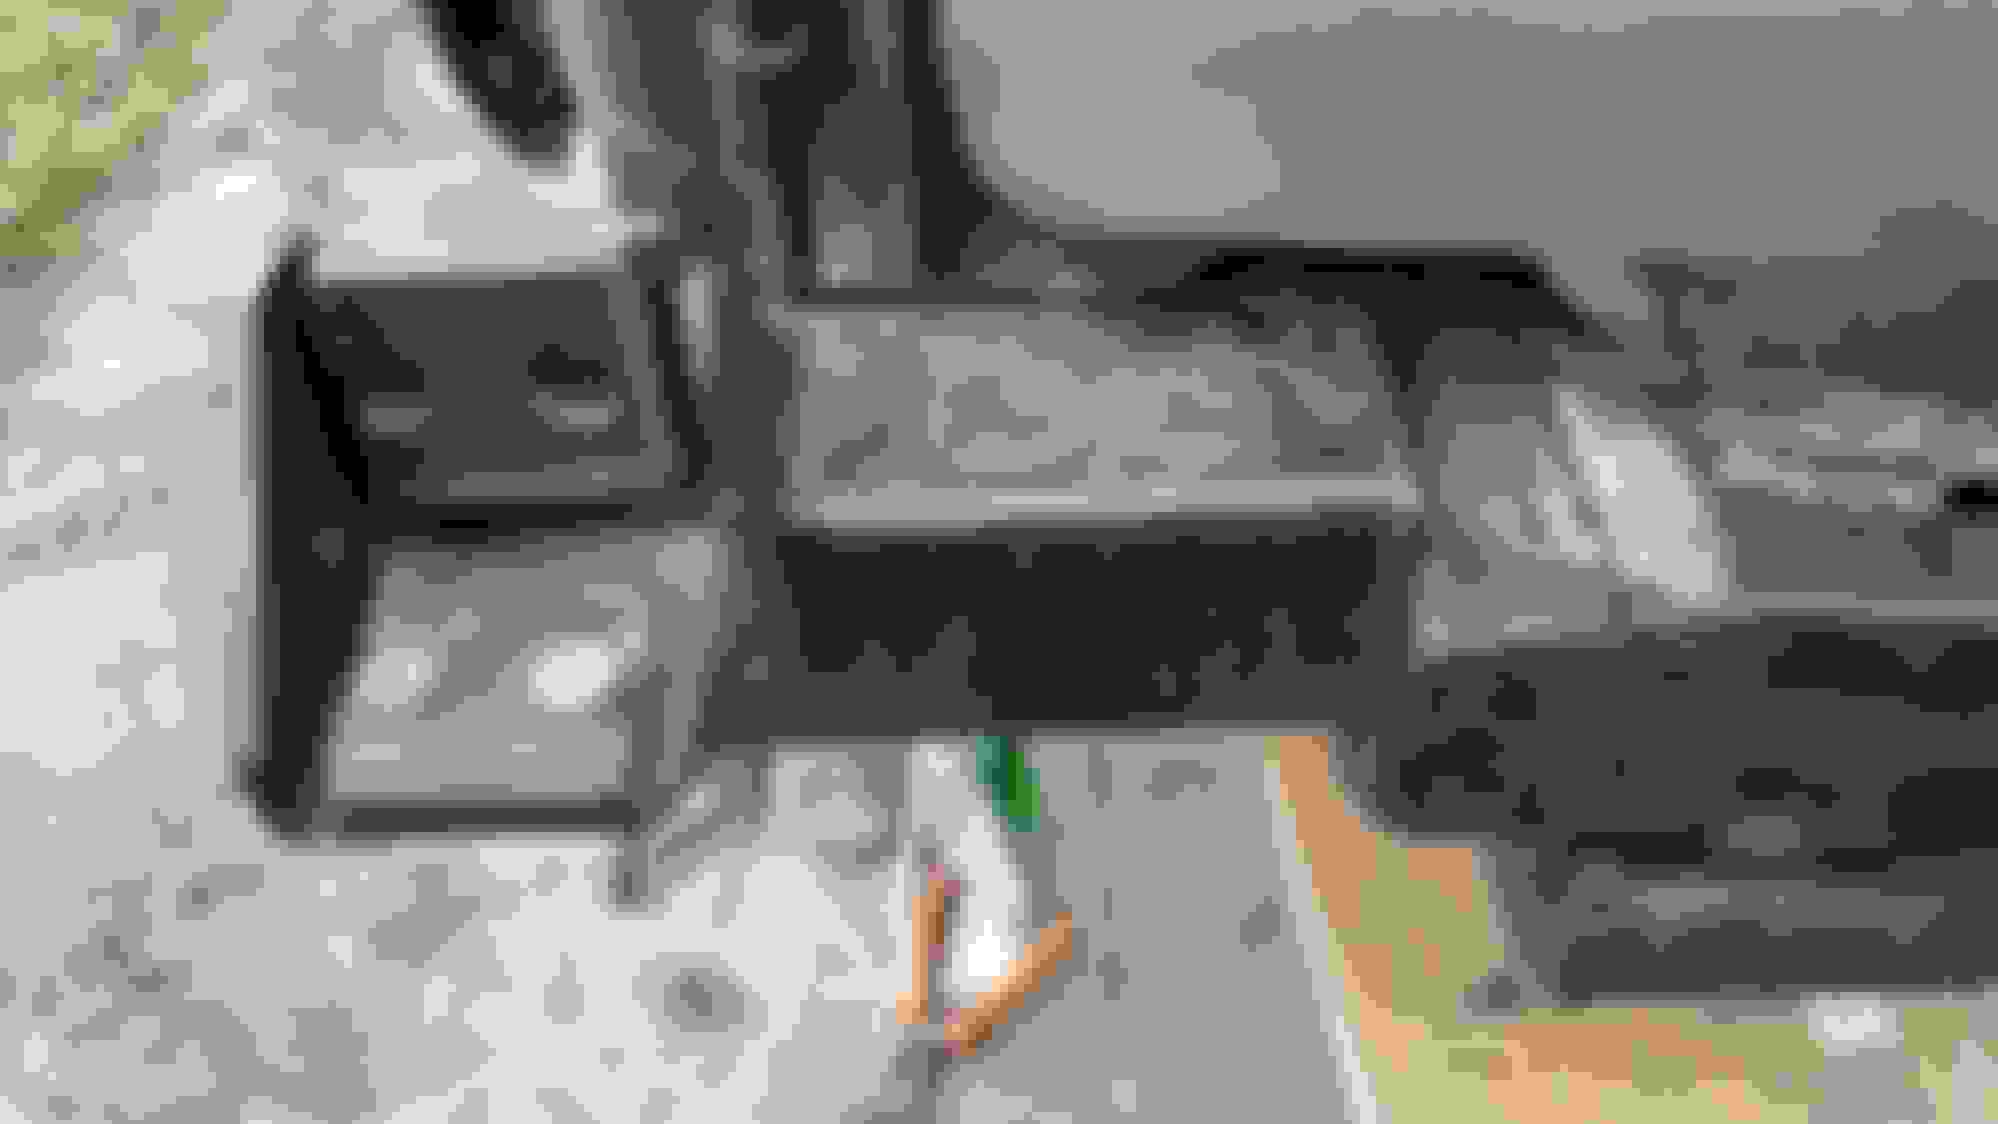
Iv been asked about what I did under the plastic bumper shell to attach and anchor the swing out tire rack.
I added steel box tube to extend the bumper to the point I wanted the hing and seat to be. Most of the steel is 1/4", mainly because that's what I had. I added a lot more bracing and support to the hinge side. due to the weight and leverage of the swing, I wanted to distribute the load out on as much of the frame as I could. There is a foam pad that goes between the steel bumper and the plastic shell, I had to cut that down a bit. The plastic shell rests on some of the added steel now, it does seem to rub the paint off at those points causing a small bit of rust.
I did not add as much to this side, most of the load is on the hinge side. I added a lot of angle bracing to this side to help distribute the load. The 4 pin trailer wiring plugs are for the backup lights, license plate light, and the back-up camera.
The gray cable running from the 4 pin connectors to the swing is a robotics cable made to continues flexing. no worry of the wire fatiguing.
 10-03-18, 08:58 AM