DIY Spark Plugs 04 GX 470
 09-14-12, 09:32 AM
#1
Driver
Thread Starter

Hi all, I've been lurking around these forums for a little while now and have gotten a lot of use of the information that is available here! Thought it was time for myself to contribute a little bit 
We bought my wife an 04 GX 470 a little less than a year ago. It had 116k on it when we got it and I was unsure what preventive or reactive maintenance had been done too it. We just recently passed 125k on it (a summer road trip was 4k miles in itself) and I finally got some time to look into the maintenance for myself. Recently, while changing the oil I noticed we had a torn up inner cv boot (with very little grease left in the boot) on the passenger side. Deciding to take that project on myself I also decided to go ahead and do the spark plugs and lower ball joints. Ordered 2 cv axles, 2 lower ball joints, and spark plugs from RockAuto. I couldn't have been happier with the customer service and prices RockAuto offered. Out the door total cost for the parts was 232$ after shipping. Enough background story! On to the DIY!!
This is my first DIY post on any forum so excuse me for anything I mess up on Any questions I can answer Ill be more than happy too!
The OEM spark plugs for the GX 470 are Denso SK20R11 (Iridium) plugs. This is what I bought from RockAuto for $6.57 a piece. There are 8 total in the engine.
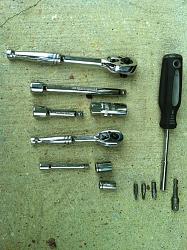
First the tools used for this project were: 1/4 ratchet and its 3" extension, 3/8 ratchet and its 3" and 6" extension, 10mm socket, 12mm socket, 5/8 spark plug socket, and screwdriver with socket adapter for 1/4 sockets and 3/8 sockets.
Before starting disconnect the battery. One, I don't like messing with electric wiring with the battery connected. Second, it gives the computer a chance to readjust for the new plugs.

Now to get started you need to remove the cosmetic engine cover it is held in place by two 10mm nuts.

With the cover off you can see the four spark plug coil packs that run along side the engine. (The picture is off the driver side). The coil packs are held in place with a 10mm hex head screw. Remove this screw and set aside (needless to say don't lose them!). You are now able to remove the coil pack. You can either pull the coil pack out while it is still attached to the spark plug wiring harness or you can unclip the harness from the coil pack. Don't let the coil pack dangle from its wiring should you leave it attached.

Next, with the 6" extension attached to the spark plug socket slide it down onto the spark plug and back the spark plug out. I found it easiest in the close quarters to place the socket and extension in first then attach the ratchet aftewards, then unattach the ratchet from its extension once you are ready to pull the old plug out. Then obviously it is the reverse of this process to install the new plug. I torqued the new spark plug by feel but its suppose to be 21 ft lbs I believe. Complete this process for the remaining three plugs on the driver side.
Continued....
We bought my wife an 04 GX 470 a little less than a year ago. It had 116k on it when we got it and I was unsure what preventive or reactive maintenance had been done too it. We just recently passed 125k on it (a summer road trip was 4k miles in itself) and I finally got some time to look into the maintenance for myself. Recently, while changing the oil I noticed we had a torn up inner cv boot (with very little grease left in the boot) on the passenger side. Deciding to take that project on myself I also decided to go ahead and do the spark plugs and lower ball joints. Ordered 2 cv axles, 2 lower ball joints, and spark plugs from RockAuto. I couldn't have been happier with the customer service and prices RockAuto offered. Out the door total cost for the parts was 232$ after shipping. Enough background story! On to the DIY!!
This is my first DIY post on any forum so excuse me for anything I mess up on
Any questions I can answer Ill be more than happy too!The OEM spark plugs for the GX 470 are Denso SK20R11 (Iridium) plugs. This is what I bought from RockAuto for $6.57 a piece. There are 8 total in the engine.
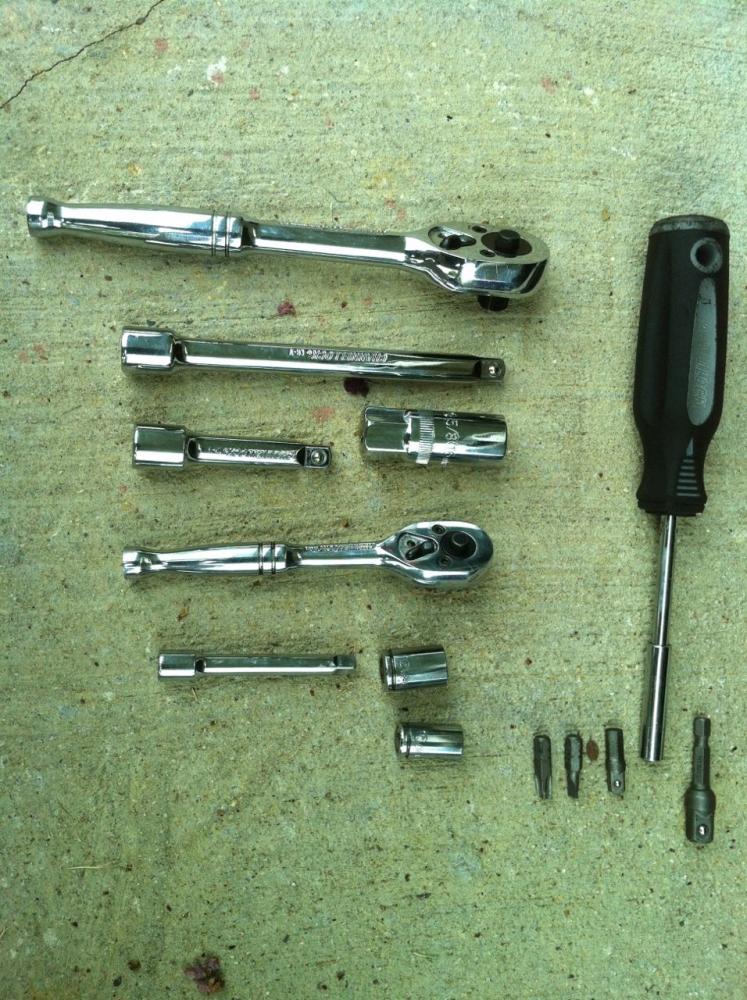
First the tools used for this project were: 1/4 ratchet and its 3" extension, 3/8 ratchet and its 3" and 6" extension, 10mm socket, 12mm socket, 5/8 spark plug socket, and screwdriver with socket adapter for 1/4 sockets and 3/8 sockets.
Before starting disconnect the battery. One, I don't like messing with electric wiring with the battery connected. Second, it gives the computer a chance to readjust for the new plugs.
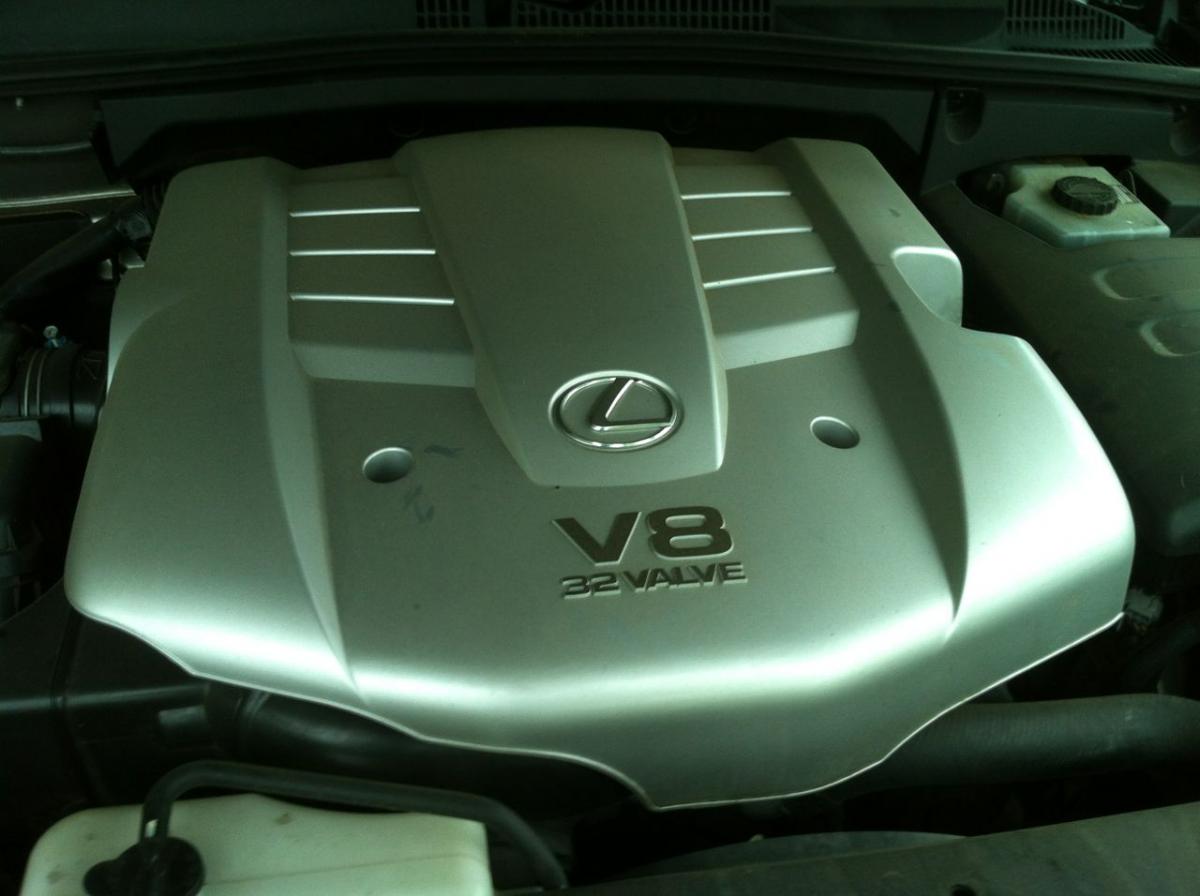
Now to get started you need to remove the cosmetic engine cover it is held in place by two 10mm nuts.
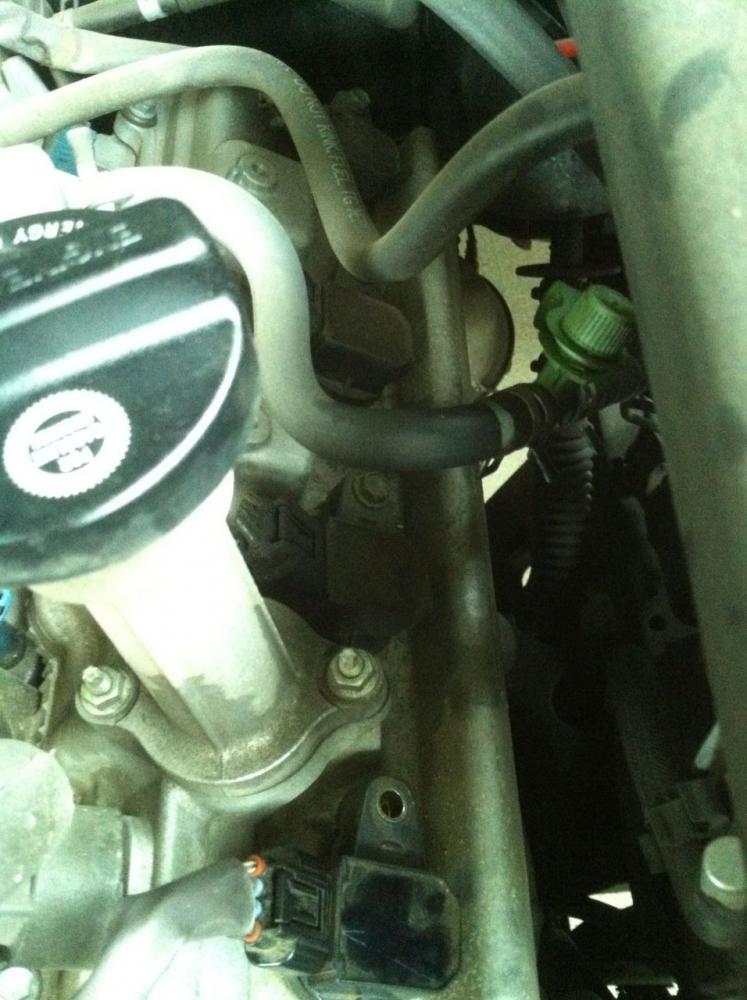
With the cover off you can see the four spark plug coil packs that run along side the engine. (The picture is off the driver side). The coil packs are held in place with a 10mm hex head screw. Remove this screw and set aside (needless to say don't lose them!). You are now able to remove the coil pack. You can either pull the coil pack out while it is still attached to the spark plug wiring harness or you can unclip the harness from the coil pack. Don't let the coil pack dangle from its wiring should you leave it attached.
Next, with the 6" extension attached to the spark plug socket slide it down onto the spark plug and back the spark plug out. I found it easiest in the close quarters to place the socket and extension in first then attach the ratchet aftewards, then unattach the ratchet from its extension once you are ready to pull the old plug out. Then obviously it is the reverse of this process to install the new plug. I torqued the new spark plug by feel but its suppose to be 21 ft lbs I believe. Complete this process for the remaining three plugs on the driver side.
Continued....
Last edited by bauer26; 09-14-12 at 09:44 AM. Reason: Edit for content.

The following 2 users liked this post by bauer26:
Lextazy (01-15-20),
Menomineef (10-09-17)
09-14-12, 09:42 AM
#2
Driver
Thread Starter
Once you complete the driver side you can move to the passenger side.
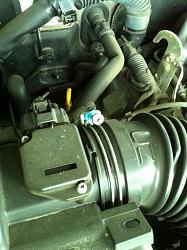
The passenger side presents a new challenge with the air filter housing being in the way of the front two plugs.
Here is how I got around it. Open the air filter housing by pulling down on the four clips that hold the upper and lower housings together. Remove the filter. Then you need to remove the upper housing.
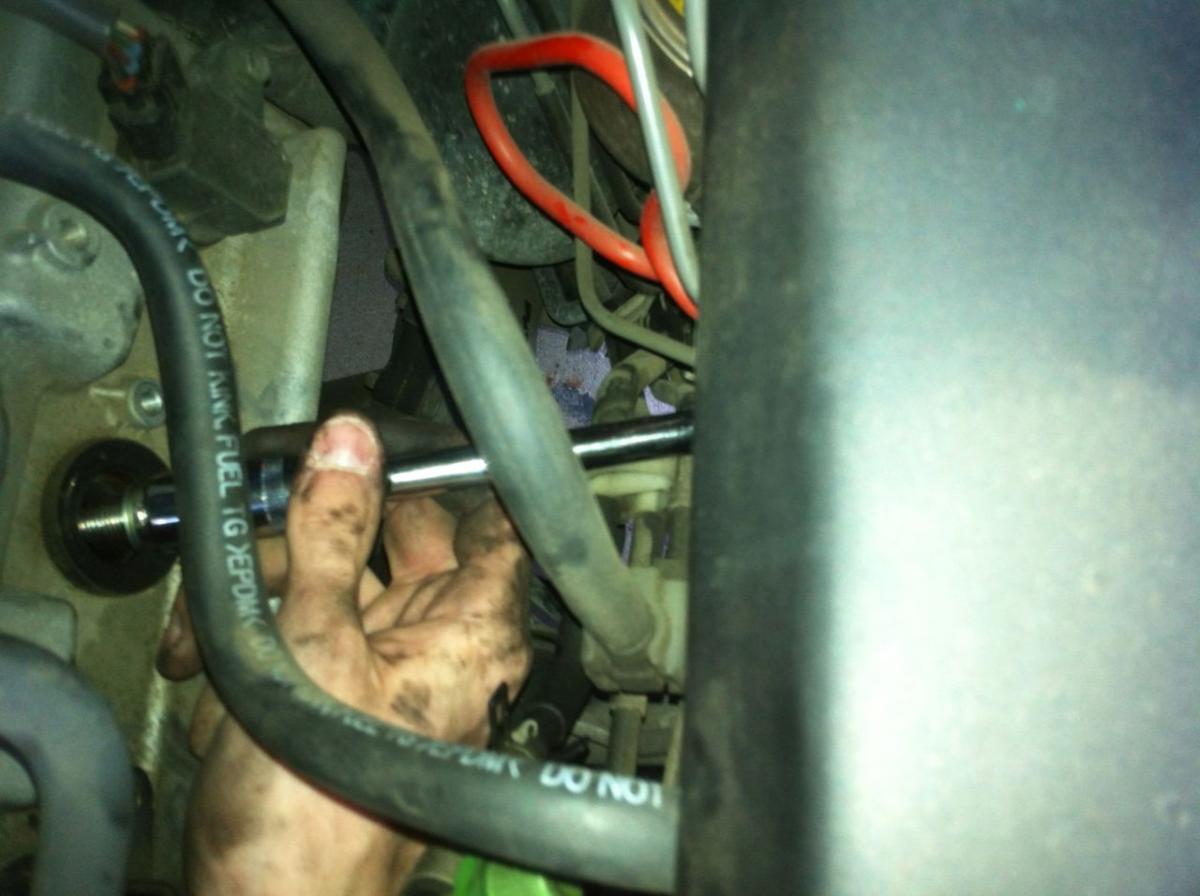
Loosen the #3 phillips head screw that tightens the clamp. Pull the housing way from the hose and place it out of the way. This leaves you with the lower housing that is bolted to the wheel well with 3 bolts.
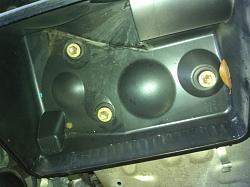
These bolts are 12mm and once removed you can remove the lower housing from the engine compartment so it is out of the way.

We now have easier access to the four plugs on the passenger side. Repeat the steps that were covered above for removal of the old plugs and installation of the new ones.
Finally once all plugs are changed and coil packs are bolted back down. Replace the air filter housing in the reverse order it was removed. Replace the cosmetic engine cover and you are done! Note: a stubby 3/8 ratchet and flex joint would be ideal for this job and would have saved me a load of time but I used what I had.
Here is an old plug next to a new one.

Next I got the CV shafts and lower ball joints to replace. Gonna have to wait a week or so but it'll get done! Hope this DIY helps someone out and sorry for the iPhone pictures it was the best I could do.
Cheers,
Brian
The passenger side presents a new challenge with the air filter housing being in the way of the front two plugs.
Here is how I got around it. Open the air filter housing by pulling down on the four clips that hold the upper and lower housings together. Remove the filter. Then you need to remove the upper housing.

Loosen the #3 phillips head screw that tightens the clamp. Pull the housing way from the hose and place it out of the way. This leaves you with the lower housing that is bolted to the wheel well with 3 bolts.
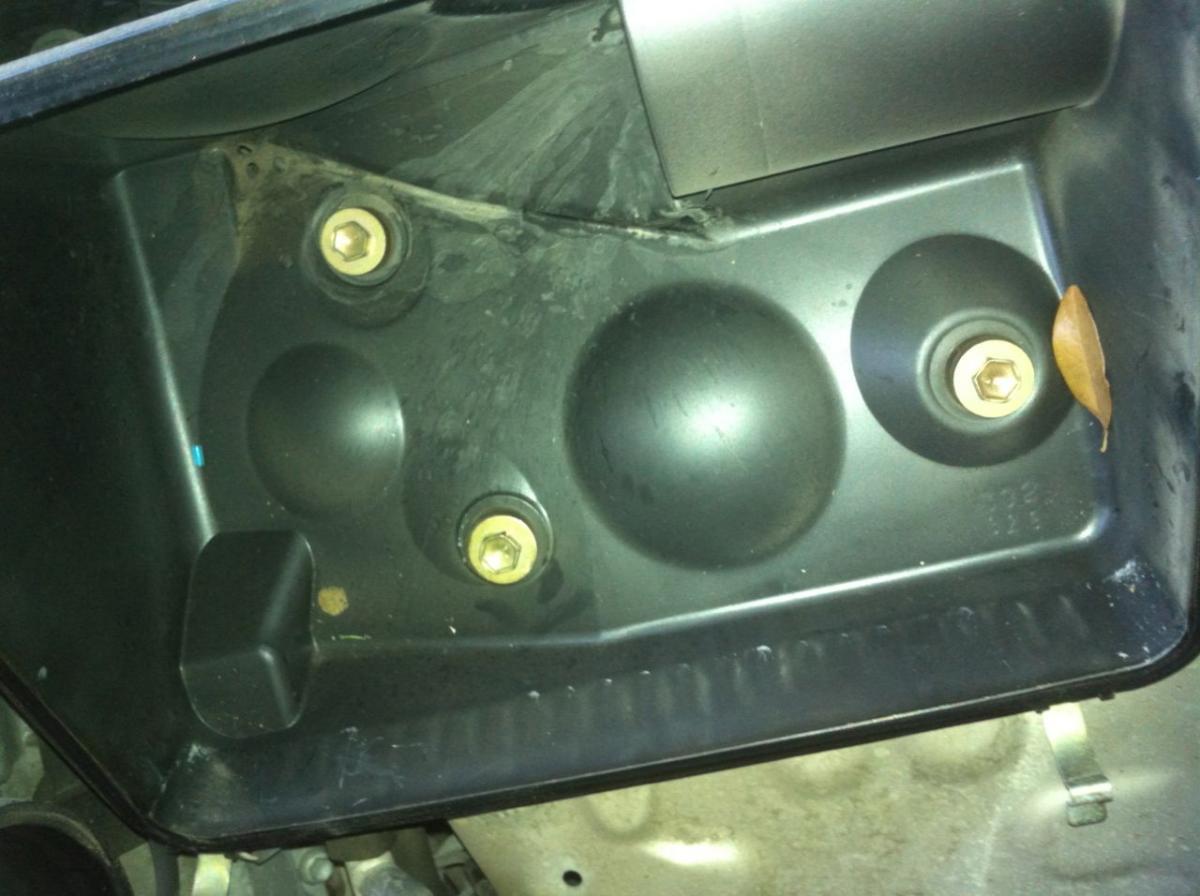
These bolts are 12mm and once removed you can remove the lower housing from the engine compartment so it is out of the way.

We now have easier access to the four plugs on the passenger side. Repeat the steps that were covered above for removal of the old plugs and installation of the new ones.
Finally once all plugs are changed and coil packs are bolted back down. Replace the air filter housing in the reverse order it was removed. Replace the cosmetic engine cover and you are done! Note: a stubby 3/8 ratchet and flex joint would be ideal for this job and would have saved me a load of time but I used what I had.
Here is an old plug next to a new one.

Next I got the CV shafts and lower ball joints to replace. Gonna have to wait a week or so but it'll get done! Hope this DIY helps someone out and sorry for the iPhone pictures it was the best I could do.
Cheers,
Brian
Last edited by bauer26; 09-14-12 at 09:50 AM. Reason: grammer
The following 5 users liked this post by bauer26:
501shane (03-07-21),
JimboVA (10-27-17),
Lextazy (01-15-20),
Menomineef (10-09-17),
RoccoL (07-03-23)
 10-05-12, 03:55 PM
#7
Lexus Champion
I just replaced mine this afternoon. Passenger side was MUCH easier than the drivers side. The drivers side wasnt hard just too much crap in the way!!
After replacing them I went to start the GX and it idled a little rough, then about 2 secs. later the CEL comes on with code P0351 (ignition coil). Yeah Im an idiot....I forgot to plug the coil back intp cylinder #1 after I just went through the whole engine / intake and made sure everything was buttoned down good. I plugged it back in and started it up and I couldnt even tell the engine was running in the cabin thats how smooth the idle was.
The only thing I noticed was two spark plugs werent as tight as the other 5 AND the #6 cylinder spark plug was barely tightened. When I loosed it it didnt even break loose thats how loose it was? It was like the factory hand threaded it, stopped and forgot to torque it down? I have the full maintenance history of my GX and the spark plugs were never changed, so that was the a little weird.
Its a pretty straight forward job that anyone can do if you have the time. It took me about 1 1/2 - 2hrs. One word of advice, make sure you have extensions and if you dont have smaller extensions, youll definitely need a swivel socket.
After replacing them I went to start the GX and it idled a little rough, then about 2 secs. later the CEL comes on with code P0351 (ignition coil).
Yeah Im an idiot....I forgot to plug the coil back intp cylinder #1 after I just went through the whole engine / intake and made sure everything was buttoned down good. I plugged it back in and started it up and I couldnt even tell the engine was running in the cabin thats how smooth the idle was. The only thing I noticed was two spark plugs werent as tight as the other 5 AND the #6 cylinder spark plug was barely tightened. When I loosed it it didnt even break loose thats how loose it was? It was like the factory hand threaded it, stopped and forgot to torque it down? I have the full maintenance history of my GX and the spark plugs were never changed, so that was the a little weird.
Its a pretty straight forward job that anyone can do if you have the time. It took me about 1 1/2 - 2hrs. One word of advice, make sure you have extensions and if you dont have smaller extensions, youll definitely need a swivel socket.
Trending Topics
10-05-12, 11:51 PM
#8
Driver
Thread Starter
RCsGX,
Yeah, I noticed a huge difference in the idle of the engine when I replaced mine. Idles much smoother, like you said the idle is barely noticeable. The engine has also been vastly more responsive while accelerating.
Its was a fairly easy job to do. I always try and do stuff on my own before resorting to taking the GX to the shop, saves a boatload in labor costs.
10-06-12, 05:01 AM
#9

Great job, easier than I expected (haven't done mine yet). Curious as to whether you gapped the spark plugs your self, or done at the auto parts store. What gap did you set?
10-06-12, 07:06 AM
#10
Driver
Thread Starter
The Denso plugs have a preset set gap of .044, which is what the GX needs. You should not need to gap them yourself at all. Of course it isn't a bad idea to double check the gap on the plug before you install it.
10-06-12, 09:47 AM
#11
Lexus Champion
And by the way, nice write-up!
 I completely forgot to mention that last night......
 10-23-12, 04:29 PM
#13

Great post, indeed.
I just replaced my spark plugs @ 108k miles. The original ones did not look bad.
I installed new NGK Laser Iridium plugs. It took me less than 2hrs and i took my time. Not a difficult job at all.
Thanks!
I just replaced my spark plugs @ 108k miles. The original ones did not look bad.
I installed new NGK Laser Iridium plugs. It took me less than 2hrs and i took my time. Not a difficult job at all.
Thanks!
10-24-12, 08:30 AM
#14
Driver
Thread Starter
10-25-12, 11:40 PM
#15
I am not sure if there is a difference. I've always had great luck with NGK in the past, so when i found a good deal on these, i pulled the trigger.

