When you click on links to various merchants on this site and make a purchase, this can result in this site earning a commission. Affiliate programs and affiliations include, but are not limited to, the eBay Partner Network.
From my other thread of issue(s) (https://www.clublexus.com/forums/gx-...l#post10905012), I believe now my fuel pump simply went south. Yeah, it still spins, but it will sound funny sometimes while other times it's a nice purrrrrr when I jump it at the FP relay location. Ever hear a fan motor wobble just a little bit on old sintered bronze bearings? That's kinda what it sounds like.
Why did it go south? 14yrs old, 225kmi, and I just emptied the fuel rails when installing new injectors, and I think (a hunch) that when the pump engaged it had no liquid resistance at all for a few sec and it probably spun freely and perhaps just failed. It still spins and does pump up gas, but I suspect not at the right pressure.
So, where's the how-to on GX470 fuel pump? Is it serviceable via service cover in rear, or is a tank drop a must-do?
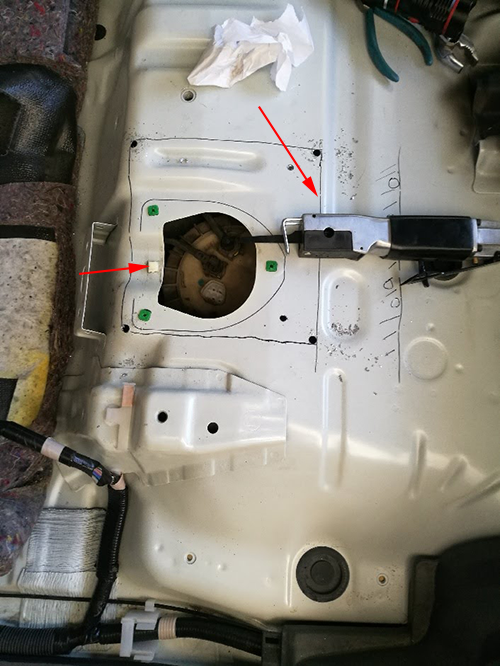
An access panel is there, BUT NOT BIG ENOUGH TO GET THE PUMP OUT !
Really?, c'mon Toyota, that's absurd. LX470 has a access door big enough, GX's don't? Can't type what I want to say here!
I very well might put my TIG to work here, maybe cut the access area bigger, TIG it back later. Probably much easier for me to do that then to try and drop the tank.
Well, when you just want to scream bad words. Why would Toyota do this? A 2hr pump replacement turns into 4-5hrs if dropping the tank !!!
With my slowness because I don't need to rush, took about 40min to get here. Super ez. The front section of carpet is attached to rear section by velcro.
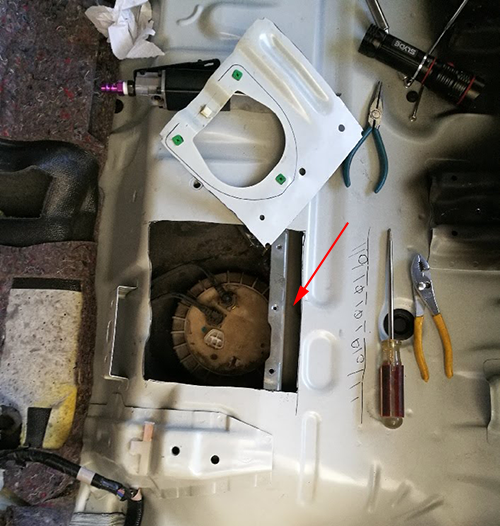
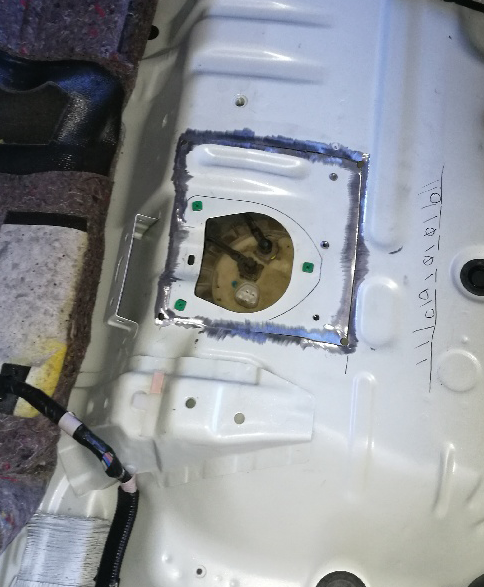
Yeah, I will be cutting out what I need to gain the required access, then will TIG it back into place. The only "problem" area is there's a re-enforcement rib that runs across that I may need to cut into (the sharpie in pic). I was thinking about re-flanging the opening to make a larger access panel w/ screws, but not sure if I want to do that just yet, I might TIG tack as needed and seal over the seam vs doing fully welded seams, this way if I need to go back in I can just remove a few TIG tacks vs having to re-cut the whole thing all over again.
I read some about the pump retaining ring, install directions say to use a generic grease to seal the flange. I notice the connectors here inside the vehicle are packed with white lithium grease on the backside of connectors.
The grease is probably there to prevent fuel from creeping up the wires by capillary action. Or it's conductive, and there to ensure a good connection.
Well, when you just want to scream bad words. Why would Toyota do this? A 2hr pump replacement turns into 4-5hrs if dropping the tank !!!
With my slowness because I don't need to rush, took about 40min to get here. Super ez. The front section of carpet is attached to rear section by velcro.
Yeah, I will be cutting out what I need to gain the required access, then will TIG it back into place. The only "problem" area is there's a re-enforcement rib that runs across that I may need to cut into (the sharpie in pic). I was thinking about re-flanging the opening to make a larger access panel w/ screws, but not sure if I want to do that just yet, I might TIG tack as needed and seal over the seam vs doing fully welded seams, this way if I need to go back in I can just remove a few TIG tacks vs having to re-cut the whole thing all over again.
I read some about the pump retaining ring, install directions say to use a generic grease to seal the flange. I notice the connectors here inside the vehicle are packed with white lithium grease on the backside of connectors.
TY for the doc. It's an interesting doc. My fuel injectors (2006) do not look like the ones in the doc. My OEM ones have a sealing insulator at the intake, and only a o-ring at the fuel rail. The doc shows a grommet and o-ring at the fuel rail for 2004 (same engine though). It appears 2003-2005's use injectors with that additional "grommet" or "insulator" at the rail.
Funny though, read through it carefully, they switch the names around of the "grommet" and "insulator". I will suspect that the upper one is the insulator and the lower one is the grommet. Pages 2 vs 11 , ooops, rush to market
Last edited by Lexus4321; Oct 6, 2020 at 05:55 PM.
Getting here was not that hard.
Now just waiting on parts (pump kit, new retainer ring) and ring tool (CTA Tools 1044 Fuel Tank Lid Wrench) to finish the swap.
Here's the prep & cut. Used a fine tooth blade (go slow, make sure all wires are out of the way, etc), and had to drill out 3 spot welds. I did manage to break a clip that cannot be replaced on it's own, but I will deal with that. Notice how the cut on right is far enough back that it's in the hat channel so I did not need to cut the edge of the hat channel off. This looks like enough room, but if needed I can trim the edge of the hat channel.
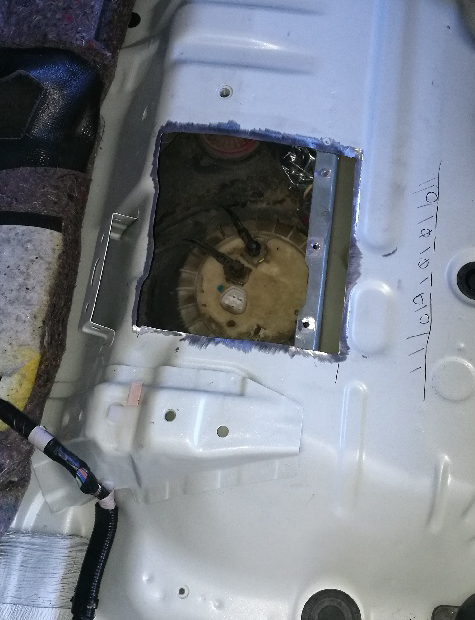
I hope that rail is high enough or far enough out of the way to pull out the pump. I like this route better than dropping the tank.
I can always carve a little off the edge of the x-rail if needed. The u-toob vids show that it can tilt quite a bit coming out. We shall soon see.
I figure this is a 1-time thing anyways. OEM pump & filter went 14.5yrs 225kmi. The new stuff should last as long, and it's low probability I will have this vehicle for another 14yrs/225kmi.
Originally Posted by IanB2
Oh man, I think I'd have dropped the tank and dealt with the rusty bolts, lol! Watching to see how this works out for you.
Mucking around with connectors/hoses/clips and stuff can be a major headache if they rip/break/tear. A little cut, pump replace, then TIG weld it back is simple for me, and I didn't need to muck around w/ dropping the tank.
The pump canister came right out w/o issue. The replacement pump is a Deatschwerks 255lph pump (these appear to be better than Walbro). Pump wires will be splices (offset) and PVDF heat shrink tubing will cover the soldered splices (see note below), etc. PVDF or FEP is what will work in gasoline.
Note: the OEM wire here is very hard to solder. Use barrel crimp connections. Scrape the OEM wire strands carefully with a razor and some copper should show. Crimp the wires into the barrel connection, and then flow some solder into the barrel. Finish with heat shrink (I put one piece on the gnd connection, and two pieces over the + connection.
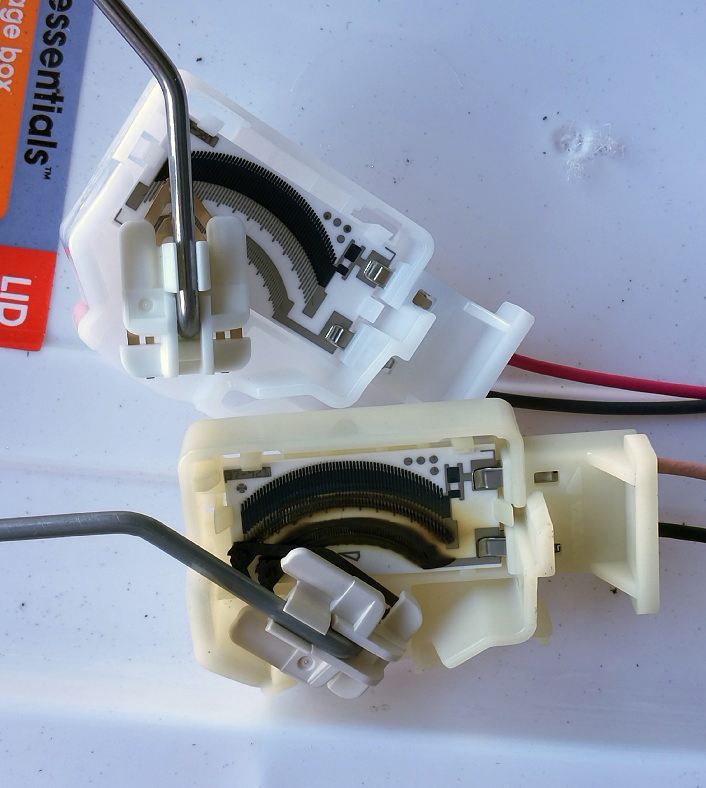
But then I look at the sending module, looks like toast and will replace it w/ OEM one. Part # 83320-60440.
14.7yrs old / 225kmi, these are the items that get worn out and need replacing.
Last edited by Lexus4321; Oct 14, 2020 at 09:24 PM.