When you click on links to various merchants on this site and make a purchase, this can result in this site earning a commission. Affiliate programs and affiliations include, but are not limited to, the eBay Partner Network.
DIY - how to remove back seat and remove/repair Mark Levinson sub
Hi guys,
Sorry if this was posted in a similar format before, I looked around and couldn't find a complete DYI on how to deal with the Mark Levinson sub in the 835W 17-speaker upgraded audio in my 2013 GS450h, which started rattling at some point (audible rattles at lower volumes under 20-25, at high volume there's a lot of acoustic pressure anyways so hard to detect). I decided to post my story as a DYI with hopes that other members might find the thread should they face similar problems and potentially fix
If you haven't experienced a rattling sub you probably have no idea how annoying it is (but good for you . My first instinct was to go and ask Lexus for a quote - I live in Oakville Canada near Toronto and you guessed, it hurts - around $1,100 all in (with variations on part/labour) which considering it's only for a speaker....let's just say I consider it expensive (yeah I know, Canadian dollar doesn't help .
So I decided to try my luck and see if I can remove the sub myself and take a look at it - and who knows, maybe even fix it. The steps I took were, along with pictures:
1. Remove the back seat cushion by pulling up from left/right as shown by arrow - it should snap out of some plastic hooks like in pic below
Pic 1 - Pull up seat cushion in arrow direction on both sides, it snaps from a clip underneath
2 - once back cushion is free, disconnect the rear heating connectors (if equipped)
Pic 2 - disconnect rear heater connectors if equipped
3 - disconnect rear left airbag connector and remove rear seat bolt as shown
Pic 3 - disconnect left airbag connector and remove left back seat bolt circled
4 - remove 2 centre seat bolts as below
Pic 4 - remove 2 bolts from centre back seat as circled5 - disconnect rear right airbag connector and remove rear right seat bolt as below
5 - Disconnect the rear right airbag and remove the right bolt show
Pic 5 - disconnect rear right airbag connector and remove right back seat bolt circled
6 - Pull up the back seat from left, centre and right (several moves) - it will lift up from some under-hooks as below, then lean forward the back seat
Pic 6 - pull up back seat from left, centre and right side and once freed from circled hooks pull/lean forward
7 - Pull back tray up from left, centre and right and it will snap from some plastic hooks - do the same with the rear left/right triangles shown
Pic 7 - pull up back tray from left, centre and right and it will snap from plastic hooks, pull the left/right rear triangles shown as the arrow, they'll also snap from plastic clips
8 - Now you can start moving the tray and left/right triangles - do several smaller pulls forward until the whole tray comes out along with the triangles
Pic 8 - pull forward the tray along with the side triangles, several moves from left/right until everything comes forward
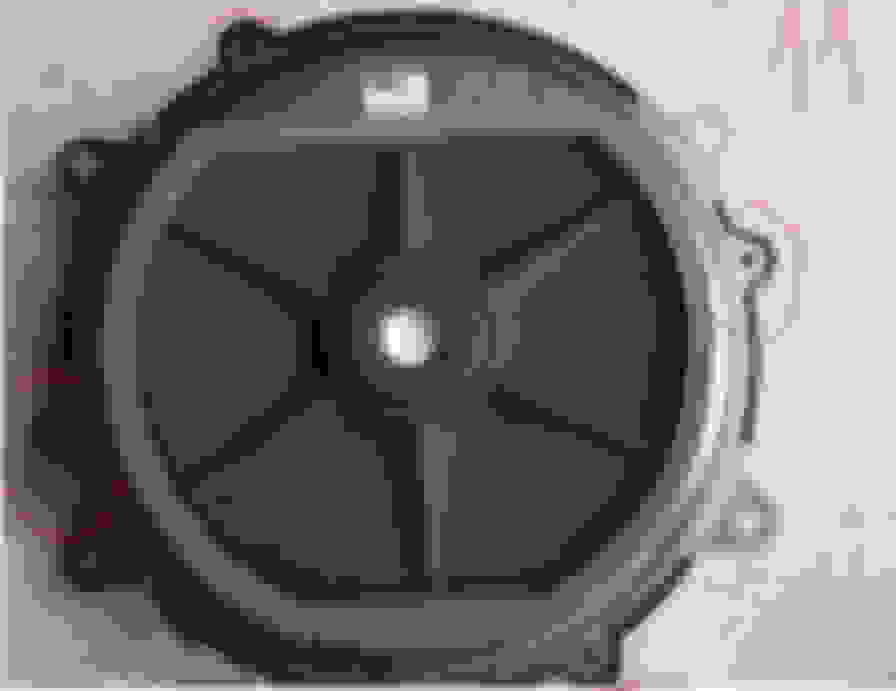
9- Good news, you can now see/access your Mark Levinson (or stock) sub
Pic 9 - the Mark Levinson 10" free-air sub10 - remove 4 bolts as shown, disconnect the sub connector and remove the sub assembly
10 - Remove 4 bolts holding the sub, disconnect the sub connector and remove the sub assembly
Pic 10 - remove 4 bolts shown, then disconnect the sub connector and remove the sub assembly
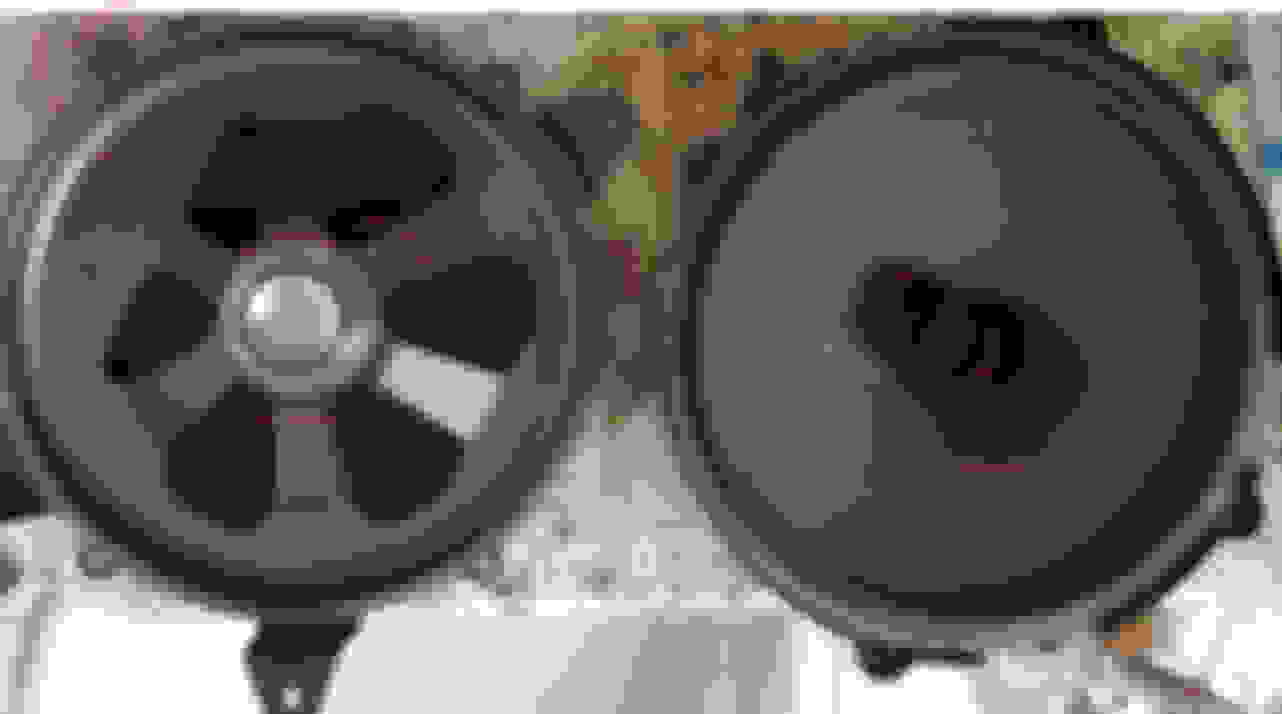
11 - Remove 4 screws from the top of the Mark Levinson sub, this will allow to separate the assembly in the magnet and voice coil/membrane sections
Pic 11 - remove 4 screws shown, it will allow you to separate the magnet from the speaker/voice coil section
12 - Separate the magnet cylinder and voice coil/membrane as shown, and carefully examine both - for the magnet the cylinder must be clear/clear of debris, and the voice coil/speaker cone/speaker foam should be undamaged and move freely
Pic 12 - Separate magnet cylinder from voice coil/speaker cone and inspect carefully
13. In my case the magnet cylinder was the problem - more specifically I found some metal debris inside which prevented the voice coil from moving freely I guess during sub operation. In other cases you might have a damaged foam, which you can easily order and replace from http://www.simplyspeakers.com/
Pic 13 - metal debris I found inside the magnet cylinder shown, I had to clean the inside area of the cylinder with a thin plastic object
14 - This is what was causing the rattle - metal debris inside the permanent magnet cylinder, preventing or scratching against the voice coil as the sub membrane was travelling
Pic 14 - metal debris I found inside the Mark Levinson sub cylinder magnet
15 - Put everything back together in reverse order and if you're lucky you saved an expensive sub replacement. Enjoy with a cold beer, wine, or whatever gives justice to your hard work
Nice write up! Definitely informative for those a little afraid of disassembling parts!
It's also amazing how one little piece of metal debris could've potentially cost you $1,100!
You're absolutely right - that tiny debris would have cost me $1,100+, now considering the sub assy is virtually sealed, it means I mislabeled it metal but it was probably a small piece of magnet chipped for whatever reason - which makes me question the materials used in the ML speakers....
wow.. thanks for the write up! would it make sense to just put in an aftermarket free-air sub instead for better bass?
I guess you could do that, although the free air sub selection is rather small, especially considering the ML impedance. If you'd go that route consider the mounting will not match your new sub so you'd have to drill it down or something - and maybe use a separate sub, ML amp might be tuned for the OEM speaker
Just wanted to give my thanks for the detailed right up! Your instructions seem clear and very easy to follow. Great job on this DIY.
I hope this never happens in my GS450h, but now I'll have a place to turn to. I'm curious if this happened to having your sub turned up too high or was just random?
I guess you could do that, although the free air sub selection is rather small, especially considering the ML impedance. If you'd go that route consider the mounting will not match your new sub so you'd have to drill it down or something - and maybe use a separate sub, ML amp might be tuned for the OEM speaker
I might just do this DIY to replace the sub with an aftermarket one JL-Audio sub. What impedence should i be looking for? The ML sub is just not going deep enough for me.
Just wanted to give my thanks for the detailed right up! Your instructions seem clear and very easy to follow. Great job on this DIY.
I hope this never happens in my GS450h, but now I'll have a place to turn to. I'm curious if this happened to having your sub turned up too high or was just random?
~ Im2bz2p345
Good question - I asked myself how this happened too - must have been some high volume sudden event (i.e. while waiting for bluetooth streaming to connect/start from my phone maybe I turned up the volume thinking it's too low - then bam, audio started...in any case there must have been a lot of mechanical movement/vibration in the speaker assembly to chip a small piece of the magnet like I've shown. Or maybe just the quality of the magnet is debateable
I might just do this DIY to replace the sub with an aftermarket one JL-Audio sub. What impedence should i be looking for? The ML sub is just not going deep enough for me.
I believe the ML sub is 8ohm, you can find a few free air 10" subs if you want to keep the ML amp. Definitely use an enclosed box aftermarket sub if you're looking for ground -shaking bass
Sorry if this was posted in a similar format before, I looked around and couldn't find a complete DYI on how to deal with the Mark Levinson sub in the 835W 17-speaker upgraded audio in my 2013 GS450h, which started rattling at some point (audible rattles at lower volumes under 20-25, at high volume there's a lot of acoustic pressure anyways so hard to detect). I decided to post my story as a DYI with hopes that other members might find the thread should they face similar problems and potentially fix
If you haven't experienced a rattling sub you probably have no idea how annoying it is (but good for you . My first instinct was to go and ask Lexus for a quote - I live in Oakville Canada near Toronto and you guessed, it hurts - around $1,100 all in (with variations on part/labour) which considering it's only for a speaker....let's just say I consider it expensive (yeah I know, Canadian dollar doesn't help .
So I decided to try my luck and see if I can remove the sub myself and take a look at it - and who knows, maybe even fix it. The steps I took were, along with pictures:
1. Remove the back seat cushion by pulling up from left/right as shown by arrow - it should snap out of some plastic hooks like in pic below
Pic 1 - Pull up seat cushion in arrow direction on both sides, it snaps from a clip underneath
2 - once back cushion is free, disconnect the rear heating connectors (if equipped)
Pic 2 - disconnect rear heater connectors if equipped
3 - disconnect rear left airbag connector and remove rear seat bolt as shown
Pic 3 - disconnect left airbag connector and remove left back seat bolt circled
4 - remove 2 centre seat bolts as below
Pic 4 - remove 2 bolts from centre back seat as circled5 - disconnect rear right airbag connector and remove rear right seat bolt as below
5 - Disconnect the rear right airbag and remove the right bolt show
Pic 5 - disconnect rear right airbag connector and remove right back seat bolt circled
6 - Pull up the back seat from left, centre and right (several moves) - it will lift up from some under-hooks as below, then lean forward the back seat
Pic 6 - pull up back seat from left, centre and right side and once freed from circled hooks pull/lean forward
7 - Pull back tray up from left, centre and right and it will snap from some plastic hooks - do the same with the rear left/right triangles shown
Pic 7 - pull up back tray from left, centre and right and it will snap from plastic hooks, pull the left/right rear triangles shown as the arrow, they'll also snap from plastic clips
8 - Now you can start moving the tray and left/right triangles - do several smaller pulls forward until the whole tray comes out along with the triangles
Pic 8 - pull forward the tray along with the side triangles, several moves from left/right until everything comes forward
9- Good news, you can now see/access your Mark Levinson (or stock) sub
Pic 9 - the Mark Levinson 10" free-air sub10 - remove 4 bolts as shown, disconnect the sub connector and remove the sub assembly
10 - Remove 4 bolts holding the sub, disconnect the sub connector and remove the sub assembly
Pic 10 - remove 4 bolts shown, then disconnect the sub connector and remove the sub assembly
11 - Remove 4 screws from the top of the Mark Levinson sub, this will allow to separate the assembly in the magnet and voice coil/membrane sections
Pic 11 - remove 4 screws shown, it will allow you to separate the magnet from the speaker/voice coil section
12 - Separate the magnet cylinder and voice coil/membrane as shown, and carefully examine both - for the magnet the cylinder must be clear/clear of debris, and the voice coil/speaker cone/speaker foam should be undamaged and move freely
Pic 12 - Separate magnet cylinder from voice coil/speaker cone and inspect carefully
13. In my case the magnet cylinder was the problem - more specifically I found some metal debris inside which prevented the voice coil from moving freely I guess during sub operation. In other cases you might have a damaged foam, which you can easily order and replace from http://www.simplyspeakers.com/
Pic 13 - metal debris I found inside the magnet cylinder shown, I had to clean the inside area of the cylinder with a thin plastic object
14 - This is what was causing the rattle - metal debris inside the permanent magnet cylinder, preventing or scratching against the voice coil as the sub membrane was travelling
Pic 14 - metal debris I found inside the Mark Levinson sub cylinder magnet
15 - Put everything back together in reverse order and if you're lucky you saved an expensive sub replacement. Enjoy with a cold beer, wine, or whatever gives justice to your hard work
How do you remove the seatbelt from the loop hole on the deck tray?
Instinctively looking at that magnet size my type “A” personality was “Why not replace it with a higher volume sub”?
After spending some more time with the sound Its so apparent the in door Mid’s do all the audible heavy lifting. Be interested to know how many miles/hours on the speaker before it broke. Seems to be not many problems resulting.
The quest for more power always has consequences either in life, politics, horsepower or low frequency output.
Great write up and happy for the bloke who avoided a big repair cost and has the satisfaction result!
 06-29-17, 12:14 PM