GS - 4th Gen (2013-2020) Discussion about the 2013 and up GS models

My Weekend Mods - CG Lock & Splitter

Thread Tools
 
Search this Thread
 
Old 05-15-17, 10:33 AM
  #1  
ThumbsUp
Driver School Candidate
Thread Starter
 
ThumbsUp's Avatar
 
Join Date: Mar 2017
Location: Alabama
Posts: 47
Received 9 Likes on 6 Posts
Default My Weekend Mods - CG Lock & Splitter

I installed one of my favorite mods this weekend. It's been a favorite of every street car I've owned for many years and I highly recommend it. It's the CG-Lock. It tensions the lap belt tightly, keeping you planted in the seat. You don't have to put a "death grip" on the steering wheel to maintain your position; it allows the driver to make precise, minute steering corrections as needed. It has about 70% of the holding power of a full race harness. Every street car I own (currently 4) has this installed. For me, it's one of those "don't leave home without it" kind of things.


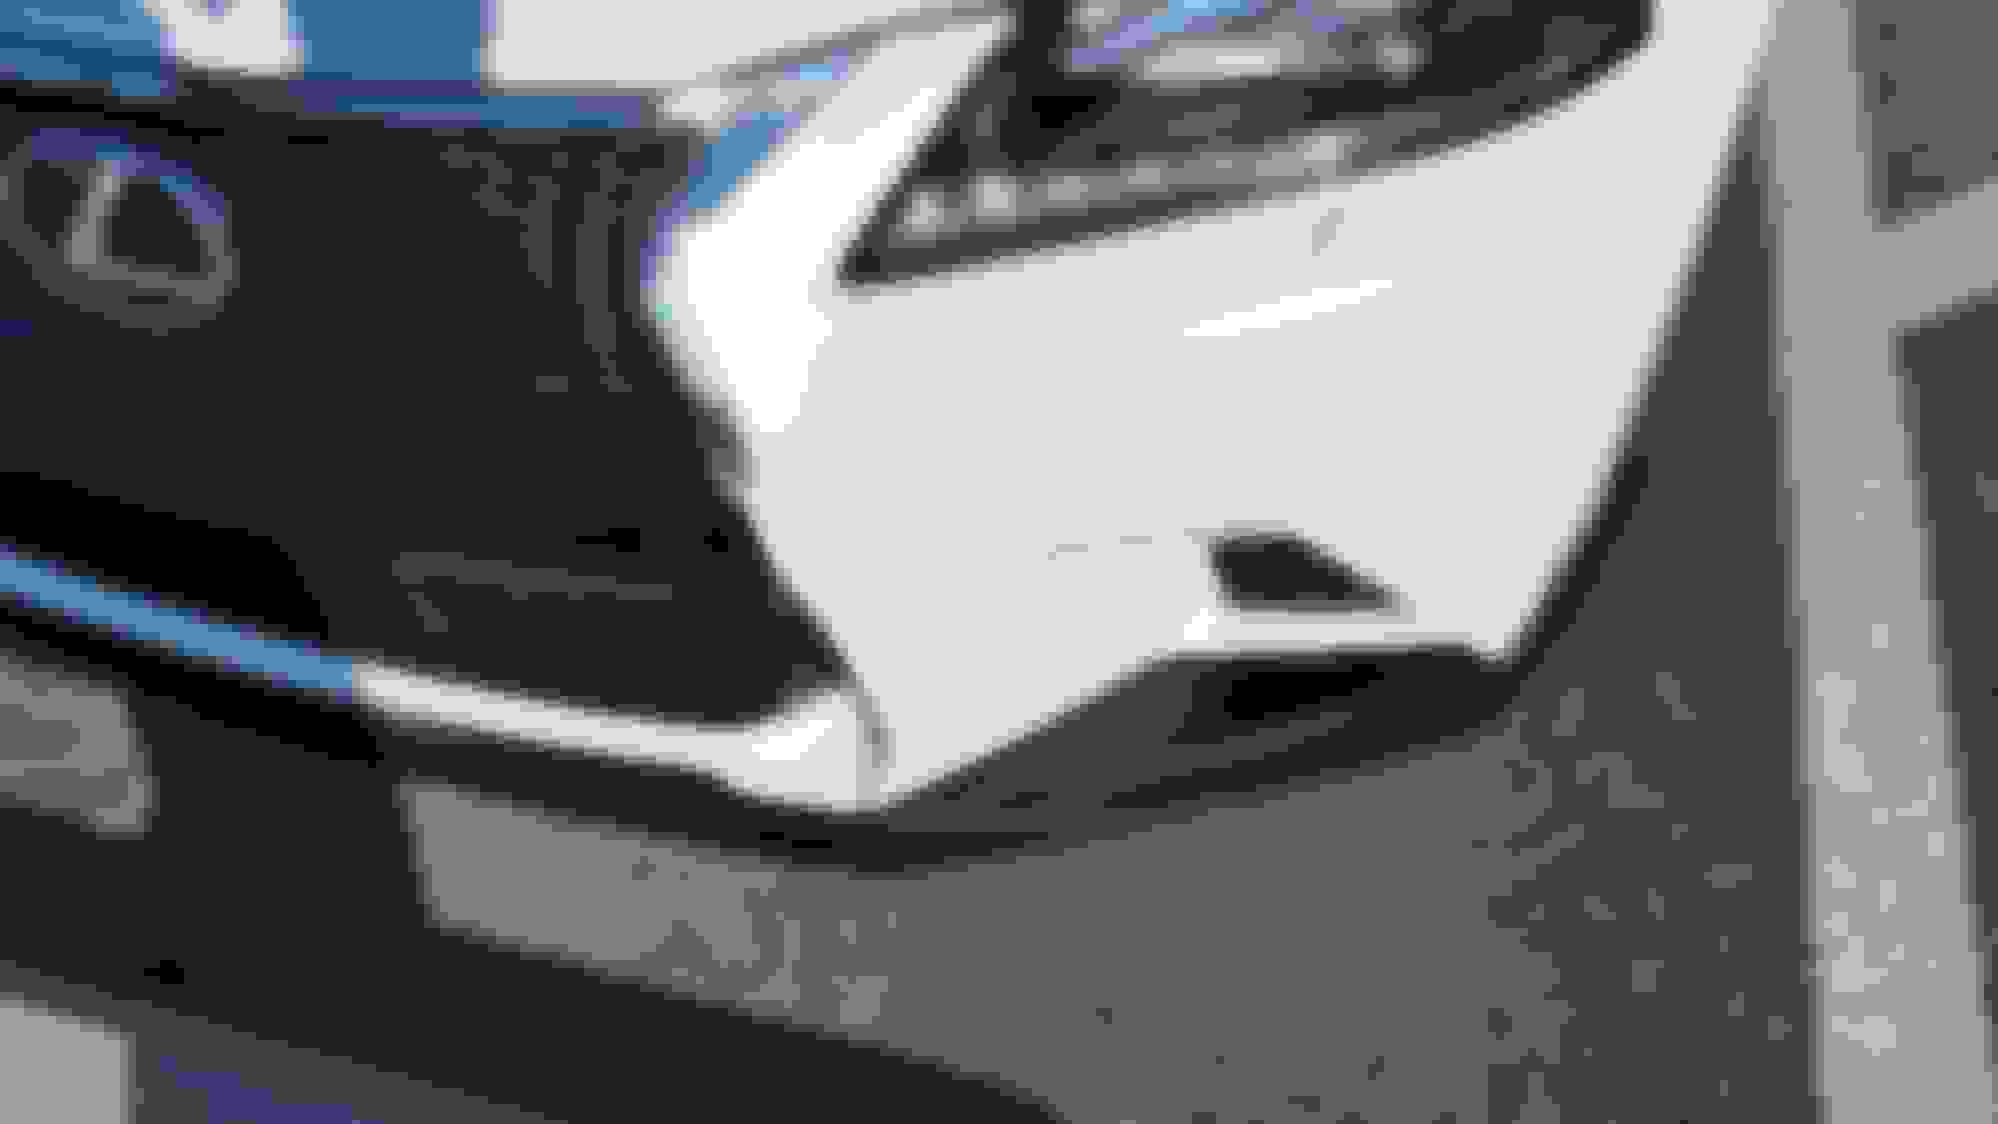
Next, I installed a front splitter from Magic Drift Polyurethane. It cost about $75, including shipping. It required only minor trimming and was a breeze to install. I left it unpainted as it matches the material of the rear difusser. I just put a little vinyl protectant on it.
Old 05-16-17, 06:04 PM
  #2  
Seize
Loves Snickerdoodles!
 
Seize's Avatar
 
Join Date: Jun 2002
Location: San Diego, California
Posts: 19,736
Received 68 Likes on 53 Posts
Default

Nice
Old 05-17-17, 05:15 AM
  #3  
kcstunna82
Driver
 
kcstunna82's Avatar
 
Join Date: Feb 2017
Location: Kentucky
Posts: 164
Received 25 Likes on 20 Posts
Default

Looking good man. Keep it up.
Old 05-17-17, 05:43 PM
  #4  
TheWizard
Driver
 
TheWizard's Avatar
 
Join Date: Mar 2017
Location: California
Posts: 89
Received 10 Likes on 9 Posts
Default

Does the splitter rub the factory paint at all on the sides by the wheel wells?
Old 05-18-17, 01:48 PM
  #5  
ThumbsUp
Driver School Candidate
Thread Starter
 
ThumbsUp's Avatar
 
Join Date: Mar 2017
Location: Alabama
Posts: 47
Received 9 Likes on 6 Posts
Default

The only place where it was really tight was the inside lip of the fender. The sides are fine. I've attached a photo of the only places where trimming was necessary.


The following users liked this post:
TheWizard (05-19-17)
Old 05-19-17, 09:56 PM
  #6  
TheWizard
Driver
 
TheWizard's Avatar
 
Join Date: Mar 2017
Location: California
Posts: 89
Received 10 Likes on 9 Posts
Default

^Awesome. Thanks for the follow up and pictures.
Old 05-19-17, 09:57 PM
  #7  
TheWizard
Driver
 
TheWizard's Avatar
 
Join Date: Mar 2017
Location: California
Posts: 89
Received 10 Likes on 9 Posts
Default

Did you buy this lip from Ebay or direct from Magic Drift?
Old 05-19-17, 10:38 PM
  #8  
ISFPOWER
Lexus Champion
iTrader: (20)
 
ISFPOWER's Avatar
 
Join Date: Sep 2012
Location: NORTH CAROLINA
Posts: 3,236
Received 144 Likes on 119 Posts
Default

i forgot i had CG lock on the ISF. loved it myself. i need to purchase another one , thanks for reminding me.
Old 05-20-17, 05:19 AM
  #9  
ThumbsUp
Driver School Candidate
Thread Starter
 
ThumbsUp's Avatar
 
Join Date: Mar 2017
Location: Alabama
Posts: 47
Received 9 Likes on 6 Posts
Default

Originally Posted by TheWizard
Did you buy this lip from Ebay or direct from Magic Drift?
BOTH! Hmmm, you say. Well, it's an interesting story. I purchased on eBay and of course began checking the UPS tracking. When it arrived at the UPS distribution center (40 miles away from home), for some reason UPS held it for pickup. Eventually, I convinced them to release it. It was finally out for delivery, but they sent it back to Magic Drift!

I called Magic Drift and asked them to bounce it back to me when they received. Instead, they just sent another one. Well, then the returned splitter hit the UPS distribution center in California, they bounced it back to me instead of delivering to Magic Drift. So I ended up with two splitters.

I called Magic Drift, they emailed me a return item label, and UPS picked it up yesterday. WHo knows, I may get it back the third time!

Anyway, the girl at Magic Drift was a joy to work with, the product was EOM quality, and the install was easy. I highly recommend.
Old 05-20-17, 09:16 AM
  #10  
kbig
Rookie
 
kbig's Avatar
 
Join Date: Nov 2016
Location: California
Posts: 59
Received 3 Likes on 3 Posts
Default

Thanks for sharing
do you have anymore pictures of the splitters?
Old 05-20-17, 11:41 AM
  #11  
LatinLS430
Instructor
iTrader: (1)
 
LatinLS430's Avatar
 
Join Date: Aug 2016
Location: AZ
Posts: 840
Received 89 Likes on 72 Posts
Default

Can you explain how this CG works?
Old 05-21-17, 07:53 AM
  #12  
pdxsc400
Driver School Candidate
 
pdxsc400's Avatar
 
Join Date: Mar 2007
Location: Oregon
Posts: 36
Likes: 0
Received 6 Likes on 4 Posts
Default

Originally Posted by ThumbsUp
The only place where it was really tight was the inside lip of the fender. The sides are fine. I've attached a photo of the only places where trimming was necessary.


I just bought that lip from Magic as well, and I'm a bit apprehensive to drill my fender well. Can you take a pic in there so I can see what it looks like please?
Old 05-23-17, 12:51 PM
  #13  
ThumbsUp
Driver School Candidate
Thread Starter
 
ThumbsUp's Avatar
 
Join Date: Mar 2017
Location: Alabama
Posts: 47
Received 9 Likes on 6 Posts
Default

Originally Posted by LatinGS350
Can you explain how this CG works?
It simply clamps to the top side of the seat belt buckle. The part of the belt that goes from the lap buckle to the shoulder runs inside the CG Lock. It's retained by that lateral clip with the company logo on it. Behind that clip is a knurled roller. This pinches the belt against the CG Lock clip. You pull the slack from the lap portion up towards the shoulder and the knurled roller pressing against the belt which presses against the clip holds it tight. It's the same concept as the seat belt tightening mechanism on, say an amusement park ride. The CG Lock also has a convenient thumb release that releases the tension and lets the belt have slack again. It becomes a motor memory reaction; I reach up, grab the buckle/CG Lock, press the thumb release as I pull the buckle down, click it, and then pull the slack out of the shoulder portion. When I unbuckle, I just unbuckle; no need to release the CG Lock until the next time you buckle up.

If you're slow, initial installation of the CG Lock takes about 3 minutes. You just have to tighten two screws.

http://www.cg-lock.com

Last edited by ThumbsUp; 05-23-17 at 01:04 PM.
Old 05-23-17, 12:52 PM
  #14  
ThumbsUp
Driver School Candidate
Thread Starter
 
ThumbsUp's Avatar
 
Join Date: Mar 2017
Location: Alabama
Posts: 47
Received 9 Likes on 6 Posts
Default

Originally Posted by pdxsc400
Can you take a pic in there so I can see what it looks like please?
Originally Posted by kbig
Do you have anymore pictures of the splitters?
Yes. As soon as I get home this afternoon I'll take some more pics.
Old 05-23-17, 07:15 PM
  #15  
pdxsc400
Driver School Candidate
 
pdxsc400's Avatar
 
Join Date: Mar 2007
Location: Oregon
Posts: 36
Likes: 0
Received 6 Likes on 4 Posts
Default

Originally Posted by ThumbsUp
Yes. As soon as I get home this afternoon I'll take some more pics.
thank you so much!!!!


Quick Reply: My Weekend Mods - CG Lock & Splitter


All times are GMT -7. The time now is 04:08 PM.