
Diy hardwire valentineone 4gs
 03-13-13, 10:20 PM
#1
Completed installation..

Before I begin, I actually had all the wirings and stuff put together before I attempted to install this into the 4GS. Everything was already put together from my previous car.
Parts needed:
ValentineOne (www.valentineone.com)
Hardwire kit (should be included with V1 when purchased)
Mini Add-A-Line (http://www.autozone.com/autozone/acc...questid=714146)
BlendMount (http://store.blendmount.com/blendmou...-350-p794.aspx)
15 Mini-Fuse
Tools:
Phillips & Straight screw driver
10mm Socket
1. The BlendMount is similar to this installation I followed for my previous car you just wrap the mount around the back of your rearview mirrors.

2. To run the cord you first remove the panel that's inside the red box.

-The way I did this is, I inserted both my index finger on each corner (the yellow circle) and slowly slid my fingers towards the direction of the yellow arrow.
-As I got closer to the dotted lines I slowly pulled the panel downwards towards with using my two index fingers and my thumb pushing upwards towards the top.
JUST BE CAREFUL HERE because the dotted lines is basically the area where the clips are located for these piece.
After removing the plastic piece, I took my finger and carefully pulled the headliner down a little to where I would be able to tuck the cord. I tucked it in and guided it towards the passenger A-Pillar.
3. Now that you completed running the cord through the headliner. You carefully run the wires down the A pillar to the fuse box. The direction you run the wire would be the red lines located in the coming up picture.

-The red circle/oval is where the fuse box is located.
-The way I ran it from the A-pillar down to the fuse box, I first pulled off the weatherstrip (the plastic black pieces. Afterwards, I took a plastic flathead shoved it into the top of the A-pillar (carefully) and pried it a bit so it came loose. Using my fingers I slowly loosened up the whole A-pillar to where I can run my cord through. After reaching the bottom of the A-Pillar with the cord. I slowly used my fingers to loosen up the remaining plastic pieces that blocked the way towards the fuse box.
The plastic pieces under the A-pillar came off really easily, I just slowly shoved my finger through it guiding it downwards and it just came out easily.
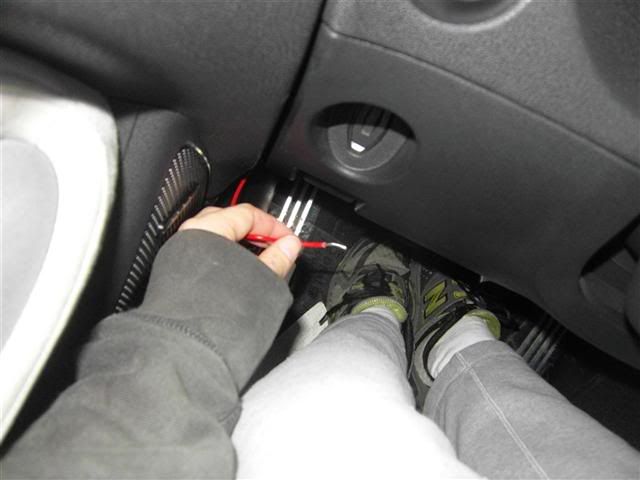
Once I reached the fuse box area, you will see a yellow circle on the picture. There's a little hole there, I shoved my hand through that to slowly pull open the panel under the glove department, the clips are mainly right under the glove department, and above the hole your hand is in. I used my fingers to push upwards so that the clips would pop out. (This piece didn't come off completely for me so don't worry if it does for you or not, as long as you are able to reach the fuse box)
4. So I had my mini a-line wired up from my previous vehicle I will post the thread I actually followed back then to complete this.
(http://www.the370z.com/diy-section-d...pix-heavy.html)
"Cut the end off of the red cable from the hardwire kit, it is not needed.
With fuse add-a-line kit, put the 2 fuse in the top, section by the wire that comes off, and now crimp the end of the wire to the red wire from the hardwire kit.
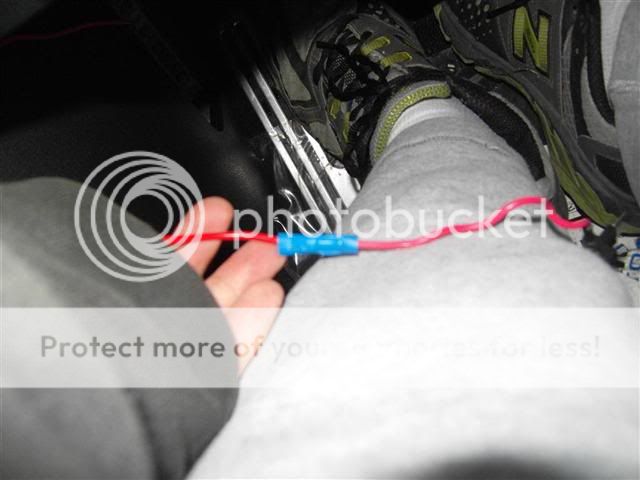 "
"
--Step 10-13 should help with this.
5. Once you have completed the above, I plugged my fuse into 15A STRG HTR (I have a red box around it on the picture)

-You remove the original 15 fuse that's located in the Fuse box and you plug in your add-a-line just like this. Plug in your V1, turn on your car, and enjoy!


Oh yeah, I just grounded it to a random bolt I saw near the fuse box.
Before I begin, I actually had all the wirings and stuff put together before I attempted to install this into the 4GS. Everything was already put together from my previous car.
Parts needed:
ValentineOne (www.valentineone.com)
Hardwire kit (should be included with V1 when purchased)
Mini Add-A-Line (http://www.autozone.com/autozone/acc...questid=714146)
BlendMount (http://store.blendmount.com/blendmou...-350-p794.aspx)
15 Mini-Fuse
Tools:
Phillips & Straight screw driver
10mm Socket
1. The BlendMount is similar to this installation I followed for my previous car you just wrap the mount around the back of your rearview mirrors.
2. To run the cord you first remove the panel that's inside the red box.
-The way I did this is, I inserted both my index finger on each corner (the yellow circle) and slowly slid my fingers towards the direction of the yellow arrow.
-As I got closer to the dotted lines I slowly pulled the panel downwards towards with using my two index fingers and my thumb pushing upwards towards the top.
JUST BE CAREFUL HERE because the dotted lines is basically the area where the clips are located for these piece.
After removing the plastic piece, I took my finger and carefully pulled the headliner down a little to where I would be able to tuck the cord. I tucked it in and guided it towards the passenger A-Pillar.
3. Now that you completed running the cord through the headliner. You carefully run the wires down the A pillar to the fuse box. The direction you run the wire would be the red lines located in the coming up picture.
-The red circle/oval is where the fuse box is located.
-The way I ran it from the A-pillar down to the fuse box, I first pulled off the weatherstrip (the plastic black pieces. Afterwards, I took a plastic flathead shoved it into the top of the A-pillar (carefully) and pried it a bit so it came loose. Using my fingers I slowly loosened up the whole A-pillar to where I can run my cord through. After reaching the bottom of the A-Pillar with the cord. I slowly used my fingers to loosen up the remaining plastic pieces that blocked the way towards the fuse box.
The plastic pieces under the A-pillar came off really easily, I just slowly shoved my finger through it guiding it downwards and it just came out easily.
Once I reached the fuse box area, you will see a yellow circle on the picture. There's a little hole there, I shoved my hand through that to slowly pull open the panel under the glove department, the clips are mainly right under the glove department, and above the hole your hand is in. I used my fingers to push upwards so that the clips would pop out. (This piece didn't come off completely for me so don't worry if it does for you or not, as long as you are able to reach the fuse box)
4. So I had my mini a-line wired up from my previous vehicle I will post the thread I actually followed back then to complete this.
(http://www.the370z.com/diy-section-d...pix-heavy.html)
"Cut the end off of the red cable from the hardwire kit, it is not needed.
With fuse add-a-line kit, put the 2 fuse in the top, section by the wire that comes off, and now crimp the end of the wire to the red wire from the hardwire kit.
"--Step 10-13 should help with this.
5. Once you have completed the above, I plugged my fuse into 15A STRG HTR (I have a red box around it on the picture)
-You remove the original 15 fuse that's located in the Fuse box and you plug in your add-a-line just like this. Plug in your V1, turn on your car, and enjoy!
Oh yeah, I just grounded it to a random bolt I saw near the fuse box.
Last edited by calvinchan; 03-14-13 at 12:53 PM.
 03-14-13, 07:55 PM
#3
Driver School Candidate

Very clean....
Any interference from the Blind Spot System or parking radar?
I'm looking to do the same exact thing, but have been reluctant because of the chance of interference.
Any interference from the Blind Spot System or parking radar?
I'm looking to do the same exact thing, but have been reluctant because of the chance of interference.
03-14-13, 08:14 PM
#4

If your GS have the night vision or LKA then there a camera hidden up. And I doubt the mount will interfere with since it mount lower than the rear view mirror.
Trending Topics
03-17-13, 05:15 PM
#8
Ok so I got the blend mount for my valentine one. And I got the visor direct wire cord that connects to the rear view mirror power supply. It used to turn or and off when the car was on or off on its own but now it doesn't do it. Any inputs? And with this DIY it doesn't turn on and off on when the car is either on or off right?
03-17-13, 07:31 PM
#9
Ok so I got the blend mount for my valentine one. And I got the visor direct wire cord that connects to the rear view mirror power supply. It used to turn or and off when the car was on or off on its own but now it doesn't do it. Any inputs? And with this DIY it doesn't turn on and off on when the car is either on or off right?
 07-25-14, 11:22 PM
#11
07-31-14, 01:02 PM
#14
Ok so I got the blend mount for my valentine one. And I got the visor direct wire cord that connects to the rear view mirror power supply. It used to turn or and off when the car was on or off on its own but now it doesn't do it. Any inputs? And with this DIY it doesn't turn on and off on when the car is either on or off right?
Chris

Thread
Thread Starter
Forum
Replies
Last Post
pieisgude
Lexus Audio, Video, Security & Electronics
136
03-29-22 07:28 AM
LEX_MAN
Performance & Maintenance
8
08-30-21 01:20 AM