When you click on links to various merchants on this site and make a purchase, this can result in this site earning a commission. Affiliate programs and affiliations include, but are not limited to, the eBay Partner Network.
I was driving down turnpike (FL), it was pretty early morning, so I was on auto-pilot... Some lady decided to block me very last minute, and parked right between two lanes. WHAM. There goes the sideview mirror! So I purchased a used, junkyard, in bad condition (but not cracked or shattered) mirror from ebay. Long story short. The only DAMAGED part was the lid, so that is all I wanted to change. Fast forward to my how-to.... which is extremely easy! I should not have listened to the cries about how difficult of a job this is!
To the point:
1) Have your car in the ON position, so you can drive the mirrors up down left and right.
2) Have two tools: Flat head screwdriver (shaper the better IMO, so you can open the tabs), Phillips head screwdriver (I dont know the #, just have a few various sizes around).
3) PATIENCE! It's a virtue. Granted I picked this and disassembled the mirror ON the car in 5 minutes (literally, and it was my first attempt), it may take others 15-30 minutes.
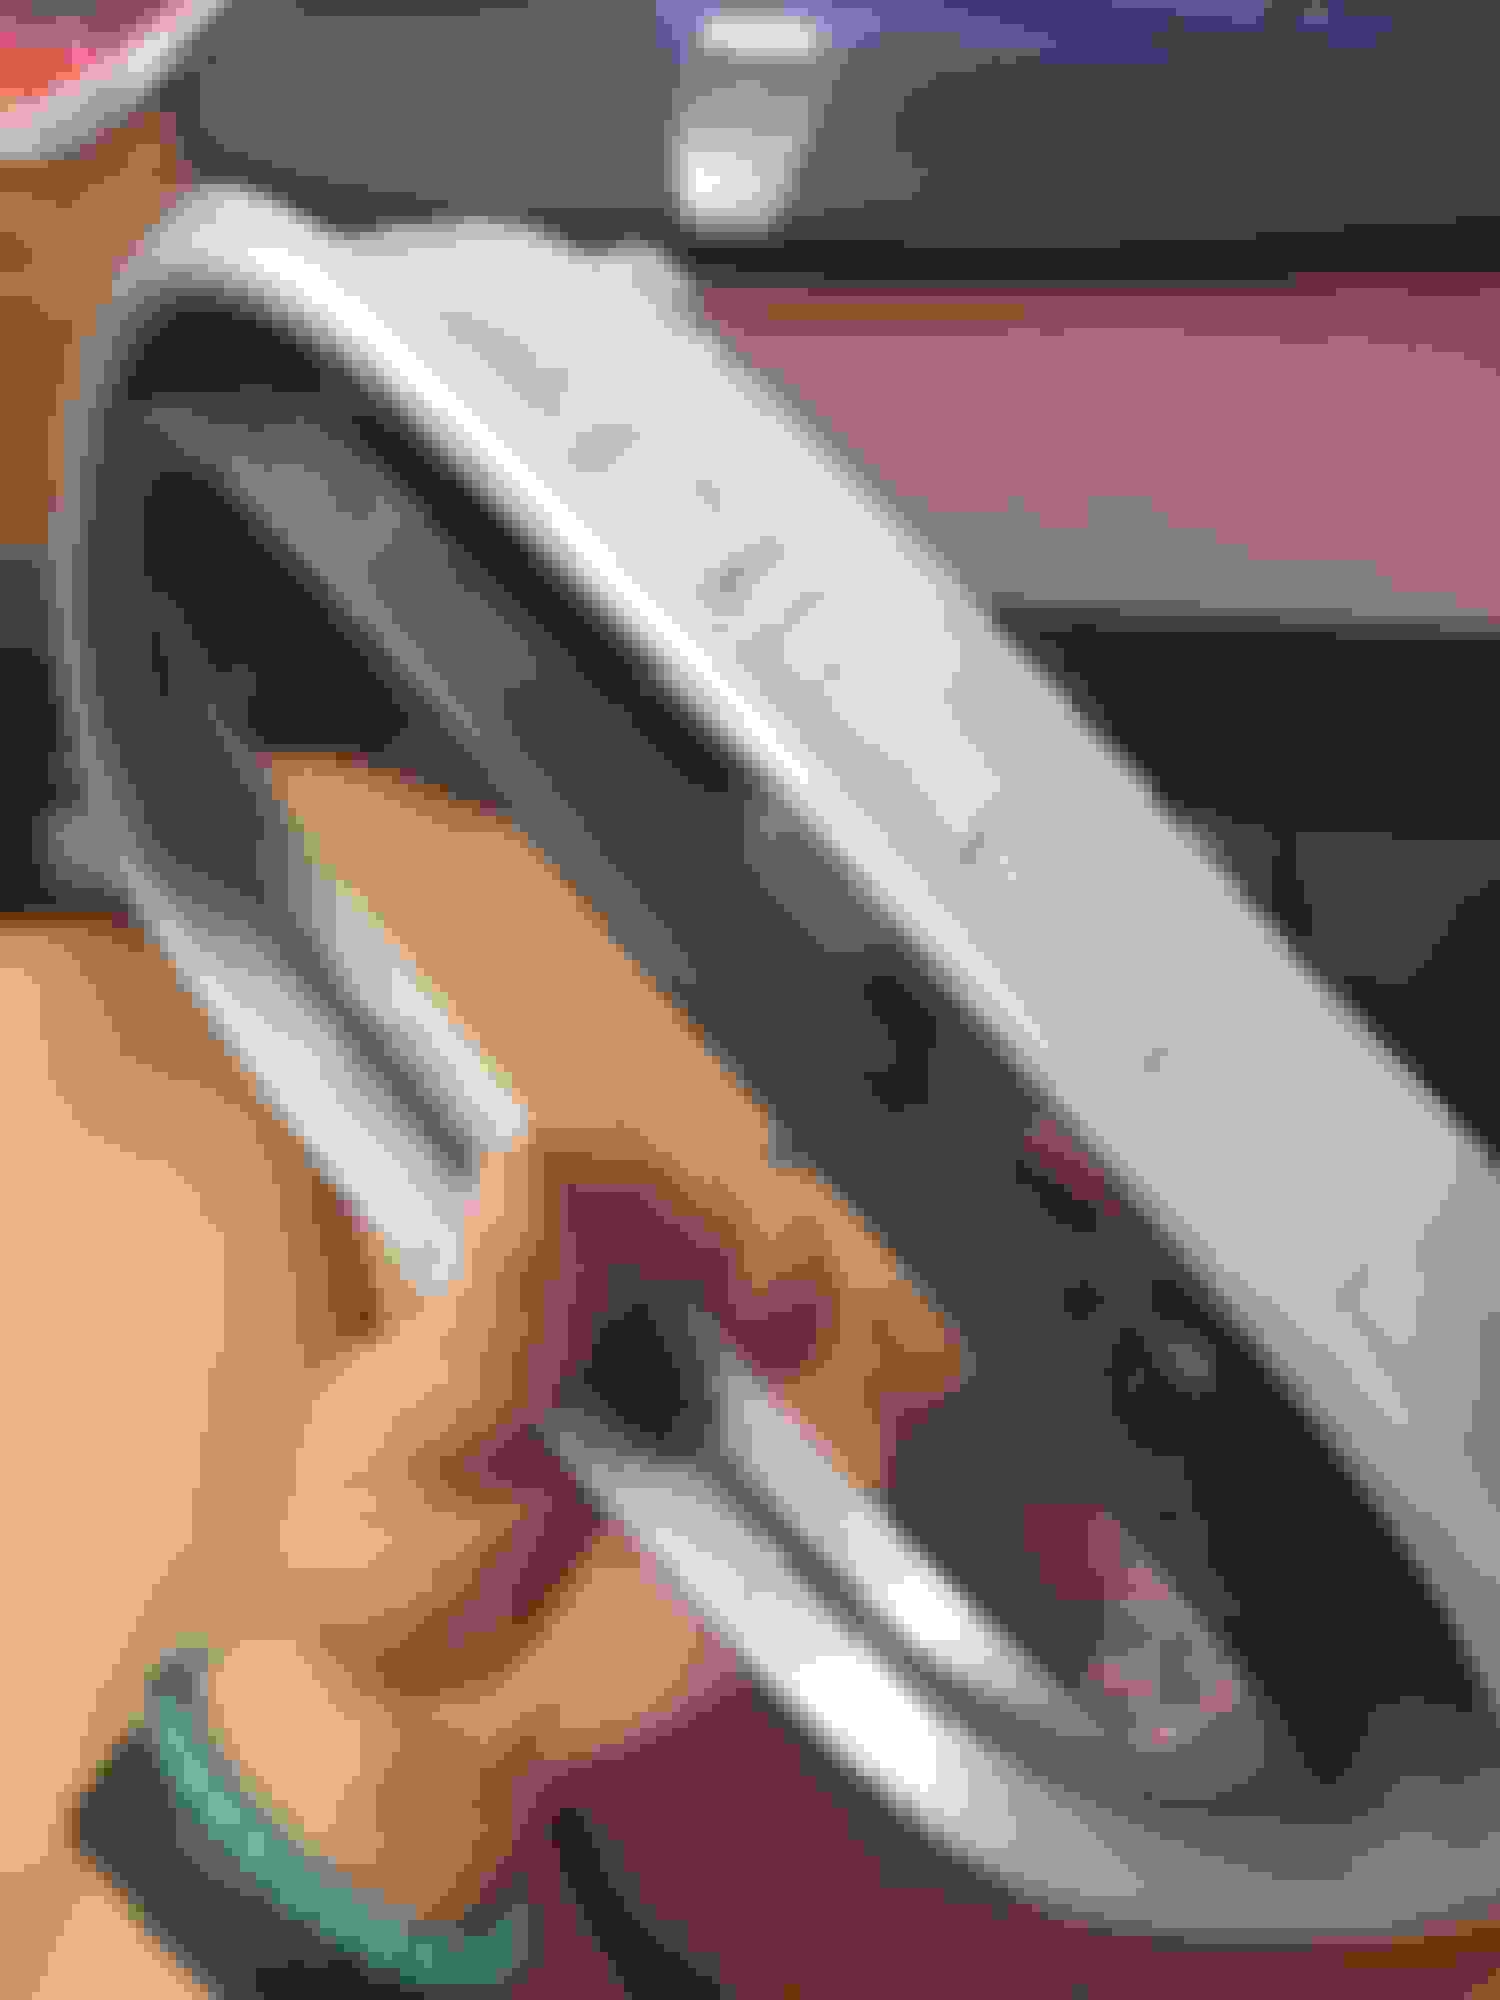
4) Now pay attention to the mirror as you move it to the extreme right, left, up, and down. There are tabs there that hold a plastic rim to the mirror. There are 3 at the top and bottom, and there are 2 at the left and right. KEEP IN MIND, it is sticky with glue, so have patience, and slowly pry it out. THe glue shouldn't be STUCK, but TACKY. Sample photo below of ONE side of the tabs:
5) You'll wedge (carefully), a flat head screwdriver in between each tab, and remove the trim section by section.
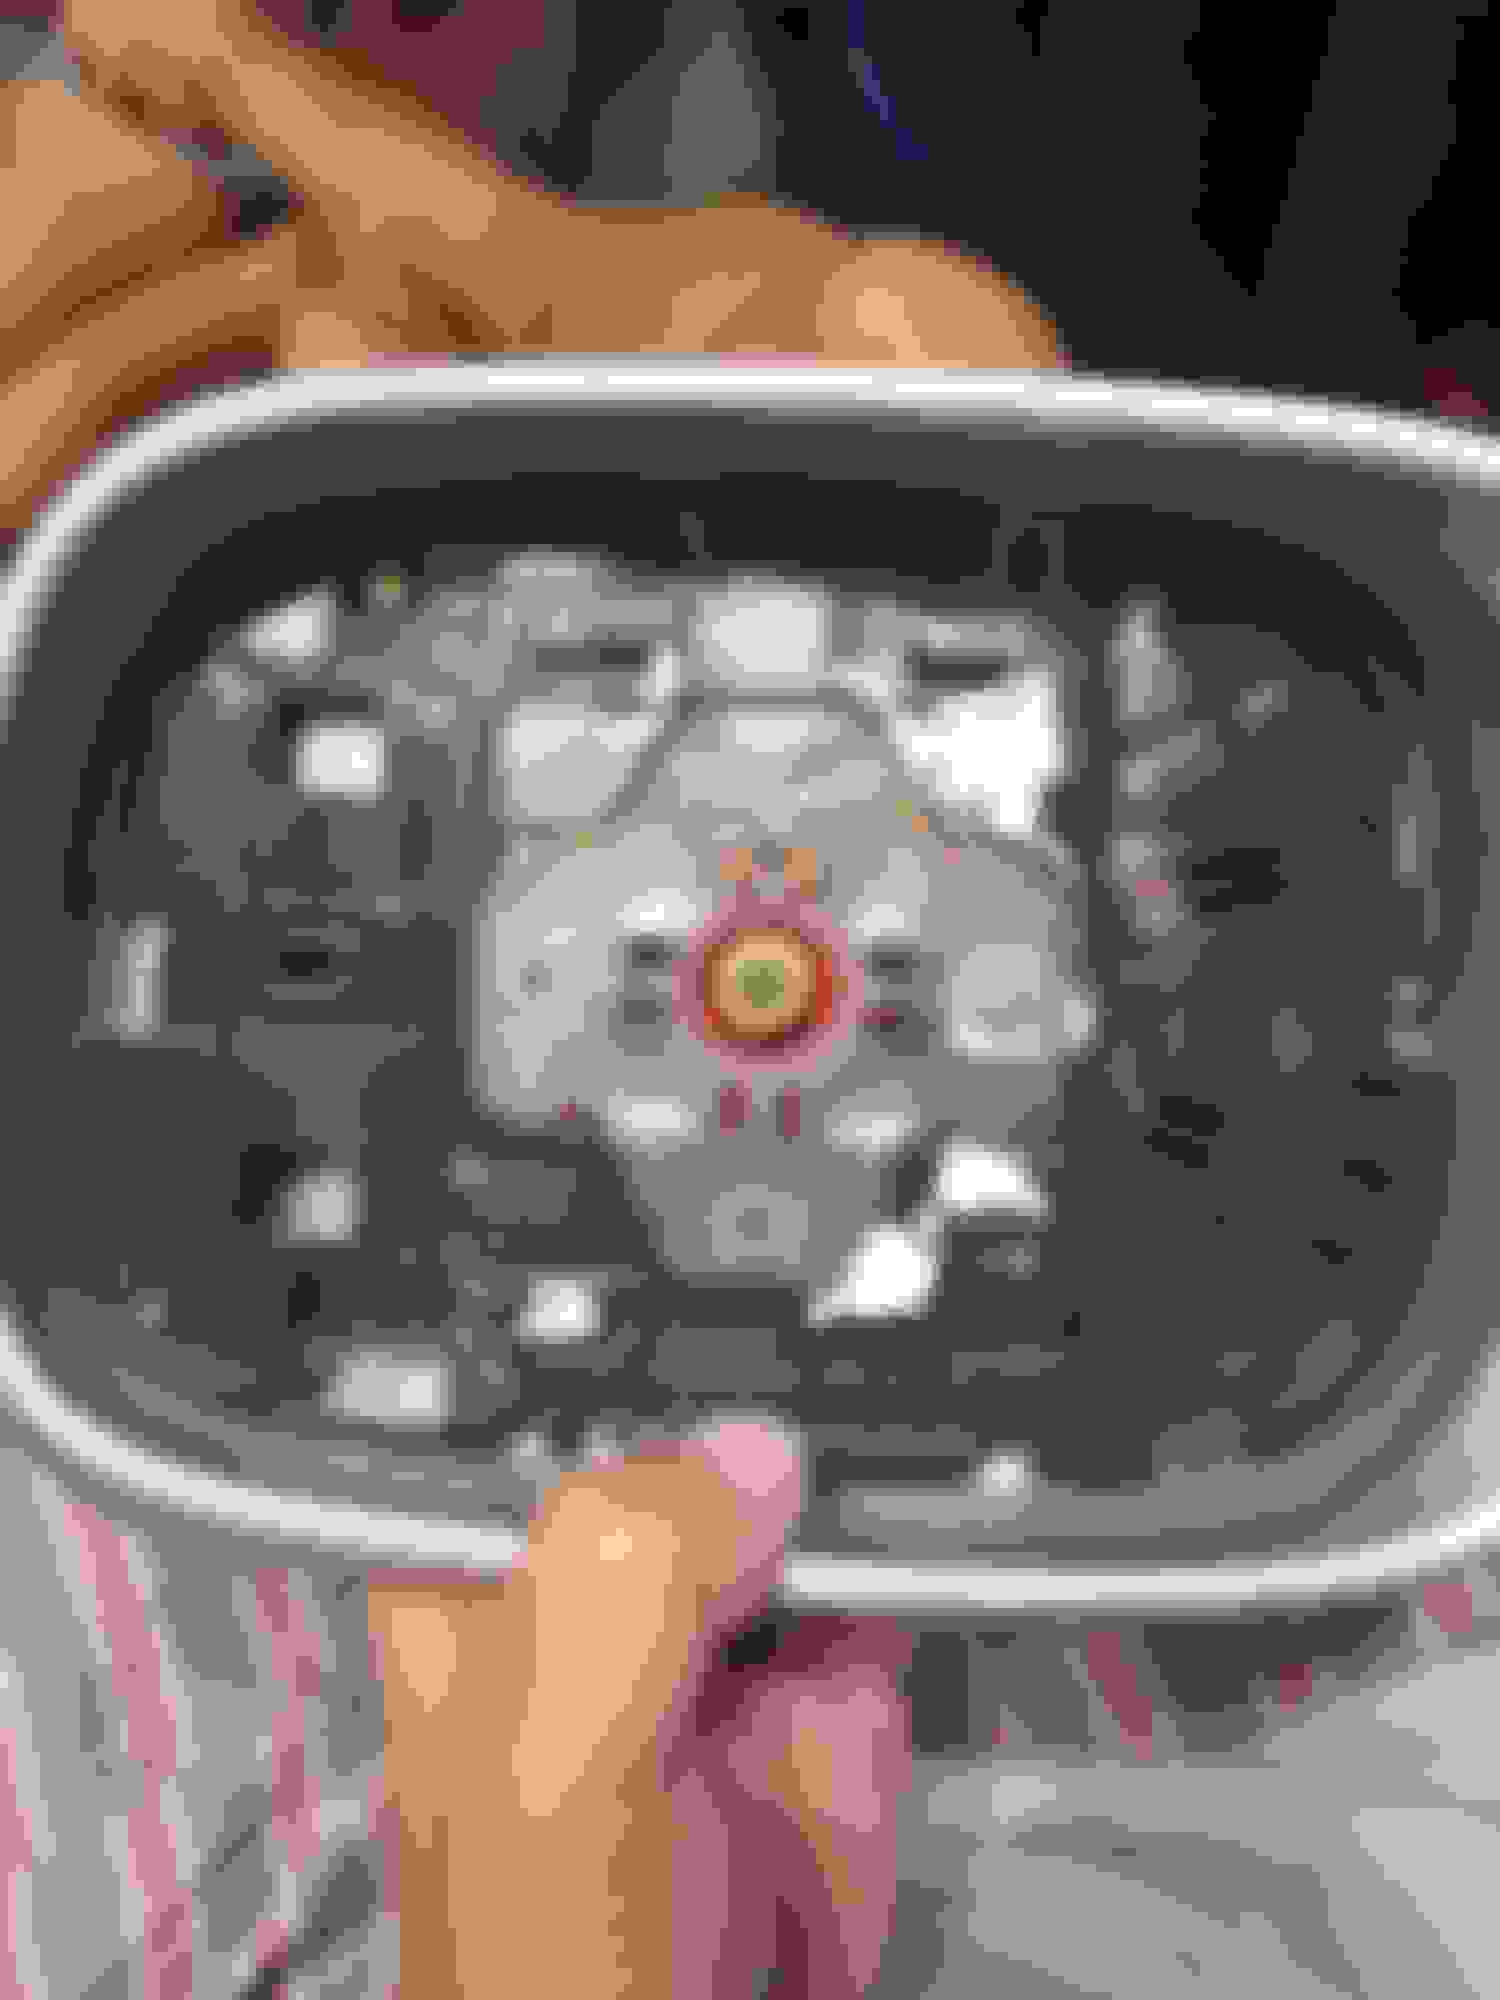
6) Once it is removed, There is a single screw in the center of the mirror. There's a red circle around it.... Remove that screw and pull the plastic housing off (CAREFULLY). ** NOTE: THERE IS A SPRING HERE, BE CAREFUL NOT TO LOSE IT!**
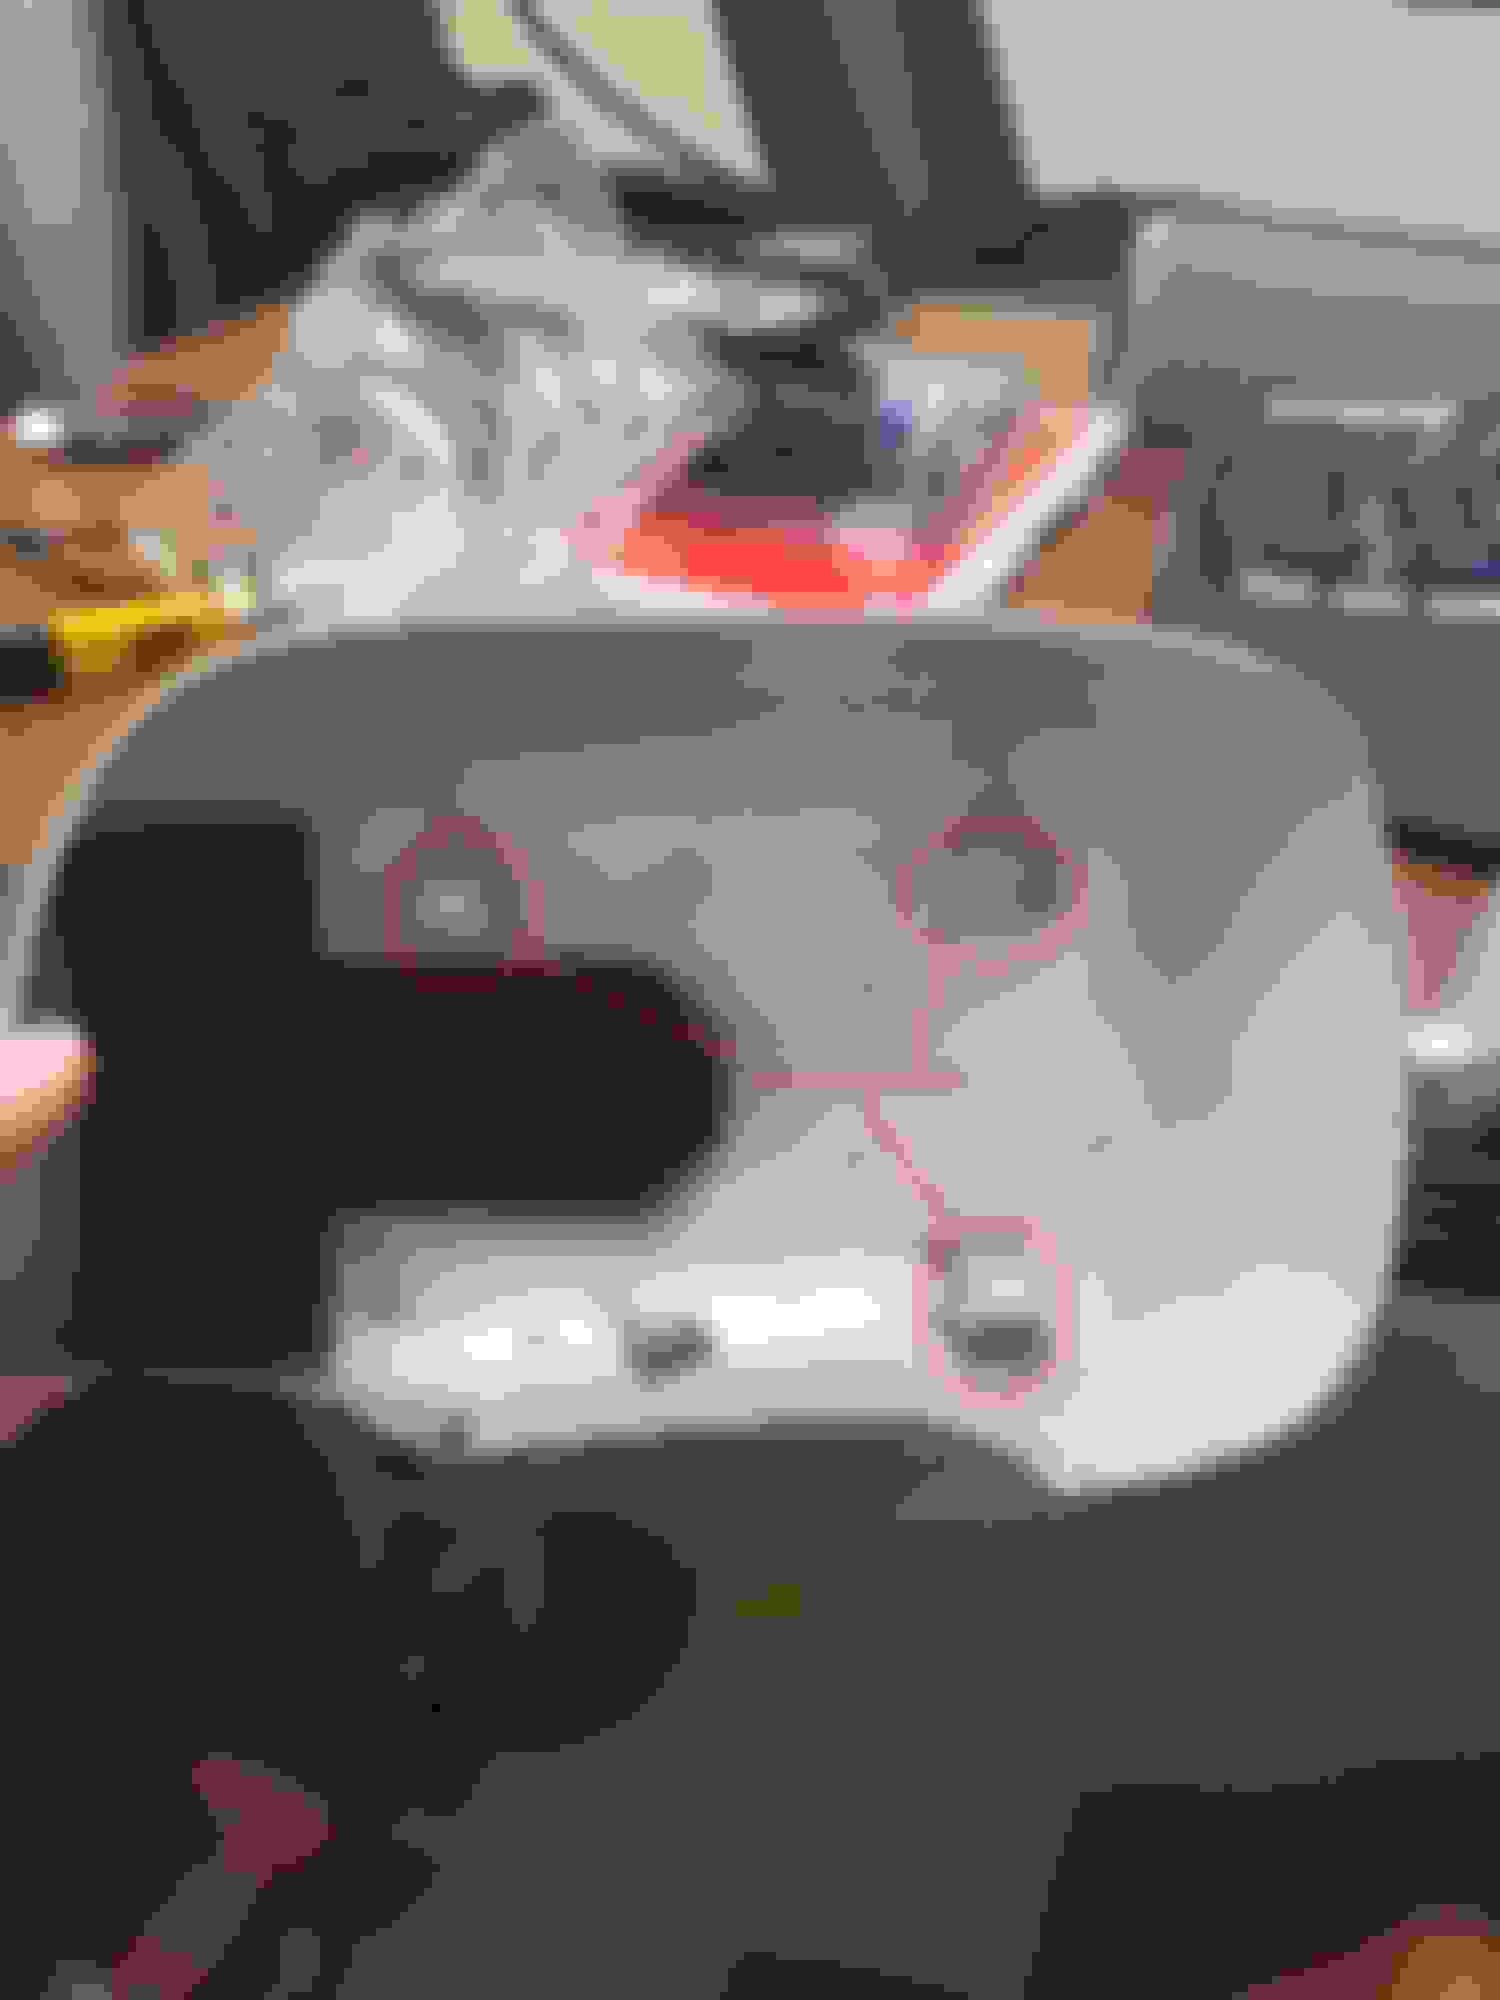
7) Once that plastic housing is removed, there should be 4 screws. unscrew the 4 screws. and the bezel facing you will be removable.
8) there are 3 white tabs, you'll use pliers to pinch each one of them and push the lid away from you.
NOTES:
- When you reassemble the mirror, reverse the order, UP UNTIL YOU GET TO THE MIRROR INSTALLATION. This is the tricky part. Once the black housing behind is installed, you'll move the mirror ALL THE WAY TO THE RIGHT, exposing the left plastic housing.
-You'll then stick your fingers back there, and tug on the plastic housing, to install the electrical clips for your auto heated/auto dimming mirrors (I don't know the function truly, I just know this is how it is reinstalled). I don't have photos for this, as it's difficult for one person to snap a photo and show you how to do the tabs. So PM me if any of you guys run into trouble. It's the fastest way I can answer you!
Last edited by XxGoKoUxX; Oct 31, 2019 at 09:24 AM.
well at least now i know what the small broken white piece of plastic that was loose in the gap under the mirror and the outer case is .... I wonder how the other 2 are holding up on my car
And if you're like me and decides to crash into a trash can and shatter the mirror, you can get an aftermarket replacement for about $20 on Amazon instead of $200 for OEM. You'll lose the auto dimming tho


 .... I wonder how the other 2 are holding up on my car
