
Interior Swap
 01-20-19, 07:22 PM
#16

Gosser this is a good thread. I did the same black interior swap a few years back but i had to do it twice since i was swapping the interior from one of my GS's to the other. It took me a full weekend to get both swapped around plus i also throughly cleaned both interiors during the swap
 01-20-19, 07:26 PM
#17
Welcome to the dark side, of interiors that is  . A few months ago I wrapped the upper half of my interior in black suede like material from Joann Fabric which was a very nice material to use if you go that route.
Here are the pillars which those alone will make a nice difference:

Here is how the headliner turned out:

But overall once the sunroof cover was done it turned out great especially with the fiber optic twinkle star effect:

. A few months ago I wrapped the upper half of my interior in black suede like material from Joann Fabric which was a very nice material to use if you go that route.Here are the pillars which those alone will make a nice difference:
Here is how the headliner turned out:
But overall once the sunroof cover was done it turned out great especially with the fiber optic twinkle star effect:
This is amazing exactly what I want to do I even got a extra headliner so I can take my time. Did you pick that up from them locally or ordered offline? Also how much fabric did you need and any pointers would be helpful. Thanks in advance
01-20-19, 09:45 PM
#18
https://www.joann.com/home-decor-sol...k/7951106.html
I used about 3 yard length of fabric with the sun visors and sunroof cover done as well. This fabric is not very stretchable so you need to cut a lot of small v cuts around the corners and tight bends to apply it properly especially on the middle pillars, rear pillars and around the sunroof opening on the headliner. I used 2 cans of 3M 90 adhesive spray which worked very good but you need to move fast once the 2 light layers are applied. Other than scissors and a razor blade no other tools were really needed when installing the fabric just take your time and smooth it outwards with your hand. Once I got to the headliner, I started halfway in the middle completing the rear half first and then doing the front section last.
I recommend you do the headliner last and start with the pillars first to get some experience if you never done this before (I have never done this myself before so it was all new to me). Also do not go too crazy with the adhesive because it can bleed through the fabric and you will have a spot. I hope it turns out good for you.
The following users liked this post:
nyc80rick (01-21-19)
01-21-19, 05:31 AM
#19
I went to the store in person to see was getting but they were out of the black color so I had to order it online. This is what I got:
https://www.joann.com/home-decor-sol...k/7951106.html
I used about 3 yard length of fabric with the sun visors and sunroof cover done as well. This fabric is not very stretchable so you need to cut a lot of small v cuts around the corners and tight bends to apply it properly especially on the middle pillars, rear pillars and around the sunroof opening on the headliner. I used 2 cans of 3M 90 adhesive spray which worked very good but you need to move fast once the 2 light layers are applied. Other than scissors and a razor blade no other tools were really needed when installing the fabric just take your time and smooth it outwards with your hand. Once I got to the headliner, I started halfway in the middle completing the rear half first and then doing the front section last.
I recommend you do the headliner last and start with the pillars first to get some experience if you never done this before (I have never done this myself before so it was all new to me). Also do not go too crazy with the adhesive because it can bleed through the fabric and you will have a spot. I hope it turns out good for you.
thats some great advice. Thanks also did you remove the old headliner material or just go right over it?
01-21-19, 08:25 AM
#20
01-21-19, 09:06 AM
#21
Driver School Candidate
Thread Starter

Thanks nyc80rick. While we have everything apart and out, we're thinking of upgrading the stereo. So its probably going to push the whole swap completion to a few weeks as we pick away at it. I like the ML non-nav stuff the 430 has, but dont want to go through the trouble if its not really plug and play friendly. Does anyone know? Or do I need to swap over the entire body harness? Is it just repinning connectors? If so, then thats fine. I know the radio connectors arent the same, which I can make a harness for. What about the amp and speakers?
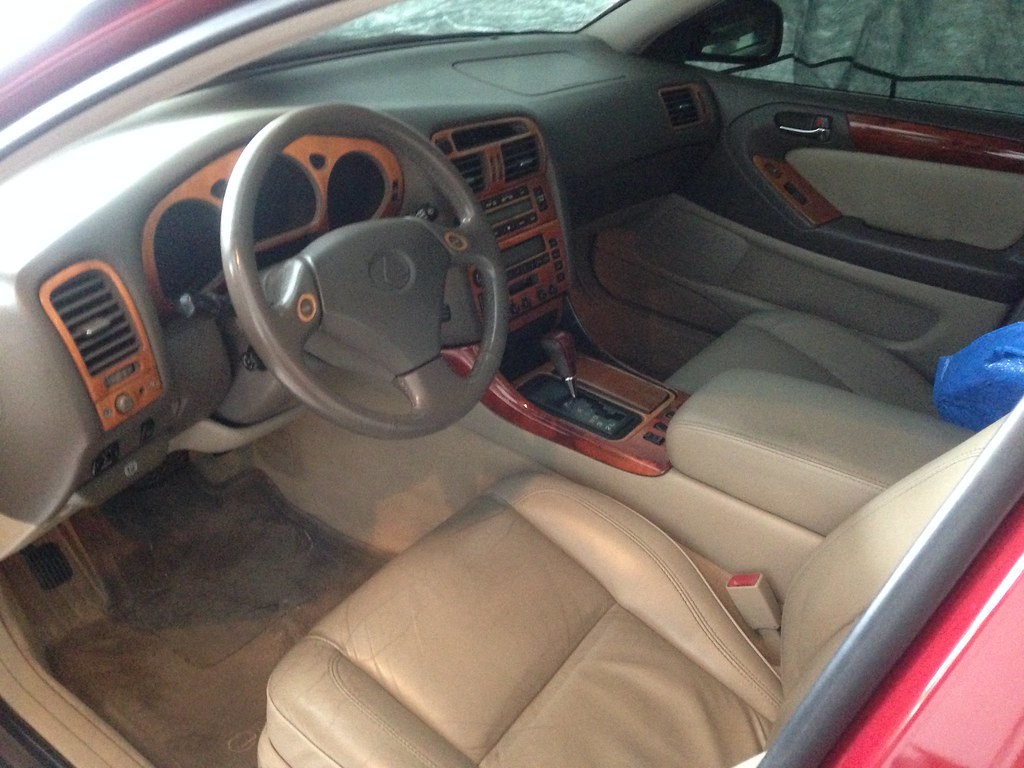
shwalker, That headliner is out of this world. I'd love to see that in person. Do you simply pull the fibers through, glue the back side then clip the ends flush to the headliner? We're going to keep it simple here. Just hope we can keep the 400s pillars and headliner, even though we have the 430 stuff. Would it look funny with a black headliner and grey holy **** handles, visors, sunroof panel, etc?
What online vendors does everyone typically use for OEM parts? For the Audi world, I have a few sites that are solid and have nearly every single part available, with accurate pictures, part numbers etc. which makes cross referencing things a breeze. Is there something equivalent in the Lexus world?
Last edited by Gosser; 01-23-21 at 12:45 PM.
01-21-19, 10:10 AM
#22
Driver School Candidate
Thread Starter
I've done some more reading on the ML system upgrade and will probably just keep what we have, or go aftermarket. I am going to try and convince him to get an aftermarket head unit, but he is more of an OEM kind of guy. Maybe we'll leave it to speakers, sub, mono amp to start and then maybe a 4 channel later.
01-21-19, 11:34 AM
#23

Well, mission accomplished:
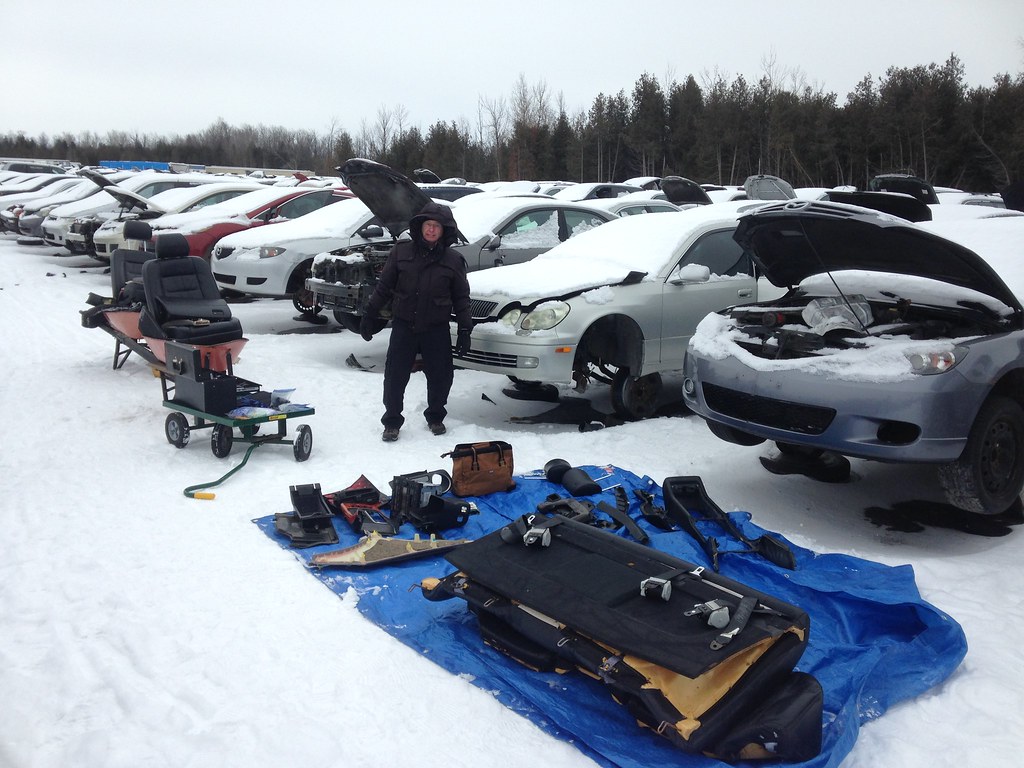
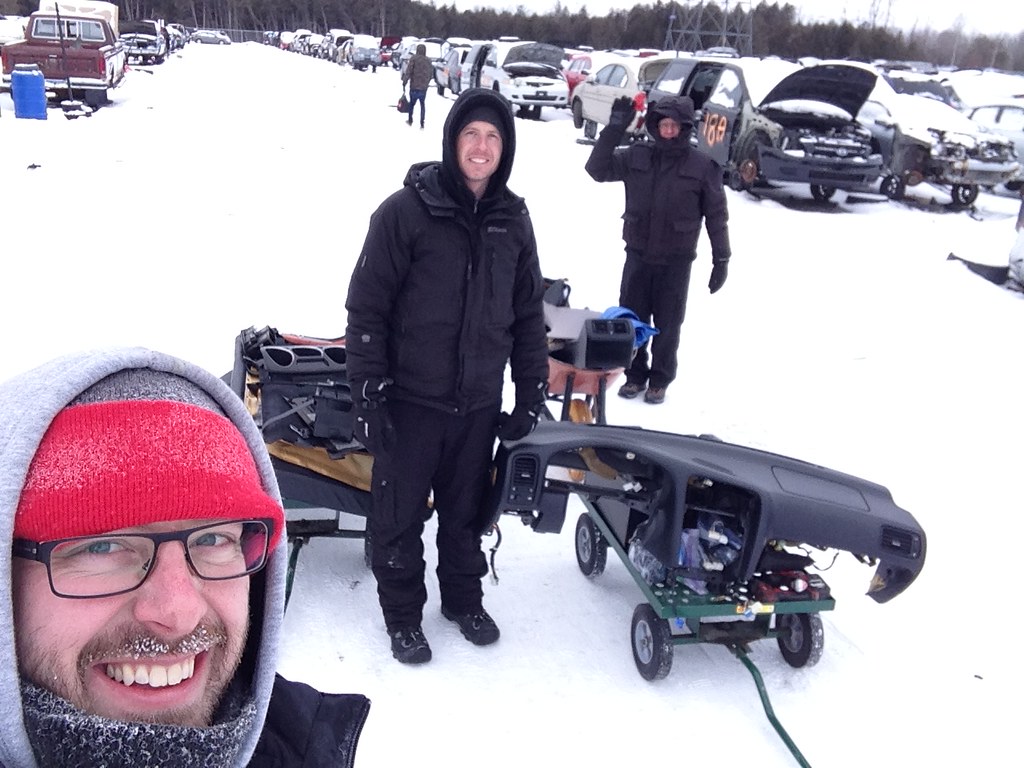
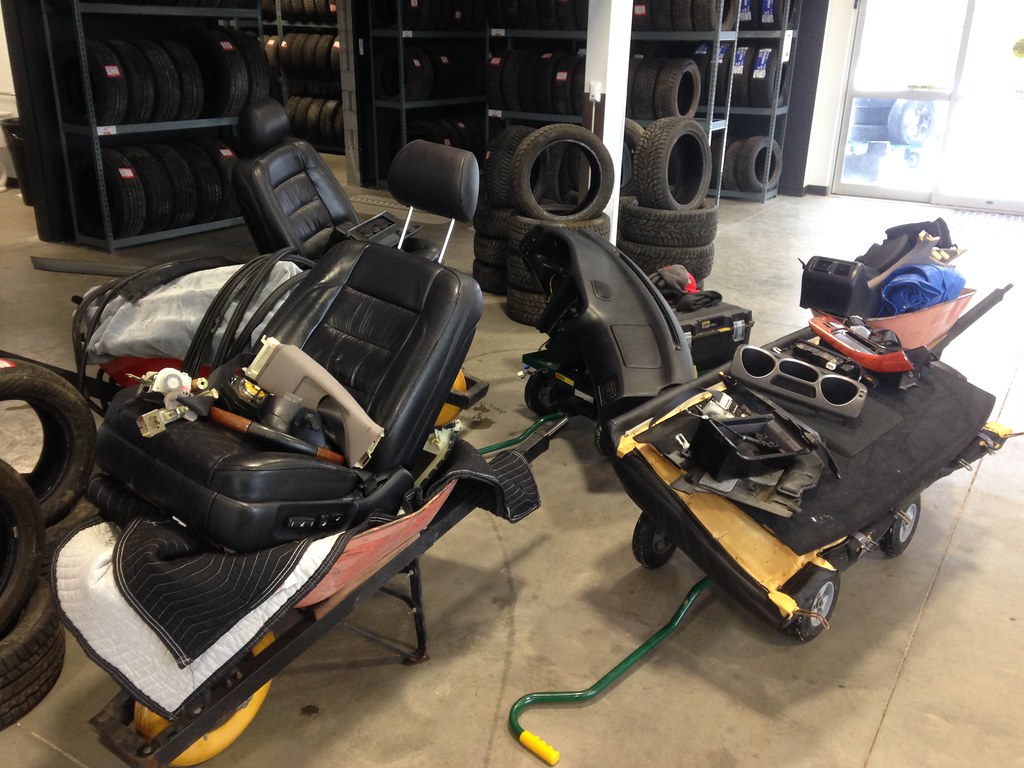
Mother nature held her end of the bargain, starting at -22*c/7.6*F and warmed up to -19.5/-3 by the time we were done. Went very quick actually. Started with just my father and I at 11:20, the brother joined by 12:30, and we were doing the final walk by 2:00. We left the carpet and headliner, which I'll grab next weekend. Total bill out the doors $530cad/$399usd.
Only broke two of the seat rail plastic end caps, two pressure clips and the brace under the glove box. I thought we would have broke way more, but this stuff is pretty stout.
So it turns out the car has a ML system. I'm wondering if its a matter of swapping the components only. I'll do some research, but if it is, then I'm definitely grabbing all the speakers, sub, crossovers and amps. The 400s nakamishi systems cuts out at 50% volume. Its terrible. Would be a nice upgrade while doing all of this.
Still debating the headliner, and the upper b pillar situation. Can I not keep the 400s upper b-pillar and just dye it? Then dye the rest of the 400s pillars and the 400s headliner? something we were thinking about instead of messing around with 430s and trying to rework the pins and all, seeing how we would be dying the 430s anyways.
Anyhow, will be looking for a few nicer bits online, like an arm rest, front floor mats, and front ashtray(someone happen to pull that only item).
Everything will be pretty much on hold until the spring when the car is out of storage and its somewhat warmer to work in where we can lay out and take out time, but cannot wait to replace this:
with this:
01-21-19, 11:37 AM
#24
I�m doing my headliner again. How�d you get the fabric to �lay� in the corners, like the little depression where the sun visor goes.
01-21-19, 12:13 PM
#25
Driver School Candidate
Thread Starter
No. Located in Ottawa, Ontario. The body on the car looked pretty decent. I think the timing skipped, and bent all the valves. The front end timing covers and pulleys were all removed, and that was the only thing I could find removed by the time I was there. All the pulleys were placed nicely in the car and not scattered everywhere in the snow, so it looked like a shop was planning to put all back together.
I wonder if its worth grabbing the transmission at 140cad/105usd. But there isnt really a way to test it so it could be a completely wasted effort.
I wonder if its worth grabbing the transmission at 140cad/105usd. But there isnt really a way to test it so it could be a completely wasted effort.
01-21-19, 09:51 PM
#26
shwalker, That headliner is out of this world. I'd love to see that in person. Do you simply pull the fibers through, glue the back side then clip the ends flush to the headliner? We're going to keep it simple here. Just hoop we can keep the 400s pillars and headliner, even though we have the 430 stuff. Would it look funny with a black headliner and grey holy **** handles, visors, sunroof panel, etc?
I do believe there is a slight difference in the front pillars due to the side air bag found in the later years but I would go for a black headliner only if you had some extra time to do it. I think even the pillars in black and the factory color headliner would be a nice touch and also less time to do that. Either route you go I like your dedication to this swap and you interior will turn out great once it's converted over.
01-22-19, 07:10 AM
#27
Driver School Candidate

Join Date: Jan 2019
Location: NY
Posts: 10
Likes: 0
Received 0 Likes
on
0 Posts

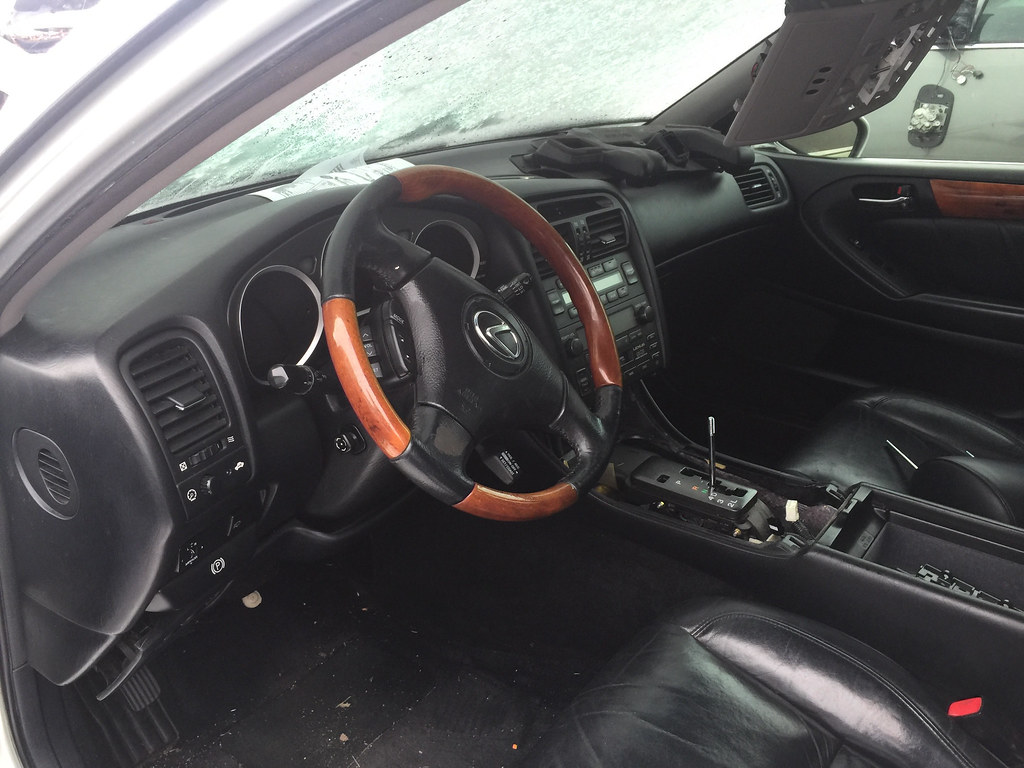
I dyed the fabric black instead of replacing it. I�m still in the process of completing the transformation from a grey interior to black and need to do another coat on the ceiling fabric to make it darker but the same bottle of dye worked for everything even the leather seats. My interior was the same exact grey and different colored wood trim you show in the picture above.
01-22-19, 07:18 AM
#28
Driver School Candidate
Thread Starter
I dyed the fabric black instead of replacing it. I�m still in the process of completing the transformation from a grey interior to black and need to do another coat on the ceiling fabric to make it darker but the same bottle of dye worked for everything even the leather seats. My interior was the same exact grey and different colored wood trim you show in the picture above.
https://www.ebay.co.uk/itm/Liquid-FA...-/360898116009
The ladder might be more difficult to apply, vs the conventional spray can, but might yield a more softer touch. I'll need to keep reading reviews if either or makes the fibers crispy to the touch.
01-22-19, 07:44 AM
#29
Driver School Candidate
Join Date: Jan 2019
Location: NY
Posts: 10
Likes: 0
Received 0 Likes
on
0 Posts


I used RIT because it leaves you with a soft touch as well. I put it in a spray bottle to cover a larger area quicker however I couldn�t do the ceiling as it would of gotten everywhere so I soaked the sponge and applied it that way. Very time consuming if you can�t use a spray bottle. Also make sure you clean the fabric after to avoid the color from bleeding. I completely swapped out interiors even dashboard and next time I will only use this dye. It�s 10 degrees out where I live so I did as much as I could indoors and that was everything except the ceiling fabric. In the picture above I did a test piece in the back to see how dark I wanted it. It took me 3 coats to get it the black color I wanted.
01-22-19, 01:50 PM
#30
Driver School Candidate
Thread Starter
Yes, I saw that product too. Thanks for the feedback on it. Did you use the same product on the holy **** handles and plastic bits? I've been thinking of leaving all those items grey, just because any paint or dye will scratch/wear and reveal the original color, no matter how much prep or material is put on.