
Another painted headlight thread with pics (Alpine/Hyperblack)
 03-27-10, 09:35 AM
#1
Lead Lap
Thread Starter
iTrader: (2)
Join Date: Jun 2009
Location: NV
Posts: 466
Likes: 0
Received 0 Likes
on
0 Posts
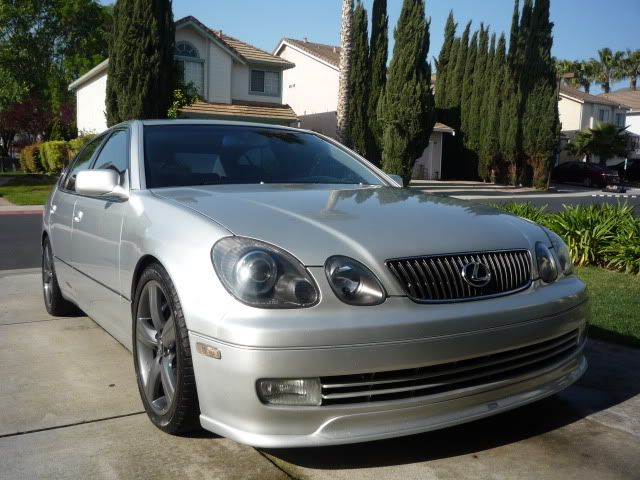
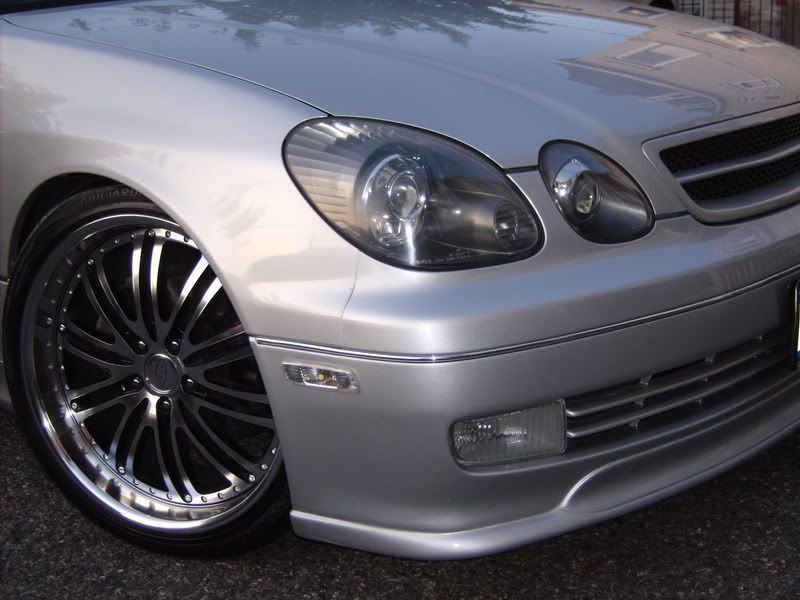
There are many of these but I know I'm always up for seeing people try new colors, etc.
Details:
- Dropped bumper down but didn't remove (keep in mind to be careful doing this because the small plastic of the bumper that goes between the main headlight and DRL can crack the paint if you flex it while pulling the lights out)
- Heated oven to 210, turned off, let sit for 10-12 minutes. (Used the same when reassembling.
- Prepped with a green scotchbrite pad
- Pick up three different paints with the goal of matching my hyperblack wheels. (nailed it on the first try though with Rustoleum Black Night Metallic).
- Started at 6PM ended at 2AM. I could do it in half the time now but I completely stipped the lights before putting them in the oven.
PICS
Last edited by Newchapter; 03-27-10 at 09:43 AM.


Trending Topics
 03-27-10, 01:56 PM
#10
There are many of these but I know I'm always up for seeing people try new colors, etc.
Details:
- Dropped bumper down but didn't remove (keep in mind to be careful doing this because the small plastic of the bumper that goes between the main headlight and DRL can crack the paint if you flex it while pulling the lights out)
- Heated oven to 210, turned off, let sit for 10-12 minutes. (Used the same when reassembling.
- Prepped with a green scotchbrite pad
- Pick up three different paints with the goal of matching my hyperblack wheels. (nailed it on the first try though with Rustoleum Black Night Metallic).
- Started at 6PM ended at 2AM. I could do it in half the time now but I completely stipped the lights before putting them in the oven.
PICS
 03-27-10, 08:20 PM
#13
It'll definitely set off your car John!
LOL.... Super elusive lip that needs to be repainted after barrages of rocks.
I saw yours when you first had it completed and it made my decision easier to paint the housings. I was debating on either gun metal or flat black. I love yours because it is the quad projector set-up and looks clean! 
LOL.... Super elusive lip that needs to be repainted after barrages of rocks.
Last edited by sleeper408; 03-27-10 at 08:26 PM.
