DIY – GS300 – clear tails – amber removal


 07-25-08, 05:14 PM
#35
I just tried to do this. Heat up my tails just like shown on page 1. But everytime I would try to open up the lens, I would put tiny cracks into the len's edge. Too afraid to go any further. Any advice?
Btw I heat it up for 20 min. coz 10 min wasnt enough for me.
Btw I heat it up for 20 min. coz 10 min wasnt enough for me.
 07-26-08, 04:04 AM
#37

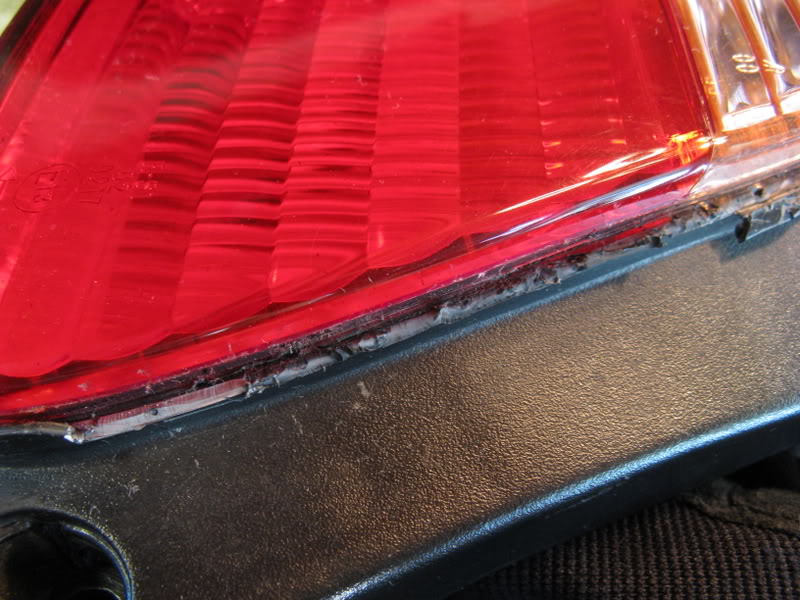
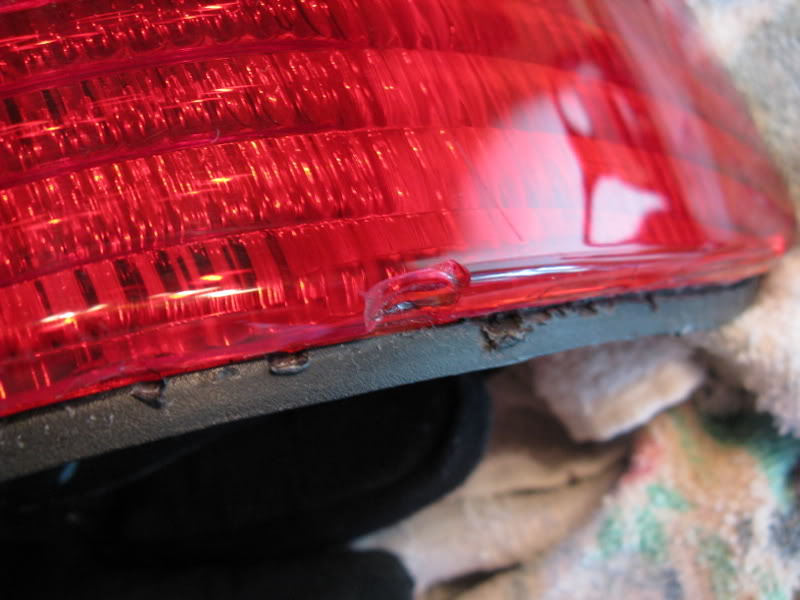
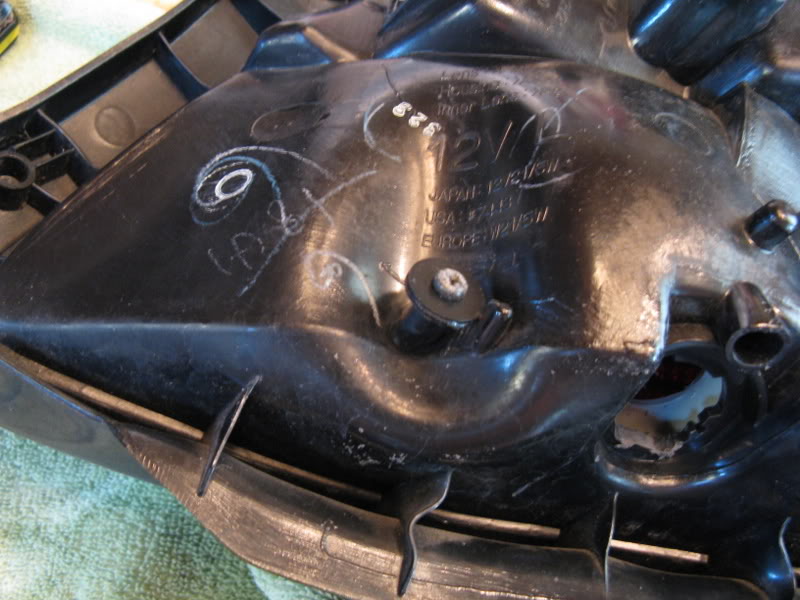
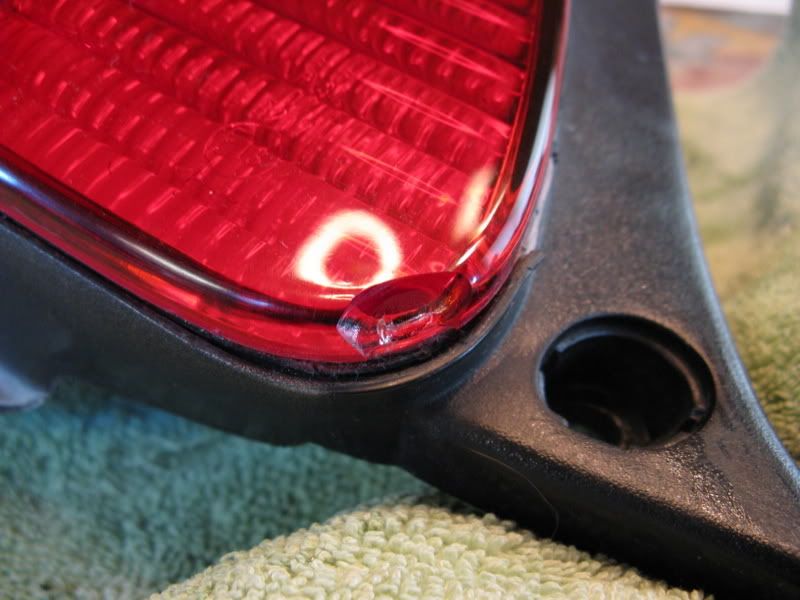
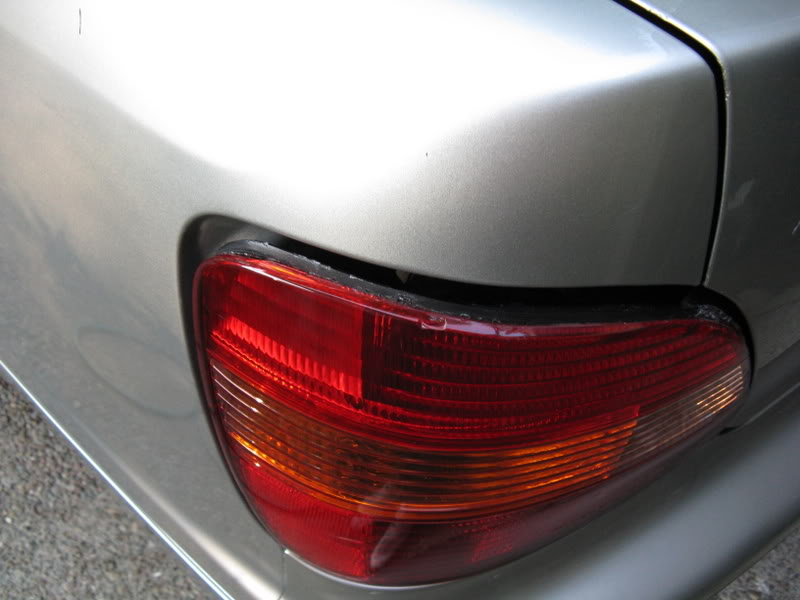
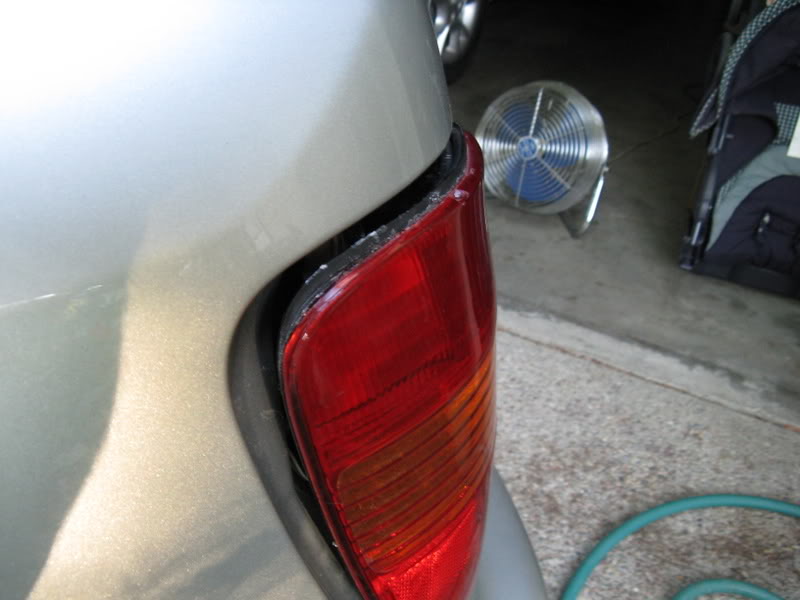
I've wanted to try this process from the time i bought my 2000 GS. This mod is a nightmare!!!! I swear it doesnt work like its supposed to. I heated my driver's side tail up in the oven following several diy "clear tail" instructions. The lense wouldnt budge from the housing. Instead my screwdriver chipped pieces of the lense off and tore thru the plastic housing without even getting close to separating. I'll admit i wasnt too patient since i wanted LED's anyway but this mod didnt go even close to how some described. I kept heating, and trying to separate but the melted glue was no where to be found. Im not sure what i did wrong but after several baking session in the oven i ended up warping the $h*t out of my plastic housings. As you can see in the pictures, the lense is chipped and the black plastic is warped to the point where the tail wont even bolt back on properly. Look at my DIY gone wrong and have a laugh at my expense. Im not too concerned, this finally gives me an excuse to get new tails.
I cant even tell where the glue is supposed to be???
Notice the huge chips my screwdriver gladly took out of the lense in these next two

Warped plastic anyone?
Had to file down the holes just to get the bulbs back

Another huge chip
Tails being held in by only 2 screws. Ready to fall off on freeway bumps
Good Luck to anyone else brave enough to try this
I cant even tell where the glue is supposed to be???
Notice the huge chips my screwdriver gladly took out of the lense in these next two
Warped plastic anyone?
Had to file down the holes just to get the bulbs back
Another huge chip
Tails being held in by only 2 screws. Ready to fall off on freeway bumps
Good Luck to anyone else brave enough to try this
07-26-08, 11:46 AM
#38
^ DAMN!. same with me. I cant even find where the glue is supposed to be to pry the lens off. I didnt want to go any further without knowing so I just stopped and put it back on the car. If i went further, mine would have ended up like yours. Good thing I didnt. But damn.. looks terrible.
Maybe someone should do a video clip of them taking the Lens off the housing. That would make it alot easier for the people who are scared of doing this mod because it might damage their tails. (like me)
Maybe someone should do a video clip of them taking the Lens off the housing. That would make it alot easier for the people who are scared of doing this mod because it might damage their tails. (like me)
07-26-08, 12:18 PM
#39

 07-26-08, 07:56 PM
#42
WOW! I'm sorry to hear you guys were having so many problems with this. I suppose if I could offer any advice it would be this:
1) I used an electric oven and am unsure if a gas oven makes any difference. I kept the temp relatively low at 200 degrees and at this temp I could still use my bare hands to handle it. Also, I put it in for 30 minutes at a time on the 2nd highest rack, though I wouldn't hesitate to put it in for 40-45 minutes the next time.
2) When using a screwdriver, I used the longest & thickest flathead I could fit between the black plastic and the lens. **IMPORTANT NOTE** Instead of prying the lens using an up/down motion, I "rotated" the screw driver clockwise and counter-clockwise kinda like as if I was screwing in a screw. AND DO IT SLOWLY! I'd also work an area and if it wouldn't separate I'd move down an inch or so and slowly work that area. As soon as I'd hear any cracking I'd stop and move to another area, and if nothing seemed to budge then back in the oven it goes!!
I hopes this helps a little...it's really not tough but you HAVE to be patient. Let me know if there's any other questions I can help with.
1) I used an electric oven and am unsure if a gas oven makes any difference. I kept the temp relatively low at 200 degrees and at this temp I could still use my bare hands to handle it. Also, I put it in for 30 minutes at a time on the 2nd highest rack, though I wouldn't hesitate to put it in for 40-45 minutes the next time.
2) When using a screwdriver, I used the longest & thickest flathead I could fit between the black plastic and the lens. **IMPORTANT NOTE** Instead of prying the lens using an up/down motion, I "rotated" the screw driver clockwise and counter-clockwise kinda like as if I was screwing in a screw. AND DO IT SLOWLY! I'd also work an area and if it wouldn't separate I'd move down an inch or so and slowly work that area. As soon as I'd hear any cracking I'd stop and move to another area, and if nothing seemed to budge then back in the oven it goes!!
I hopes this helps a little...it's really not tough but you HAVE to be patient.
Let me know if there's any other questions I can help with.

 08-03-08, 02:56 PM
#45
Pole Position
iTrader: (2)
Join Date: Aug 2008
Location: Bartlett, TN
Posts: 225
Likes: 0
Received 0 Likes
on
0 Posts
Wow this tip is just like my write up at twinturbo.net with the 300z tail lights. I just got my GS, and I am sure I will be able to do this one too. Thanks for the write ups, as they are always great to have.