DIY Rear Suspension Removal and Installation
 04-15-07, 10:52 PM
#1
Pole Position
Thread Starter

Join Date: Feb 2007
Location: CA
Posts: 208
Likes: 0
Received 0 Likes
on
0 Posts
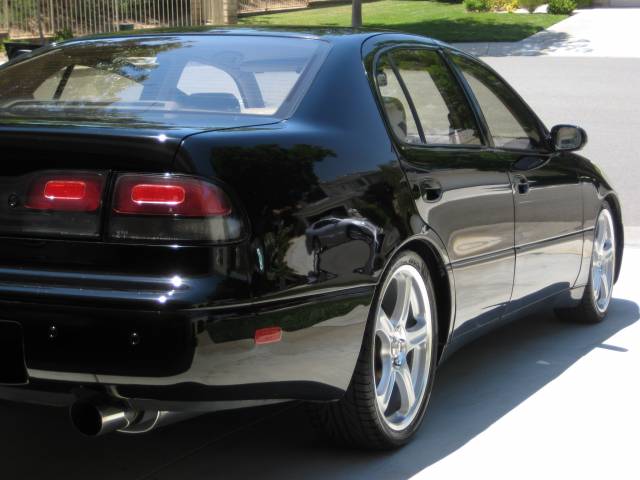
Here is what I did for the rear suspension remove and install. I replaced my stock original shocks and springs with KYB GR2 shocks and RSR lowering springs. They lowered about 1 3/4 inches.
If you are interested in the front suspension install, see my other post here:
https://www.clublexus.com/forums/sho...d.php?t=275482
You will need a spring compressor, ratchet set, wrench set, door panel puller, torque wrench and an optional impact wrench.
Remember to have your alignment checked after doing suspension work.
I followed the Lexus service manual with the exception of the brake caliper, which the manual said to remove but I did not. You'll see pictures of how I got the shock out without taking off the calipers.
Lets begin...
REMOVAL
1. REMOVE LUGGAGE COMPARTMENT TRIM FRONT
COVER AND FLOOR MAT

Use a panel removal tool and pry off the 4 fasteners on top.

Remove the trunk mat and pry off the fasteners at the bottom.

Here's what's behind the luggage compartment trim.

2. REMOVE REAR WHEEL Torque: 103 N·m (1,050 kgf·cm, 76 ft·lbf)
Jack up the car at the rear cross member (do not lift by the differential near it)

Support both sides with jack stands at the jack points listed in the owner's manual

3. REMOVE REAR BRAKE CALIPER (I DID NOT DO THIS, though it is easier to get the shock out of the wheel well without the caliper)
(a) Remove the 2 bolts and brake caliper from the rear axle
carrier.
Torque: 104 N·m (1,065 kgf·cm, 77 ft·lbf)
(b) Support the brake caliper securely.
4. DISCONNECT REAR STABILIZER BAR LINK
Remove the nut and disconnect the stabilizer bar link from the
No.2 lower suspension arm.
Torque: 44 N·m (450 kgf·cm, 33 ft·lbf)

5. REMOVE SHOCK ABSORBER WITH COIL SPRING
(a) Remove the nut and bolt on the lower side of the shock
absorber.
Torque: 137 N·m (1,400 kgf·cm, 101 ft·lbf)
HINT:
At the time of installation, after stabilizing the suspension,
torque the nut.

If you are interested in the front suspension install, see my other post here:
https://www.clublexus.com/forums/sho...d.php?t=275482
You will need a spring compressor, ratchet set, wrench set, door panel puller, torque wrench and an optional impact wrench.
Remember to have your alignment checked after doing suspension work.
I followed the Lexus service manual with the exception of the brake caliper, which the manual said to remove but I did not. You'll see pictures of how I got the shock out without taking off the calipers.
Lets begin...
REMOVAL
1. REMOVE LUGGAGE COMPARTMENT TRIM FRONT
COVER AND FLOOR MAT
Use a panel removal tool and pry off the 4 fasteners on top.
Remove the trunk mat and pry off the fasteners at the bottom.
Here's what's behind the luggage compartment trim.
2. REMOVE REAR WHEEL Torque: 103 N·m (1,050 kgf·cm, 76 ft·lbf)
Jack up the car at the rear cross member (do not lift by the differential near it)
Support both sides with jack stands at the jack points listed in the owner's manual
3. REMOVE REAR BRAKE CALIPER (I DID NOT DO THIS, though it is easier to get the shock out of the wheel well without the caliper)
(a) Remove the 2 bolts and brake caliper from the rear axle
carrier.
Torque: 104 N·m (1,065 kgf·cm, 77 ft·lbf)
(b) Support the brake caliper securely.
4. DISCONNECT REAR STABILIZER BAR LINK
Remove the nut and disconnect the stabilizer bar link from the
No.2 lower suspension arm.
Torque: 44 N·m (450 kgf·cm, 33 ft·lbf)
5. REMOVE SHOCK ABSORBER WITH COIL SPRING
(a) Remove the nut and bolt on the lower side of the shock
absorber.
Torque: 137 N·m (1,400 kgf·cm, 101 ft·lbf)
HINT:
At the time of installation, after stabilizing the suspension,
torque the nut.
Last edited by phollero; 04-15-07 at 11:25 PM. Reason: Additional information.
 04-15-07, 10:59 PM
#2
Pole Position
Thread Starter
Join Date: Feb 2007
Location: CA
Posts: 208
Likes: 0
Received 0 Likes
on
0 Posts
(b) Loosen the nut in the middle of the suspension support.
NOTICE:
Do not remove it.
Torque: 27 N�m (280 kgf�cm, 20 ft�lbf)

(c) Remove the 3 nuts

(d) Remove suspension support seat and shock
absorber with the coil spring.
Torque: 27 N�m (280 kgf�cm, 20 ft�lbf)
Push the wheel hub down and pull the shock spring assembly out like this. If you removed the caliper, you will have an easier time getting it out.


Make note of how the 3 screws at the top of the shock mount are oriented in relation to the shock.

NOTICE:
Do not remove it.
Torque: 27 N�m (280 kgf�cm, 20 ft�lbf)
(c) Remove the 3 nuts
(d) Remove suspension support seat and shock
absorber with the coil spring.
Torque: 27 N�m (280 kgf�cm, 20 ft�lbf)
Push the wheel hub down and pull the shock spring assembly out like this. If you removed the caliper, you will have an easier time getting it out.
Make note of how the 3 screws at the top of the shock mount are oriented in relation to the shock.
04-15-07, 11:05 PM
#3
Pole Position
Thread Starter
Join Date: Feb 2007
Location: CA
Posts: 208
Likes: 0
Received 0 Likes
on
0 Posts
After compressing the spring with spring compressors, remove the piston rod lock nut.

Remove the shock mount. If it is stuck, use a rubber mallet to gently tap it off.


Remove the shock boot (insulator)

Upon inspection, see mine is coming apart. I used a hot glue gun and electrical tape to repair it.

Remove the spring from the shock.

Remove the shock mount. If it is stuck, use a rubber mallet to gently tap it off.
Remove the shock boot (insulator)
Upon inspection, see mine is coming apart. I used a hot glue gun and electrical tape to repair it.
Remove the spring from the shock.
04-15-07, 11:14 PM
#4
Pole Position
Thread Starter
Join Date: Feb 2007
Location: CA
Posts: 208
Likes: 0
Received 0 Likes
on
0 Posts
Here is a comparison of the old and new shocks.

Comparison of old and new springs.

REASSEMBLY
INSTALL SUSPENSION SUPPORT AND COIL SPRING
(a) Install the lower insulator to the shock absorber.
(b) Install the spring bumper sub–assembly to the suspension
support.
(c) Using spring compressor, compress the coil spring.
(d) Install the coil spring to the shock absorber.
HINT:
Fit the lower end of the coil spring into the recess of the spring
seat of the shock absorber.
(e) Install the suspension support to the rod and temporarily
tighten a new nut.
(f) Rotate the suspension support so that the rod and 1 of the
bolts on suspension support are aligned with the lower
bracket.
(g) Remove the spring compressor
HINT:
Recheck the direction of the suspension
support.


Here is the new shock-spring assembly installed by just reversing the instructions above.
AFTER

BEFORE

Remember to torque all nuts and bolts to the specifications mentioned.

That's it. Good luck.
TOTAL TIME: 4 Hours
1 hour preparation, 1 hour per wheel, 1 hour cleanup/double checking work.
Comparison of old and new springs.
REASSEMBLY
INSTALL SUSPENSION SUPPORT AND COIL SPRING
(a) Install the lower insulator to the shock absorber.
(b) Install the spring bumper sub–assembly to the suspension
support.
(c) Using spring compressor, compress the coil spring.
(d) Install the coil spring to the shock absorber.
HINT:
Fit the lower end of the coil spring into the recess of the spring
seat of the shock absorber.
(e) Install the suspension support to the rod and temporarily
tighten a new nut.
(f) Rotate the suspension support so that the rod and 1 of the
bolts on suspension support are aligned with the lower
bracket.
(g) Remove the spring compressor
HINT:
Recheck the direction of the suspension
support.
Here is the new shock-spring assembly installed by just reversing the instructions above.
AFTER
BEFORE
Remember to torque all nuts and bolts to the specifications mentioned.
That's it. Good luck.
TOTAL TIME: 4 Hours
1 hour preparation, 1 hour per wheel, 1 hour cleanup/double checking work.
Last edited by phollero; 04-15-07 at 11:18 PM.


Trending Topics
08-20-07, 11:00 AM
#8
Pole Position

Join Date: Nov 2005
Location: MA
Posts: 229
Likes: 0
Received 0 Likes
on
0 Posts
guys, on step # 4 where you disconnect the rear stabilizer bar link (at the lower nut), what did you do to hold the whole assembly still? when I turn the nut, the bolt is spinning as well, despite liberal application of PB Blaster. I am trying to hold thing thing still with some vise grips, c-clamps etc. but not a lot of luck.
I noticed the fastener originally had a tab on it so the whole assembly would stay still. But mine, with 140k miles on it, is very delicate, and is bending.
Any advice?
I noticed the fastener originally had a tab on it so the whole assembly would stay still. But mine, with 140k miles on it, is very delicate, and is bending.
Any advice?
 08-21-07, 04:31 AM
#11
Rookie

Join Date: Nov 2003
Location: International
Posts: 70
Likes: 0
Received 0 Likes
on
0 Posts
guys, on step # 4 where you disconnect the rear stabilizer bar link (at the lower nut), what did you do to hold the whole assembly still? when I turn the nut, the bolt is spinning as well, despite liberal application of PB Blaster. I am trying to hold thing thing still with some vise grips, c-clamps etc. but not a lot of luck.
I noticed the fastener originally had a tab on it so the whole assembly would stay still. But mine, with 140k miles on it, is very delicate, and is bending.
Any advice?
I noticed the fastener originally had a tab on it so the whole assembly would stay still. But mine, with 140k miles on it, is very delicate, and is bending.
Any advice?
Best thing to do it get a friend with a long bar, place the end of the bar under the chassis and then one bit of the bar on top of the rear caliper. Then just simply push down far enough until you can get the strut out. Thats what i did on both side of my car, no negative effects and nothing went bang either.
Basically, your looking at prising it apart enought to get the strut out.
Hope that helps.
08-22-07, 12:56 AM
#13
Pole Position
Thread Starter
Join Date: Feb 2007
Location: CA
Posts: 208
Likes: 0
Received 0 Likes
on
0 Posts