DIY Rear Door Lock Actuator
 06-15-13, 08:32 PM
#1
Driver School Candidate
Thread Starter

My rear passenger side door would not lock or unlock using the remote. I saw it kind of try to work but it wouldn't fully engage, tall tale sign of a weak or broken actuator.
I had a tough time finding anything on a rear door for a 97-01 ES300, not even in the factory service manual for some reason, only had details for the front door.
Here is a DIY on my 01. The actuator can be had for about $120 new, I found one in the junkyard for $25. You could try and replace the motor like i've seen done on the GS threads but i didn't want to bother with that. It's a simple process that took me less than 30mins first time with no instructions so if it dies again, i'll just find another one in the junkyard. Harbor Freight 5 piece auto trim removal tools really helped not scratch up the interior.
Do this at your own risk, i'm not responsible for anything that happens when you try this.
1) First take off the inside door handle TRIM. You will need to take a small flathead screwdriver and pry open the little door that is hiding the screw. Once opened, take the screw off. You'll need to then pry on the outer corner of the handle trim toward the rear of the vehicle. Then pull that same direction and it should pop out. This was probably the hardest part of it all.


2) Stick a pry tool or flathead screwdriver under the window control panel trim and it should pop right out. Unplug it. There is another screw in there. Take that off.

3) Then take your pry tool and start pulling the door panel off. Lift up and out.

4) Take off the plastic sheet that is covering everything.


5) You will see a small red plastic holding a metal bar, you'll stick a small flathead in there to release it from the bar. Becarful, you don't want to break that small clip. Once you release it, the bar will pull right off.


8) Remove 10mm screw bolt, and 3 torque (T30) screws on side. The actuator can be shifted down now so you can do the next step.

9) Then you will need to remove the yellow clip inside that holds the actuator. This part is tricky, you can reach your hand in through the hole and stick a screwdriver in from the back small hole where the 3 torque screws were.

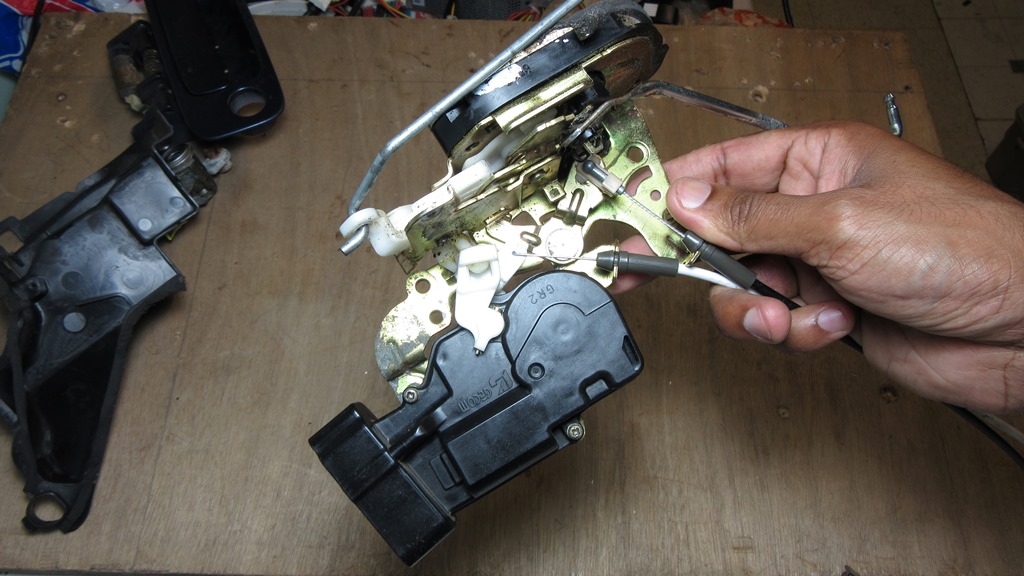
10) Unplug the actuator and it should pull right out. Replace with working one, and install in reverse.

I had a tough time finding anything on a rear door for a 97-01 ES300, not even in the factory service manual for some reason, only had details for the front door.
Here is a DIY on my 01. The actuator can be had for about $120 new, I found one in the junkyard for $25. You could try and replace the motor like i've seen done on the GS threads but i didn't want to bother with that. It's a simple process that took me less than 30mins first time with no instructions so if it dies again, i'll just find another one in the junkyard. Harbor Freight 5 piece auto trim removal tools really helped not scratch up the interior.
Do this at your own risk, i'm not responsible for anything that happens when you try this.
1) First take off the inside door handle TRIM. You will need to take a small flathead screwdriver and pry open the little door that is hiding the screw. Once opened, take the screw off. You'll need to then pry on the outer corner of the handle trim toward the rear of the vehicle. Then pull that same direction and it should pop out. This was probably the hardest part of it all.
2) Stick a pry tool or flathead screwdriver under the window control panel trim and it should pop right out. Unplug it. There is another screw in there. Take that off.
3) Then take your pry tool and start pulling the door panel off. Lift up and out.
4) Take off the plastic sheet that is covering everything.
5) You will see a small red plastic holding a metal bar, you'll stick a small flathead in there to release it from the bar. Becarful, you don't want to break that small clip. Once you release it, the bar will pull right off.
8) Remove 10mm screw bolt, and 3 torque (T30) screws on side. The actuator can be shifted down now so you can do the next step.
9) Then you will need to remove the yellow clip inside that holds the actuator. This part is tricky, you can reach your hand in through the hole and stick a screwdriver in from the back small hole where the 3 torque screws were.
10) Unplug the actuator and it should pull right out. Replace with working one, and install in reverse.
Last edited by afaik; 06-15-13 at 08:52 PM.


 09-01-15, 07:45 PM
#5
Lexus Champion
Just updating this thread with my power door lock actuator replacement.
My Solara's passenger side lock actuator started failing first, then the drivers side soon after. It was getting worse in hot weather. Annoying to stretch over and open the door lock manually, but at least I only have 2 doors! I'm sure the 3rd gen ES300 would be similar, since it too has frameless glass.
Here's a video on how it was done:
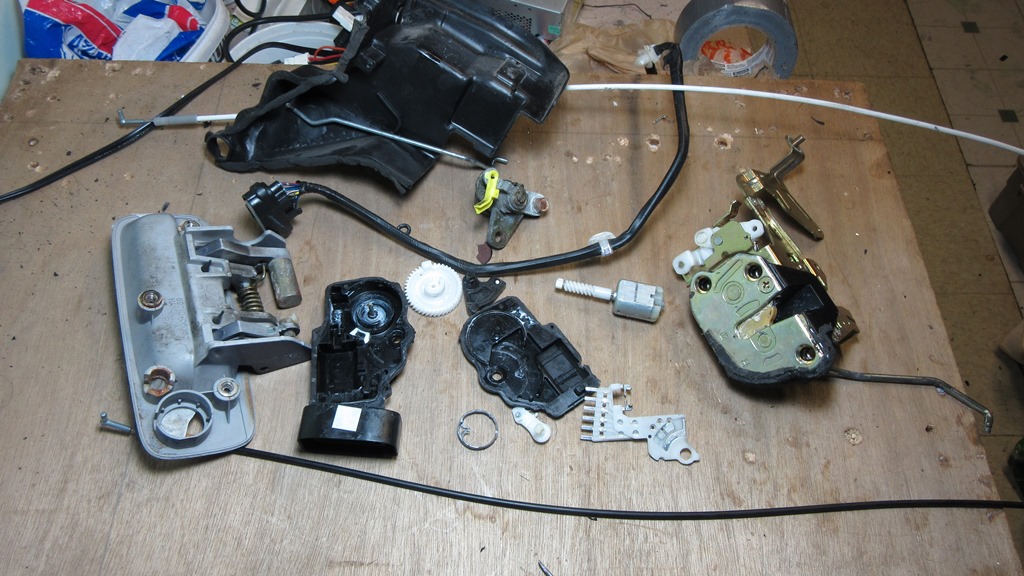
A few photos of the procedure:
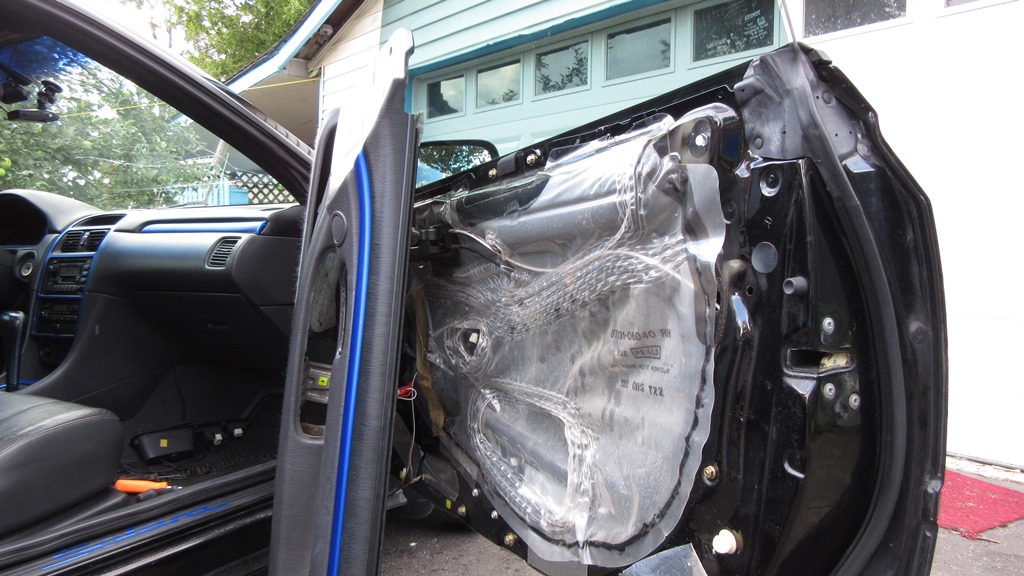
Door panel removed:
Remove the interior door handle and its cables:
Looking inside, the power door lock actuator is the black thing on the right, part of the door latch assembly:
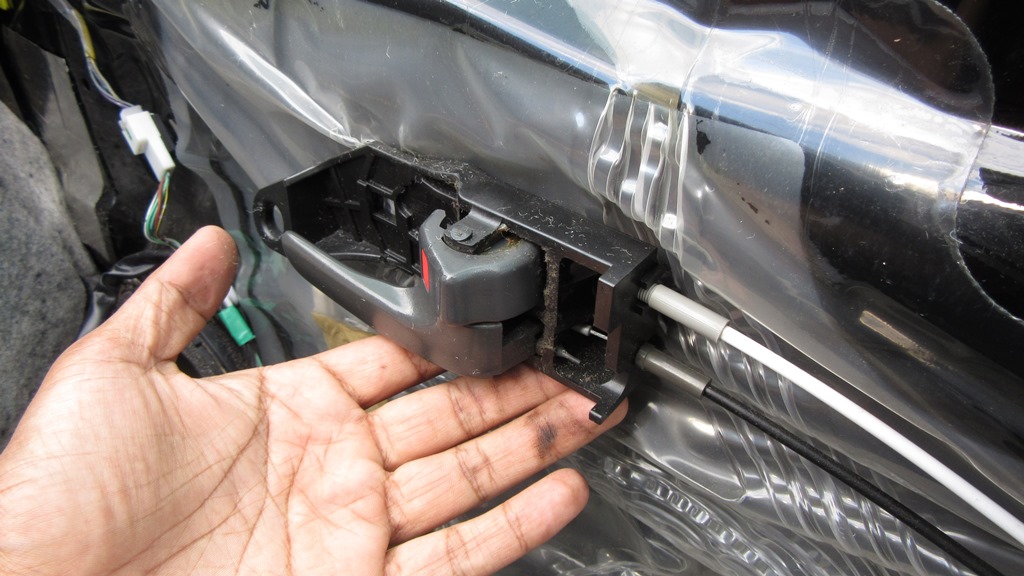
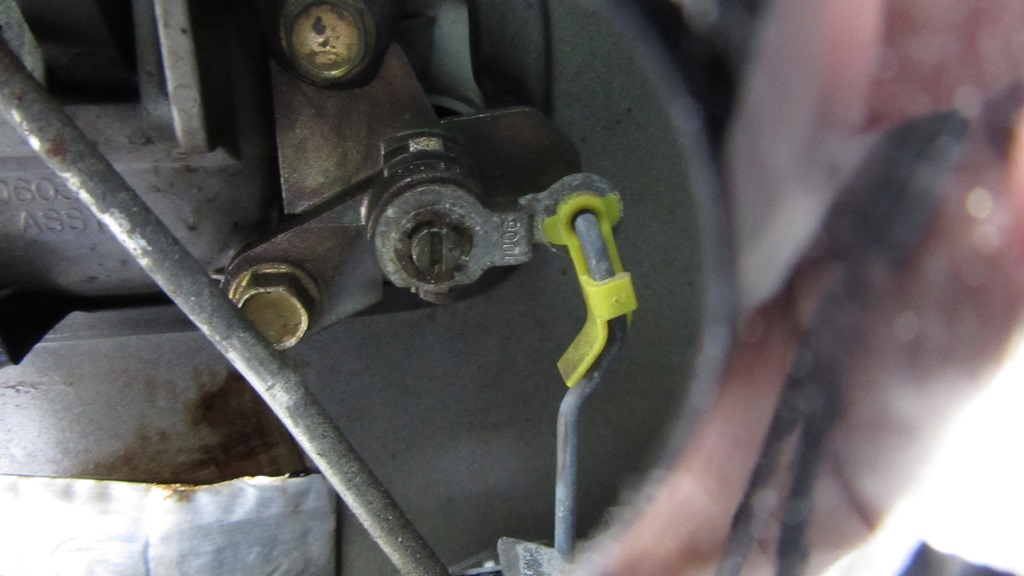
A closer look at the connections around the door handle:

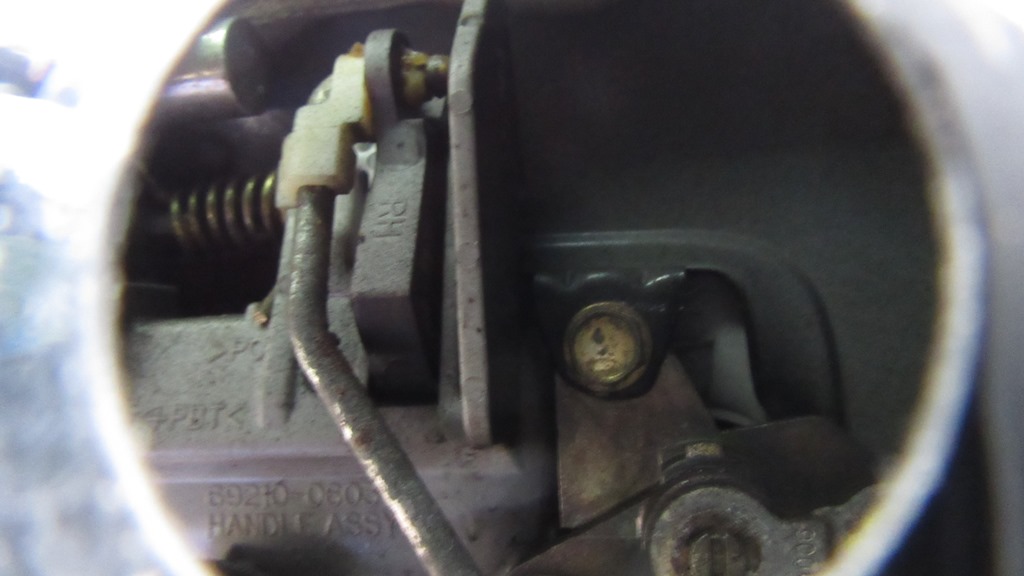
A closer look at the handle rod that needs to be removed:
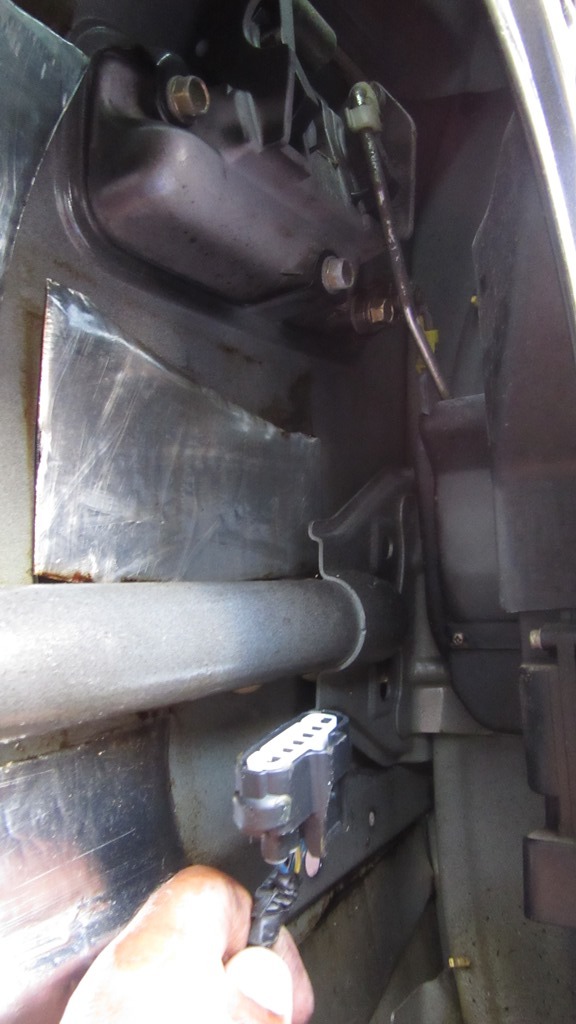
And the lock rod, looking through the access hole:
Once the door handle is removed, you can use a pliers to skin the tabs outward and pop the rod out:
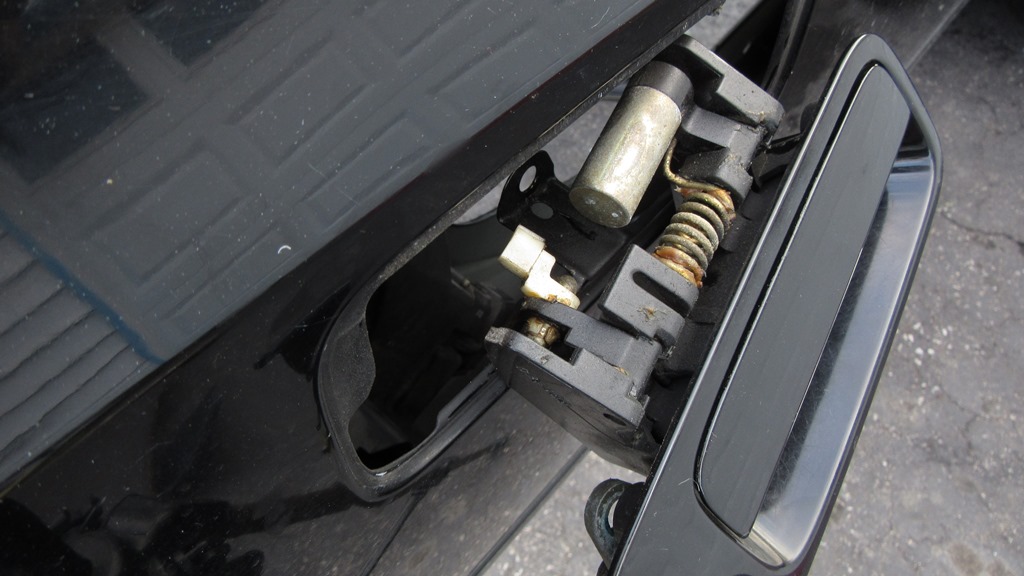
3 torx bolts and 1 10mm nut hold the latch/lock assembly to the car:
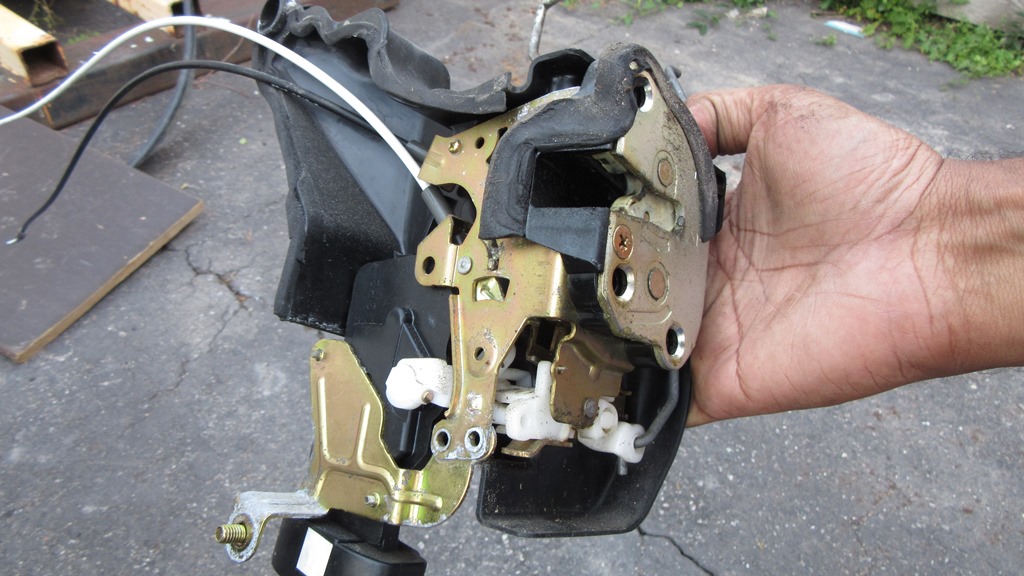
A closer look at that white plastic connector for the handle rod:
Here's the black actuator attached to the latch:
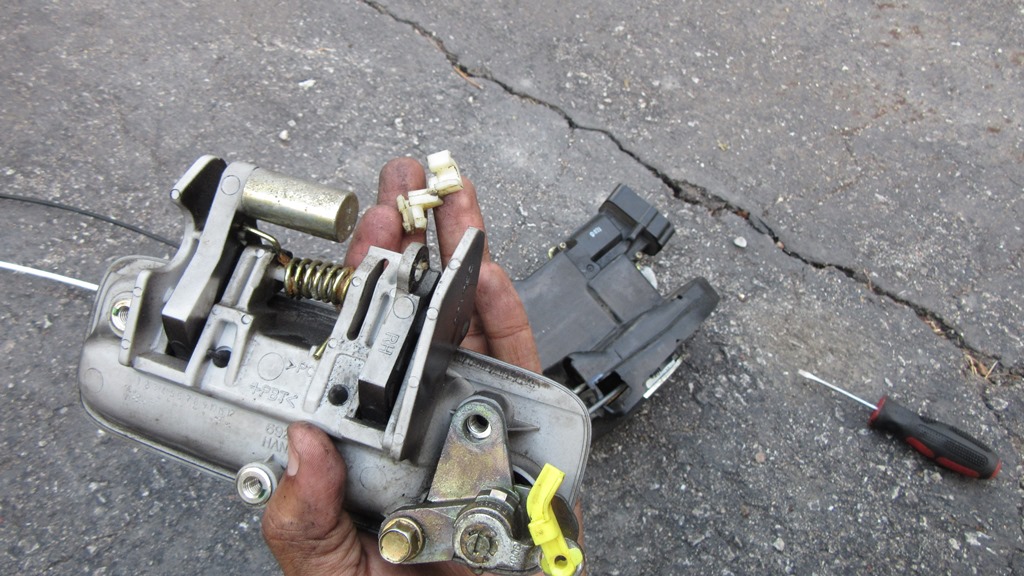
If you pry open (I used a dremel tool with a cutoff wheel) the casing you can see the internal guts of the actuator. It consists of a 12V DC motor, a spiral gear / cam, the actuator, as well as some electrical contacts for the unlock, lock and unlock detection swtiches.
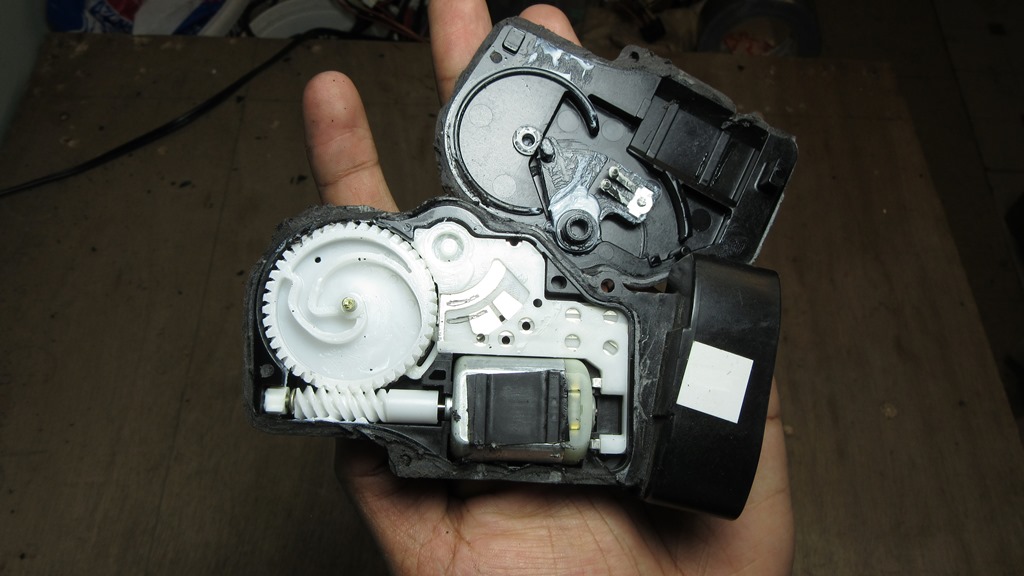
And this is pretty much what's inside the door lock actuator:
My Solara's passenger side lock actuator started failing first, then the drivers side soon after. It was getting worse in hot weather. Annoying to stretch over and open the door lock manually, but at least I only have 2 doors! I'm sure the 3rd gen ES300 would be similar, since it too has frameless glass.
Here's a video on how it was done:
A few photos of the procedure:
Door panel removed:

Remove the interior door handle and its cables:

Looking inside, the power door lock actuator is the black thing on the right, part of the door latch assembly:

A closer look at the connections around the door handle:

A closer look at the handle rod that needs to be removed:

And the lock rod, looking through the access hole:

Once the door handle is removed, you can use a pliers to skin the tabs outward and pop the rod out:

3 torx bolts and 1 10mm nut hold the latch/lock assembly to the car:

A closer look at that white plastic connector for the handle rod:

Here's the black actuator attached to the latch:

If you pry open (I used a dremel tool with a cutoff wheel) the casing you can see the internal guts of the actuator. It consists of a 12V DC motor, a spiral gear / cam, the actuator, as well as some electrical contacts for the unlock, lock and unlock detection swtiches.

And this is pretty much what's inside the door lock actuator:


Thread
Thread Starter
Forum
Replies
Last Post