DIY: 2007-2012 Lexus ES350 fuel filter change!
 09-14-15, 01:10 PM
#1
Lead Lap
Thread Starter
Here is the DIY how to change the fuel filter on a 07-12 Lexus ES350. The fuel filter is located in the fuel tank.
1. Pull of the rear seat bench and remove it from the car.
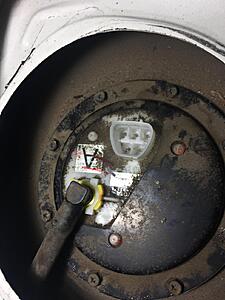
2. There you will find this. Pop up the black rubber:
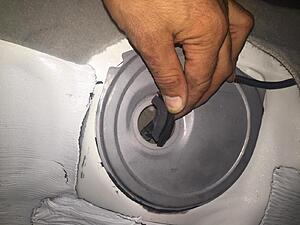
2. Take a steel knife and try to separate the cover which is glued with silicone:

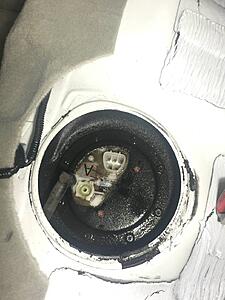
3. Under the cover there is a plug. Remove it by pressing the clip:
Now start the engine and let it run until it dies.
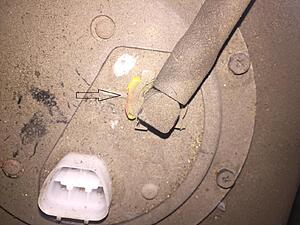
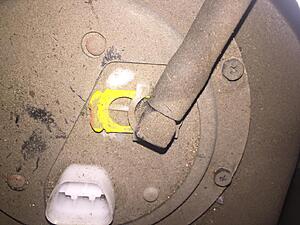
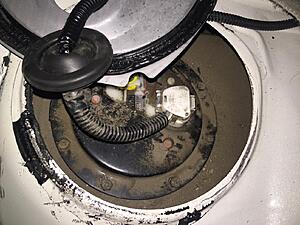
4. Now you need to remove the hose. First you need to slide the yellow clip and remove it completely:
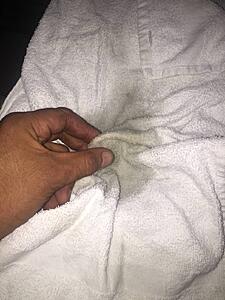
5. Put a towel over the hole, grab the hose and pull it up:

Because of the fuel pressure, some fuel may pour but the towel will "drink" it:
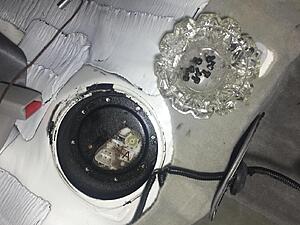
6. Remove the towel and you'll see this:
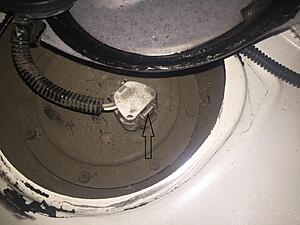
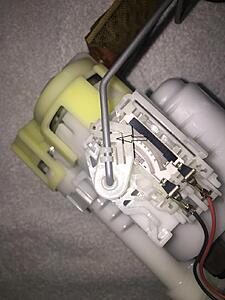
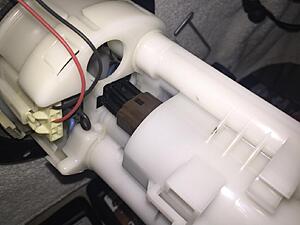
7. Now, with a 8mm socket remove all the bolts (8 of them):
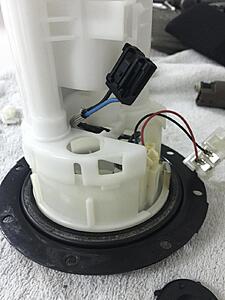
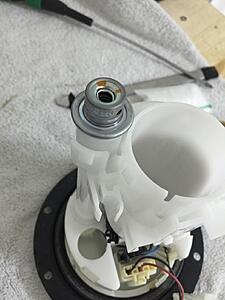
8. Pull the whole unit. Look for the fuel sender, it's on the right:

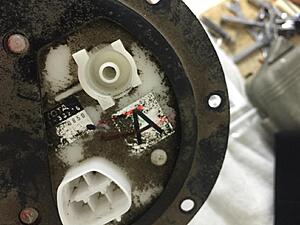
9. This is where the unit goes. It's so clean because it's sorrounded by plastic walls and the dirt and water cannot get in there:

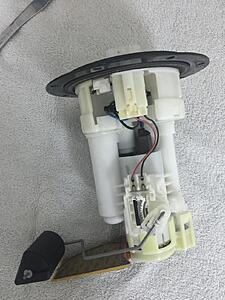
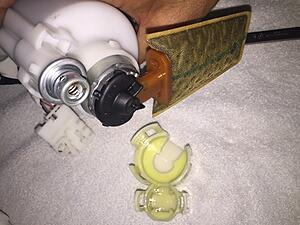
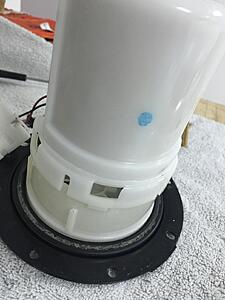
10. This is the unit:
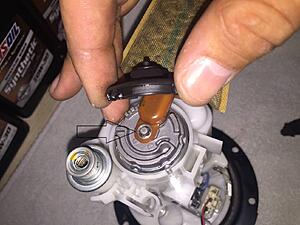
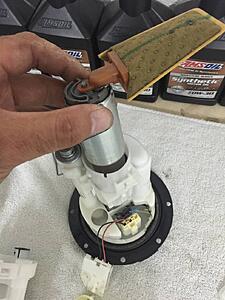
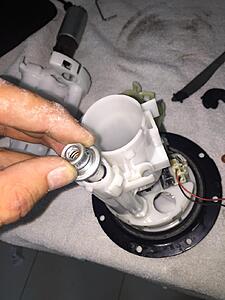
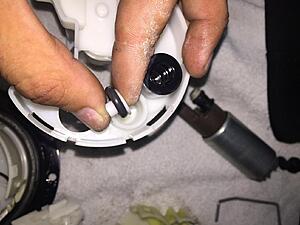
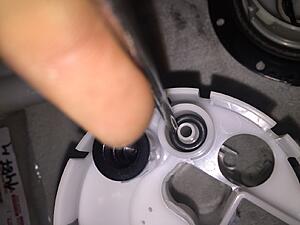
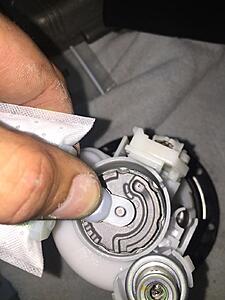
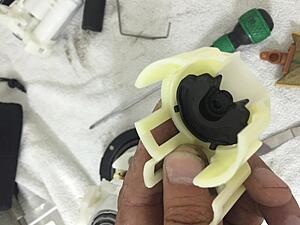
11. This is the fuel level sender or FLS. You need to remove the metal thing. Press on the white clip, turn the metal thing clockwise and pull:
12. Now, you have to remove the FLS. Just press it down:
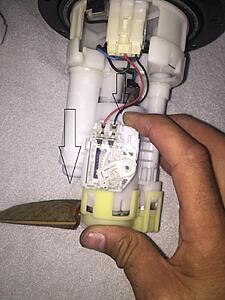
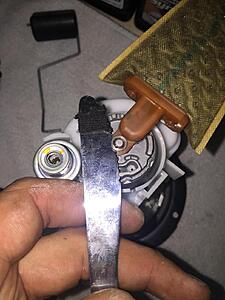
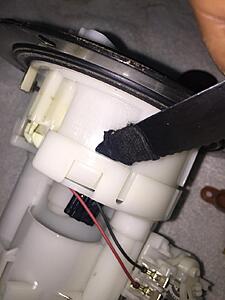
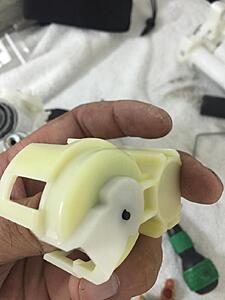
13. This plastic holds the pump. Remove it, start with this holder:
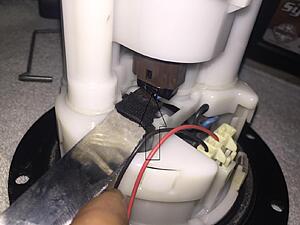
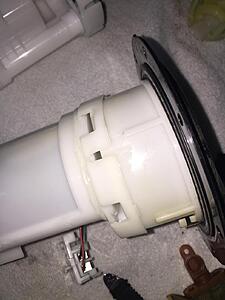
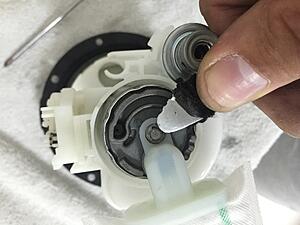
14.Remove this piece of rubber and underneath it you will see the fuse that holds the FUEL STRAINER:
15. Take the knife and remove it:
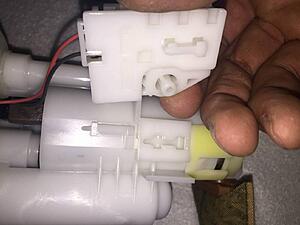
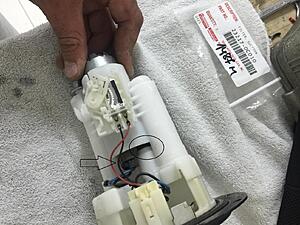
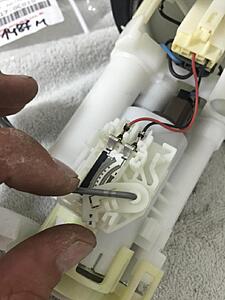
16. Remove the fuel pump connector, press the clip and separate it from the plug:
17. Remove the pump. Just pull:
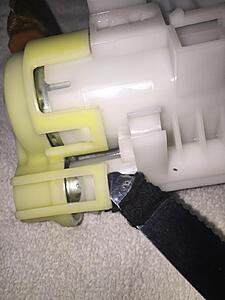
18. The pump and the gasket:

19. Remove the strainer:
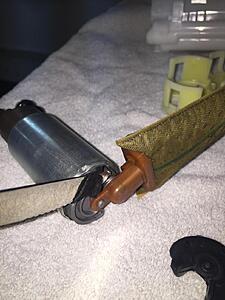
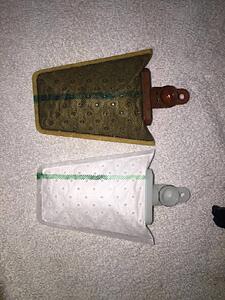
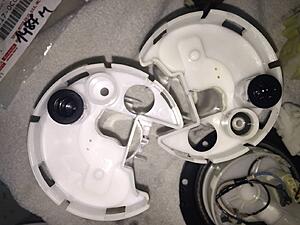
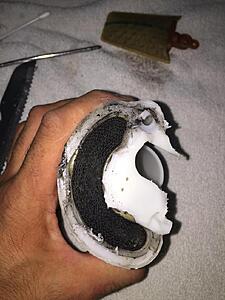
New vs. old:
1. Pull of the rear seat bench and remove it from the car.
2. There you will find this. Pop up the black rubber:

2. Take a steel knife and try to separate the cover which is glued with silicone:

3. Under the cover there is a plug. Remove it by pressing the clip:

Now start the engine and let it run until it dies.
4. Now you need to remove the hose. First you need to slide the yellow clip and remove it completely:


5. Put a towel over the hole, grab the hose and pull it up:

Because of the fuel pressure, some fuel may pour but the towel will "drink" it:

6. Remove the towel and you'll see this:

7. Now, with a 8mm socket remove all the bolts (8 of them):

8. Pull the whole unit. Look for the fuel sender, it's on the right:
9. This is where the unit goes. It's so clean because it's sorrounded by plastic walls and the dirt and water cannot get in there:
10. This is the unit:

11. This is the fuel level sender or FLS. You need to remove the metal thing. Press on the white clip, turn the metal thing clockwise and pull:

12. Now, you have to remove the FLS. Just press it down:


13. This plastic holds the pump. Remove it, start with this holder:


14.Remove this piece of rubber and underneath it you will see the fuse that holds the FUEL STRAINER:

15. Take the knife and remove it:

16. Remove the fuel pump connector, press the clip and separate it from the plug:


17. Remove the pump. Just pull:

18. The pump and the gasket:

19. Remove the strainer:

New vs. old:

Last edited by ESh; 10-04-15 at 05:38 AM.
 09-14-15, 01:11 PM
#2
Lead Lap
Thread Starter
20. Remove the fuel pressure regulator, just pull:
21. Separation:
New vs. old:
22. Take the FPR gasket from the old filter and put it on the new one:
Press it down with the screwdriver:
23. Now, the marriage. Align all the holders and press it down. Before you press it down, you have to make sure the fuel pump wires are placed on the right place:
24. Put the FPR back in, just press it:
25. Put the strainer on the right place and press it hard down:
26. Put the strainer fuse and press it:
27. Now, the pump. Align it with the wires, plug the connector and press it down:
28. Put the rubber thing in the holder and put them back:
29. Put the metal thing in the hole and turn it anti clockwise:
30. Clean the place where the hose goes, clean it with Q-tips:
31. Put it back in the tank, return all 8 bolts, put the hose, the fuse and the connector:
32. Cover the hole with a towel and start the engine. It will crank much longer than normal and it will run rough until it builds up the fuel pressure:
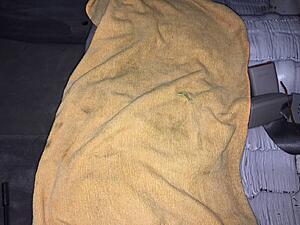
While it runs take a look at the towel, just in case if there's fuel leak.
Put the cover back, press it hard, put the rubber, the seat bench and call it a day.
33. This is how the filter look like:
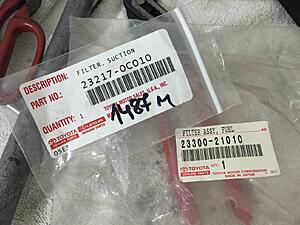
34. Part numbers:

21. Separation:


New vs. old:

22. Take the FPR gasket from the old filter and put it on the new one:

Press it down with the screwdriver:

23. Now, the marriage. Align all the holders and press it down. Before you press it down, you have to make sure the fuel pump wires are placed on the right place:


24. Put the FPR back in, just press it:

25. Put the strainer on the right place and press it hard down:

26. Put the strainer fuse and press it:

27. Now, the pump. Align it with the wires, plug the connector and press it down:

28. Put the rubber thing in the holder and put them back:


29. Put the metal thing in the hole and turn it anti clockwise:

30. Clean the place where the hose goes, clean it with Q-tips:

31. Put it back in the tank, return all 8 bolts, put the hose, the fuse and the connector:


32. Cover the hole with a towel and start the engine. It will crank much longer than normal and it will run rough until it builds up the fuel pressure:

While it runs take a look at the towel, just in case if there's fuel leak.
Put the cover back, press it hard, put the rubber, the seat bench and call it a day.
33. This is how the filter look like:

34. Part numbers:

Last edited by ESh; 09-15-15 at 03:37 PM.
09-15-15, 01:21 AM
#4
Lead Lap
Thread Starter
No, everything was OK with the car. The filter is small and I think 65000 miles is really enough on original filter.
09-16-15, 11:05 AM
#5
First off, this is a great tutorial on how to do this from start to finish. Thank you very much for putting this together. Believe it or not, my car has over 150,000 miles and i don't think i have done that ever.
Quick validation question, is the fuel pump part of the same assembly? I am assuming that if my fuel pump ever goes out, i can follow your step to change it. But either case, it is a good idea to swap out the fuel filter since there is a finite life on it.
How long did it take you to do this from start to finish?
09-16-15, 02:00 PM
#6
Lead Lap
Thread Starter
Yes, you can use this tutorial to replace the pump since it is part od the unit.
I would change the filter ASAP. 150000 is too much on factory filter, because it is too small.
I think it took me about 1 hour 30 minutes, but I lost so much time taking pictures.
I would change the filter ASAP. 150000 is too much on factory filter, because it is too small.
I think it took me about 1 hour 30 minutes, but I lost so much time taking pictures.
09-21-15, 08:37 PM
#7
Driver School Candidate

Join Date: Jun 2015
Location: tx
Posts: 12
Likes: 0
Received 0 Likes
on
0 Posts
How much trouble was removing the rear bench? Once it was put back did it feel 'the same'?
Thanks again!
Trending Topics
09-22-15, 12:51 AM
#8
Lead Lap
Thread Starter
12-30-16, 12:41 PM
#9
Driver School Candidate

Thank You so much for this detailed work. It's invaluable to amateurs like me. So much money will be saved from the stealerships.
Your effort is not wasted.
Your effort is not wasted.
Last edited by kinny; 12-30-16 at 12:43 PM. Reason: addition
 05-12-18, 04:01 PM
#12

Nicely done. I have over 200K and no fuel issues, yet. Never even done a fuel injection service. Every other oil change I run back-to-back bottles of Lucas or Techron injector cleaners. At the moment I'm more concerned about replacing the water pump. Will certainly keep this bookmarked. Thanks.
05-13-18, 06:58 PM
#13
i have 197k on mine now never had the Fuel filter changed i do get fuel service done every 70k usually and run a bottle of techron every 10k and get about 28mpg steady on highway trips the way i figure this number out is by not trusting the computer readout i fill tank jump on highway continue my road trips and then fill up again when the dash says im at 1/4 tank of fuel left and then i take the miles dirrent by the gallons pumped and their i have my fuel MPG i also am rounding down i have in the past had times where i got as high as 31mpg using this method but usualy on 75% of the trips i take ill get 28.4 is what my math comes out to.
The following users liked this post:
NdYAG (04-17-20)

Thread
Thread Starter
Forum
Replies
Last Post
sc4doubleO
Performance & Maintenance
32
11-09-18 11:06 AM
swhockey98
ES - 1st to 4th Gen (1990-2006)
8
03-23-15 08:35 AM