When you click on links to various merchants on this site and make a purchase, this can result in this site earning a commission. Affiliate programs and affiliations include, but are not limited to, the eBay Partner Network.
I just did the 180k mile service on my 02 ES300, in my garage with basic tools. This is ABSOLUTELY something anyone with basic mechanical knowledge can do. If you can change your spark plugs and coils, you can do this. I didn't take very many pix, but here is the run-down:
Step-by-step guide.
Put car in garage, close all doors and turn on A/C in garage (its hot).
Grab cold coke (sub in beer if you partake).
Put front of car on jackstands. It isn't necessary to do both sides, but it is helpful.
Remove underpinnings and covers from under car (10mm screws)
Drain coolant.
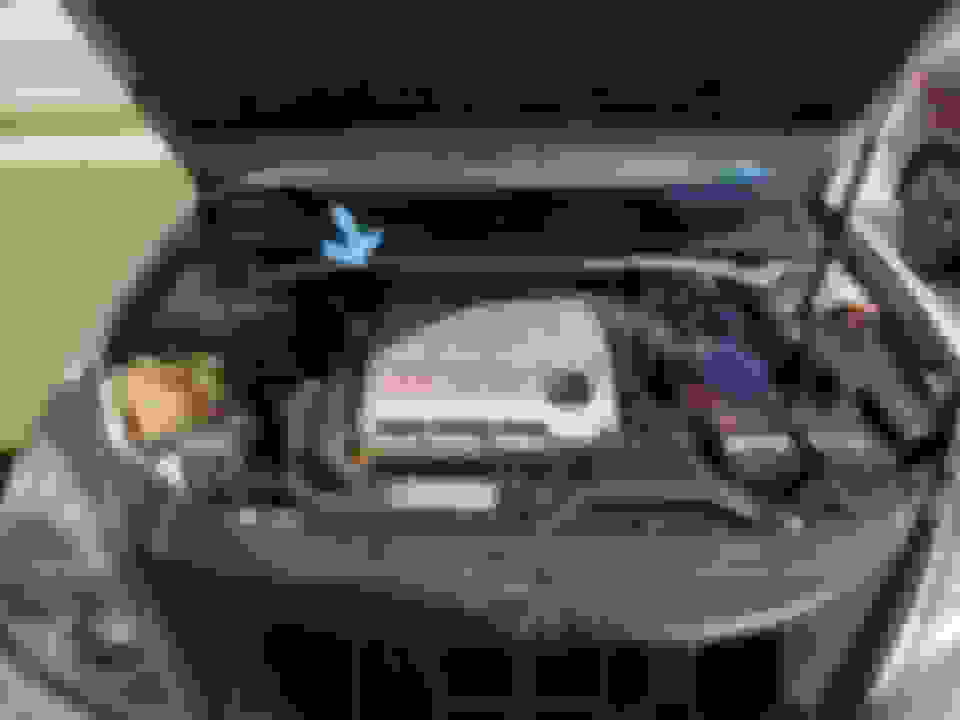
Remove strut tower brace.
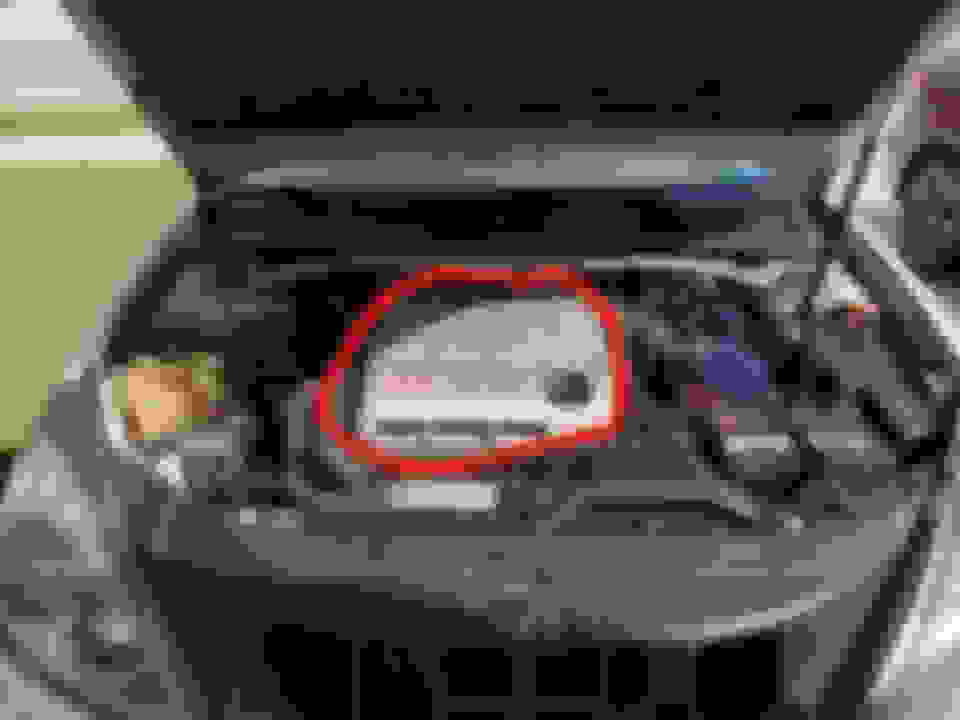
7. Remove engine cover:
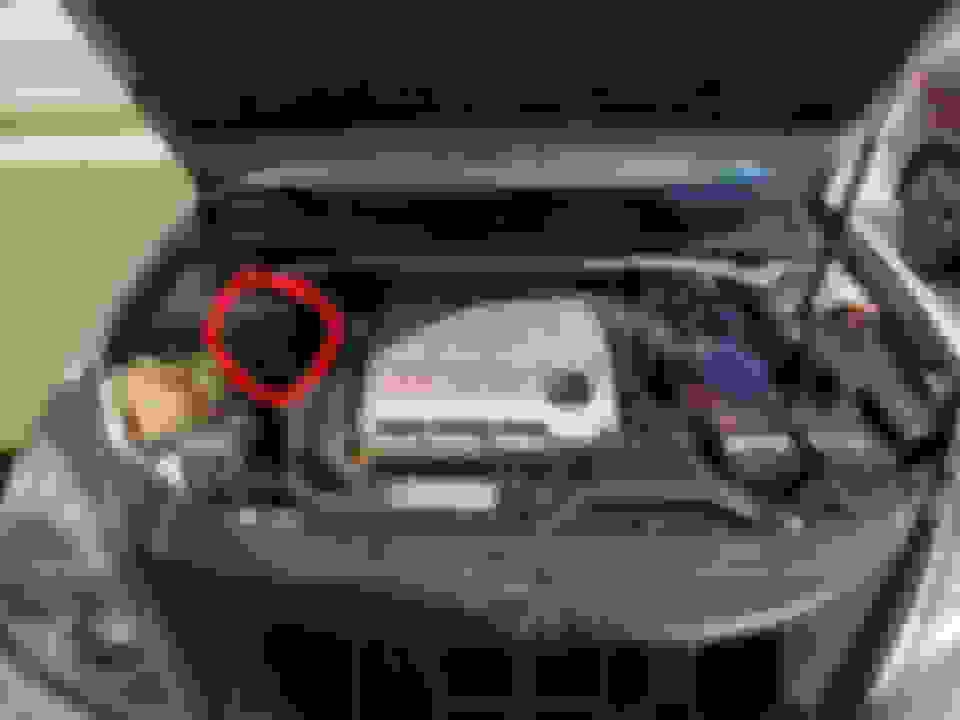
8. Remove Upper radiator hose:
9. Remove upper right side engine mount:
10. Remove serpentine belt.
11. Remove power steering belt.
12. Remove crank pulley (You will need a puller for this, you can borrow from autozone or O'Reilly's if need be, I bought mine at HF for $15.
13. Remove upper timing cover:
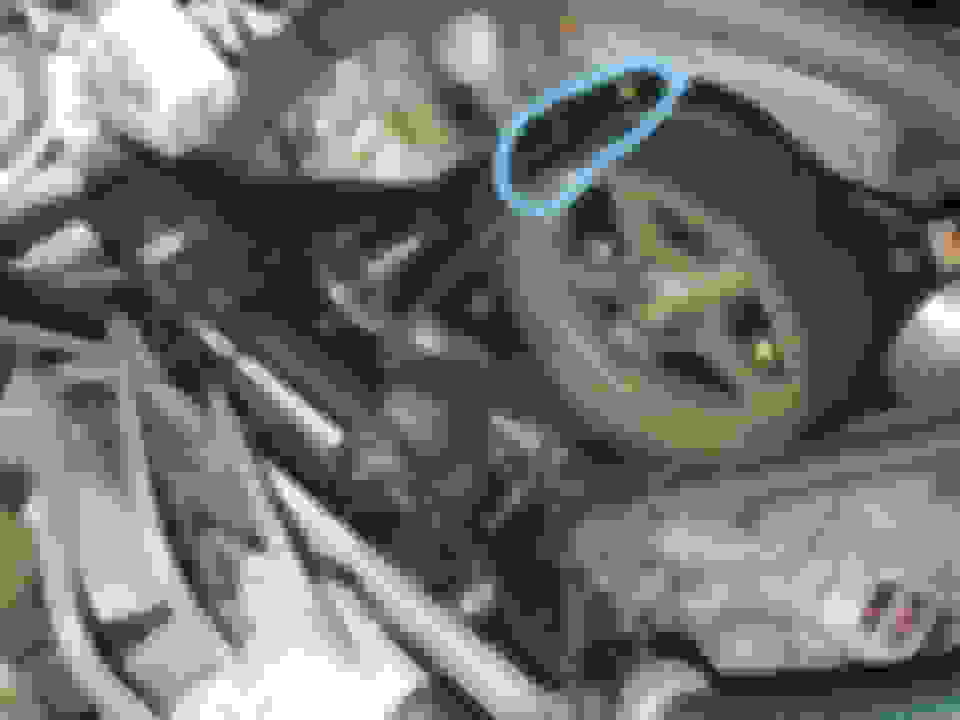
14. Remove lower timing cover (this is what you should see):
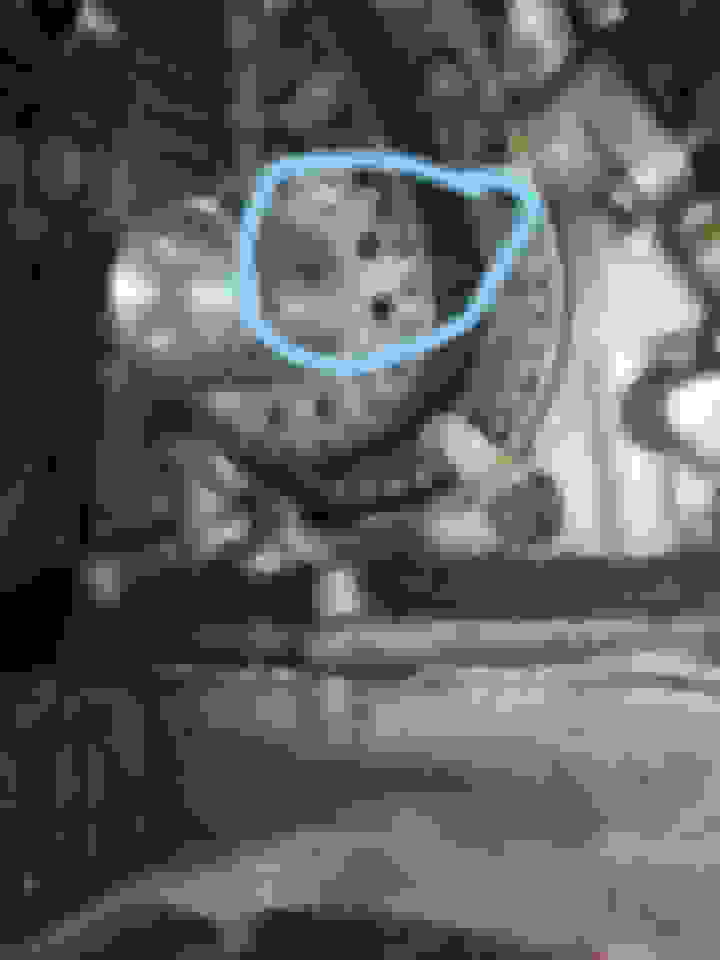
15. re-install bolt back into crank, and rotate engine assembly by hand with a ratchet until you can see the timing marks on the cam gears:
These next steps are VERY IMPORTANT. If you do not follow them exactly, you WILL damage your engine internals, resulting in a rebuild.
DO NOT MOVE ANY OF THE PULLEYS OR GEARS at this point. As long as you don't move either the cam gears, or the crankshaft, and you line up the timing marks with the new belt, everything will work as its supposed too. Don't get too concerned with what position the engine is in (Top Dead Center, etc), because it doesn't matter. Whatever position the engine was in when you removed the belt, it will still be in when you replace it. If (when you are reinstalling the belt) one of the gears slips and rotates one direction or the other (it can sometimes happen), it will only rotate about 90 degrees. Just grab your ratchet and rotate it back to where you had it. As any internal combustion engine is basically just an air compressor, there will be resistance when rotating the assembly by hand.
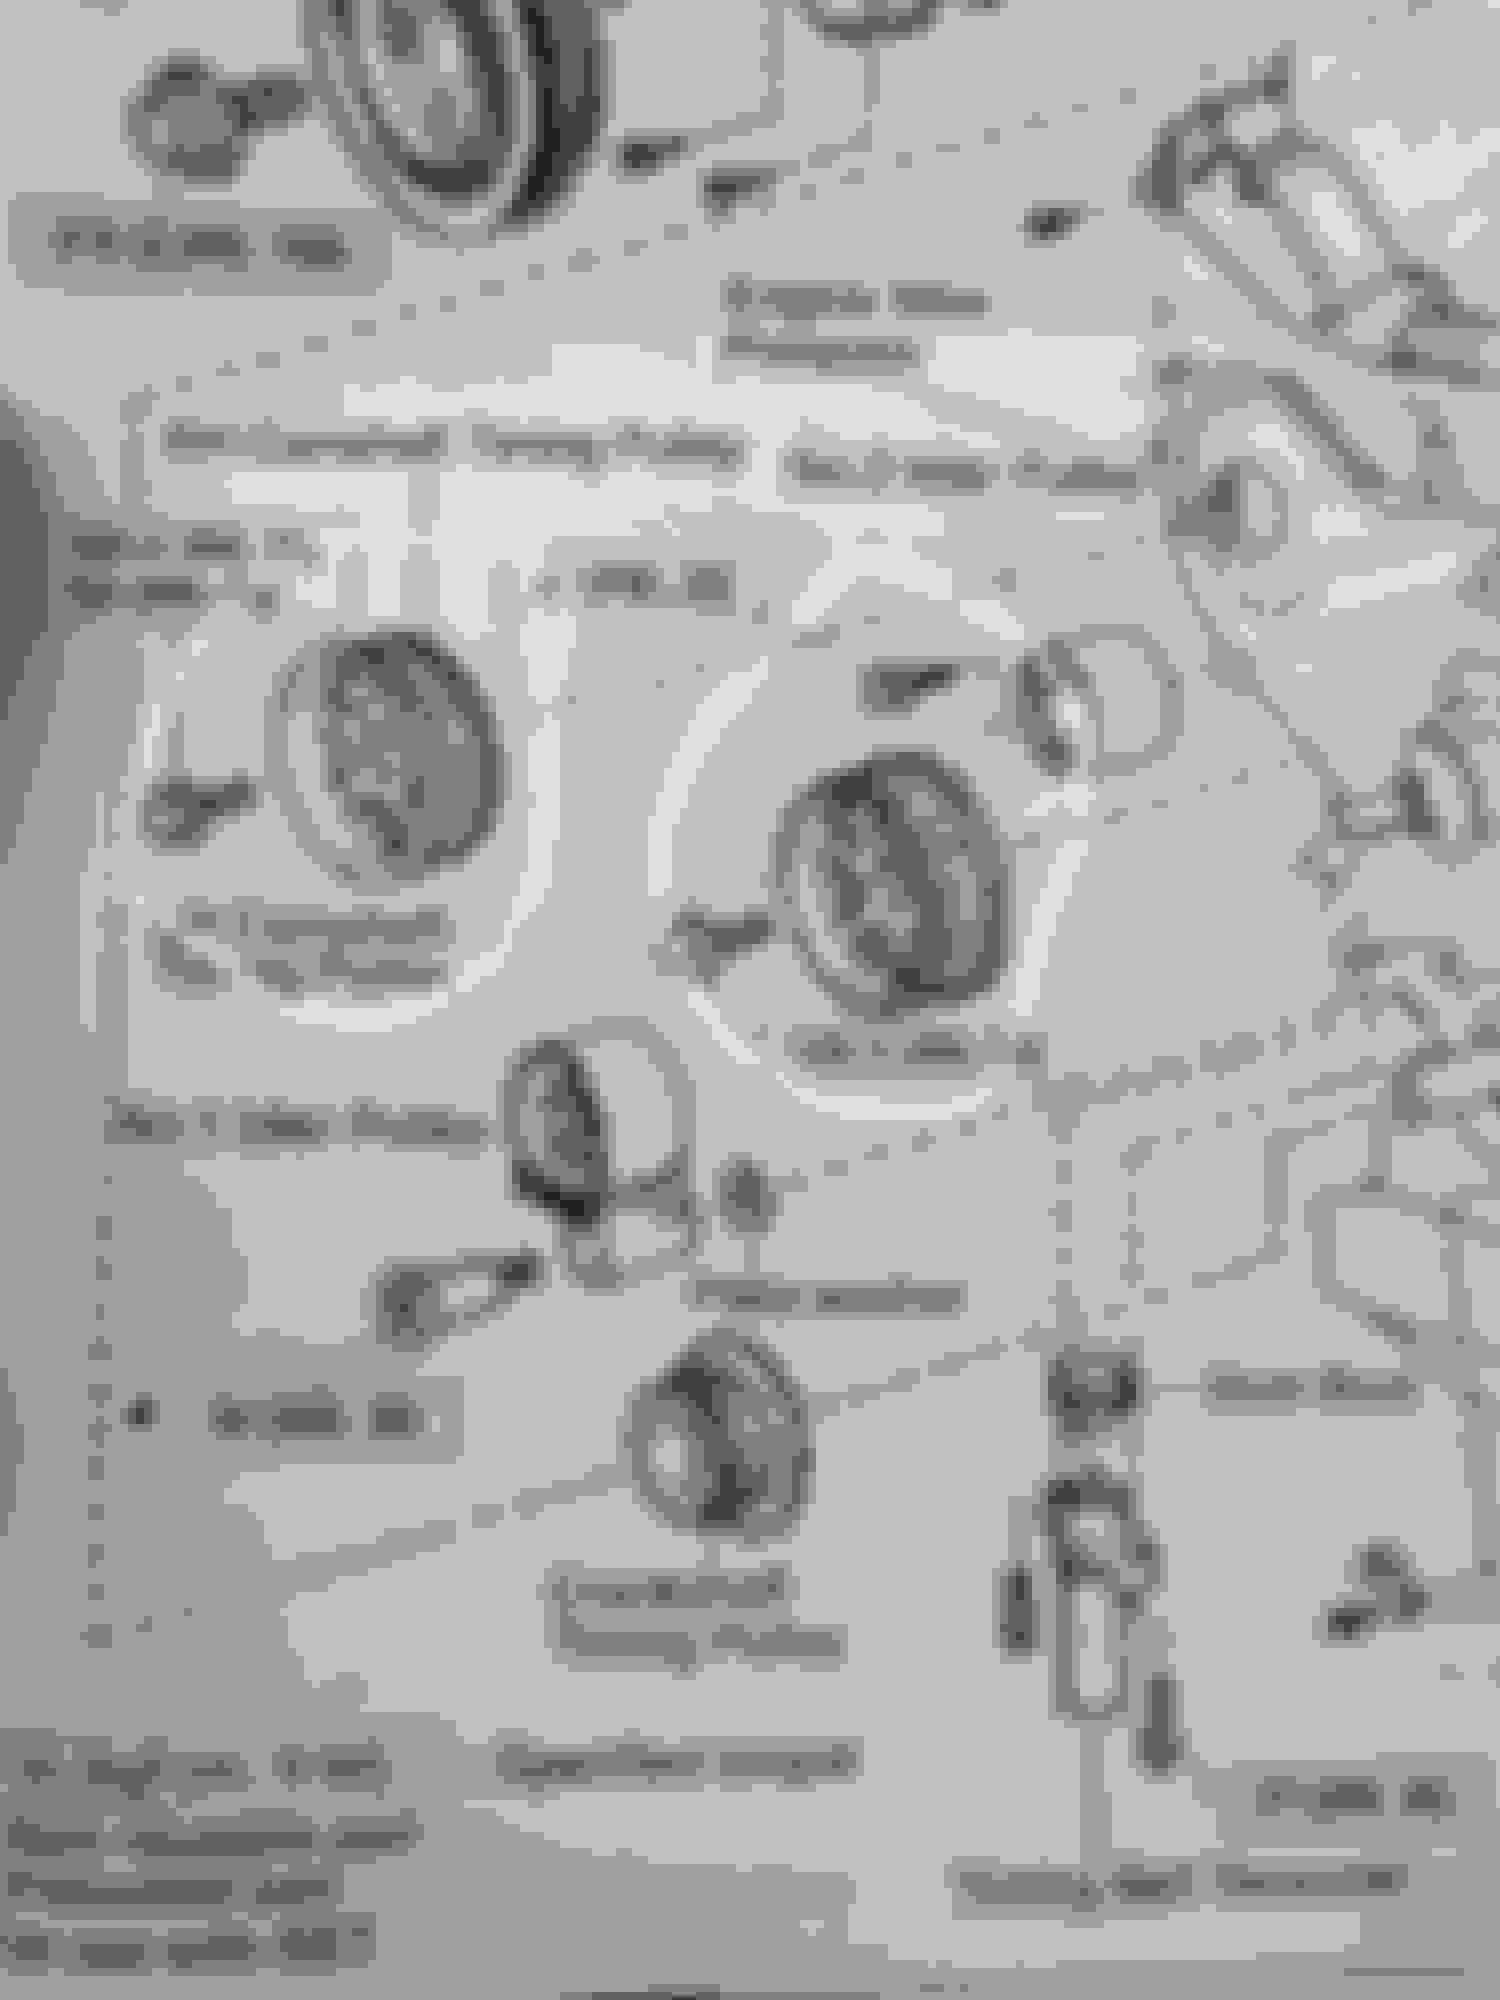
23. Install new water pump with new metal gasket.
24. Reinstall Timing cover backing plate.
25. Reinstall camshaft gears.
26. Install new Hydraulic Tensioner. **DO NOT REMOVE THE PIN** 27. Install new Idler pulley.
When you reinstall the belt, start at the front cam. Note the arrows on the belt. They should be pointing to the passenger side fender.
Align the solid line on the belt with the mark on the front cam. Use a clamp to hold the belt in place.
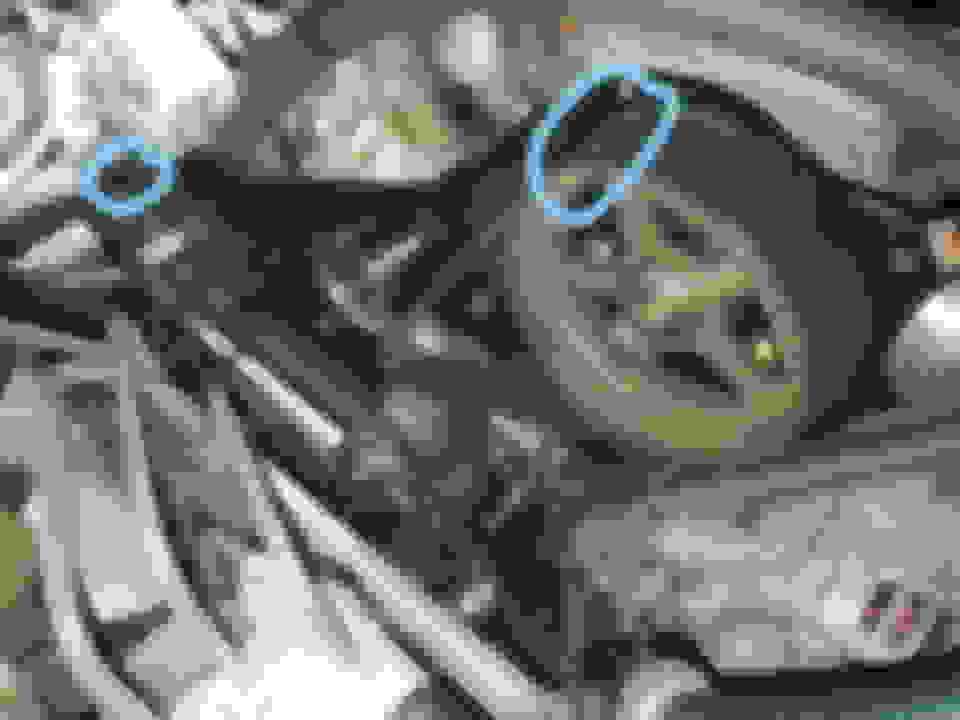
28. Line up rear cam gear timing mark with the second solid mark on the new timing belt. Clamp the belt in place on the gear.
29. Route belt around tensioner, water pump and idler pulleys.
30. Line up the dotted line with the indentation on the crankshaft sprocket. It will be difficult, its supposed to be if its routed correctly. At this point there should be VERY little slack.
Top Tip: Gears have the ribbed side of the belt contacting them. Smooth surfaced pulleys have the smooth side of the belt contacting them.
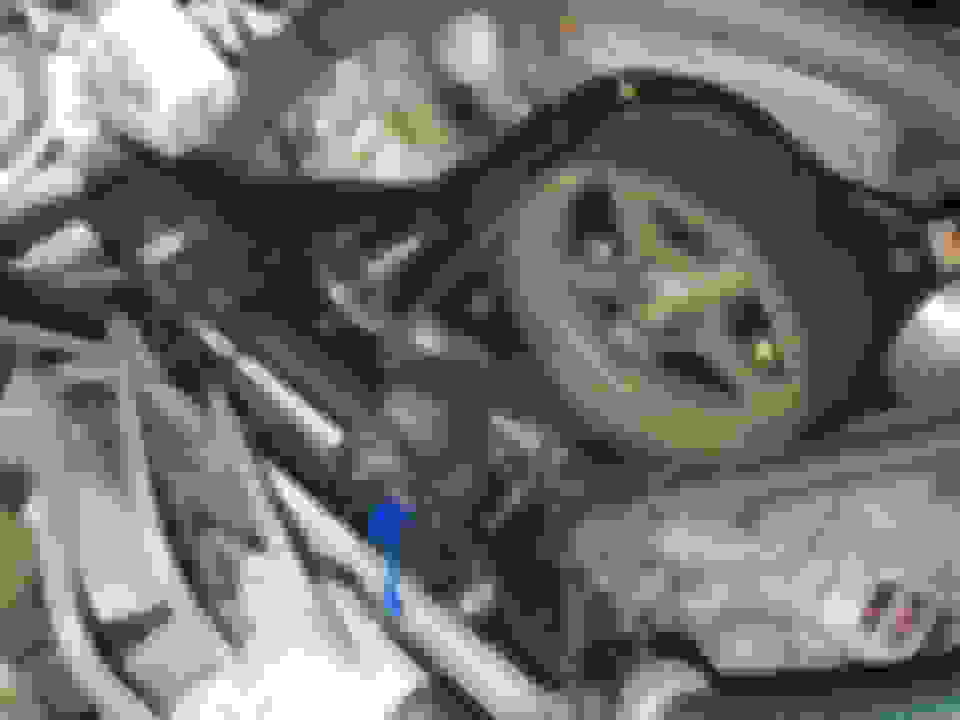
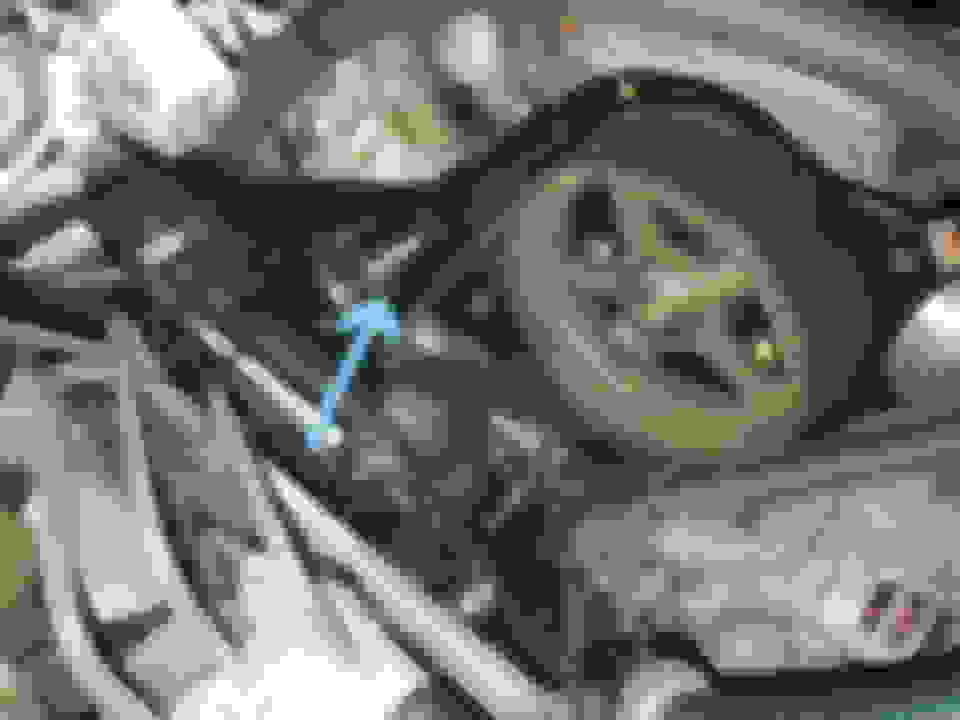
31. Double check the belt routing and ensure all timing marks are where they should be.
32. Remove clamps from camshaft gears.
33. Pull the pin on the hydraulic tensioner. verify springy tension on belt. It should be tight, with less than 1/4" give before the tensioner moves.
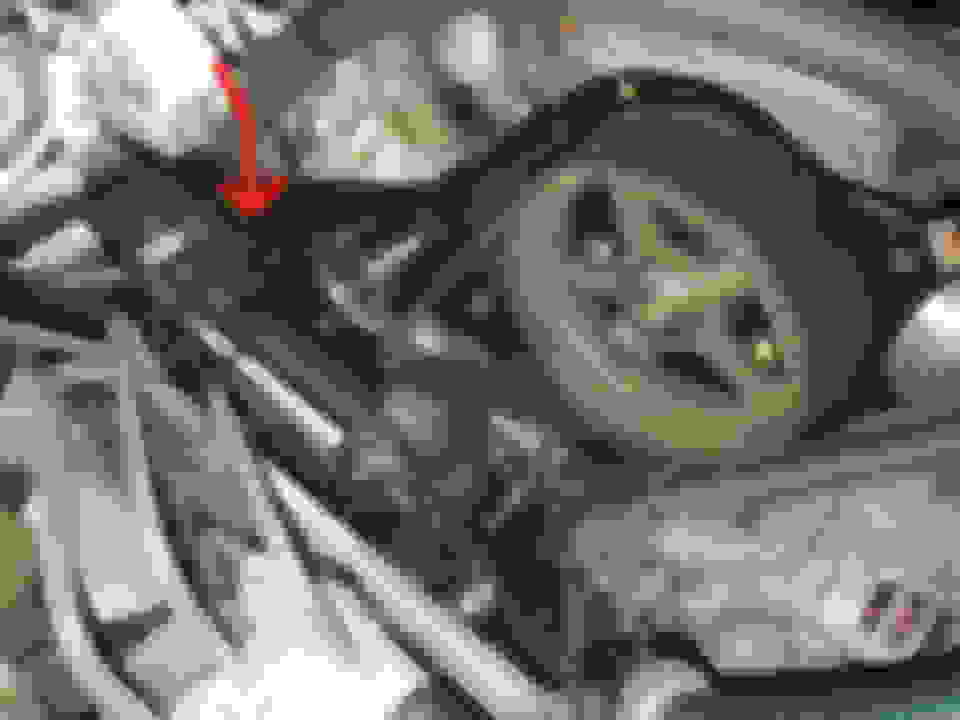
34. Reconnect upper radiator hose.
At this point you can start the engine briefly to make sure it will run correctly. Before you do, take another look one last time at the timing marks. If they are all lined up and you didn't forget to pull the pin on the tensioner, then all will be well.
35. Start engine. Run for approximately 10 seconds to verify repair.
36. Reinstall all other parts removed in reverse order.
37. fill coolant through cap (not reservior) with engine running to burp the system.
Im expecting to have a timing belt replaced at the weekend at a toyota service centre, car has done 95 k miles,.having read a little about this job , ive been under the impression its just about standard practice to replace the water pump at this time,( I guess to save further labour costs ?) I asked the service centre if they will be changing the water pump on this job and they said only if its leaking..
which seems fine to me but got me thinking if this is something i should simply do now to avoid worry later,
it seems the water pump is quite expensive , so im not trying to make my bill more than it needs to be, but can anyone tell me if the water pump really does need changing now, while the timing belt is being done?
Water pump is replaced because the Aisin kits come with the pump and are not expensive but in reality the water pump is known to easily last past 200,000 miles without leaking. It's one of those things that you replace because "you're in there". Any way you can find an independent mechanic to do the job?
Water pump is replaced because the Aisin kits come with the pump and are not expensive but in reality the water pump is known to easily last past 200,000 miles without leaking. It's one of those things that you replace because "you're in there". Any way you can find an independent mechanic to do the job?
Okay, if its capable of 200.000, i wont replace the water pump unless Toyota advise to do so, (they also advised the price of the parts for the timing belt, but no kit with w/pump here) labour rates are pretty good here so i will just do the timing belt for peace of mind for now. also the water pump estimate by one company was around 120 us dollar
ive tried to find independant mechanics, but many wont touch a lexus I did find one that would, but they quoted me much more than Toyota.
so Toyota it is! Thanks for your helpful reply.
First off, great simple write up, down to the point.
if you want more detail, I recommend these two YouTube videos.
This one shows every bolt and major step while being fast and efficient with the editing. I recommend writing it out in steps as a checklist. My 98 ES300 was identical aside from the strut tower brace.
the second one is good at showing a different method at removing the camshaft and crankshaft seals, how to line up the camshaft and crankshaft pulleys with the belt, and reuse the tensioner if you don�t have a new one.
I highly recommend you pick up this tool if you�re replacing the seals. It made taking out both camshaft ones so easy and effortless!
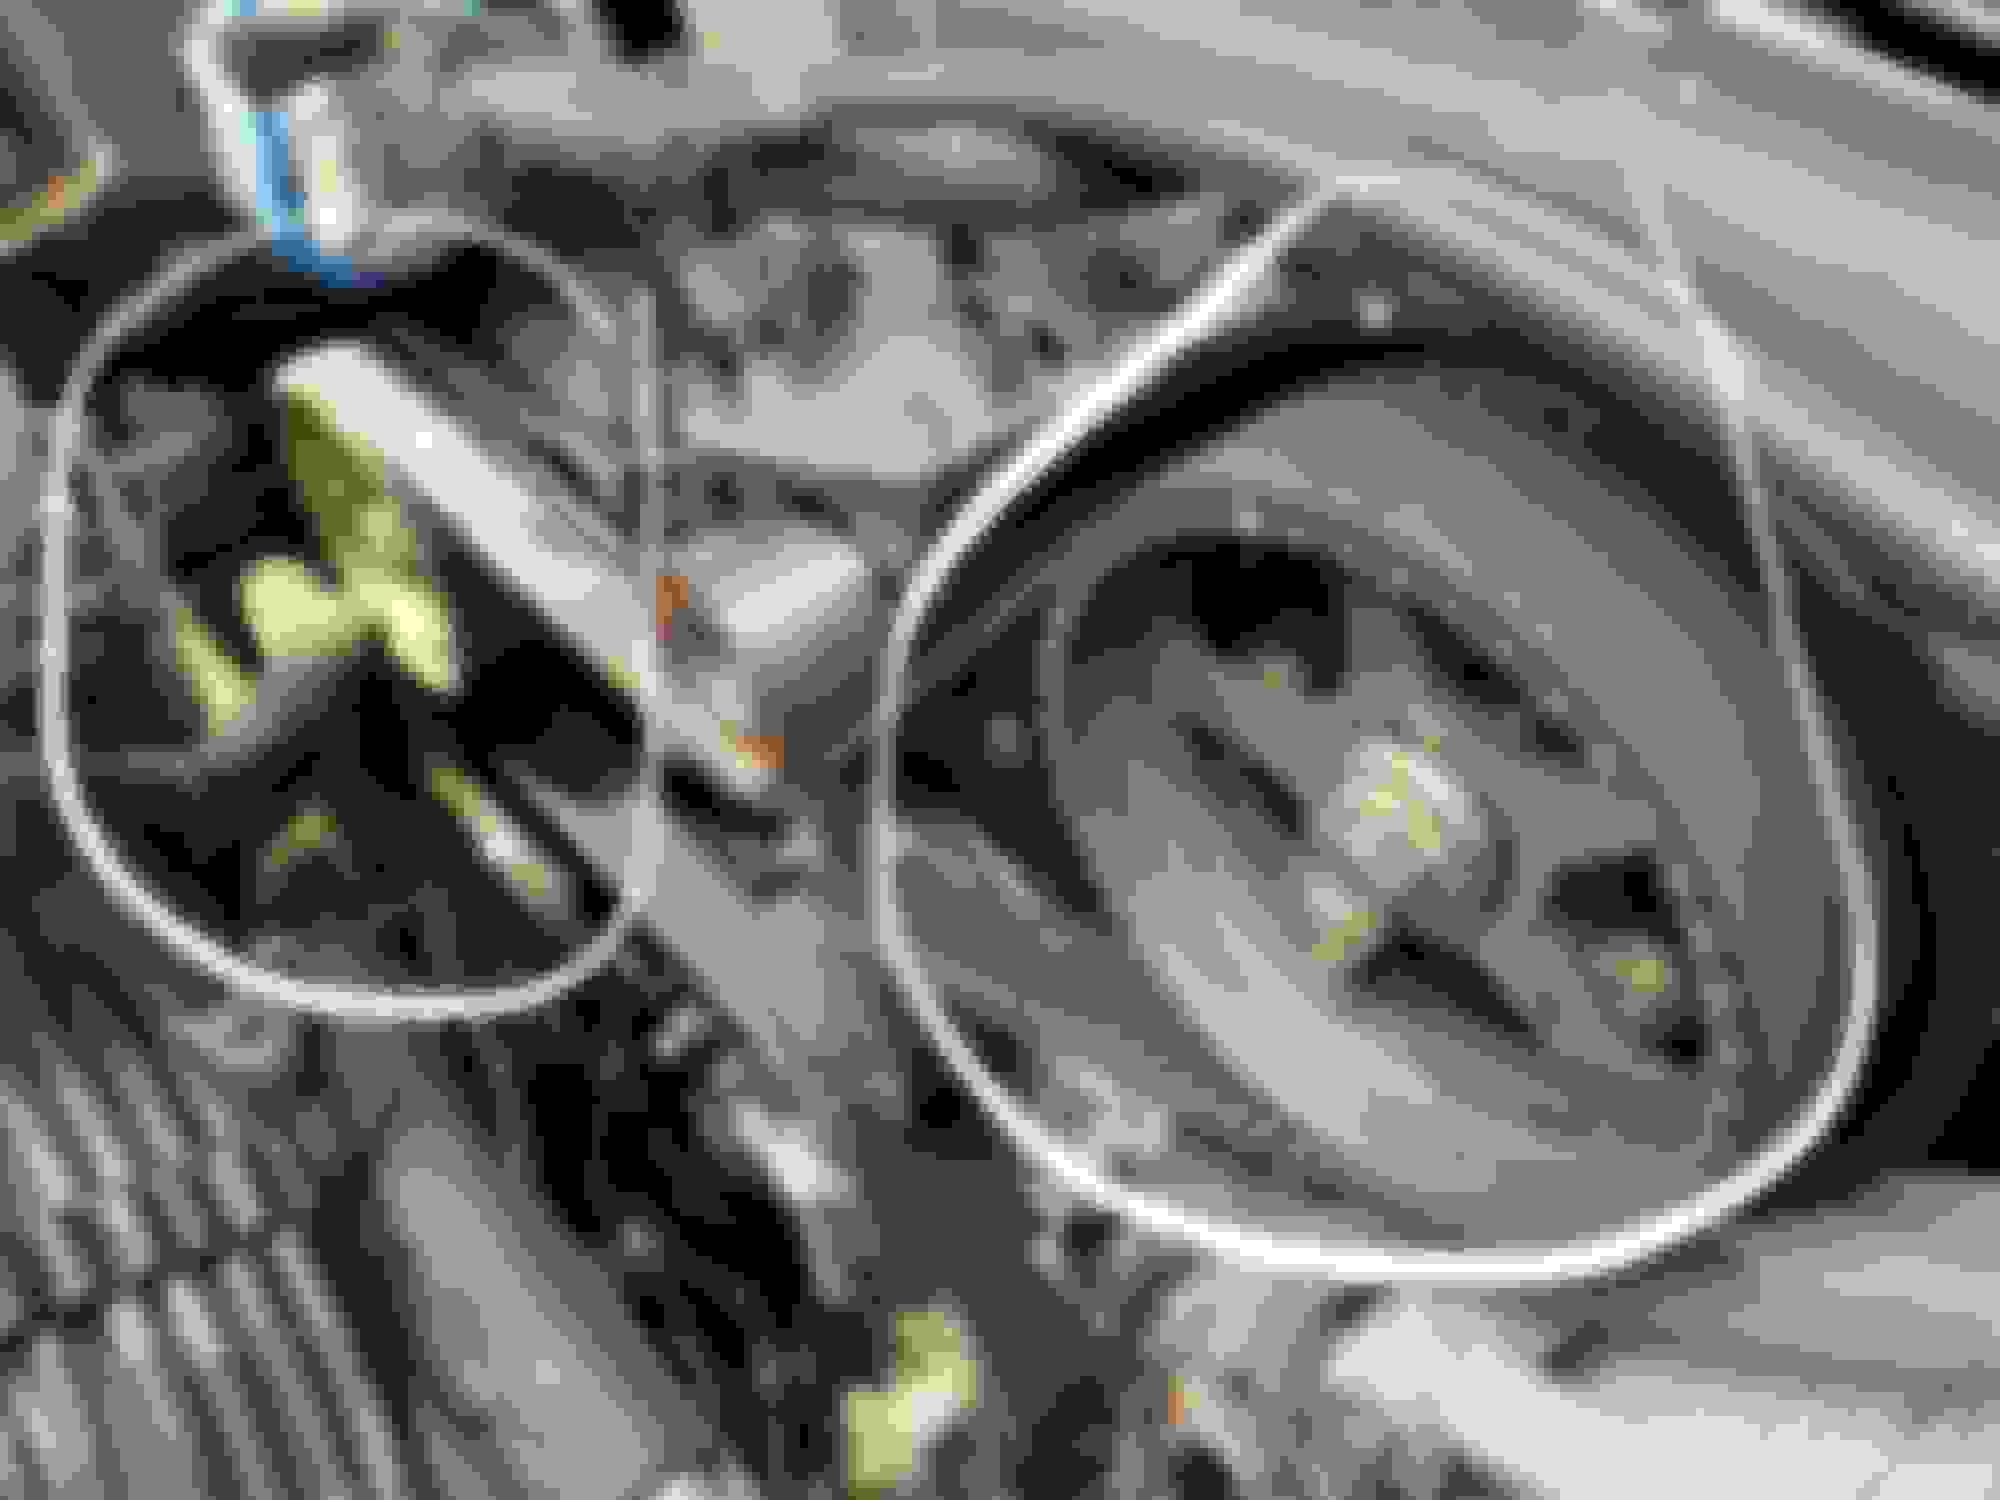
Also something I didn�t notice in any of the guides but had to go back and pay close attention to my pictures and references is the orientation of the camshaft pulleys. They are not facing the same direction! They�re flipped 180 degrees relative to each other. This helps keep the belt from falling off.
How they�re supposed to be oriented. Old belt shows the correct orientation. Made a mistake and installed them both in the same way. Luckily I caught it before I started the engine, so I went back and fixed it.
28. Line up rear cam gear timing mark with the second solid mark on the new timing belt. Clamp the belt in place on the gear.
29. Route belt around tensioner, water pump and idler pulleys.
30. Line up the dotted line with the indentation on the crankshaft sprocket. It will be difficult, its supposed to be if its routed correctly. At this point there should be VERY little slack.
Top Tip: Gears have the ribbed side of the belt contacting them. Smooth surfaced pulleys have the smooth side of the belt contacting them.
31. Double check the belt routing and ensure all timing marks are where they should be.
32. Remove clamps from camshaft gears.
33. Pull the pin on the hydraulic tensioner. verify springy tension on belt. It should be tight, with less than 1/4" give before the tensioner moves.
34. Reconnect upper radiator hose.
At this point you can start the engine briefly to make sure it will run correctly. Before you do, take another look one last time at the timing marks. If they are all lined up and you didn't forget to pull the pin on the tensioner, then all will be well.
35. Start engine. Run for approximately 10 seconds to verify repair.
36. Reinstall all other parts removed in reverse order.
37. fill coolant through cap (not reservior) with engine running to burp the system.
and you are done!
Very nicely done! Really good show and tell. I think I have a pulley squealing in mine when I start it up in the mornings. Now I know what it looks like anyway. Doesn't seem as daunting now.
You can use nail polish or a sharpie to mark the places where you put the clabe sure
Originally Posted by ArmyofOne
28. Line up rear cam gear timing mark with the second solid mark on the new timing belt. Clamp the belt in place on the gear.
29. Route belt around tensioner, water pump and idler pulleys.
30. Line up the dotted line with the indentation on the crankshaft sprocket. It will be difficult, its supposed to be if its routed correctly. At this point there should be VERY little slack.
Top Tip: Gears have the ribbed side of the belt contacting them. Smooth surfaced pulleys have the smooth side of the belt contacting them.
31. Double check the belt routing and ensure all timing marks are where they should be.
32. Remove clamps from camshaft gears.
33. Pull the pin on the hydraulic tensioner. verify springy tension on belt. It should be tight, with less than 1/4" give before the tensioner moves.
34. Reconnect upper radiator hose.
At this point you can start the engine briefly to make sure it will run correctly. Before you do, take another look one last time at the timing marks. If they are all lined up and you didn't forget to pull the pin on the tensioner, then all will be well.
35. Start engine. Run for approximately 10 seconds to verify repair.
36. Reinstall all other parts removed in reverse order.
37. fill coolant through cap (not reservior) with engine running to burp the system.
and you are done!
You can use nail polish or a sharpie to mark the places where you put the clabe sure
To make sure that you're not shifting anything wow removing you can use those clamps or you can mark them with nail polish on the both places or a sharpie would work as well.
 08-27-18, 10:57 AM