When you click on links to various merchants on this site and make a purchase, this can result in this site earning a commission. Affiliate programs and affiliations include, but are not limited to, the eBay Partner Network.
So I have been on a bit of a hiatus since I joined up awhile back, but I have been rather busy with life and especially the Soarer, so I decided to create a new post covering what I have been up to. I'll try to keep it brief (just wrote most of it already but chrome crashed when uploading pictures so I'm rewriting it now with less words...) and answer any questions you guys have in the comments.
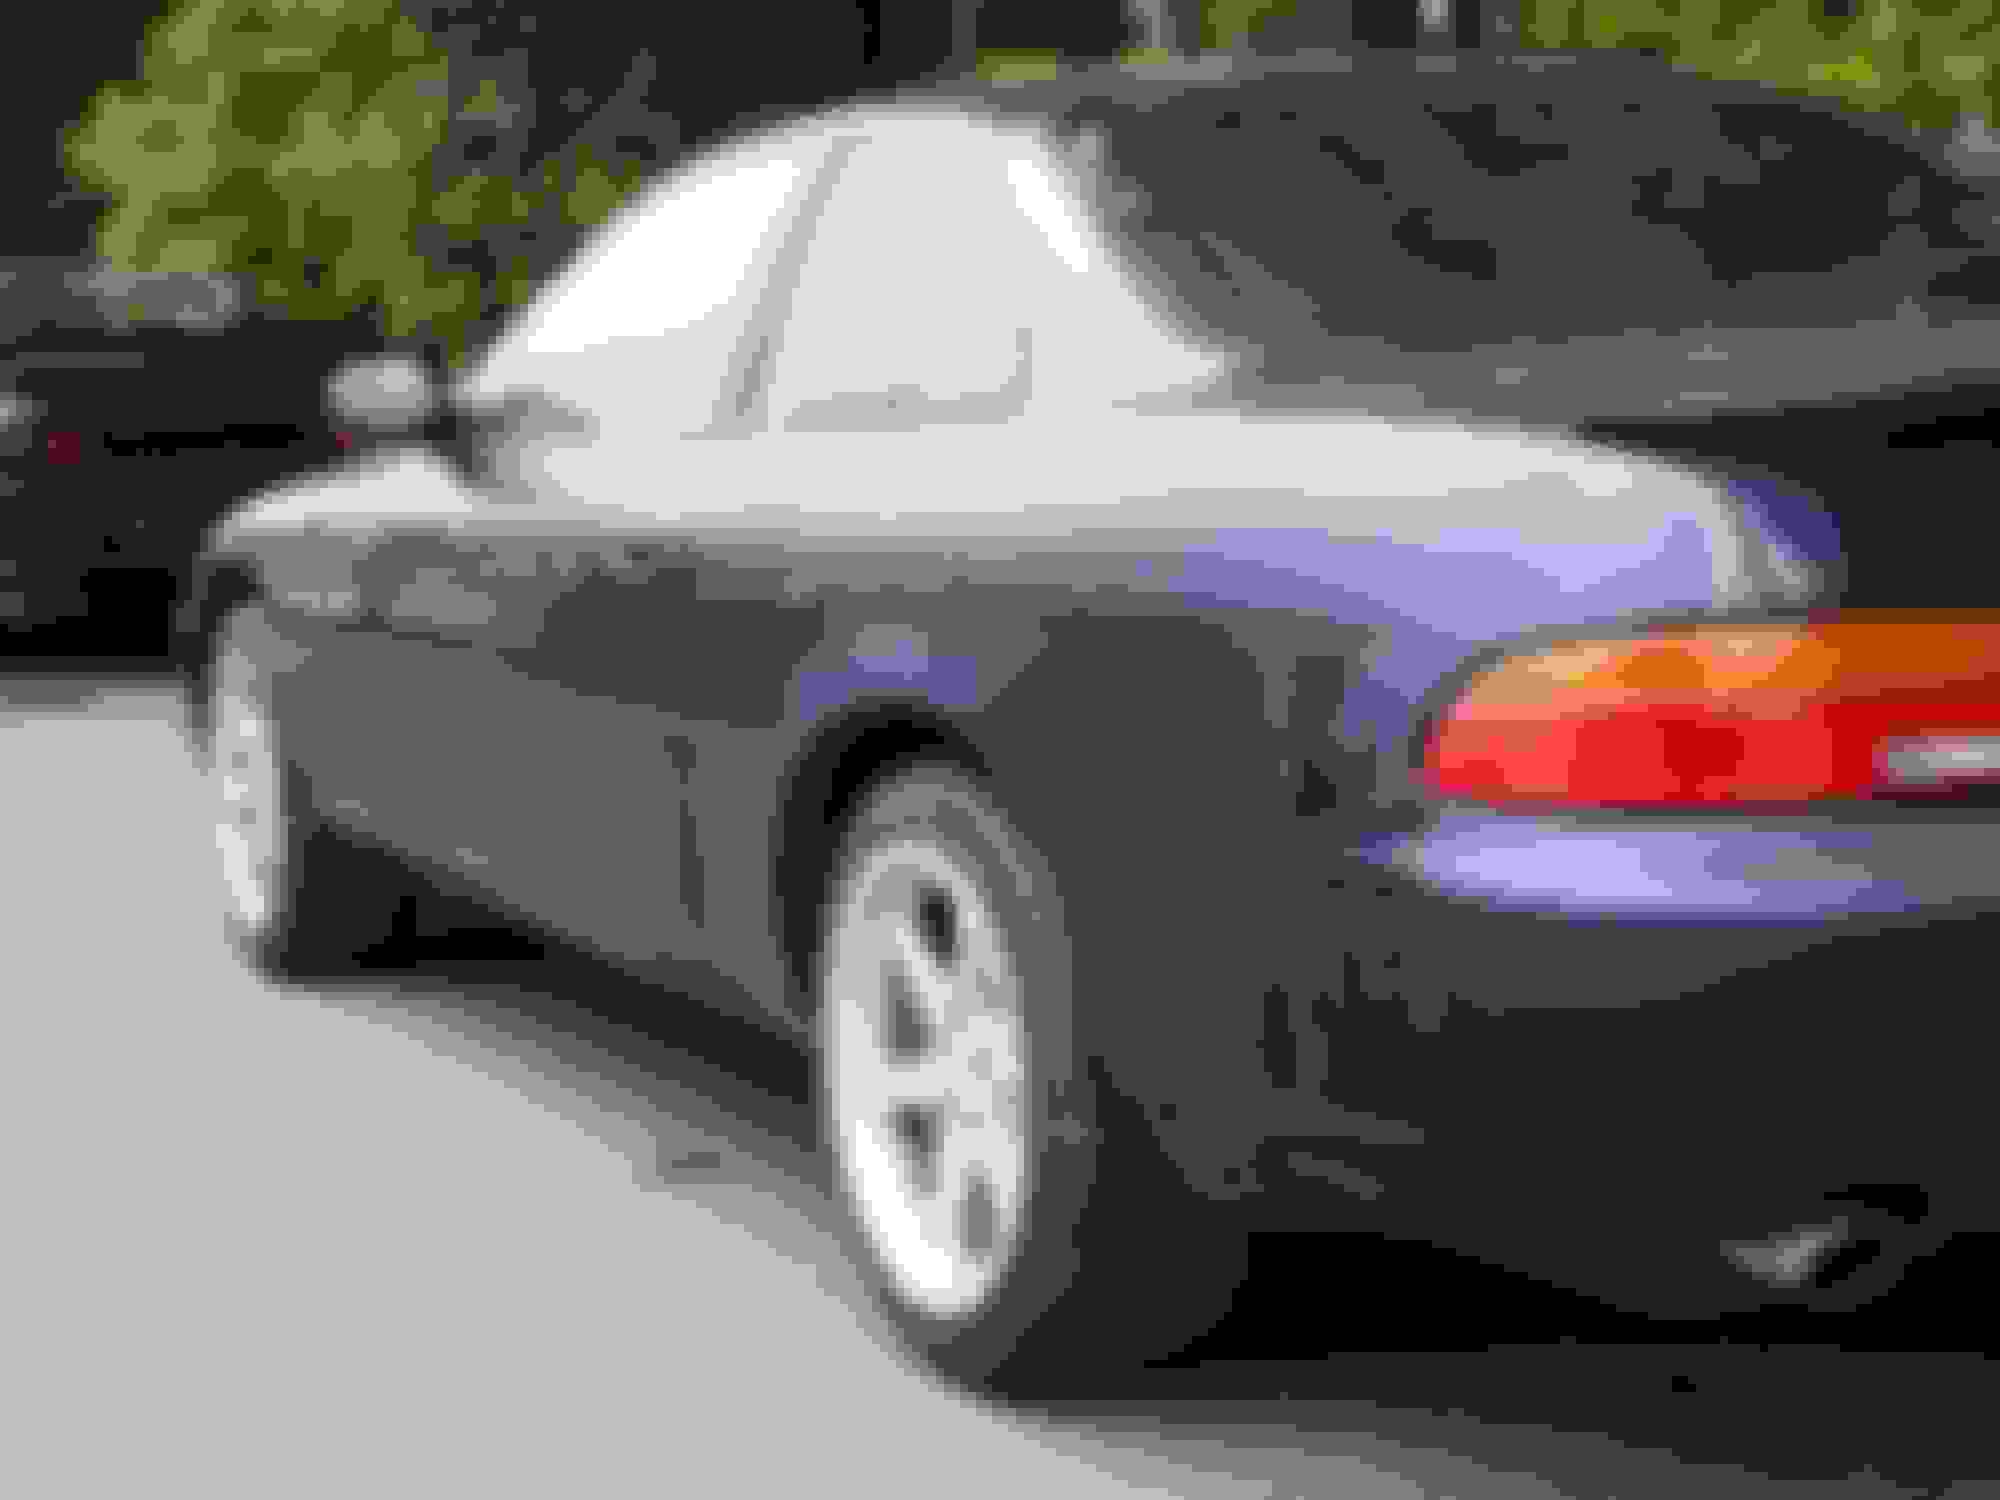
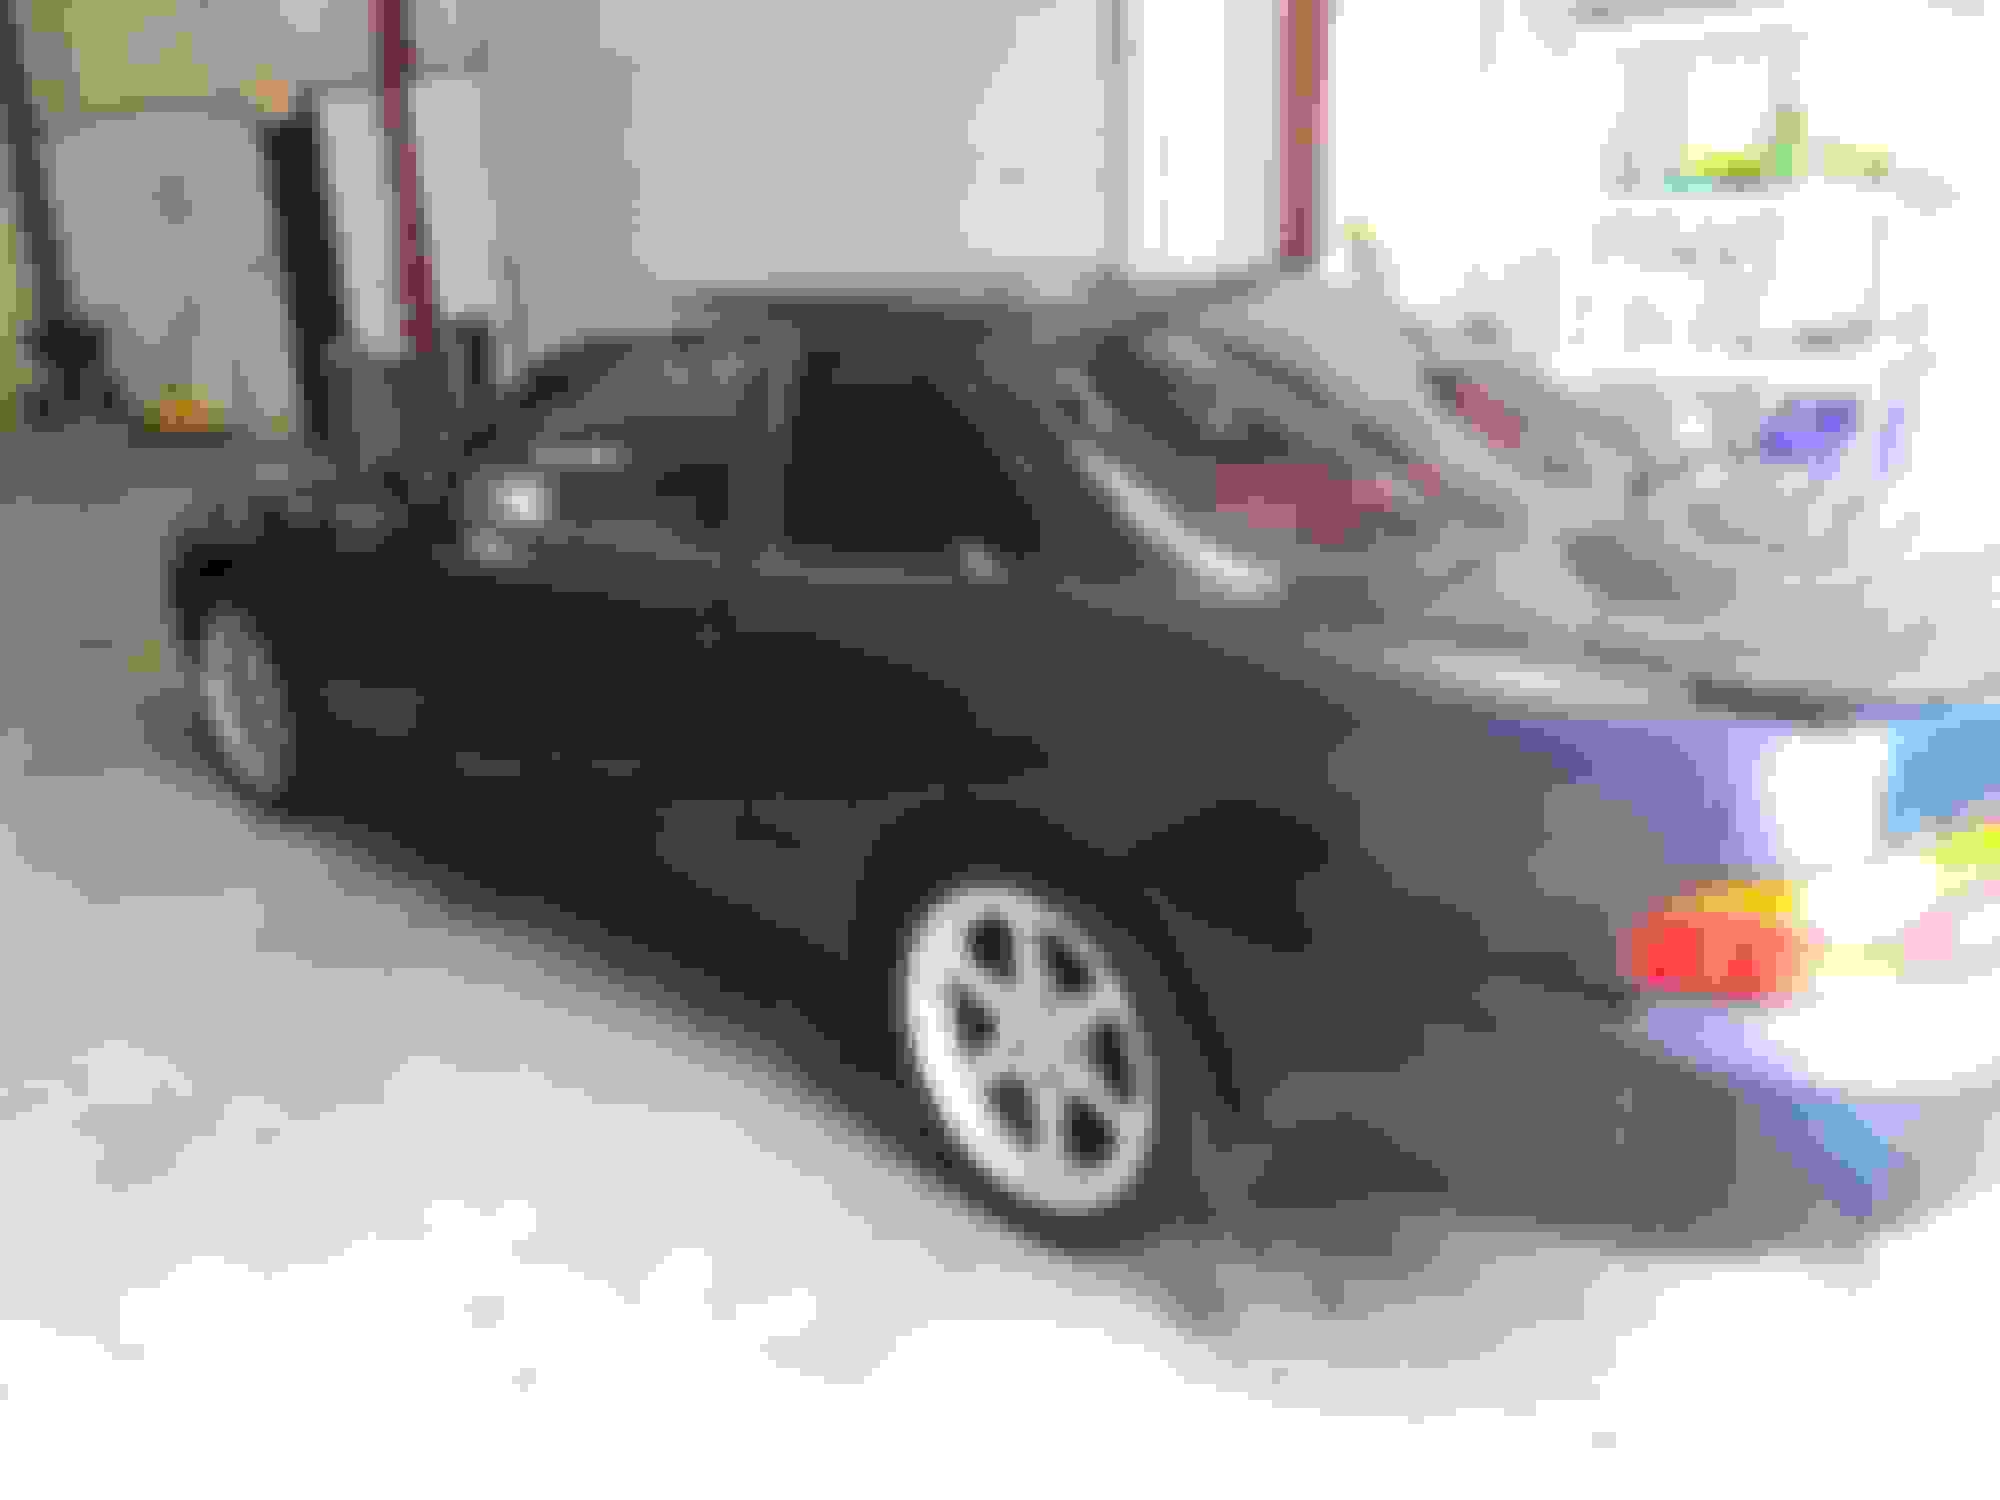
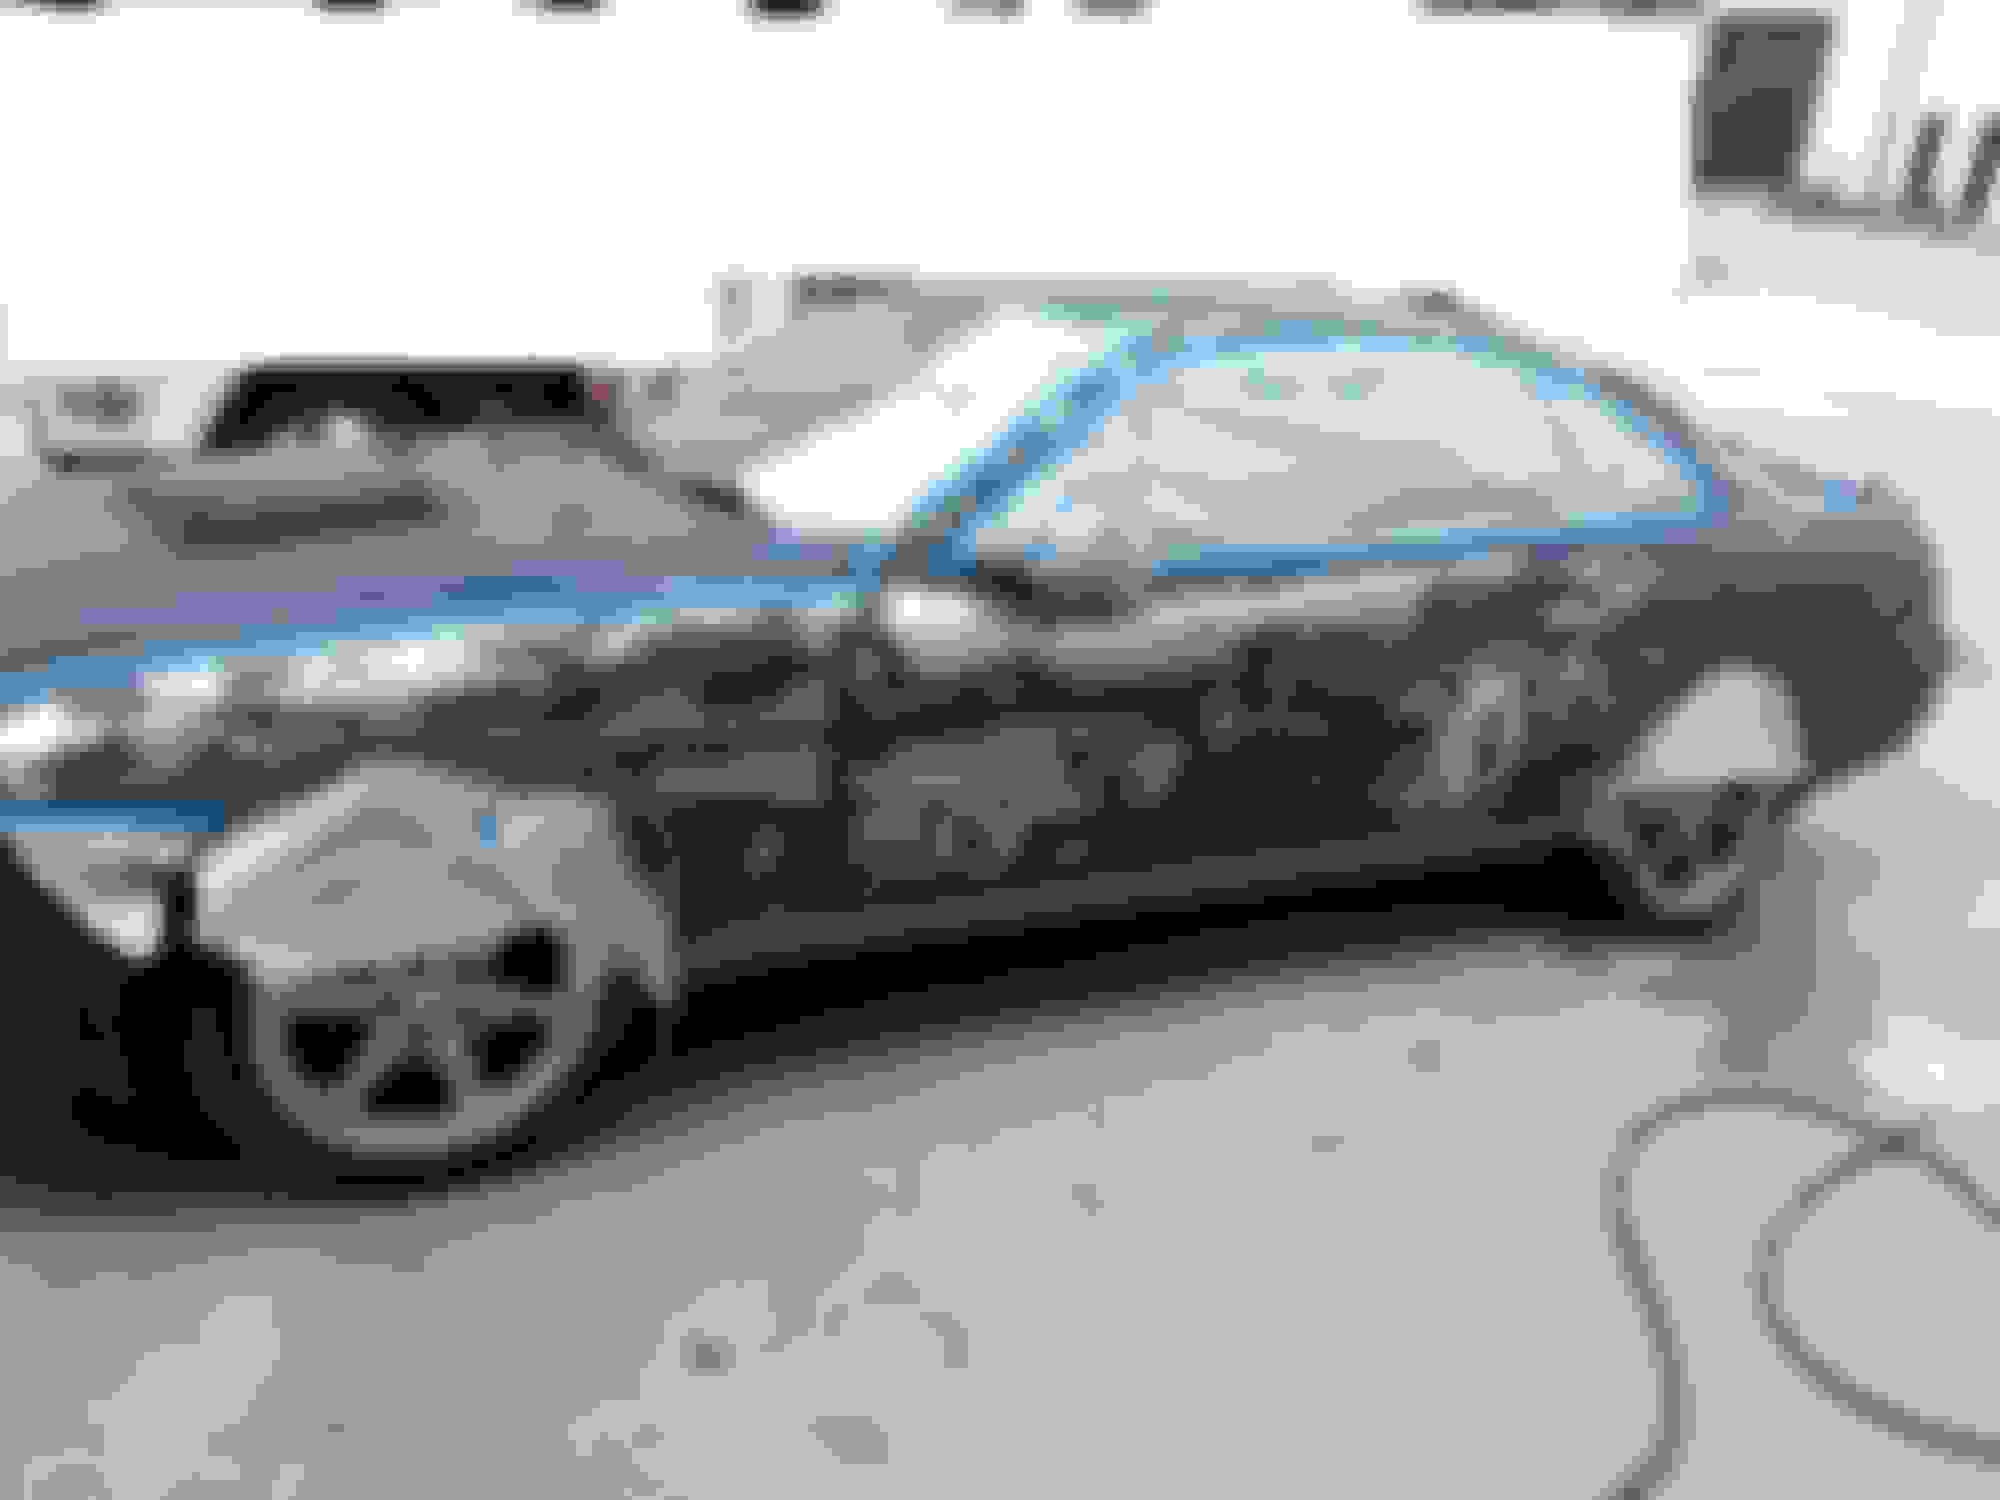
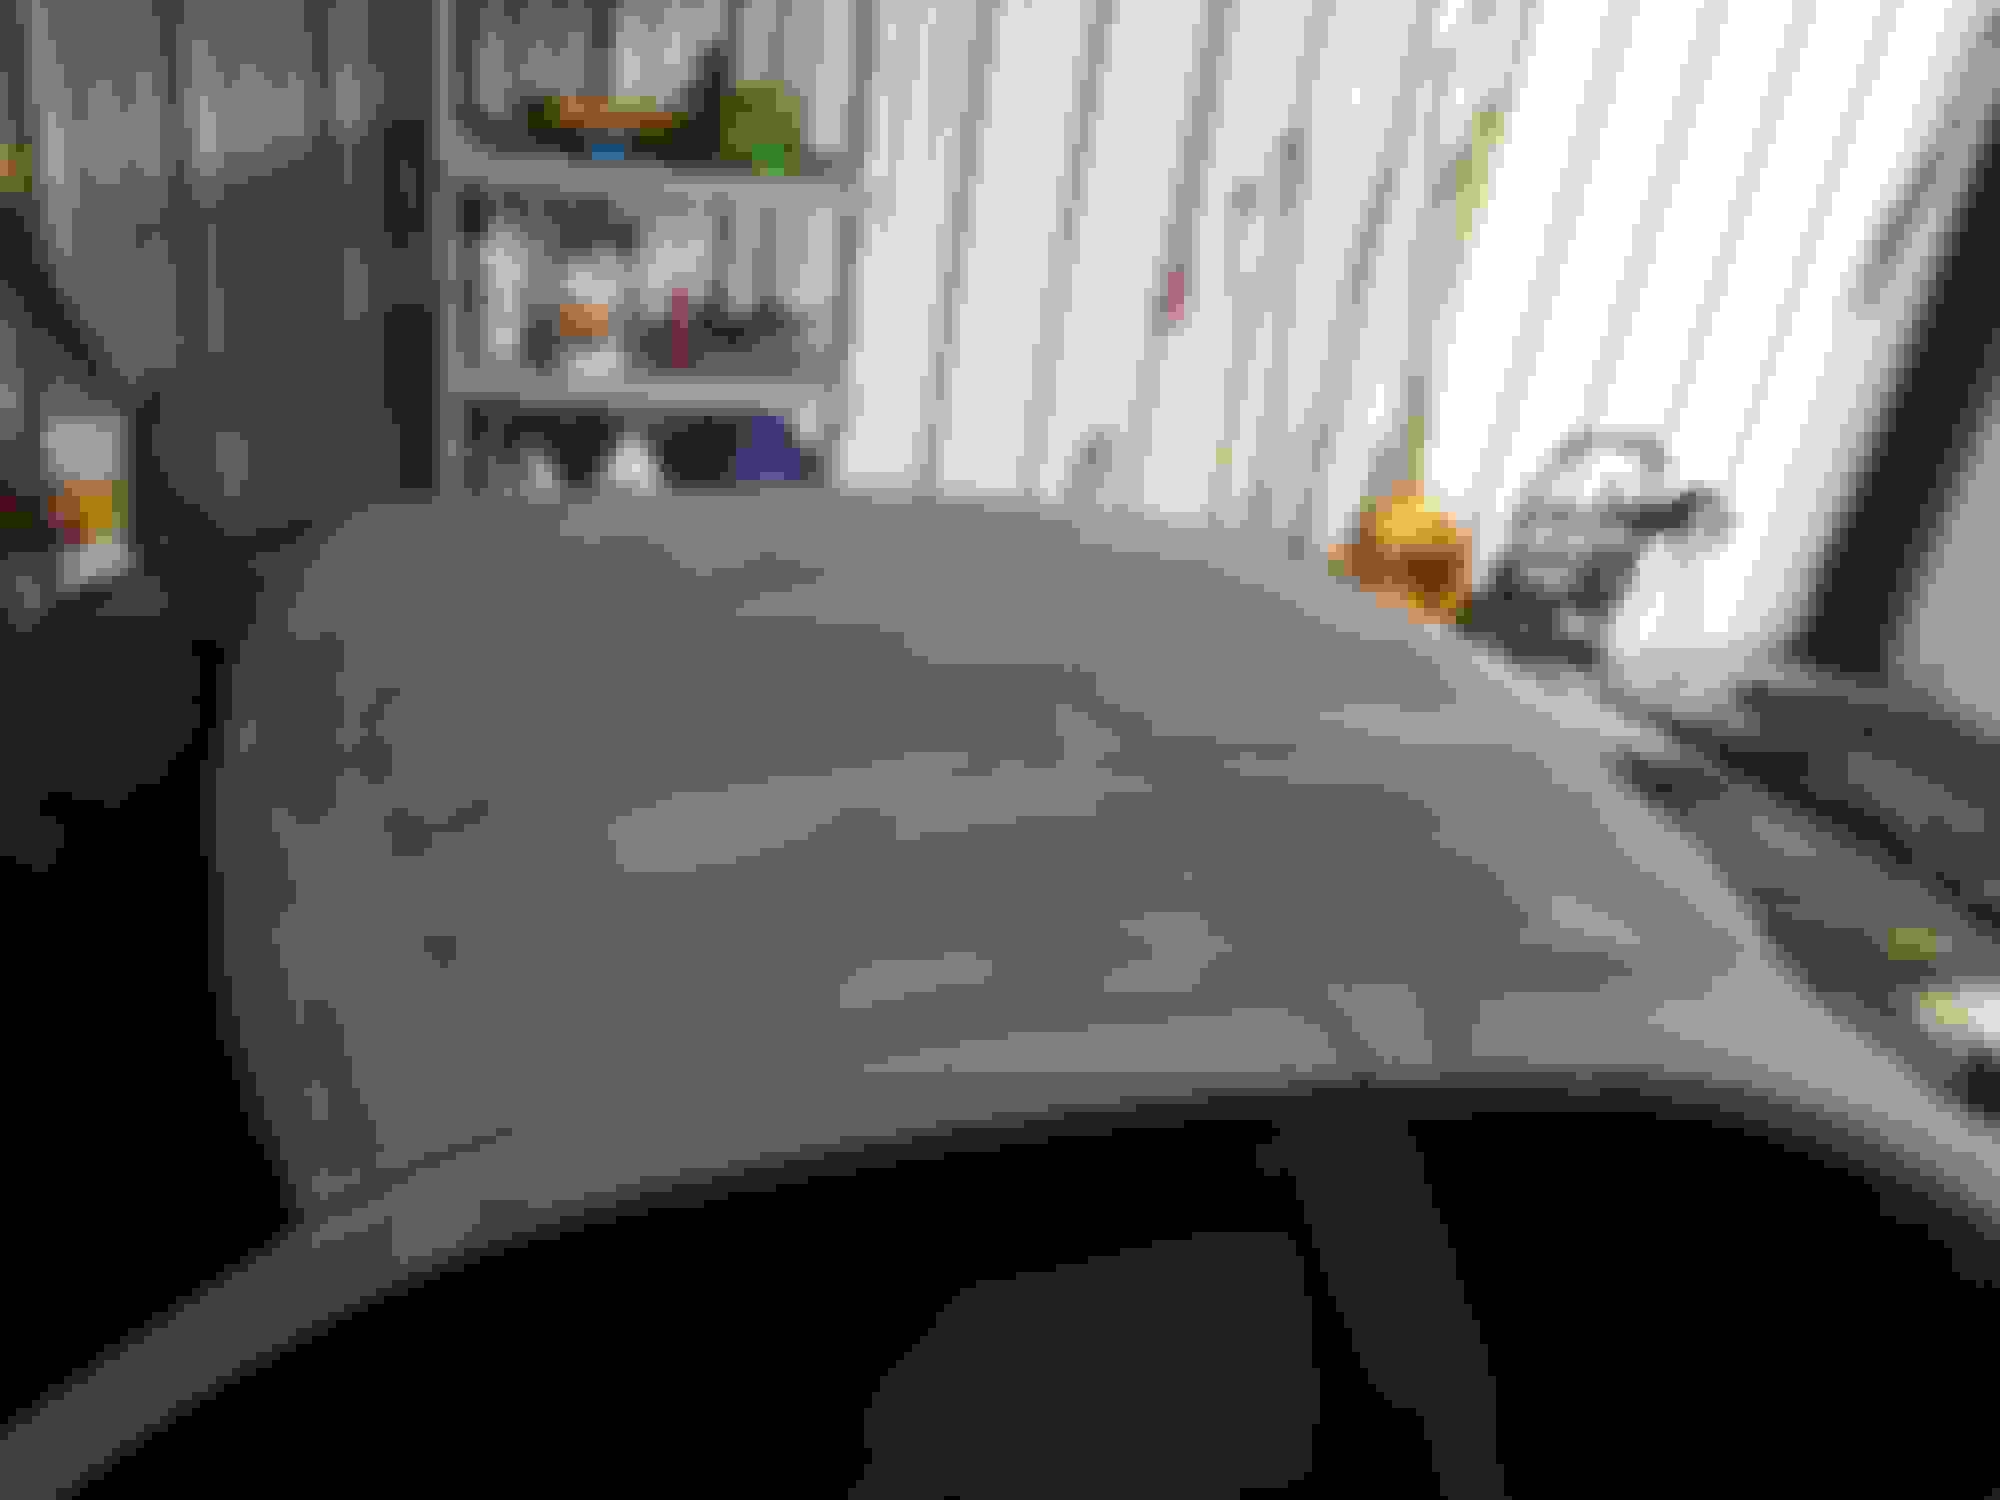
So when I bought this Soarer, I knew immediately what my first objective would be. From the little auction photo alone I could see that peeling clear coat and paint was contributing to the undesirable nature of the car. But I thought hell... I can fix that. So I put in a low bid and won it! as for the peeling paint, you can take a look for yourself:
Hopefully these aren't too big in the post.
So yes, it wasn't in the best shape on the outside, but my goodness the inside wasn't half bad! and recently I detailed the inside and it is fantastic in my opinion. but anywho.
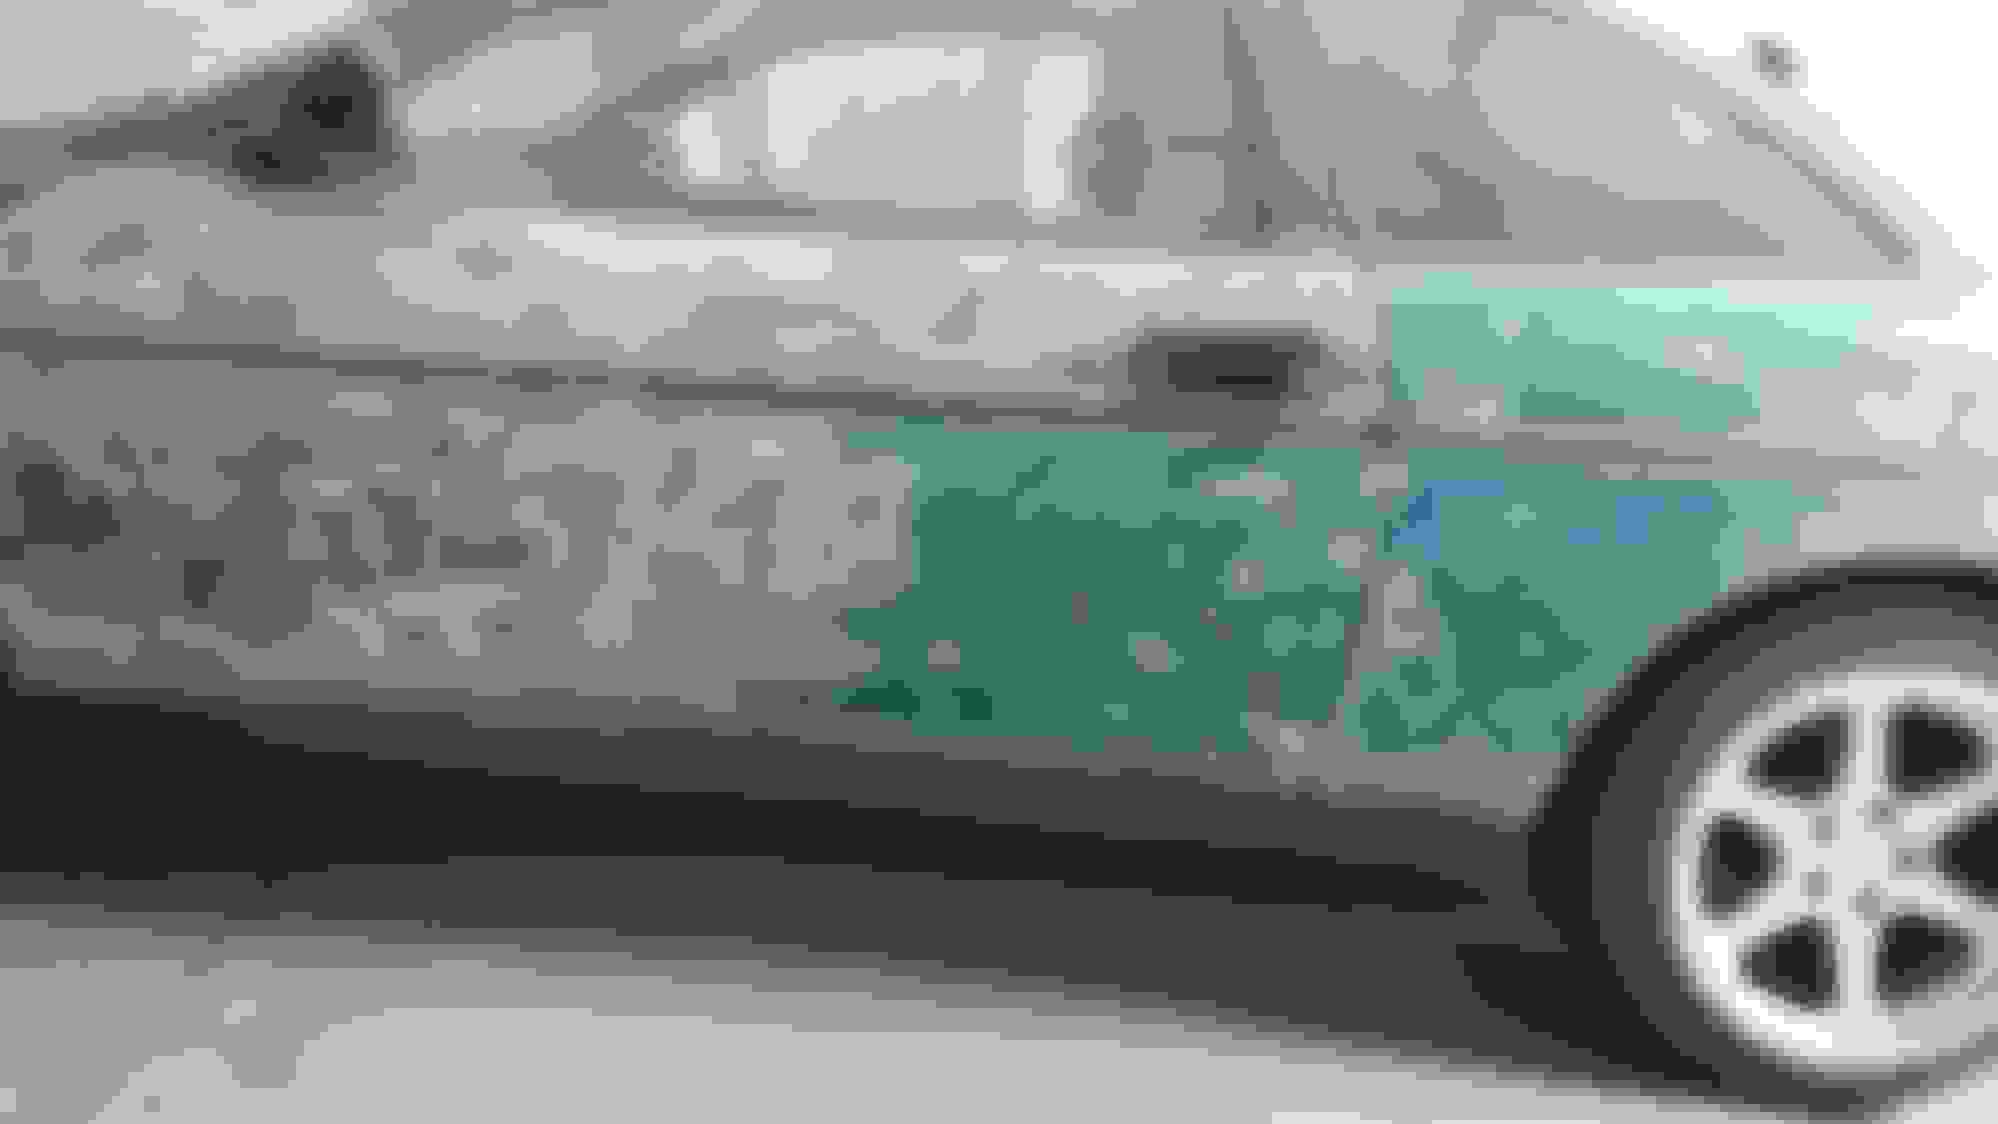
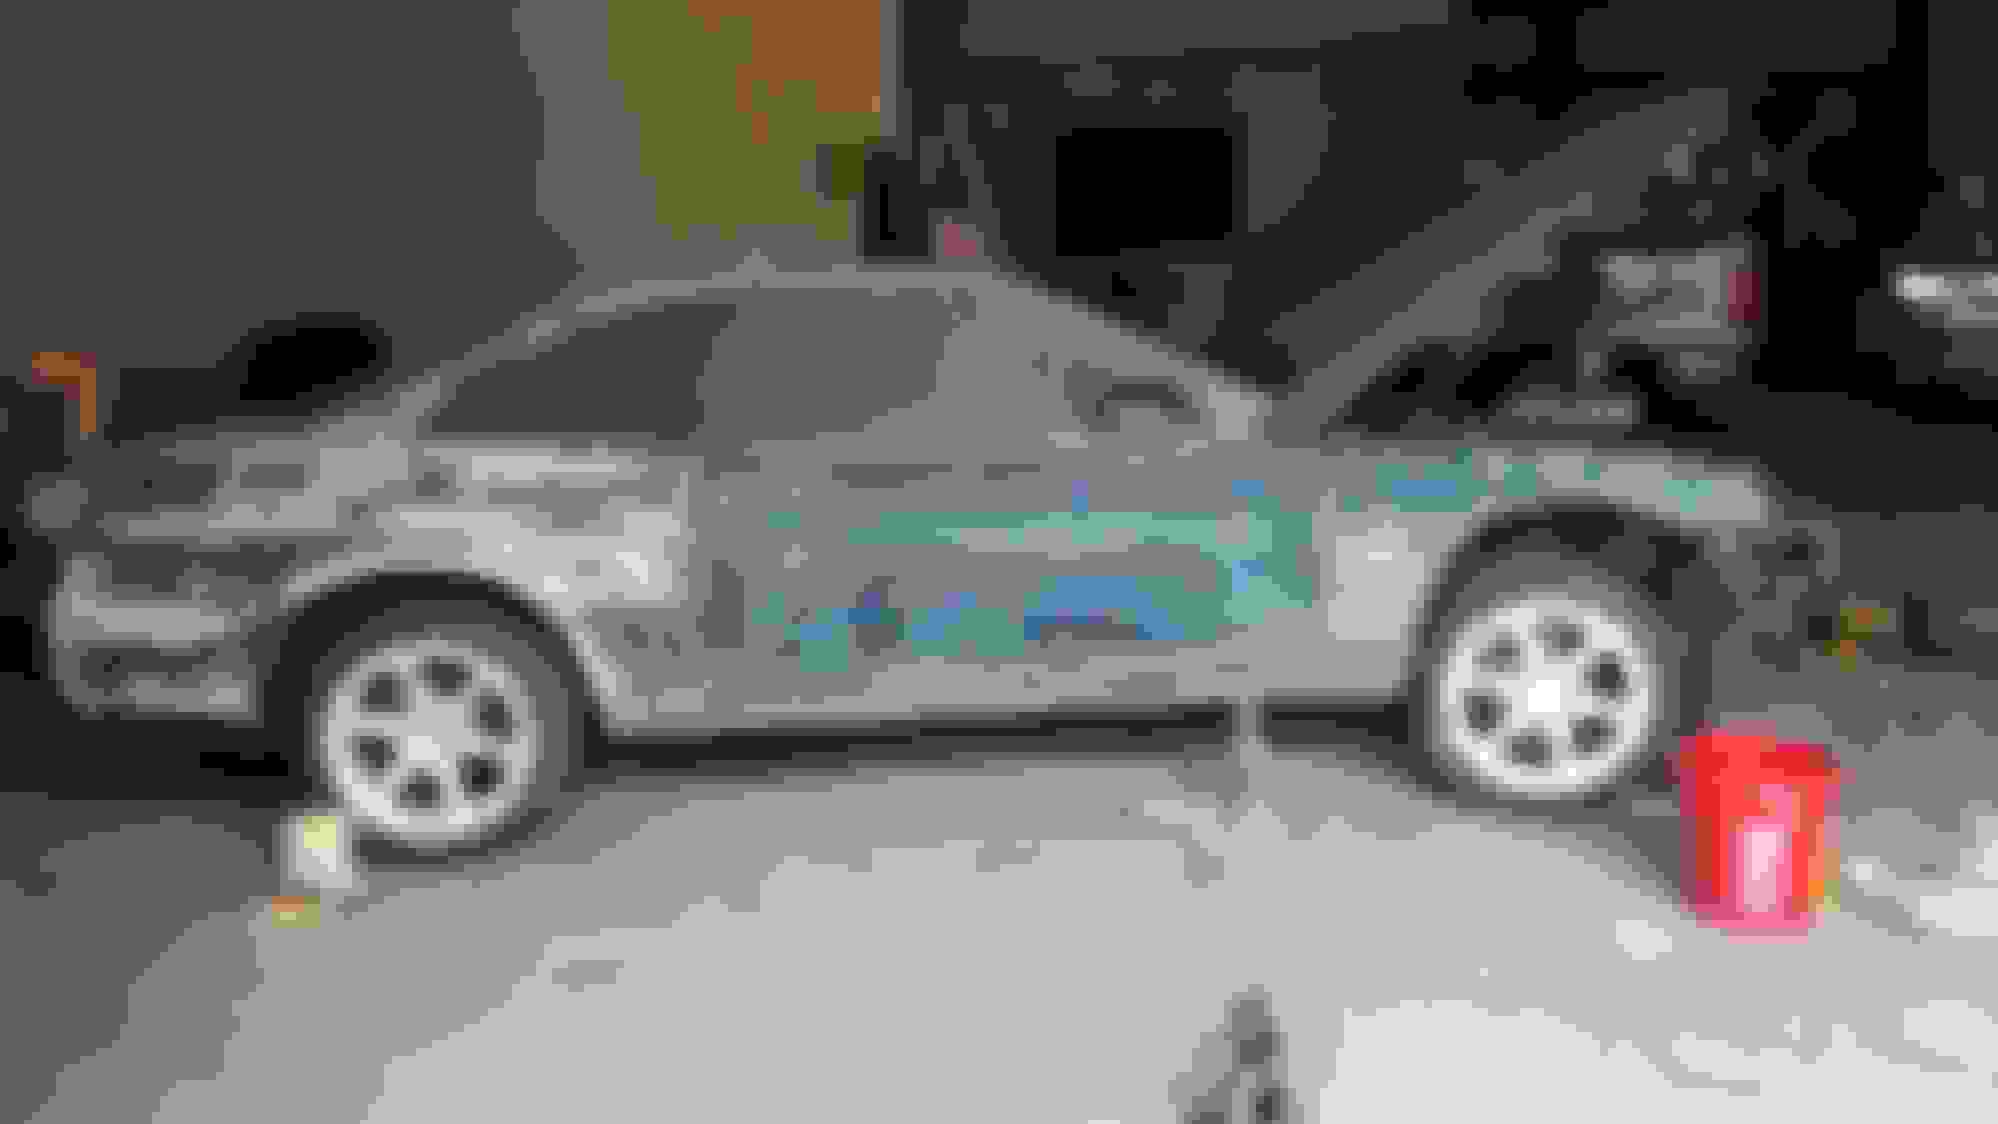
So after move forward a few months and a new radiator, I decided because of the price for a paint job I would attempt to do the prep work myself as that is the most expensive part of the process due to the amount of time and patience that goes into it... I had time on the weekends thanks to my boss letting me use the shop as a place to work on my car which was very generous, but patience wore thin at times while sanding down and prepping this thing for paint. It took a few weekends, long days of sanding away and smoothing out panel after panel, making sure to get it as even as possible... sanding down edges and eliminating any trace of gloss or clear coat from each surface. This was my first time doing real body work. I have spray painted before and done minor work on my celica and other cars, but this was a full on repaint, and I wanted to get it as perfect as I could. My wife even helped out with it, which made things so much better.
You may say "Dear god dude, what did you do to that thing?? but please, this was my first time and I did what I could to get the body in a suitable condition to prime and paint. I did not take it down to bare metal (for most areas) as the factory primer and paint in most places was actually really solid to utilize. In fact I spent hours on each panel taking it down slowly and trying not to damage the paint or body. It was difficult, and even after painting it there are a few noticeable swirls from the orbital sander, but I have to say it looks pretty good for my first time.
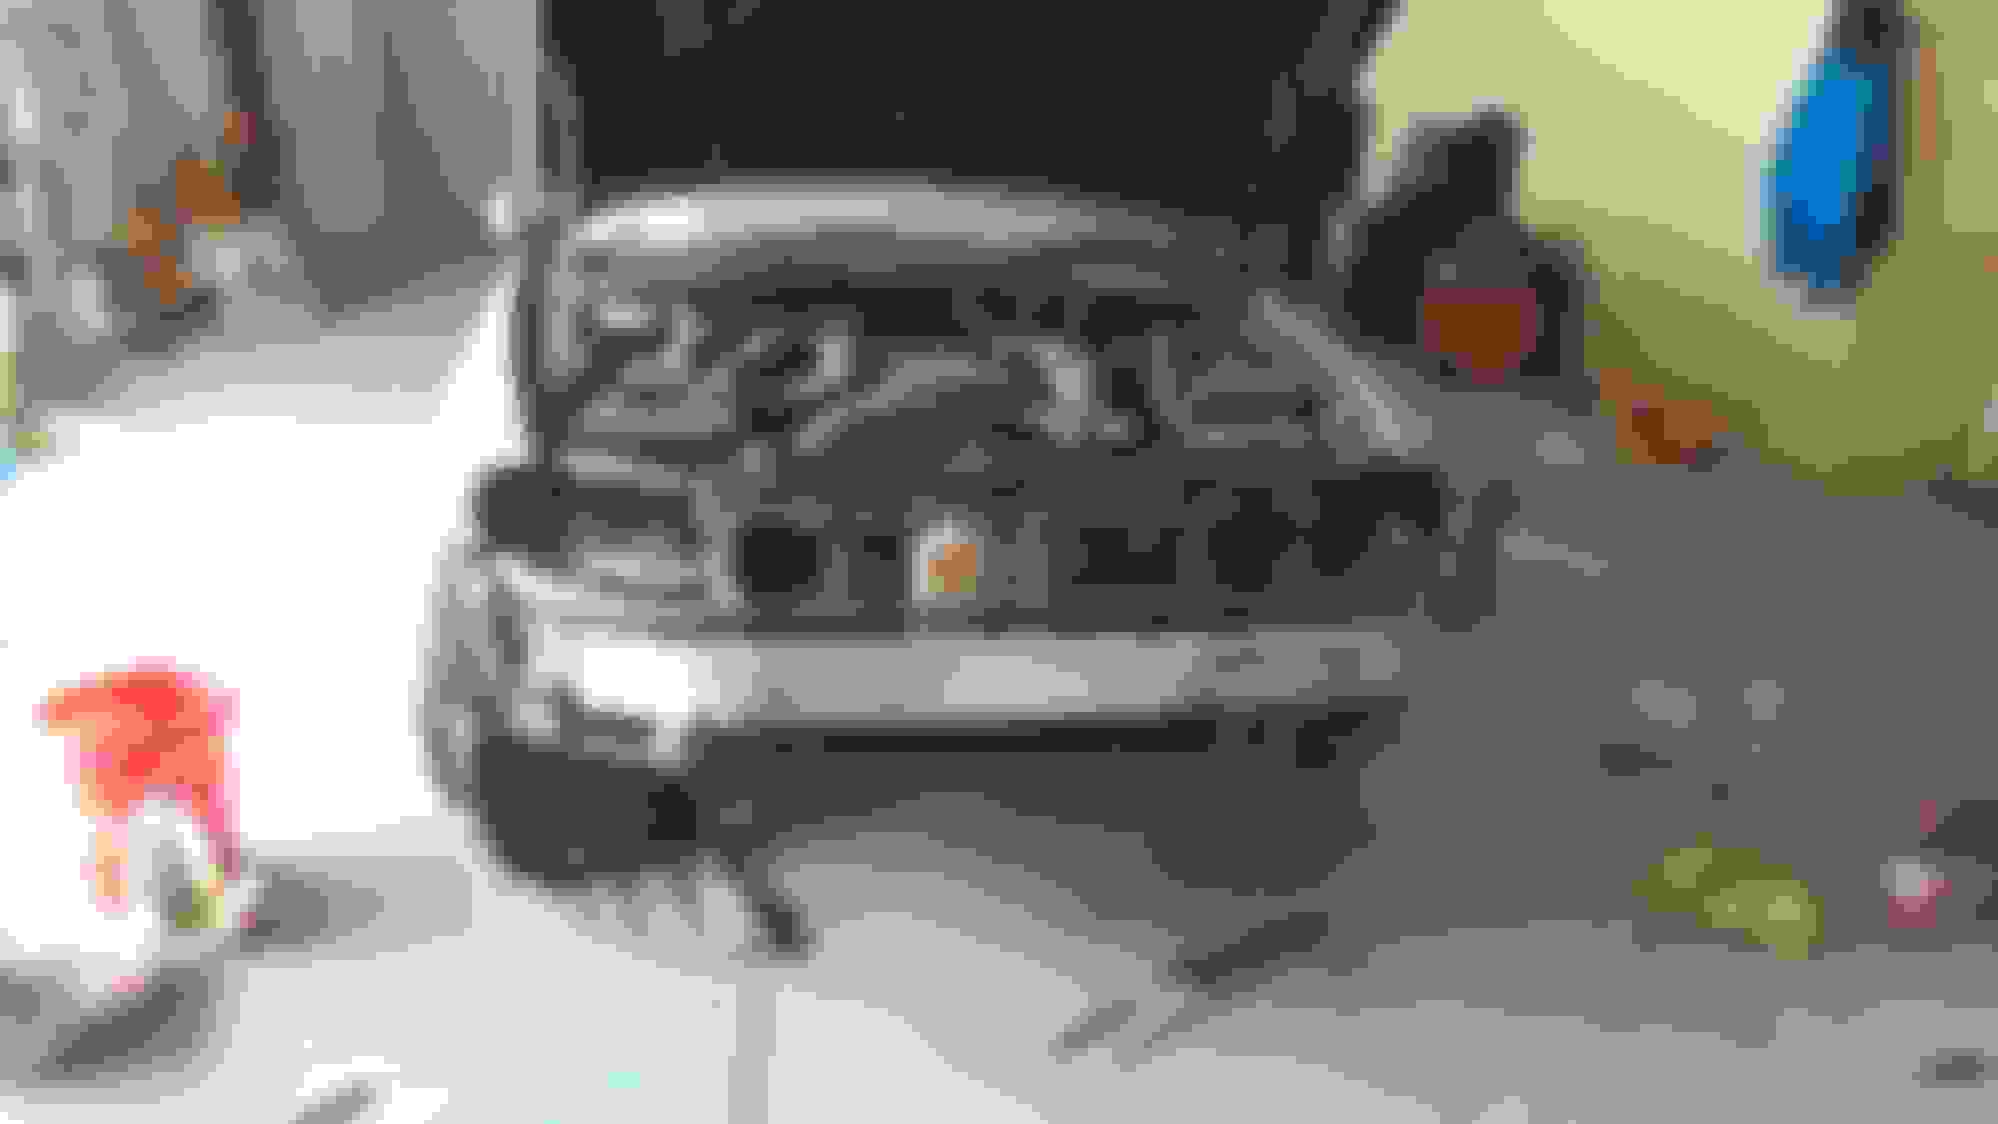
Anywho, once I had gotten everything sanded, cleaned, and prepped, I began the primer stage.
the easiest way for me to do this was by using Rustoleum sandable primer, from cans. You may say to me again "Dear god Derek, why would you spray can anything!?!"
And I'll say "I don't have the equipment, space, or funds to sink into a decent spray gun and compressor setup... and I don't have anywhere to properly keep it... certainly not at work.
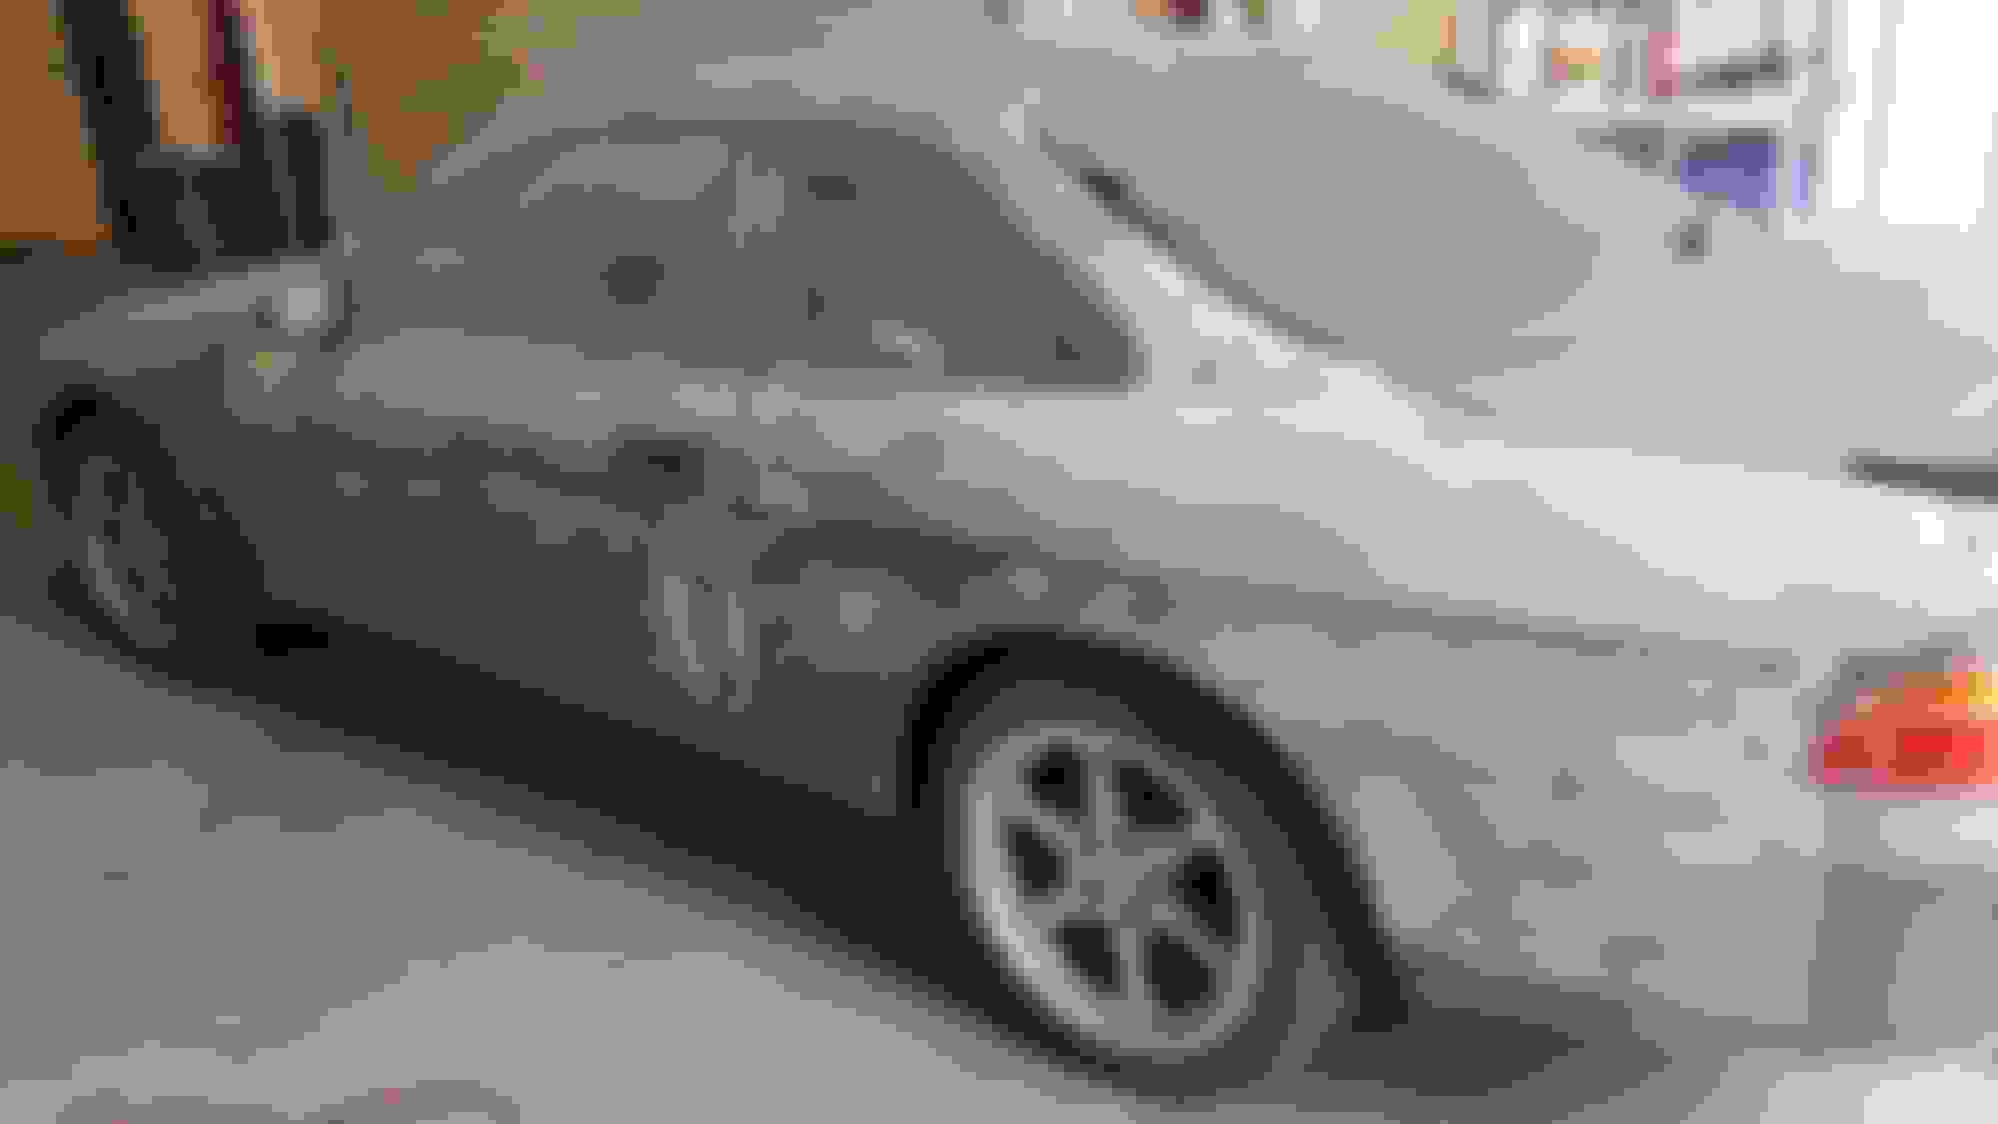
So I primed it using close to 14 large cans of gray primer, trying to do multiple coats for each panel so that the sanding process to get ready for painting went well without cutting it too thin.
Alas, I had it fully primed to the best of my abilities, which this alone took about 3 weekends, saturdays and sometimes sundays, to finish.
As for the paint.... I wanted it done right. And I did not have the equipment to do it properly, so I took it to a Maaco that I've had do work on my wife's hyundai and I was impressed with. they also had some great reviews and they were honest with the process. The only problem was they were in the process of moving their location, so I had to wait a couple weeks to get it painted....
I wasn't in the mood to take it somewhere else, so instead I got it ready for vacation!
ROAD TRIP TO VISIT FAM IN COLORADO!
how else was I going to test how well the primer holds up? or even how reliable my new touring car would be at touring?
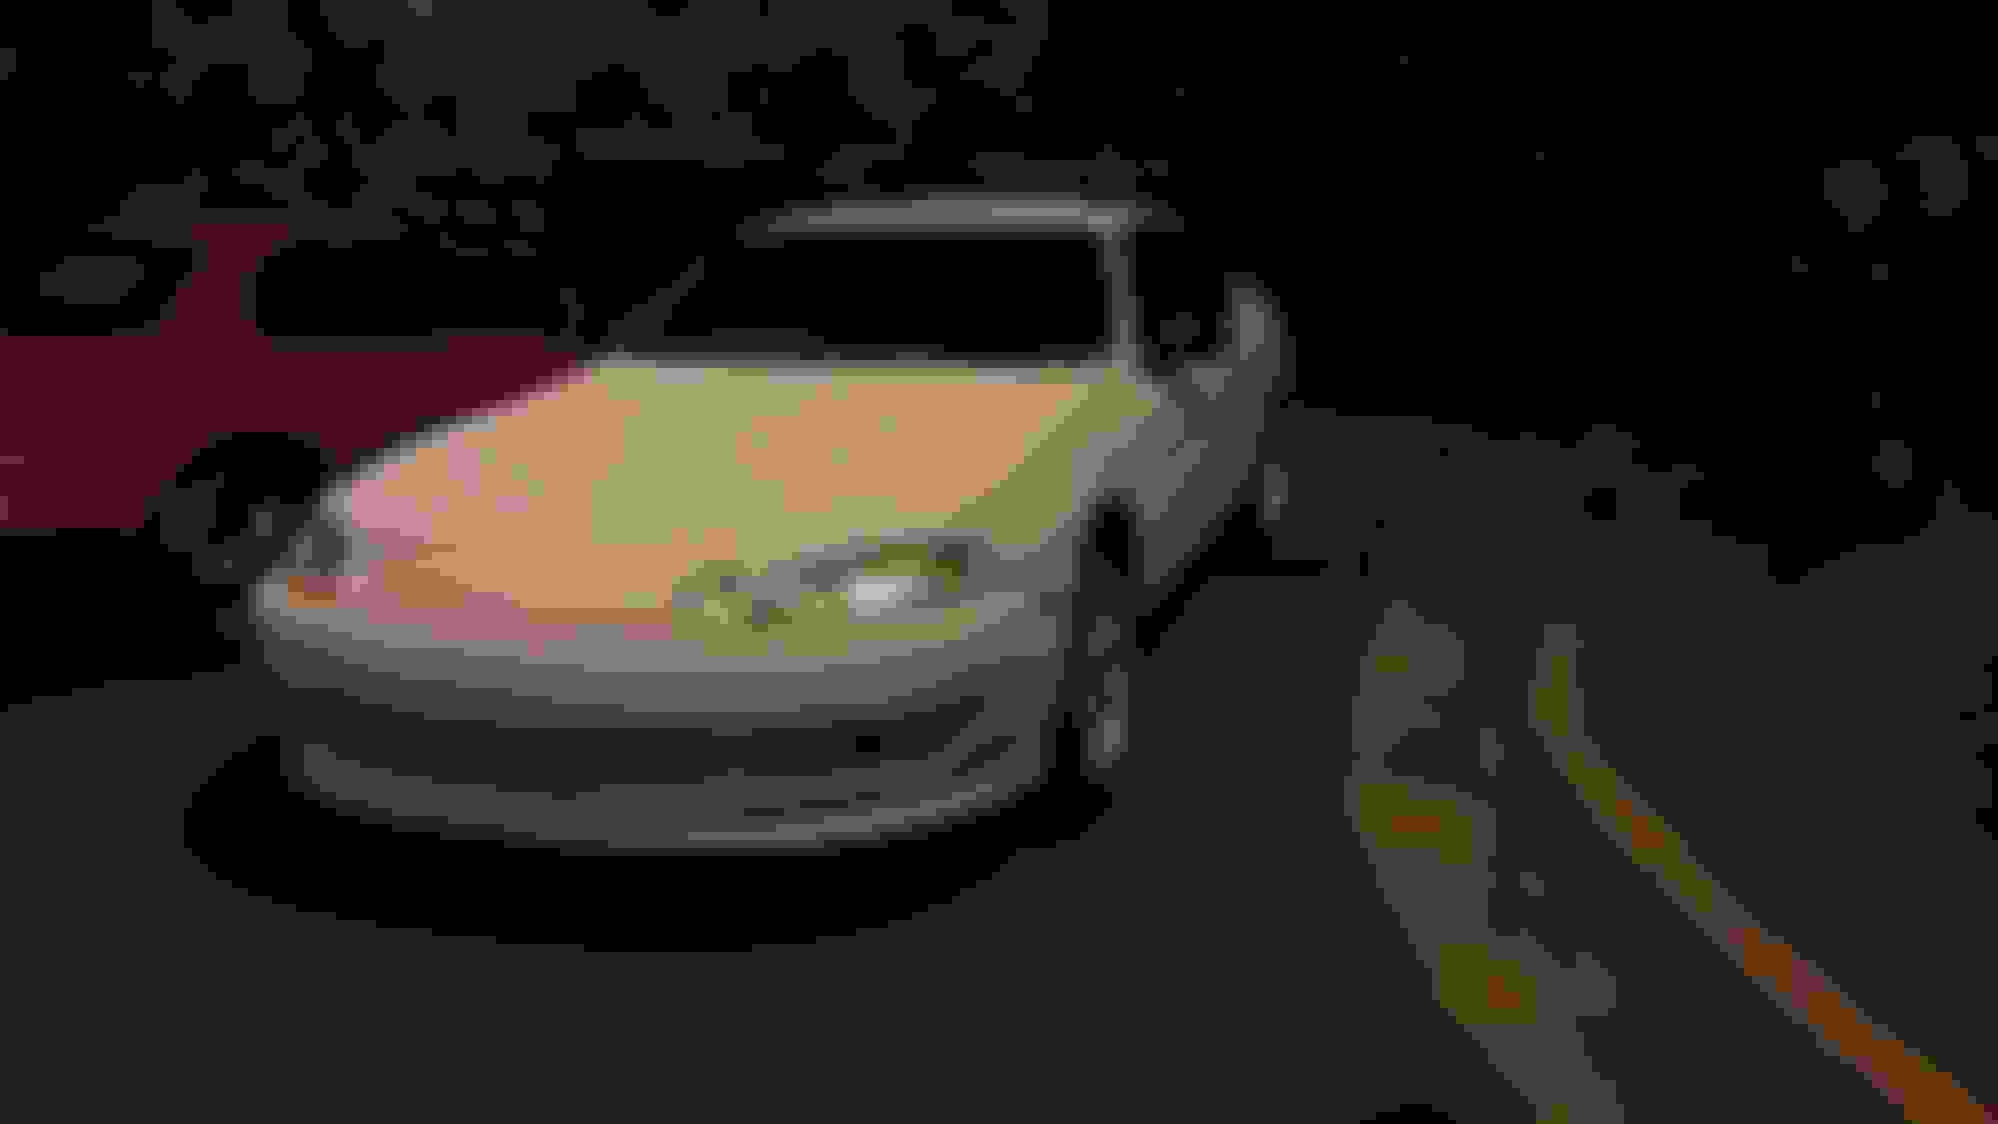
So we set off on our journey half way across the United States! (pics included in comments) She even made it to the top of PIKES PEAK!
(missing colorado pics)
On the drive back the only problem I had was hitting something in the middle of the road and blowing a tire, which I found out this car comes with a full size tire for a spare! but we stopped in the next town and got some new front tires for it. still need some back tires.... but Im enjoying getting a little drift time out of the old ones in the back right now XD
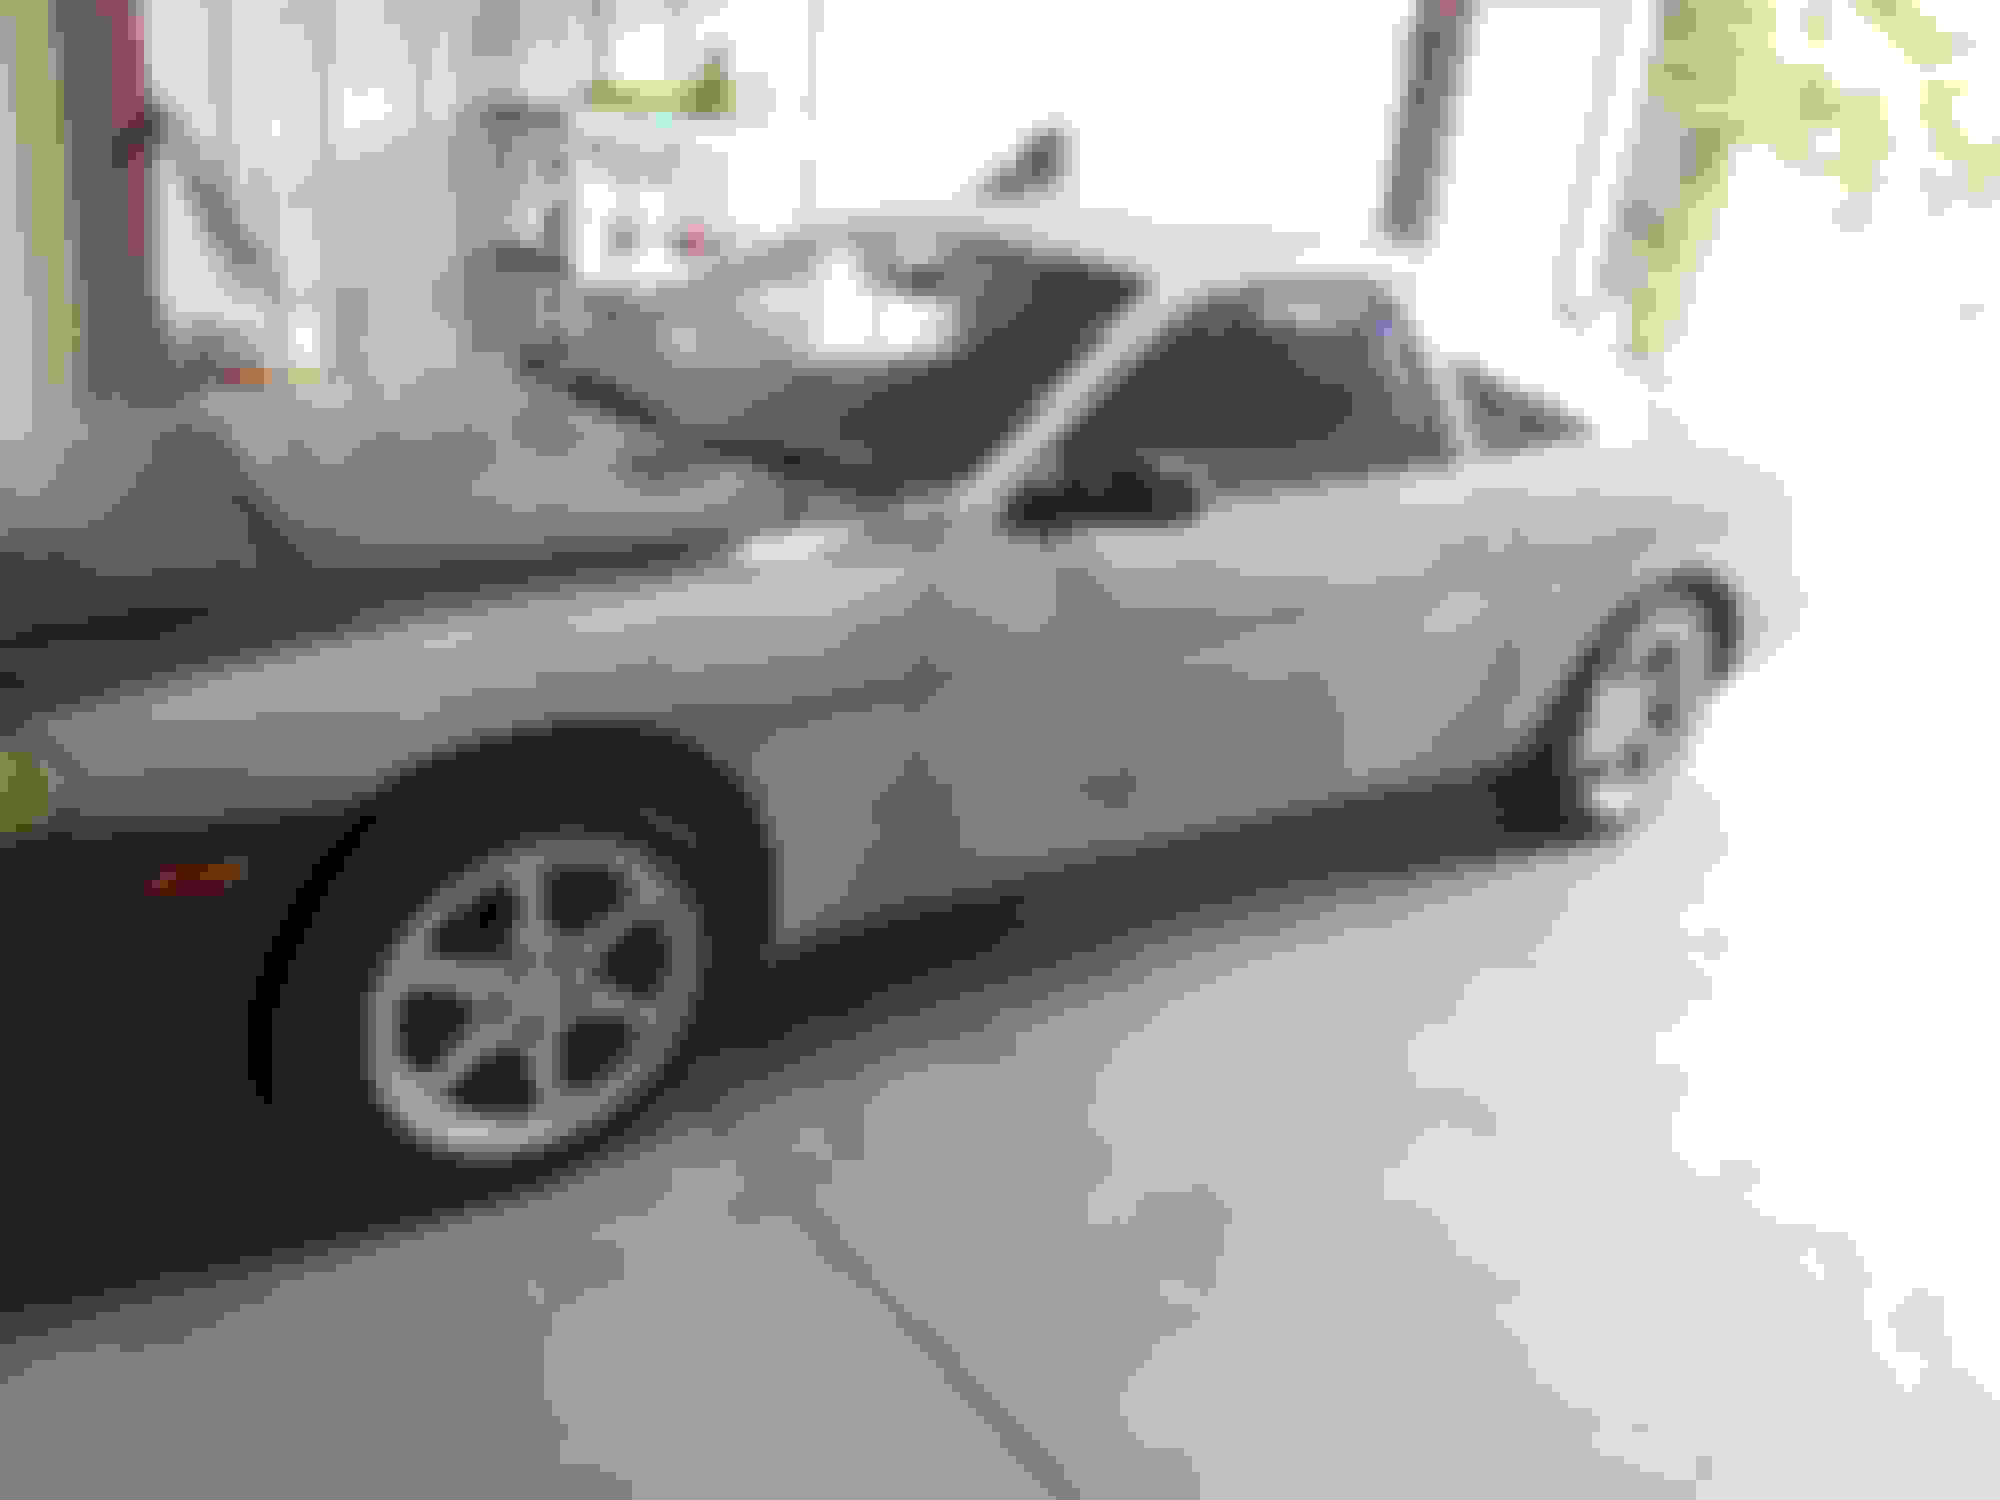
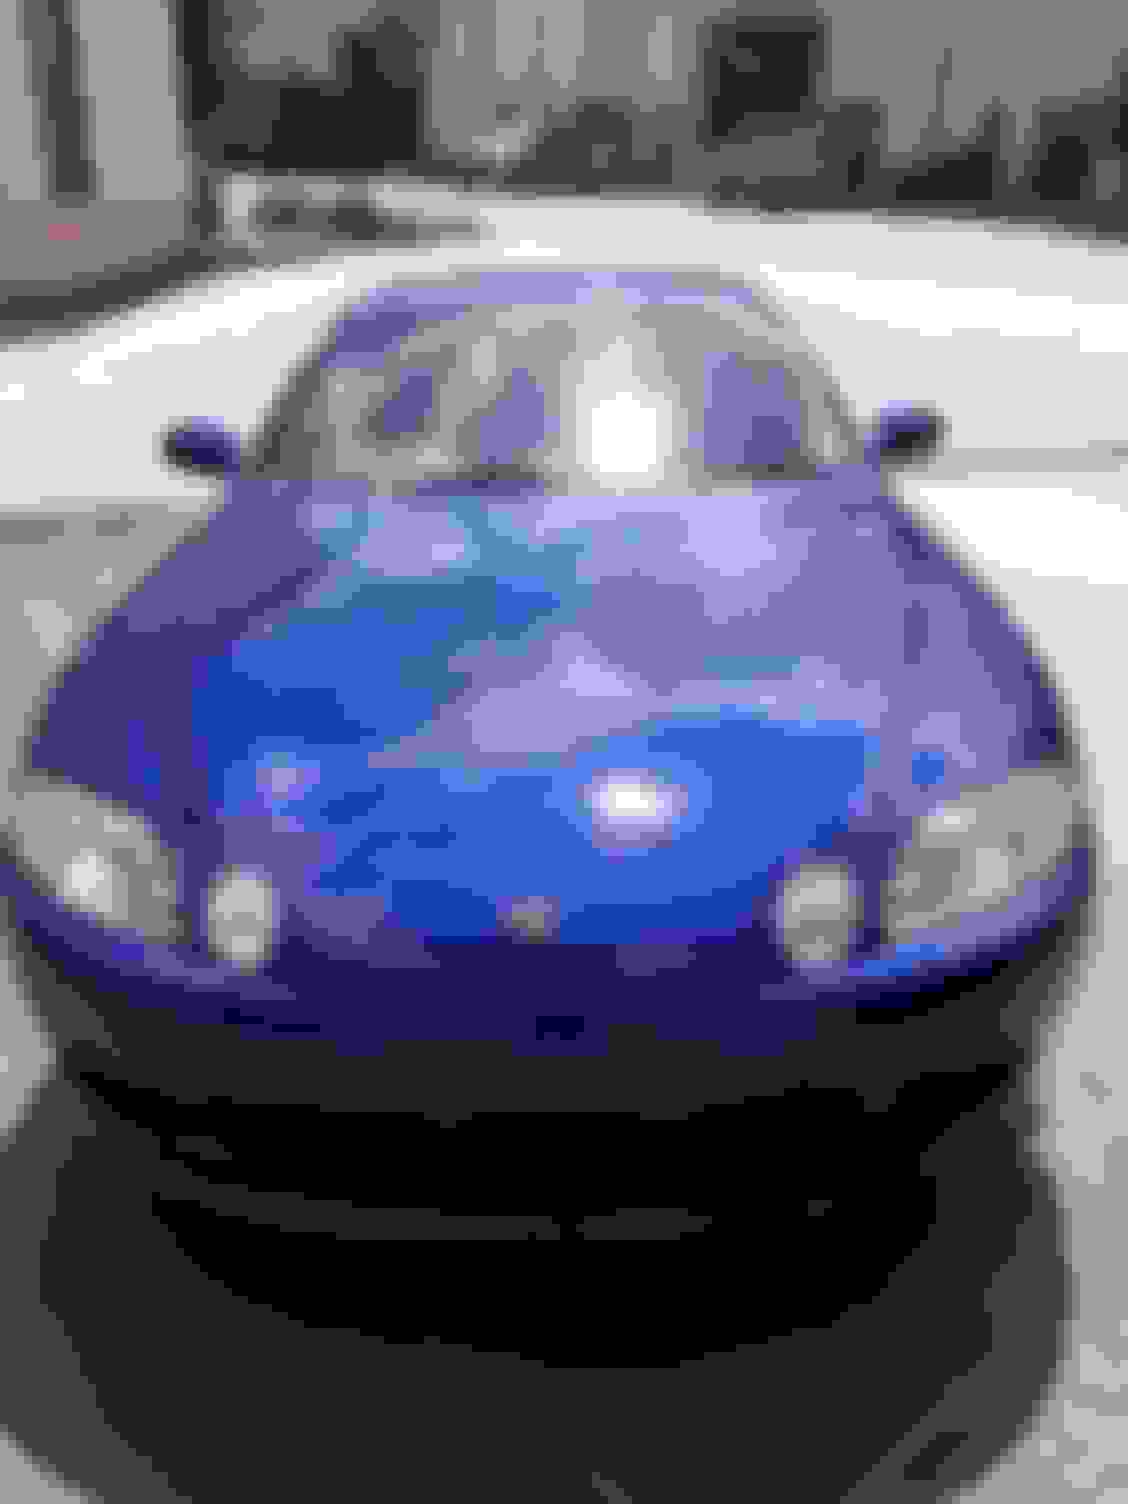
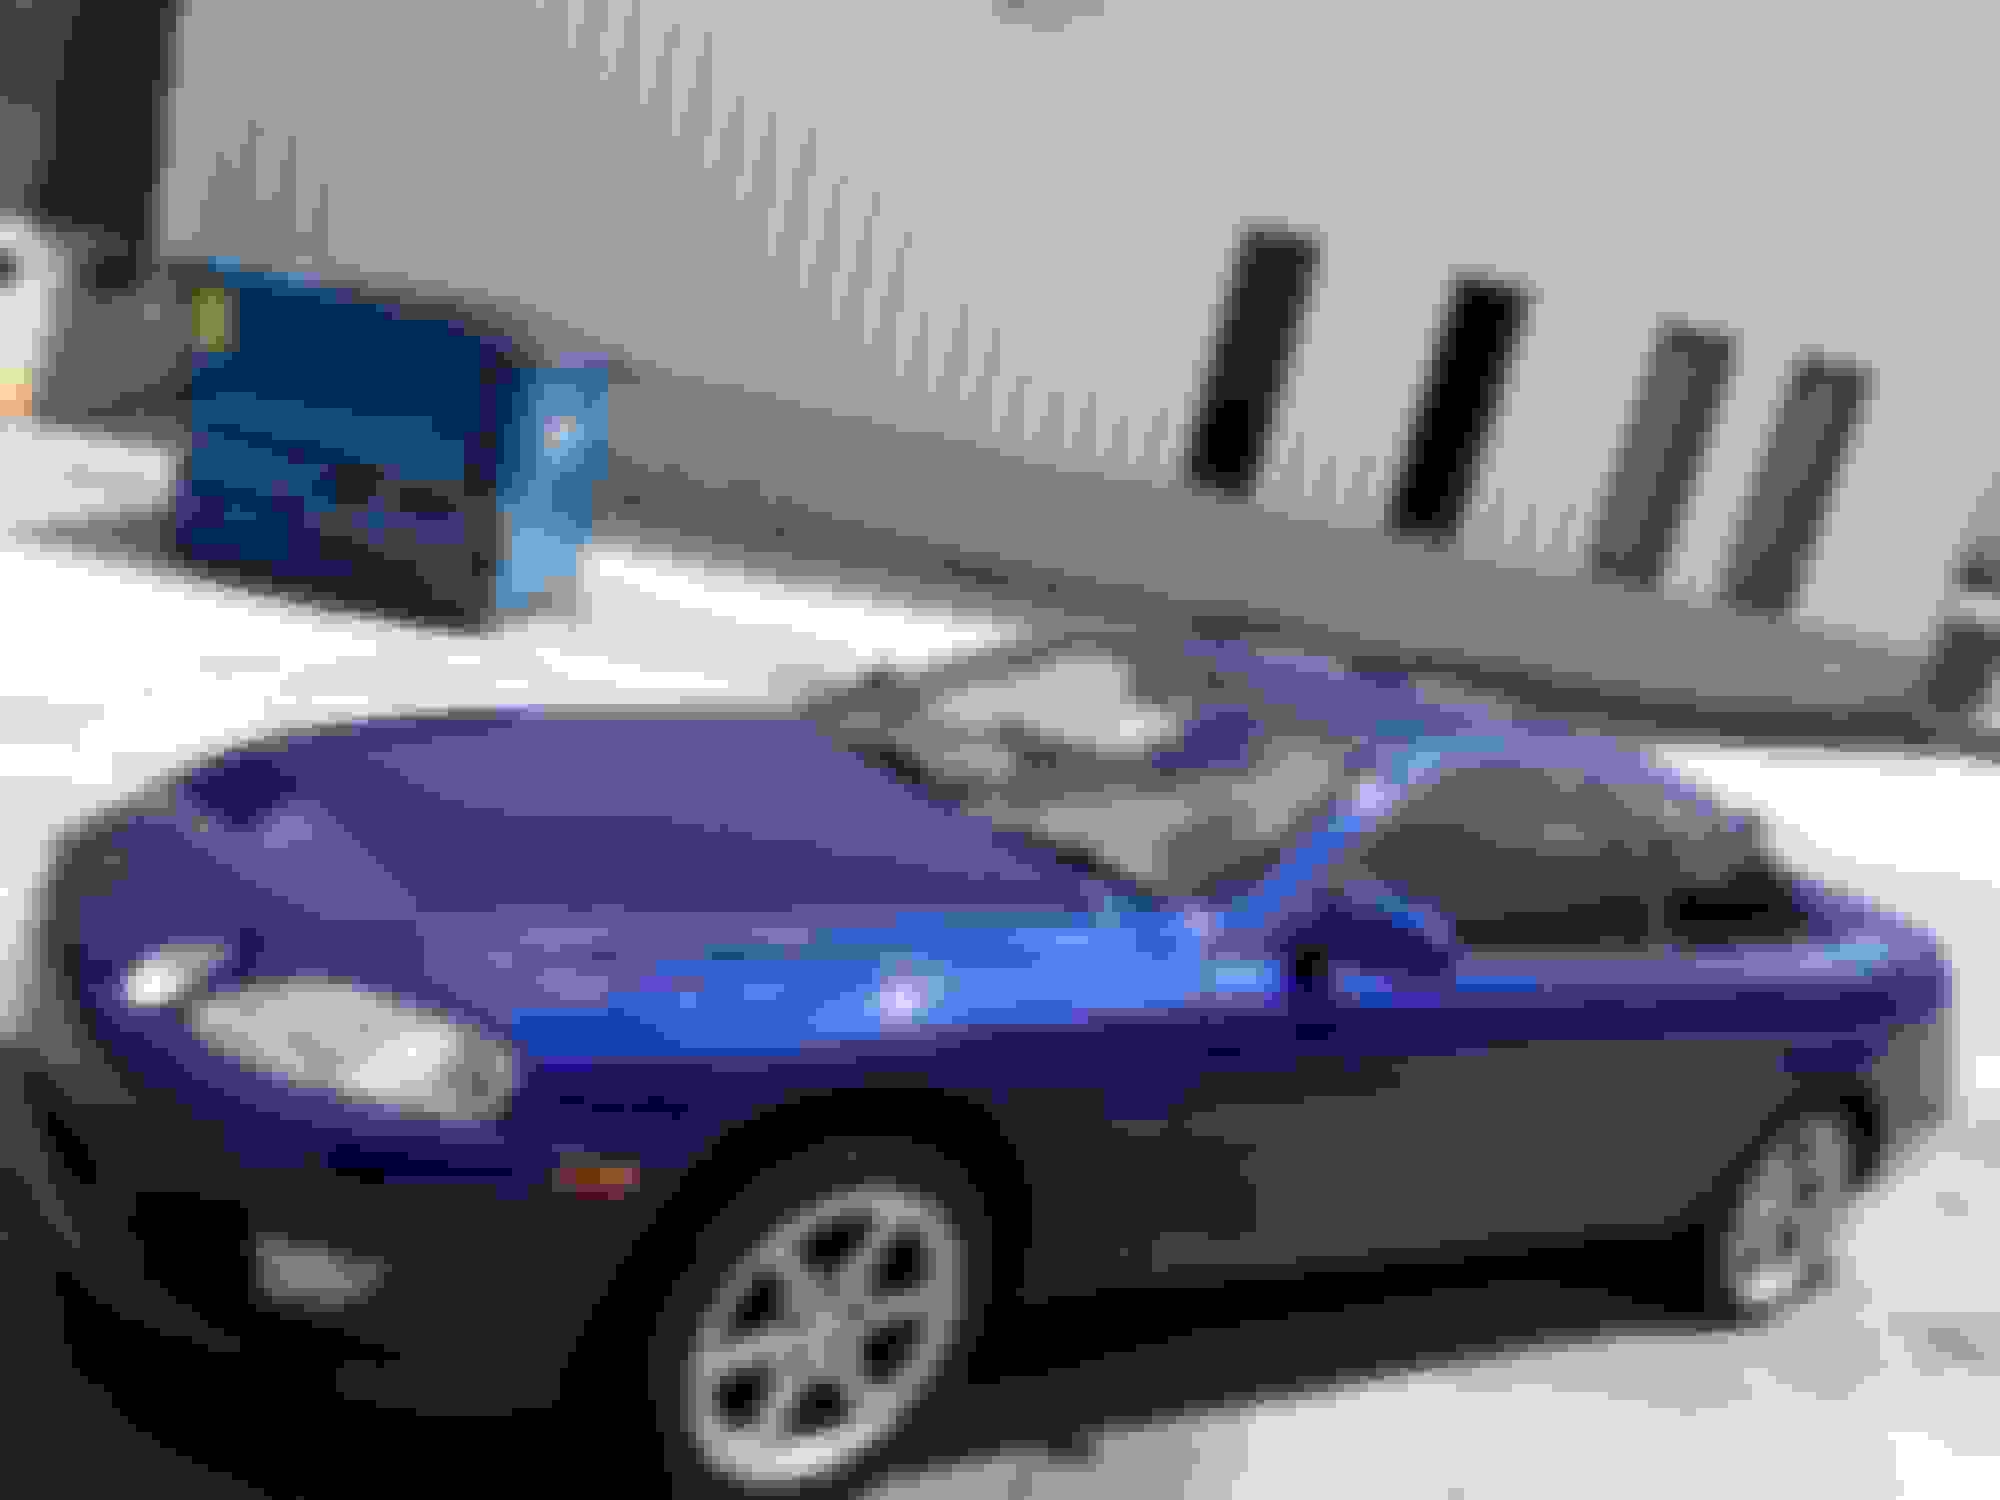
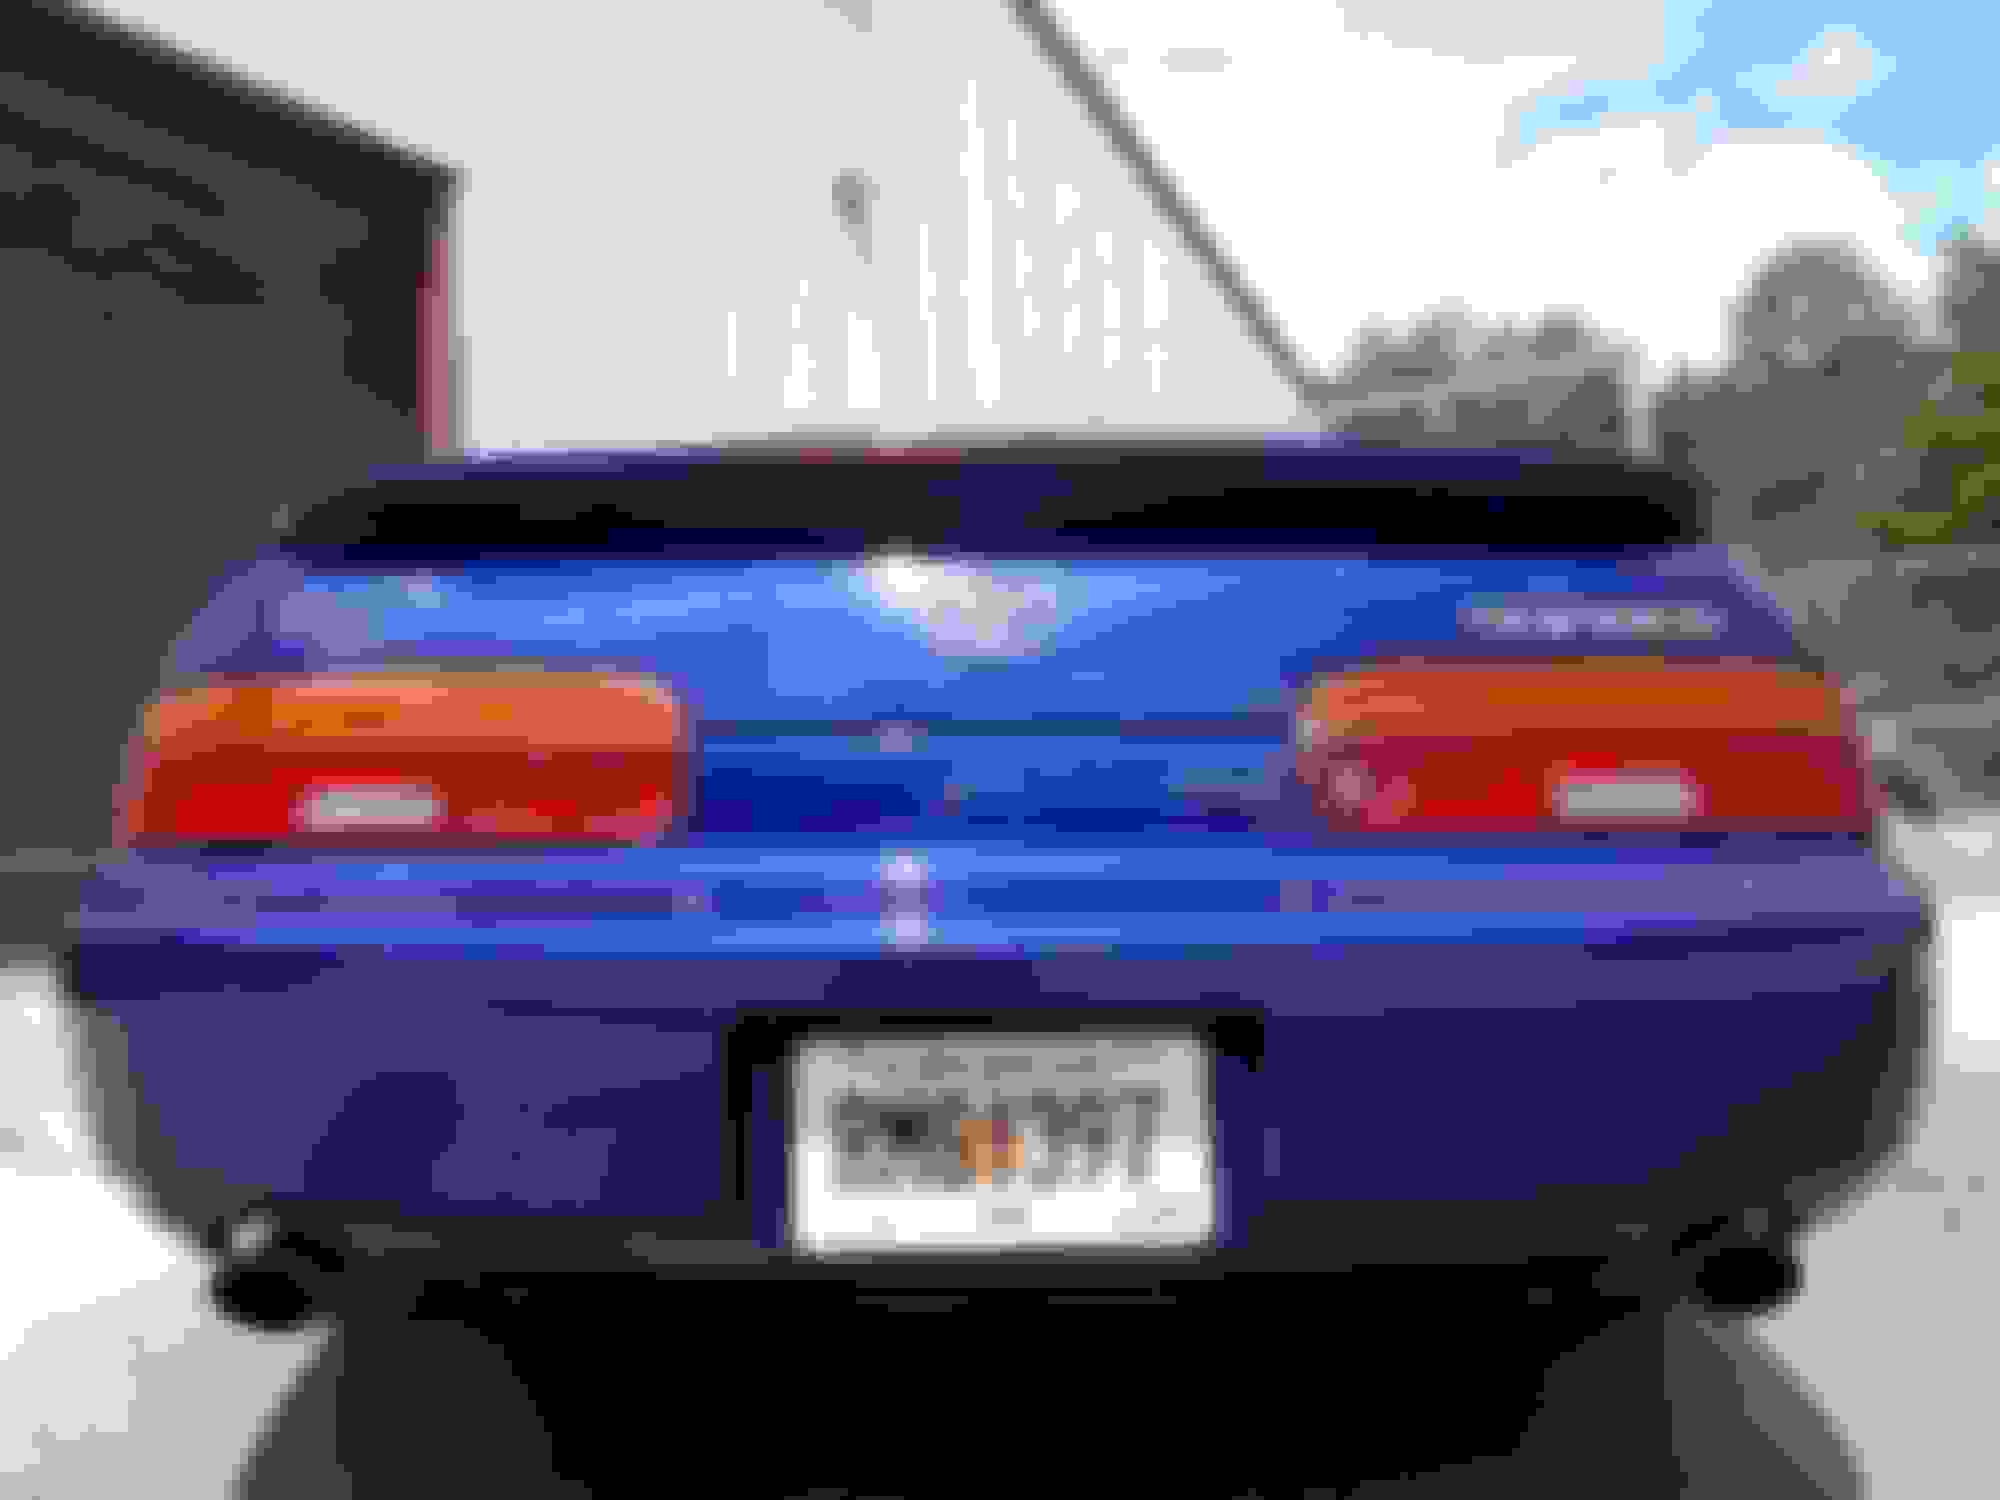
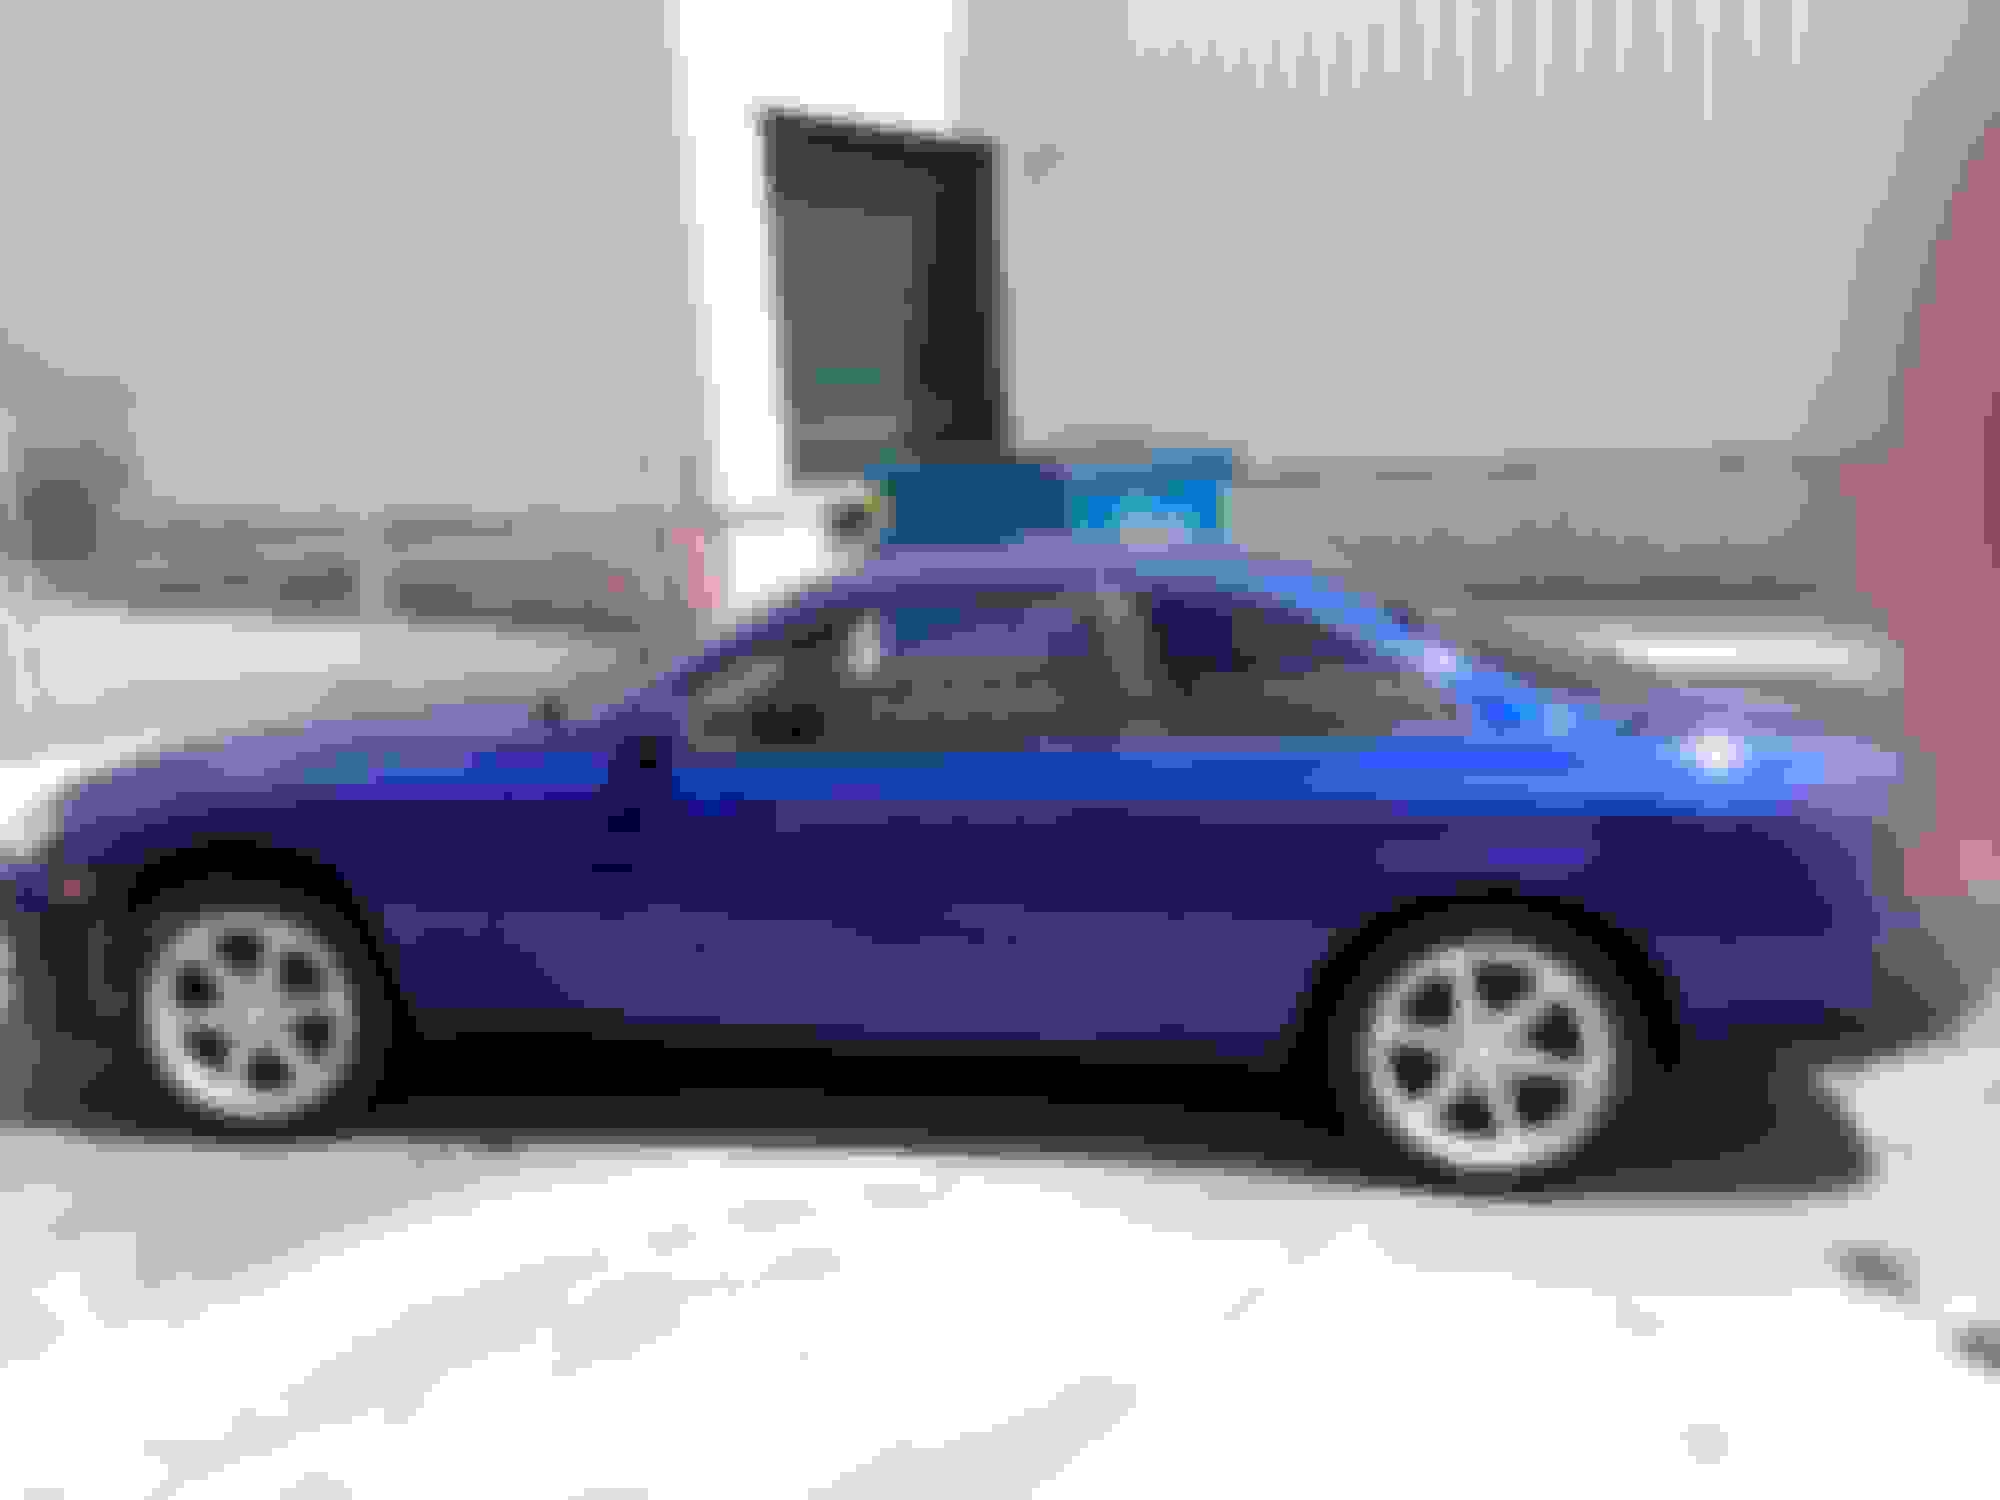
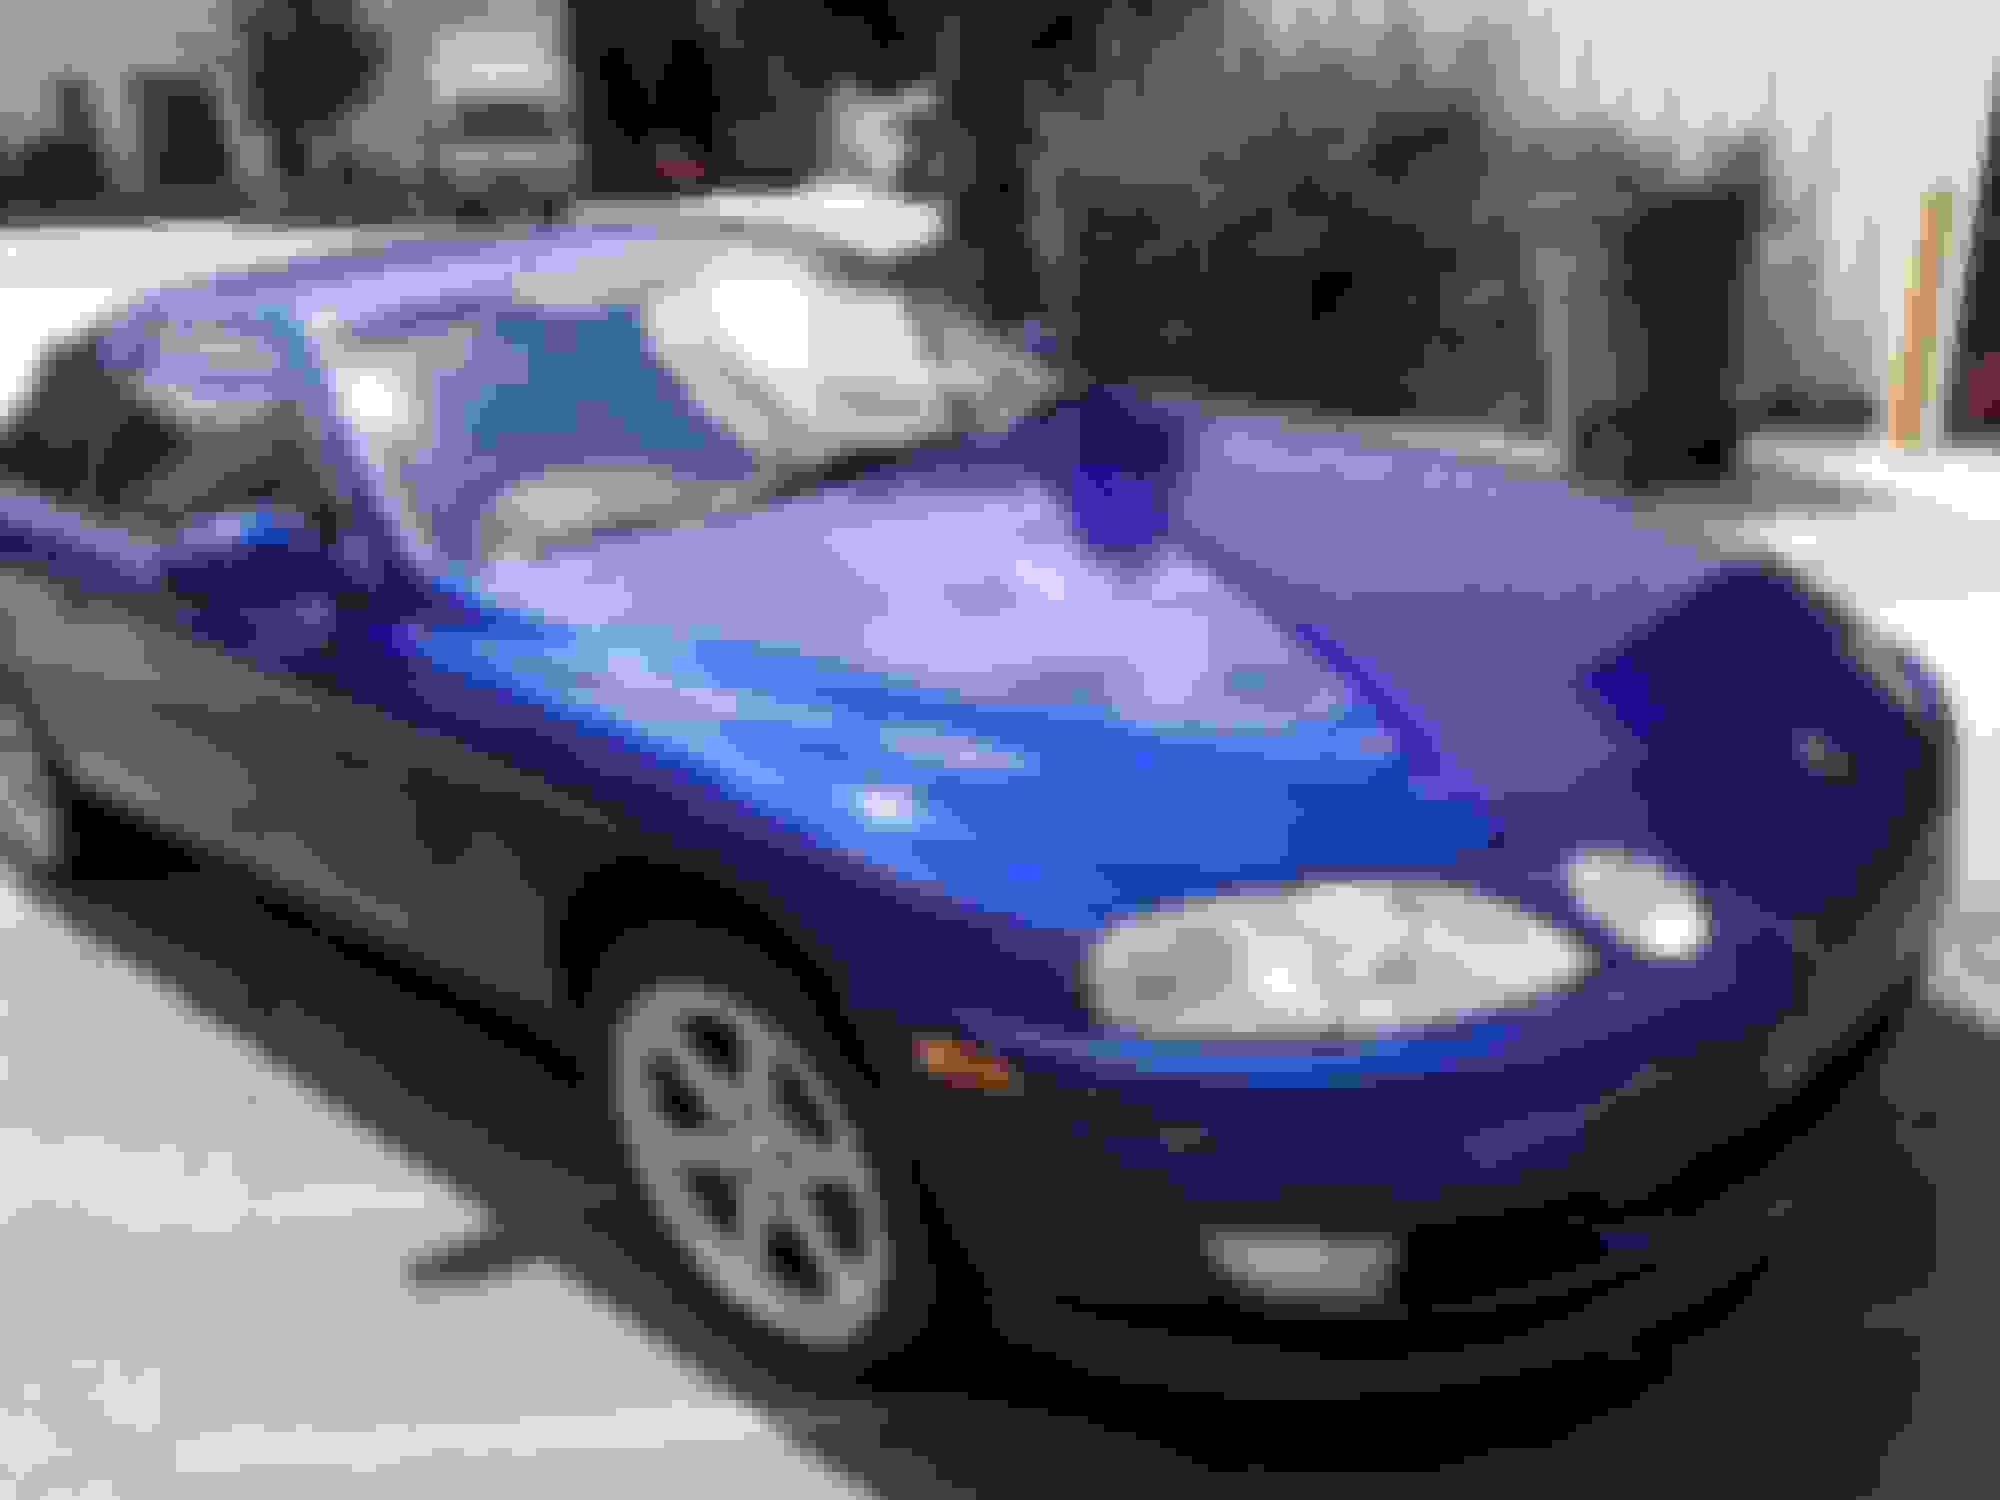
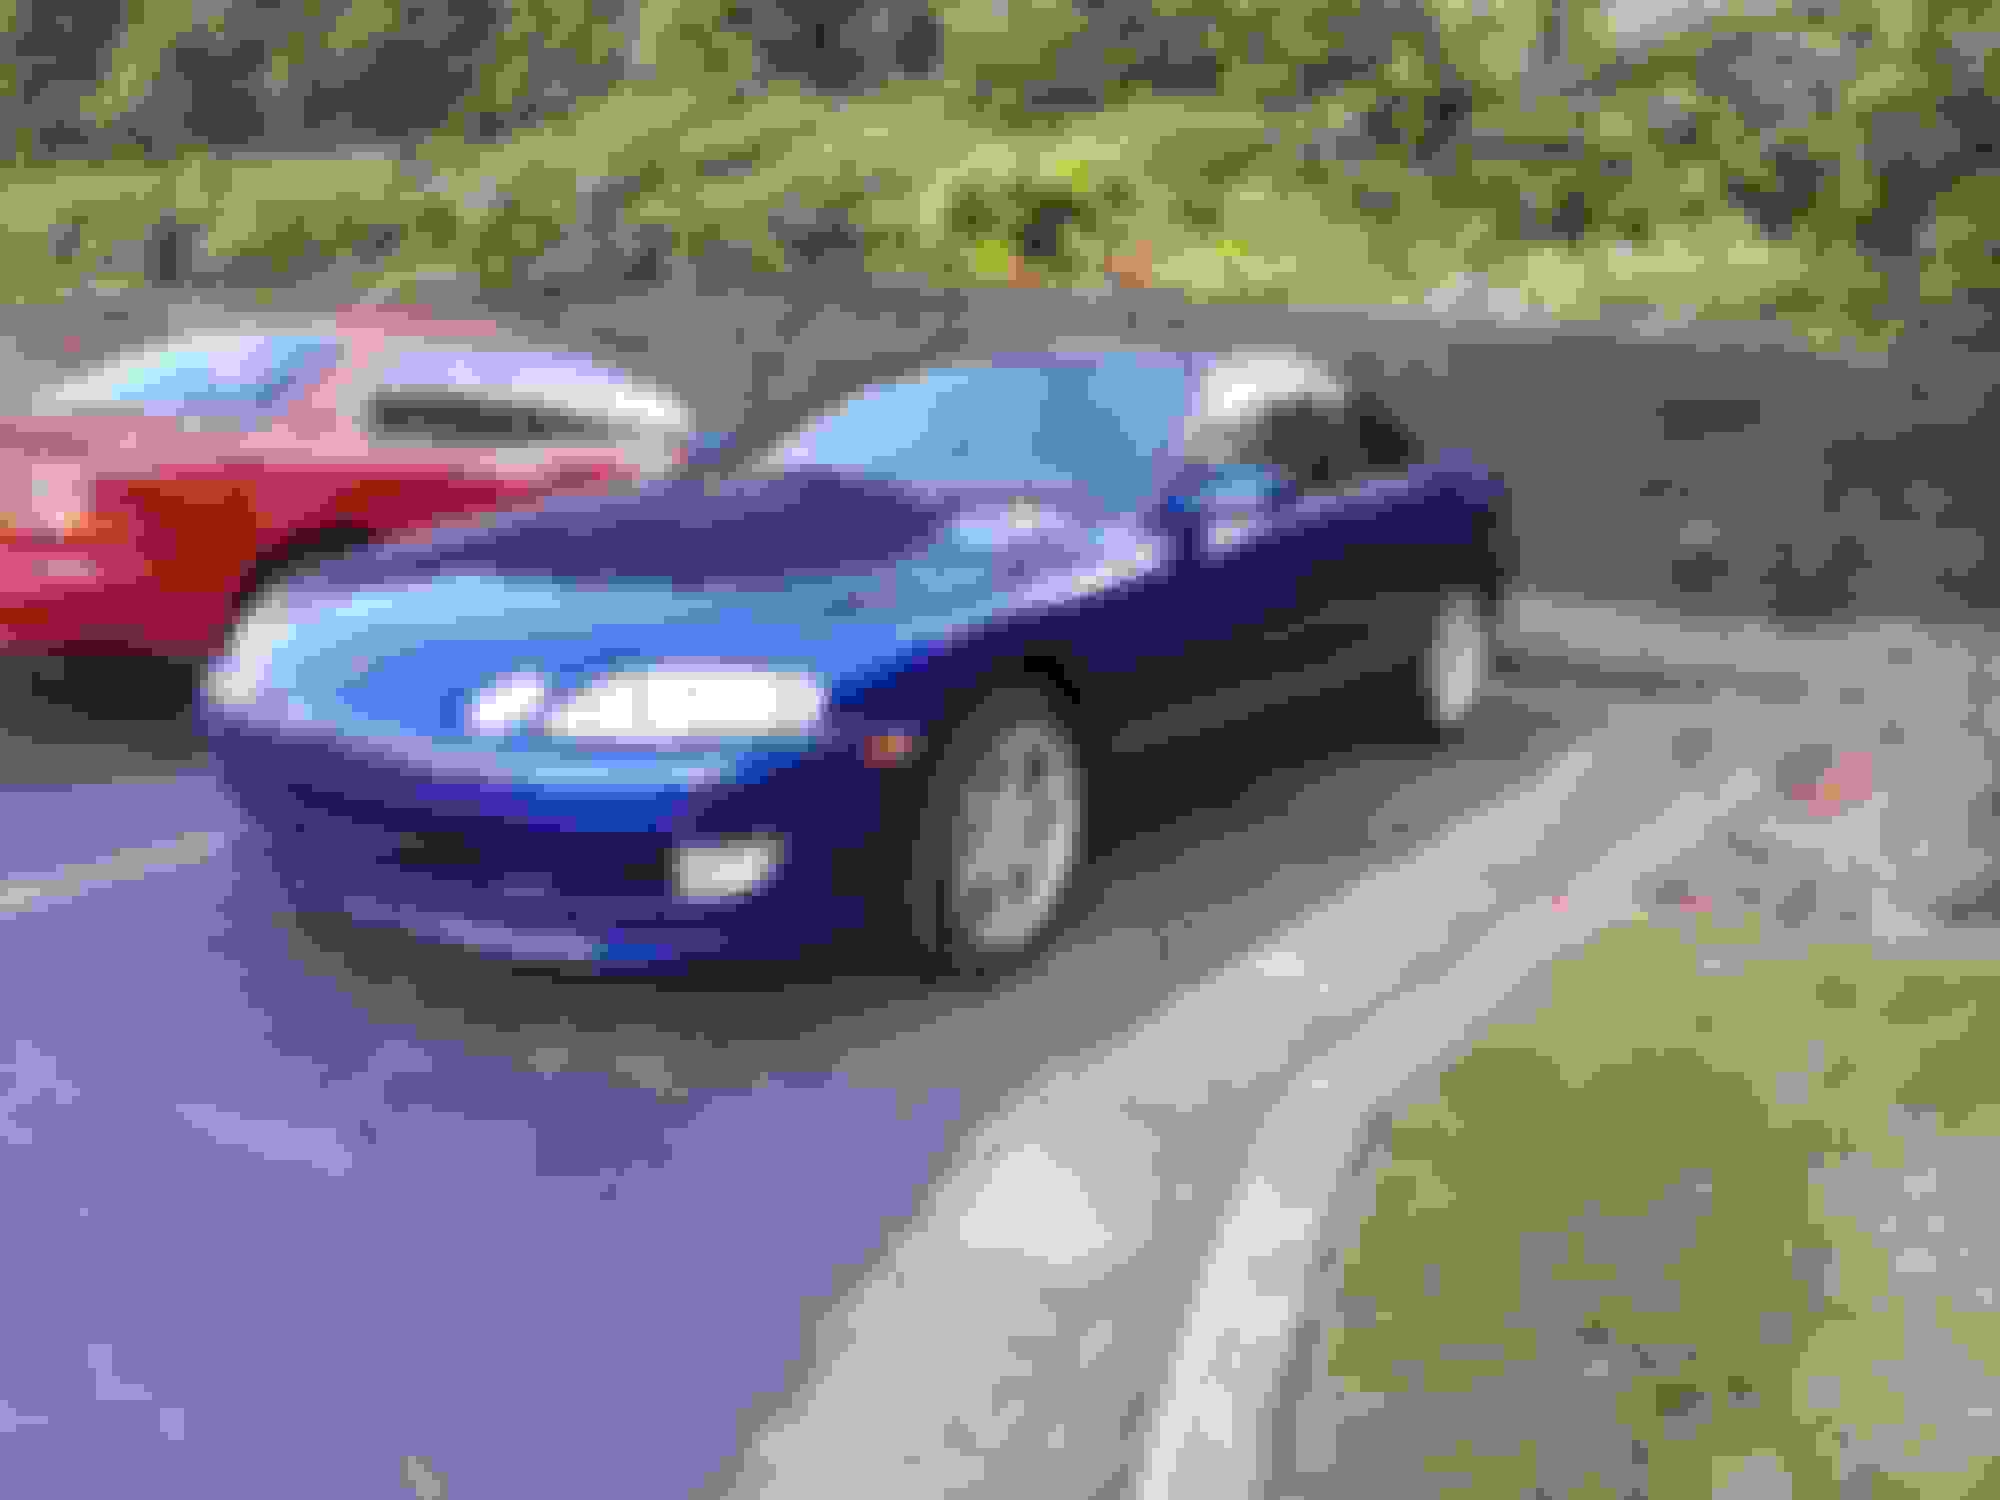
Anywho, so we get back from our adventure, and I take her in to the shop to get painted... and it was that day I decided hell.... instead of the dark indigo blue, let's do something a bit more interesting. And I went from an 8J5 paint code, to an 8L5 paint code.
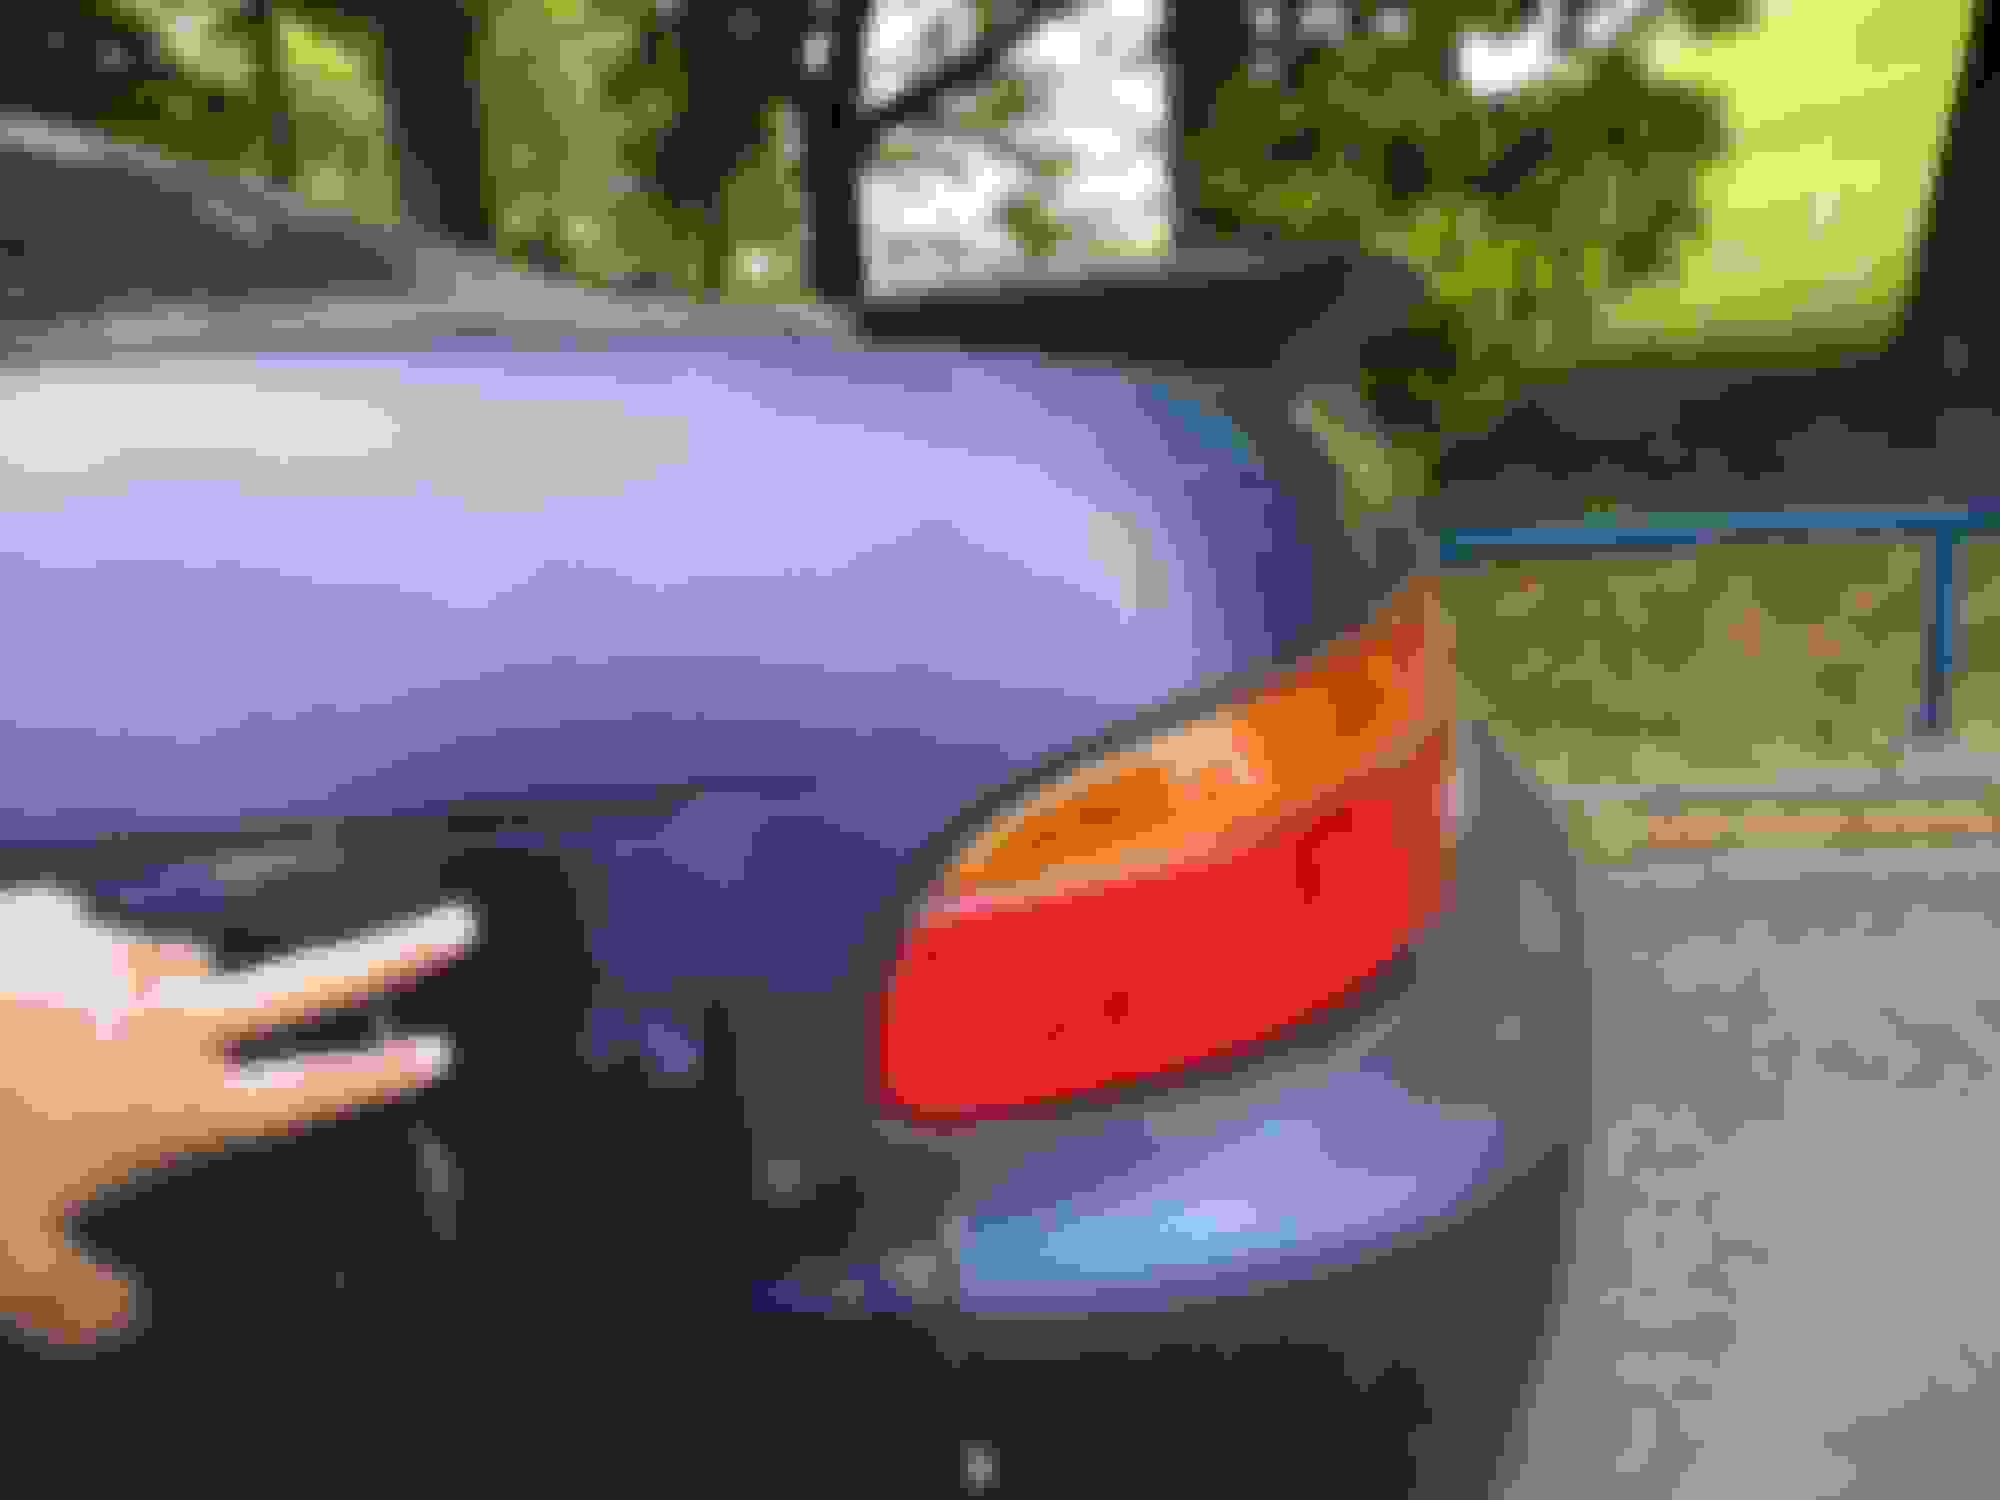
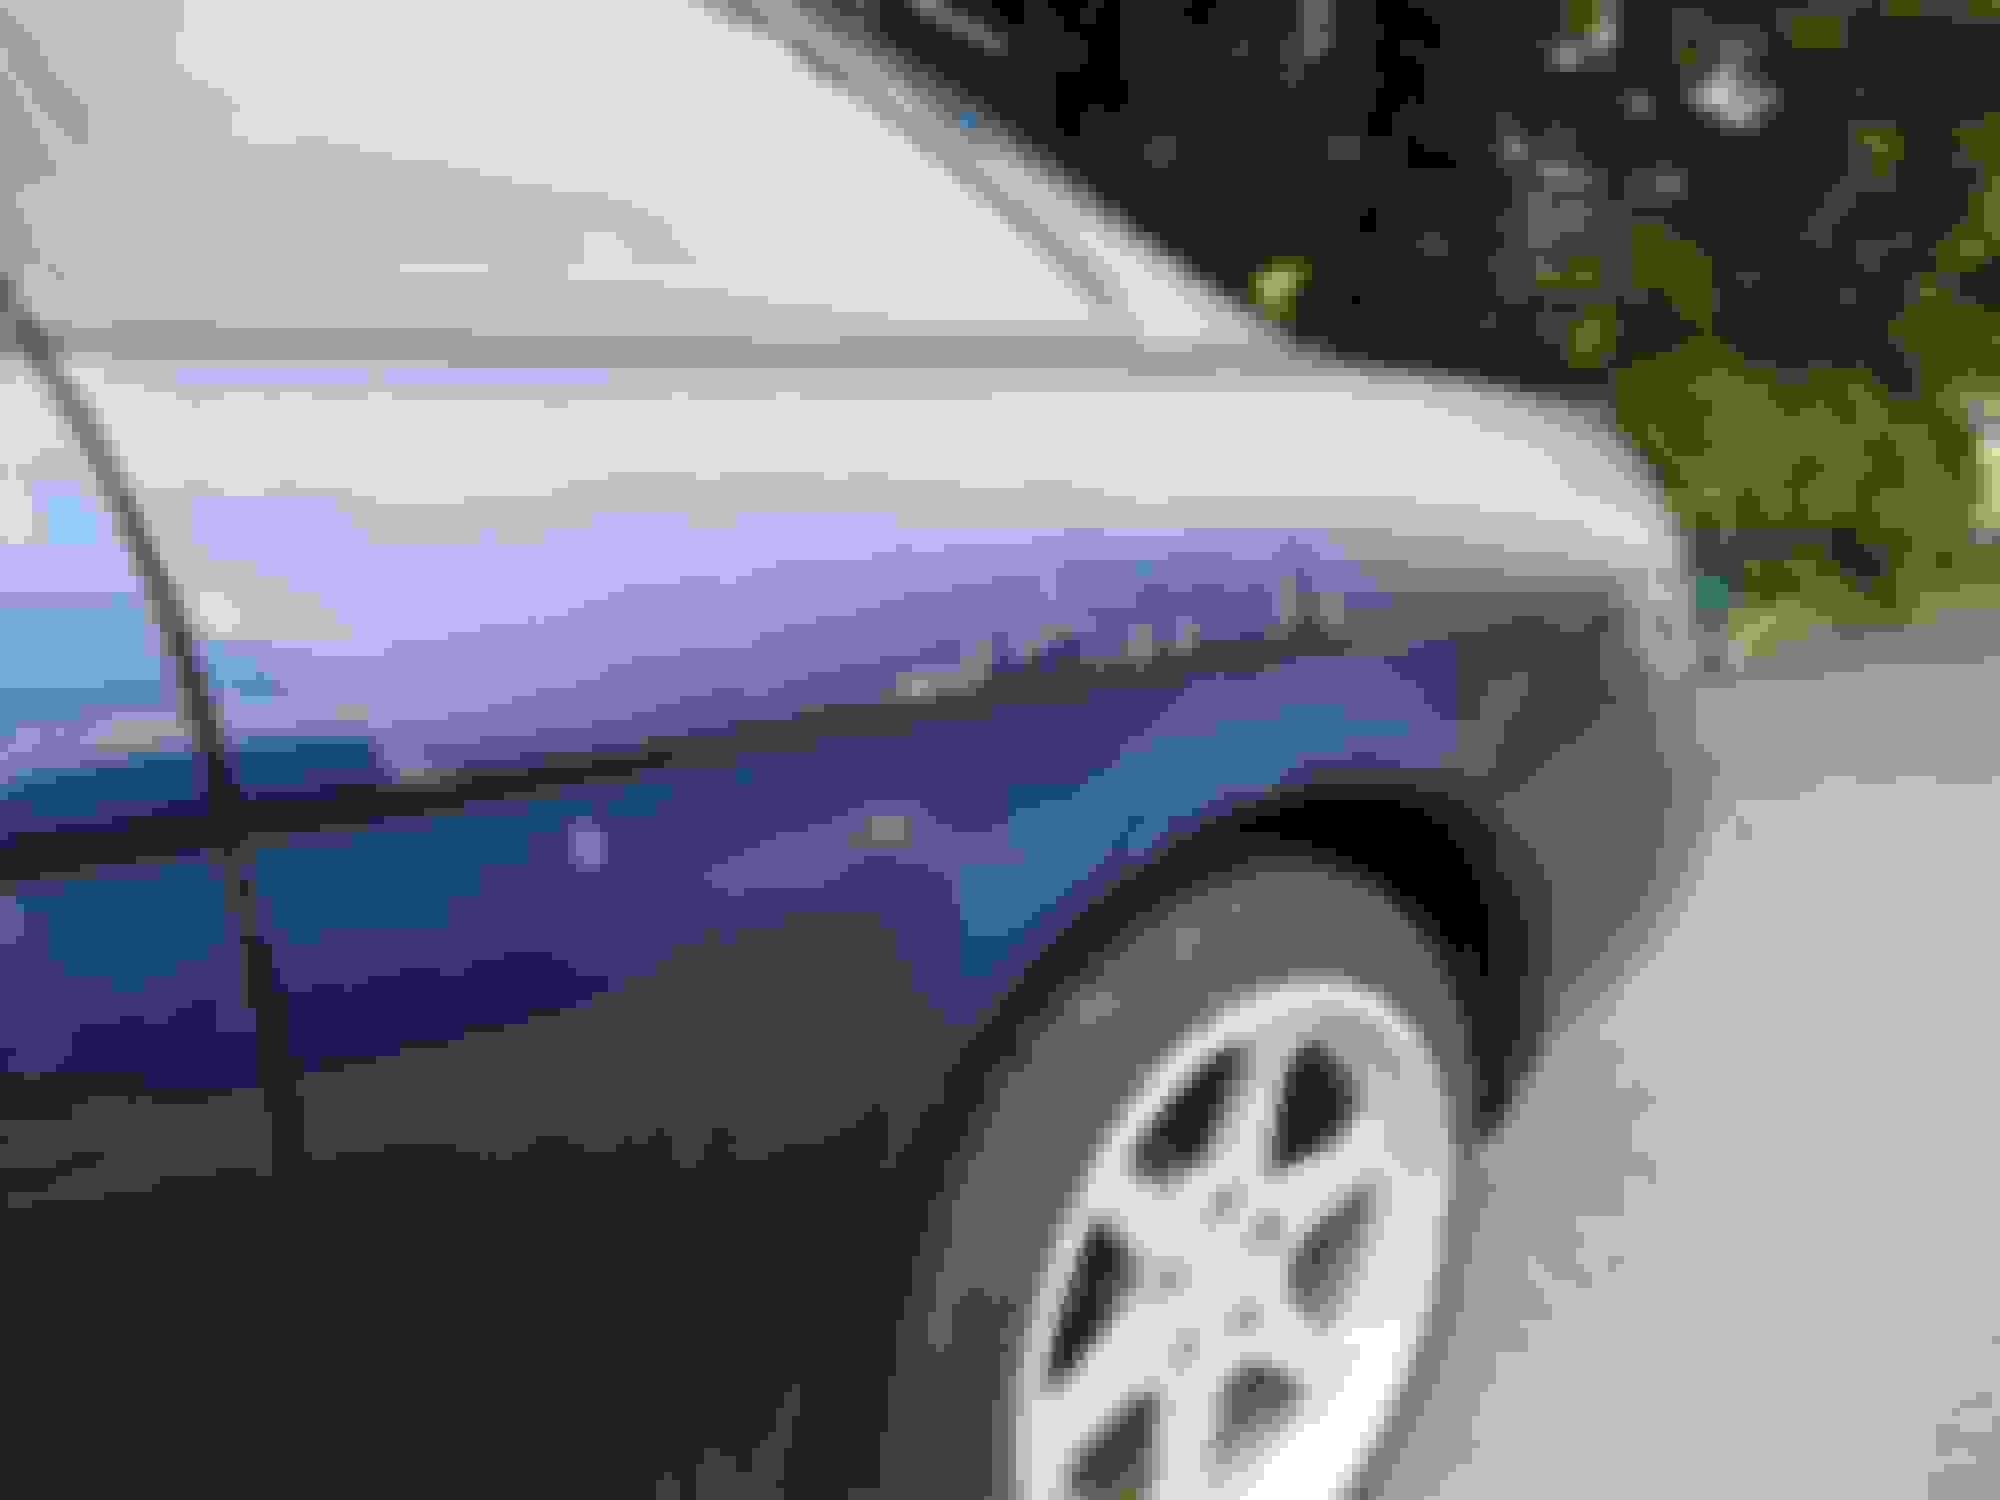
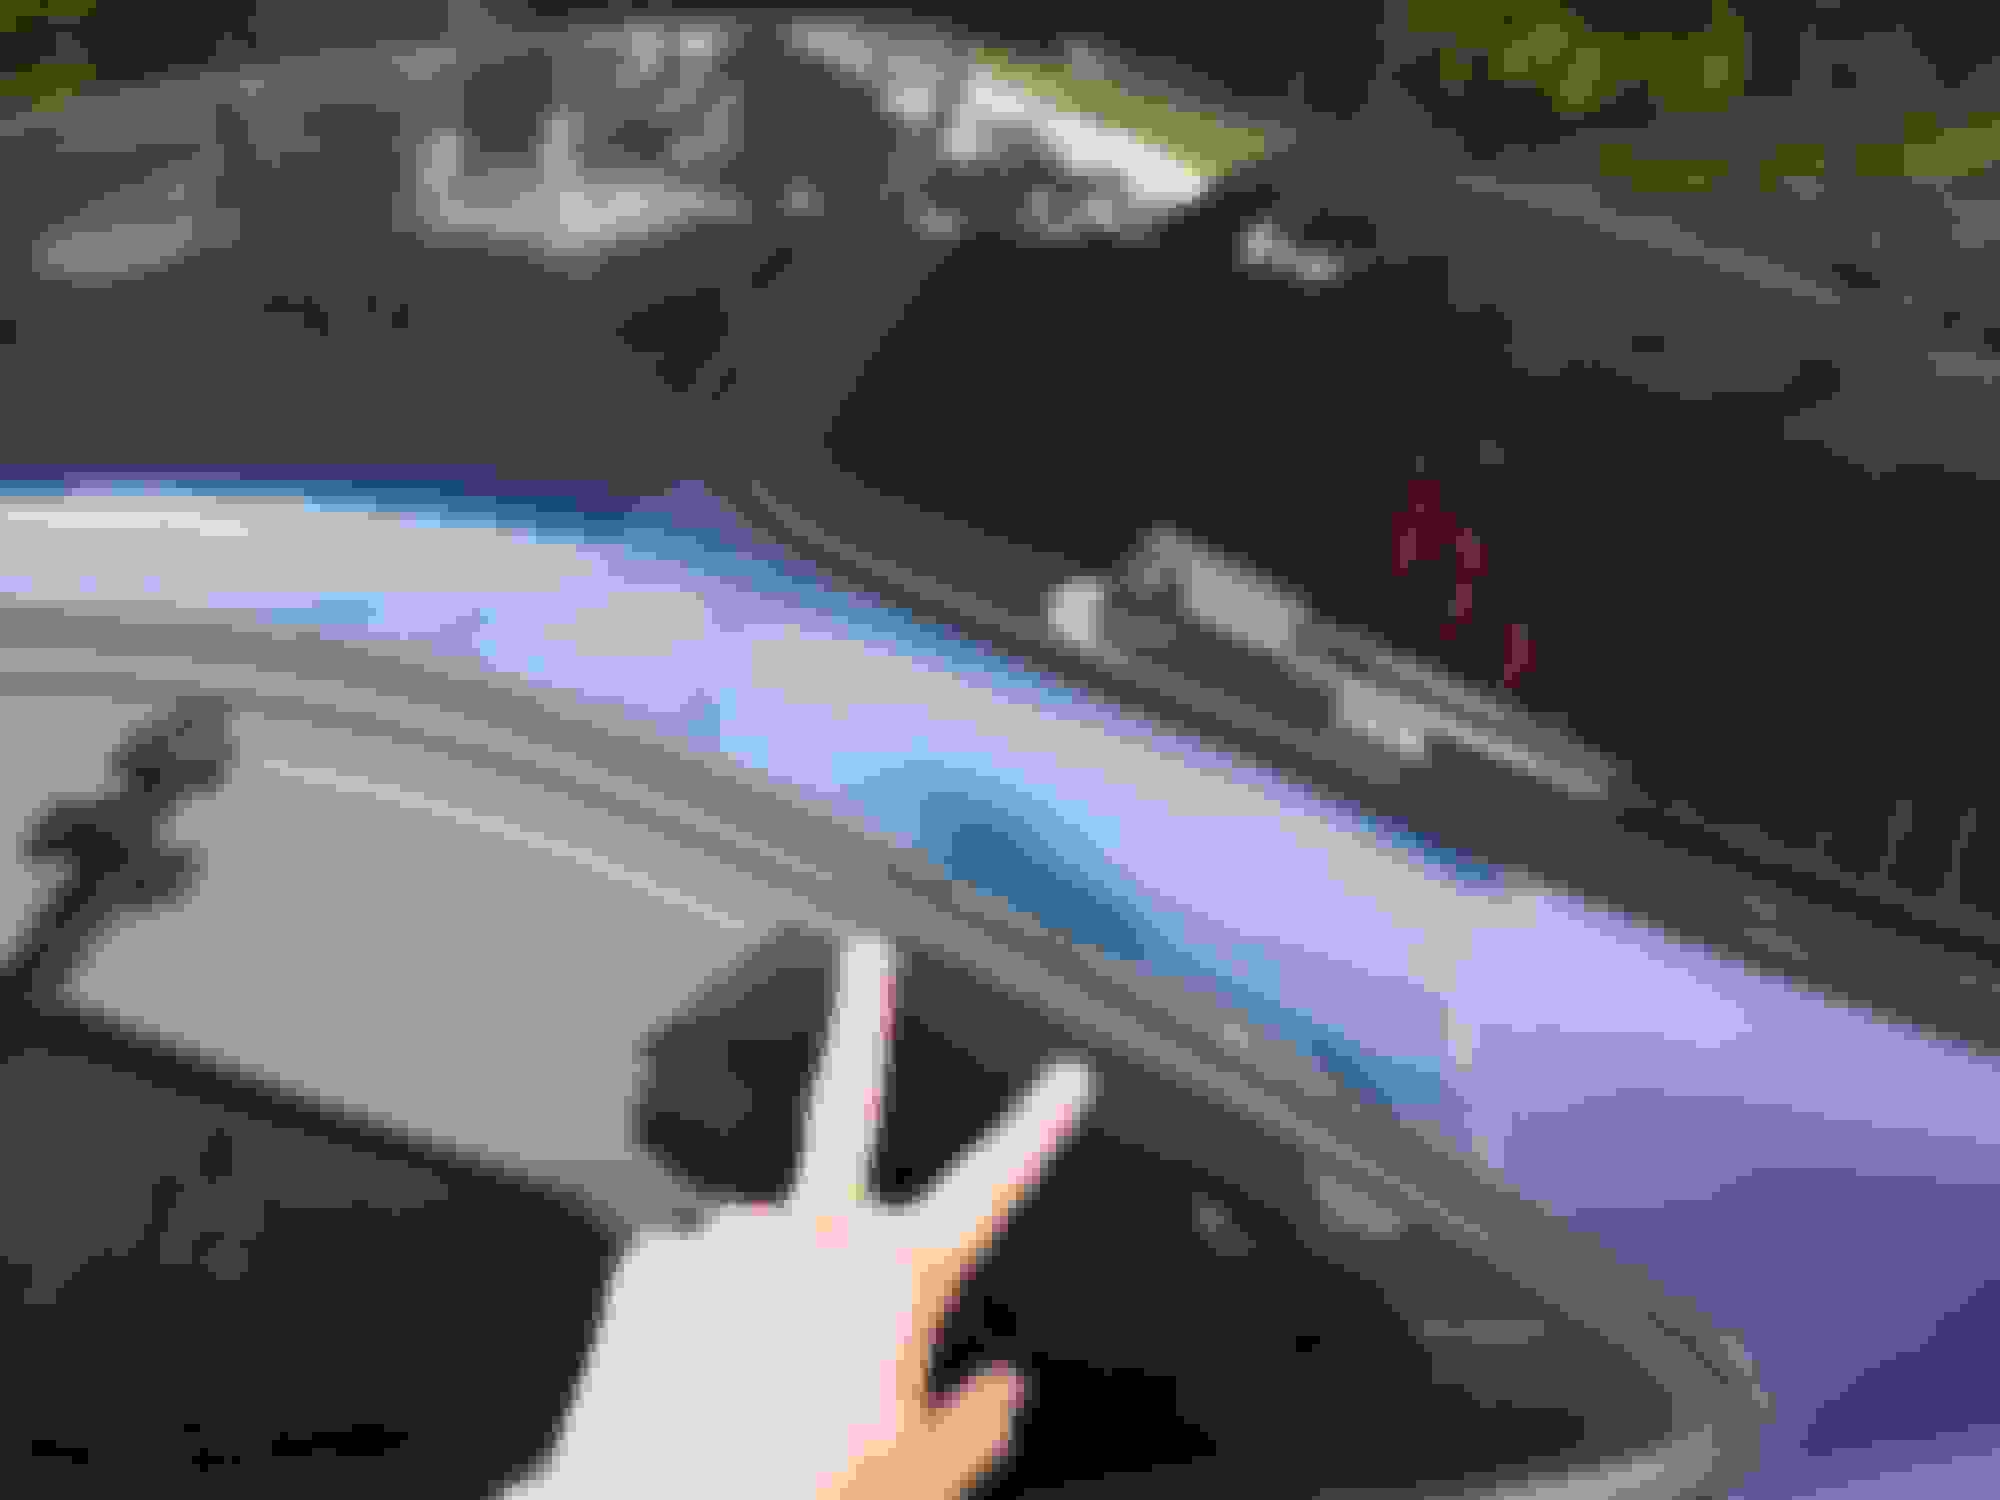
Royal Sapphire Pearl.
this color is exactly what I was looking for, and it's still a lexus color. One that pictures do little justice for, and lighting makes huge differences in how it's perceived by the eye. Sometimes it's blue, sometimes it's purplish, sometimes it's just drop dead gorgeous. This was my ideal color I was trying to find. And I believe Maaco mixed it pretty well.
I've only lightly washed it, and I still have to wait a few more weeks before even thinking about waxing it, but after a good polish and wax, this thing should little pretty darn good. there are a few hiccups in areas of the paint where my prepwork hadn't been perfect, but I'm happy with how it came out for my first major attempt. And next time I'll have the knowledge and skill to do this more effectively and efficiently. I've learned from my mistakes in this prep and paint process, but I've learned a lot and I'm happy to admit I contributed to getting this car prepared for paint.
In honesty though, I just needed to keep the body protected with a reliable paint job, so it wasn't too expensive and I got a 2 stage done. Down the road when I'm done with school and I have a garage, I'll work on any imperfections.
My next project though will involve the struts/shocks and bushings, so when I have time to get around to that I'll make sure to take pictures and document the process as well.
Feel free to comment and chime in with any questions ya'll have, I'll try to answer in a reasonable amount of time!
dclevs, the paint job came out very well!! All that prep work paid off! From these pictures it looks flawless. And it seems you did not have to remove any of the rubber seals or chrome trim doing it this way either?
Road trips like those in an SC are the best Gerrb would like to hear how well the Soarer did going up and down Pikes Peak I bet, as would I!
And those wheels that came on the car... what are they? I love them!
Great work! You're doing a great job taking care of this classic. I hope you're having lots of fun with it!
Wow .. nice paint job . . How much did MAACO charge you for that 2 stage paint job having done all the prep. I figure all they did was spray the base and topcoat .
Pretty sure you enjoyed that drive up to Pike's Peak !
Holy ****... well done! I definitely admire your ambition and dedication to make it possible. Looks really fresh and much better than before. RSP was a good call. I have seen those wheels on a few Soarers for sale in Japan and like how simple and understated they are - definitely hang on to them, they suit the car well!
dclevs, the paint job came out very well!! All that prep work paid off! From these pictures it looks flawless. And it seems you did not have to remove any of the rubber seals or chrome trim doing it this way either?
Road trips like those in an SC are the best Gerrb would like to hear how well the Soarer did going up and down Pikes Peak I bet, as would I!
And those wheels that came on the car... what are they? I love them!
Great work! You're doing a great job taking care of this classic. I hope you're having lots of fun with it!
Thank you Kahn, and nope I didn't have to remove any of the trim thankfully. I just ended up taking the front bumper cover off as well as the spoiler piece. And as for the rims I forget the name of them but it is a german brand which I thought was odd but they do look nice on the Soarer, really fill out the tire well nicely! I'll have to check back in about the brand I'm sorry.
Wow .. nice paint job . . How much did MAACO charge you for that 2 stage paint job having done all the prep. I figure all they did was spray the base and topcoat .
Pretty sure you enjoyed that drive up to Pike's Peak !
Hey thanks Gerrb! so the 2-stage came out to about $850, though the listed price they had for it was closer to $1200. All the places I checked around at for paint were a bit higher, even with the prep work done, so I believe this was a decent price for a decent paint job.
As for Pike's Peak, that was a lot of fun. scared the wife a bit... teased her with some throttle going around the corners XD but naw it was a nice cruise to the top and down. A bit before getting to the top I pulled over and checked for any bottles and cans I had to make sure nothing was blowing up, and I thought I might as well check the gas tank.... that thing was spewing fumes when I released the pressure, never seen anything like it honestly. I could only imagine how much pressure had built up in there, as apparently it wasn't venting it out after a certain psi like I thought tanks typically do.
I'm sure one day I'll take it back up there if I end up moving back to Colorado after school.
Holy ****... well done! I definitely admire your ambition and dedication to make it possible. Looks really fresh and much better than before. RSP was a good call. I have seen those wheels on a few Soarers for sale in Japan and like how simple and understated they are - definitely hang on to them, they suit the car well!
thanks man, and yeah the rims are zeit's, never heard of um before seeing these. I'll have to have them recoated one of these days as the coating on them (not sure what kind of material it is made of) is starting to peel and chip in certain places. I think they fit the car very nicely though and plan to hang on to them.
Hey thanks Gerrb! so the 2-stage came out to about $850, though the listed price they had for it was closer to $1200. All the places I checked around at for paint were a bit higher, even with the prep work done, so I believe this was a decent price for a decent paint job.
As for Pike's Peak, that was a lot of fun. scared the wife a bit... teased her with some throttle going around the corners XD but naw it was a nice cruise to the top and down. A bit before getting to the top I pulled over and checked for any bottles and cans I had to make sure nothing was blowing up, and I thought I might as well check the gas tank.... that thing was spewing fumes when I released the pressure, never seen anything like it honestly. I could only imagine how much pressure had built up in there, as apparently it wasn't venting it out after a certain psi like I thought tanks typically do.
I'm sure one day I'll take it back up there if I end up moving back to Colorado after school.
Nice ! Colorado is a great place .
Take it to the highest paved road in North America .. Mt. Evans https://photos.app.goo.gl/c1iiChNJLjBVUvks9 . It is more challenging and will definitely scare your wife if she got scared with Pike's Peak since the roads are narrower and no guard rails . It is just outside Denver near Idaho Springs.
Other interesting roads to take that car in CO will be the Trail Ridge Rd around Rocky Mountain National Park, Independence Pass going up Aspen and the Rim Rock Drive of the Colorado National Monument and along the way from Denver to Fruita CO on your way to the CO Nat'l Monument ..... you will go through I-70 which has tons of pretty areas to.
 09-03-18, 12:28 PM


 Gerrb would like to hear how well the Soarer did going up and down Pikes Peak I bet, as would I!
 . How much did MAACO charge you for that 2 stage paint job having done all the prep. I figure all they did was spray the base and topcoat .
