When you click on links to various merchants on this site and make a purchase, this can result in this site earning a commission. Affiliate programs and affiliations include, but are not limited to, the eBay Partner Network.
Am I seeing that right? Three catalytic converters on there? Reminds me of my Mazda RX-7 convertible where they had so many cats on there it choked the heck out of it. Pre cat, another, a main cat then finally the mufflers.
Originally Posted by NotnFsport
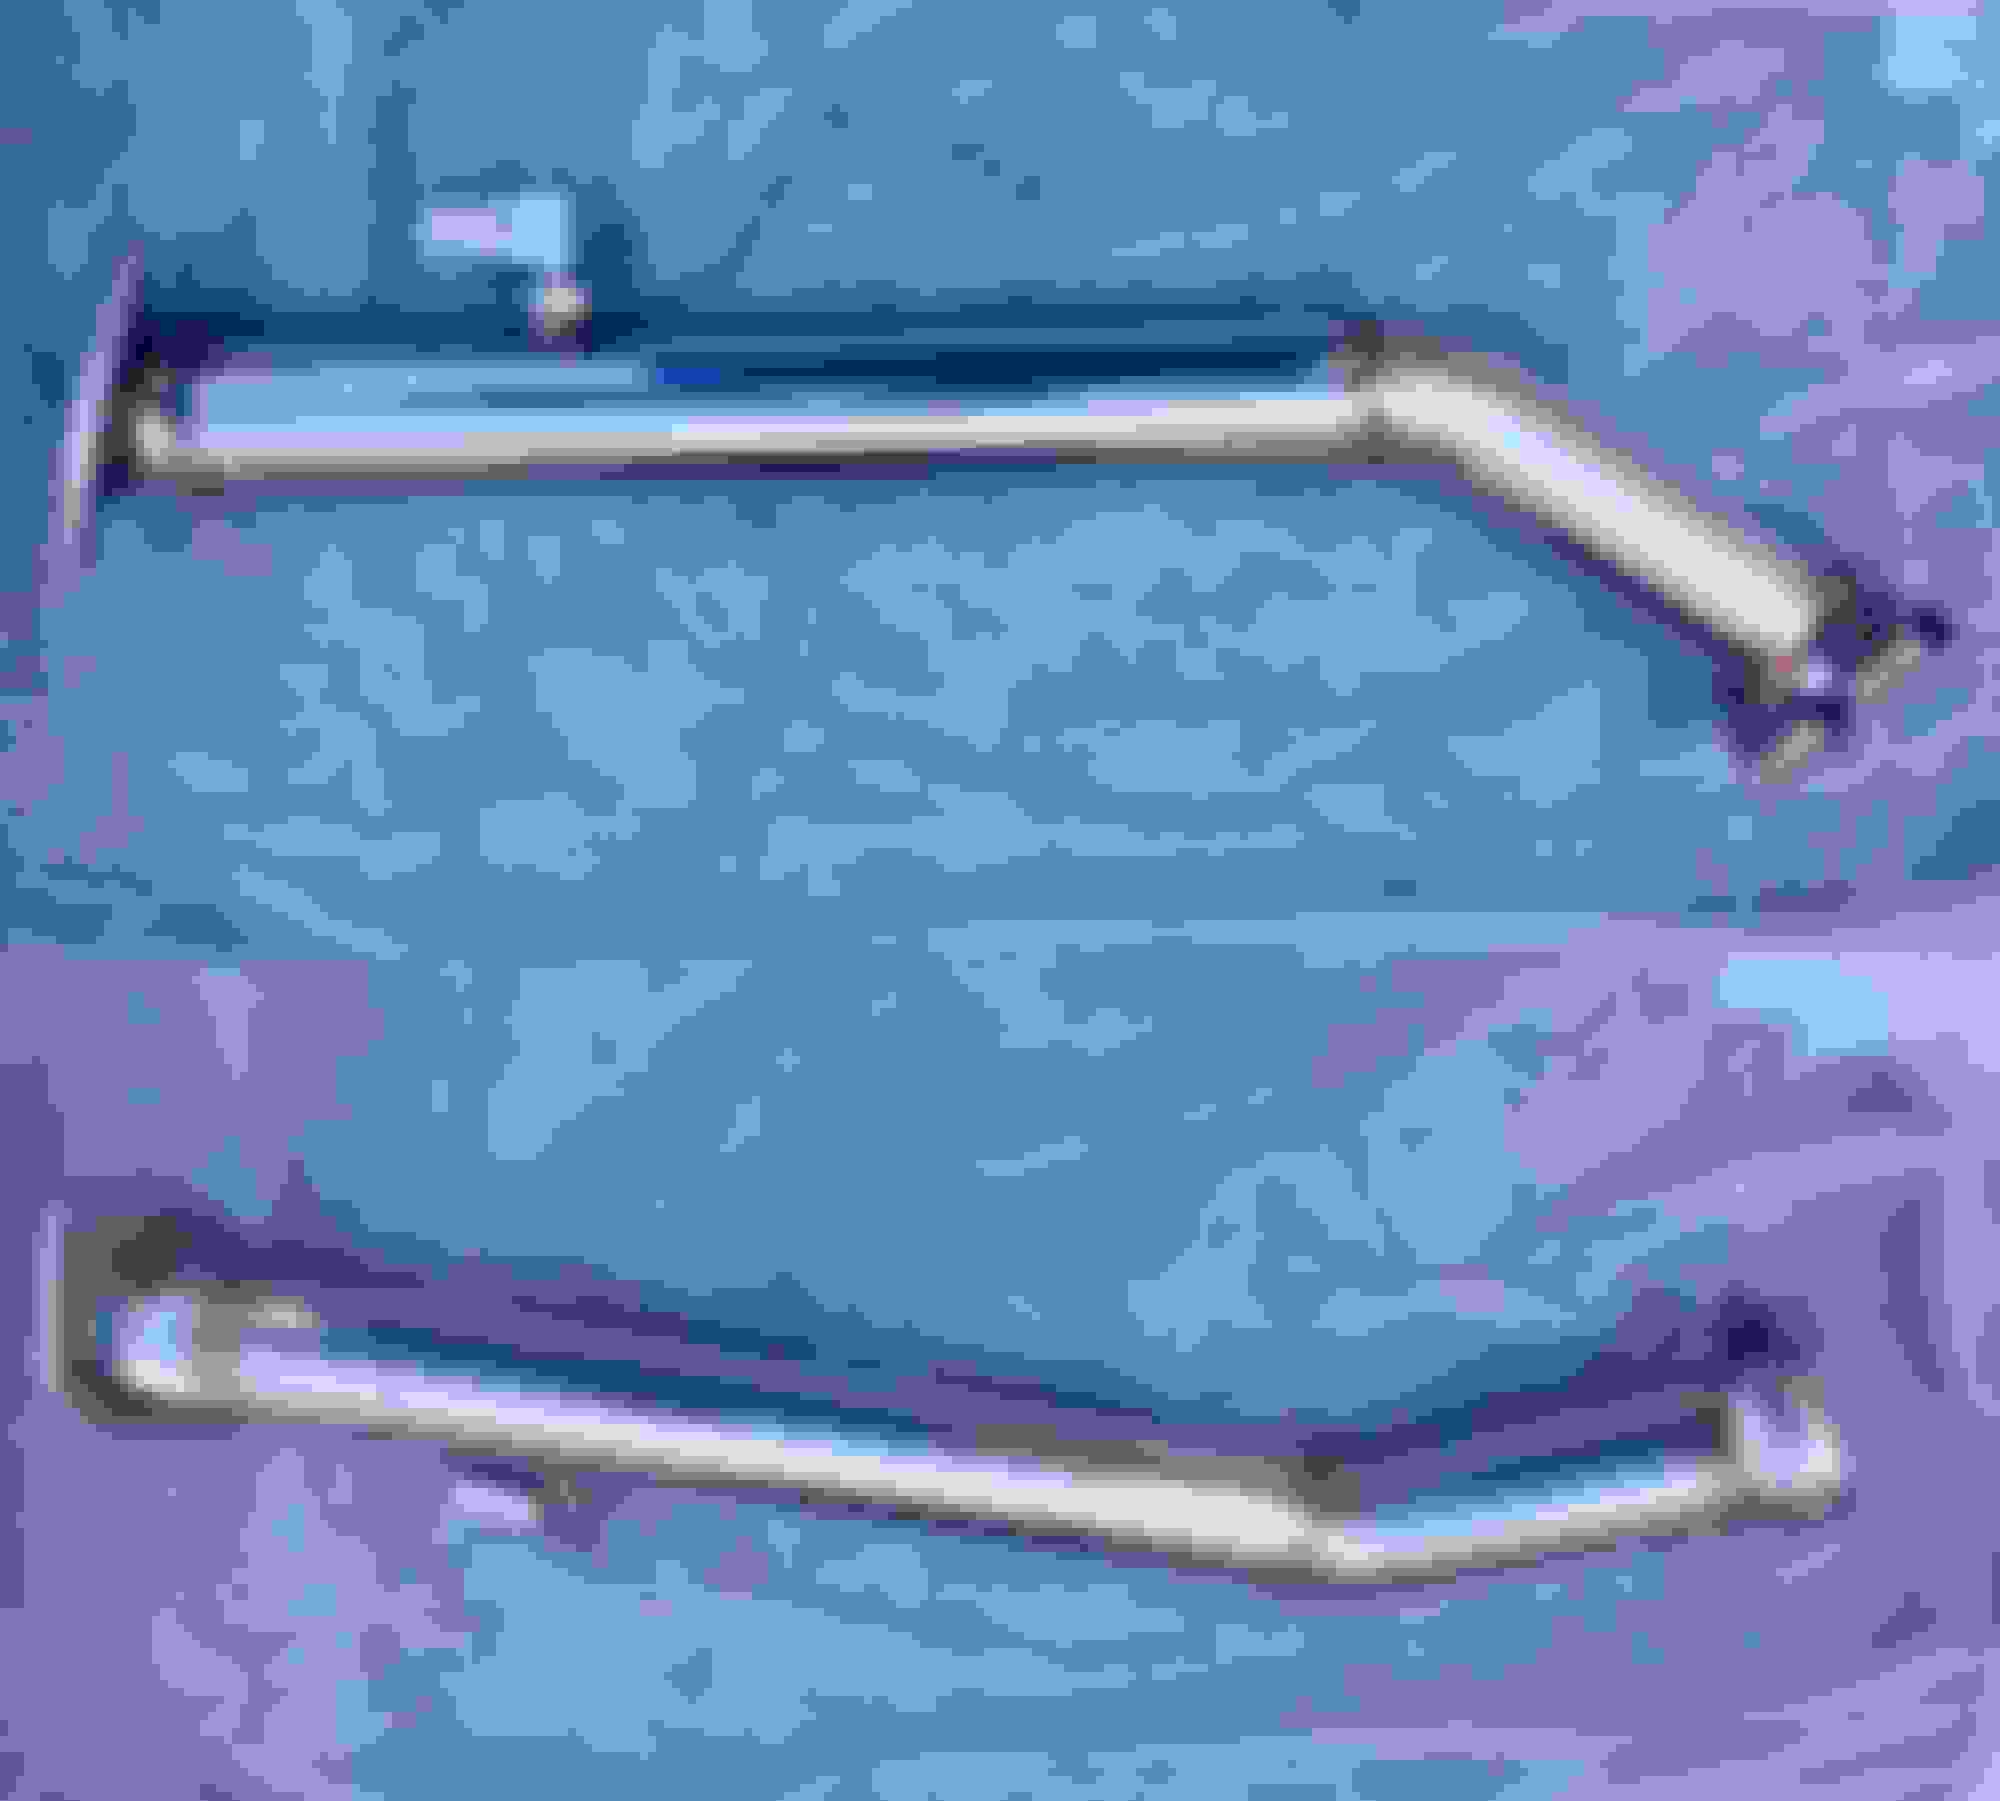
Novel cat back exhaust : 2 cats, one resonator and 2 mufflers.
This is "NOT" the exhaust for the GSF. This is the exhaust for the ISF
First impression! Very well made impressive workmanship and beautiful welds...
The equal length headers are in a class by them selves! They offer percision over and under piping design with beautiful welds followed by removable collectors.
I just cannot get over the craftsmanship and quality that went into these header, & exhaust for that matter. Then comes two connecting pipes that contain 90 degrees
shaped o2 sensor bung mounts (No electronic simulator needed) that connect you to the mid pipe starting with 2 high flow cats, and move into a side by side dual
pipe built in sequence together and polished. Which in unison with the headers gives this exhaust that "beautiful tone" Next we have a nice set of short mufflers with
a vacuum switching valve that allows you to switch from business to pleasure with a flip of the switch. Wrapping it off with beautiful tail pipes engraved with "Novel"
After using the Apexi throttle controller in other builds, we decided go with it once again. Yes, there is no power advantage with this unit but the throttle response is insane!
Apexi - Throttle controller
Decided to install the throttle controller button in the center console. There is a blank button for the rear window
shade that's a Perfect fit!
How long does it take to do this install at the same location for the switch? Can you post a DIY please!
What is the sequence of things that need to come off?
Where are the wires routed from the connector (near the pedal) to the switch..
Here's what I did...
I removed the trim where the start button is. Don't recall If I really needed to, but if you do open the glove box, and use your hands to pull outwards. Held on by I believe 4 clips.
Then remove the plug that connects the start button. Then set it aside.
On drivers side remove the LT side trim on the console. Start by pushing outward, then lift up. (start at end closest to console storage)
(See pic)
Then remove the mouse/pad by using a plastic pry, and start on end closest to console storage. Slowly - pry upward in a twisting mode while using other hand pulling up.
(maybe use a cloth under pry tool)
If you have to use a lot of pressure something is wrong
(See pic)
Basically ran the wires through the console under the dash to the pedal. Remove the pigtail connected to the gas pedal, connect the Apexi plug between the stock plug/pedal
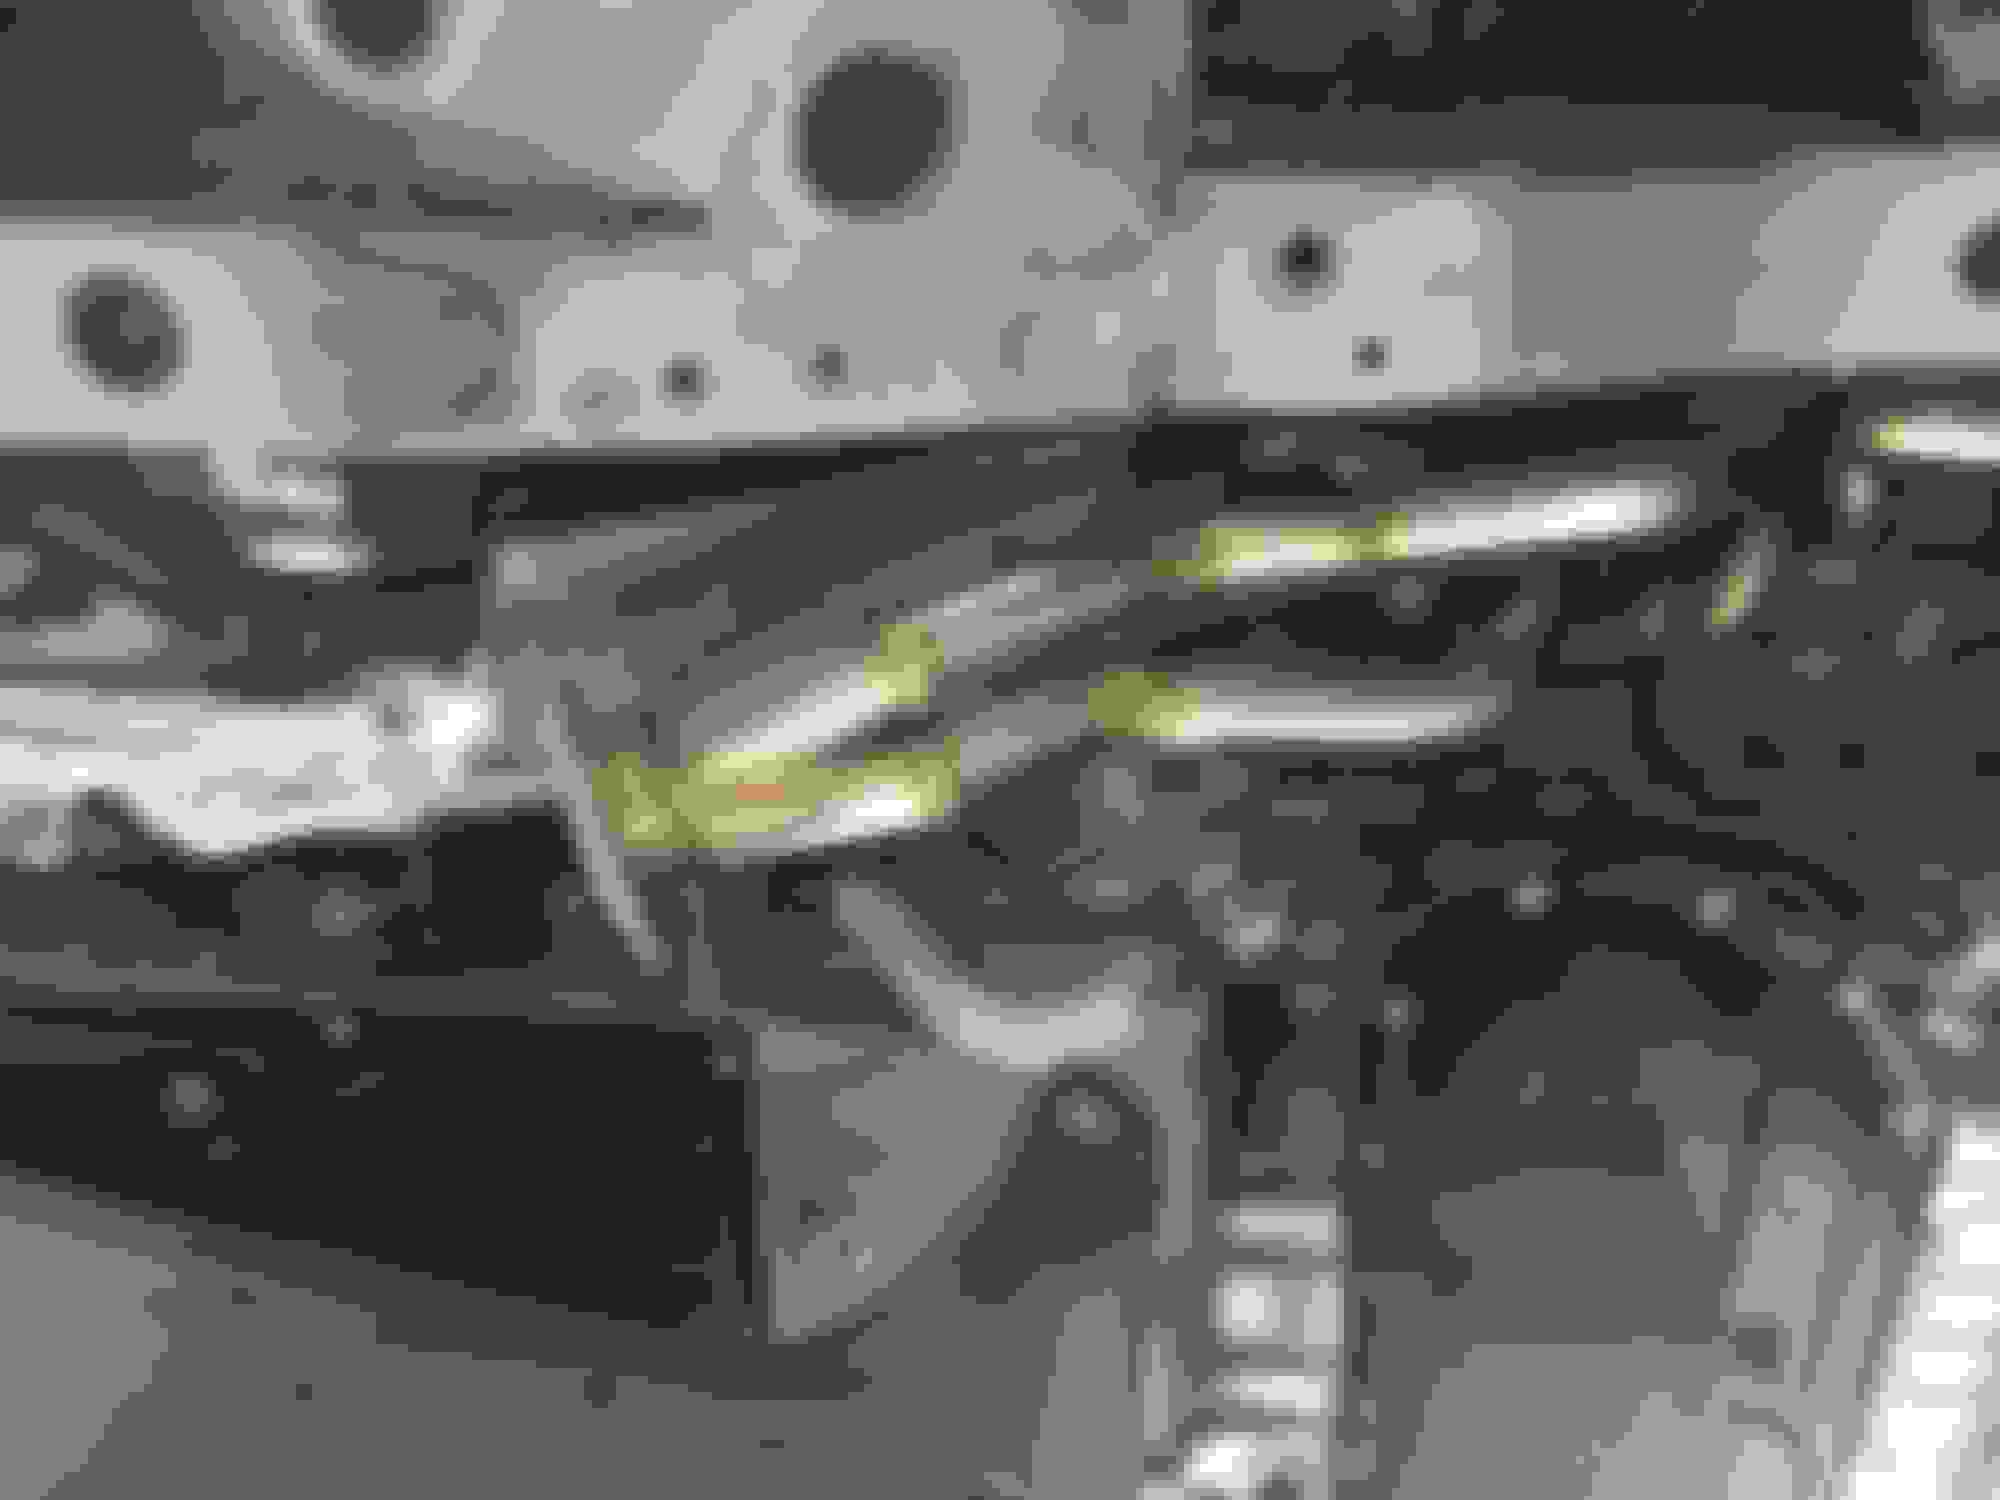
Unfortunately, we were missing a couple couplers so, we could only install the headers at this point. As you can see the stock headers are very restrictive compared to the Novel headers. The install was easier than expected. Don't get me wrong it wasn't a walk in the park either
I've done quite a bit of flow testing. It is impossible to characterize how something flows by its appearance. I am certain Novel did their homework, and their solution outperforms the OEM setup, but saying the OEM headers are "restrictive" without any testing is foolish at best. Sometimes the most counterintuitive appearances actually perform very well.
The other thing about headers - they can change the way an engine makes power. They don't necessarily improve performance across the board, and may very well sacrifice torque in one place to add it in another. If you don't normally drive in that rpm range, you might find them disappointing all depending on your application.
On the IS F, owners found there was little difference between gutted OEM headers and the aftermarket headers in quarter mile testing, and in roll races. With the elevated power level of the later model 2UR-GSE, it's even harder to extract more from the platform as provided by the factory.
Don't misunderstand me, I think Novel makes some really great stuff, but be careful of expecting dramatic changes in performance compared to just gutting the OEM headers.


 10-26-17, 10:14 AM