1991 Soarer 1JZ "from rags to riches" built


 07-17-17, 08:39 AM
#18
Driver School Candidate
Thread Starter
yo thanks for the resurrection 
that's some sludge you have there! just like mine did. so much for that lifetime oilfill
I was planning to update the thread in august when my holiday is coming up, and I have time to, once again, work on the soarer. Unfortunatly I lost my smartphone last year where all my built pictures were stored on.
Then this thing came along which needed some tlc and ate up my spare time:


1995 Supra RZ (Twin Turbo, 6 speed)
then I sold it and got that last month:

luckily that one needs no overhaulin. just did gearbox oil and solenoid clean, rear brakes, y-pipe and injectors and an ecutek tune to 635HP and 612.3 ft�lb.
now just a detail and then it's back to the soarer
some pics I had left on the notebook...
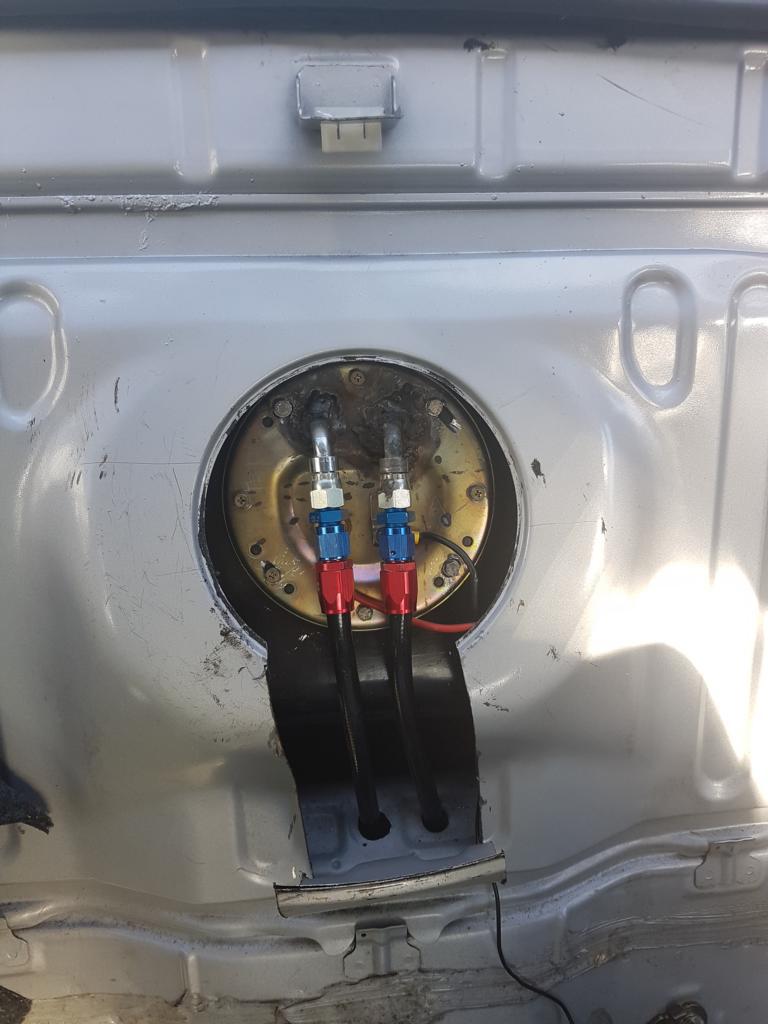
professional welding on my new fuel system:
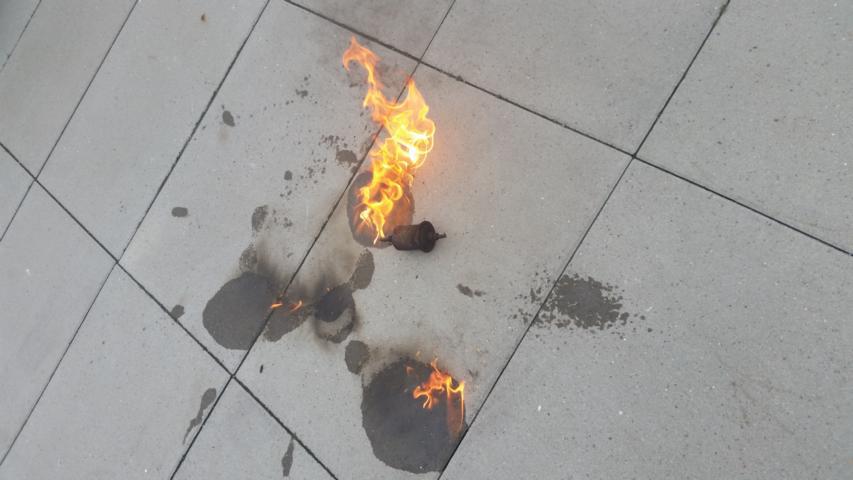
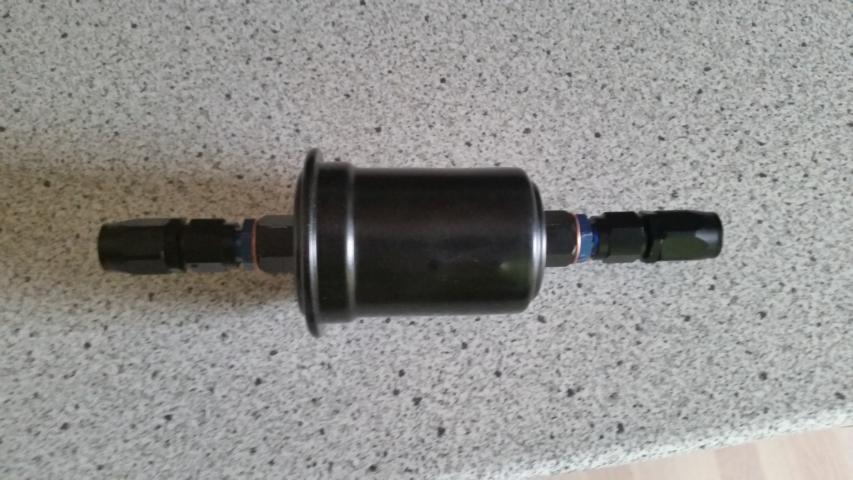
old and new fuel filter:
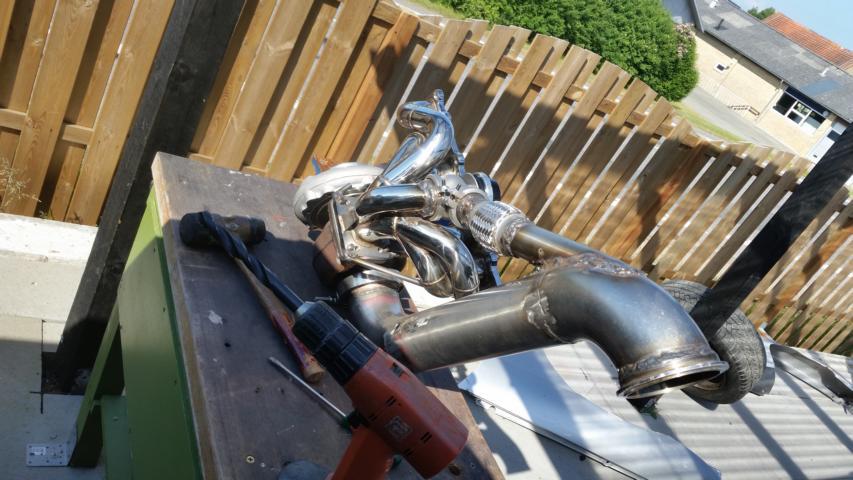
turbo (since been replaced with SXE362), manifold, downpipe, wastegate
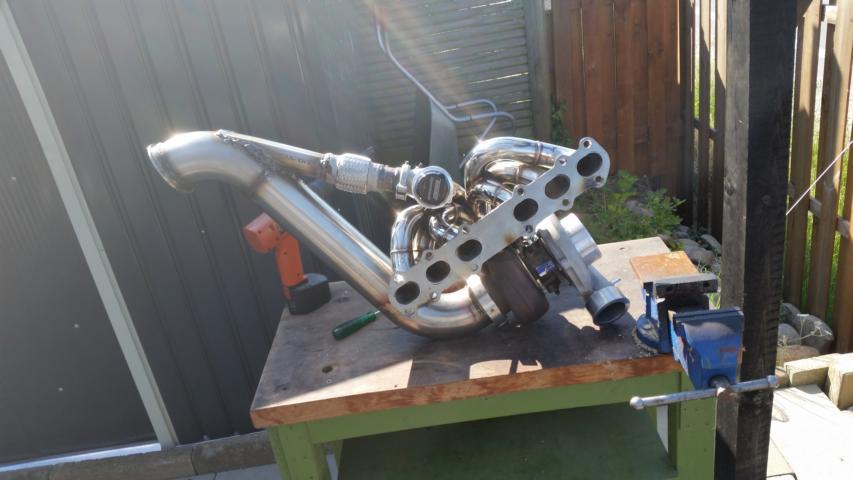
exhaust which I have to modify again because the two cats are too low to the ground for german law

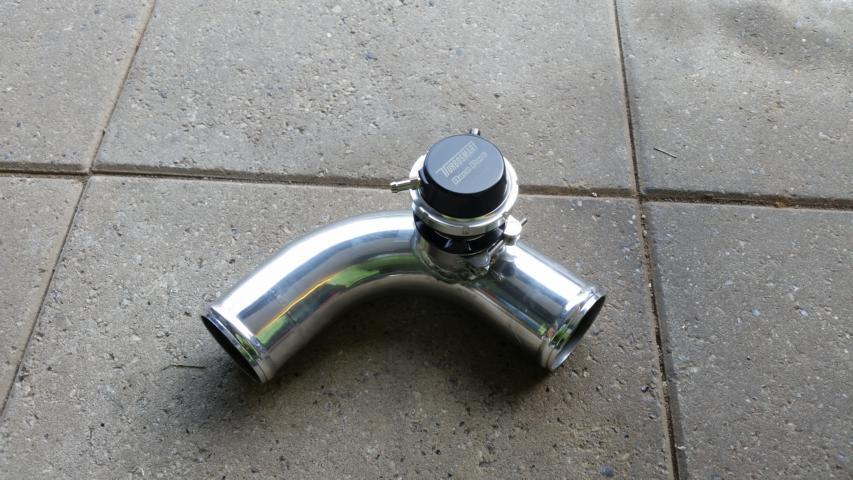
turbosmart blow off
that's some sludge you have there! just like mine did. so much for that lifetime oilfill
I was planning to update the thread in august when my holiday is coming up, and I have time to, once again, work on the soarer. Unfortunatly I lost my smartphone last year where all my built pictures were stored on.
Then this thing came along which needed some tlc and ate up my spare time:


1995 Supra RZ (Twin Turbo, 6 speed)
then I sold it and got that last month:

luckily that one needs no overhaulin. just did gearbox oil and solenoid clean, rear brakes, y-pipe and injectors and an ecutek tune to 635HP and 612.3 ft�lb.
now just a detail and then it's back to the soarer
some pics I had left on the notebook...
professional welding on my new fuel system:

old and new fuel filter:


turbo (since been replaced with SXE362), manifold, downpipe, wastegate


exhaust which I have to modify again because the two cats are too low to the ground for german law

turbosmart blow off
 08-21-17, 08:20 AM
#19
Driver School Candidate
Thread Starter
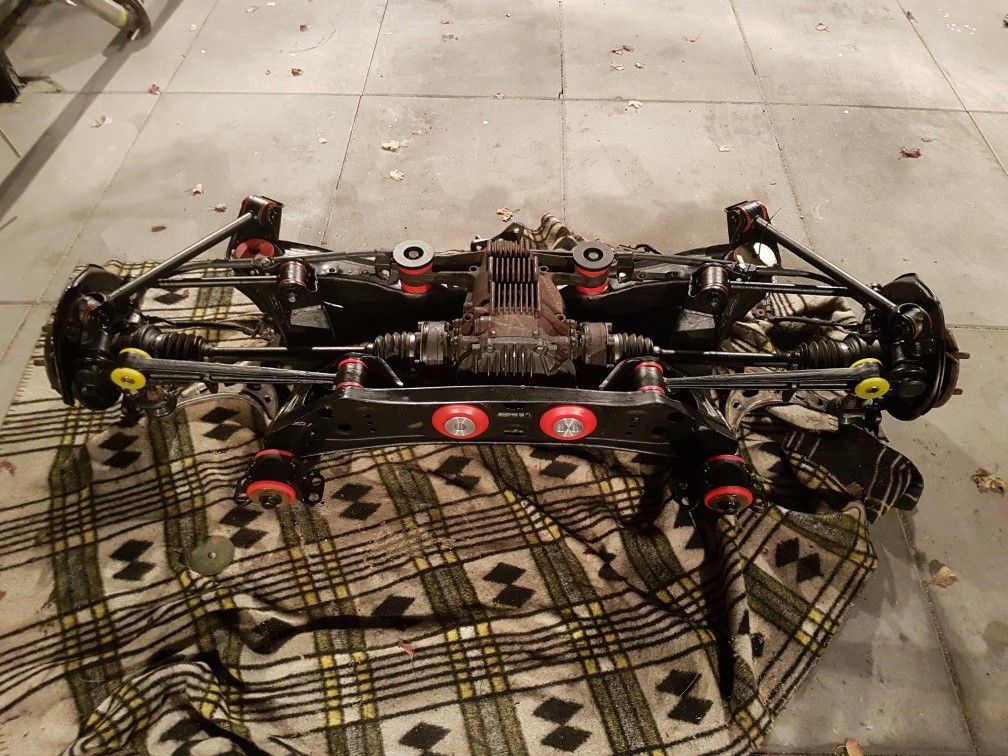
removed the rear crossmember because I just couldn't stand to look at that rust anymore. of course removing the rust on this thing is opening a can of worms.
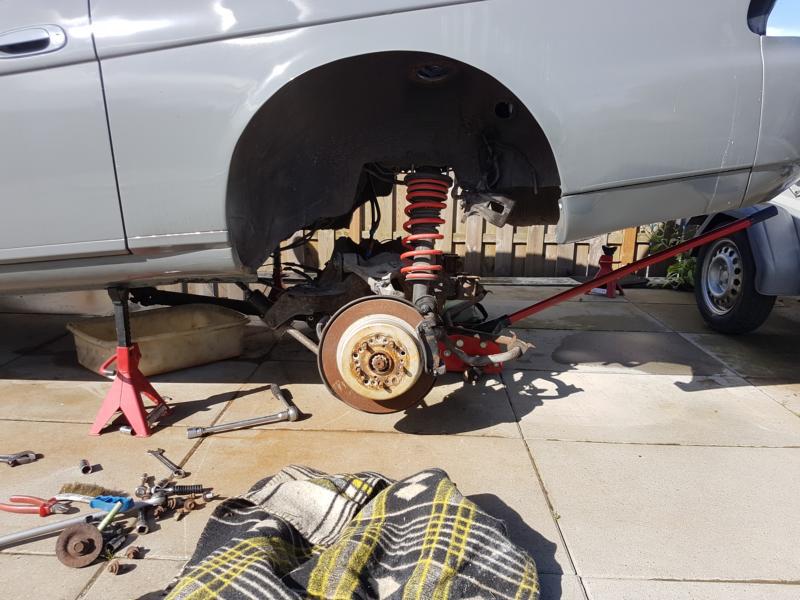
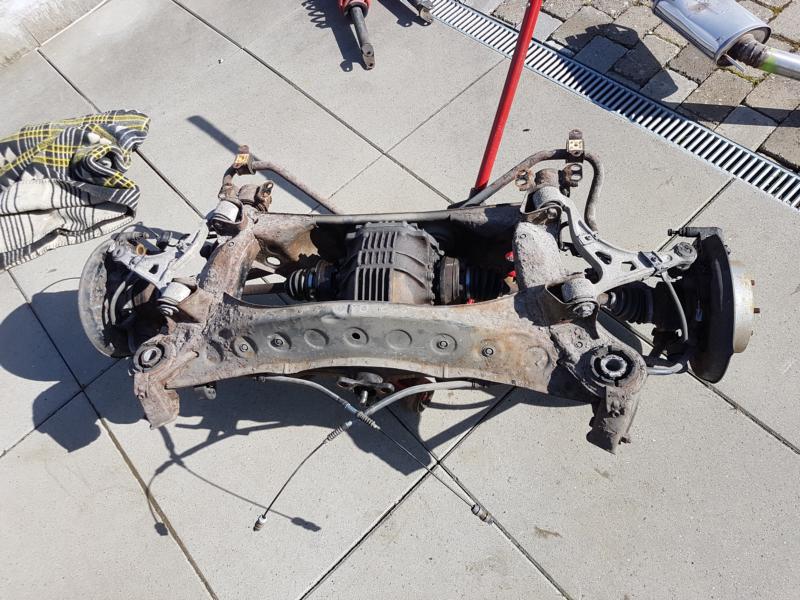
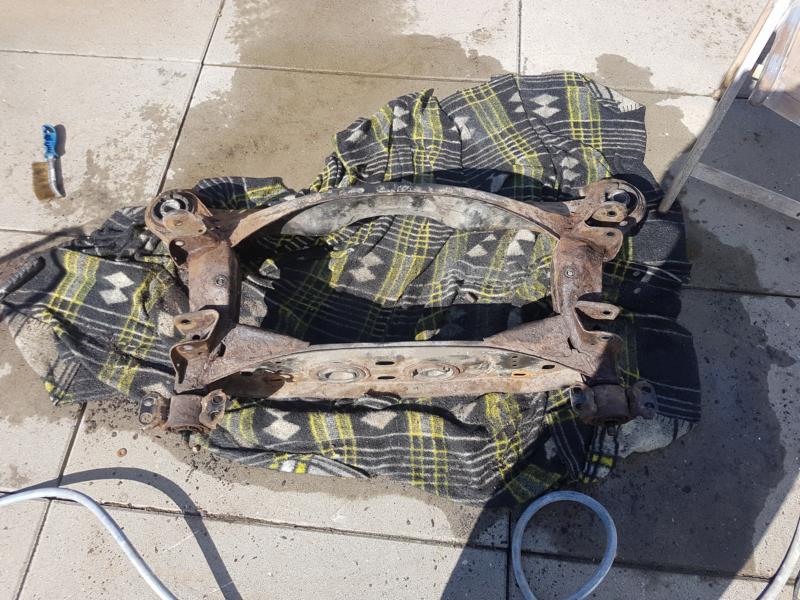
seized bolts , worn bushes... now I will replace everything with polyurethane bushes while I'm at it.
will try to sandblast the rust off, need to get some dry sand first though.
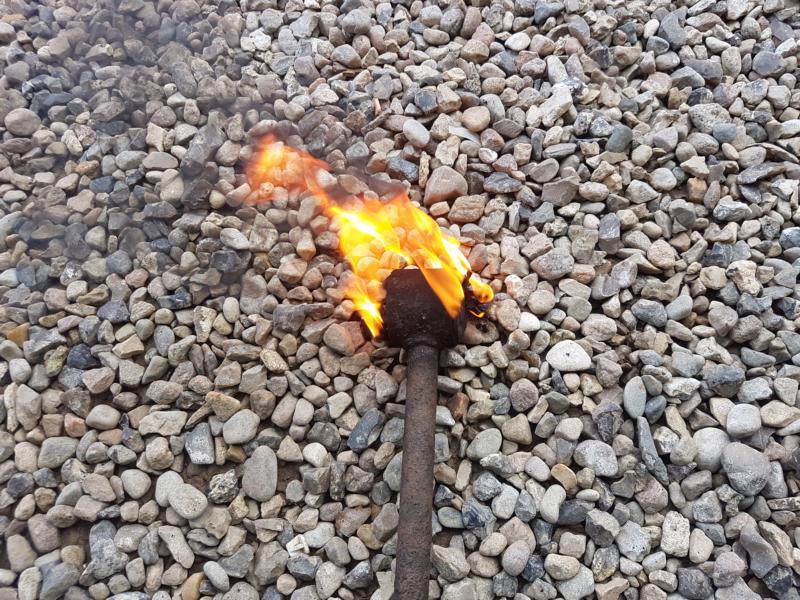
using different techniques to get all the bushes out


seized bolts , worn bushes... now I will replace everything with polyurethane bushes while I'm at it.
will try to sandblast the rust off, need to get some dry sand first though.
using different techniques to get all the bushes out


 10-04-17, 07:22 PM
#22
Awesome work with the rear subframe man! Brings back memories when we took mine out and had pretty much everything blasted/ chemically stripped and powdercoated. Lots of work!
Tell me you're gonna do the same treatment on the rusty diff housing! I know it's just cosmetic surface rust but might as well paint it while it's out of the car.
Tell me you're gonna do the same treatment on the rusty diff housing! I know it's just cosmetic surface rust but might as well paint it while it's out of the car.
10-05-17, 09:30 AM
#24
Driver School Candidate
Thread Starter
Awesome work with the rear subframe man! Brings back memories when we took mine out and had pretty much everything blasted/ chemically stripped and powdercoated. Lots of work!
Tell me you're gonna do the same treatment on the rusty diff housing! I know it's just cosmetic surface rust but might as well paint it while it's out of the car.
Tell me you're gonna do the same treatment on the rusty diff housing! I know it's just cosmetic surface rust but might as well paint it while it's out of the car.
 haha I thought about the diff housing but then decided against it as it was not half as bad as the rest (it's an A01B I bought second hand)
I have to stay reasonable and not overdo stuff as there is more pressing work to be done to the car and my spare time is limited


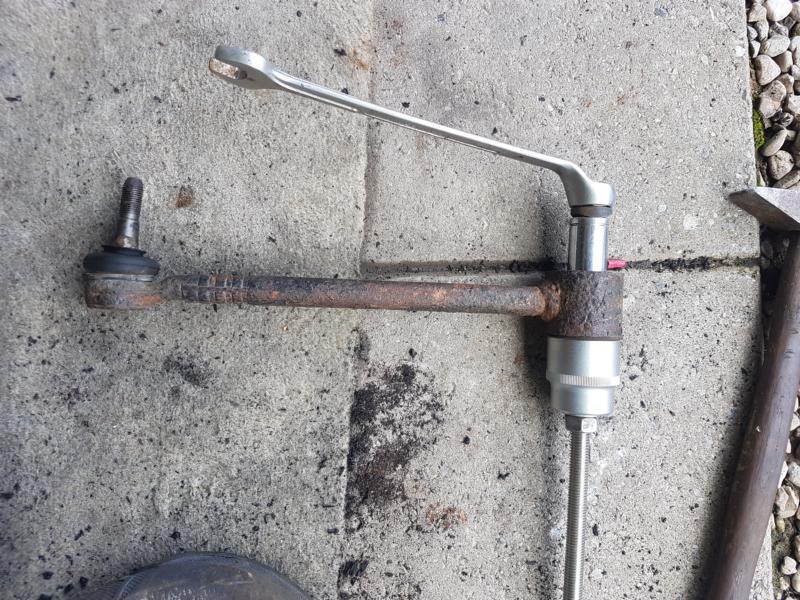
noo I just replaced the old rubber boots with new ones, the ball joints were all fine. I think by applying new grease and protecting the joints with new boots they will last quite a bit longer.

Thread
Thread Starter
Forum
Replies
Last Post