
TheShaddix's Build thread


Thread Starter
Pole Position
Joined: Dec 2011
Posts: 395
Likes: 9
From: CA
Just installed it straight up. The only parts I see needing any grease would be the bottom bolts since they rotate, but even the factory suspension didn't have any grease. Now that you mentioned it, sounds like a better idea to use some kind of grease. I'll just spray it with WD40 next time I adjust.

Rookie
Joined: Nov 2012
Posts: 52
Likes: 0
From: CA
Quick question,
Where exactly did you get the 4d c/f from? Please help out lol
Price and how much amount did you get etc etc
Thanks a lot!
Text me and help me out if you could
Ild seriously appreciate it!
Want it done already but dont wanna order garbage
626-394-4481
jT
Thanks again !!!
Where exactly did you get the 4d c/f from? Please help out lol
Price and how much amount did you get etc etc
Thanks a lot!
Text me and help me out if you could
Ild seriously appreciate it!
Want it done already but dont wanna order garbage
626-394-4481
jT
Thanks again !!!
Rookie
Joined: Nov 2012
Posts: 52
Likes: 0
From: CA
Btw,
By far,
The cleanest legit mods so far on the entire site here atleast,
Now these, are actually mods that are NOT a downgrade from stock and actually are legit upgrades...
This is how its done^^^^
Keep it up
By far,
The cleanest legit mods so far on the entire site here atleast,
Now these, are actually mods that are NOT a downgrade from stock and actually are legit upgrades...
This is how its done^^^^
Keep it up
Last edited by jt3944481; Jan 7, 2014 at 05:39 PM.
[QUOTE="jt3944481;8315020"]Btw, By far, The cleanest legit mods so far on the entire site here atleast, Now these, are actually mods that are NOT a downgrade from stock and actually are legit upgrades... This is how its done^^^^ Kelp it up [/
kinda a bold statement don't you think lol. there are plenty well done modded cars on here .
[/kinda a bold statement don't you think lol. there are plenty well done modded cars on here .

so when you removed the rear emblems there were no holes behind there? I want to remove mines as well but wasnt sure if there were holes like the 2IS .
Also are you from the US or Canada? I noticed that you have a F sport with telescoping steering column. I didnt think this combo was possible in the US. Do you have memory seats and Mirror tilt in reverse?
Also are you from the US or Canada? I noticed that you have a F sport with telescoping steering column. I didnt think this combo was possible in the US. Do you have memory seats and Mirror tilt in reverse?
Thread Starter
Pole Position
Joined: Dec 2011
Posts: 395
Likes: 9
From: CA
Quick question,
Where exactly did you get the 4d c/f from? Please help out lol
Price and how much amount did you get etc etc
Thanks a lot!
Text me and help me out if you could
Ild seriously appreciate it!
Want it done already but dont wanna order garbage
626-394-4481
jT
Thanks again !!!
Where exactly did you get the 4d c/f from? Please help out lol
Price and how much amount did you get etc etc
Thanks a lot!
Text me and help me out if you could
Ild seriously appreciate it!
Want it done already but dont wanna order garbage
626-394-4481
jT
Thanks again !!!
However, as much as I like this 4D vinyl, I'm still really tempted to continue practicing with real CF. Prior to 4D, I tried laying real cf onto the glove box trim piece and it came out nearly perfect, with high gloss and what not, but I messed up in some final stages of the process, and ultimately gave up and went with vinyl. But after talking to some people who've done cf, I'm going to continue... No vinyl out there will replicate the look. That CF bit on my steering wheel reminds me of that every day. But the 4D vinyl is durable, doesn't bubble (don't use any adhesive on top of what's there), doesn't look and feel as cheap as the 3M variant, has some gloss, and looks like cf cloth. It's just lacking that super glossy and reflective resin clear on top. By far it's the best thing besides real CF that I have personally seen and I'm sure the majority of this forum would dig it. I'm just too picky for my own good. PM me if you need help with installing the vinyl. I have a few tricks I've learned in the process.
[QUOTE=tmf2004;8315024]
Btw, By far, The cleanest legit mods so far on the entire site here atleast, Now these, are actually mods that are NOT a downgrade from stock and actually are legit upgrades... This is how its done^^^^ Kelp it up [/
kinda a bold statement don't you think lol. there are plenty well done modded cars on here .
[/kinda a bold statement don't you think lol. there are plenty well done modded cars on here .
so when you removed the rear emblems there were no holes behind there? I want to remove mines as well but wasnt sure if there were holes like the 2IS .
Also are you from the US or Canada? I noticed that you have a F sport with telescoping steering column. I didnt think this combo was possible in the US. Do you have memory seats and Mirror tilt in reverse?
Also are you from the US or Canada? I noticed that you have a F sport with telescoping steering column. I didnt think this combo was possible in the US. Do you have memory seats and Mirror tilt in reverse?
I don't have memory seats and mirror tilt.
Last edited by TheShaddix; Jan 7, 2014 at 10:18 PM.

Rookie
Joined: Jan 2014
Posts: 60
Likes: 0
From: Ontario
Just a tip for laying real CF fabric.
After measuring out the size of fabric needed to cover your part tape and secure all four edges of the cloth with sticky tape. Of course this helps greatly in avoiding the fabric to distort when laying it onto tack and curved surfaces.
Another method that i herd helps, (never tried this for myself) BUT spraying a light mist of hairspray/or light spray adhesive on the fabric before applying to tack surface helps keep the weave from distorting as well.
I know for a fact that keeping the weave from distorting is the toughest challenge in laying real CF and why people fear that the end result might not be satisfying.
**I will be also be experimenting in the future with real CF laying/skinning as "they" say.
Thread Starter
Pole Position
Joined: Dec 2011
Posts: 395
Likes: 9
From: CA
Thanks man. Just learnt that same thing too, wish i knew about it before. I was recommended to use 3M spray adhesive for initial coat instead of using resin so the CF cloth sticks better without peeling. The look of real CF is just too damn provocative. I thought I was done for good because it was a messy process, but after learning a few things I realized all the mess can be avoided easily (using masking tape, etc). I'll post here if I get something decent to show.
Thread Starter
Pole Position
Joined: Dec 2011
Posts: 395
Likes: 9
From: CA
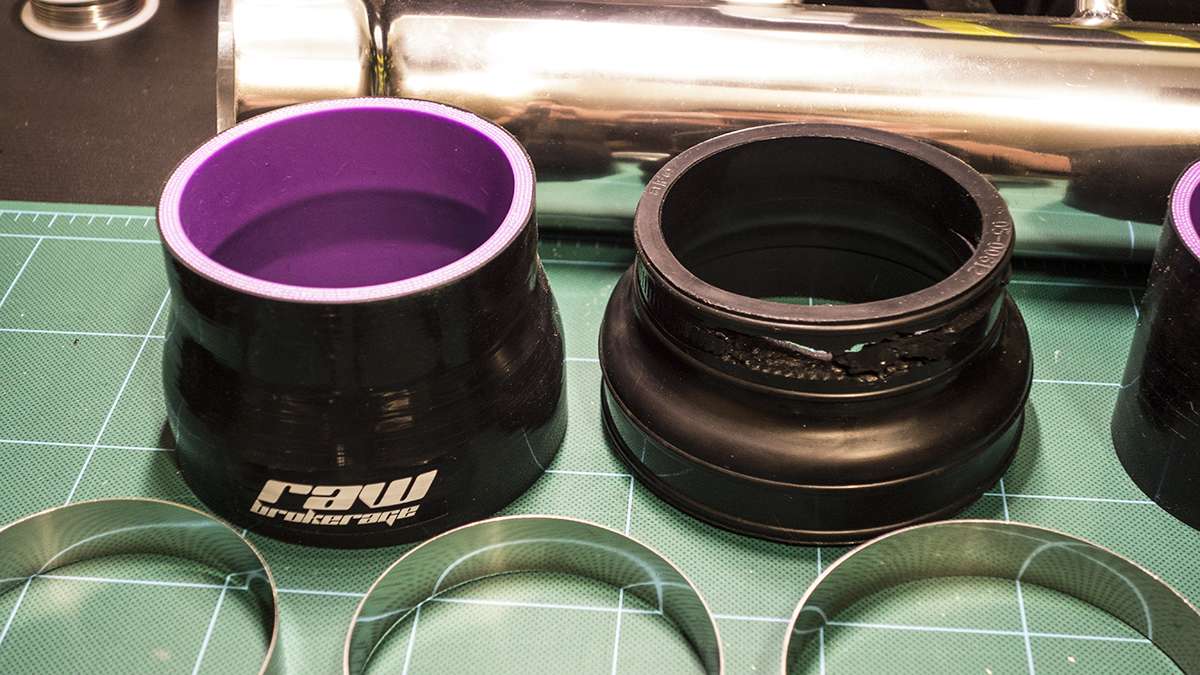
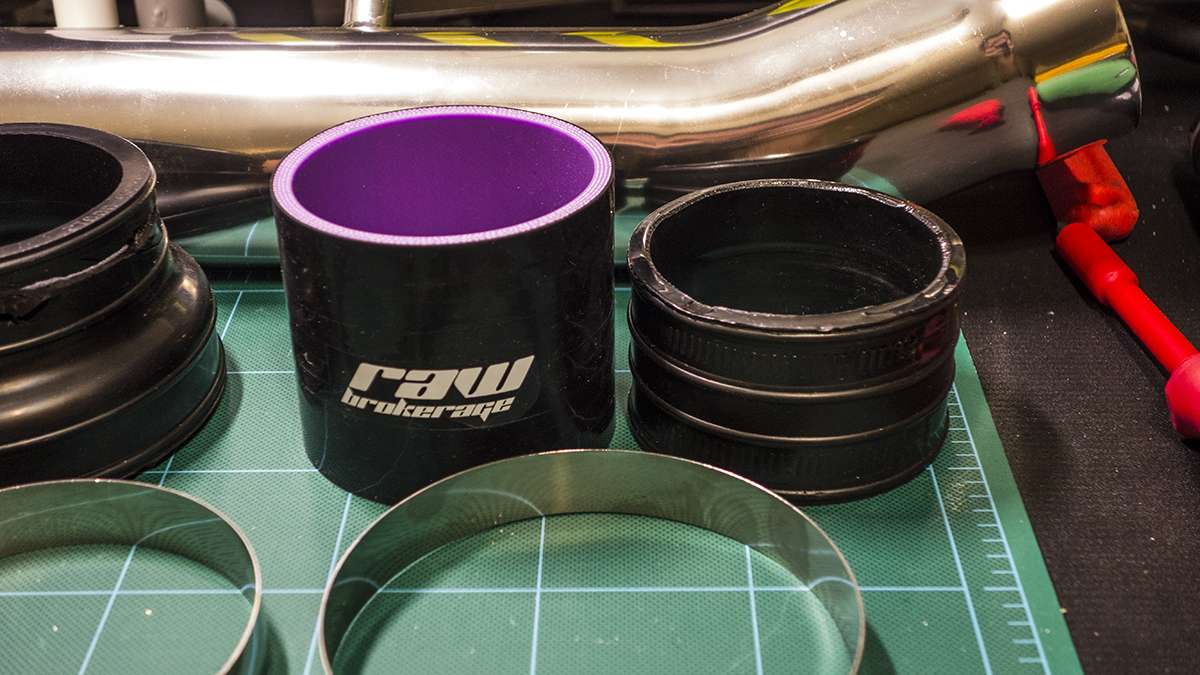
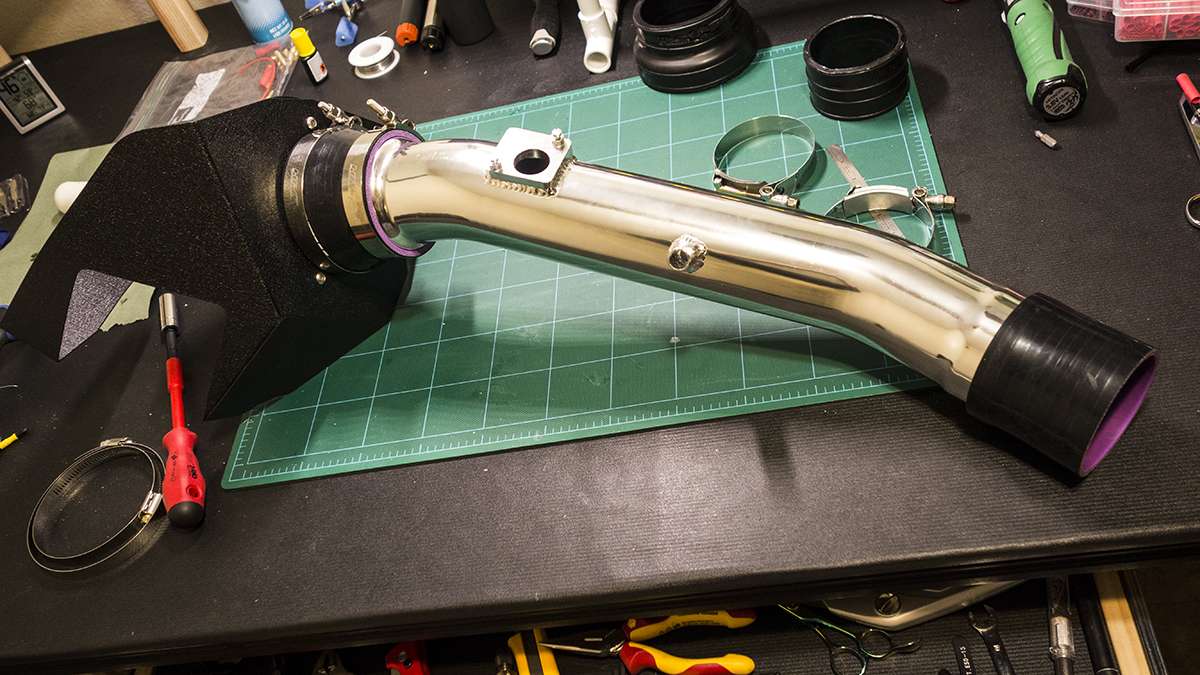
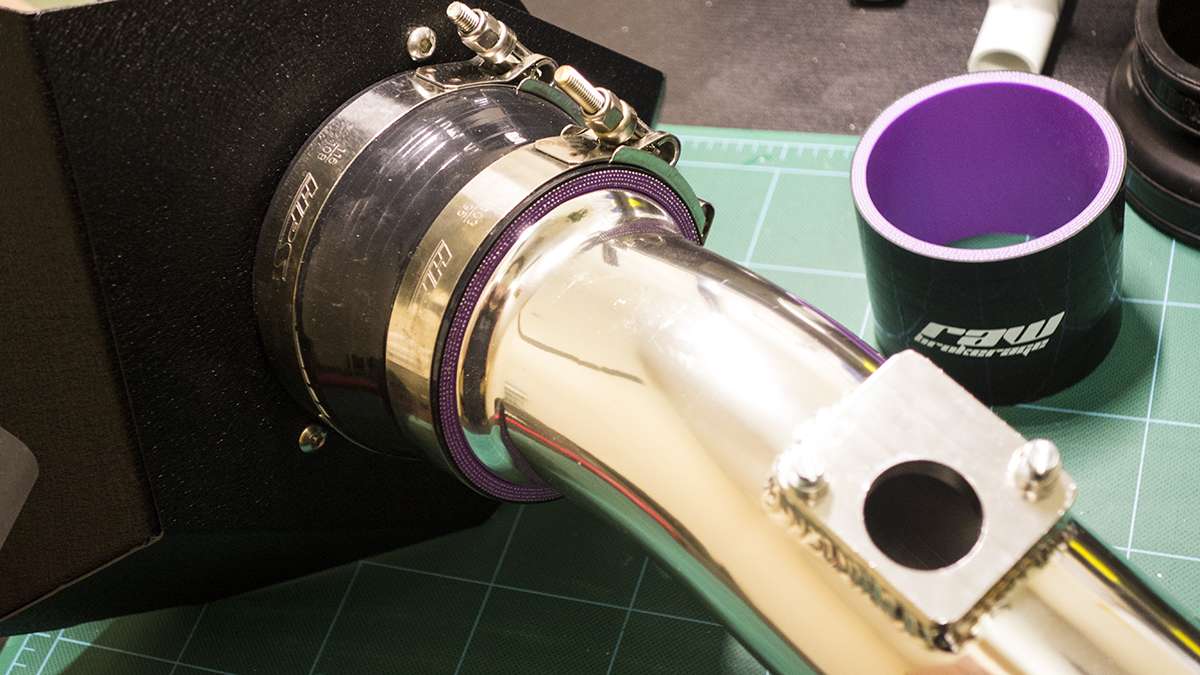
Not exactly a new mod, but fixed my takeda intake. The couplings got damaged by the clamps over time. So i decided to get some reinforced ones along with better clamps. These are made for turbo piping, an overkill for a simple intake no doubt, but I'm not taking any chances. Anyone running takeda/greddy, my advice is to check your couplings just in case. Loosen the clamps and check the condition of the silicone underneath. Mine looked like that :0 The sizes for the new ones are 4" to 3.5" (filter to pipe) and 3" pipe to motor (the clamp needs to be around 3.2 though). Cost me about 50 in total but can be found for much cheaper if going with other brands. I just liked the colors!


Last edited by TheShaddix; Mar 20, 2014 at 03:34 AM.