Slammer1's Latest Audio Build
 11-02-13, 05:15 PM
#1
Lexus Test Driver
Thread Starter
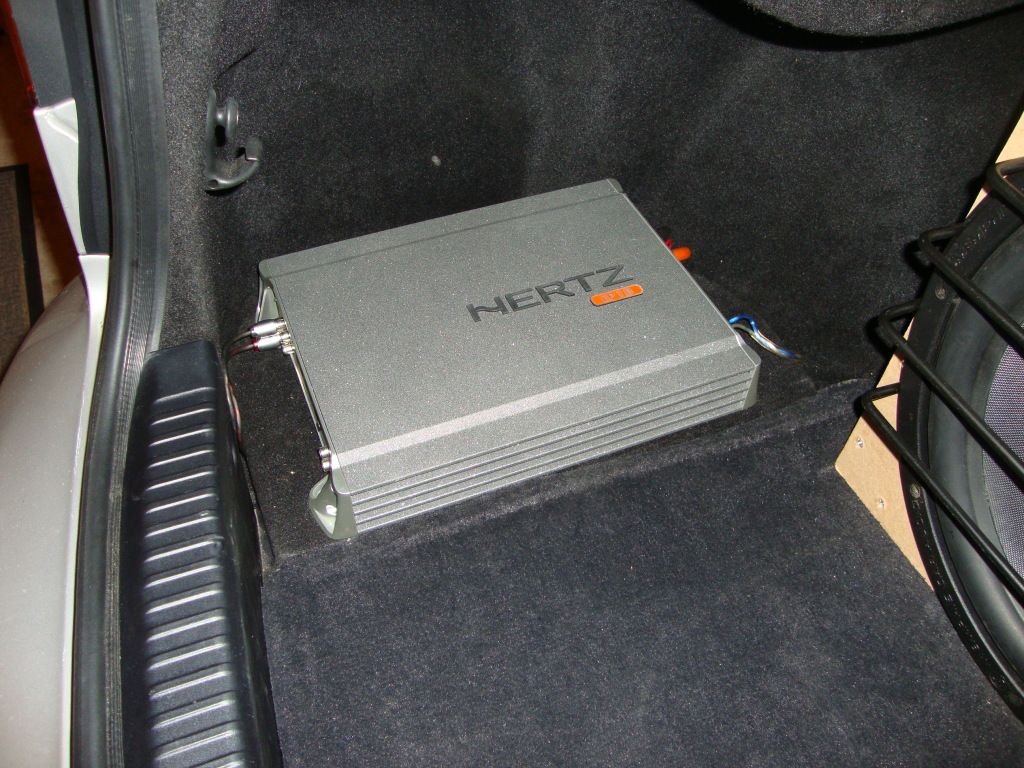
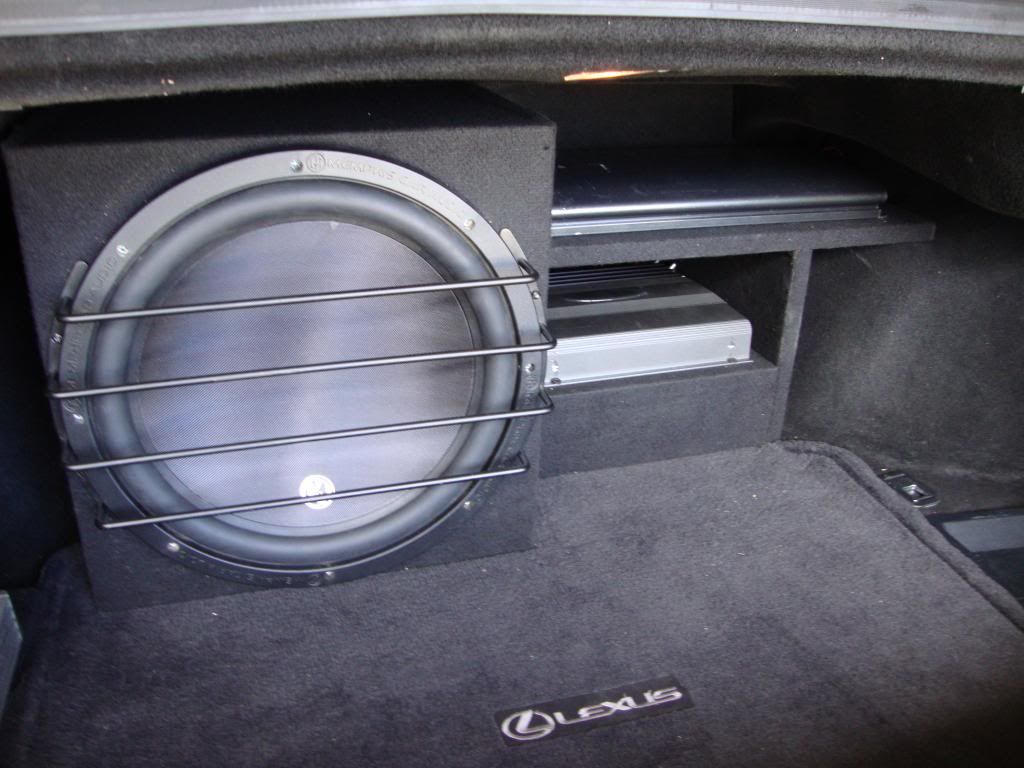
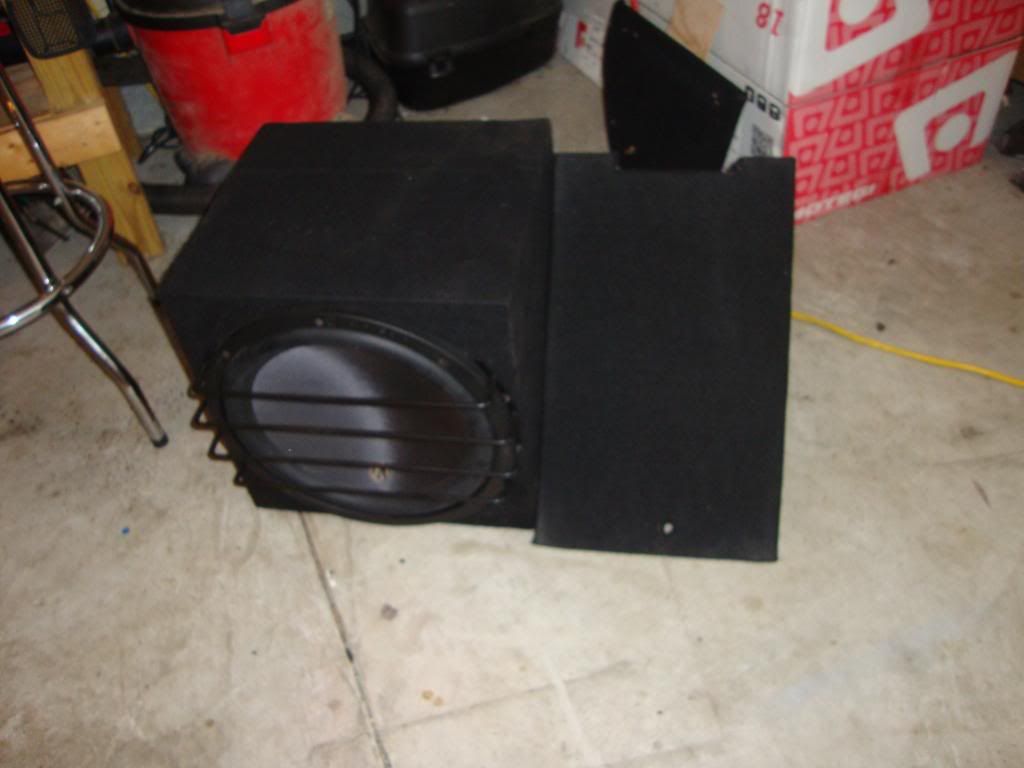
I posted a thread on CL about two and a half years ago, asking for opinions about a dash kit I had seen online for the 2nd Gen IS. The consensus was that the kit was hideous so I decided to fabricate my own. I was able to make my own lower section single DIN mount and got the install done. Since then, I have changed my system's components numerous times. I have been a car audio enthusiast for years but have been more into the SQ end of it for the last few years. My initial setup was Hertz HSK 165 components (front and rear) and a 15" Memphis sub in the trunk. The biggest changes have been to the amps up to now. I've run a Hertz EP5, Memphis MC1.500 and MC4.50, Zapco 350.2 and 200.2, as well as an old school PPI PC2.150. The speakers always stayed the same but I was still wanting the system to sound better than it did.
The HSKs were run passive and I really wanted to try my first active setup, so I decided to change the speakers and the amps and just about start over. None of the amps that I had would work for active because I couldn't cross the tweeters over high enough with them, so I went to the drawing board on exactly how I wanted my new system to be laid out. The HSKs were three years old, so I wanted to upgrade them. I was last running three different amps in the car, so I wanted to consolidate and go back to a five channel. All replacement equipment needed to be an upgrade from what I was running to be sure it would be worth the trouble.
Here are a few pics of the system that I had.......
I decided to go with speakers in the front only, so I wasn't going to run speakers in the rear doors. I am going from 9 speakers to 5 (counting the sub), but confident it would sound better. Lots of people say that having speakers in the rear is good for "fill" and I thought so too. After attending an SQ meet, I was amazed by how much better most of the cars there sounded than mine but was more surprised by how many of those cars used speakers in the front only. Hell, several had ALL of their speakers in the front, including their subs. When was the last time you went to a concert and heard any music playing behind you? Made sense to me so I figured it was worth a shot...
The HSKs were run passive and I really wanted to try my first active setup, so I decided to change the speakers and the amps and just about start over. None of the amps that I had would work for active because I couldn't cross the tweeters over high enough with them, so I went to the drawing board on exactly how I wanted my new system to be laid out. The HSKs were three years old, so I wanted to upgrade them. I was last running three different amps in the car, so I wanted to consolidate and go back to a five channel. All replacement equipment needed to be an upgrade from what I was running to be sure it would be worth the trouble.
Here are a few pics of the system that I had.......


I decided to go with speakers in the front only, so I wasn't going to run speakers in the rear doors. I am going from 9 speakers to 5 (counting the sub), but confident it would sound better. Lots of people say that having speakers in the rear is good for "fill" and I thought so too. After attending an SQ meet, I was amazed by how much better most of the cars there sounded than mine but was more surprised by how many of those cars used speakers in the front only. Hell, several had ALL of their speakers in the front, including their subs. When was the last time you went to a concert and heard any music playing behind you? Made sense to me so I figured it was worth a shot...
Last edited by Slammer1; 11-02-13 at 05:23 PM.
 11-02-13, 05:37 PM
#2
Lexus Test Driver
Thread Starter
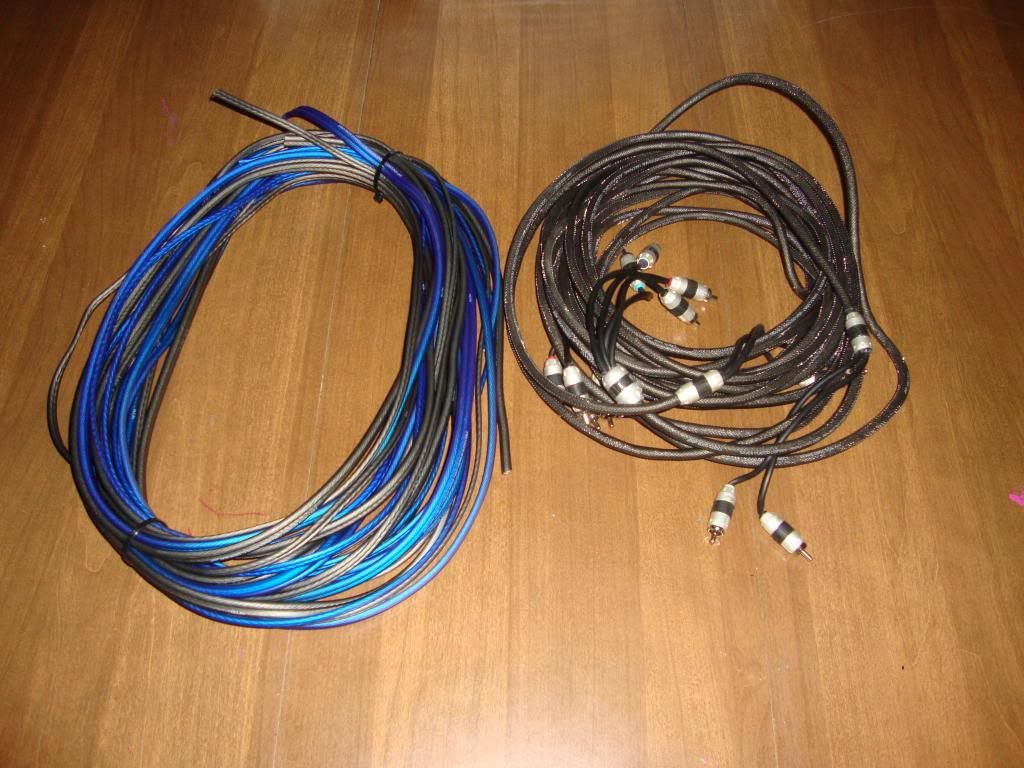
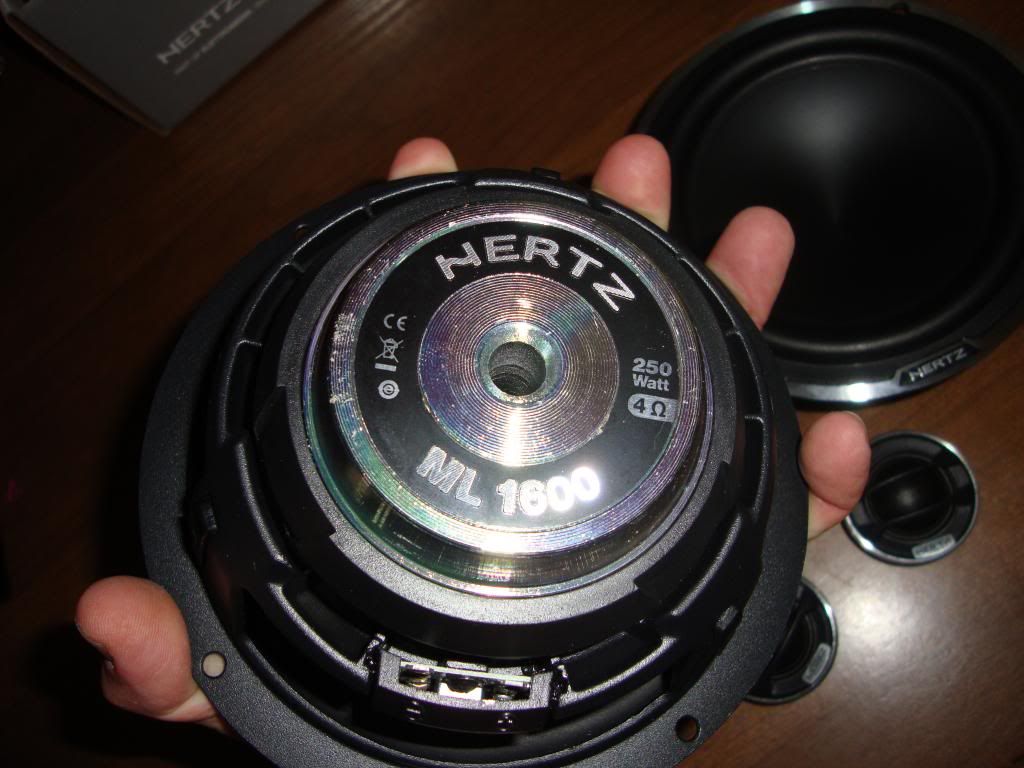
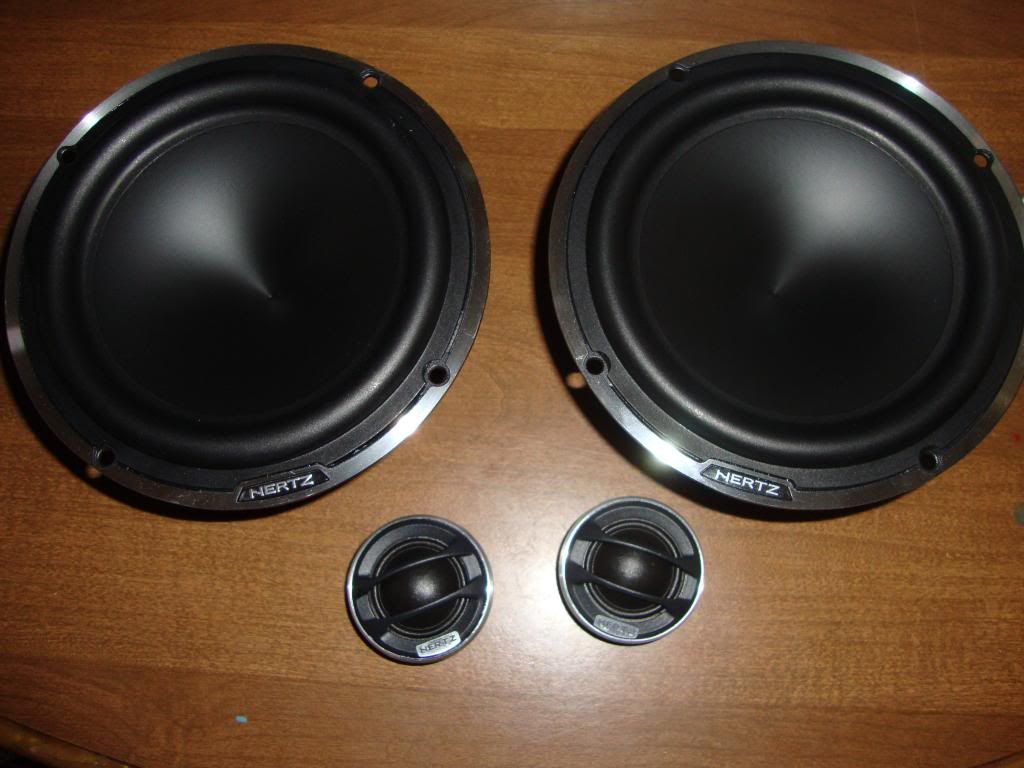
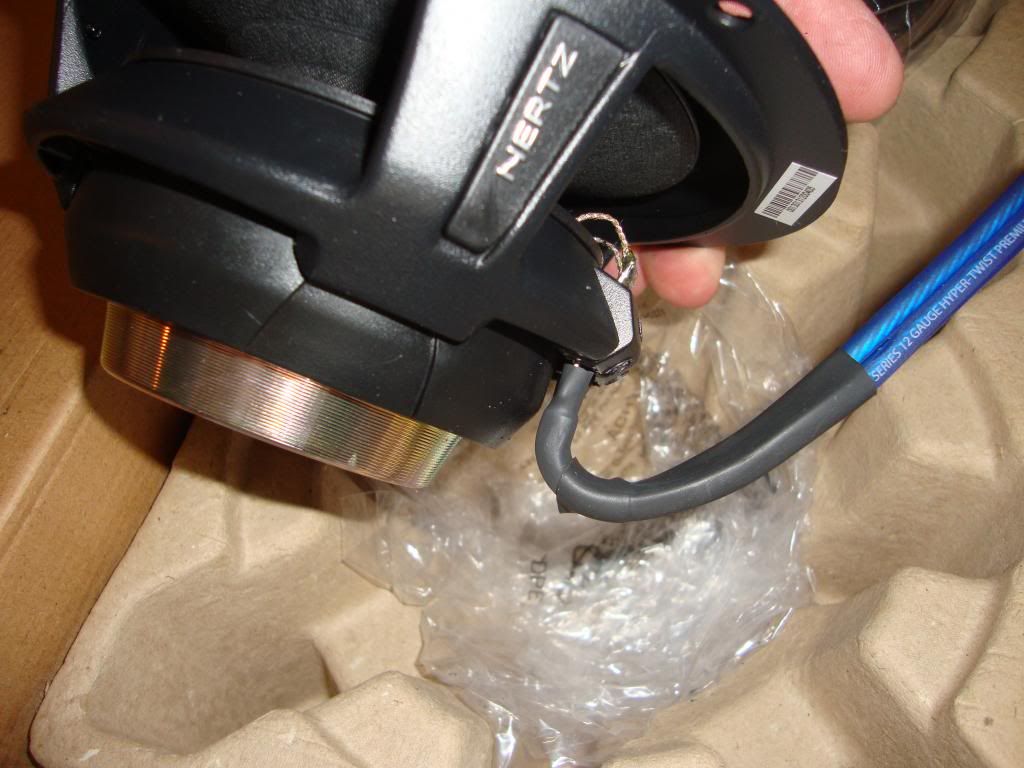
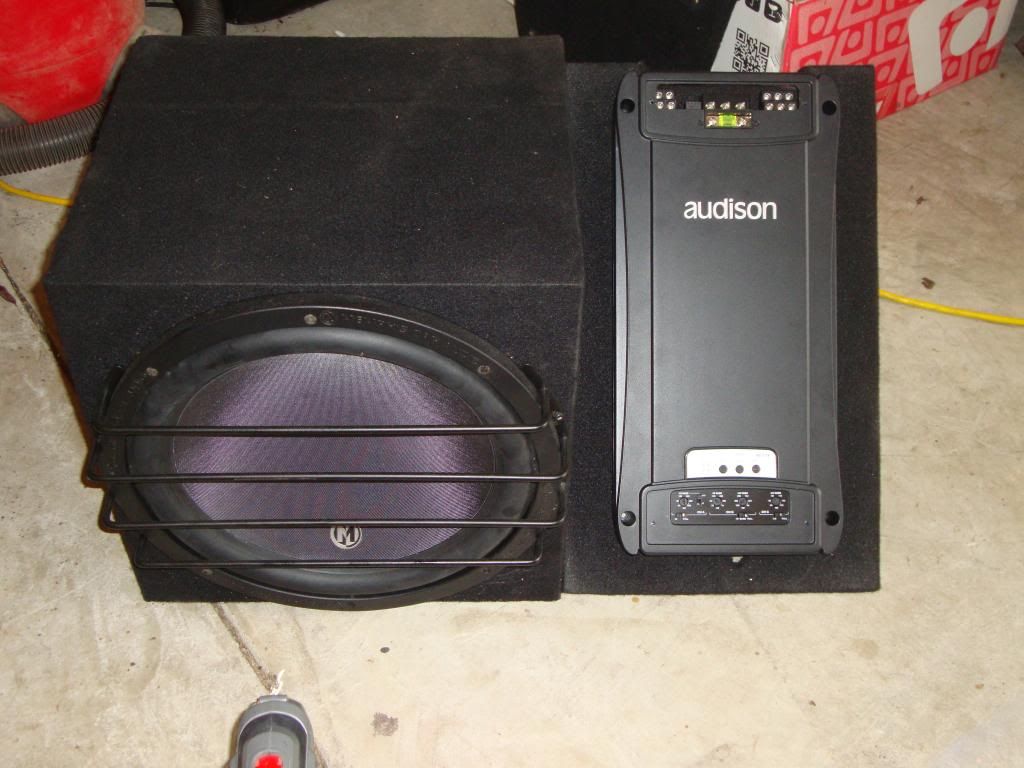
Now for the fun stuff! Here is the new gear. New 6.5s and tweeters as well as the Audison 5 channel amp. The speakers are the Hertz Mille line, which is as good as they make unless you pony up for the Audison speakers. This is already a budget buster and these drivers are amazing, so I'm good with these. Other items of note, I am upgrading my interconnects in the process. I had a set of Memphis 6 channel interconnects and decided to go with Stinger's 8000 series for better sound quality and less chance of induced noise. I also wanted to run dedicated speaker wire as well. Up until this point, I've been wire tapping into the OE speaker wires in the trunk and using them to power the HSKs. The OE speaker wire is about 20ga at best. I opted for 20' runs of Stinger speaker wire and am using 16ga for the tweets and 12ga for the 6.5s. Sure to be a huge improvement!
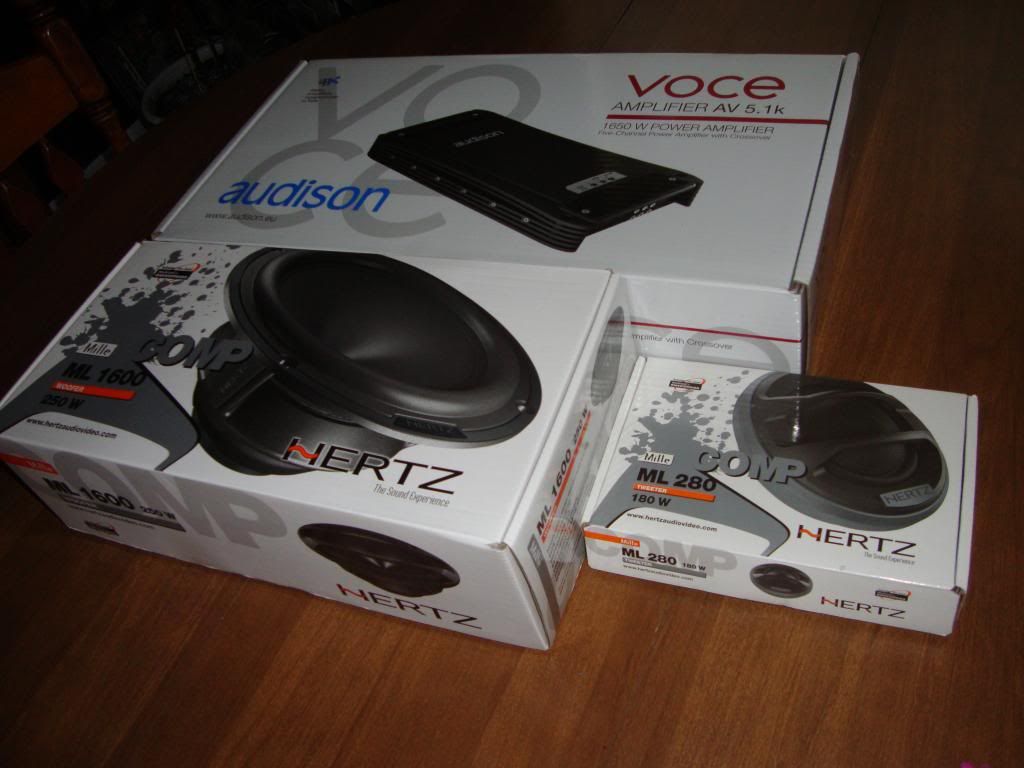
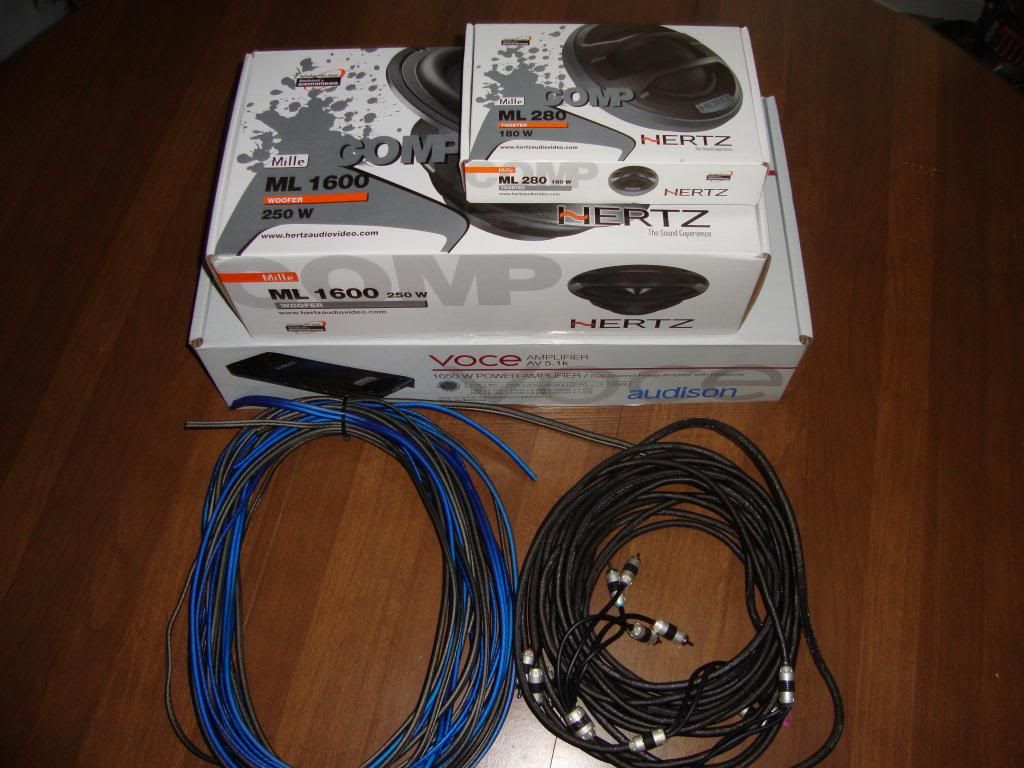
Yes I'm a Hertz *****.... Don't judge me! Ha!
Love the Audison 5 channel but it is massive! This amp gives me 140x2 on the 6.5s, 75x2 on the tweets and 600x1 on the sub at 4ohms (what my initial setup will be) or 1,000x1 on the sub (if I recone the C3 with a dual 4ohm cartridge and wire it at 2ohms).
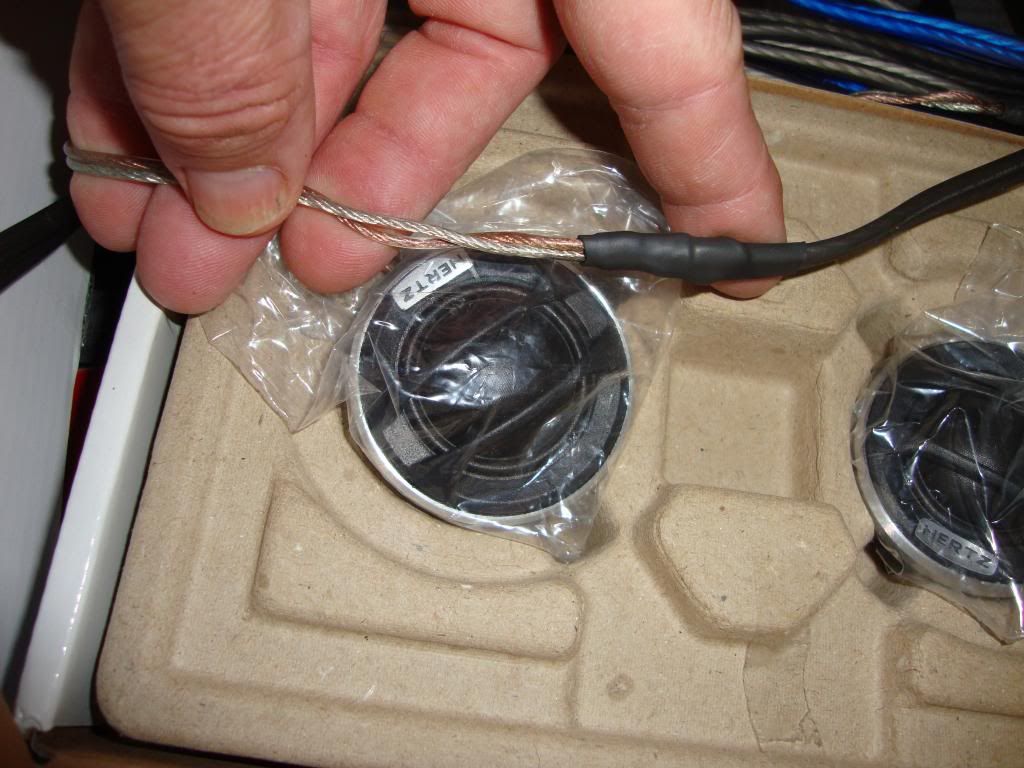
Not wanting any "connections" between the amp and the drivers, I had the 20' runs of Stinger wire soldered and shrink wrapped to each speaker. This made the install a little tougher but was worth it in my opinion. Sucks I can't solder without making a shiny liquid metal mess because this would have been much easier to do AFTER fishing the wire runs from the trunk. Doing it this way meant that I had to mount the speakers first, then fish the runs to the trunk.


Yes I'm a Hertz *****.... Don't judge me! Ha!


Love the Audison 5 channel but it is massive! This amp gives me 140x2 on the 6.5s, 75x2 on the tweets and 600x1 on the sub at 4ohms (what my initial setup will be) or 1,000x1 on the sub (if I recone the C3 with a dual 4ohm cartridge and wire it at 2ohms).

Not wanting any "connections" between the amp and the drivers, I had the 20' runs of Stinger wire soldered and shrink wrapped to each speaker. This made the install a little tougher but was worth it in my opinion. Sucks I can't solder without making a shiny liquid metal mess because this would have been much easier to do AFTER fishing the wire runs from the trunk. Doing it this way meant that I had to mount the speakers first, then fish the runs to the trunk.

 11-02-13, 06:02 PM
#3
Lexus Test Driver
Thread Starter
All of the old gear removed from the trunk!
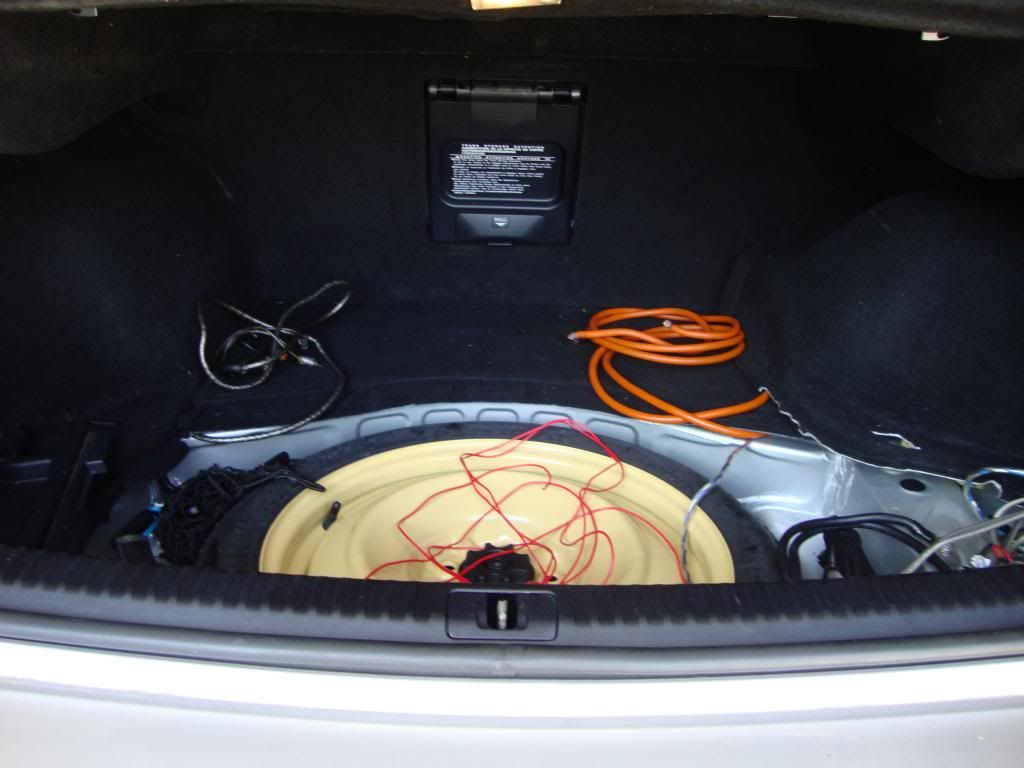
Everything else pulled from the trunk. I added some Dynamat to the rear panel later as well, just for good measure.

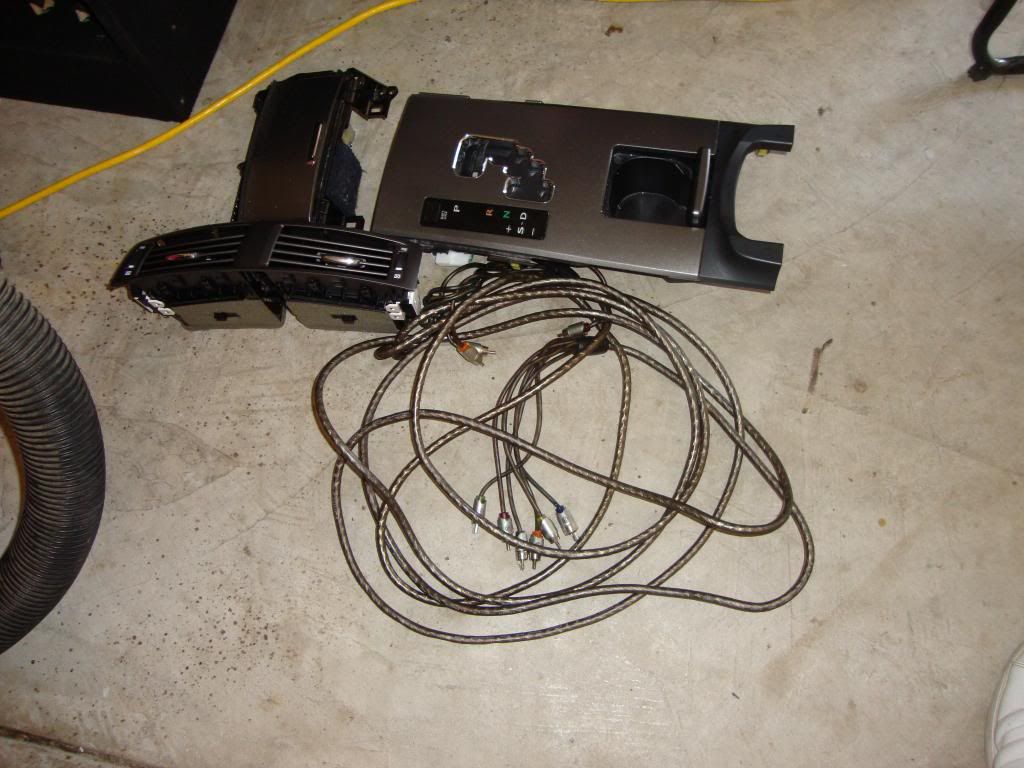
A/C vents and center console trim pulled for access to the HU.........
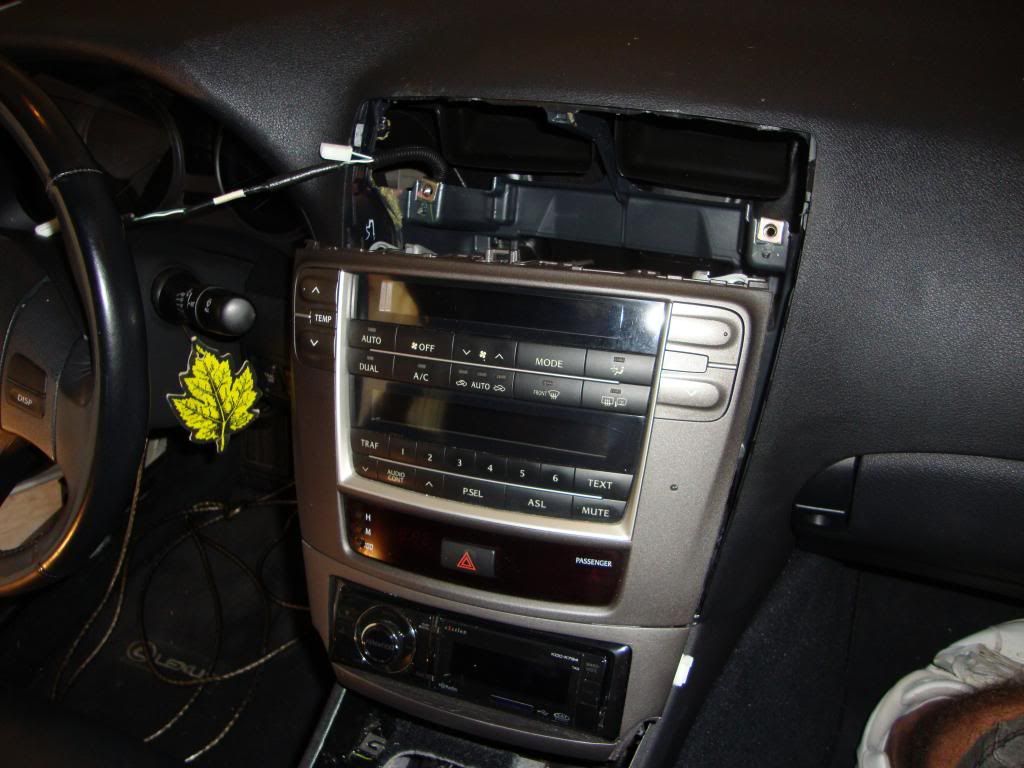
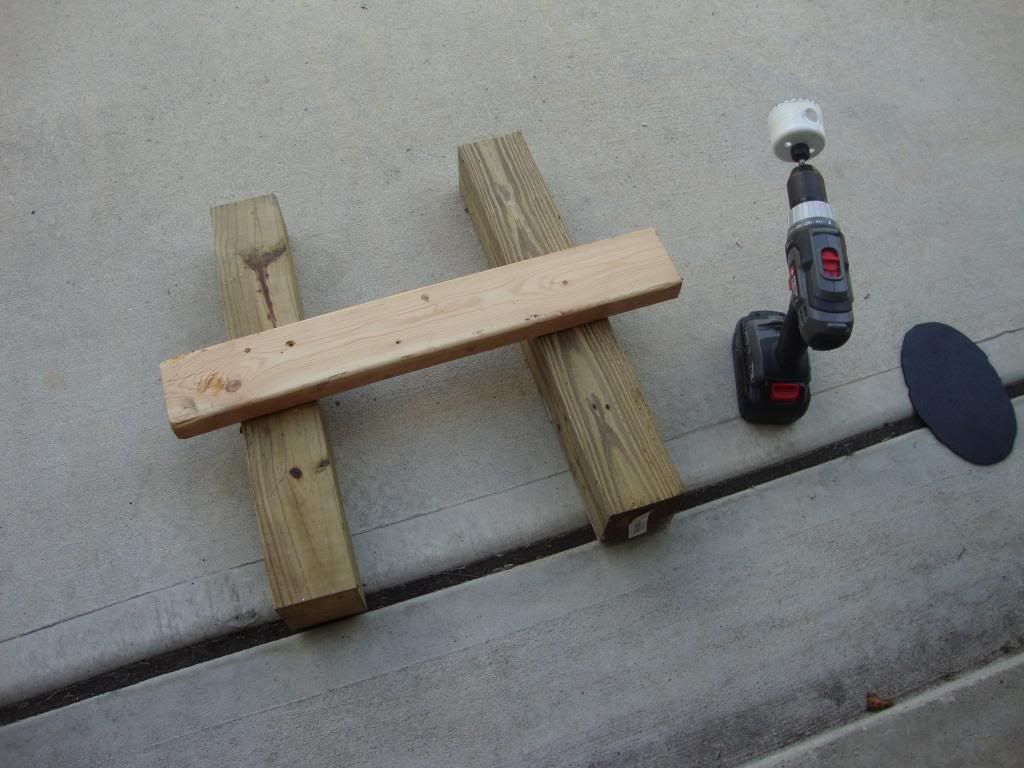
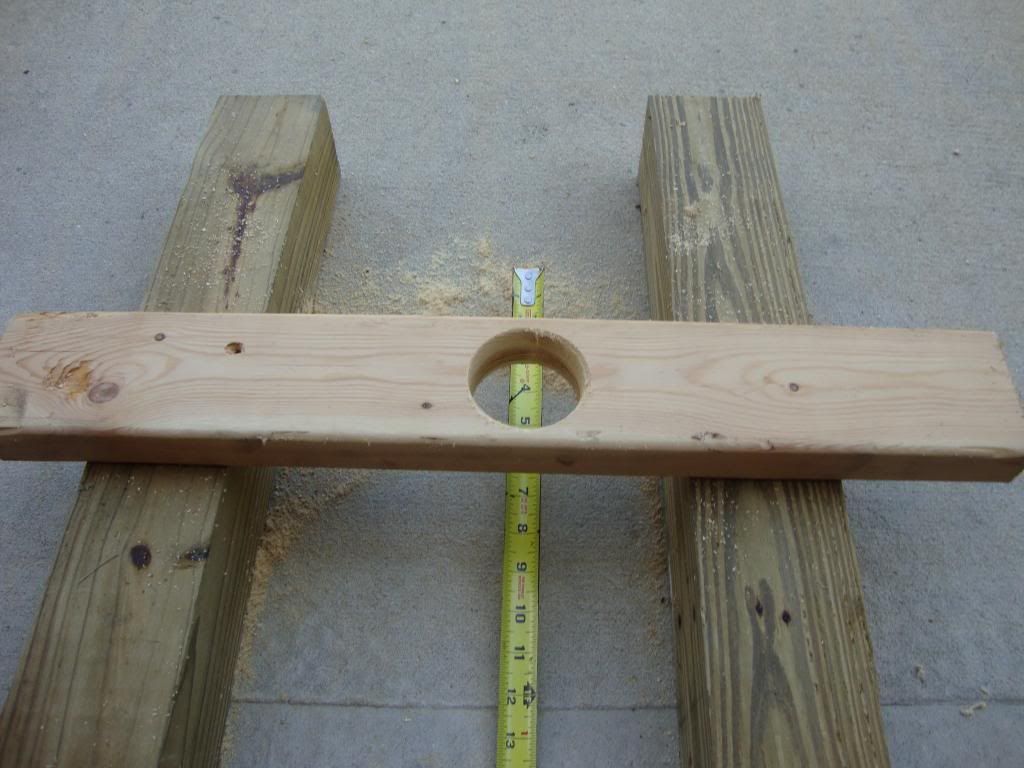
As if that was easy, the hard stuff was just ahead..... My original install had the 6.5" HSK woofers where the OE 6.5s were (with adapters). The OE tweets were simply disconnected and essentially "dead" but I put the HSK tweets in the OE mid brackets in the middle. The HSK tweets had an adapter which allowed me to put them in the OE bracket and it worked nicely though the angle wasn't what it should be. With the Mille tweets this had to change because they mount differently and I want to improve the angle. I needed to make custom pods that would work with the OE mid brackets. I started with ABS plastic and used a heat gun to "mold" it into the shape that I wanted. I took a 2x4 and drilled a 2" hole in it with a hole saw and then laid the plastic over it. I used a tape measure to mark the center line of the hole, since I wouldn't know exactly where it was once the plastic was in place. I heated the plastic and then used a can to push the plastic into the shape that I wanted. This took numerous patient attempts to ensure that I didn't break a hole in any part of the plastic.
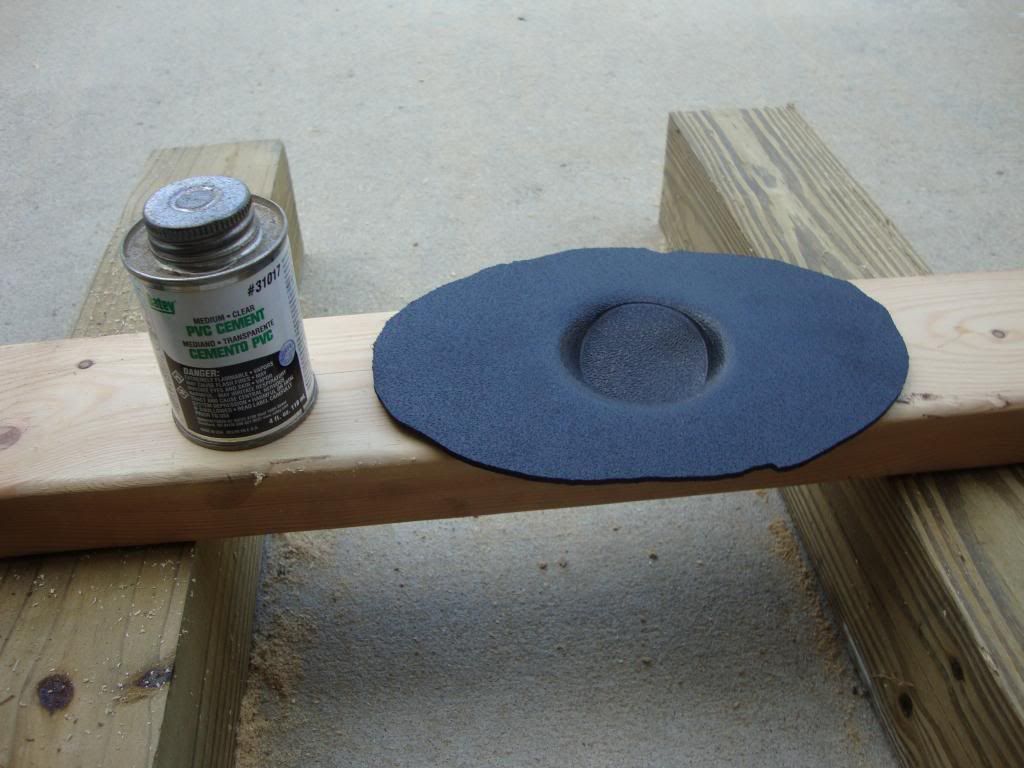
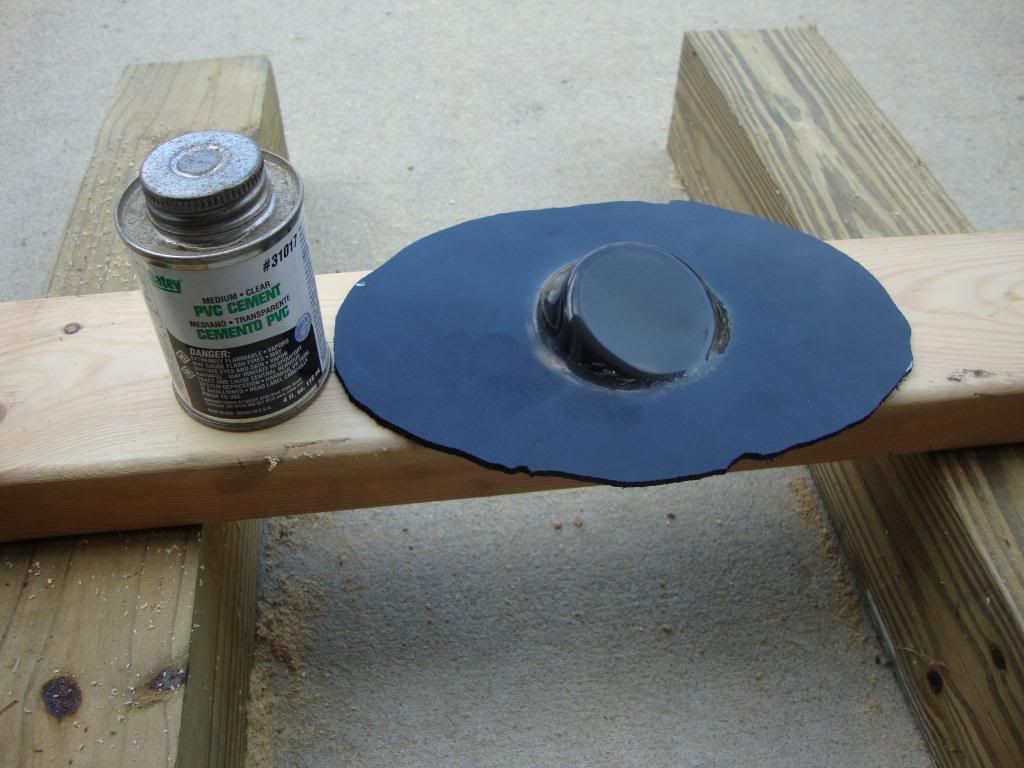
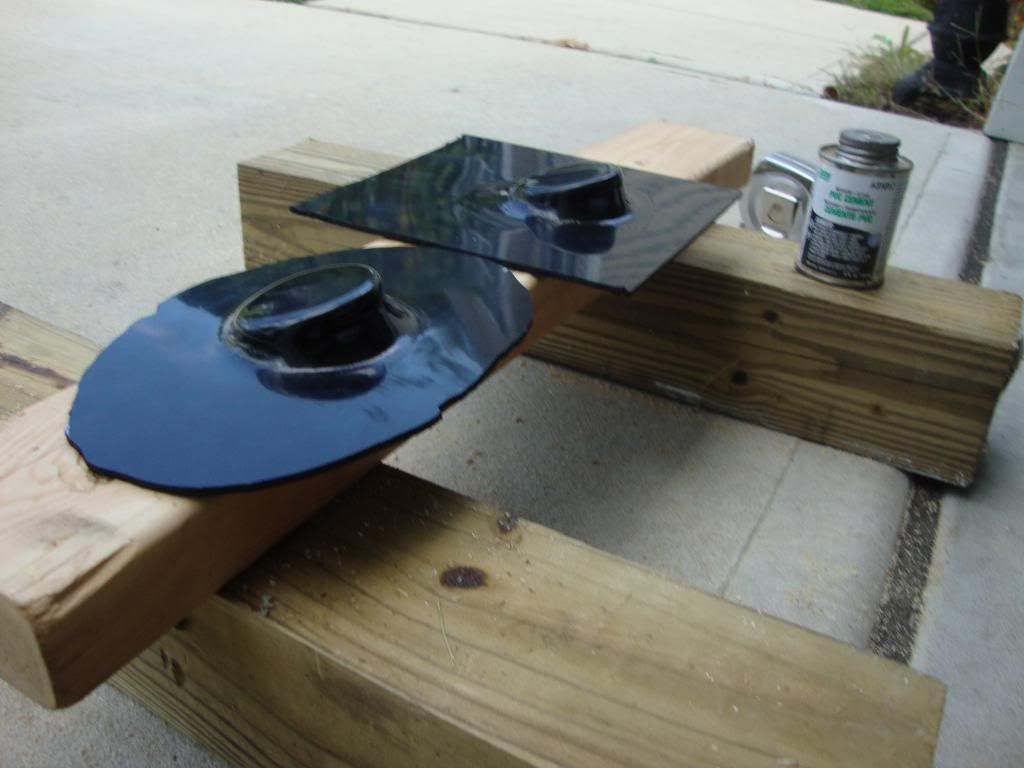
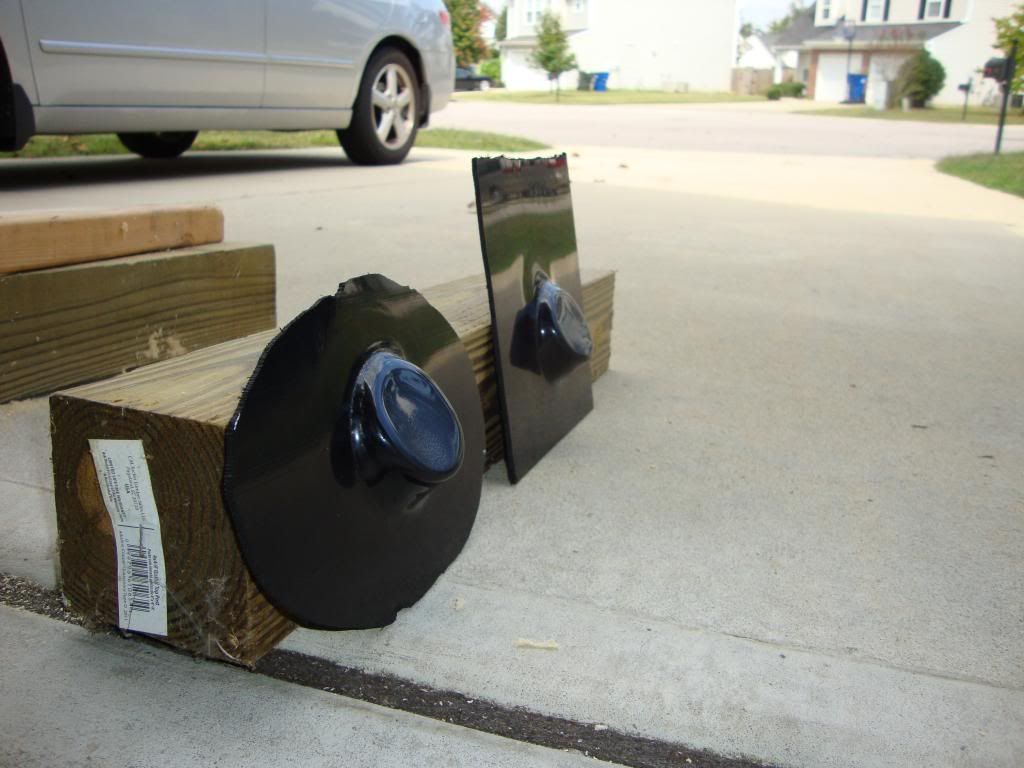
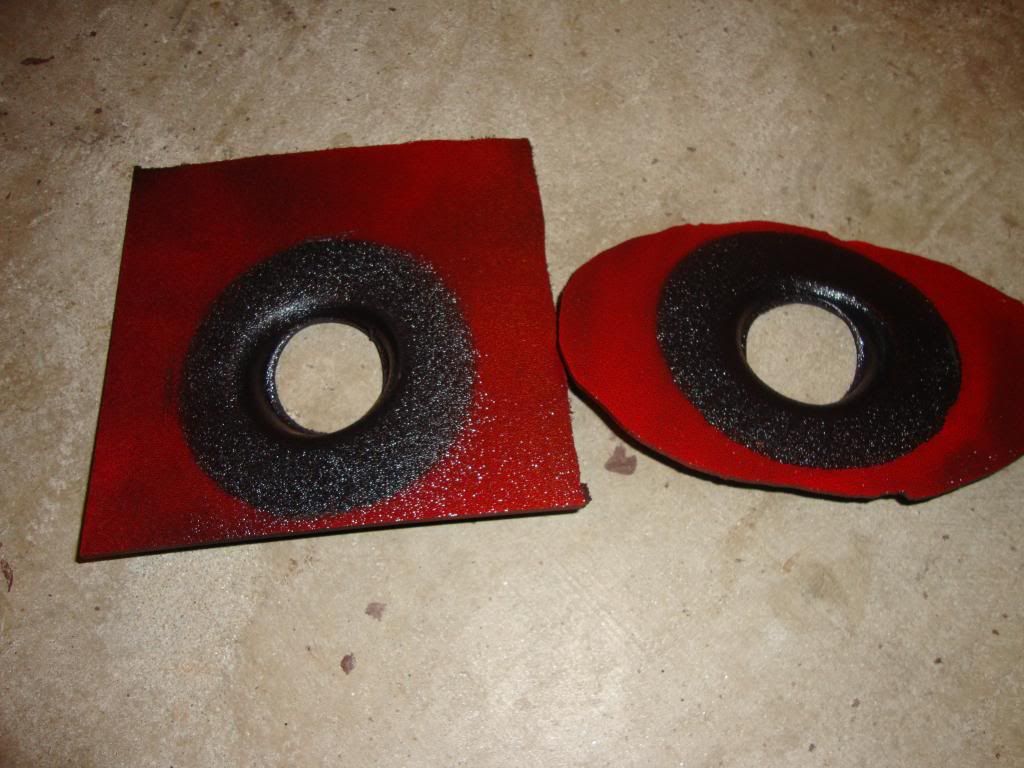
I then found an appropriately sized paint can to use as a "safe" gauge for cutting away the extra pod material and sprayed with red paint before taking the Dremel to the pods to cut away the excess.


Everything else pulled from the trunk. I added some Dynamat to the rear panel later as well, just for good measure.

A/C vents and center console trim pulled for access to the HU.........


As if that was easy, the hard stuff was just ahead..... My original install had the 6.5" HSK woofers where the OE 6.5s were (with adapters). The OE tweets were simply disconnected and essentially "dead" but I put the HSK tweets in the OE mid brackets in the middle. The HSK tweets had an adapter which allowed me to put them in the OE bracket and it worked nicely though the angle wasn't what it should be. With the Mille tweets this had to change because they mount differently and I want to improve the angle. I needed to make custom pods that would work with the OE mid brackets. I started with ABS plastic and used a heat gun to "mold" it into the shape that I wanted. I took a 2x4 and drilled a 2" hole in it with a hole saw and then laid the plastic over it. I used a tape measure to mark the center line of the hole, since I wouldn't know exactly where it was once the plastic was in place. I heated the plastic and then used a can to push the plastic into the shape that I wanted. This took numerous patient attempts to ensure that I didn't break a hole in any part of the plastic.


I then found an appropriately sized paint can to use as a "safe" gauge for cutting away the extra pod material and sprayed with red paint before taking the Dremel to the pods to cut away the excess.


 11-02-13, 06:42 PM
#4
Lexus Test Driver
Thread Starter
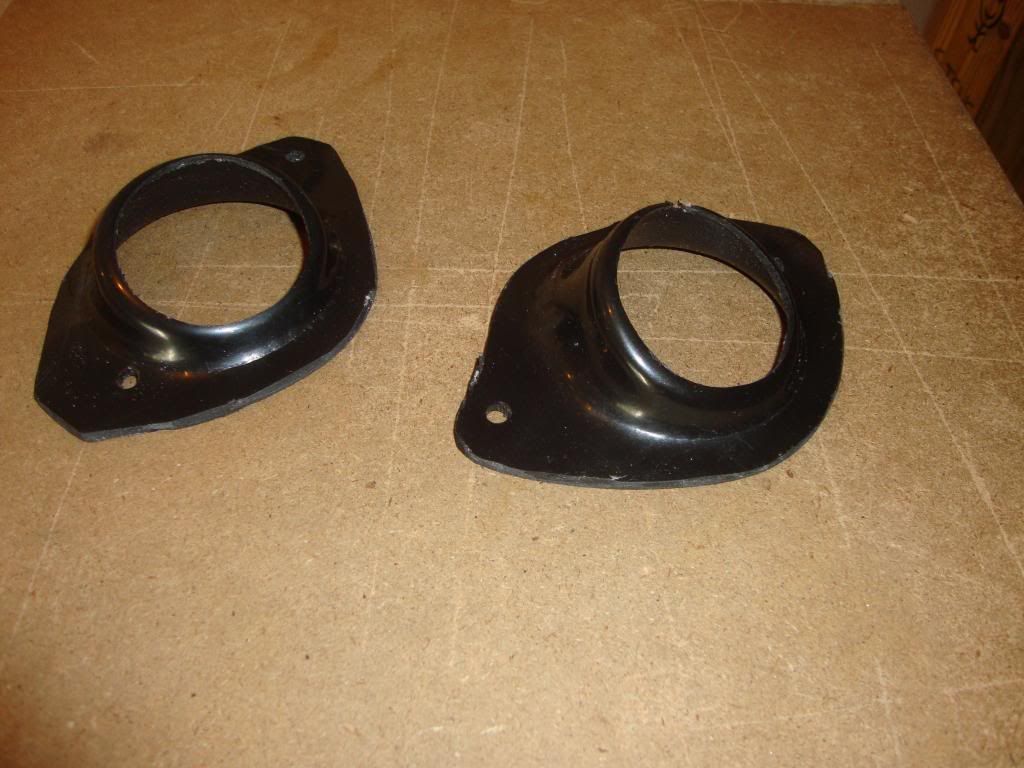
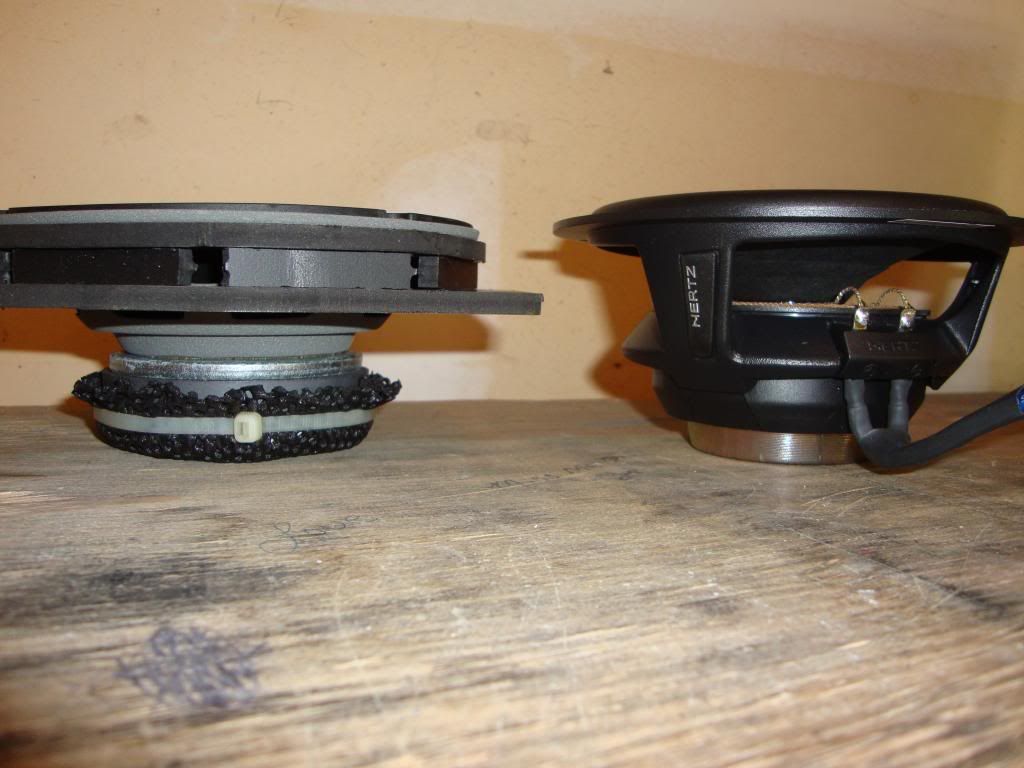
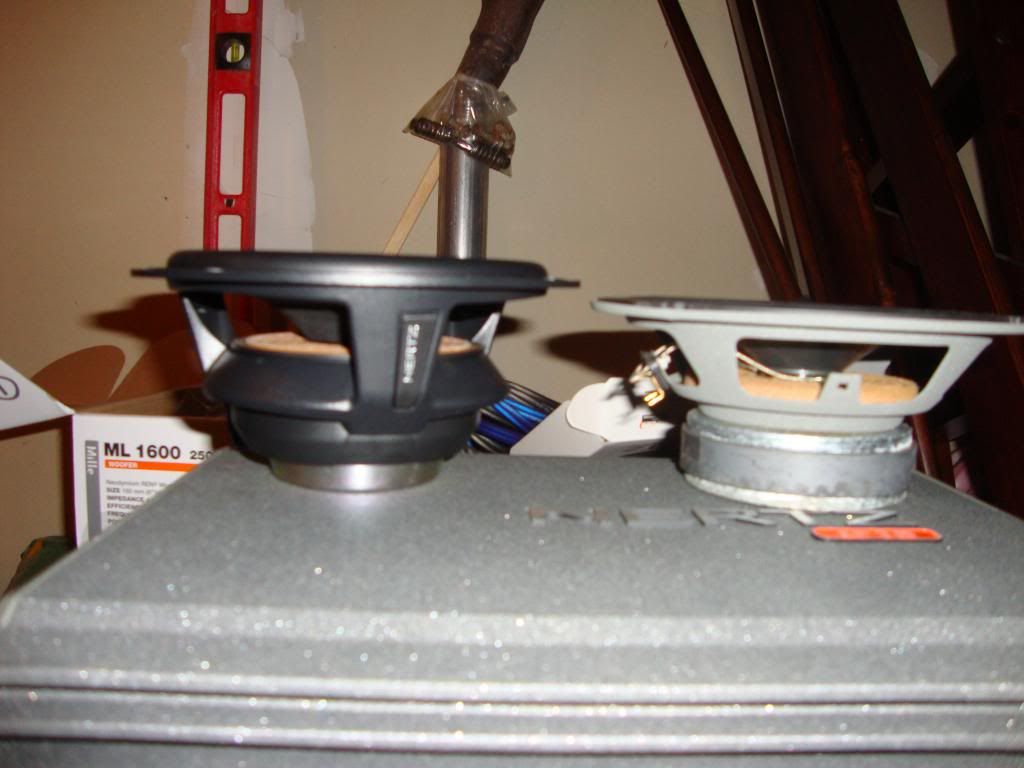
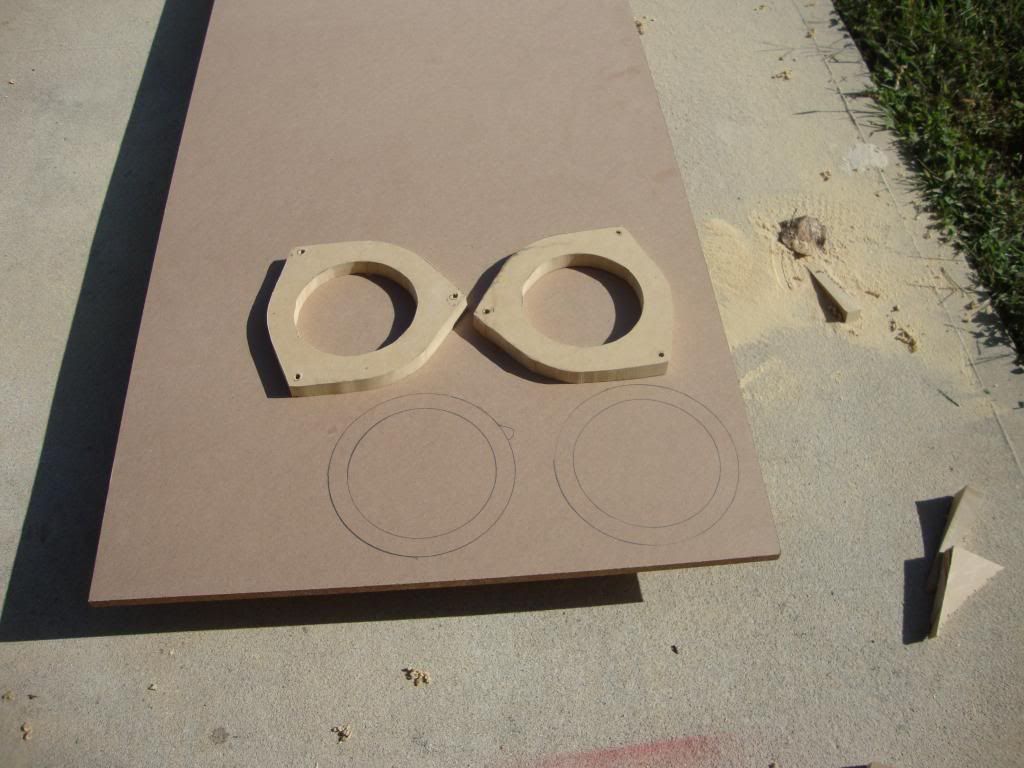
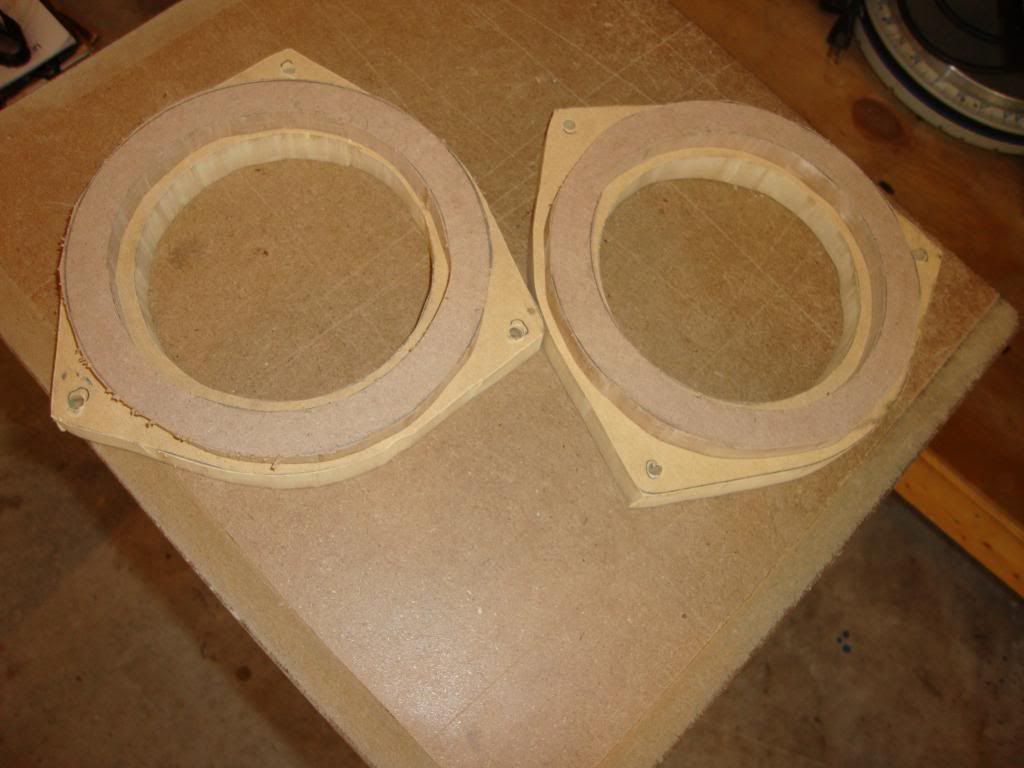
I had used eBay speaker adapters for the 6.5s on the original install but the deeper mounting depth of the Mille speakers meant that I had to use spacers. Notice the foam toolbox liner zip tied to the back of the HSKs? This was to keep the window glass from hitting the back of the magnet when the door was shut with the window down. With the Mille speakers being significantly deeper, I needed to make my own adapters out of MDF, and add a spacer ring as well.


 11-06-13, 04:31 PM
#5
Lexus Test Driver
Thread Starter
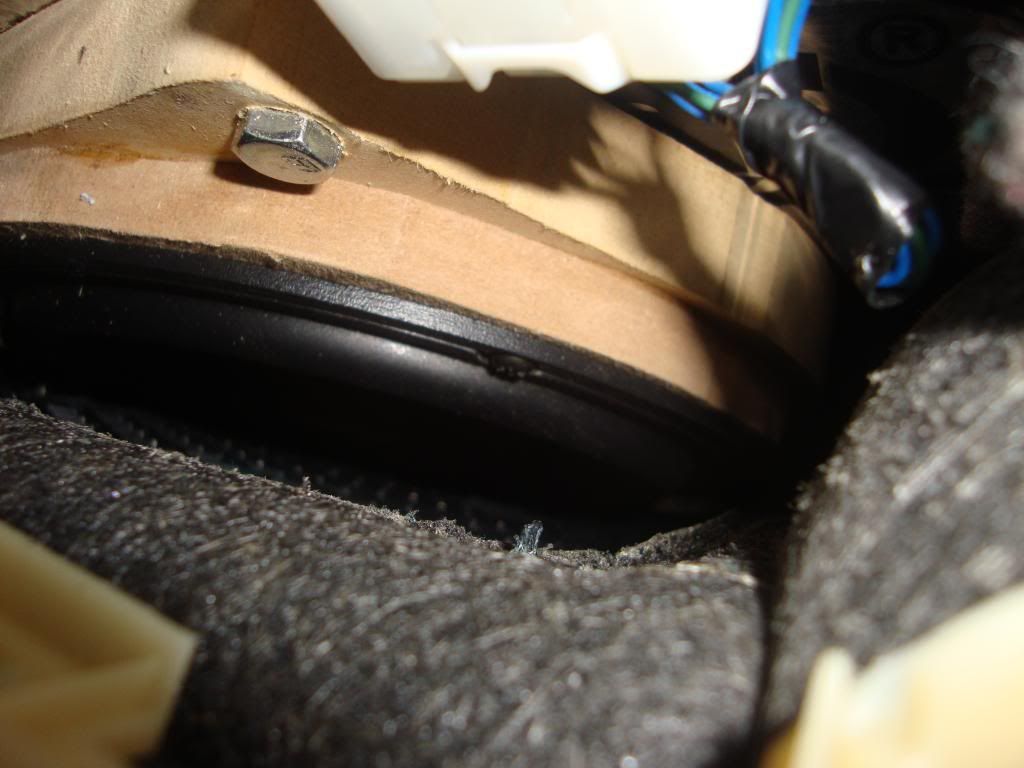
After a "test fit", I determined the surround of the 6.5s was dangerously close to the plastic trim of the door skin. I pulled the skins back off and removed the spacers. I pulled the screws out of the spacer rings and ran the counter sink bit down another 1/4" or so. Then I put the screws back in and sanded the spacers with a belt sander. Still not convinced I had adequate clearance, I removed the excess material from the inside of the door skin with my Dremel.
Clearance before.....
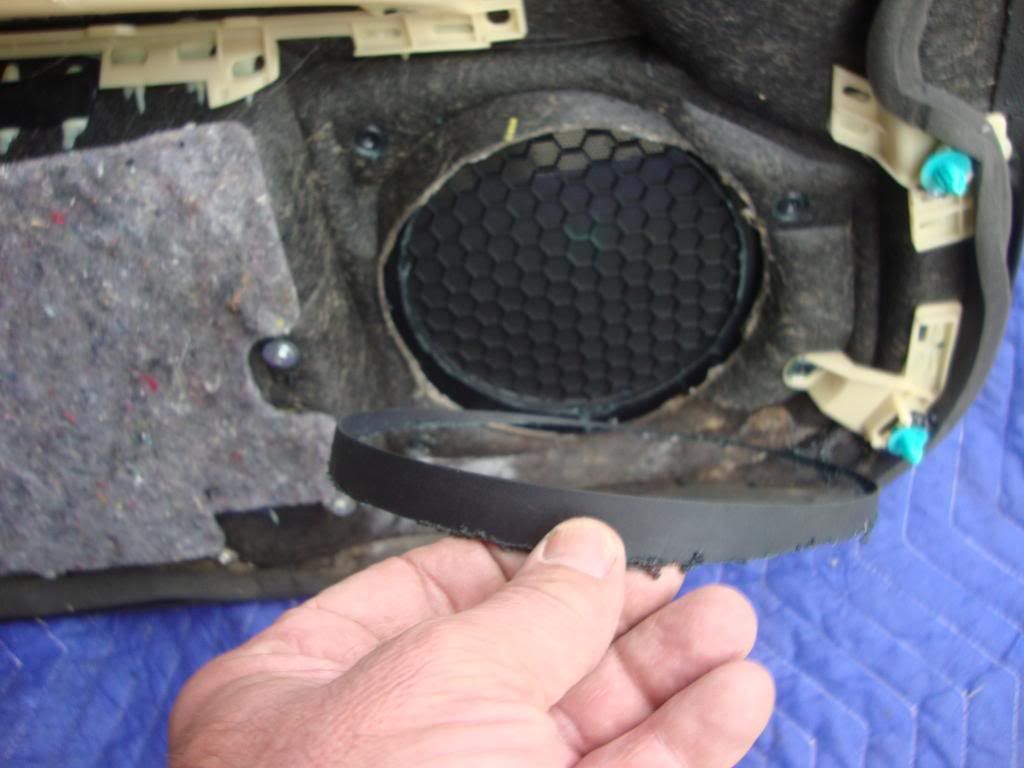
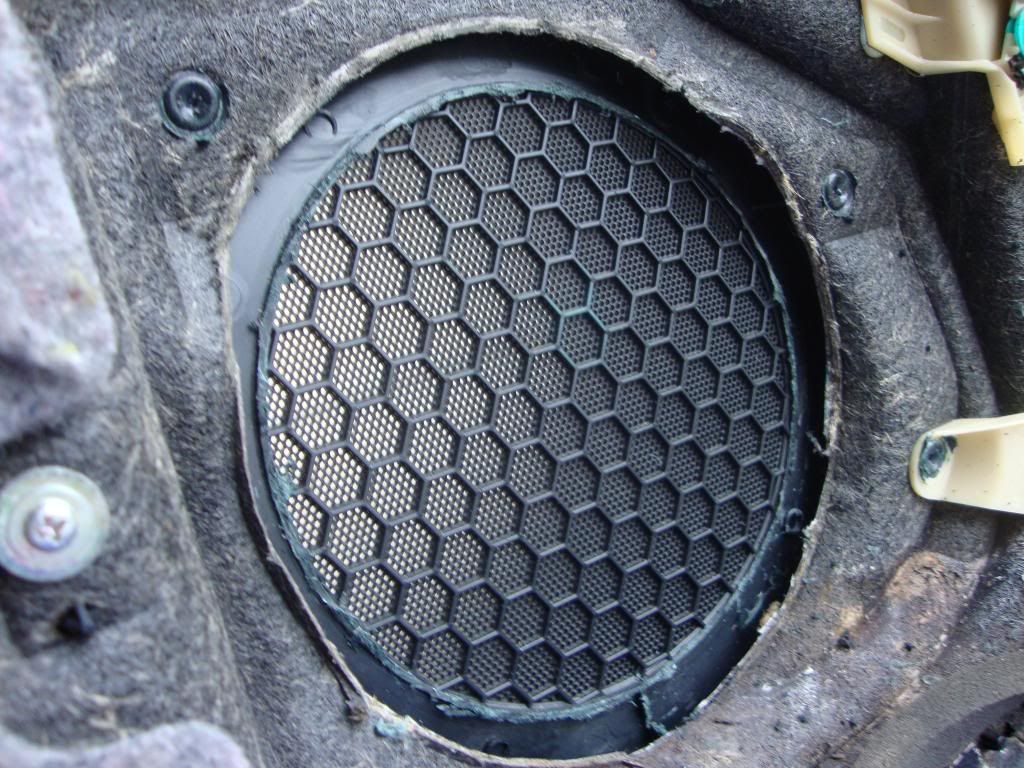
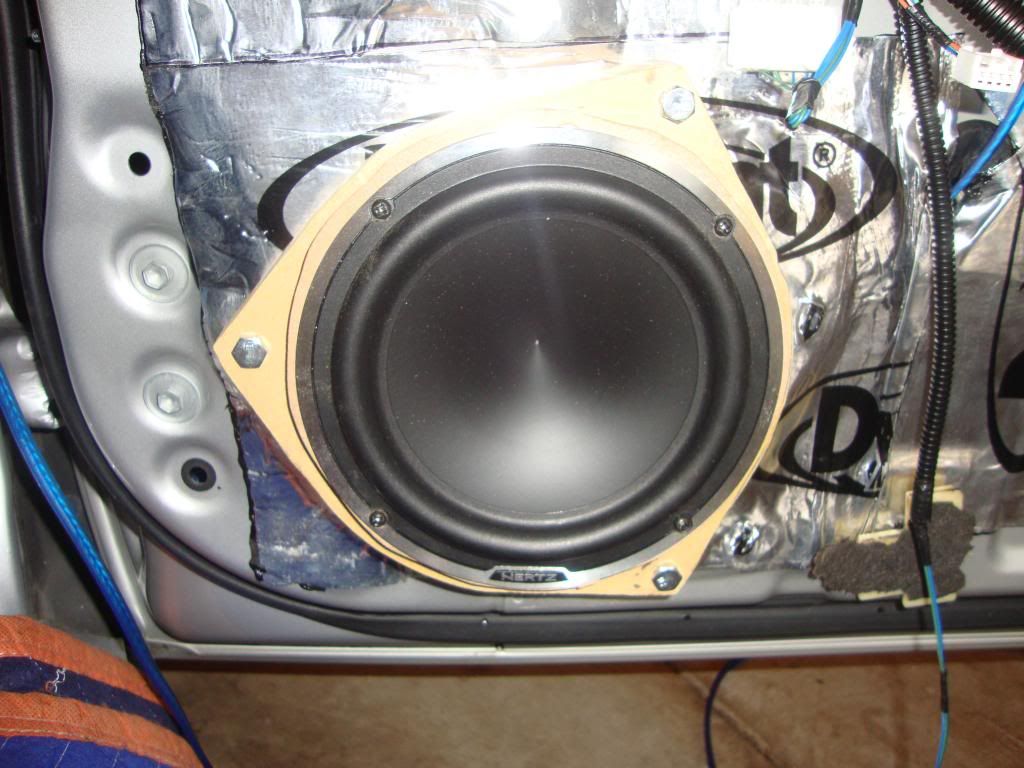
Clearance after....
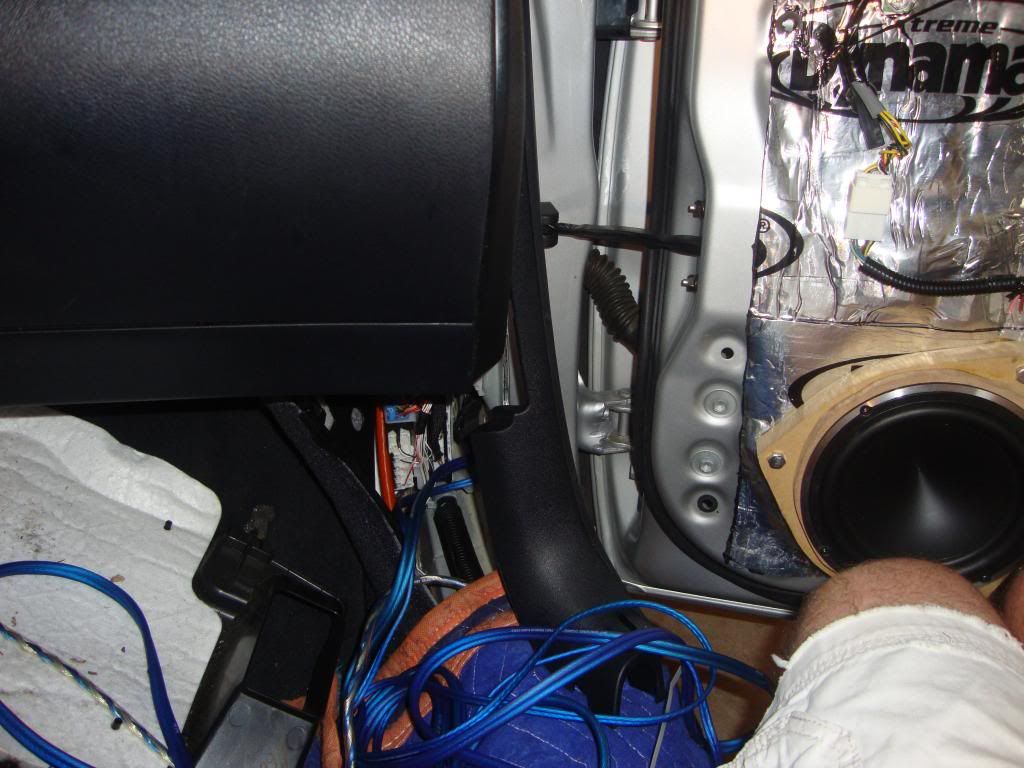
Quick pic of the Mille in the door.
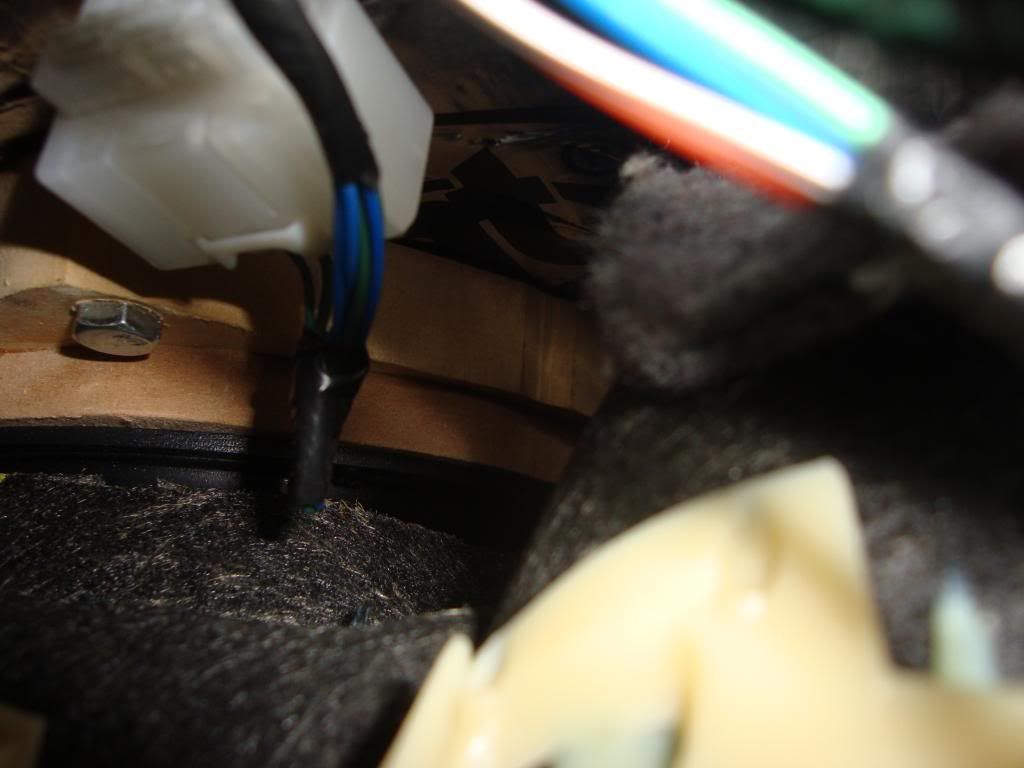
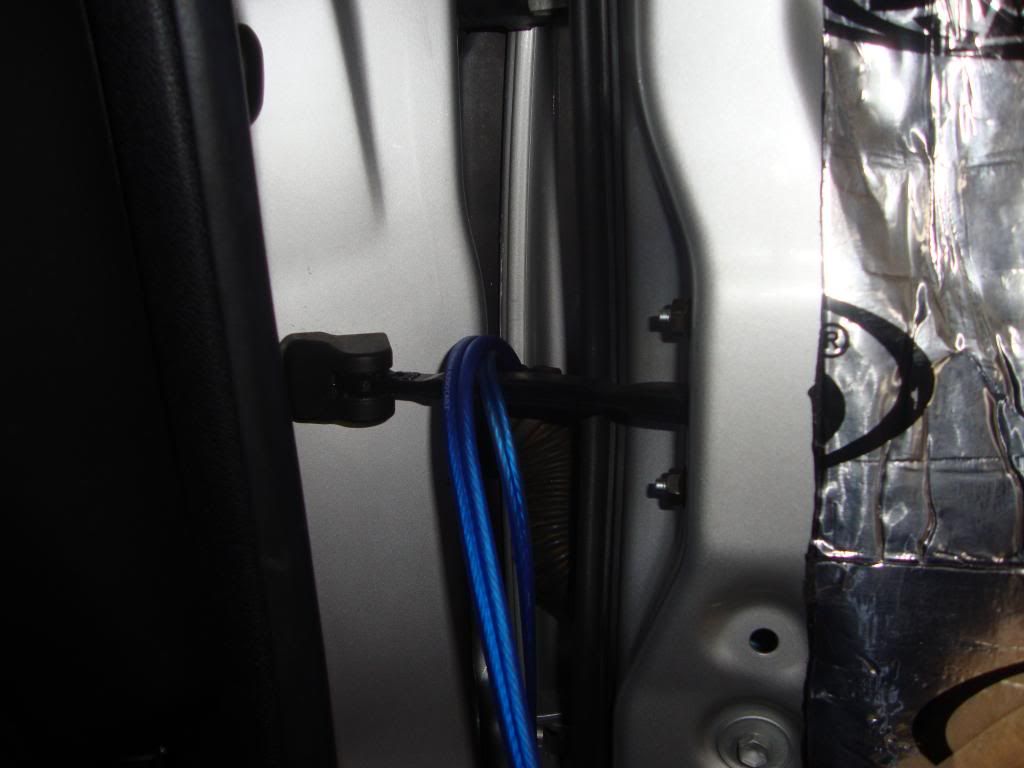
Now for the not so fun part. I needed to fish four 20' runs of speaker wire through the door panels. I had to do this with the 6.5s in the floor of the car because where they were going to be mounted was my only access to the inside of the door. I zip tied the runs together (tweeter and mid) and then ran a small zip tie through them and ran it through a large zip tie. I snipped the flimsy end off and was ready to go after wrapping in electrical tape.
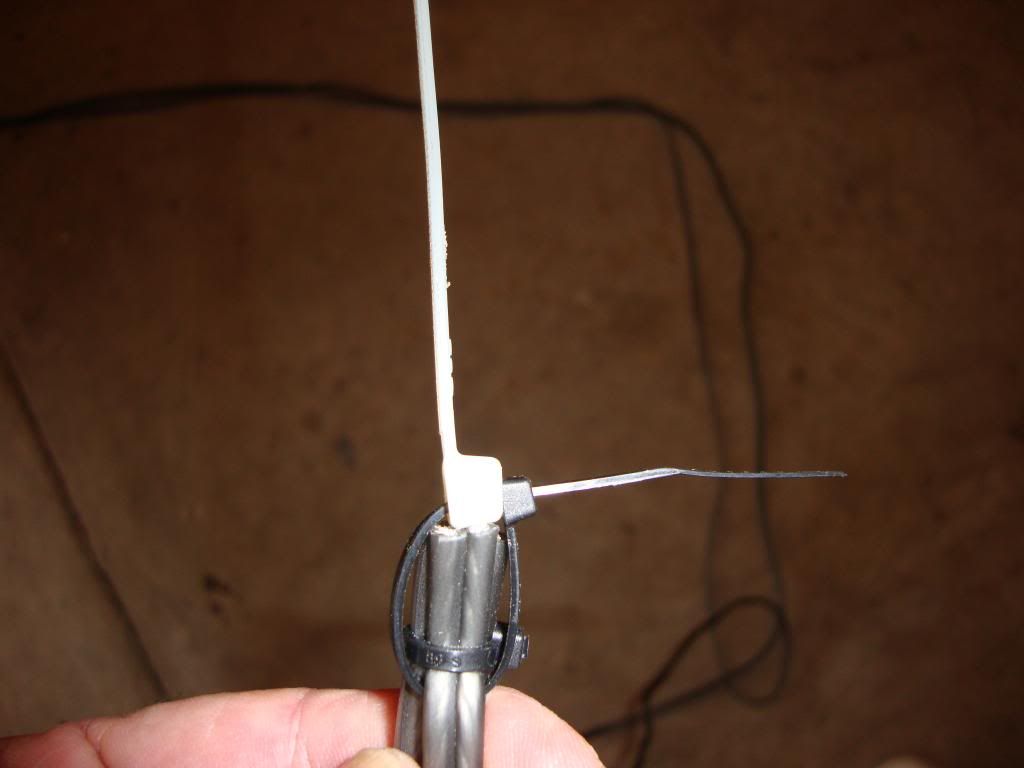

I pulled the kick panels and found that there was a plastic "board" of relays and pigtails behind each. These had to be pulled as well to gain access to the entry point into the car. Just getting the runs through the grommets on both sides took me a solid hour! Once I got each started, it helped to lube the speaker wires up with some dish soap when pulling them through the grommet.
Clearance before.....


Clearance after....

Quick pic of the Mille in the door.

Now for the not so fun part. I needed to fish four 20' runs of speaker wire through the door panels. I had to do this with the 6.5s in the floor of the car because where they were going to be mounted was my only access to the inside of the door. I zip tied the runs together (tweeter and mid) and then ran a small zip tie through them and ran it through a large zip tie. I snipped the flimsy end off and was ready to go after wrapping in electrical tape.


I pulled the kick panels and found that there was a plastic "board" of relays and pigtails behind each. These had to be pulled as well to gain access to the entry point into the car. Just getting the runs through the grommets on both sides took me a solid hour! Once I got each started, it helped to lube the speaker wires up with some dish soap when pulling them through the grommet.
11-06-13, 04:44 PM
#6
Lexus Test Driver
Thread Starter
The aggravating task of pulling the wires through the grommet......
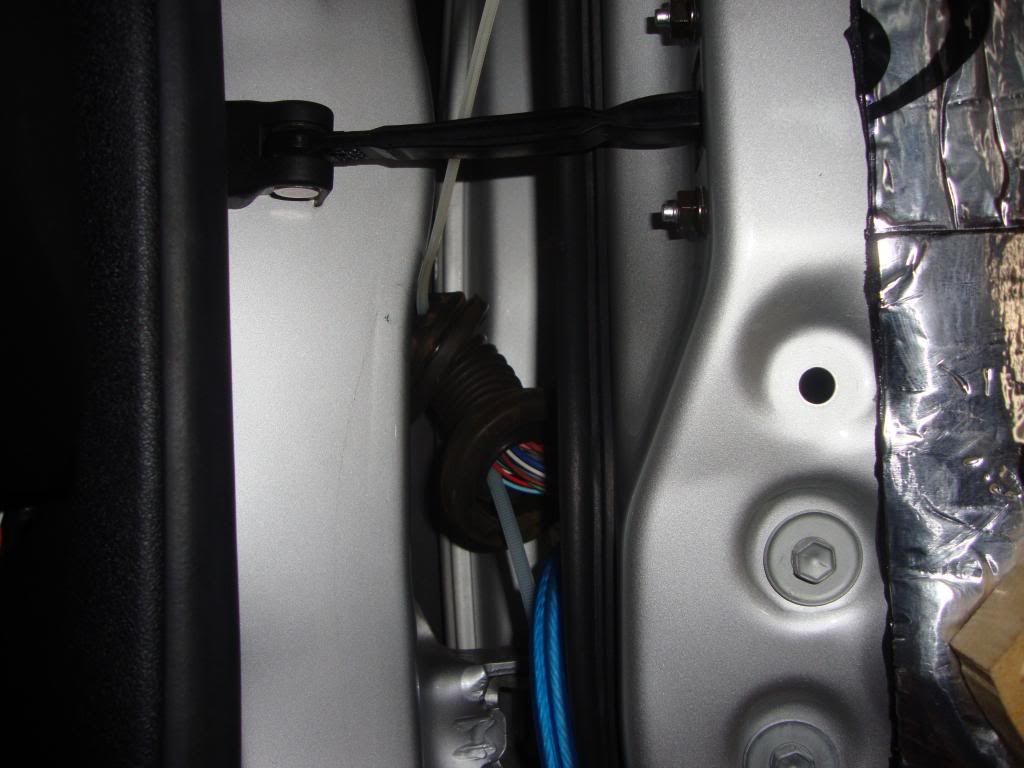
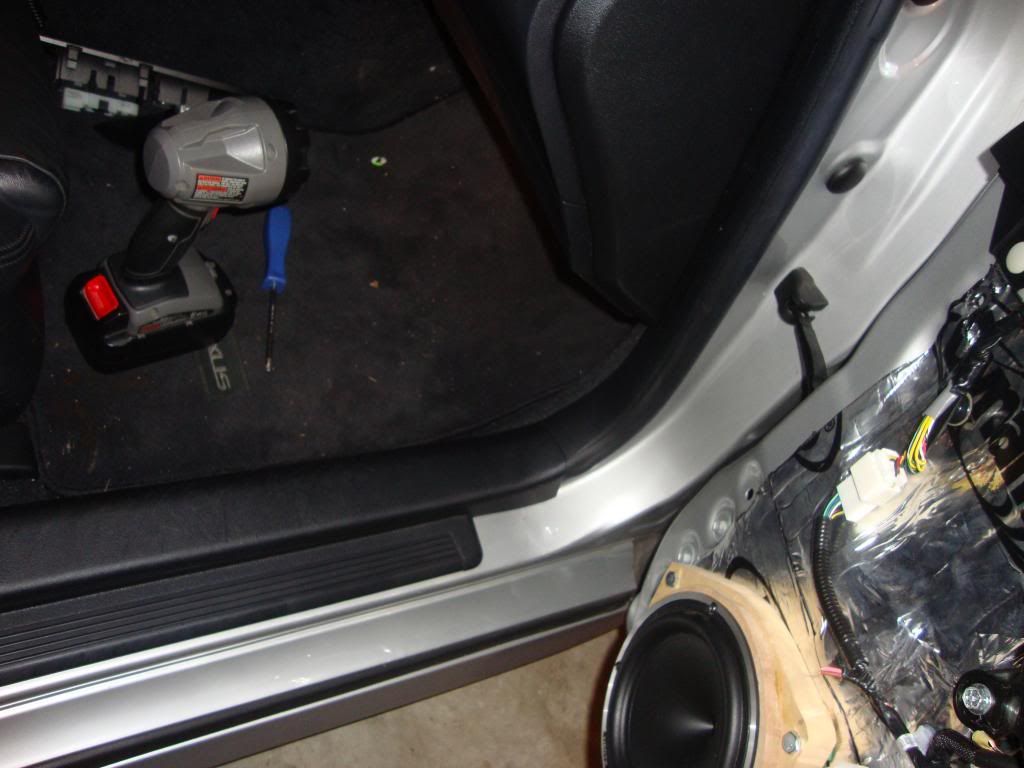
Passenger side wires run successfully and tucked beneath the sill... Finally!
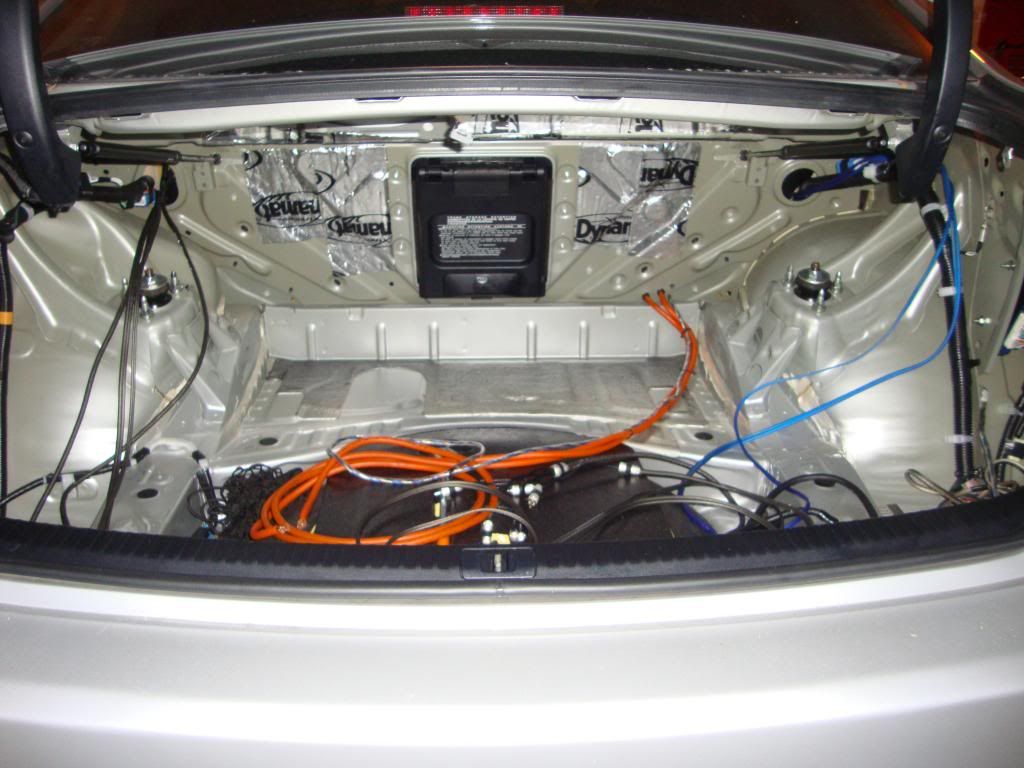
All runs now at the trunk. I had the two runs of 4ga because I had multiple amps. I had the EP1D run off of one and had a distro block splitting the other into a pair of 8ga runs for the amps that were on the doors. I had originally planned to run these into a distro block for a single 4ga run for the amp, but when I realized that the Audison had to power inputs (one for batt and one for a cap), I simply ran both runs into the amp.
I had the Memphis 15 wired at 1 ohm but the Audison isn't 1 ohm stable so I had to pull it and wire it in series so that it would be a 4 ohm load at the amp (it is a dual 2 ohm woofer). Notice the excessive bracing and numerous coats of fiberglass resin inside the box? Can't let go of my SPL mentality, even when building for SQ......
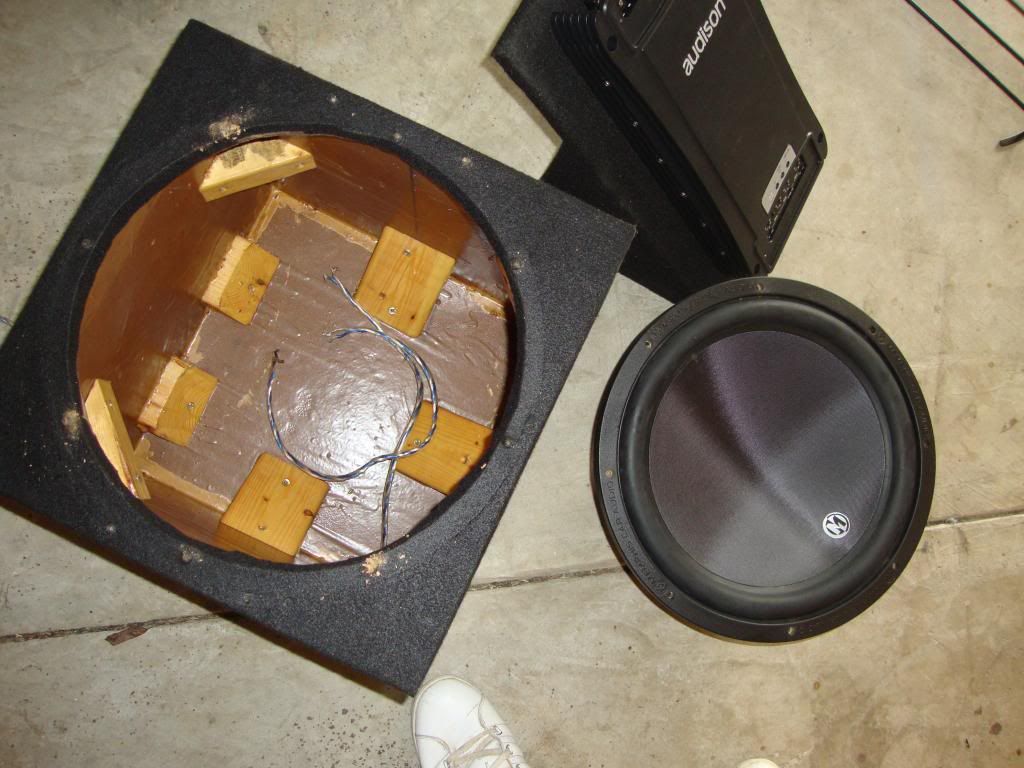
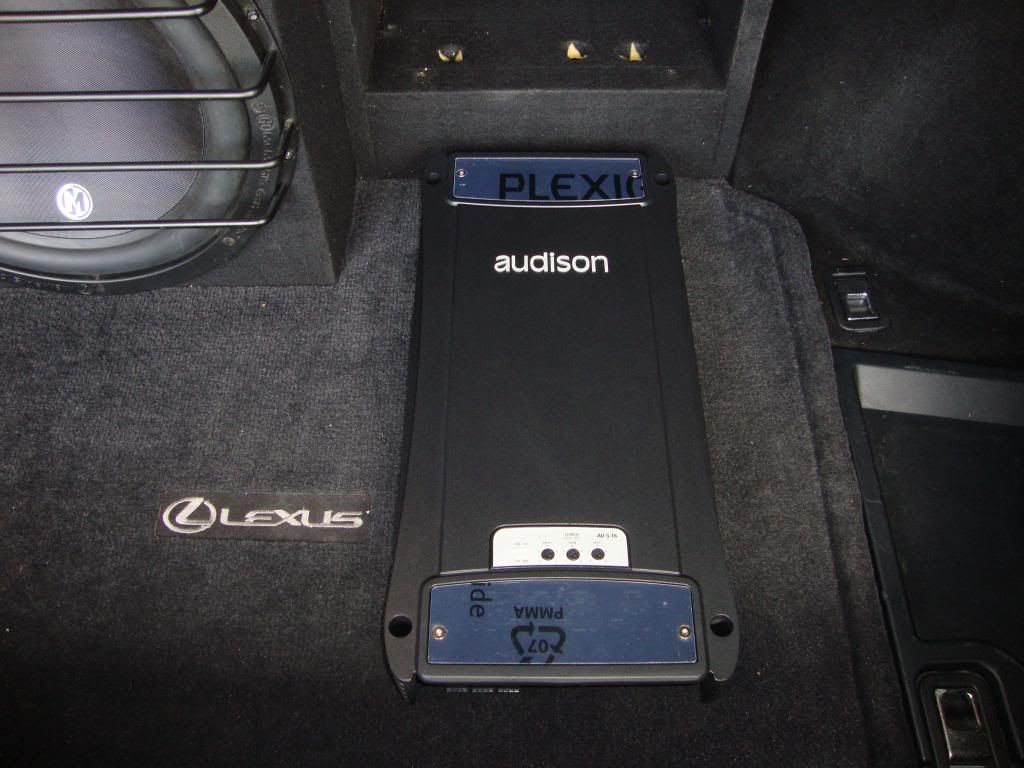
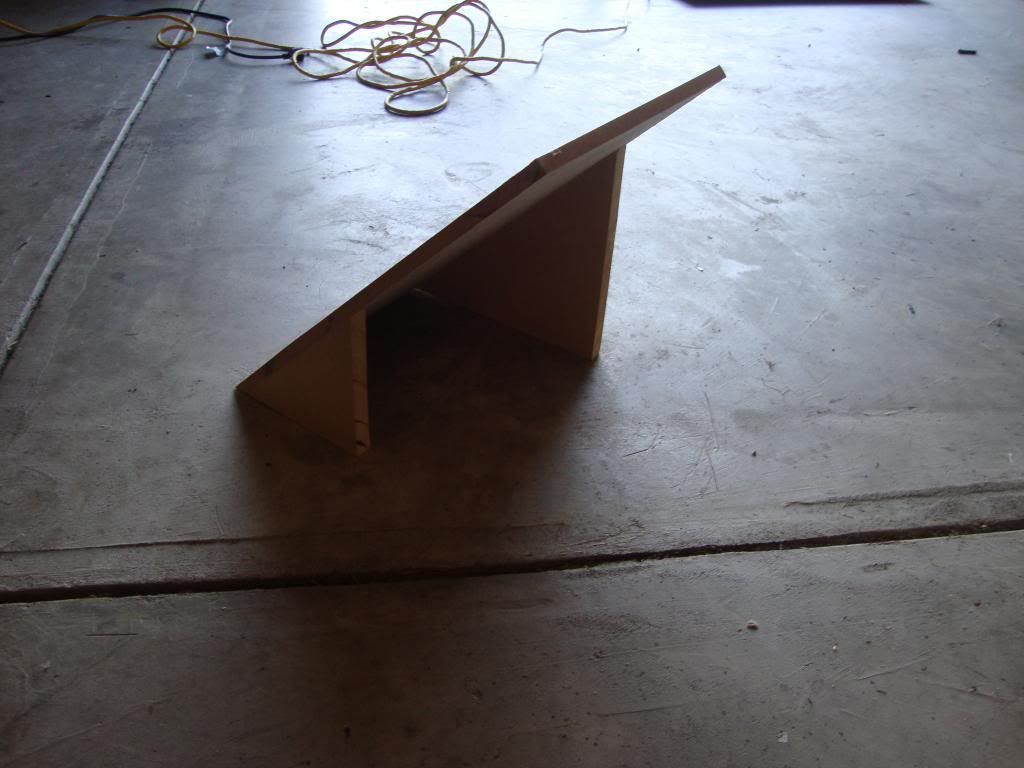
Now for the amp rack. This amp is quite large and really heavy. Not wanting to change my enclosure meant that I had to get a little creative to make this thing fit. I wanted to do something a little fancier than what I ended up doing, but oh well.
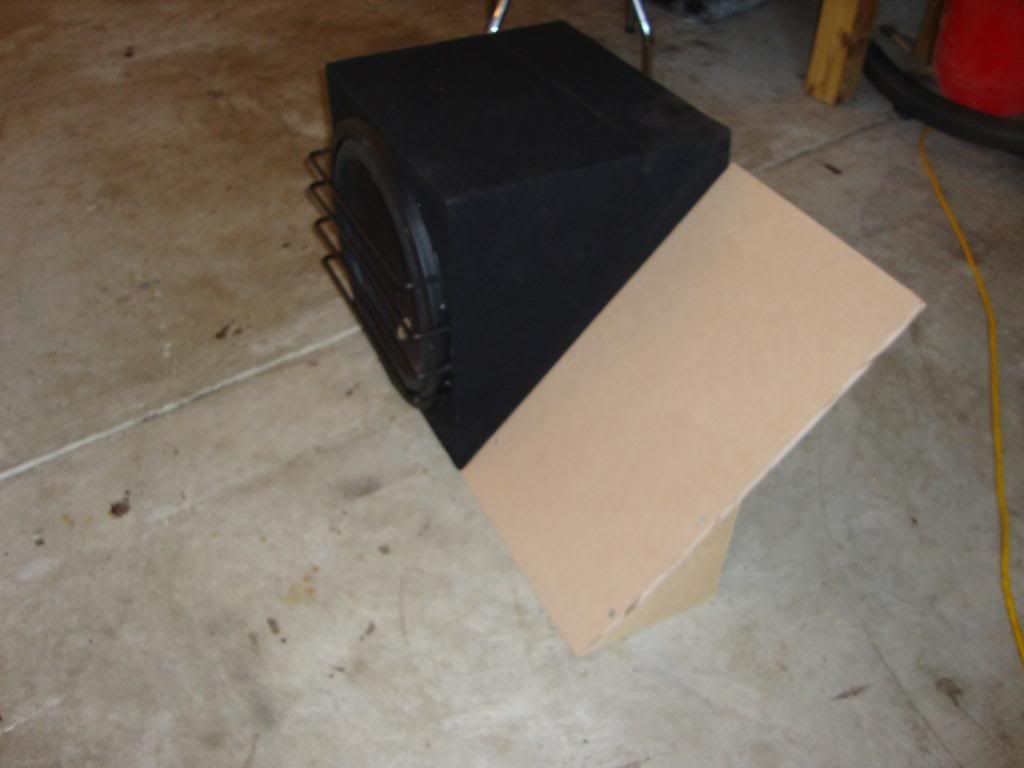
Wrapped in carpet.......
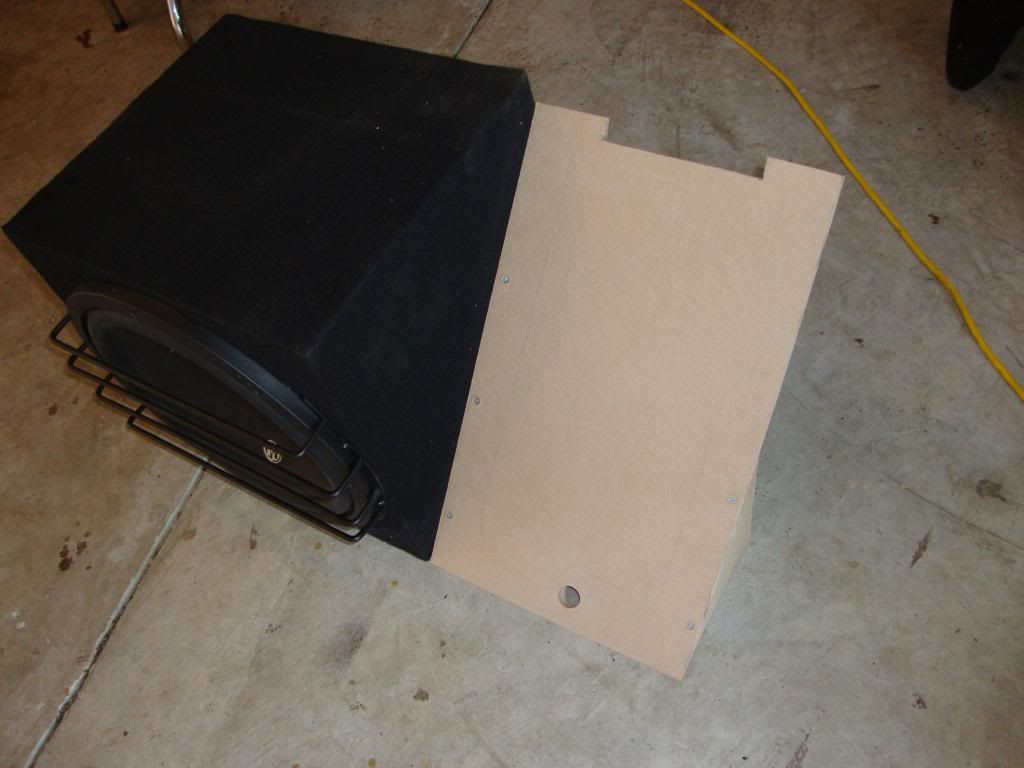
And amp securely mounted......
With that out of the way, it was time to get some more prep work done in the trunk and get this install wrapped up!


Passenger side wires run successfully and tucked beneath the sill... Finally!

All runs now at the trunk. I had the two runs of 4ga because I had multiple amps. I had the EP1D run off of one and had a distro block splitting the other into a pair of 8ga runs for the amps that were on the doors. I had originally planned to run these into a distro block for a single 4ga run for the amp, but when I realized that the Audison had to power inputs (one for batt and one for a cap), I simply ran both runs into the amp.

I had the Memphis 15 wired at 1 ohm but the Audison isn't 1 ohm stable so I had to pull it and wire it in series so that it would be a 4 ohm load at the amp (it is a dual 2 ohm woofer). Notice the excessive bracing and numerous coats of fiberglass resin inside the box? Can't let go of my SPL mentality, even when building for SQ......

Now for the amp rack. This amp is quite large and really heavy. Not wanting to change my enclosure meant that I had to get a little creative to make this thing fit. I wanted to do something a little fancier than what I ended up doing, but oh well.


Wrapped in carpet.......

And amp securely mounted......

With that out of the way, it was time to get some more prep work done in the trunk and get this install wrapped up!
Trending Topics


 5 channel for interior and the class D for the two subs.
11-23-13, 07:12 PM
5 channel for interior and the class D for the two subs.
11-23-13, 07:12 PM
#11
Lexus Test Driver
Thread Starter
Sorry for the delay in updates guys, been a rough couple of weeks at work. Thanks for the compliments though. Now, for the completion of the project......
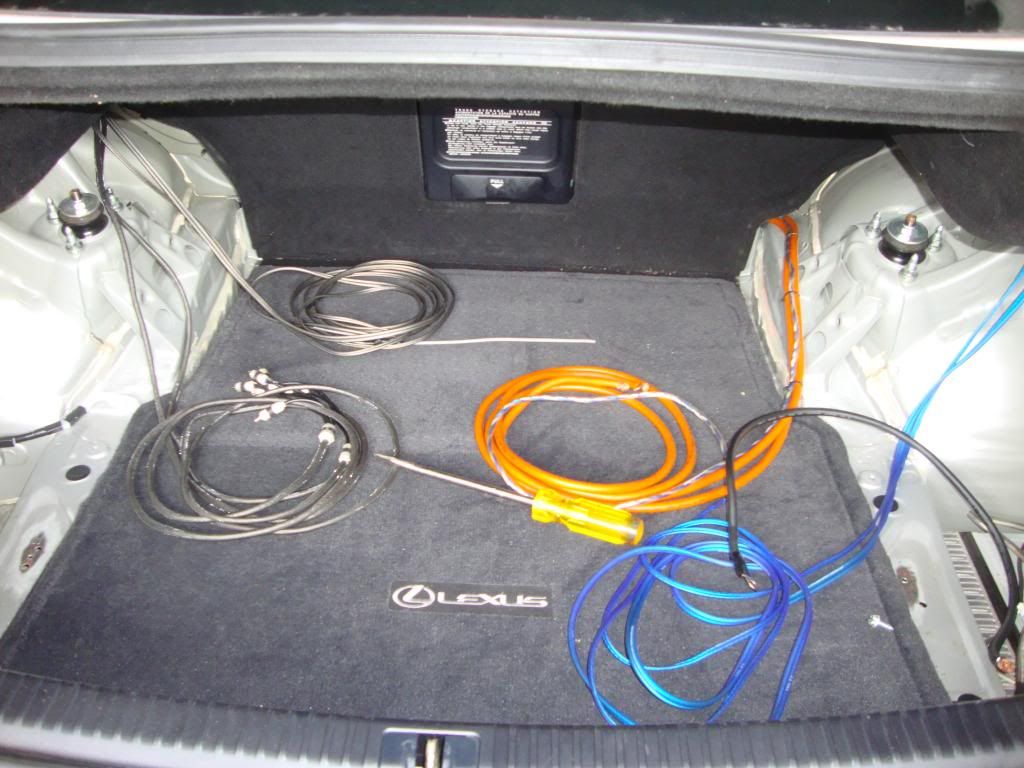
A quick pic of the trunk once all of the runs were in place and I was able to get the center carpet section of the trunk in place. Finally starting to look halfway normal at this point!
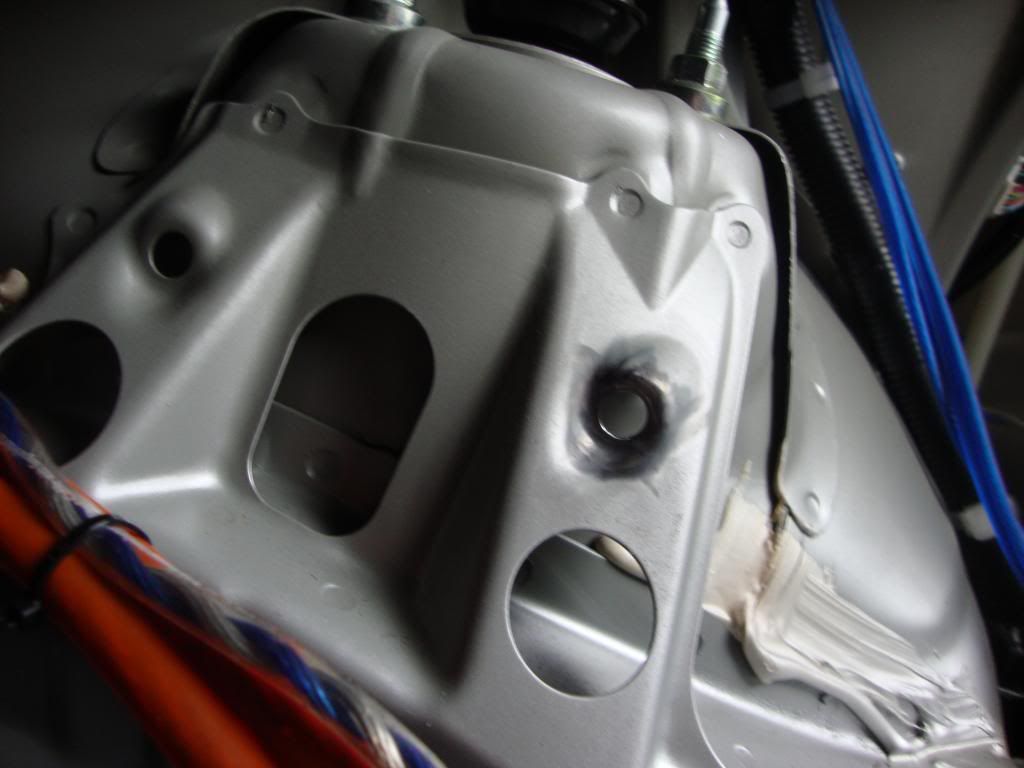
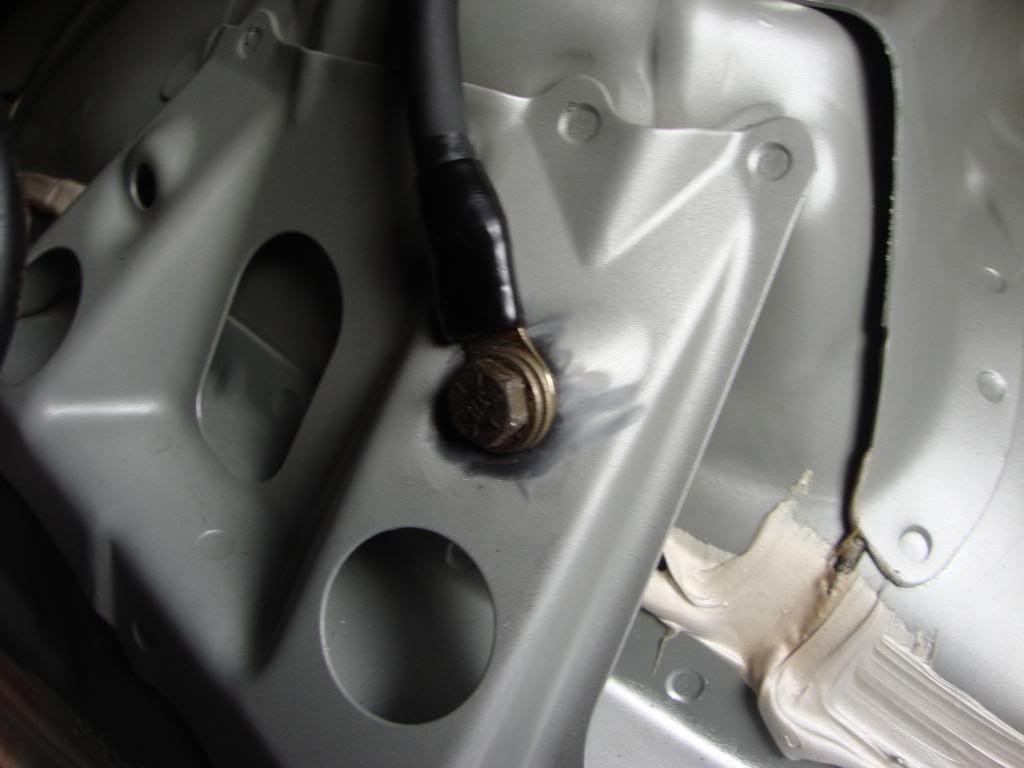
While I may have had plenty of extra length in my two 4ga power runs, the location of my ground was coming up a little bit short. I had it bolted to the rail that is immediately to the left of the factory amp, but had to relocate it to the passenger side rear strut tower in order to get it close enough. I could have just gotten a longer piece of ground wire but moving it worked so why not? I already have a box full of scrap wire and runs and didn't really want to add to it. As always, my grounds are sanded to bare metal, bolted from the rear and then sprayed with clear paint to prevent corrosion.
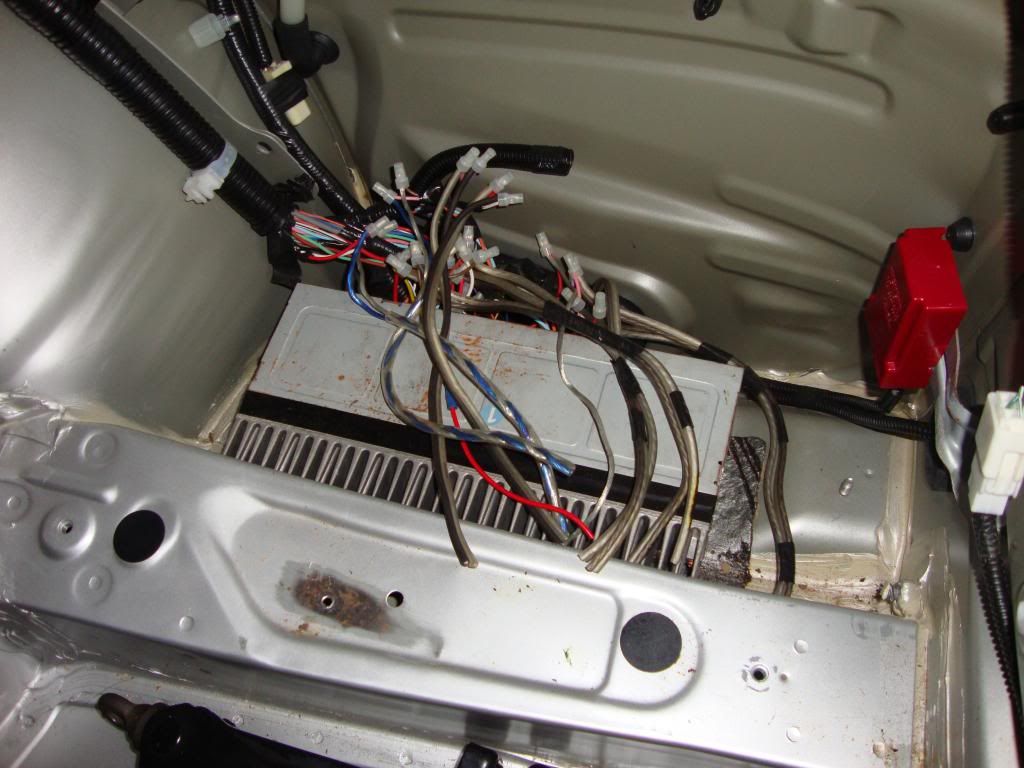
Now for some unfinished business. Anyone that has read my thread from three years ago when I was first exploring the idea of an aftermarket dash kit and my experimentation with OE integration is well aware of how many times I changed my system. I had spliced the OE amp's inputs and outputs repeatedly. When I installed my custom made dash kit, I simply capped all of those off but really wanted to get rid of them at this point.
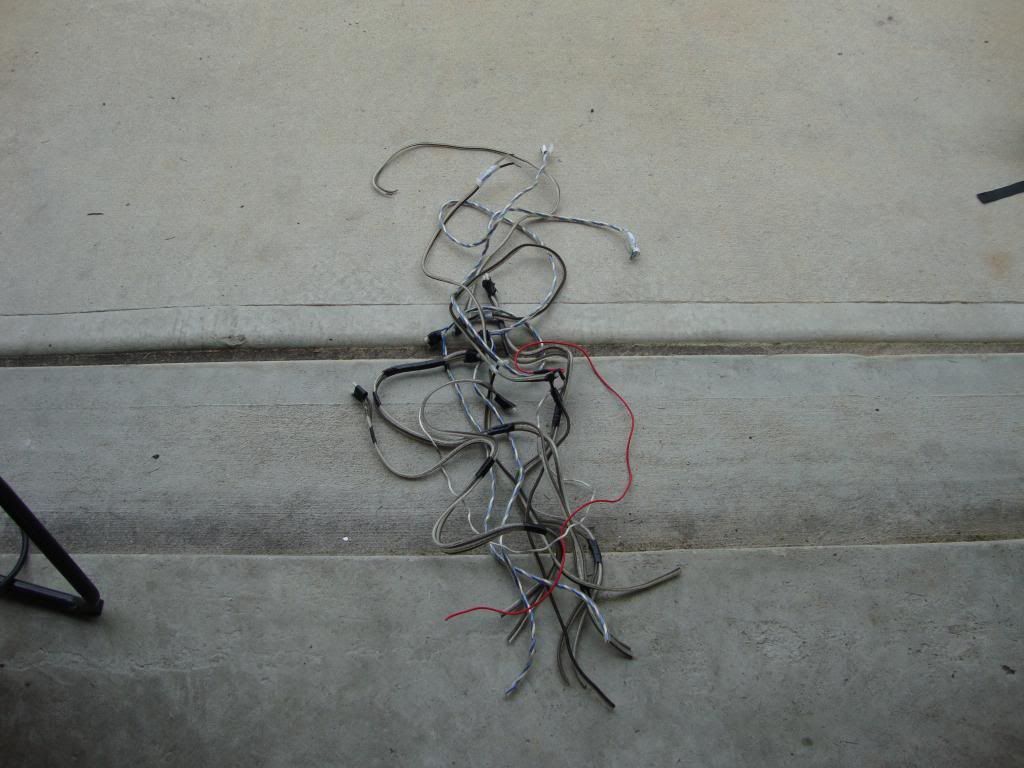
Done!
Now for the fun stuff. Had to re-install the remaining trunk liners and get my wires routed the way that I wanted them, always keeping the RCAs as far away from the power runs as possible.
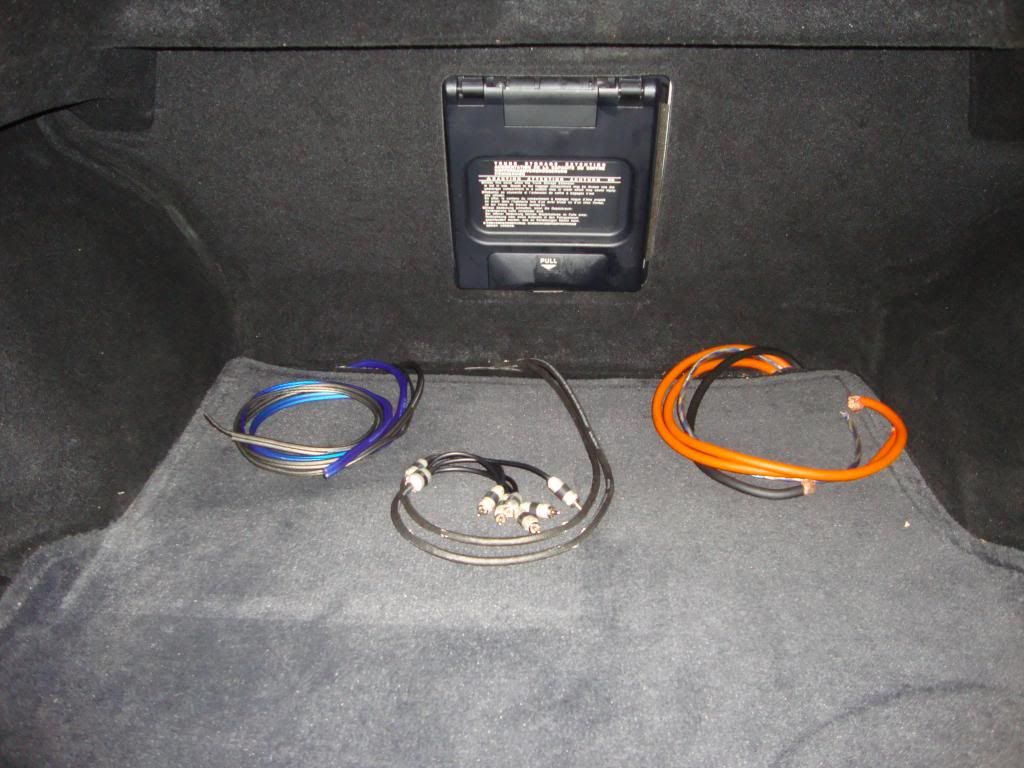
Quick pic of the Stinger interconnects tucked through the hole that I drilled. Tried to get a "braided" look when fishing them through, just to make it look a little better. Running these through the hole and connecting them was no easy task. The screw down connections are great, but a real pain after you've twisted the first few on. Gets a little tight and not easy to do each one after the next.

All back together and powered up. Sorry I didn't get a cleaner pic or with the two plastic trays in place (I will try to remember to post one up tomorrow).
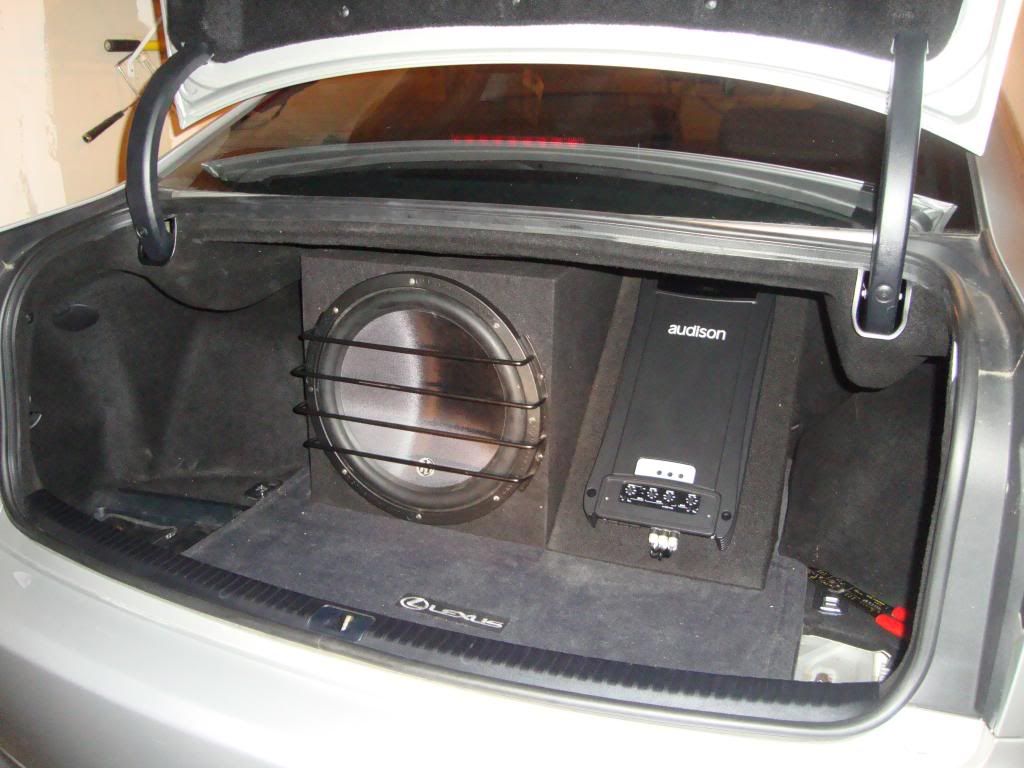
Now for the review. To be honest, I thought the system that I had was amazing and I received numerous compliments at an SQ meet in the fall. The new install is honestly like night and day. My regret is that I don't know how much of the credit is due to the Audison amp and how much should go to the Mille tweeters. I can honestly say that the mid bass from the 6.5 Milles isn't impressively better than what I had with the old HSKs. The difference is in the tweets and I absolutely love it. I had issues in the past with vocals at high volume levels being a little "scratchy". Not anymore. Smooth as silk and ridiculously clean. I have played IASCA zero bit tracks at full volume and can't hear any noise at all. I had a friend listen to the car a few days ago for a solid hour, without telling him what I had changed. When we were done, I asked him how many speakers he thought I had in the car (not counting the sub). His answer was eight. When I told him that he was hearing four speakers, he couldn't believe it and insisted on sticking his head in each door to listen for more. Two 6.5s, two tweeters and one 15" woofer! Lots and lots of work, but well worth it once I was done..............
A quick pic of the trunk once all of the runs were in place and I was able to get the center carpet section of the trunk in place. Finally starting to look halfway normal at this point!

While I may have had plenty of extra length in my two 4ga power runs, the location of my ground was coming up a little bit short. I had it bolted to the rail that is immediately to the left of the factory amp, but had to relocate it to the passenger side rear strut tower in order to get it close enough. I could have just gotten a longer piece of ground wire but moving it worked so why not? I already have a box full of scrap wire and runs and didn't really want to add to it. As always, my grounds are sanded to bare metal, bolted from the rear and then sprayed with clear paint to prevent corrosion.


Now for some unfinished business. Anyone that has read my thread from three years ago when I was first exploring the idea of an aftermarket dash kit and my experimentation with OE integration is well aware of how many times I changed my system. I had spliced the OE amp's inputs and outputs repeatedly. When I installed my custom made dash kit, I simply capped all of those off but really wanted to get rid of them at this point.

Done!

Now for the fun stuff. Had to re-install the remaining trunk liners and get my wires routed the way that I wanted them, always keeping the RCAs as far away from the power runs as possible.

Quick pic of the Stinger interconnects tucked through the hole that I drilled. Tried to get a "braided" look when fishing them through, just to make it look a little better. Running these through the hole and connecting them was no easy task. The screw down connections are great, but a real pain after you've twisted the first few on. Gets a little tight and not easy to do each one after the next.

All back together and powered up. Sorry I didn't get a cleaner pic or with the two plastic trays in place (I will try to remember to post one up tomorrow).

Now for the review. To be honest, I thought the system that I had was amazing and I received numerous compliments at an SQ meet in the fall. The new install is honestly like night and day. My regret is that I don't know how much of the credit is due to the Audison amp and how much should go to the Mille tweeters. I can honestly say that the mid bass from the 6.5 Milles isn't impressively better than what I had with the old HSKs. The difference is in the tweets and I absolutely love it. I had issues in the past with vocals at high volume levels being a little "scratchy". Not anymore. Smooth as silk and ridiculously clean. I have played IASCA zero bit tracks at full volume and can't hear any noise at all. I had a friend listen to the car a few days ago for a solid hour, without telling him what I had changed. When we were done, I asked him how many speakers he thought I had in the car (not counting the sub). His answer was eight. When I told him that he was hearing four speakers, he couldn't believe it and insisted on sticking his head in each door to listen for more. Two 6.5s, two tweeters and one 15" woofer! Lots and lots of work, but well worth it once I was done..............
12-02-13, 08:18 PM
#14
Lexus Test Driver
Thread Starter
Oh, hell no. I've been to SQ meets and heard cars that put mine to shame. I love the improvement but as good as this sounds the way it is, it isn't even in the ballpark of being an SQ competitor. I love it though, which is what matters. Thanks again for the compliments! Lots of work but well worth it.

Thread
Thread Starter
Forum
Replies
Last Post
NAZTY97
GS - 3rd Gen (2006-2011)
15
11-21-06 08:51 AM

