Deputy's Build Thread


 06-29-16, 06:38 AM
#140
Well, I started assembling my engine last night. I pretty much questioned everything I did, despite me doing lots of research, following torque specs and orders, etc. It's my first time assembling an engine from a near scratch state, so I am and will continue to be nervous about it. So please, feel free to stop me anywhere if I did something wrong. I rather correct it now before it gets dropped and started!!
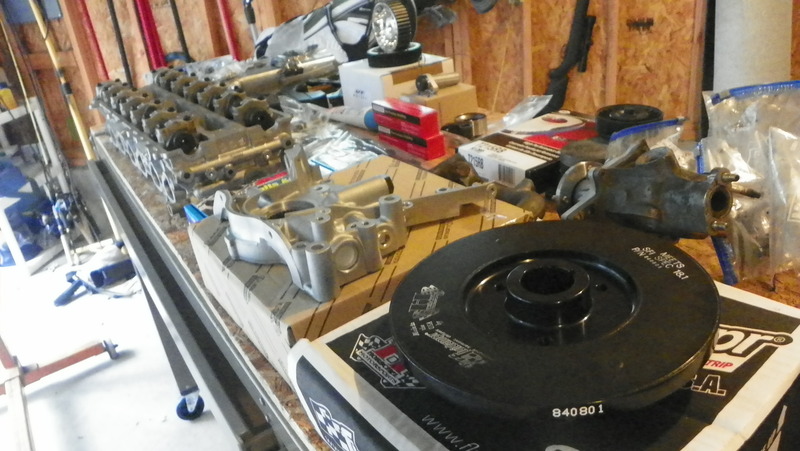
Ignore my messy garage. My woman threw stuff in at random and I'm in the middle of organizing... I had everything cleared out of my way until it started to rain outside, so everything was shoved back in
Here we have my bench of parts of things I'm trying to get done first!

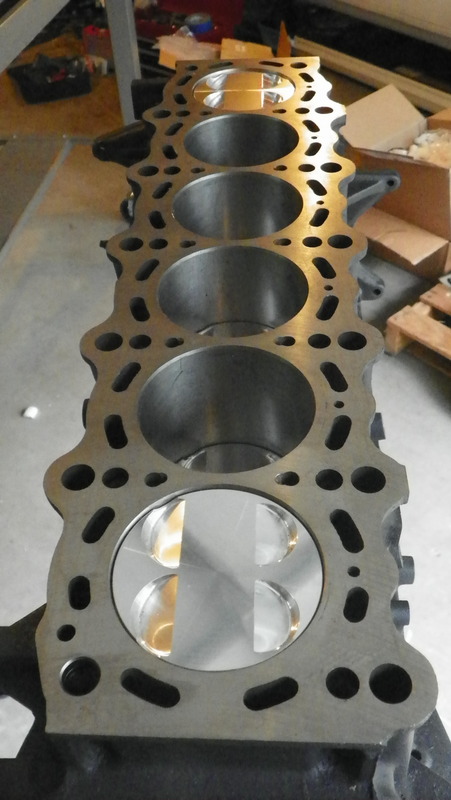
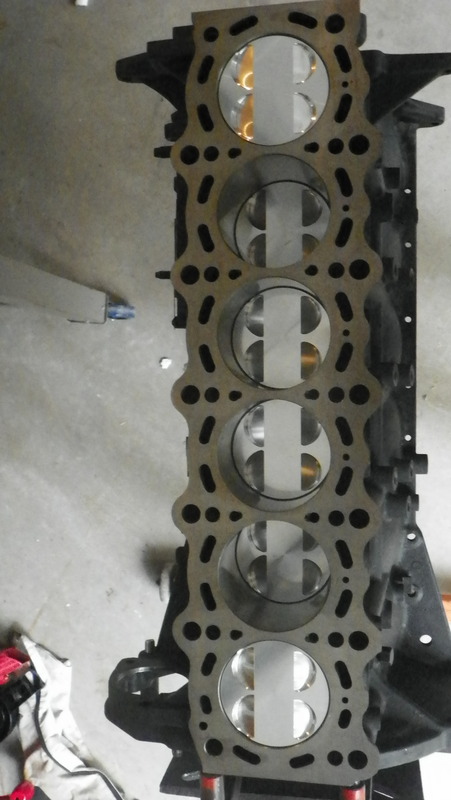
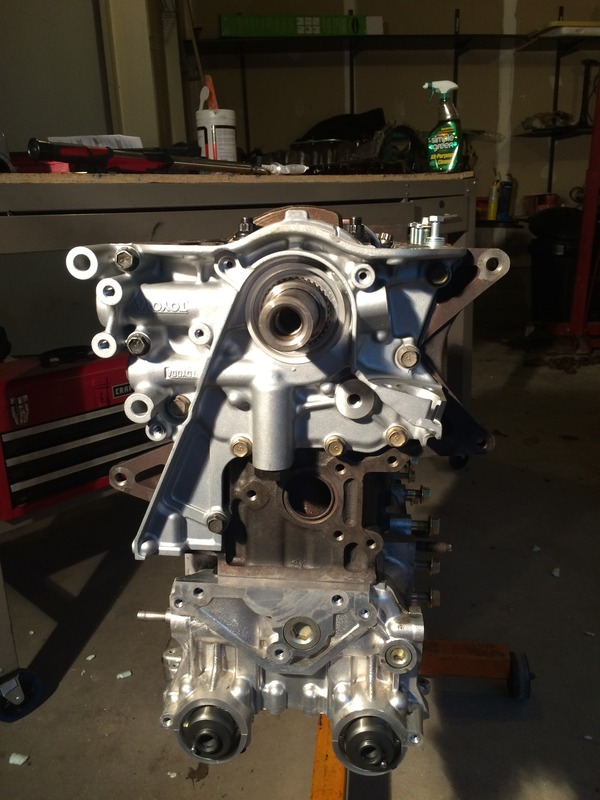
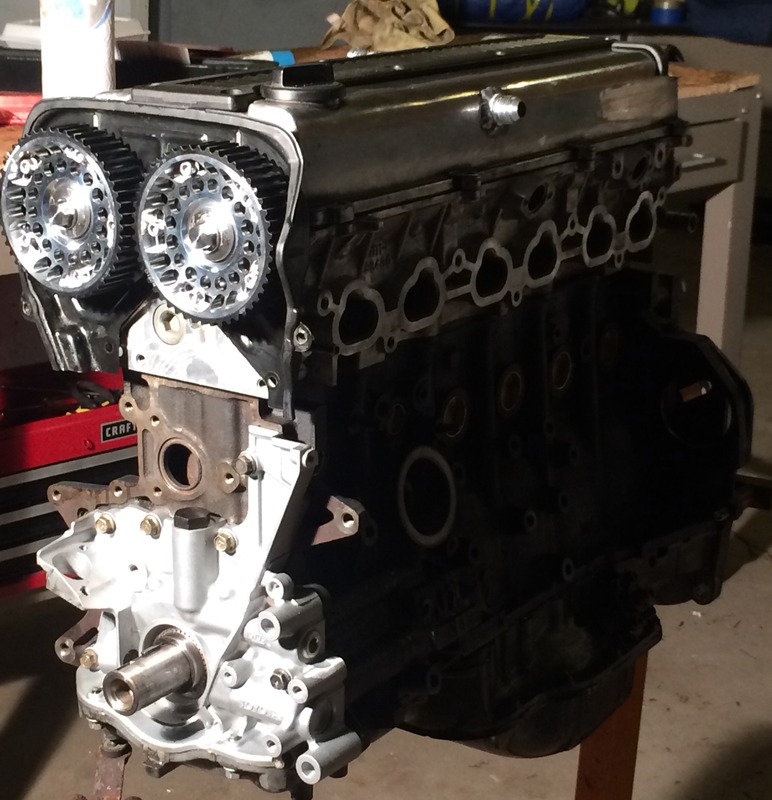
My block lying in wait:
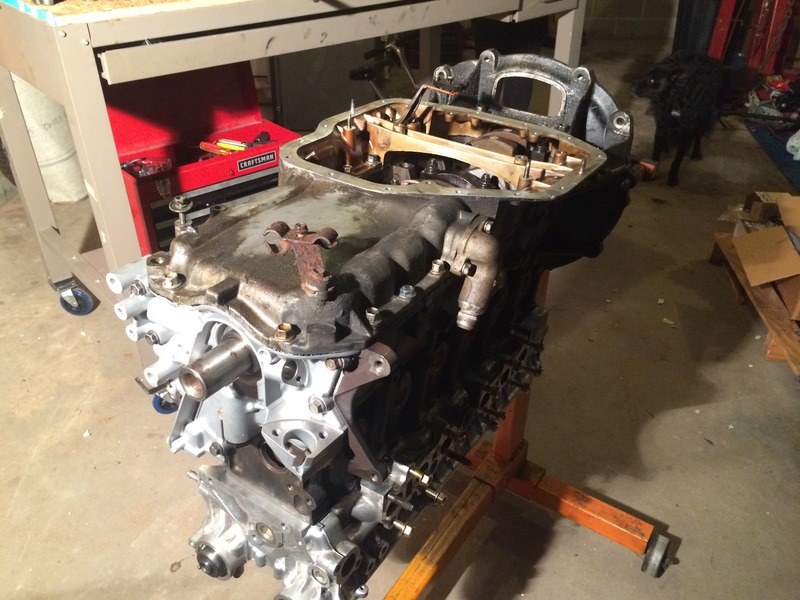
Having never done this before, I learned I should have put my head on AFTER I installed my oil pans, pump, etc.. Oh well, live and learn for next time. Gonna be a ***** to spin it back up right on the engine stand
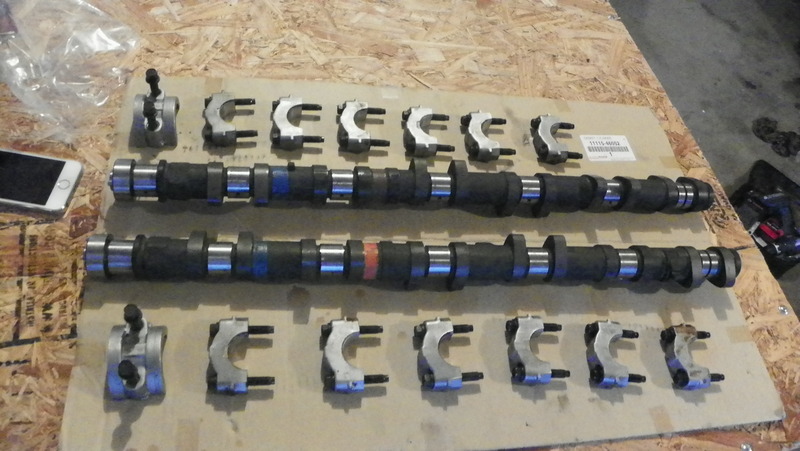
My cams came lightly installed in my head from the shop that did all my valvetrain. What I had installed in my head: BC 272 Cams, GSC Titanium Spring/Retainer Kit, BC Billet Keepers, BC Guides and Seals. Had to obviously remove cams to get the head onto the block..
Next I threaded my new APR studs onto my block (hand tight) and laid down my new Cometic gasket. I can't remember what size was ordered for me, however I'm aiming for 10:1 compression. Moly lubed the threads as well!
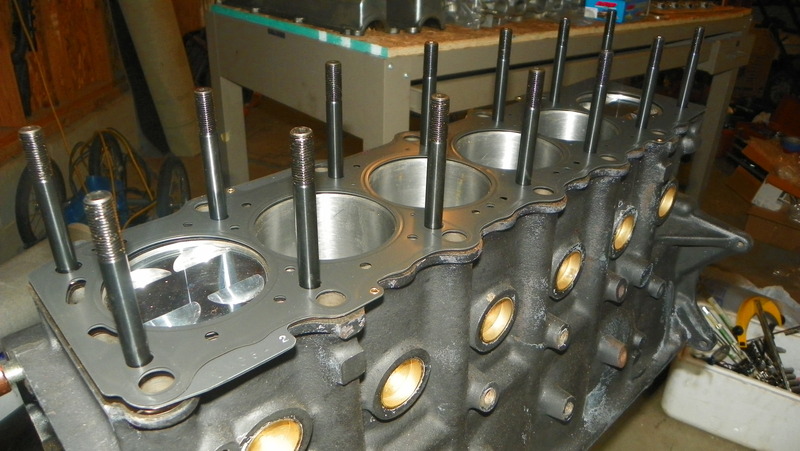
Fortunately I did enough reading so I knew to put my APR washers in before setting the head back down on the block! Set the head on with no issues and started torquing down my head. I did it in 3 passes, 30/60/80 following the torque sequence and the final 90* turn at the end... which I found was quite difficult to do, so I was a tad reluctant.
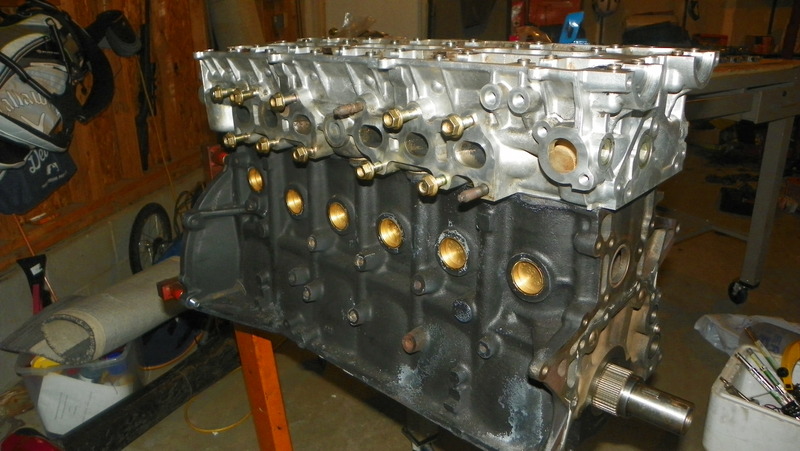
Then I re-installed my cams. I added assembly lube to every metal on metal surface. I was a bit worried about this procedure as I knew some of the lobes would be pressing down on my valves, so I was extra careful. I ended up tightening these down ever so slowly in 4 different passes, following the torque sequence, the last sequence torquing it down to spec. Everything seems to spin the way it should, so I feel like I did it right...
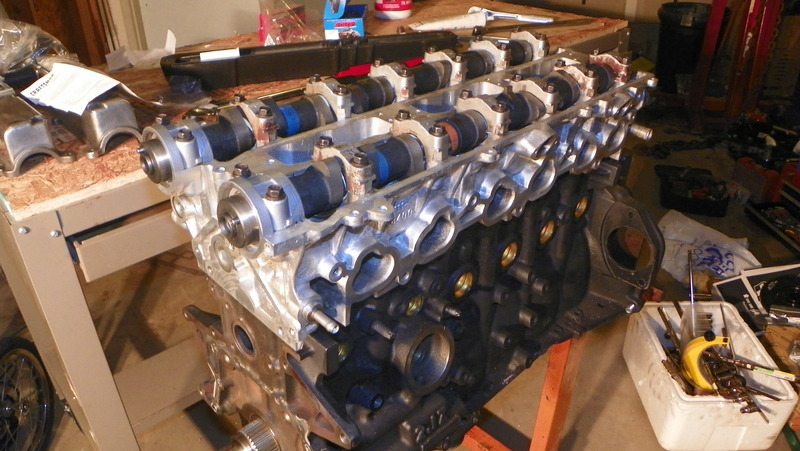
Then I flipped my engine over (which is when I realized I should have done this first) and I'm starting to install my Oil pump, oil pan(s) and the like.
This is as far as I got today. Took my sweet *** time, so by the time I was done with all of this, it was time to head off to bed. I'm hoping to get the majority of things installed tonight. Still waiting for my timing gear which my parts guy "accidentally forgot to send".. Mostly looking forward to seeing my cam gears, turbo and intake manifold all installed together!
Ignore my messy garage. My woman threw stuff in at random and I'm in the middle of organizing... I had everything cleared out of my way until it started to rain outside, so everything was shoved back in
Here we have my bench of parts of things I'm trying to get done first!


My block lying in wait:


Having never done this before, I learned I should have put my head on AFTER I installed my oil pans, pump, etc.. Oh well, live and learn for next time. Gonna be a ***** to spin it back up right on the engine stand
My cams came lightly installed in my head from the shop that did all my valvetrain. What I had installed in my head: BC 272 Cams, GSC Titanium Spring/Retainer Kit, BC Billet Keepers, BC Guides and Seals. Had to obviously remove cams to get the head onto the block..

Next I threaded my new APR studs onto my block (hand tight) and laid down my new Cometic gasket. I can't remember what size was ordered for me, however I'm aiming for 10:1 compression. Moly lubed the threads as well!

Fortunately I did enough reading so I knew to put my APR washers in before setting the head back down on the block! Set the head on with no issues and started torquing down my head. I did it in 3 passes, 30/60/80 following the torque sequence and the final 90* turn at the end... which I found was quite difficult to do, so I was a tad reluctant.

Then I re-installed my cams. I added assembly lube to every metal on metal surface. I was a bit worried about this procedure as I knew some of the lobes would be pressing down on my valves, so I was extra careful. I ended up tightening these down ever so slowly in 4 different passes, following the torque sequence, the last sequence torquing it down to spec. Everything seems to spin the way it should, so I feel like I did it right...

Then I flipped my engine over (which is when I realized I should have done this first) and I'm starting to install my Oil pump, oil pan(s) and the like.

This is as far as I got today. Took my sweet *** time, so by the time I was done with all of this, it was time to head off to bed. I'm hoping to get the majority of things installed tonight. Still waiting for my timing gear which my parts guy "accidentally forgot to send".. Mostly looking forward to seeing my cam gears, turbo and intake manifold all installed together!
06-29-16, 07:22 AM
#141
"7. Following the manufacturers recommended torque sequence tighten the nuts in three equal steps to 80 ft lbs with ARP ULTRA-TORQUE FASTENER ASSEMBLY LUBRICANT."
There's no mention of a 90 deg turn. For the OEM studs? Yes; but not the ARP studs. If you're lucky, the fasteners didn't yield.
I have over-torqued a head stud, and you could definitely feel the fastener yield. So, if the torque wrench didn't "give-way", then you could be ok. It's your call.
-scott
06-29-16, 07:36 AM
#142
Just trying to help here; so, please don't take offense. The ARP studs should NOT be torqued 90 deg after reaching final torque; that's why it was "quite difficult". Please click here: http://arp-bolts.com/kits/instructio...?RecordID=1146 and then click "Kit Instructions". Quoting step 7:
"7. Following the manufacturers recommended torque sequence tighten the nuts in three equal steps to 80 ft lbs with ARP ULTRA-TORQUE FASTENER ASSEMBLY LUBRICANT."
There's no mention of a 90 deg turn. For the OEM studs? Yes; but not the ARP studs. If you're lucky, the fasteners didn't yield.
I have over-torqued a head stud, and you could definitely feel the fastener yield. So, if the torque wrench didn't "give-way", then you could be ok. It's your call.
-scott
Anyway I'd be able to tell if my fasteners yielded?
06-29-16, 08:11 AM
#143
If the torque diminished as you went for the 90 deg turn, then yes; the fastener yielded. If not, then it's probably ok.
I had one fastener yield because I failed to pre-load the torque wrench before using it. After that, I always force the torque wrench to "click" on a dummy fastener before torqueing the actual fastener. Why? because a mechanical torque wrench will sometimes have stiction after changing the required torque to a new value, and that can cause you to over torque the fastener the first time. Now, I use a digital torque wrench for all critical torques just to be safe.
-scott
Last edited by motorheaddown; 06-29-16 at 08:15 AM.
06-29-16, 08:27 AM
#144
That's good news.
If the torque diminished as you went for the 90 deg turn, then yes; the fastener yielded. If not, then it's probably ok.
I had one fastener yield because I failed to pre-load the torque wrench before using it. After that, I always force the torque wrench to "click" on a dummy fastener before torqueing the actual fastener. Why? because a mechanical torque wrench will sometimes have stiction after changing the required torque to a new value, and that can cause you to over torque the fastener the first time. Now, I use a digital torque wrench for all critical torques just to be safe.
-scott
I just bought a new torque wrench (digital) and it did that to me once already. Never "clicked' when taking something to 30ft/lbs.. So I started torquing a dummy bolt on something unimportant to be sure its working every time I change settings.
Question about timing and degreeing my cams:
I should be setting my crank to TDC and my cams to TDC first, then placing my timing belt on and pulling the pin on the pulley. Then once thats done,I degree the cams via the adjustable portion on my cam gears?
Shane
06-29-16, 09:22 AM
#145
Yes, properly install the cams and cam gears first; then adjust them.
Did you remember to install the crank thrust bearing and was the thrust bearing main cap machined flush to the block?
Did you remember to install the crank thrust bearing and was the thrust bearing main cap machined flush to the block?
Last edited by motorheaddown; 06-29-16 at 09:37 AM.
06-30-16, 09:45 AM
#147
Assembly day 2!
Got my brand new modified oil pump in an on. Installed some new o-rings and bolted it all down. Gotta love the look of brand new parts!
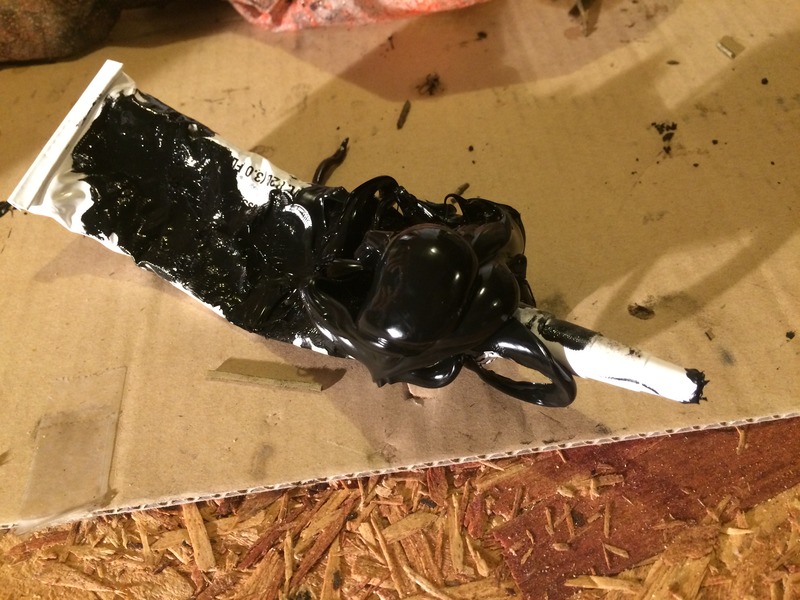
Next up was my upper oil pan and new o-ring. Nothing special here. Had to replace a few bolts I somehow managed to lose. Also had an issue with my Form In Place Gasket tube.. I must not have cleared out all of the FIPG that dried up, so I ended up with a clog tore the tube. My thumb went right on through.... HUGE mess....
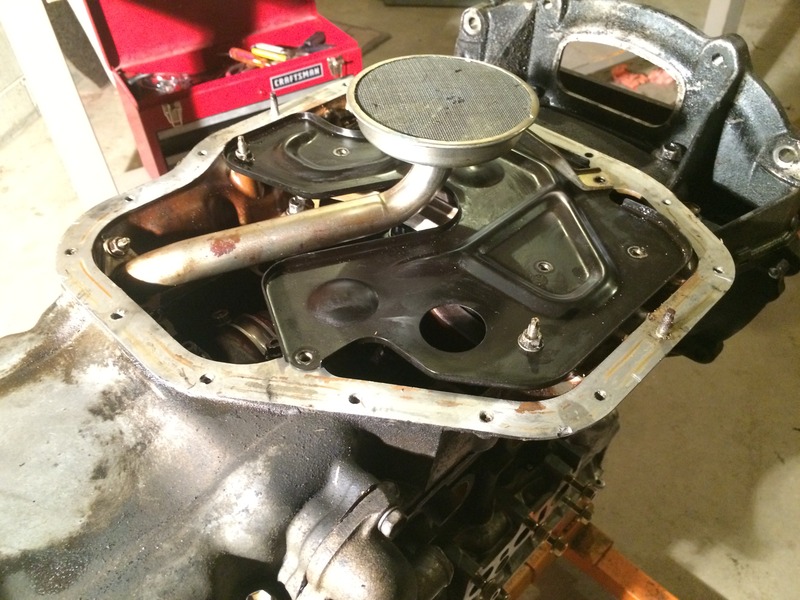
Thankfully I bought 2 tubes of FIPG and was able to keep going. Next I put on my little oil tray, oil pick-up with new gasket and the lower oil pan. Smooth sailing here.. Forgot I broke one of my bolts off for the lower oil pan, so I had to fish that one out. Other than that, it wasn't too hard. I also took the time to clean/scrub my oil pans. Turned out really nice!

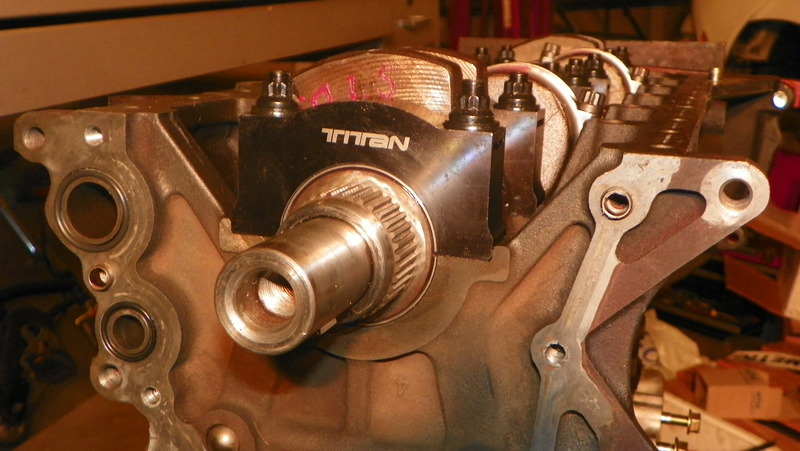
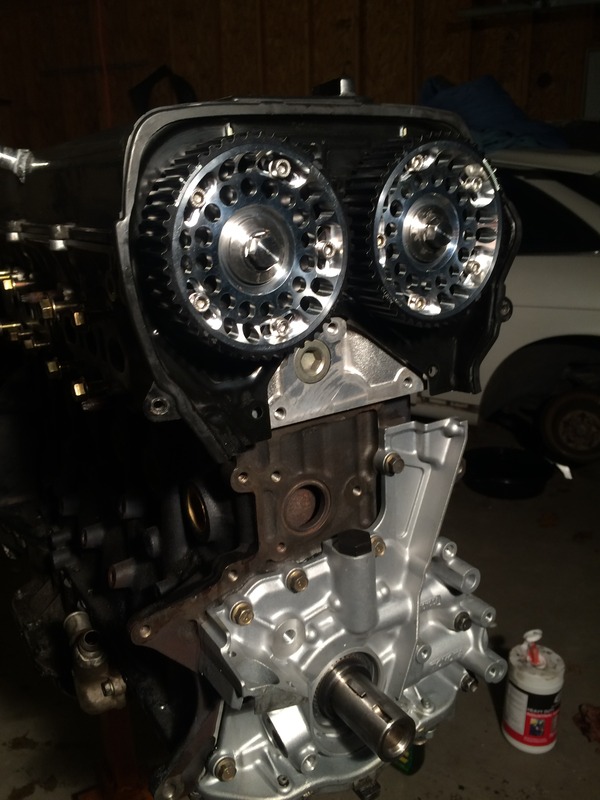
Then I just couldn't wait to see what my new Unorthodox Cam Gears were going to look like, so I cleaned off my cam gear plate and mocked up the cam gears. In love! Can't wait to see everything all together and in proper color. I still need to get my valve covers and compressor housing coated black.
Getting closer! Just waiting on my exhaust manifold, exhaust housing and downpipe to show up and I can start to really throw on the flashy goods!
Got my brand new modified oil pump in an on. Installed some new o-rings and bolted it all down. Gotta love the look of brand new parts!

Next up was my upper oil pan and new o-ring. Nothing special here. Had to replace a few bolts I somehow managed to lose. Also had an issue with my Form In Place Gasket tube.. I must not have cleared out all of the FIPG that dried up, so I ended up with a clog tore the tube. My thumb went right on through.... HUGE mess....


Thankfully I bought 2 tubes of FIPG and was able to keep going. Next I put on my little oil tray, oil pick-up with new gasket and the lower oil pan. Smooth sailing here.. Forgot I broke one of my bolts off for the lower oil pan, so I had to fish that one out. Other than that, it wasn't too hard. I also took the time to clean/scrub my oil pans. Turned out really nice!


Then I just couldn't wait to see what my new Unorthodox Cam Gears were going to look like, so I cleaned off my cam gear plate and mocked up the cam gears. In love! Can't wait to see everything all together and in proper color. I still need to get my valve covers and compressor housing coated black.


Getting closer! Just waiting on my exhaust manifold, exhaust housing and downpipe to show up and I can start to really throw on the flashy goods!
07-14-16, 06:47 AM
#148
Got a few more parts in that I've been waiting on FOREVER...
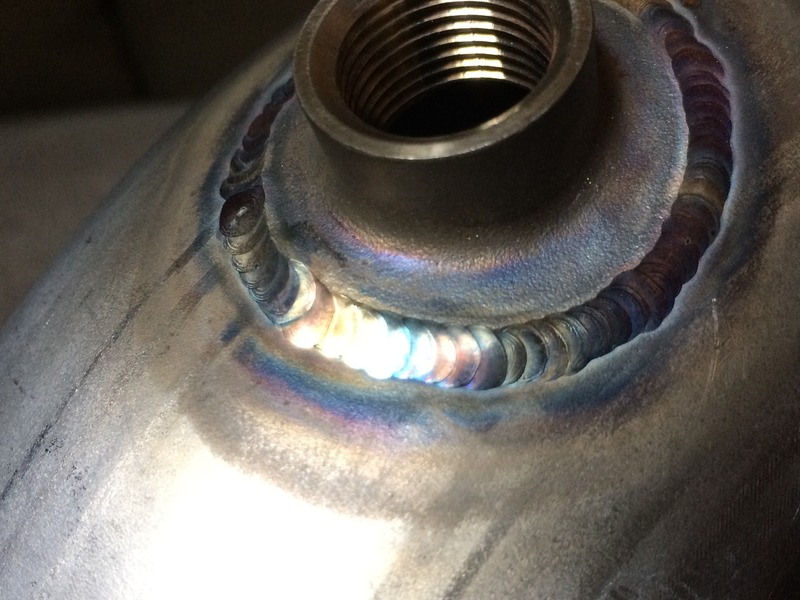
First being my welded timing gear. Sounds minuscule, but its been holding me up.
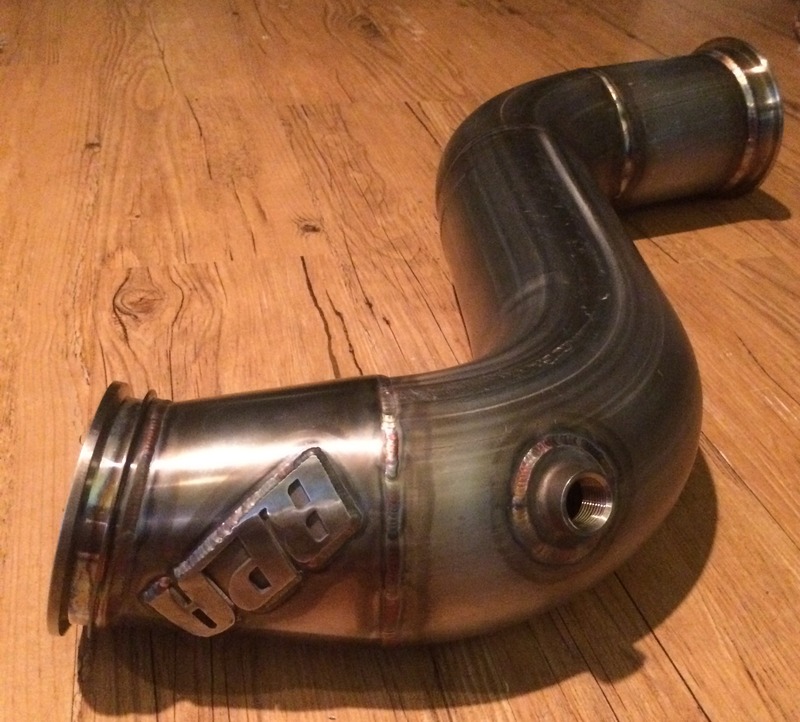
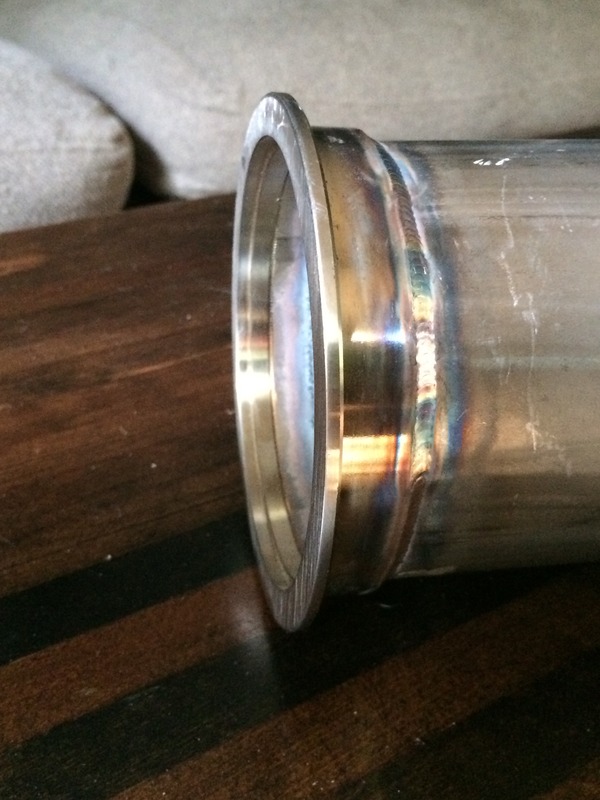
Secondly I got my downpipe. This one is 1000x better than my old one. Soooo happy with it and its gonna look great in my bay! Very very beautiful piece. The downpipe is 3" to 4" as I'll be running a full 4" exhaust.
Hopefully I can get back to installing. Humidity has been insane at my house lately, so sitting in the garage hasn't been at the top of my list.
Still waiting on my turbo manifold and the exhaust housing to my turbo. If you recall from prior postings, I sent my manifold, dump tube and downpipe back to my parts guy to get redone (terrible work done the first time). I sent this stuff out 91 days ago. I waited 96 days to get it all the first time around.. Setting records on waiting for stuff....... Last updated I received showed that everything was done, so now we have yet to see how prompt he is in getting everything out to me.
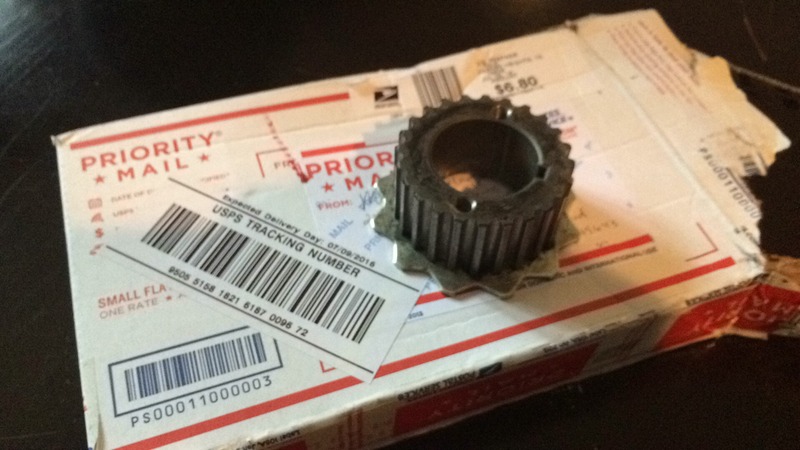

First being my welded timing gear. Sounds minuscule, but its been holding me up.
Secondly I got my downpipe. This one is 1000x better than my old one. Soooo happy with it and its gonna look great in my bay! Very very beautiful piece. The downpipe is 3" to 4" as I'll be running a full 4" exhaust.
Hopefully I can get back to installing. Humidity has been insane at my house lately, so sitting in the garage hasn't been at the top of my list.
Still waiting on my turbo manifold and the exhaust housing to my turbo. If you recall from prior postings, I sent my manifold, dump tube and downpipe back to my parts guy to get redone (terrible work done the first time). I sent this stuff out 91 days ago. I waited 96 days to get it all the first time around.. Setting records on waiting for stuff....... Last updated I received showed that everything was done, so now we have yet to see how prompt he is in getting everything out to me.


 .
.