Project AARP Casino Cruiser - LS400 5spd drift car build


 06-19-13, 09:05 PM
#137

You had to modify the adapter plate? Lame. I think its design leaves a lot to be desired, since it doesn't even consider the starter bolts. I don't understand what you mean about the plate not being for this car. The plate is for the motor from this car, and the manifolds are from this motor.And the throw out bearing, that really sucks. I'd be pissed if I was you.
06-20-13, 02:13 AM
#138

You had to modify the adapter plate? Lame. I think its design leaves a lot to be desired, since it doesn't even consider the starter bolts. I don't understand what you mean about the plate not being for this car. The plate is for the motor from this car, and the manifolds are from this motor.And the throw out bearing, that really sucks. I'd be pissed if I was you.
06-20-13, 10:50 AM
#139
Mine needed no modification. My r154 adapter won't need modification. And the guy who made those plates told me his adapter for nissan transmissions doesn't need modification for the starter bolts.
Rhough for the w58 I needed to countersink the bolt holes on the front bearing retainer, cut off the throw out bearing guide, and replace the bolts with flat head bolts. But he made me aware of this before I bought it. And the modifications were necessary for the spacer/adapter for t56 throw out bearing.
Rhough for the w58 I needed to countersink the bolt holes on the front bearing retainer, cut off the throw out bearing guide, and replace the bolts with flat head bolts. But he made me aware of this before I bought it. And the modifications were necessary for the spacer/adapter for t56 throw out bearing.
06-20-13, 04:00 PM
#140
Driver
Thread Starter

You had to modify the adapter plate? Lame. I think its design leaves a lot to be desired, since it doesn't even consider the starter bolts. I don't understand what you mean about the plate not being for this car. The plate is for the motor from this car, and the manifolds are from this motor.And the throw out bearing, that really sucks. I'd be pissed if I was you.
06-20-13, 06:41 PM
#141


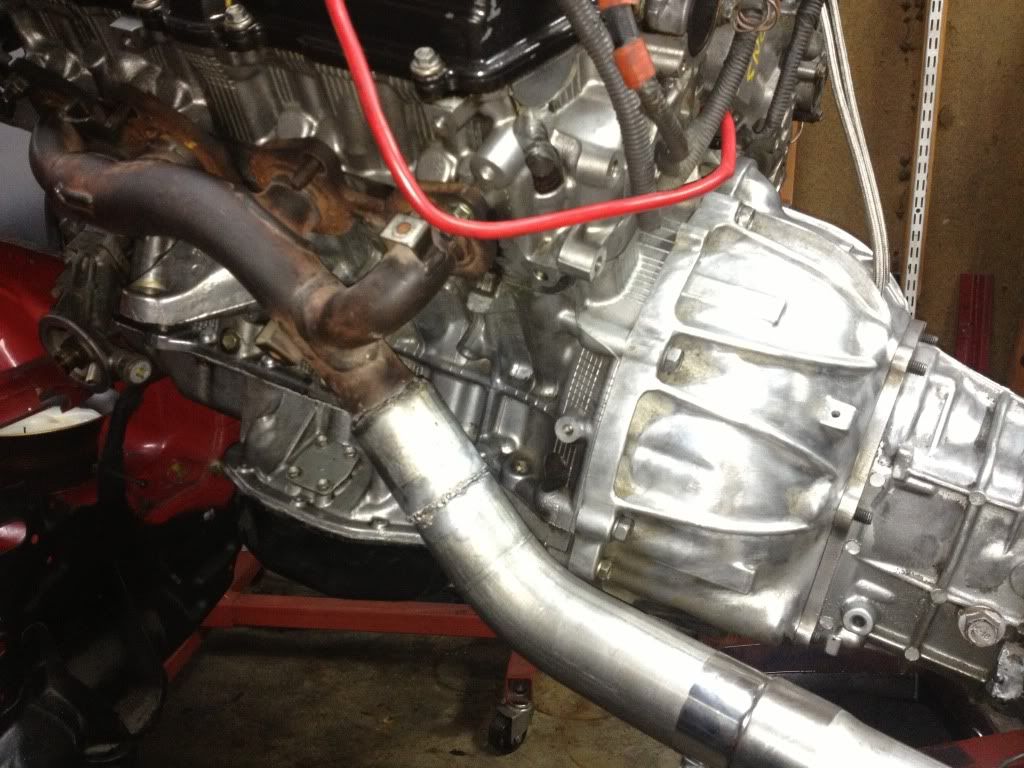
This nissan adapter adapts the nissan bellhousing to the 1uz engine.
OP, since you now now how to weld, why didn't you just cut the flange off the manifold and weld on a smaller flange, v-band clamp or stainless band clamp with slip joints.

Much better than hacking the adapter plate.
06-20-13, 11:05 PM
#142
Driver
Thread Starter
The trans adapter for toyota r and w series trans adapts the gearbox to the original autotrans bellhousing so there are no starter bolt issues.
This nissan adapter adapts the nissan bellhousing to the 1uz engine.
OP, since you now now how to weld, why didn't you just cut the flange off the manifold and weld on a smaller flange, v-band clamp or stainless band clamp with slip joints.
Much better than hacking the adapter plate.
This nissan adapter adapts the nissan bellhousing to the 1uz engine.
OP, since you now now how to weld, why didn't you just cut the flange off the manifold and weld on a smaller flange, v-band clamp or stainless band clamp with slip joints.
Much better than hacking the adapter plate.
06-29-13, 08:22 PM
#143
Driver
Thread Starter
Update #18 6/29/13
Huge update. So in the last week and a half I've gotten a bunch done.
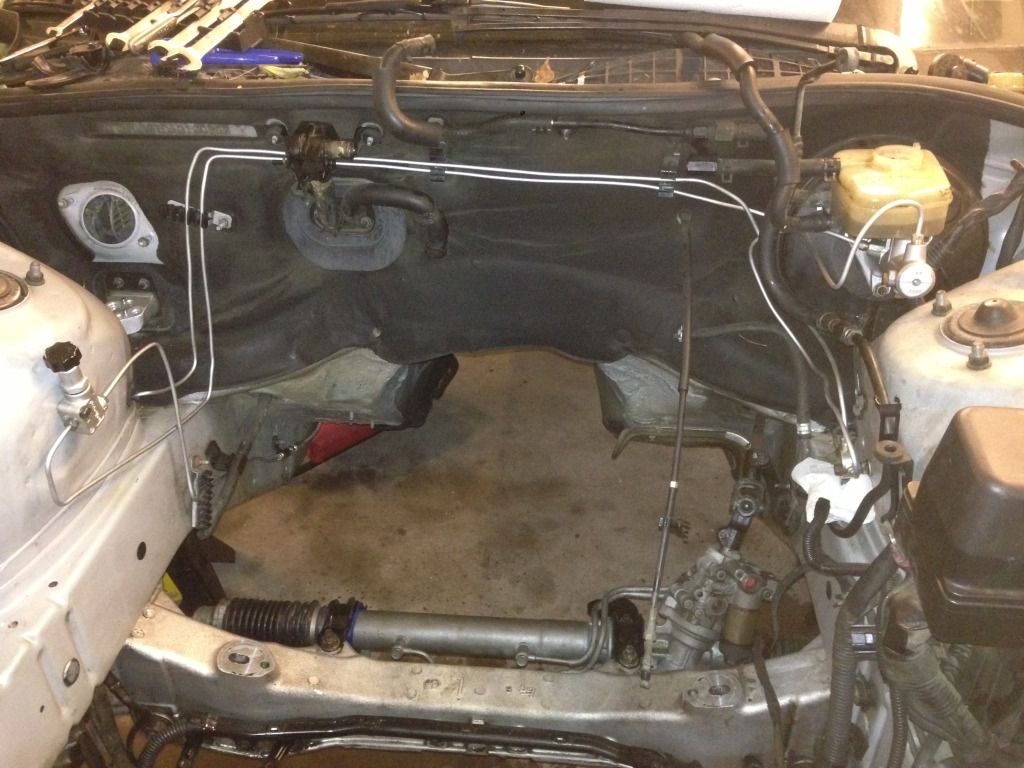
First and foremost, here are some terrible photos of the meh brake lines I promised. Again, I didn't have a pipe bender until the last 2 bends, and I know they're ugly, but they're functional. That's all I care about.
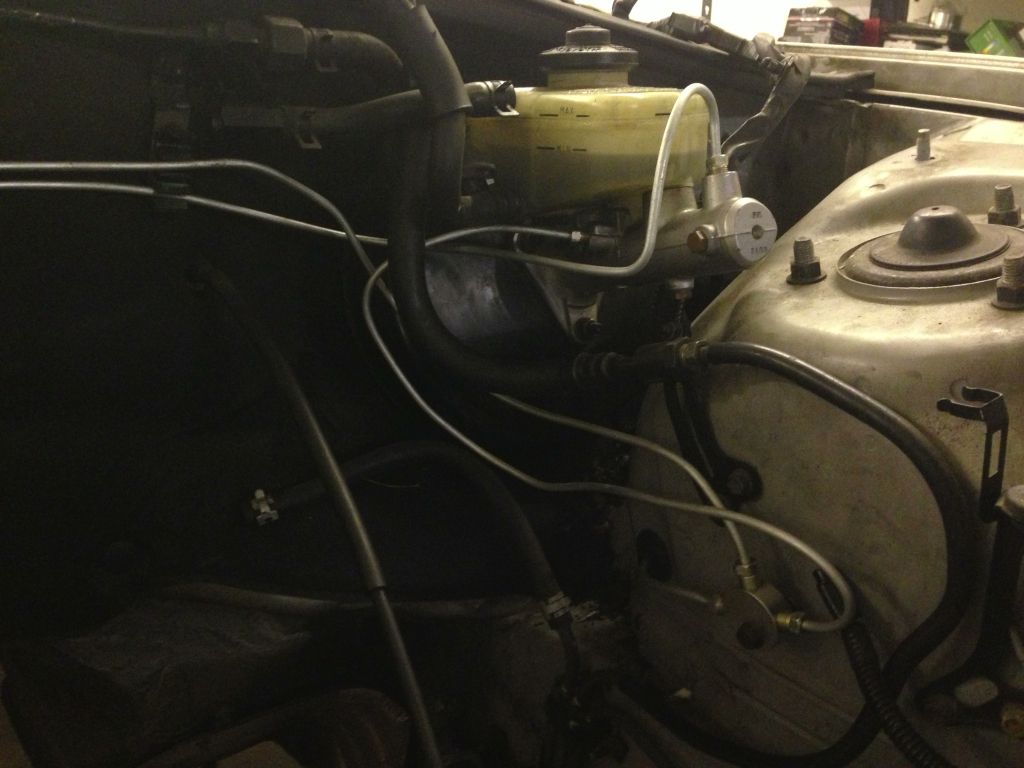
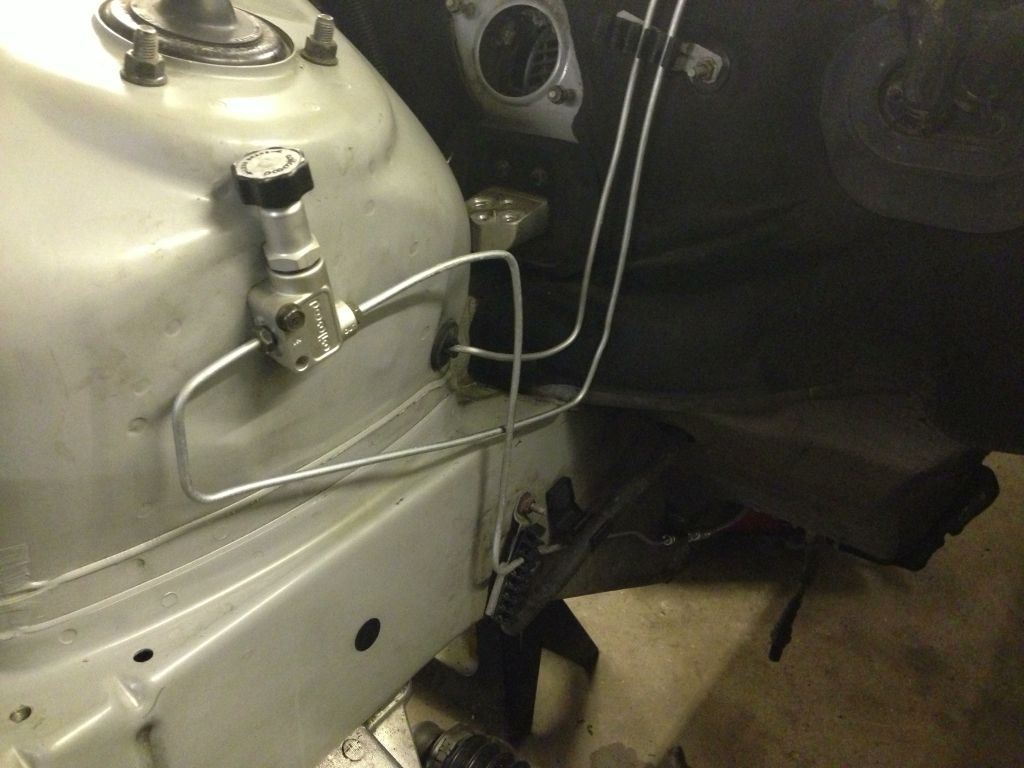
Ended up having some bad flares on the same line, so I had to get creative afterwards since I had already flared the longer one. Its not the "right way", but it works. I'll fix it some day.
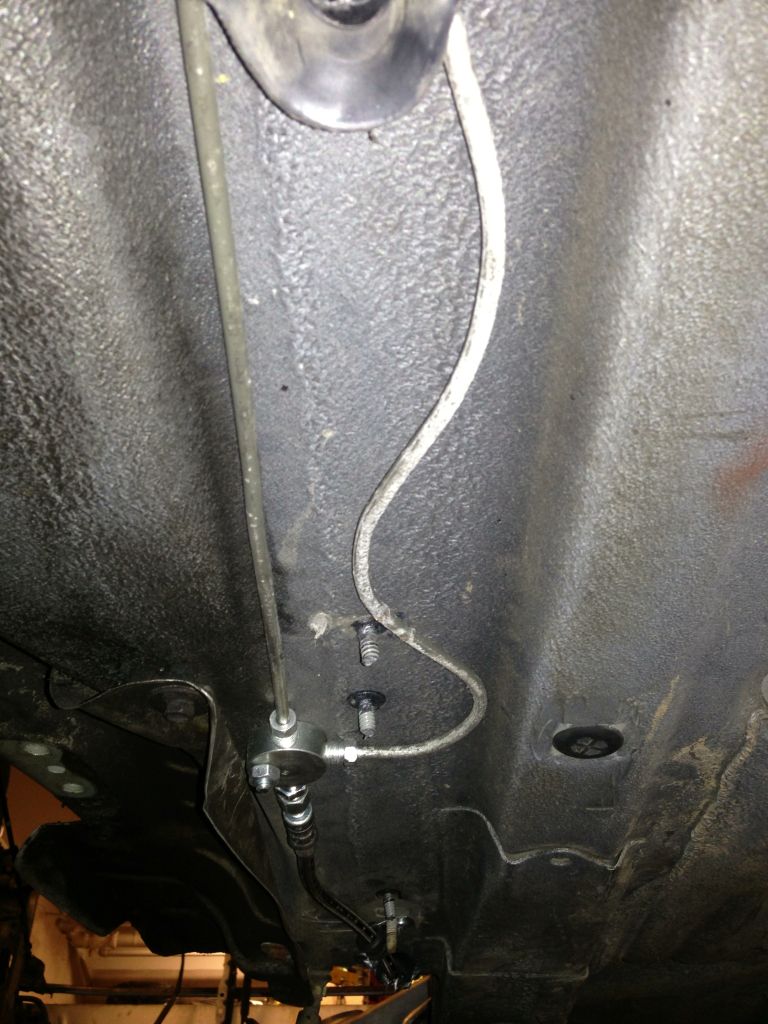
Was able to reuse one of the factory unions that has a little bracket on it. Bolted the line to an threaded stud for the plastic brake line holder that was there.

Alright. Now onto the stuff I got done since the last update.
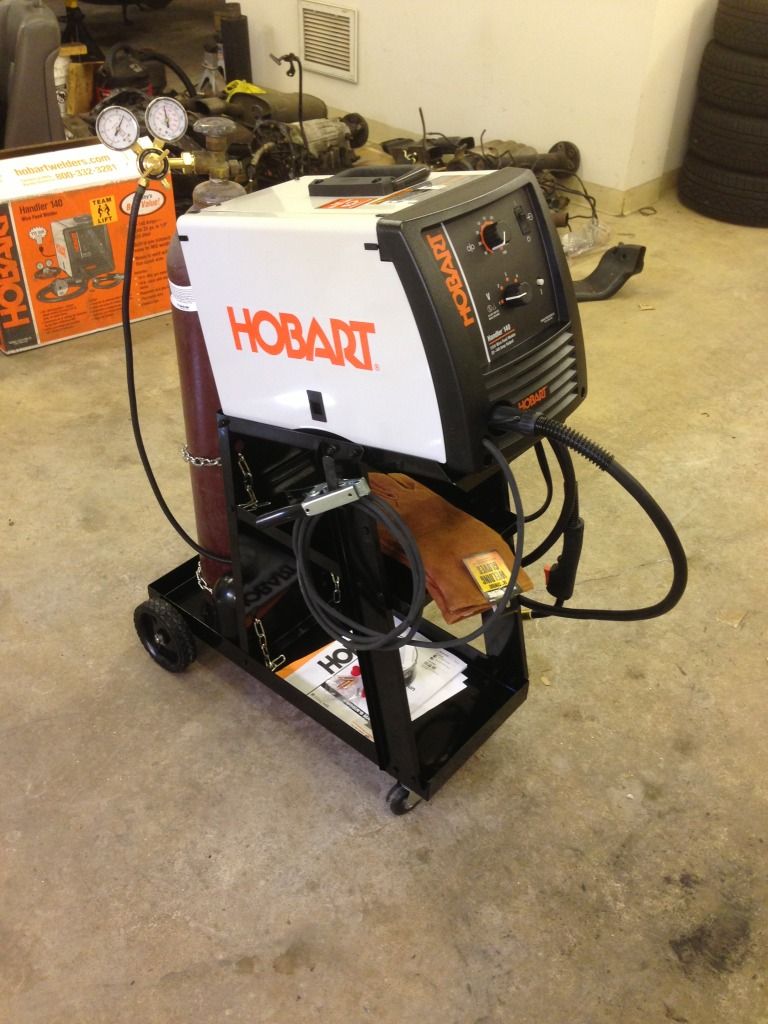
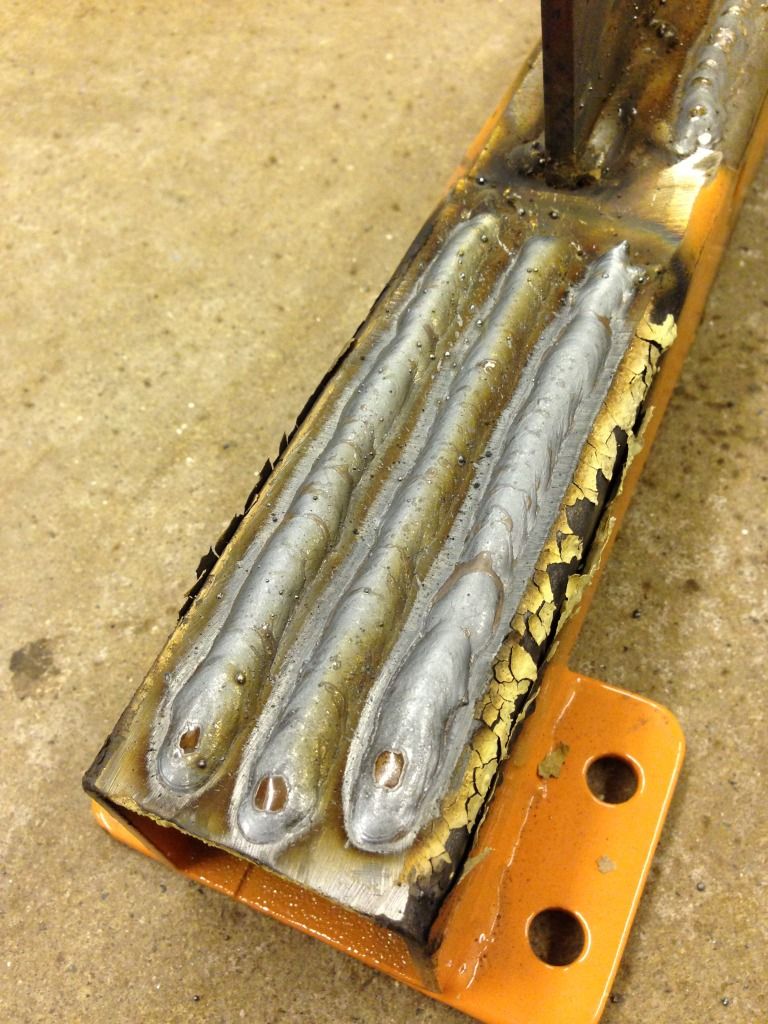
My welder finally came in! Went to Tech-Air, got a 80cf tank, then to Harbor Freight for a welding cart and some gloves, and finally Lowe's for a Lincoln Electric mask. Even got to give it a shot laying some beads down. I'm still a noob so don't hate too hard >.<
Next, this little gem came in the mail after empty promises of shipping by a certain date, and avoided phone calls for >7 days. I should of just made my own >.<.
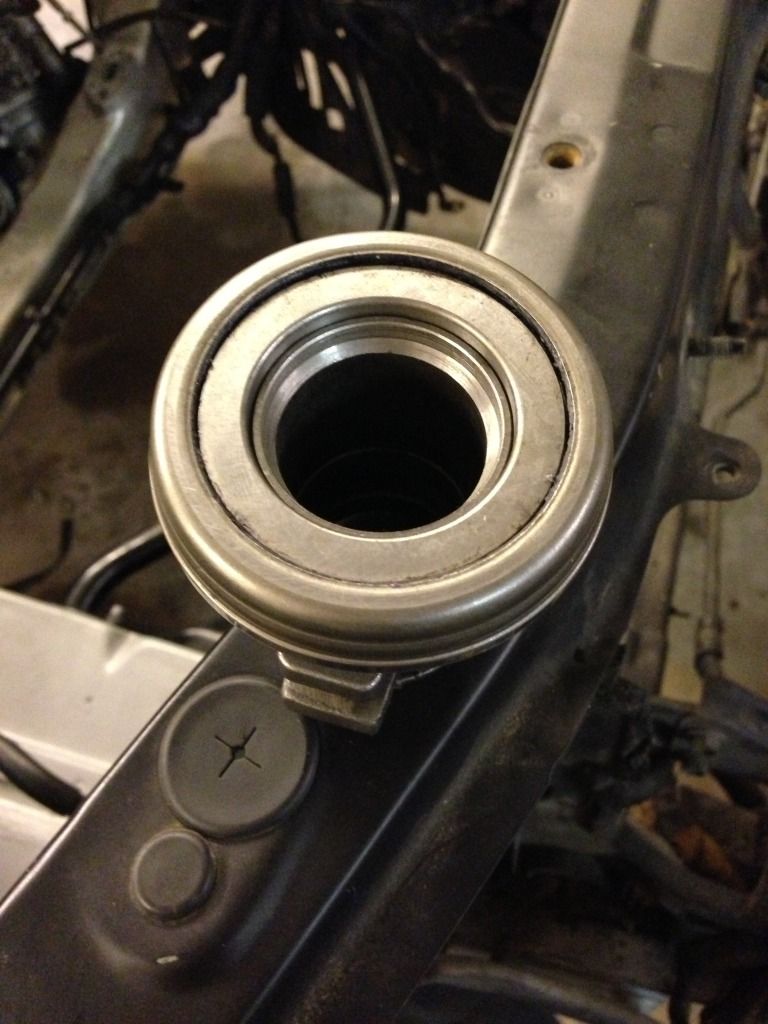
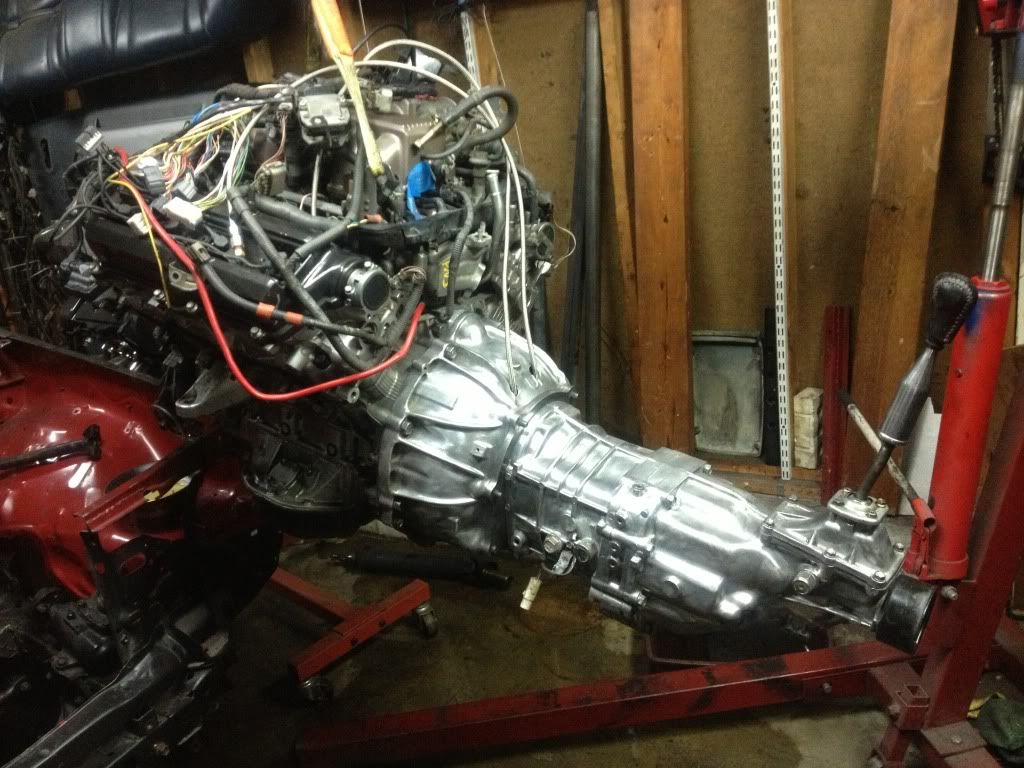
With the TOB finally in, I rushed to get the trans on, and the motor/trans into the car to take the measurement and get a driveshaft ordered. Explain later why.
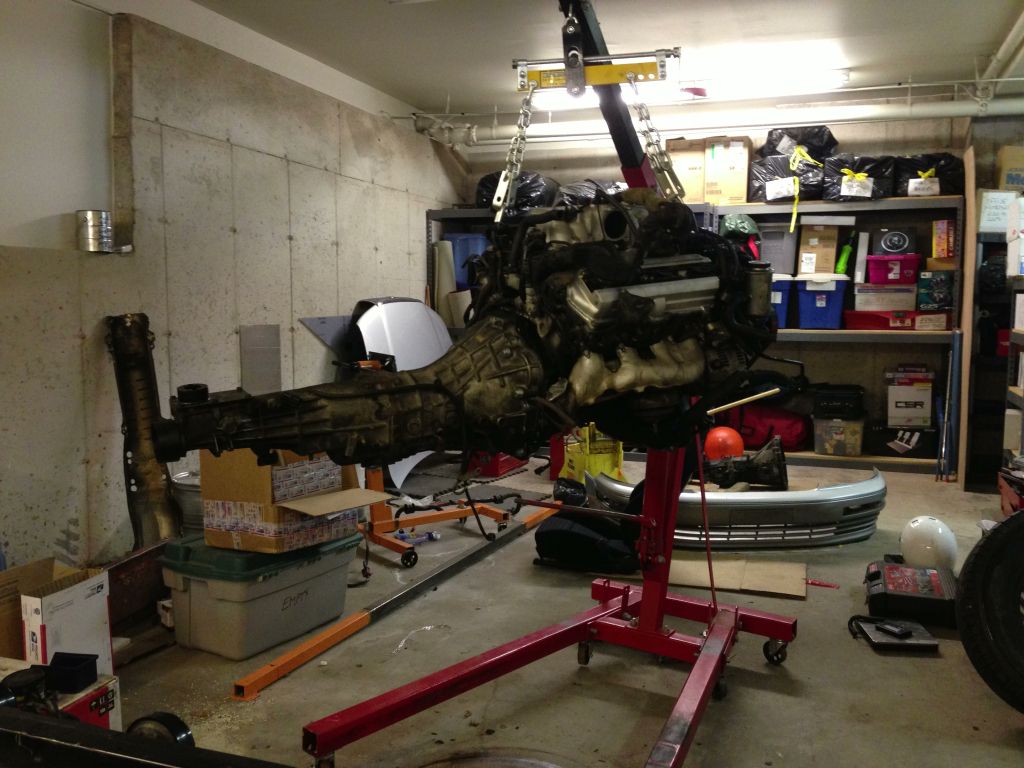

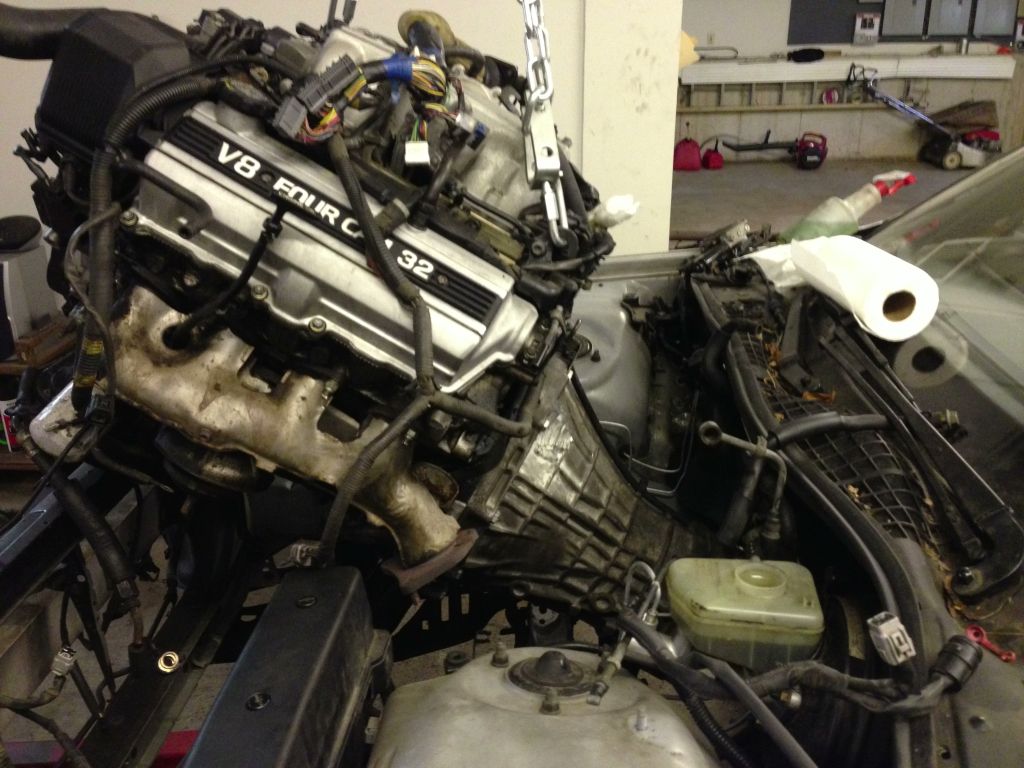
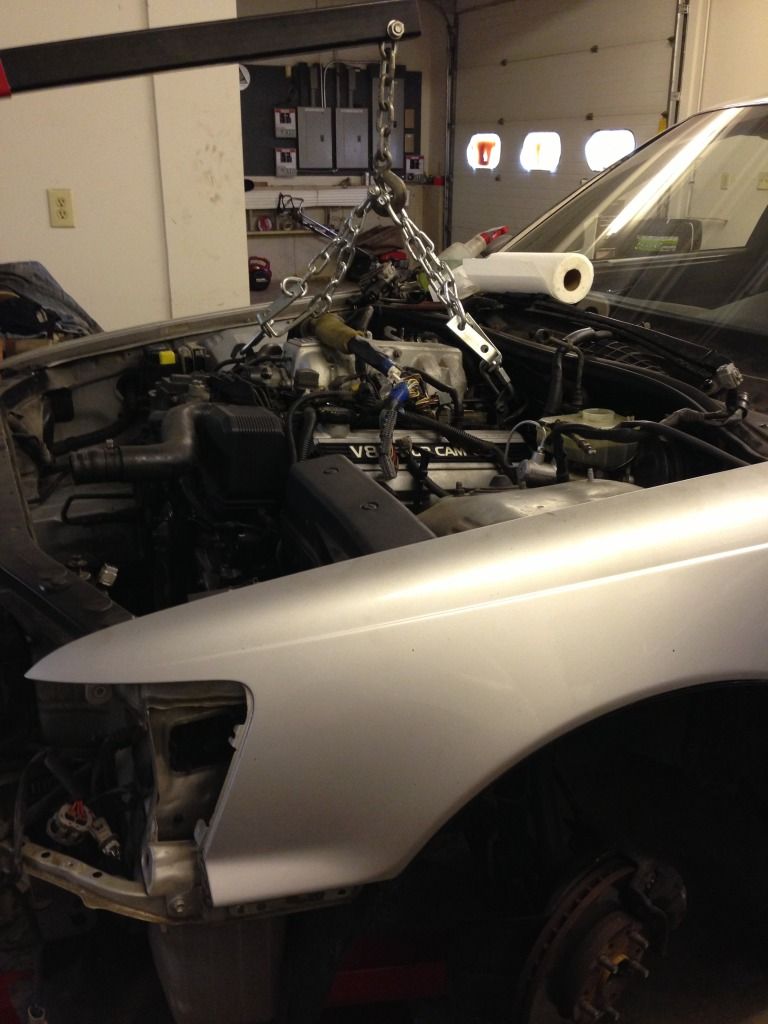
FINALLY in. Thank GOD. Never want to do that again, at least not alone.
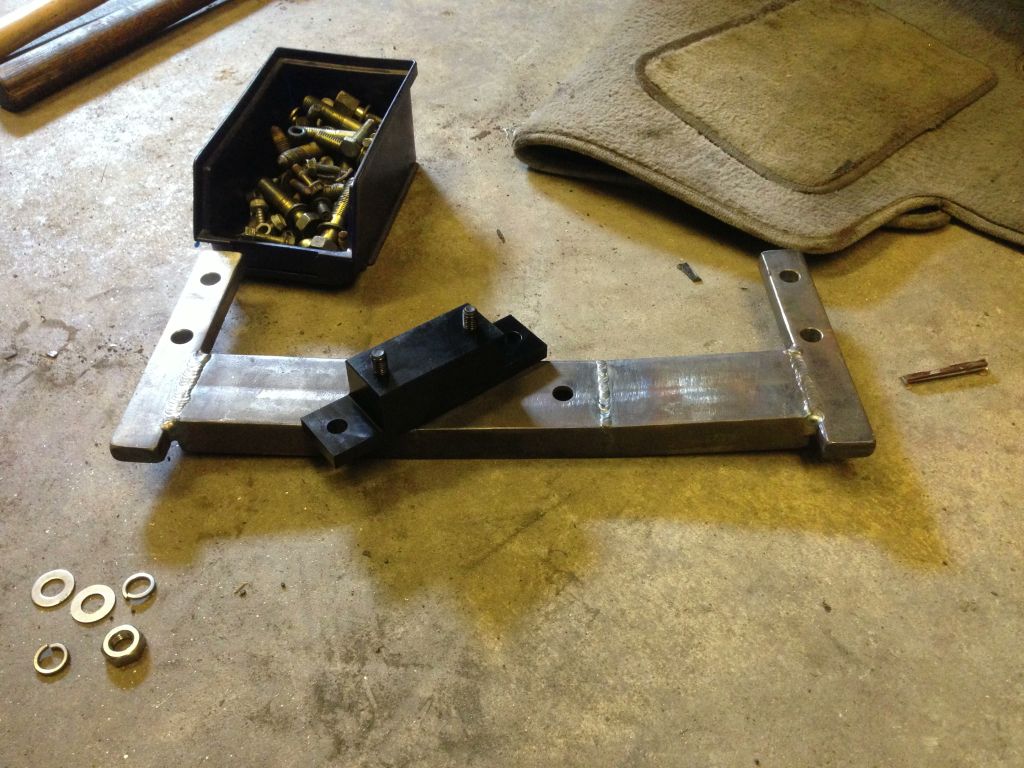
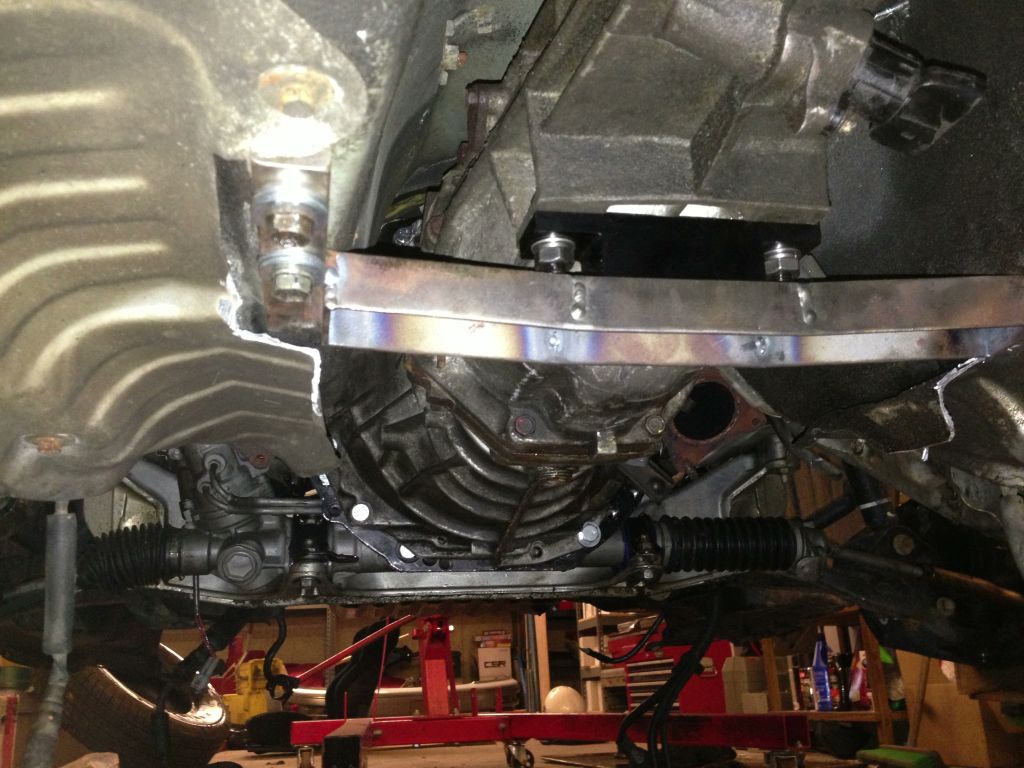
Next I tended to the trans crossmember. I got it from a Odyssey Parts Shop (thanks again Cashflo!). Gave it a quick spray with truck bedliner before tossing it on. Fit like a glove btw.

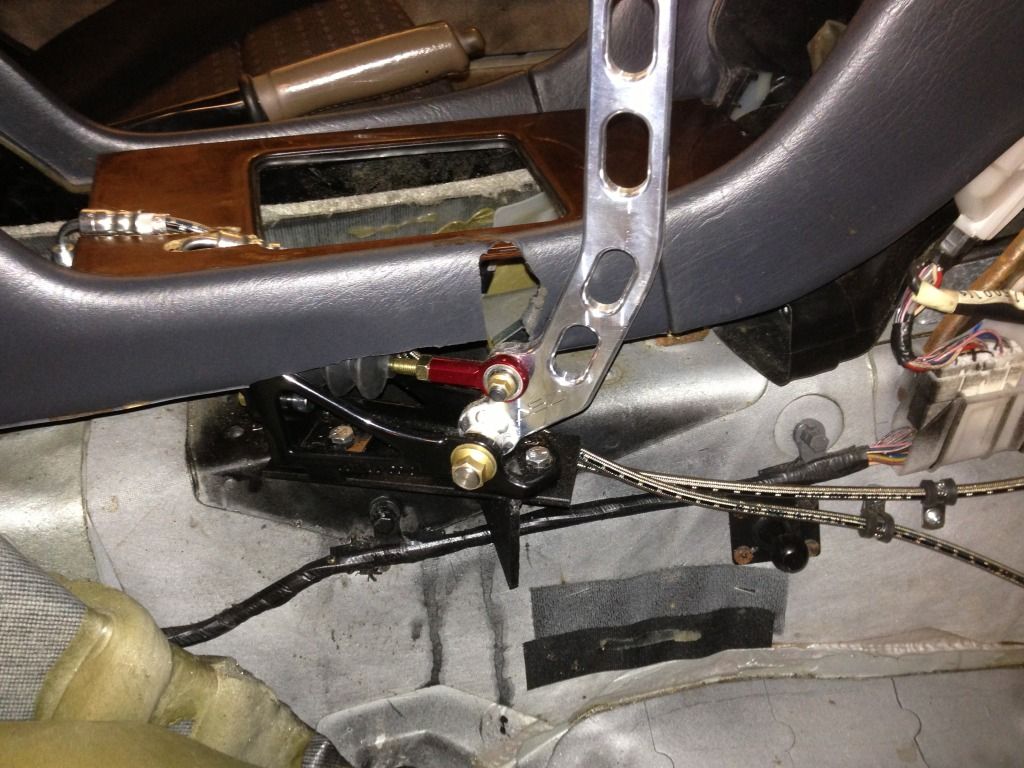
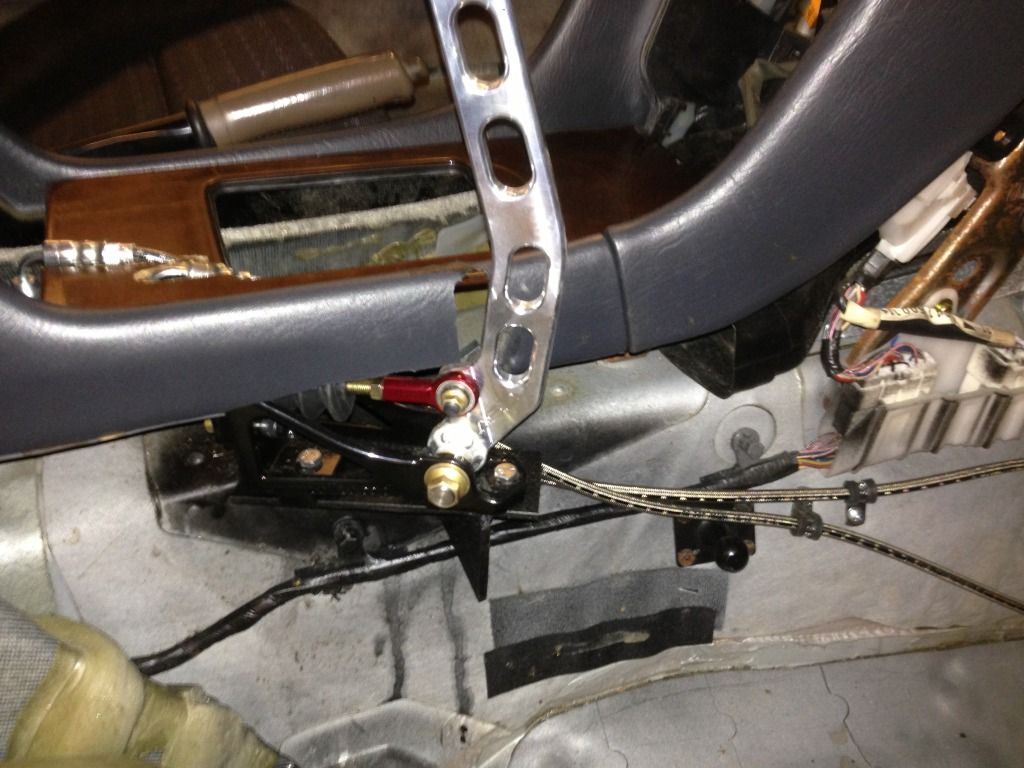
After that, I noticed the shifter didn't line up with the hole like the swap kit builder speculated it would, though it was close. Quick use my new favorite tool and it was no longer an issue.

Huge update. So in the last week and a half I've gotten a bunch done.
First and foremost, here are some terrible photos of the meh brake lines I promised. Again, I didn't have a pipe bender until the last 2 bends, and I know they're ugly, but they're functional. That's all I care about.


Ended up having some bad flares on the same line, so I had to get creative afterwards since I had already flared the longer one. Its not the "right way", but it works. I'll fix it some day.


Was able to reuse one of the factory unions that has a little bracket on it. Bolted the line to an threaded stud for the plastic brake line holder that was there.


Alright. Now onto the stuff I got done since the last update.
My welder finally came in! Went to Tech-Air, got a 80cf tank, then to Harbor Freight for a welding cart and some gloves, and finally Lowe's for a Lincoln Electric mask. Even got to give it a shot laying some beads down. I'm still a noob so don't hate too hard >.<


Next, this little gem came in the mail after empty promises of shipping by a certain date, and avoided phone calls for >7 days. I should of just made my own >.<.


With the TOB finally in, I rushed to get the trans on, and the motor/trans into the car to take the measurement and get a driveshaft ordered. Explain later why.


FINALLY in. Thank GOD. Never want to do that again, at least not alone.

Next I tended to the trans crossmember. I got it from a Odyssey Parts Shop (thanks again Cashflo!). Gave it a quick spray with truck bedliner before tossing it on. Fit like a glove btw.


After that, I noticed the shifter didn't line up with the hole like the swap kit builder speculated it would, though it was close. Quick use my new favorite tool and it was no longer an issue.
 06-29-13, 08:23 PM
#144
Driver
Thread Starter
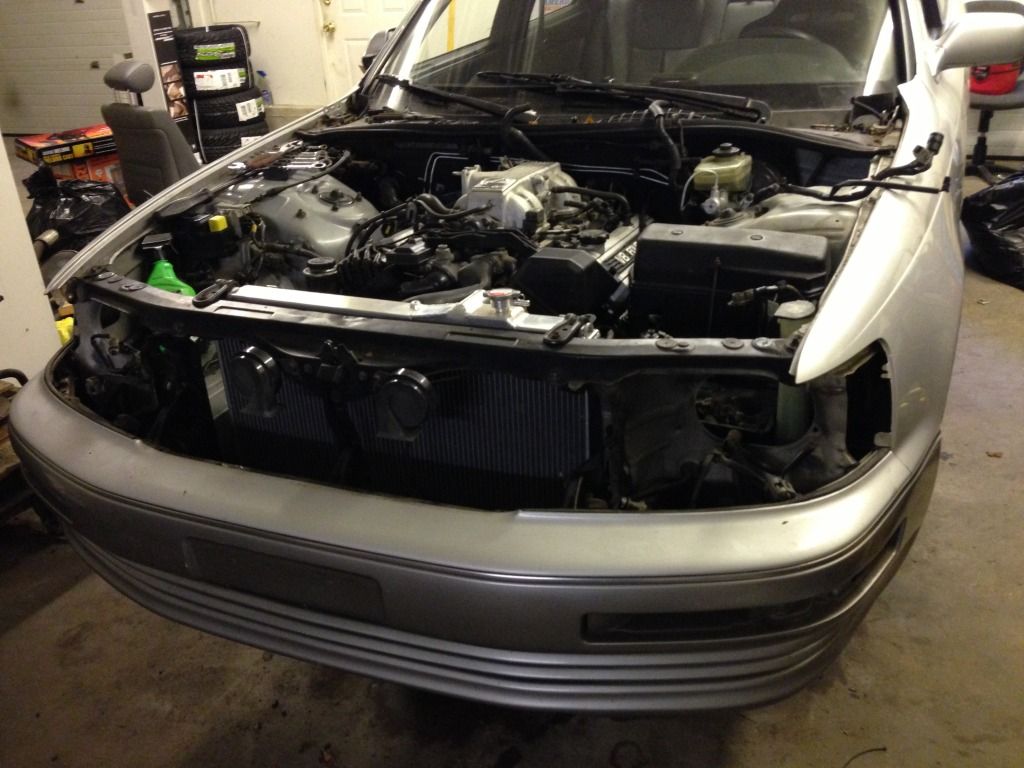
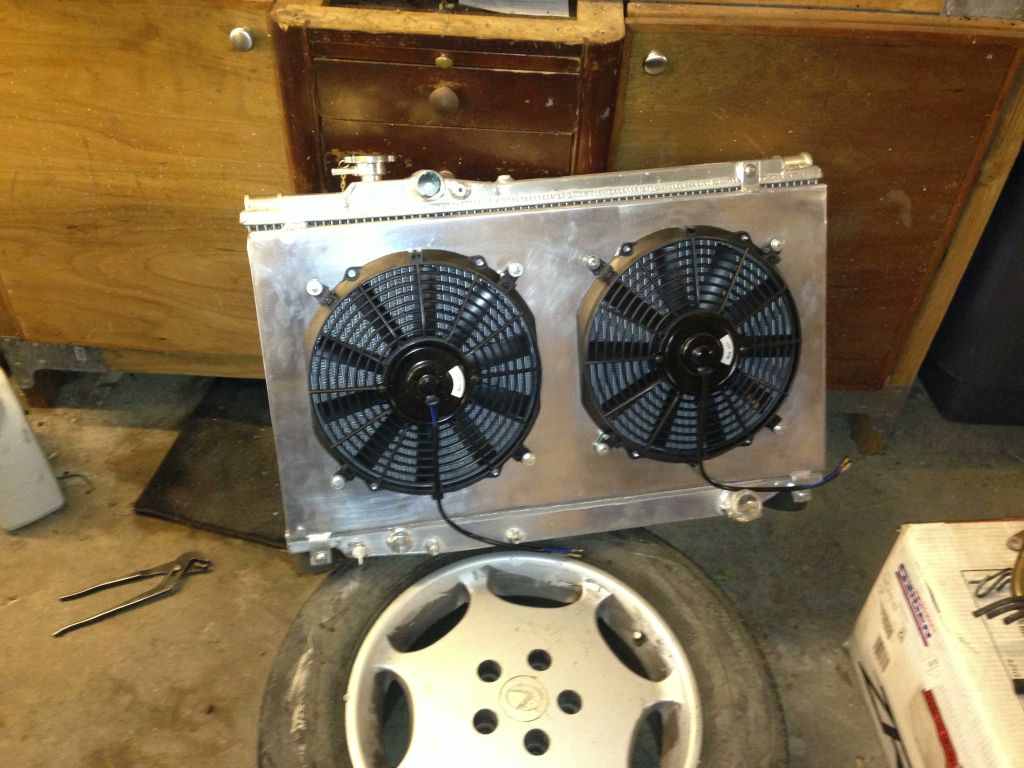
Next I decided to install the rad to try and figure out the hose situation.
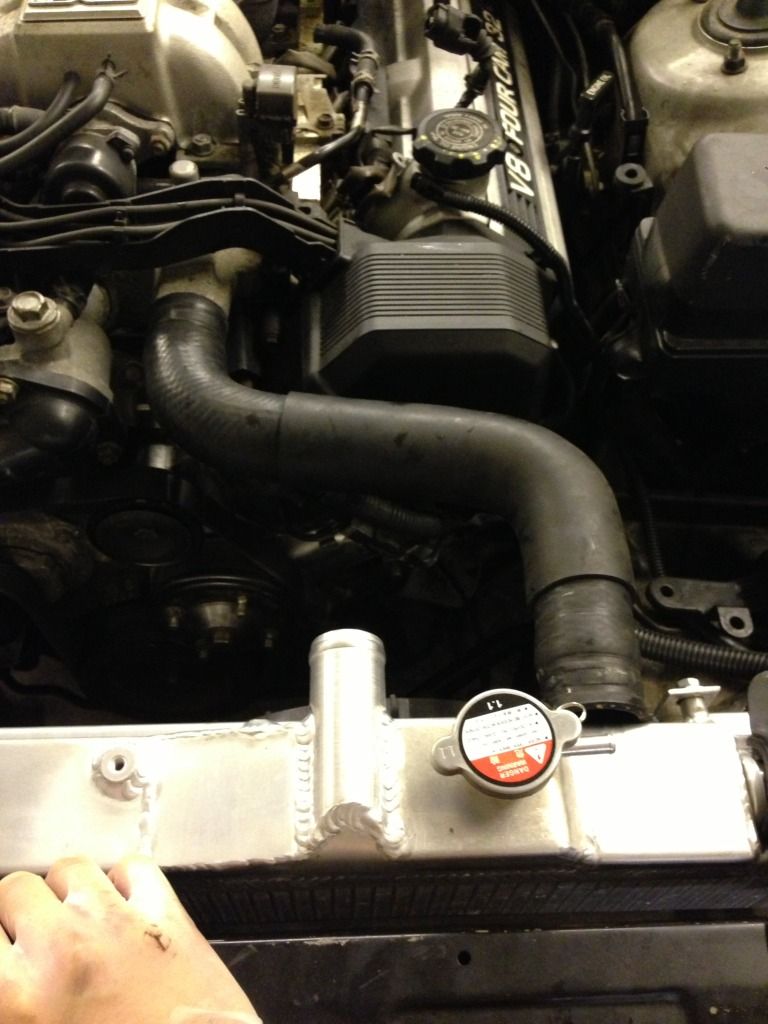
Stock hose isn't going to work...
Bingo! Fixed it!!!
Seriously though, I hacked the stock one up to have something to take with me to Pep Boys..boy was that a mistake...
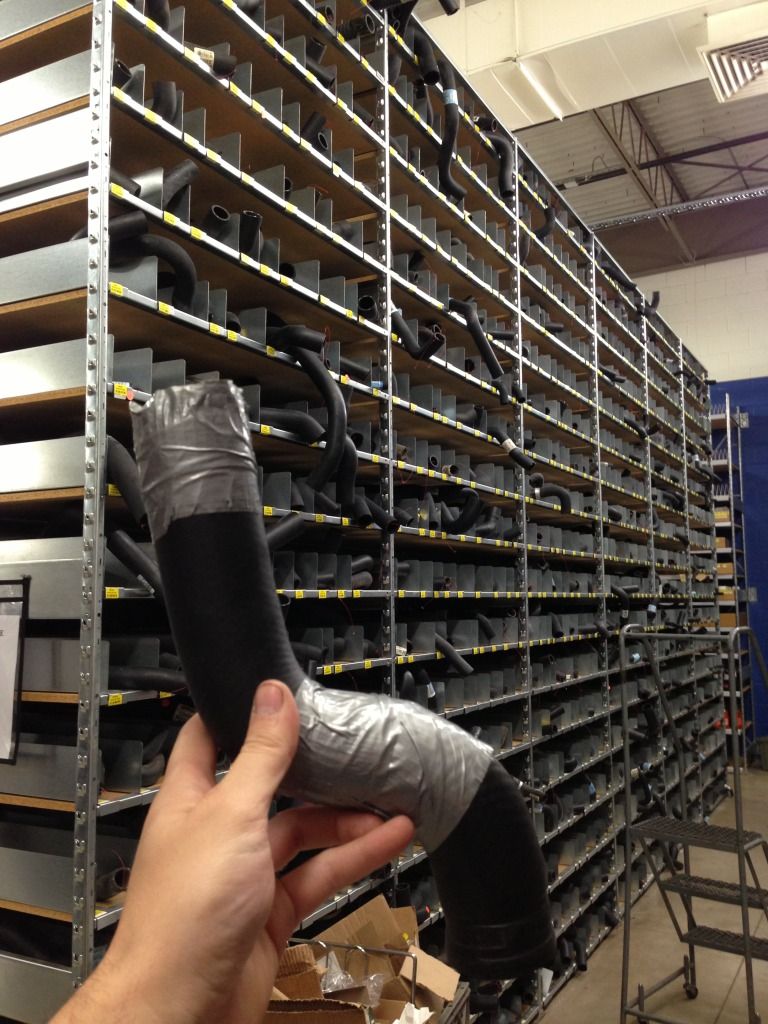
So after a quick glance and realizing I'd be there forever, I did some quick googling at the SC400 upper hoses and it looked like the radiator flange was closer to the center much like the MK4 supra radiator, so I found one off the shelf and bingo, that's gonna work.
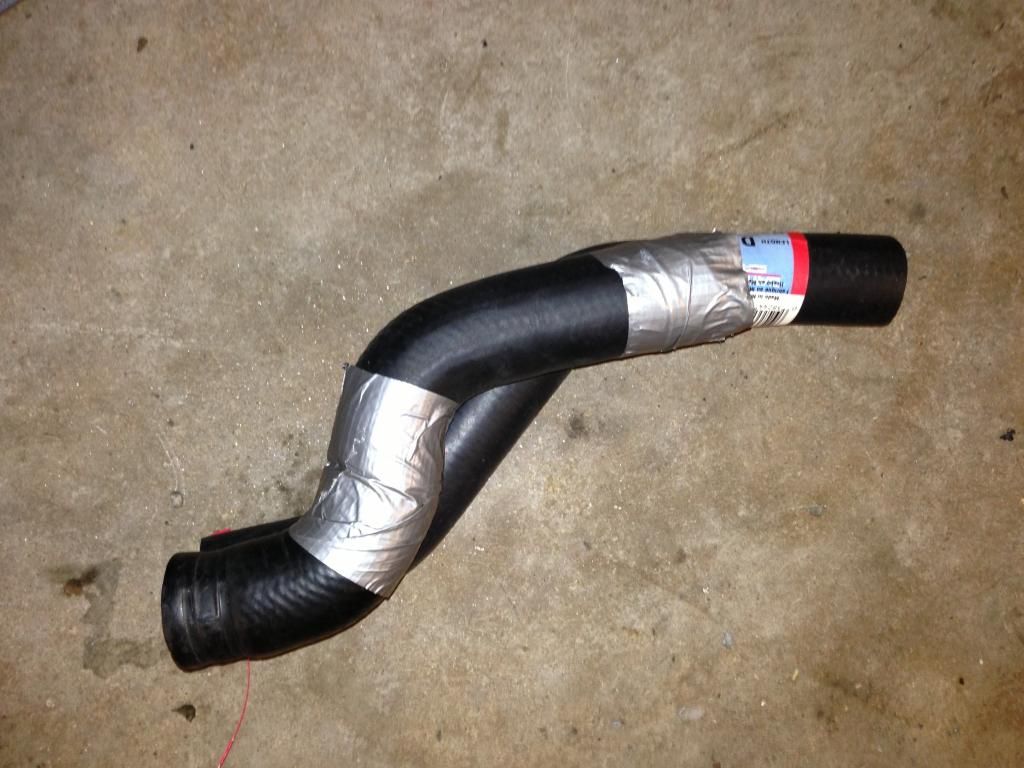
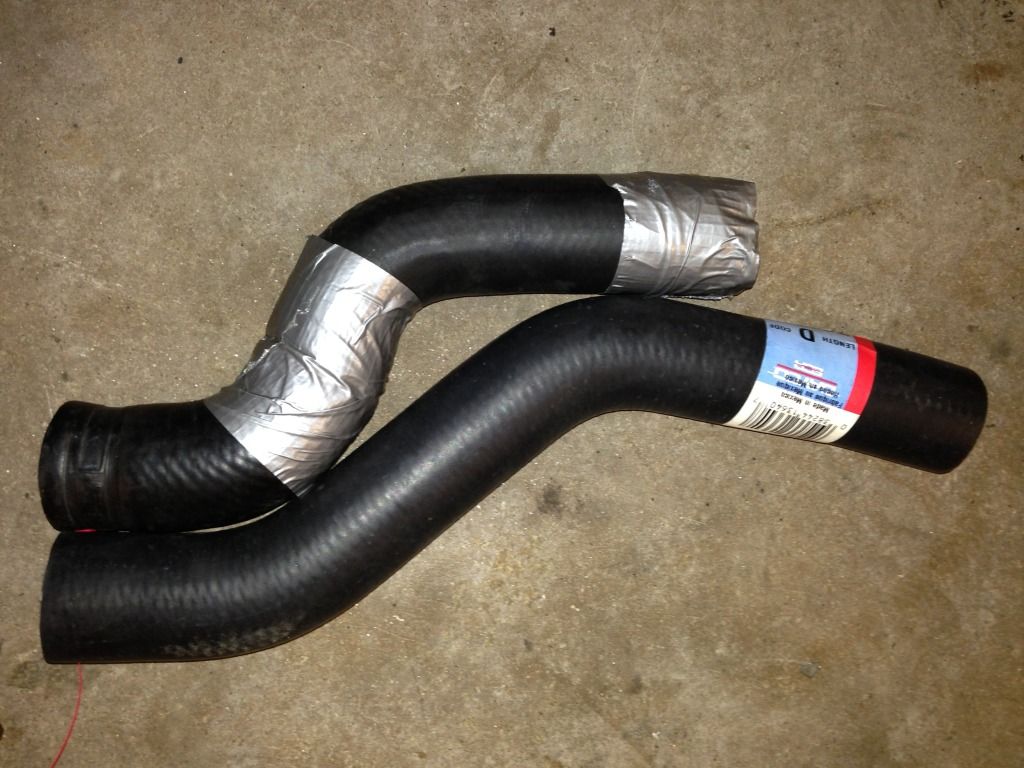
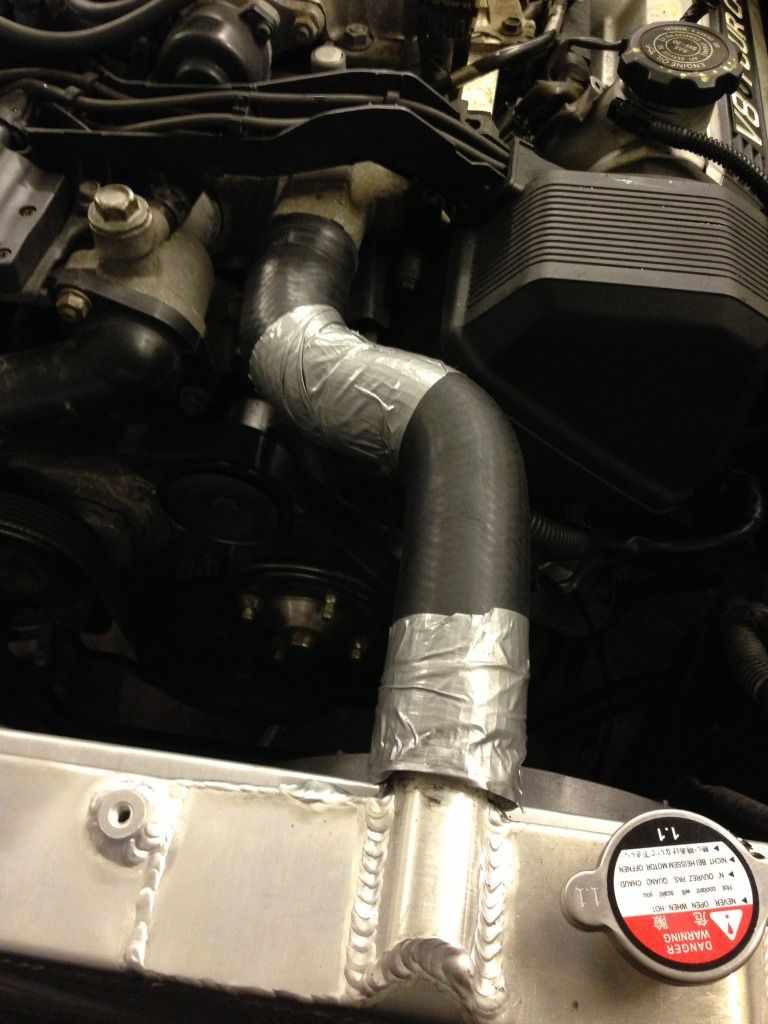
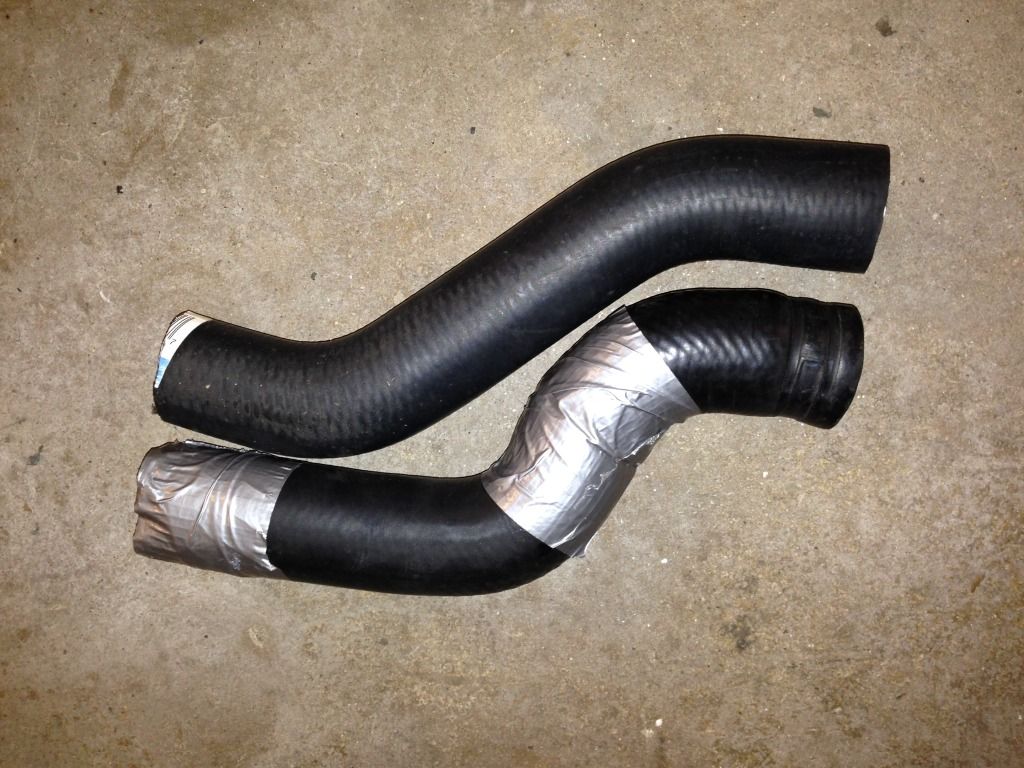
1 single cut and it was essentially perfect.

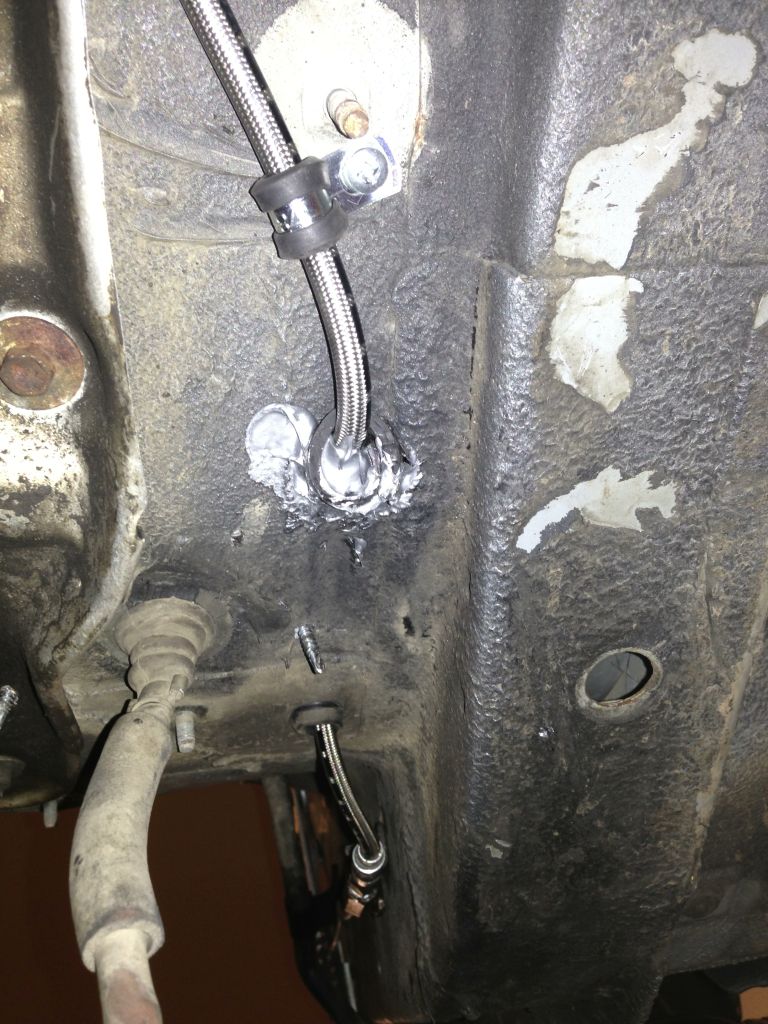
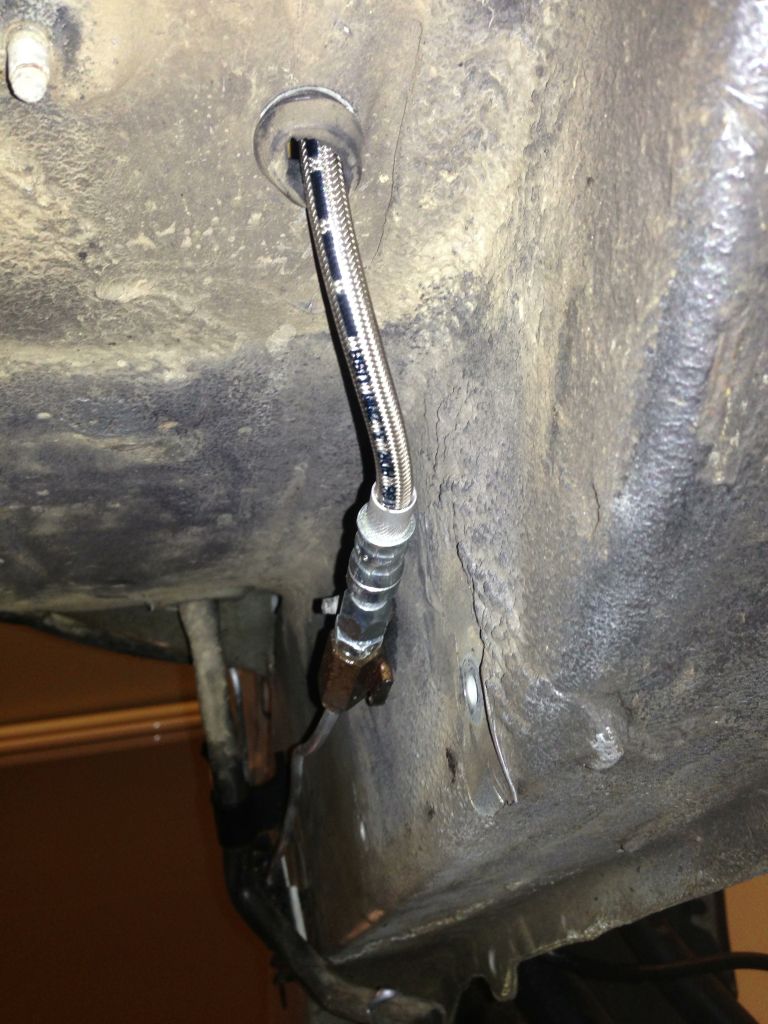
I then took a break from that since I had to wait for the Radiator temp. sensor adapter to come in to figure out the lower hose, so I went and got a clutch line made. Back to Fluid Dynamics!
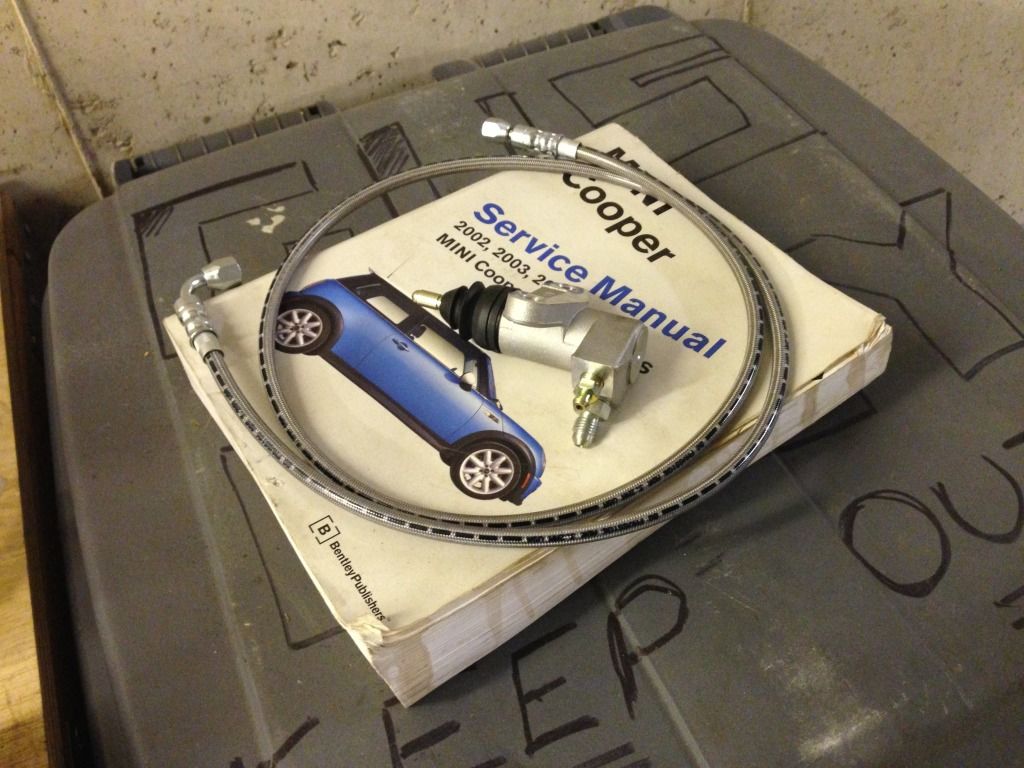
And this is the final product. The giant grommet is from a B13 Sentra engine harness. Was almost the perfect size, but I put a little bit of window silicone just to fill the little gap. Tilton reservoir mounted nicely out of the way too.

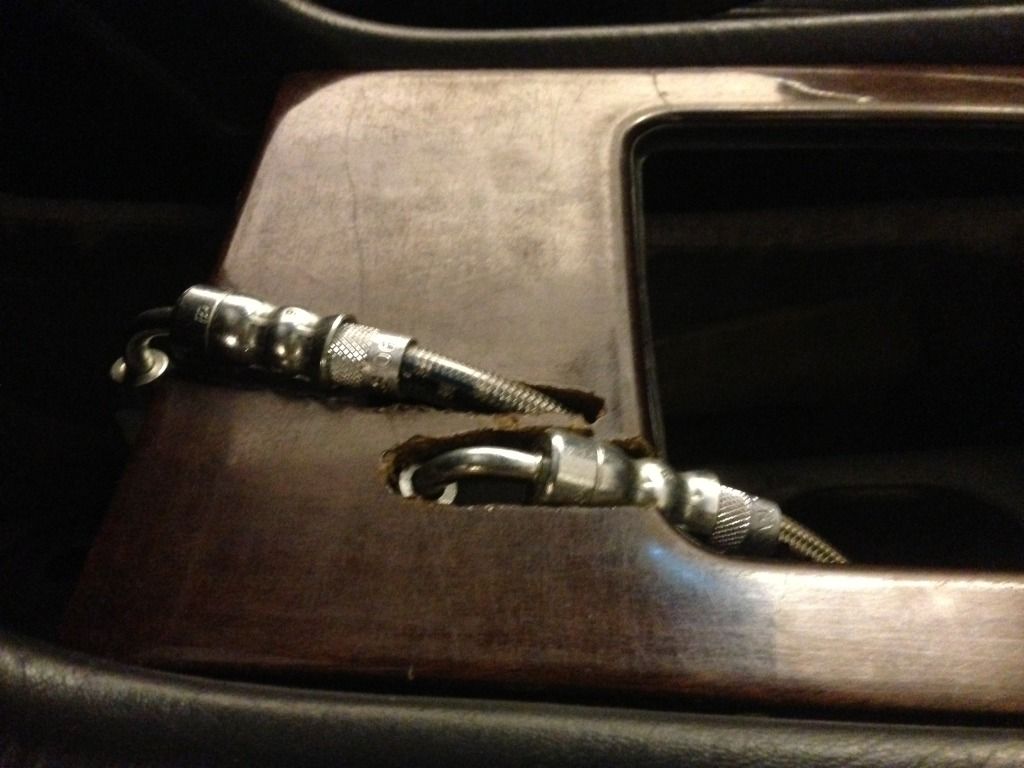
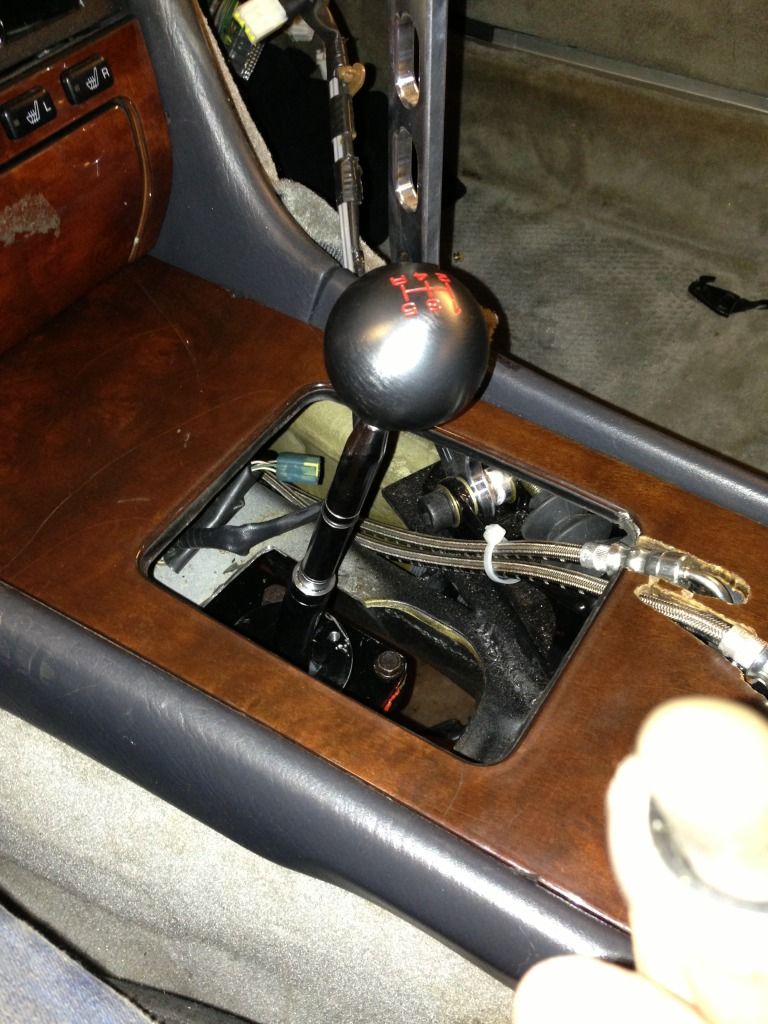
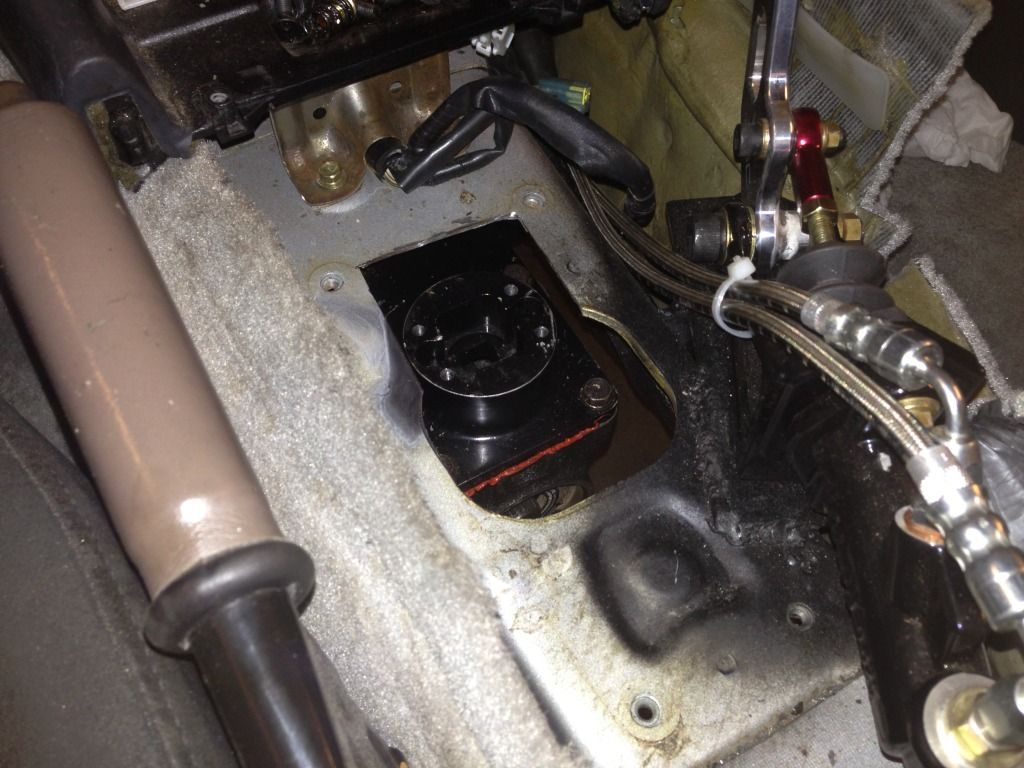
Then the only other thing I got done was test fitted the shifter to see what kind of shift lever modifications I'm going to need. Definitely going to have to cut and reweld this to get it to come out centered. Fun. (its in neutral)
Aside all the shown, I did a bunch of smaller things. Removed a bit more weight, started modifying the center console because the stock armrest hits my elbow with I rip the hydrobrake, installed the wideband in the ashtray, plumbed almost all the vac lines, reconnected all the plugs/grounds/lines in the engine bay, and did some more cleaning. I did also end up ordering the driveshaft this past Monday, though of course it would be my luck that this *** took his sweet time so when I called to give Driveshaft Shop the measurements they informed me all of this week (June 29- July ) they're on vacation. It most likely wont get shipped out for another week after they get back. FML. Oh well, more time to finish tidying everything up. More to come soon!

Stock hose isn't going to work...

Bingo! Fixed it!!!

Seriously though, I hacked the stock one up to have something to take with me to Pep Boys..boy was that a mistake...

So after a quick glance and realizing I'd be there forever, I did some quick googling at the SC400 upper hoses and it looked like the radiator flange was closer to the center much like the MK4 supra radiator, so I found one off the shelf and bingo, that's gonna work.


1 single cut and it was essentially perfect.


I then took a break from that since I had to wait for the Radiator temp. sensor adapter to come in to figure out the lower hose, so I went and got a clutch line made. Back to Fluid Dynamics!

And this is the final product. The giant grommet is from a B13 Sentra engine harness. Was almost the perfect size, but I put a little bit of window silicone just to fill the little gap. Tilton reservoir mounted nicely out of the way too.

Then the only other thing I got done was test fitted the shifter to see what kind of shift lever modifications I'm going to need. Definitely going to have to cut and reweld this to get it to come out centered. Fun. (its in neutral)

Aside all the shown, I did a bunch of smaller things. Removed a bit more weight, started modifying the center console because the stock armrest hits my elbow with I rip the hydrobrake, installed the wideband in the ashtray, plumbed almost all the vac lines, reconnected all the plugs/grounds/lines in the engine bay, and did some more cleaning. I did also end up ordering the driveshaft this past Monday, though of course it would be my luck that this *** took his sweet time so when I called to give Driveshaft Shop the measurements they informed me all of this week (June 29- July ) they're on vacation. It most likely wont get shipped out for another week after they get back. FML. Oh well, more time to finish tidying everything up. More to come soon!
06-30-13, 01:02 AM
#146
Driver
Thread Starter
") .
07-02-13, 01:23 PM
.
07-02-13, 01:23 PM
#147
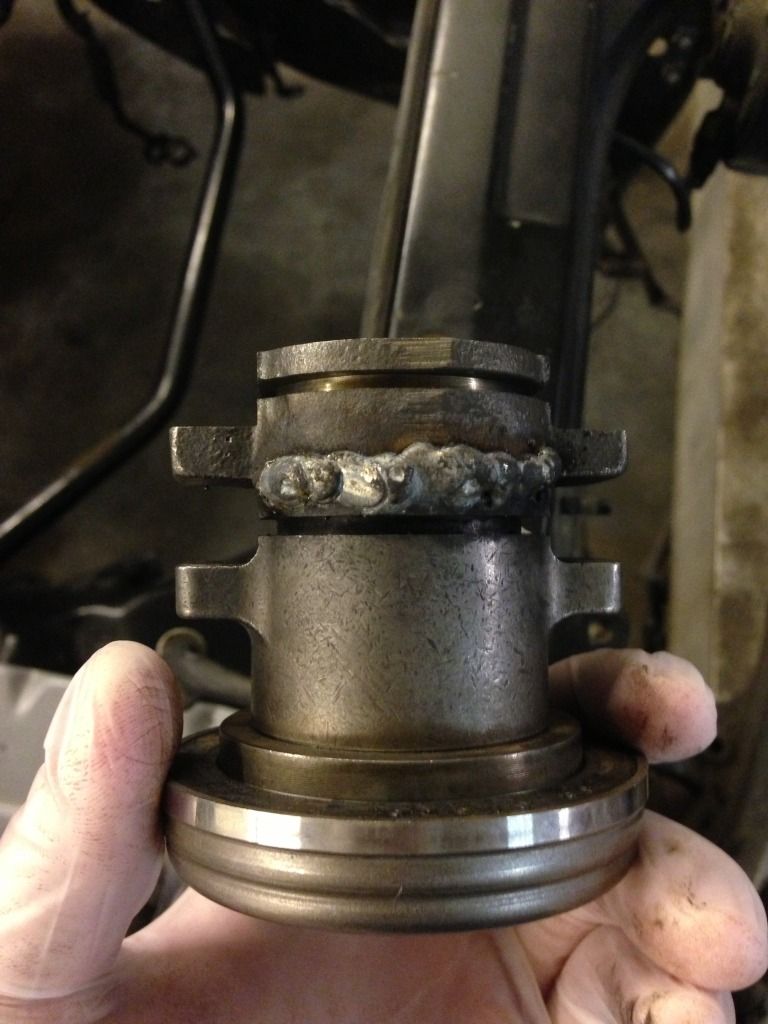
Do you happen to have any pics of how you guys welded your diff? I'm doing mine next week, and was curious as to how yours is welded up. I did the rear diff on my old toyota pickup, and added some extra reinforcment to make sure it didn't break the welds.
07-03-13, 06:17 AM
#148
Driver
Thread Starter
Alright so I finished plugging almost everything in yesterday, got some new crush washers for the fuel line and went to prime the system to make sure they didn't leak since they're a bit thinner than the old ones. Put the keys in and everything lights up dash wise, but I do not hear the fuel pump priming. Now I haven't wired in the neutral safety switch, but I doubt this could have anything to do with it...could it?!
07-15-13, 10:53 PM
#149
Driver
Thread Starter
Update # 19 7/16/13
So I've gotten a lot more done on the car. Its almost road worthy.
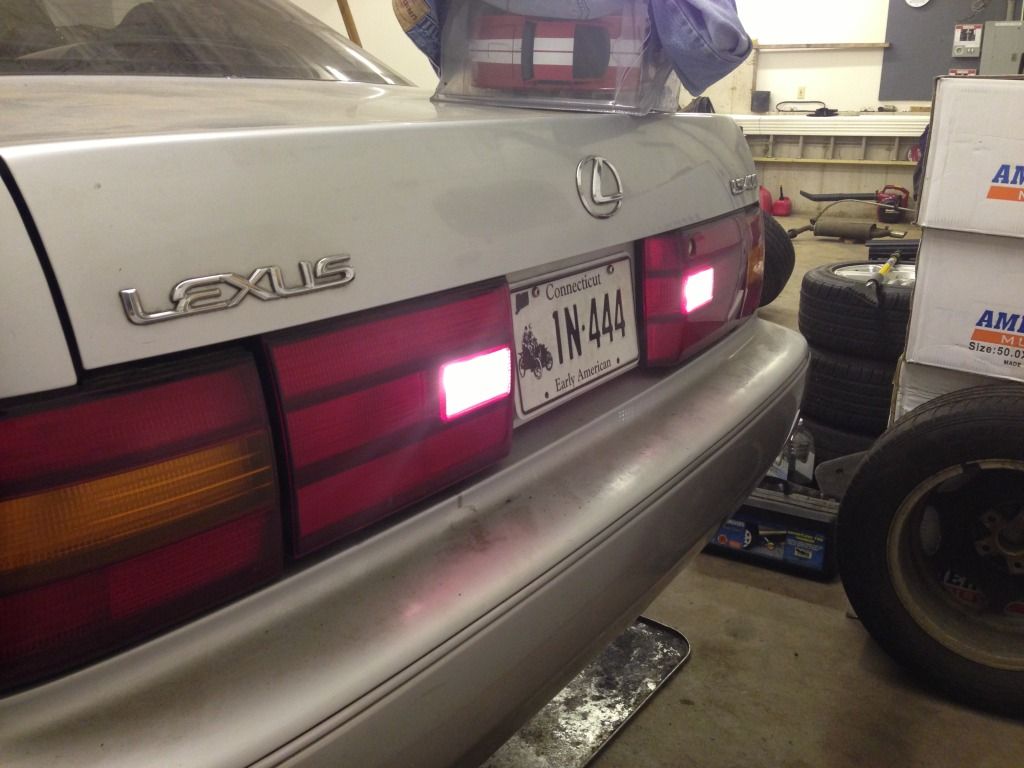
Well for starters, I got the reverse lights working with the KA trans! Found a website that sells Nissan harness pigtails for dirt cheap. Ordered one for the speed sensor and the reverse lights. Mike helped out a lot with this, thanks again man!
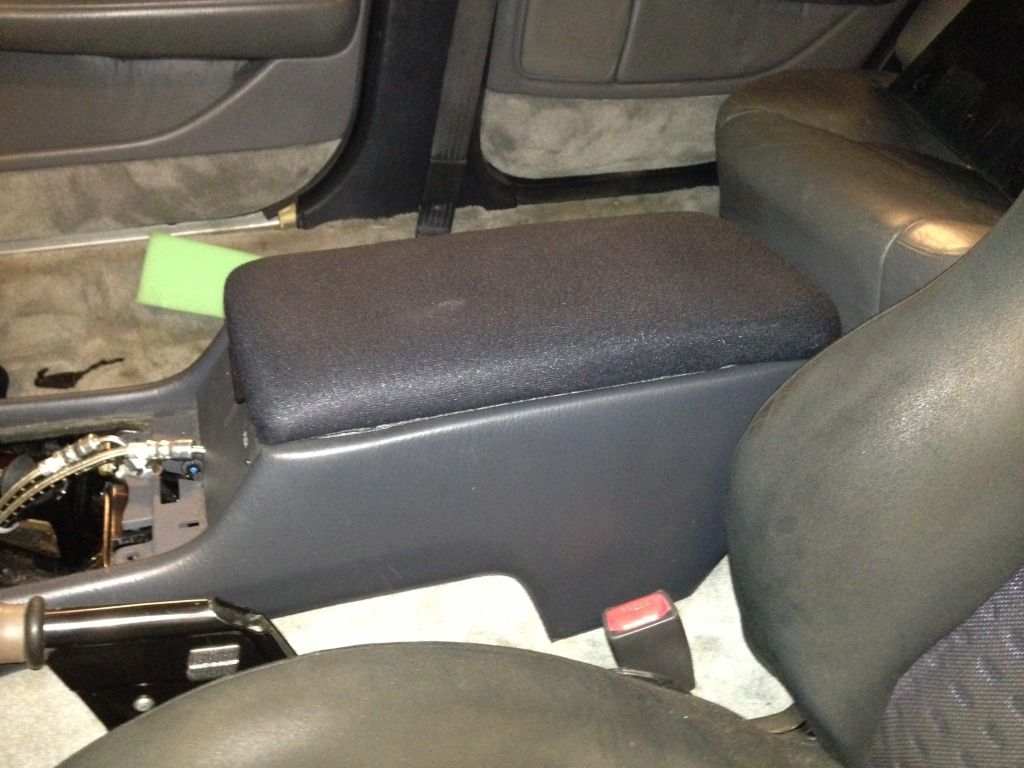
Next I moved onto tackling the lack of armrest. Now I feel like an idiot that I didn't really take any photos of the process of building it. It happened over the course of a few months, but here is the finished product. Reason I had to make a new one was that my elbow would smash into it if I pulled the hydro, and it was too tall for the shifter. Just leaving the armrest in the open position when I want to use the hydrobrake wasn't a solution for me.
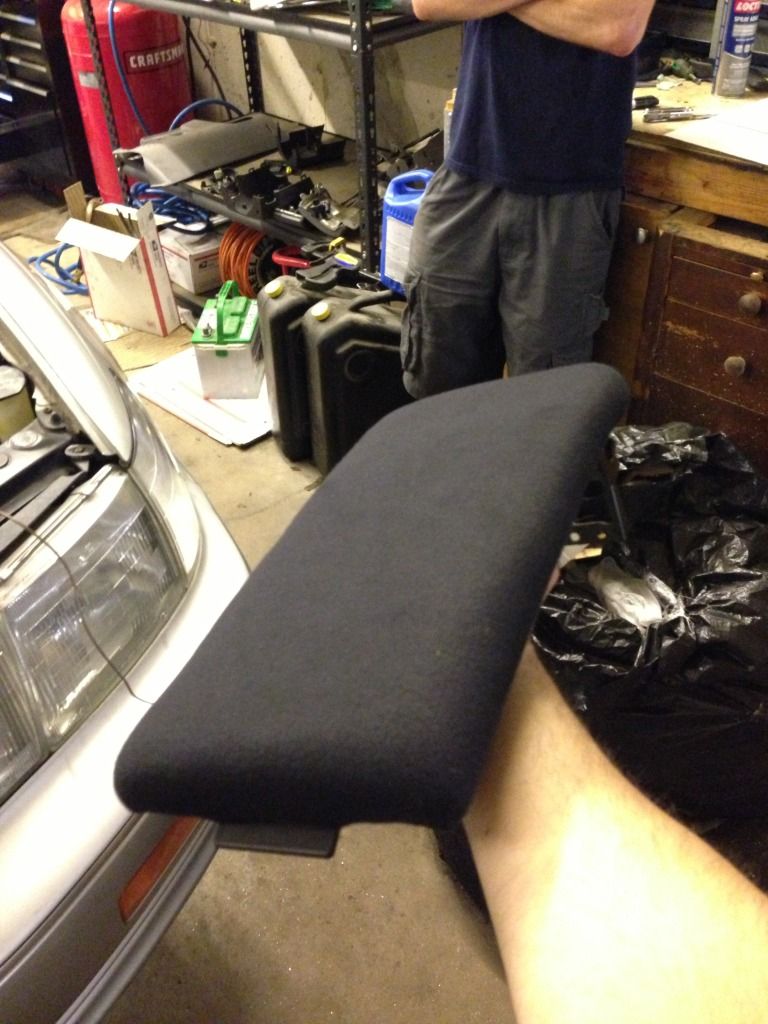
If this at all makes sense, I started by taking apart the armrest. I took the plastic piece that sits on the inside of the armrest, cut the plastic hump off so it was not a flat piece with a big hole in the center. If you lift up the armrest and look at the inside of it, its the big plastic piece. I turned it upside down so what was before facing the inside pocket not faced up. I then took the stock hinge, removed the springs, and installed it on the plastic piece with some small screws that came out of taking everything apart. I took the latch which mounts to the armrest mold itself and put it on the plastic piece. I had to JB weld it on, no real other way of mounting it. I then took some thin 18G sheet metal and cut a piece out to fill the open hole from cutting out the hump in the plastic piece. Bought some foam at Jo-Ann Fabrics, as well as some black headliner material and used some Loctite spray adhesive from Lowe's. I have to say, it turned out a lot more legit than I thought it would have.
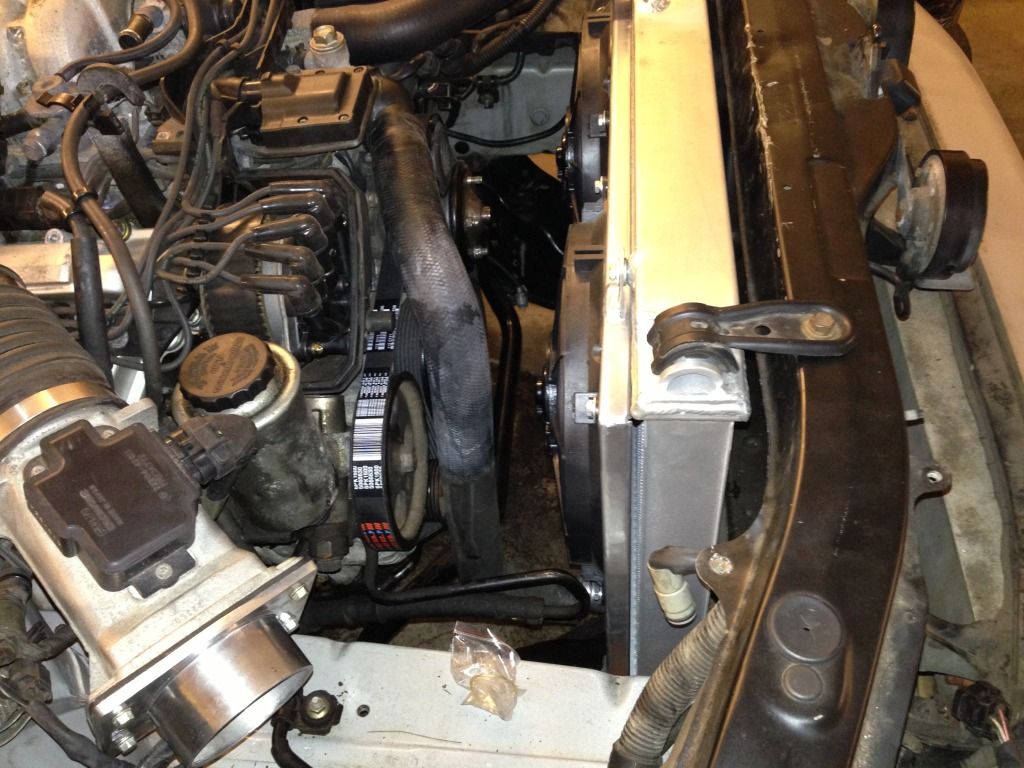
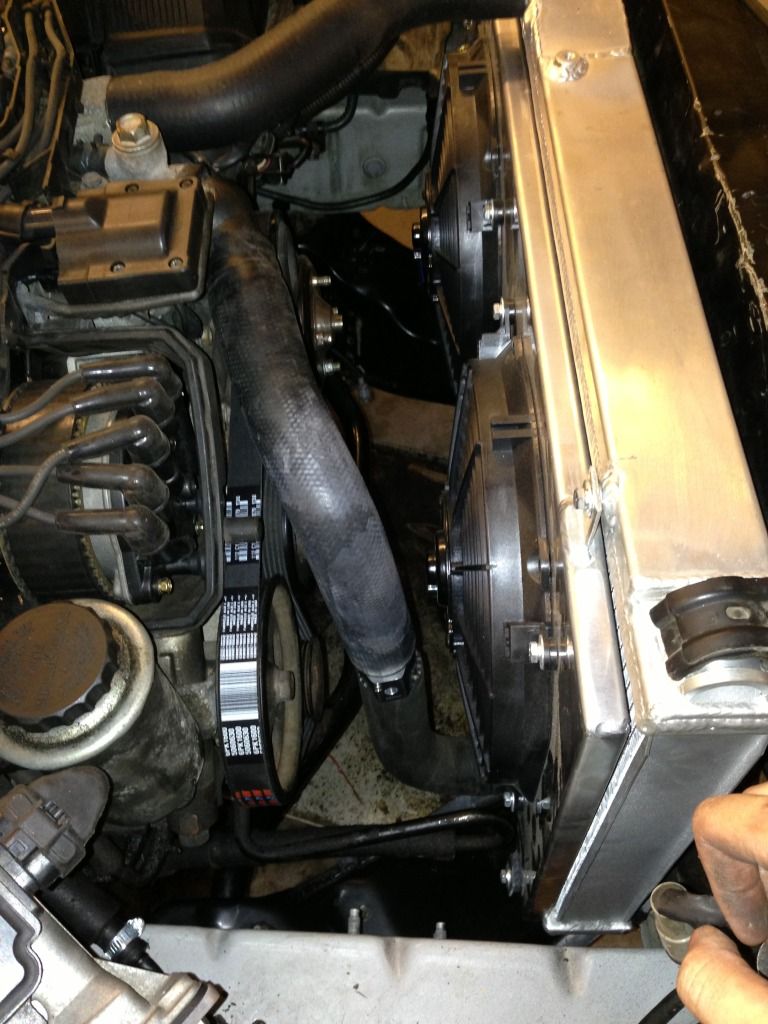
Next I decided to finish figuring out the cooling system. In the process of removing the entire fan/rad/ac system i tossed all the OEM sensors and relays for it. Didn't care for the weight, or bulkiness of it. With the MKIV rad in place, and having figured out the upper hose I realized I never even bothered to look at the lower..LOL. Well, I lucked out. The stock one fits almost perfectly.
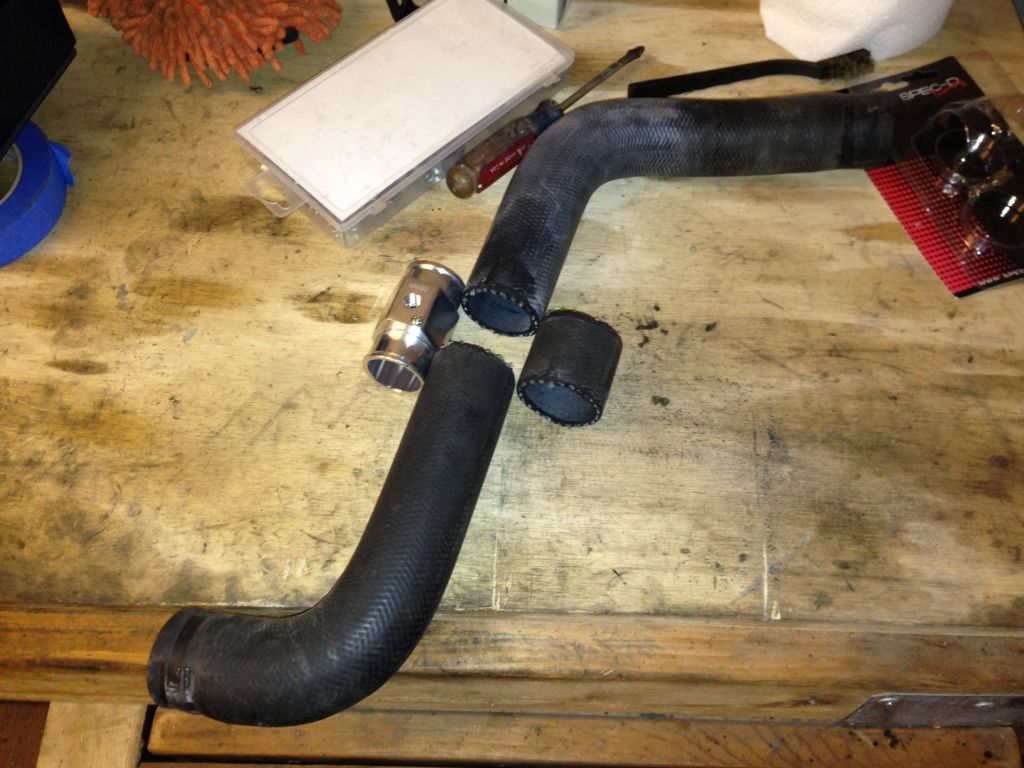
A buddy of mine was over and mentioned to me a possible solution for the radiator fans. Now, if I haven't made it apparent, my philosophy behind this entire build is that I want a turn key daily drivable car that anyone could get into and just drive. I don't want any special procedure for driving the car, just turn the key put it in gear and go. That meant no interior rad fan switches that I'd have to turn on at xxx temperature. Solution, universal thermal fan switch. Got a 200*F on/185*F off kit after doing a lot of research and seeing what people with 1UZ swaps are doing for temps, and wired it in. Took me forever to figure out where to mount the sensor, and my buddy came through to save the day again! $9.68 on eBay for a "radiator adaptor". I should add that it did say universal fits most models, yet the ONLY 1/8" NPT sensor I found was nowhere near what I needed for the 1UZ. EVERYTHING ELSE IS 3/8" NPT. I figured okay, no big deal I'll just bore it out. Is there anyone who can rationalize why exactly a 3/8" NPT fitting is in no way 3/8's of an inch? Sorry, that does not compute.
Anywho, here is the adapter and the amount of hose I had to remove. Ended up having to take off an extra inch or so to make the hose fit correctly.
LOL/Ragequit moment - So I was an idiot and thought it would be a good idea to reuse the stock spring clamps. I compress one with my channel locks and start lowering it to the bottom hose, it snaps off and ****ing hits me square in the goddamn face. Left a bruise, that's how much freaking tension they have. FUUUUUUUUUUUUUUUUUUUUUUUUUUUUU. Pure rage moment.
So even after eating a face full of clamp, I continued to use it. Filled the rad and it started to leak. Tried to slip it off and put a hose clamp on and ended up pouring coolant ALL OVER ME. Down my arm into my shirt, over the creeper, over the floor, in my hair, on my glasses. Theres days I want to just unload my 1911 into the side of this ****ing car. This was one of those days.
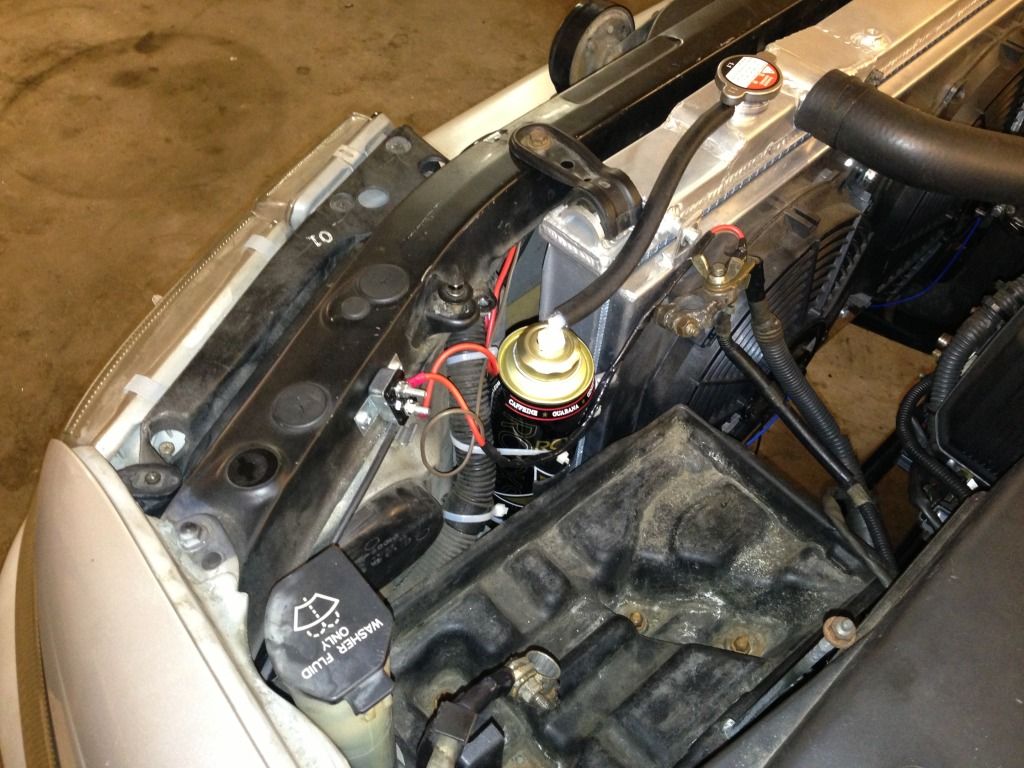
Moving on, I realized I still had no coolant overflow. You can think this is ghetto, or trashy. Frankly, I don't care. I'm way over budget on this car, its a purpose built vehicle, and hey...it works! Was at Lowe's buying some bolts, and saw my buddy who works there. He was drinking a Rockstar...yup. Immediately walked over to the plumbing section. $3.52 for 2 plastic fittings, and made him pound the rest of the can and give it to me haha.
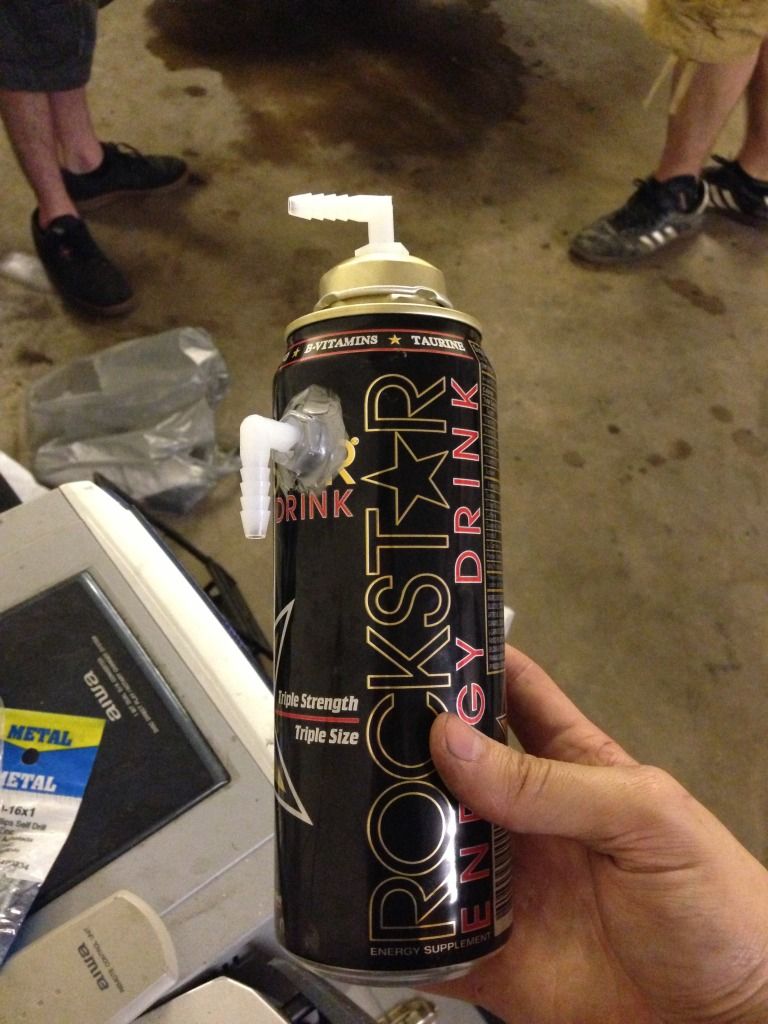
Tossed that on and all was well. While all this was getting done, my intake parts came in! I love eBay. Literally, everything you'd ever need made by some child laborer in China and sold for next to nothing. $55 total cost, that 45" 3.25" elbow was NOT cheap either. It came in ugly raw aluminum finish too, Truck Bedliner fixes everything.
My hoodrich coolant overflow.
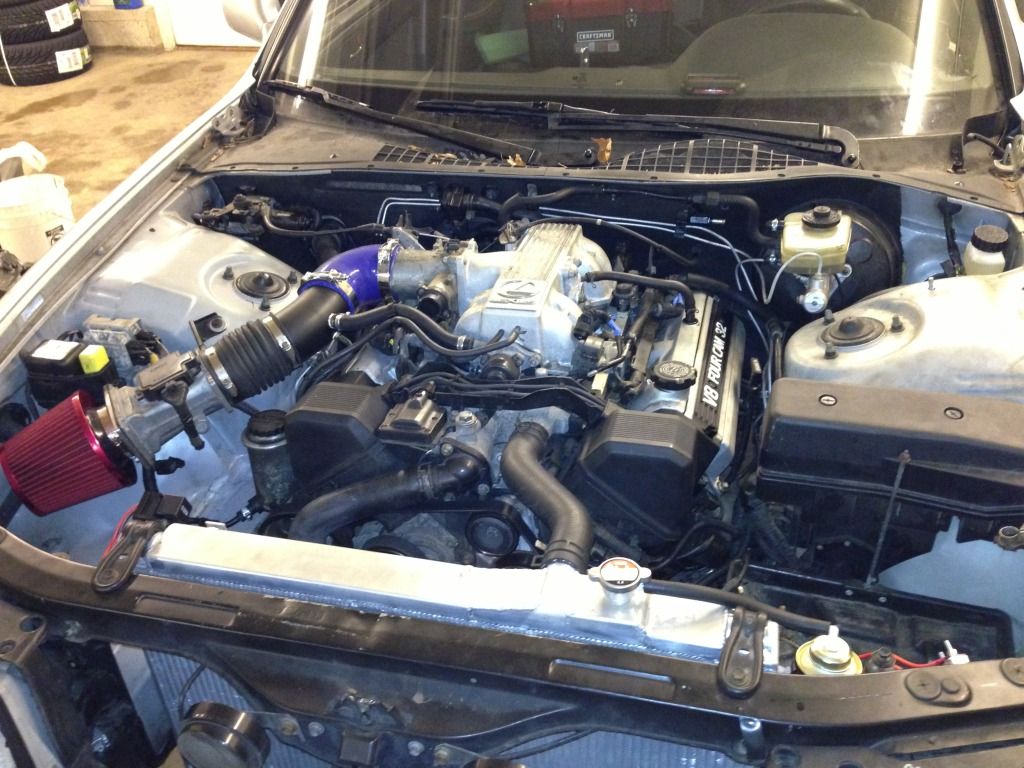
So engine bay is mostly done for now. I should add, I did fire up the car. First try, the thing fired up with no hesitation. It did stall out, and gave me some issues, but I quickly tracked that down to vacuum leaks, and now its just like stock, except 7000% louder.
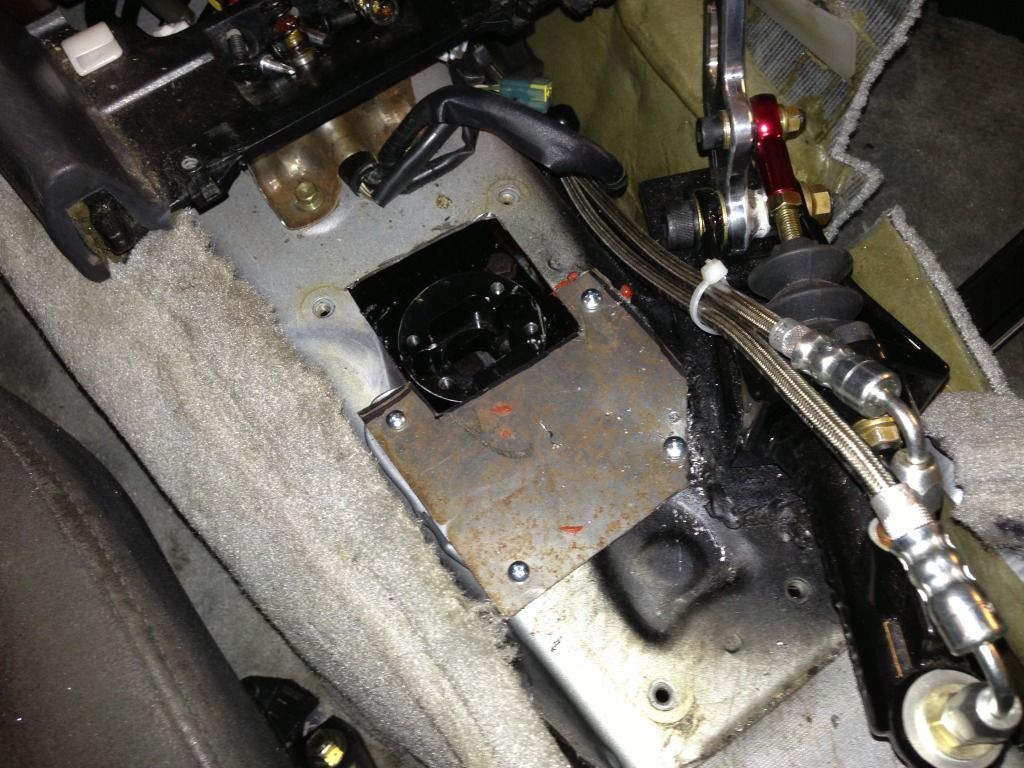
So after having started the car, I realized it got insanely hot in the trans tunnel. In order to keep the heat out, and reduce the noise I need to close up the original shifter cutout. That sheet of sheet metal my buddy gave me just keeps on giving.
Put a beat of silicone underneath too so it had a nice seal. Went back the next day and put some self tapping screws through it.
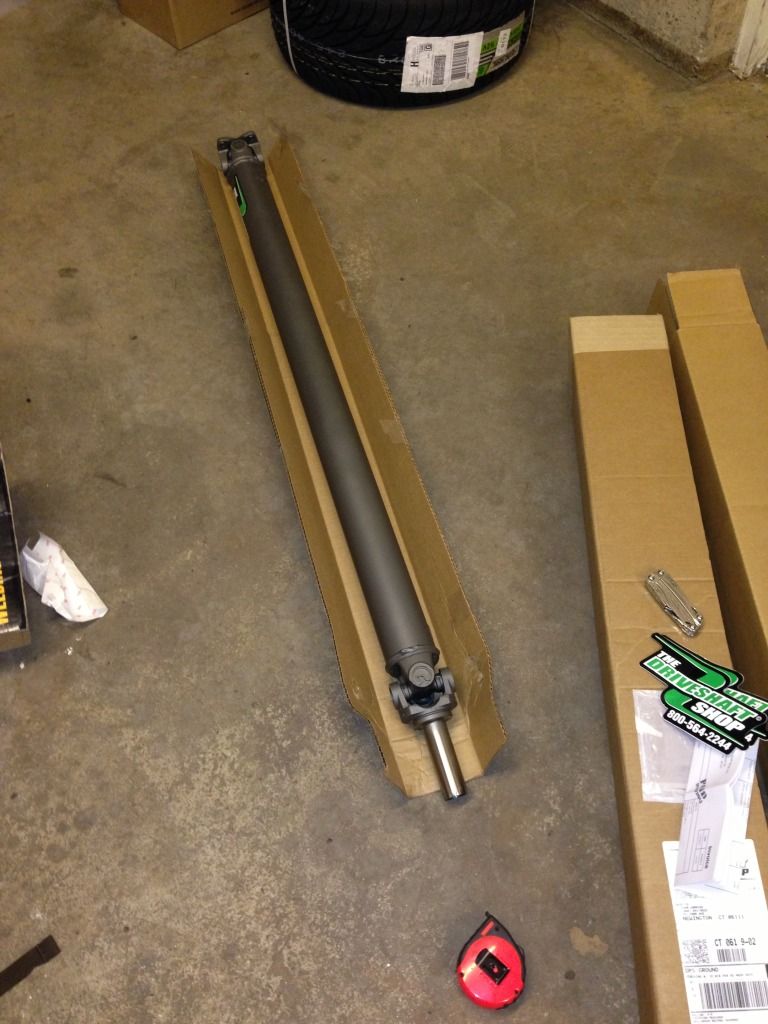
Then 2 really good things happened, 1st was this bad boy came in!
LOL moment/Ragequit #2 - Driveshaft Shop FORGOT to send the Toyota 3 bolt -> 1350 diff adapter. AWESOME. It shipped out immediately, should be here today at some point.
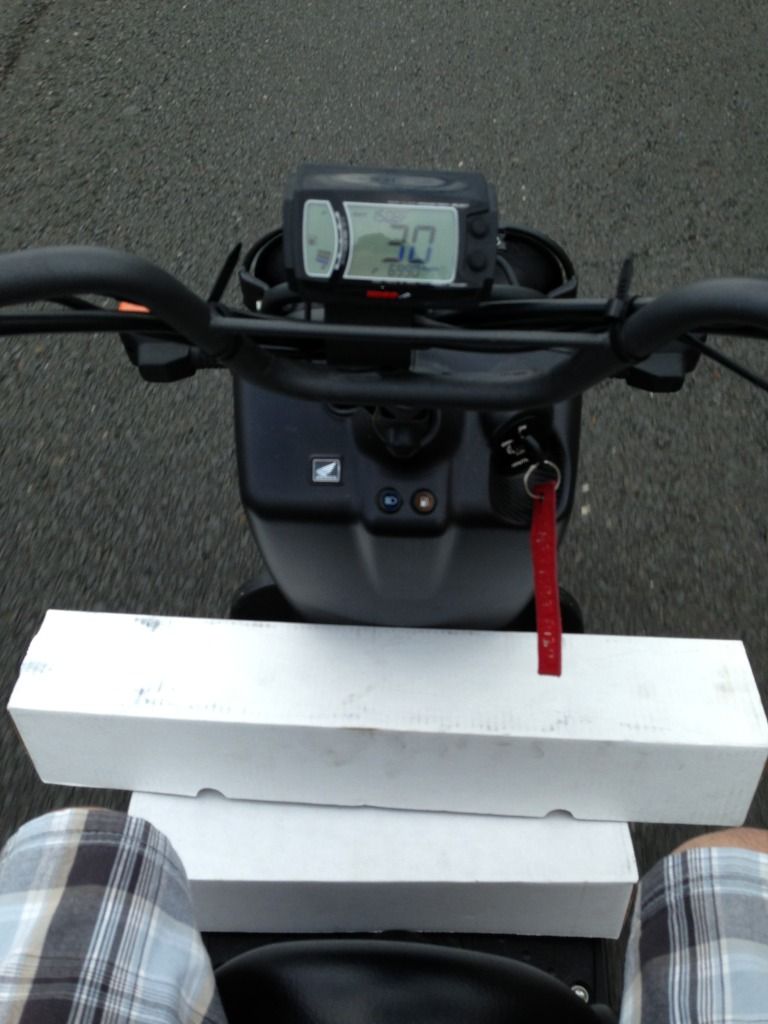
Good thing number 2, my exhaust parts came in. I was on the Ruck when I got the call...I use this thing for everything, 0 ****s are given.
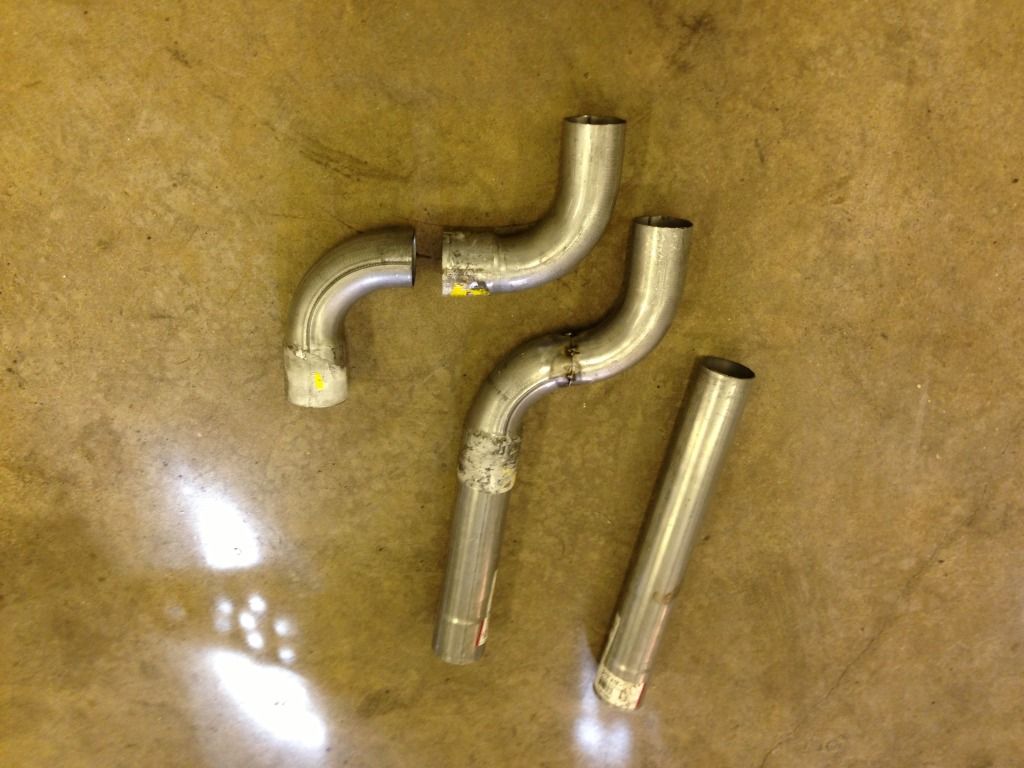
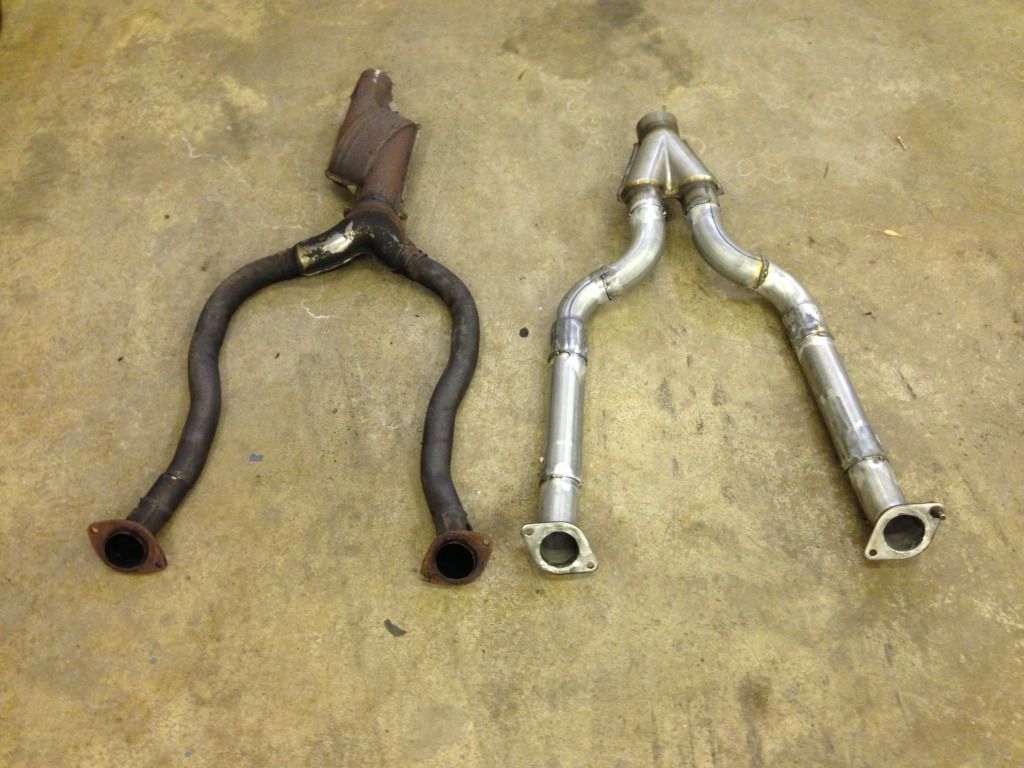
So I spaced on taking a picture of the stuff I bought, but it was; 4x 90*, 2x 45*, 2x 18" straight sections all from Napa in 2.5" diameter to make the y-pipe.
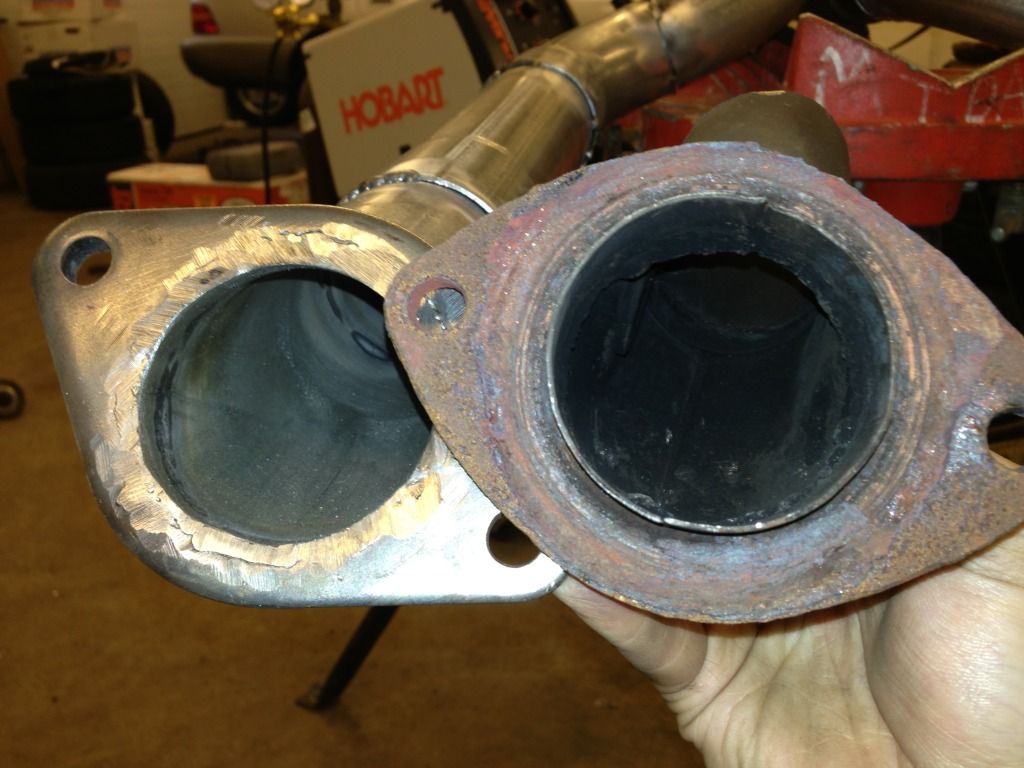
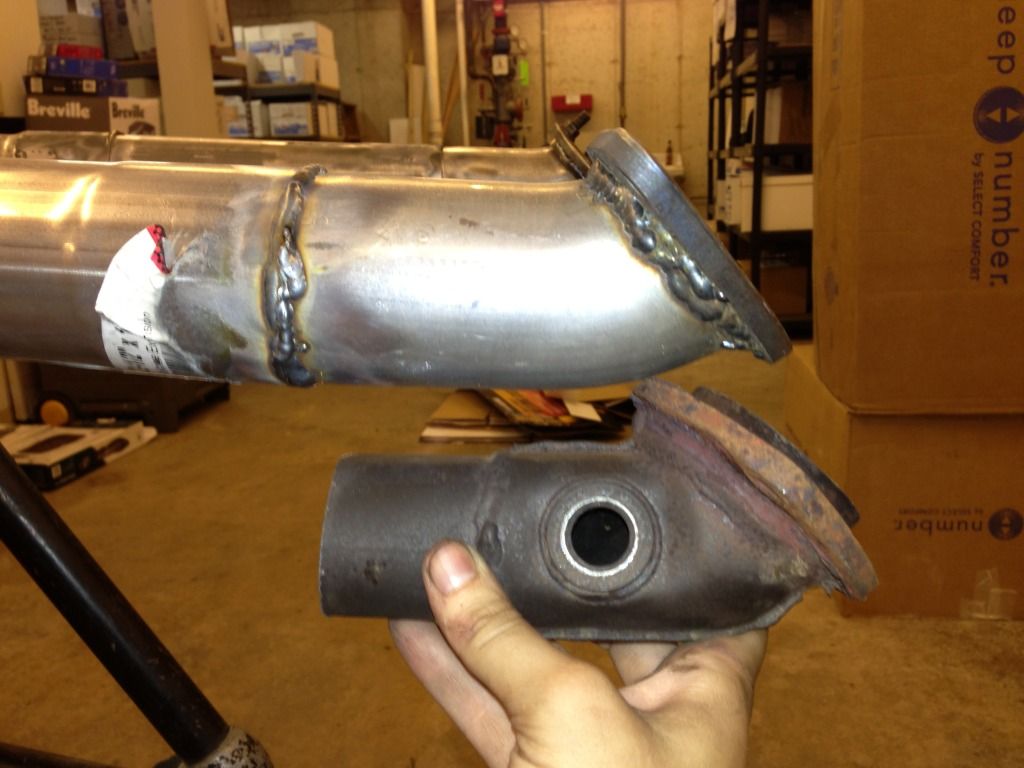
What the Y's looked like when I got them, and how much I had to remove to make them work going into the Magnaflow 2->1 collector.
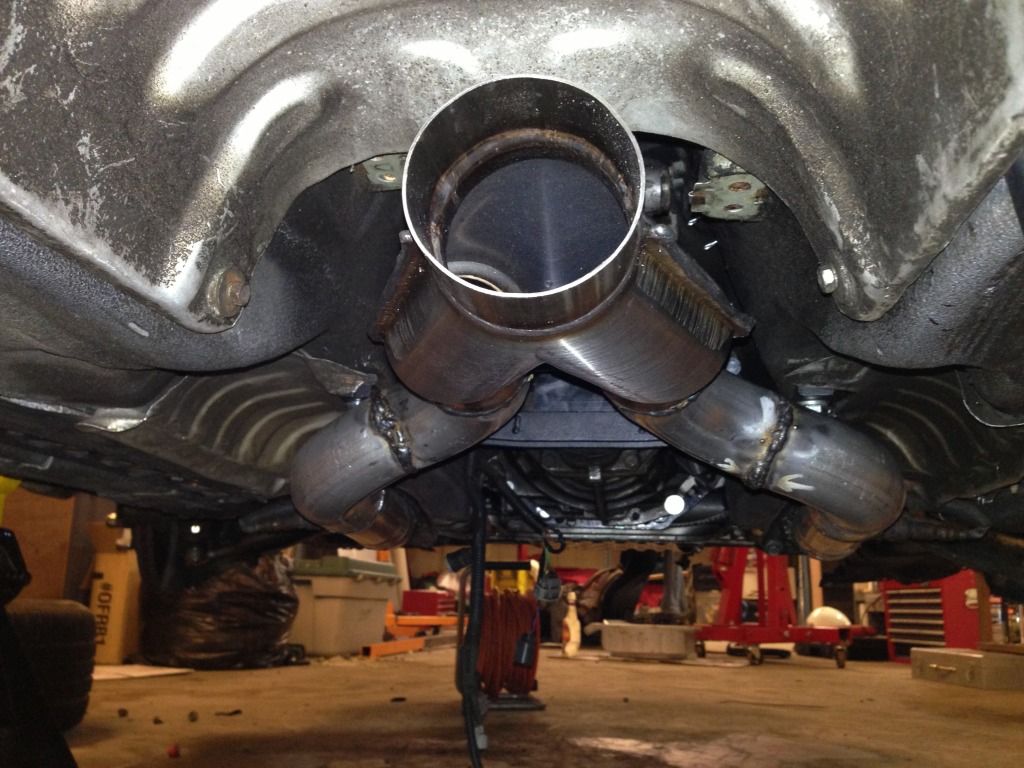
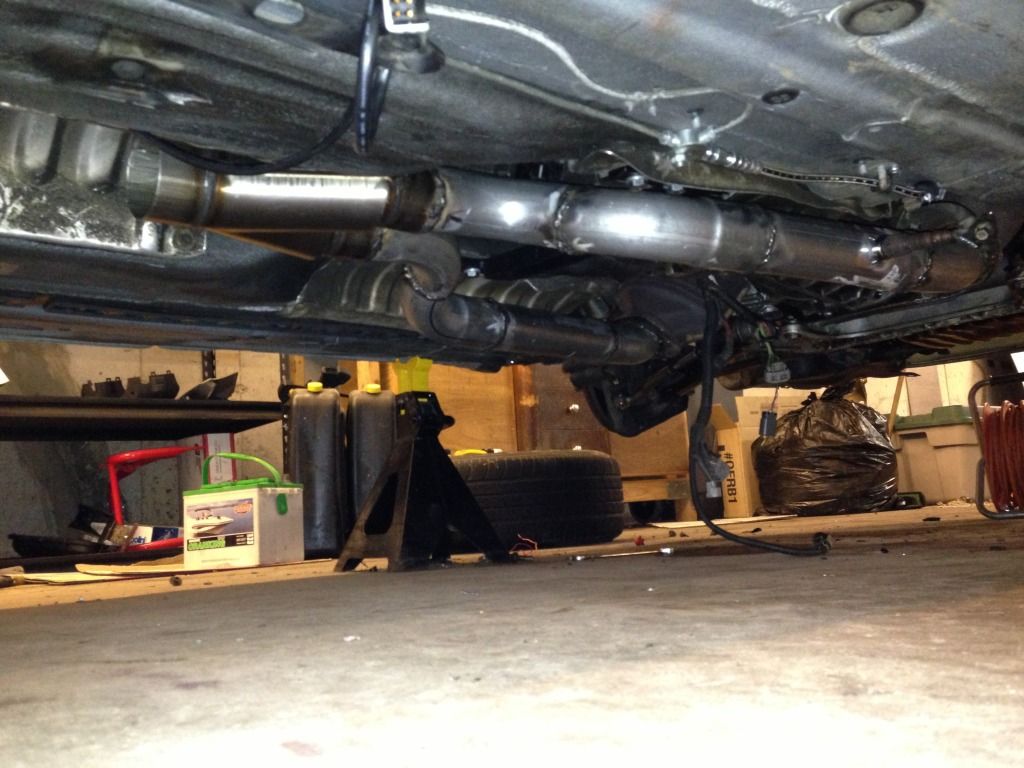
Final product!!! At first I was really proud of myself. First time I've really ever fabricated anything! It felt so awesome.
Unfortunately, my excitement didn't last long. I wire-wheeled all the weld sections and started to weld. The welds came out like ABSOLUTE ****. I don't know why, maybe I was going too slow, I know I had the heat right, maybe the speed was off? It looks like total butt now, but its functional :/.
And that's it for the last 2 weeks folks. Goal is to drive the car to the Wednesday night get together at Dunkin Donuts. Should be able to finish the rest of the 3" section of the exhaust tomorrow, or at the very least buy it and finish it Wednesday. I have a 3" high flow cat coming in, already have the reasonator and muffler. Going to use some band clamps to put the cat on just in case I ever want to run a straight pipe, a install the driveshaft, cut and reweld the shifter and I should be good to go!!! I'll update at the end of the week, hopefully have some videos too!
So I've gotten a lot more done on the car. Its almost road worthy.
Well for starters, I got the reverse lights working with the KA trans! Found a website that sells Nissan harness pigtails for dirt cheap. Ordered one for the speed sensor and the reverse lights. Mike helped out a lot with this, thanks again man!

Next I moved onto tackling the lack of armrest. Now I feel like an idiot that I didn't really take any photos of the process of building it. It happened over the course of a few months, but here is the finished product. Reason I had to make a new one was that my elbow would smash into it if I pulled the hydro, and it was too tall for the shifter. Just leaving the armrest in the open position when I want to use the hydrobrake wasn't a solution for me.

If this at all makes sense, I started by taking apart the armrest. I took the plastic piece that sits on the inside of the armrest, cut the plastic hump off so it was not a flat piece with a big hole in the center. If you lift up the armrest and look at the inside of it, its the big plastic piece. I turned it upside down so what was before facing the inside pocket not faced up. I then took the stock hinge, removed the springs, and installed it on the plastic piece with some small screws that came out of taking everything apart. I took the latch which mounts to the armrest mold itself and put it on the plastic piece. I had to JB weld it on, no real other way of mounting it. I then took some thin 18G sheet metal and cut a piece out to fill the open hole from cutting out the hump in the plastic piece. Bought some foam at Jo-Ann Fabrics, as well as some black headliner material and used some Loctite spray adhesive from Lowe's. I have to say, it turned out a lot more legit than I thought it would have.

Next I decided to finish figuring out the cooling system. In the process of removing the entire fan/rad/ac system i tossed all the OEM sensors and relays for it. Didn't care for the weight, or bulkiness of it. With the MKIV rad in place, and having figured out the upper hose I realized I never even bothered to look at the lower..LOL. Well, I lucked out. The stock one fits almost perfectly.

A buddy of mine was over and mentioned to me a possible solution for the radiator fans. Now, if I haven't made it apparent, my philosophy behind this entire build is that I want a turn key daily drivable car that anyone could get into and just drive. I don't want any special procedure for driving the car, just turn the key put it in gear and go. That meant no interior rad fan switches that I'd have to turn on at xxx temperature. Solution, universal thermal fan switch. Got a 200*F on/185*F off kit after doing a lot of research and seeing what people with 1UZ swaps are doing for temps, and wired it in. Took me forever to figure out where to mount the sensor, and my buddy came through to save the day again! $9.68 on eBay for a "radiator adaptor". I should add that it did say universal fits most models, yet the ONLY 1/8" NPT sensor I found was nowhere near what I needed for the 1UZ. EVERYTHING ELSE IS 3/8" NPT. I figured okay, no big deal I'll just bore it out. Is there anyone who can rationalize why exactly a 3/8" NPT fitting is in no way 3/8's of an inch? Sorry, that does not compute.
Anywho, here is the adapter and the amount of hose I had to remove. Ended up having to take off an extra inch or so to make the hose fit correctly.


LOL/Ragequit moment - So I was an idiot and thought it would be a good idea to reuse the stock spring clamps. I compress one with my channel locks and start lowering it to the bottom hose, it snaps off and ****ing hits me square in the goddamn face. Left a bruise, that's how much freaking tension they have. FUUUUUUUUUUUUUUUUUUUUUUUUUUUUU. Pure rage moment.
So even after eating a face full of clamp, I continued to use it. Filled the rad and it started to leak. Tried to slip it off and put a hose clamp on and ended up pouring coolant ALL OVER ME. Down my arm into my shirt, over the creeper, over the floor, in my hair, on my glasses. Theres days I want to just unload my 1911 into the side of this ****ing car. This was one of those days.
Moving on, I realized I still had no coolant overflow. You can think this is ghetto, or trashy. Frankly, I don't care. I'm way over budget on this car, its a purpose built vehicle, and hey...it works! Was at Lowe's buying some bolts, and saw my buddy who works there. He was drinking a Rockstar...yup. Immediately walked over to the plumbing section. $3.52 for 2 plastic fittings, and made him pound the rest of the can and give it to me haha.

Tossed that on and all was well. While all this was getting done, my intake parts came in! I love eBay. Literally, everything you'd ever need made by some child laborer in China and sold for next to nothing. $55 total cost, that 45" 3.25" elbow was NOT cheap either. It came in ugly raw aluminum finish too, Truck Bedliner fixes everything.

My hoodrich coolant overflow.

So engine bay is mostly done for now. I should add, I did fire up the car. First try, the thing fired up with no hesitation. It did stall out, and gave me some issues, but I quickly tracked that down to vacuum leaks, and now its just like stock, except 7000% louder.
So after having started the car, I realized it got insanely hot in the trans tunnel. In order to keep the heat out, and reduce the noise I need to close up the original shifter cutout. That sheet of sheet metal my buddy gave me just keeps on giving.

Put a beat of silicone underneath too so it had a nice seal. Went back the next day and put some self tapping screws through it.

Then 2 really good things happened, 1st was this bad boy came in!

LOL moment/Ragequit #2 - Driveshaft Shop FORGOT to send the Toyota 3 bolt -> 1350 diff adapter. AWESOME. It shipped out immediately, should be here today at some point.
Good thing number 2, my exhaust parts came in. I was on the Ruck when I got the call...I use this thing for everything, 0 ****s are given.

So I spaced on taking a picture of the stuff I bought, but it was; 4x 90*, 2x 45*, 2x 18" straight sections all from Napa in 2.5" diameter to make the y-pipe.
What the Y's looked like when I got them, and how much I had to remove to make them work going into the Magnaflow 2->1 collector.

Final product!!! At first I was really proud of myself. First time I've really ever fabricated anything! It felt so awesome.


Unfortunately, my excitement didn't last long. I wire-wheeled all the weld sections and started to weld. The welds came out like ABSOLUTE ****. I don't know why, maybe I was going too slow, I know I had the heat right, maybe the speed was off? It looks like total butt now, but its functional :/.


And that's it for the last 2 weeks folks. Goal is to drive the car to the Wednesday night get together at Dunkin Donuts. Should be able to finish the rest of the 3" section of the exhaust tomorrow, or at the very least buy it and finish it Wednesday. I have a 3" high flow cat coming in, already have the reasonator and muffler. Going to use some band clamps to put the cat on just in case I ever want to run a straight pipe, a install the driveshaft, cut and reweld the shifter and I should be good to go!!! I'll update at the end of the week, hopefully have some videos too!
