Build Threads Details on Club Lexus SC owner vehicles

My ´97 SC400

Thread Tools
 
Search this Thread
 
Old 07-14-14, 03:14 AM
  #301  
Boergy
Advanced
Thread Starter
iTrader: (2)
 
Boergy's Avatar
 
Join Date: Jan 2009
Location: Austria
Posts: 700
Received 111 Likes on 60 Posts
Default

Hy!

In germany, is no problem to go lower, the have no minimum. the experts in Austria have no eggs to say, yes, he can drive with 6cm space... no no.. the rule say minium 11cm or with maxium axle load 8cm. .we have also no loud exhausts, only 1dB louder as in the papers. my SC have 81dB official
Old 08-05-14, 02:30 AM
  #302  
JenniColky
Driver School Candidate
 
JenniColky's Avatar
 
Join Date: Aug 2014
Location: Czech republic
Posts: 2
Likes: 0
Received 0 Likes on 0 Posts
Default

It´s not a problem, I am from Czech Republic and i so many problems with stock TTSupra supension, road here are so bad
Old 08-05-14, 12:19 PM
  #303  
Boergy
Advanced
Thread Starter
iTrader: (2)
 
Boergy's Avatar
 
Join Date: Jan 2009
Location: Austria
Posts: 700
Received 111 Likes on 60 Posts
Default

Hi!

My car is now legal! but it was only for 1 hour Silencer from the midpipe removed and Vertex Clear Side Marker installed

The next step is my MT swap

build the clutch pedal assembly


done!

next step -> install!


enough place to work


insulation cutted to fit better the assembly


outside


drill the holes, start!


bigger holes

Old 08-05-14, 12:26 PM
  #304  
Boergy
Advanced
Thread Starter
iTrader: (2)
 
Boergy's Avatar
 
Join Date: Jan 2009
Location: Austria
Posts: 700
Received 111 Likes on 60 Posts
Default

10mm holes


engine room side


for the big hole


easy with a big ratchet


10mm hole for the lowest screw of the assembly


in the fender

Old 08-05-14, 12:36 PM
  #305  
Boergy
Advanced
Thread Starter
iTrader: (2)
 
Boergy's Avatar
 
Join Date: Jan 2009
Location: Austria
Posts: 700
Received 111 Likes on 60 Posts
Default

brake pedal swap


installed!


is not easy, but ok, i had needed around 3 hours for all.


only the steering wheel ecu needs a new place under the dashboard. the original bracket have no space more with the clutch assembly.


screw lower position


screw upper position (under the dashboard)


finish!


Old 08-05-14, 12:38 PM
  #306  
Boergy
Advanced
Thread Starter
iTrader: (2)
 
Boergy's Avatar
 
Join Date: Jan 2009
Location: Austria
Posts: 700
Received 111 Likes on 60 Posts
Default

next step - > transmission

3AN adapter installed on the release bearing, and the 3AN lines. holes in the bellhouse closed with sealant


next days more

greets

Tom
Old 08-05-14, 12:54 PM
  #307  
Boergy
Advanced
Thread Starter
iTrader: (2)
 
Boergy's Avatar
 
Join Date: Jan 2009
Location: Austria
Posts: 700
Received 111 Likes on 60 Posts
Default

next is install all this with a Spec stage 3 clutch and a NST Short Shifter. now, i have a 4.08 diff with a TT LSD installed, but i change this to a 3,76 in a TT housing with a TRD 2-Way LSD all parts here, i waiting of the correct spacer for the pinion gear, is this ok, i will calibrate the LSD correct.
Old 08-11-14, 09:44 PM
  #308  
JenniColky
Driver School Candidate
 
JenniColky's Avatar
 
Join Date: Aug 2014
Location: Czech republic
Posts: 2
Likes: 0
Received 0 Likes on 0 Posts
Default

Nice progress
Old 09-05-14, 02:25 PM
  #309  
Boergy
Advanced
Thread Starter
iTrader: (2)
 
Boergy's Avatar
 
Join Date: Jan 2009
Location: Austria
Posts: 700
Received 111 Likes on 60 Posts
Default

HY!

update

Time to start the swap on my car

Removed exhaust, driveshaft, transmission,...


bellhouse srews remove


shifter and center console removed


mh... no flange for the MT front driveshaft...


Daily with MT


flex plate and wires, don´t forget the kickdown cable to remove from the throttle body!


AT vs MT tranny


all cables up to the engine room, only the for the speed sensor is here


Flywheel from Bolt Perfomance installed, 9kg steel, no Spacer from the flexplate!!


pilot bearing installed, around 15mm put in the crankshaft (1cm on backward from the bearing, 8mm bearing itself)


centering pin and Spec Stage 3 Clutch


Last edited by Boergy; 09-05-14 at 02:34 PM.
Old 09-05-14, 02:33 PM
  #310  
Boergy
Advanced
Thread Starter
iTrader: (2)
 
Boergy's Avatar
 
Join Date: Jan 2009
Location: Austria
Posts: 700
Received 111 Likes on 60 Posts
Default

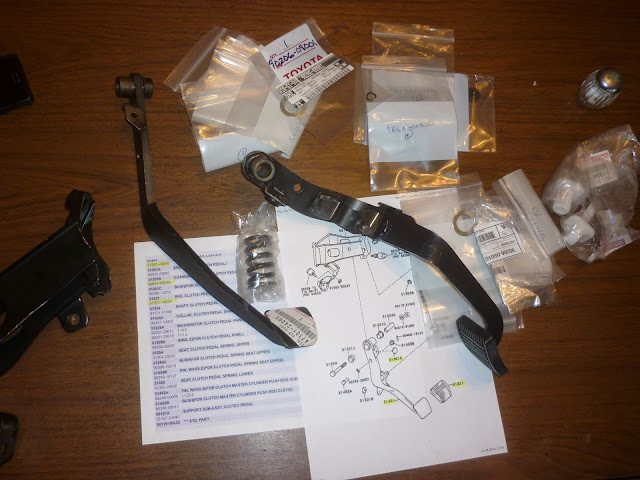
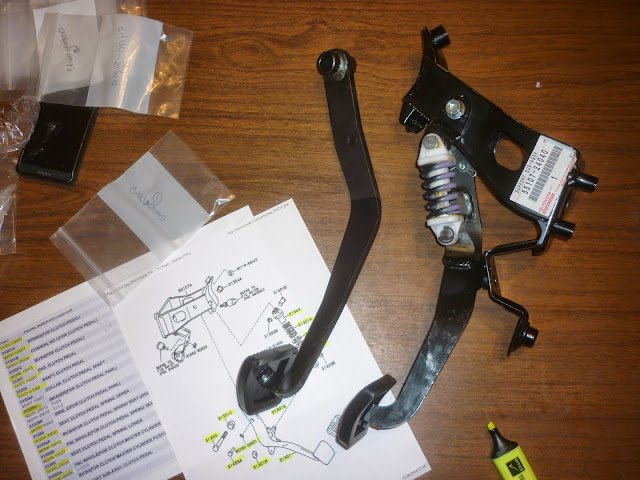
here was the first failure from my car, the pressure plate was over 1 year in my garage, like new, but little bit rusty on the bolts for the centering plates, ands my car shakes after starting, tranny removed, failure found, rusty bolts, pressure plate not centerd


FAIL:


one side


opposite


i used rust dissolver and a rubber hammer to fix the problem

so.. next "normal" step

tranny installed, clutch lines and wires in the engine room


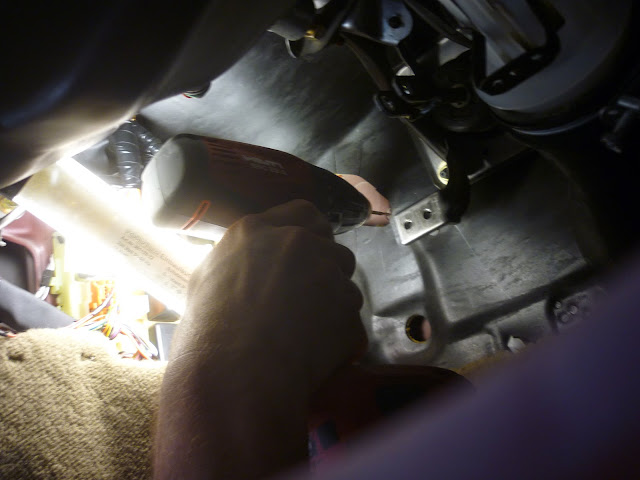
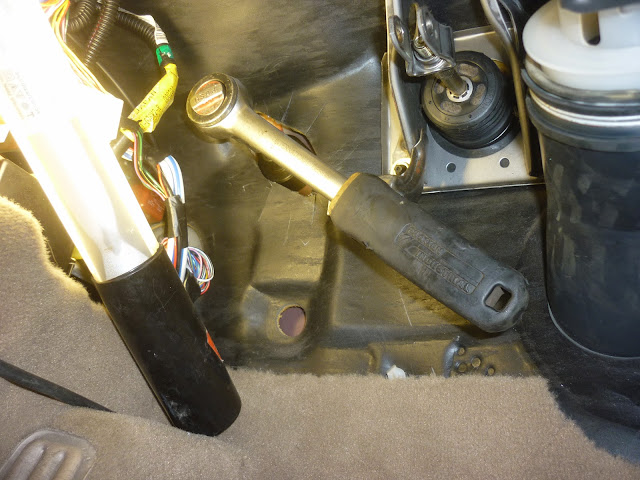
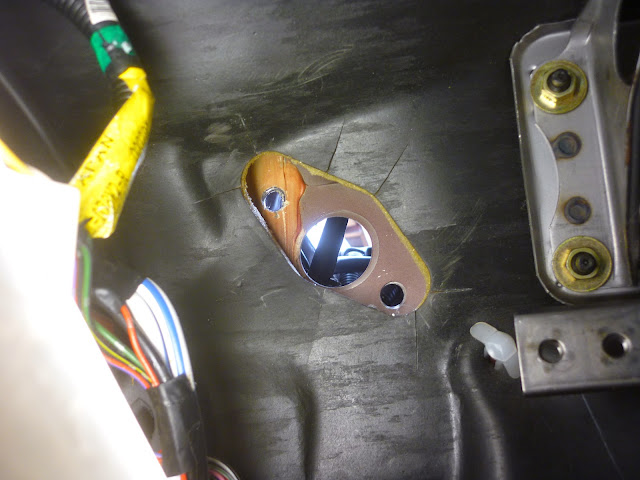
hello tripod! but the tripod had contact with the tunnel... ok.. cut the metal and make a own tunnel cover, the original metal is not more available


MY Friend Robert makes me this stainless steel plate


a look from the bottom


Last edited by Boergy; 09-05-14 at 02:52 PM.
The following users liked this post:
jadu (07-17-17)
Old 09-05-14, 02:57 PM
  #311  
Boergy
Advanced
Thread Starter
iTrader: (2)
 
Boergy's Avatar
 
Join Date: Jan 2009
Location: Austria
Posts: 700
Received 111 Likes on 60 Posts
Default

tunnel is ready to use

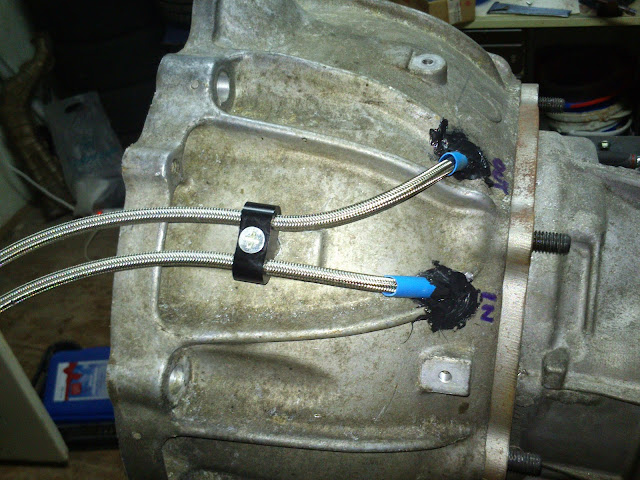
next step, modify the drive shaft, my first idea was, to use the oem SC400 and weld on the front part from the MT, is possible, but not good, the front part from the SC400 is sliding, not good, driveable, but not good. i orderd a used front part from a supra and from UKa soarer rear part.


clutch line bleeding, its not difficult, with a good vacuum pump is this in 5 minutes done


driveshaft installed for first testdrive


its ok for a test, but i changed to the right combination of drivehsafts.

Shifter and boot installed


original shifter from W58 from supra ( the tripod is a 1/2" longer as this from the SC300) the ball sits low in the gear geater, and on 2-4-R is very close to the frame


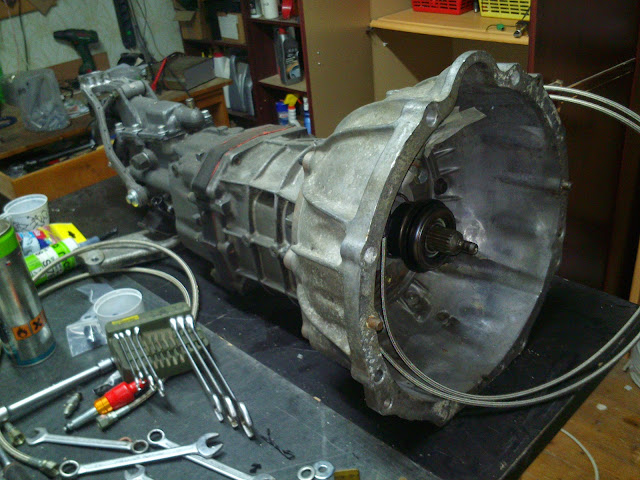
Supra TT Diff (3.77) with TRD 2-Way LSD ready for install


Diff is installed, next step, shortshifter from NST modification with the oem shifter to have the shifter in the center of the console, around 2cm higher for the best position to shift.


i changed back from the alloy bushings in the tripod to the original rubber bearings, i think, the tranny makes for me to much sound, but my clutch bearing makes also a noise, its maybe not perfect adjusted, but the clutch works fine!


Supra driveshaft arrived, but rear part to short

Old 09-05-14, 03:16 PM
  #312  
Boergy
Advanced
Thread Starter
iTrader: (2)
 
Boergy's Avatar
 
Join Date: Jan 2009
Location: Austria
Posts: 700
Received 111 Likes on 60 Posts
Default

yeah! right position of the shifter!


fixing the shift boot


bad picture, i used 5-7mm thick piece from am fuel hose (10mm) cutted this and used as centerpiece between shifter and boot.


works perfect!


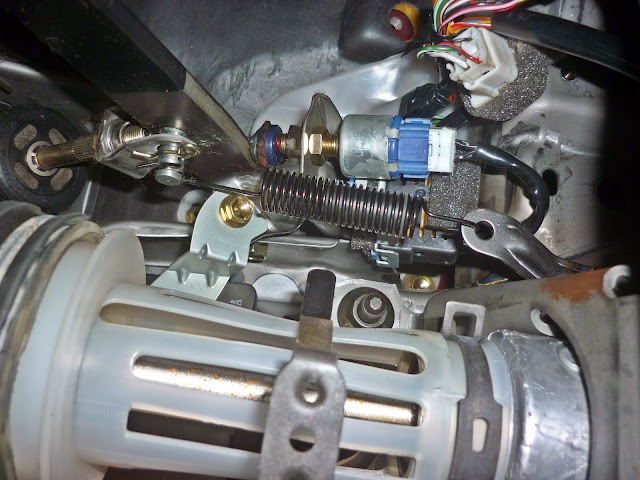
on the ECU, i cutted the cable for R, to connect this to the yellow cable from the shifter switch with D (for the cruise control) and P for starting. This is the only cable to cut on the ECU, its a blue one.


permanent Sport Modus (bulb in the cluster removed)


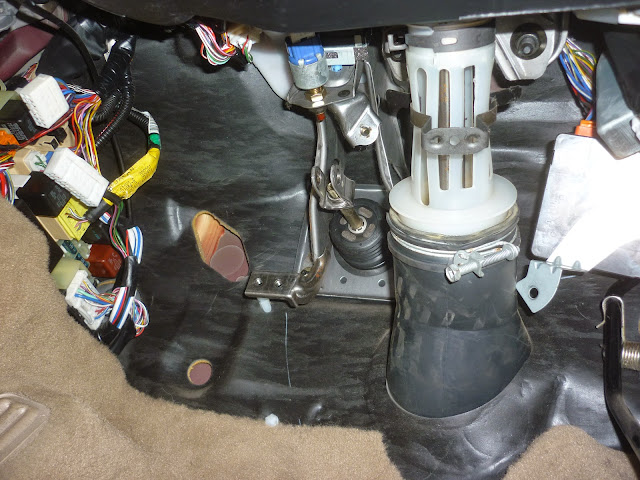
wires from the shifter switch connected, the 2 seperate red lines, are the wires to the reverse light switch on the tranny


yellow box connected on the orange connector from the gauge cluster, all cables here (plus, minus, signal) to install it easy


little chaos


position for the yellow box


okey.. all driveshafts arrived! ready for puzzle


The flange on the TT Diff was the big one for the Supra TT, but i need the small one for the SC/Supra NA) change on the car, and the flange tightened with 140Nm (toyota manual) ok!


installed, but in the winter, i will rebalance the complete shaft, i have minimal low frequency vibration on over 140km/h (you can here it later in my video)


bellhouse with maintenance hole for the clutch bearing to degrease this
Old 09-05-14, 03:18 PM
  #313  
Boergy
Advanced
Thread Starter
iTrader: (2)
 
Boergy's Avatar
 
Join Date: Jan 2009
Location: Austria
Posts: 700
Received 111 Likes on 60 Posts
Default


hole closed with rubber


today was my first longer testdrive with the car, the speedo was 8km/h to slow (used GPS to check), i chose 10% on the yellow box and its now ok!

first video


next step is to install the resistors to simulate the transmission, to have no CEL more

greets

Tom
The following users liked this post:
dadswrld (08-31-17)
Old 09-05-14, 09:28 PM
  #314  
scENFORCER
Lexus Champion
 
scENFORCER's Avatar
 
Join Date: Oct 2006
Location: BC
Posts: 3,114
Likes: 0
Received 2 Likes on 2 Posts
Default

Wow what a fantastic writeup. Great work! WIll definitely be referring to this when I dive into this on my '99..

..by the way, how does the car feel? Is it noticably faster?

Last edited by scENFORCER; 09-05-14 at 09:31 PM.
Old 09-05-14, 11:48 PM
  #315  
Boergy
Advanced
Thread Starter
iTrader: (2)
 
Boergy's Avatar
 
Join Date: Jan 2009
Location: Austria
Posts: 700
Received 111 Likes on 60 Posts
Default

hy!

thanks

the car feels now much more sporty as before, a complete new character, no cruise car more, you can cruise, if you want, no problem, without the rubber band feeling from the AT. The engine have a new sound with the MT, you feel each millimeter from the gas pedal on power, no waiting, the best upgrade i have done. 2-3 little things still to do ( drive shaft balance, resistor to simulate the AT, clutch pedal adjustment, clutch bearing sound) and its finished.

yes, the car is faster, you can see on the video, now 5 gears, before 3+OD and a torque converter, big difference, only, i have to learn to use the clutch pedal near 3 years my both cars (SC and Daily) are AT´s

greets

Tom

Last edited by Boergy; 09-05-14 at 11:51 PM.


Quick Reply: My ´97 SC400


All times are GMT -7. The time now is 02:16 AM.