Amazing results with Turtle wax polishing rubbing compound
 01-12-15, 08:47 PM
#1
This is sort of bittersweet because ive been trying to learn about detailing, and ive been flooded with different answers, different fancy products and confusing advice.
They told me I cant get a good result from anything other then a powerful machine buffing.
They told me about all sorts of fancy expensive scientific products.
In the end I gave up trying to learn and tried some old fashioned turtle wax polishing compound applied by HAND.
After 1 initial treatment and 1 repeated treatment I got rid of 80-90% of all the surface scratches on my bumper, as well as it leaving a mirror like high gloss finish.
I decided I will treat the entire car with this product, and I will finish off with a simple spray wax by mothers or meguirs.
If basic turtle wax can give me this good of a result, there has to be an even better hand polishing system out there.
Does anyone know of one?
Thanks
Last edited by 1WILLY1; 01-12-15 at 09:00 PM.
 01-13-15, 08:11 AM
#2

That is very harsh stuff to use regularly. in fact, I have never used a polishing compound on any car I have ever owned except for specific spot use where something got into the paint.
For most things like overspray or stains or bird droppings you can use any clay product. They all work.
I would not use this product on my car, but to each his own. Almost all the mainstream companies have different products. Most of our modern cars can get by with any product and the most important part is to use it, but a compound is generally used to remove the top layer of paint, and why would you want to do that and lower the life expectancy of the paint?
01-13-15, 08:48 AM
#3
That is very harsh stuff to use regularly. in fact, I have never used a polishing compound on any car I have ever owned except for specific spot use where something got into the paint.
For most things like overspray or stains or bird droppings you can use any clay product. They all work.
I would not use this product on my car, but to each his own. Almost all the mainstream companies have different products. Most of our modern cars can get by with any product and the most important part is to use it, but a compound is generally used to remove the top layer of paint, and why would you want to do that and lower the life expectancy of the paint?
For most things like overspray or stains or bird droppings you can use any clay product. They all work.
I would not use this product on my car, but to each his own. Almost all the mainstream companies have different products. Most of our modern cars can get by with any product and the most important part is to use it, but a compound is generally used to remove the top layer of paint, and why would you want to do that and lower the life expectancy of the paint?
When a car has scratches in the clear coat the only way to properly remove them is by buffing them out.
Im not saying this is a miracle product or anything like that, im just saying im a little surprised to get such good results from such a basic retail product.
It didn't fill the scratches or mask them, it literally removed them, and it wasn't very hard at all.
I forgot to mention I didn't use the rubbing compound (heavy duty cleaner) I only used the polish compound (light cleaner)
Does anyone know of any other good quality hand applied compounds? Surely there must be some
01-13-15, 12:49 PM
#4

Machine-applied polishes have the advantage of speed (of the moving pad) and heat to help remove defects. They can do as much with mild abrasives as you are doing with a much more aggressive abrasive. You may think your paint has a "mirror like shine", but if I saw it, I'd probably think, "That paint is JACKED!"
Consider yourself lucky. Once you can spot these defects, you'll either spend a lot more time, money, and effort into maintaining your car's appearance, or let it go, and be depressed about all of the imperfections.
Consider yourself lucky. Once you can spot these defects, you'll either spend a lot more time, money, and effort into maintaining your car's appearance, or let it go, and be depressed about all of the imperfections.
01-13-15, 04:00 PM
#5
Glad you found something that works for you.
Do you have anymore photos? Perhaps demonstrating the abilities of the products you're raving about.
When discussing paint correction, direct lighting (note: not overhead light bulbs) is usually preferred in showing off the paint before and after because harsh lighting really shows the condition of the surface while ambient lighting does not.
Here's a great example... this Porsche 997 was a vehicle I worked on fairly recently.
This first picture was snapped with my cell phone right after the vehicle was dropped off. This was before any work had been done to the vehicle, yet the paint still looks nice and shiny.

Upon further inspection with proper lighting, it is easy to see the paint was actually in poor condition.

The surface was refined through a 2 step correction process to eliminate the vast majority of surface defects.
50/50 showing improvement after the compounding step.

Before correction

After careful correction with my 3" machine.

The vehicle was then coated with a durable layer of protection, and now the car looks like it should.


I'd love to see some more pics of what you've achieved with your car! Corvettes have some of the most difficult paint to work with... especially black! Since the panels are composite, heat is a major concern as it does not dissipate as quickly as it would on a metal panel. They sure do look great when they're properly polished though
-Zach
Do you have anymore photos? Perhaps demonstrating the abilities of the products you're raving about.
When discussing paint correction, direct lighting (note: not overhead light bulbs) is usually preferred in showing off the paint before and after because harsh lighting really shows the condition of the surface while ambient lighting does not.
Here's a great example... this Porsche 997 was a vehicle I worked on fairly recently.
This first picture was snapped with my cell phone right after the vehicle was dropped off. This was before any work had been done to the vehicle, yet the paint still looks nice and shiny.
Upon further inspection with proper lighting, it is easy to see the paint was actually in poor condition.
The surface was refined through a 2 step correction process to eliminate the vast majority of surface defects.
50/50 showing improvement after the compounding step.
Before correction
After careful correction with my 3" machine.
The vehicle was then coated with a durable layer of protection, and now the car looks like it should.
I'd love to see some more pics of what you've achieved with your car! Corvettes have some of the most difficult paint to work with... especially black! Since the panels are composite, heat is a major concern as it does not dissipate as quickly as it would on a metal panel. They sure do look great when they're properly polished though
-Zach
Last edited by zmcgovern4; 01-13-15 at 04:04 PM.
01-14-15, 06:01 AM
#6
Driver
Join Date: Dec 2014
Location: FL
Posts: 107
Likes: 0
Received 0 Likes
on
0 Posts
Glad you found something that works for you.
Do you have anymore photos? Perhaps demonstrating the abilities of the products you're raving about.
When discussing paint correction, direct lighting (note: not overhead light bulbs) is usually preferred in showing off the paint before and after because harsh lighting really shows the condition of the surface while ambient lighting does not.
Here's a great example... this Porsche 997 was a vehicle I worked on fairly recently.
This first picture was snapped with my cell phone right after the vehicle was dropped off. This was before any work had been done to the vehicle, yet the paint still looks nice and shiny.
(removed Image)
Upon further inspection with proper lighting, it is easy to see the paint was actually in poor condition.
(removed Image)
The surface was refined through a 2 step correction process to eliminate the vast majority of surface defects.
50/50 showing improvement after the compounding step.
(removed Image)
Before correction
(removed Image)
After careful correction with my 3" machine.
(removed Image)
The vehicle was then coated with a durable layer of protection, and now the car looks like it should.
(removed Image)
(removed Image)
I'd love to see some more pics of what you've achieved with your car! Corvettes have some of the most difficult paint to work with... especially black! Since the panels are composite, heat is a major concern as it does not dissipate as quickly as it would on a metal panel. They sure do look great when they're properly polished though
-Zach
Zach can you elaborate on your 2 step process and the materials used. You can PM me if you like. Thanks
Last edited by zmcgovern4; 01-19-15 at 05:50 AM.
01-14-15, 08:08 AM
#7

The full write up of this vehicle & many more, including breakdown of the process and products used, can be found on my website... CLICK HERE to read more about the Porsche.
Trending Topics


 01-18-15, 07:08 PM
#10
3M products are very common in body shops, but not used often in the detailing world. The products are a bit out dated in my opinion. Companies like Meguiar's and Menzeran constantly revise and improve their formulas to progress the detailing world. I'd highly recommend their polishing products.
Let me know if you've got any questions.
-Zach
Let me know if you've got any questions.
-Zach
01-19-15, 02:11 AM
#11

I've used the older versions of that Turtle Wax Rubbing Compound and Polishing Compound. The rubbing compound was extremely harsh the first time I tried it. I mainly just use it to polish headlights. The newer Turtle Wax compounds seem to give better results.
I see you have a Corvette now. Do you still have the LS and SC?
I see you have a Corvette now. Do you still have the LS and SC?
01-19-15, 06:52 AM
#12
Driver School Candidate
1WILLY1 - I would err on the side of caution using a coarse abrasive compound.
Here a a couple of detailing industry quotes
"Always use the least aggressive method first."
"You can not obtain the results by hand that can be achieved with a machine."
Here is one of my recent results..
Before
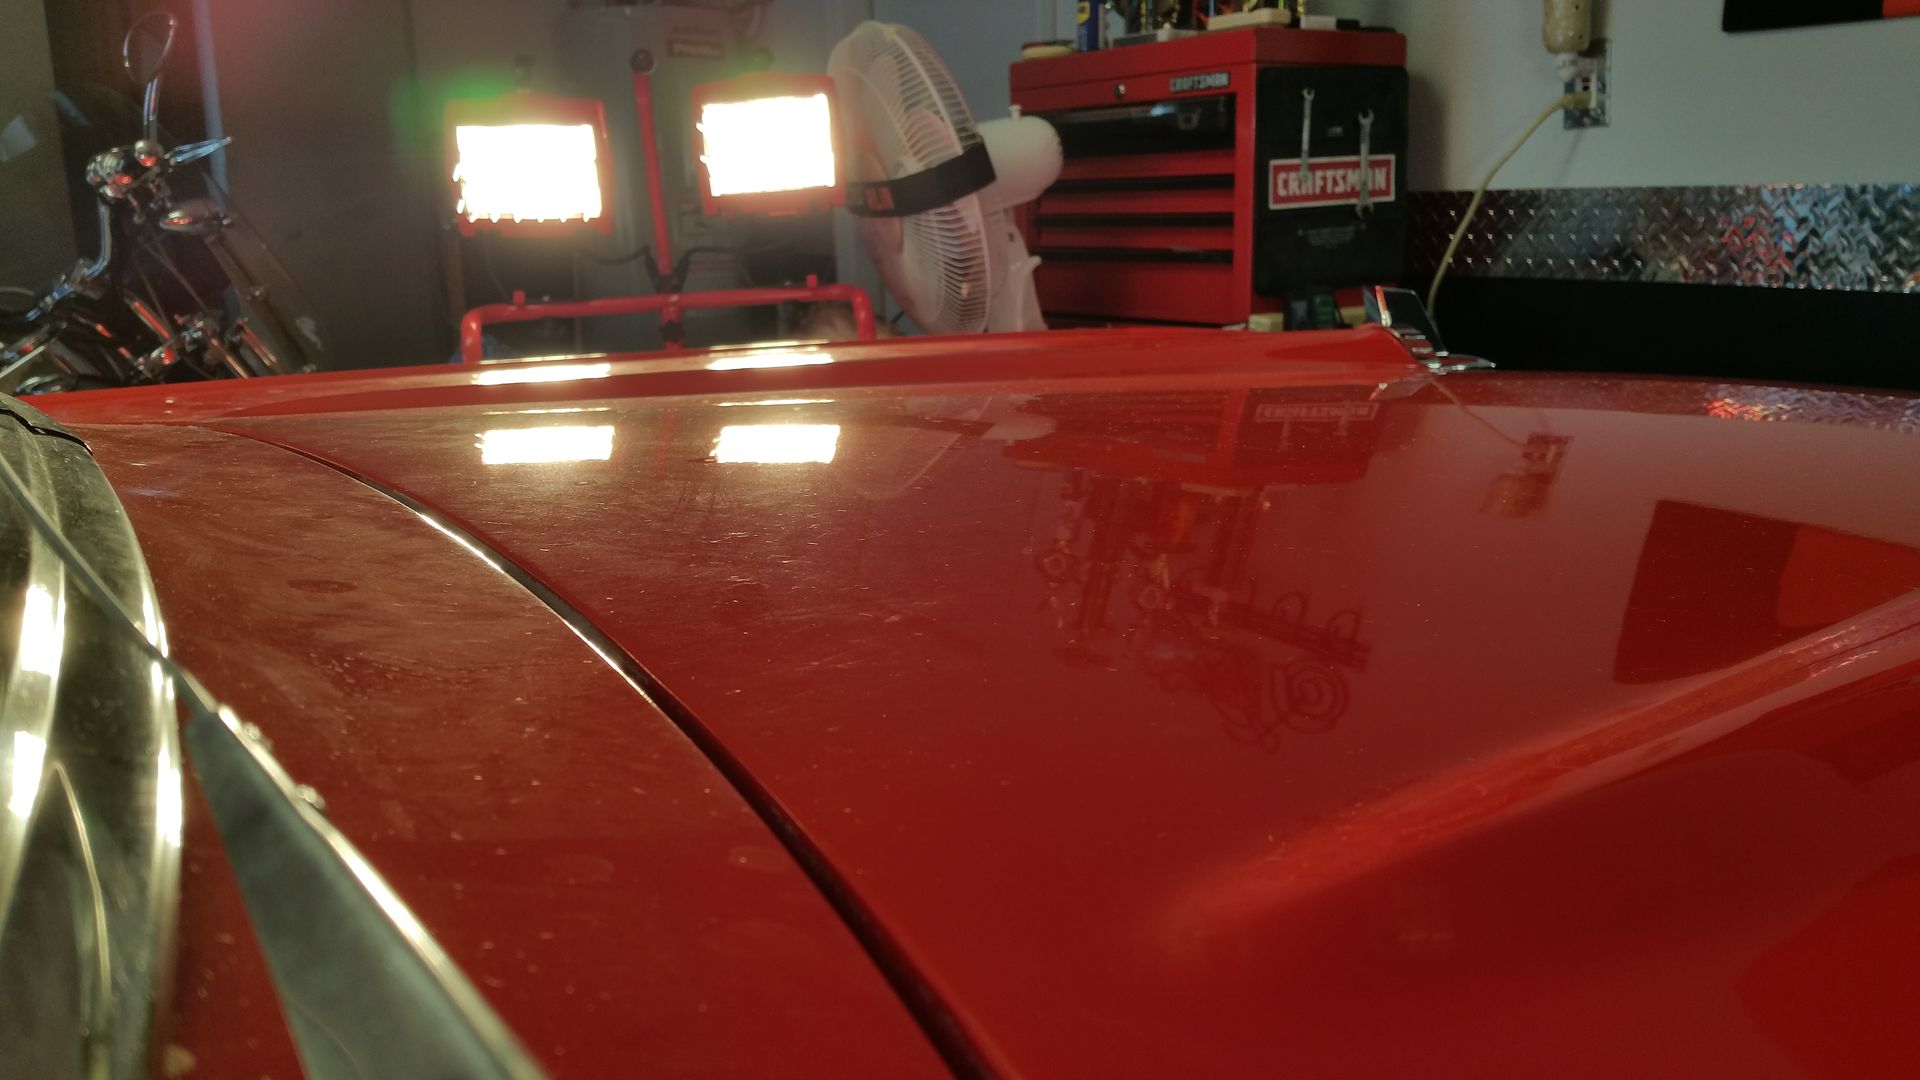
Note...No Turtle Wax products were used.
After
A Note on lighting...Direct overhead sun is my best fried and biggest enemy.
Here a a couple of detailing industry quotes
"Always use the least aggressive method first."
"You can not obtain the results by hand that can be achieved with a machine."
Here is one of my recent results..
Before
Note...No Turtle Wax products were used.
After
A Note on lighting...Direct overhead sun is my best fried and biggest enemy.
01-19-15, 08:46 AM
#13
Driver
Join Date: Dec 2014
Location: FL
Posts: 107
Likes: 0
Received 0 Likes
on
0 Posts
1WILLY1 - I would err on the side of caution using a coarse abrasive compound.
Here a a couple of detailing industry quotes
"Always use the least aggressive method first."
"You can not obtain the results by hand that can be achieved with a machine."
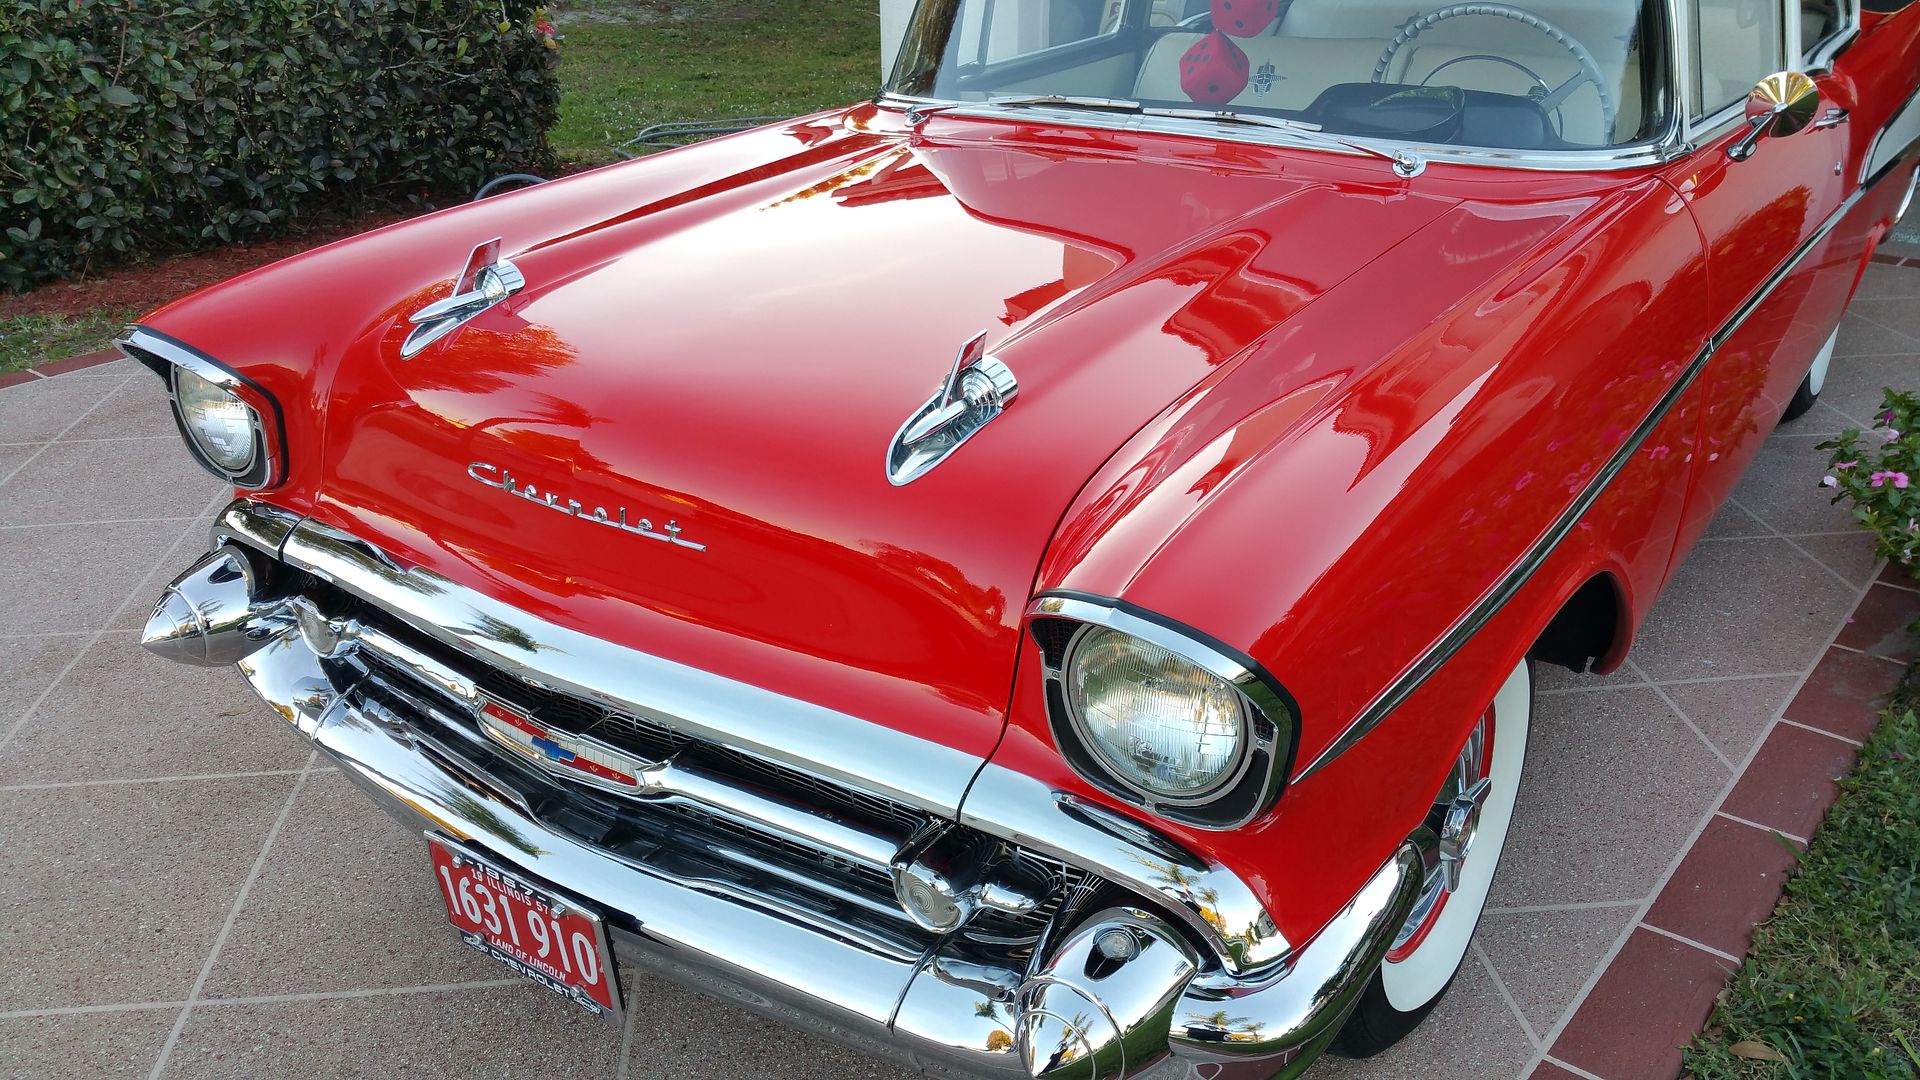
Here is one of my recent results..
Before
Note...No Turtle Wax products were used.
After
A Note on lighting...Direct overhead sun is my best fried and biggest enemy.
Here a a couple of detailing industry quotes
"Always use the least aggressive method first."
"You can not obtain the results by hand that can be achieved with a machine."
Here is one of my recent results..
Before
Note...No Turtle Wax products were used.
After
A Note on lighting...Direct overhead sun is my best fried and biggest enemy.
01-19-15, 08:59 AM
#14
Driver School Candidate
Thank You.
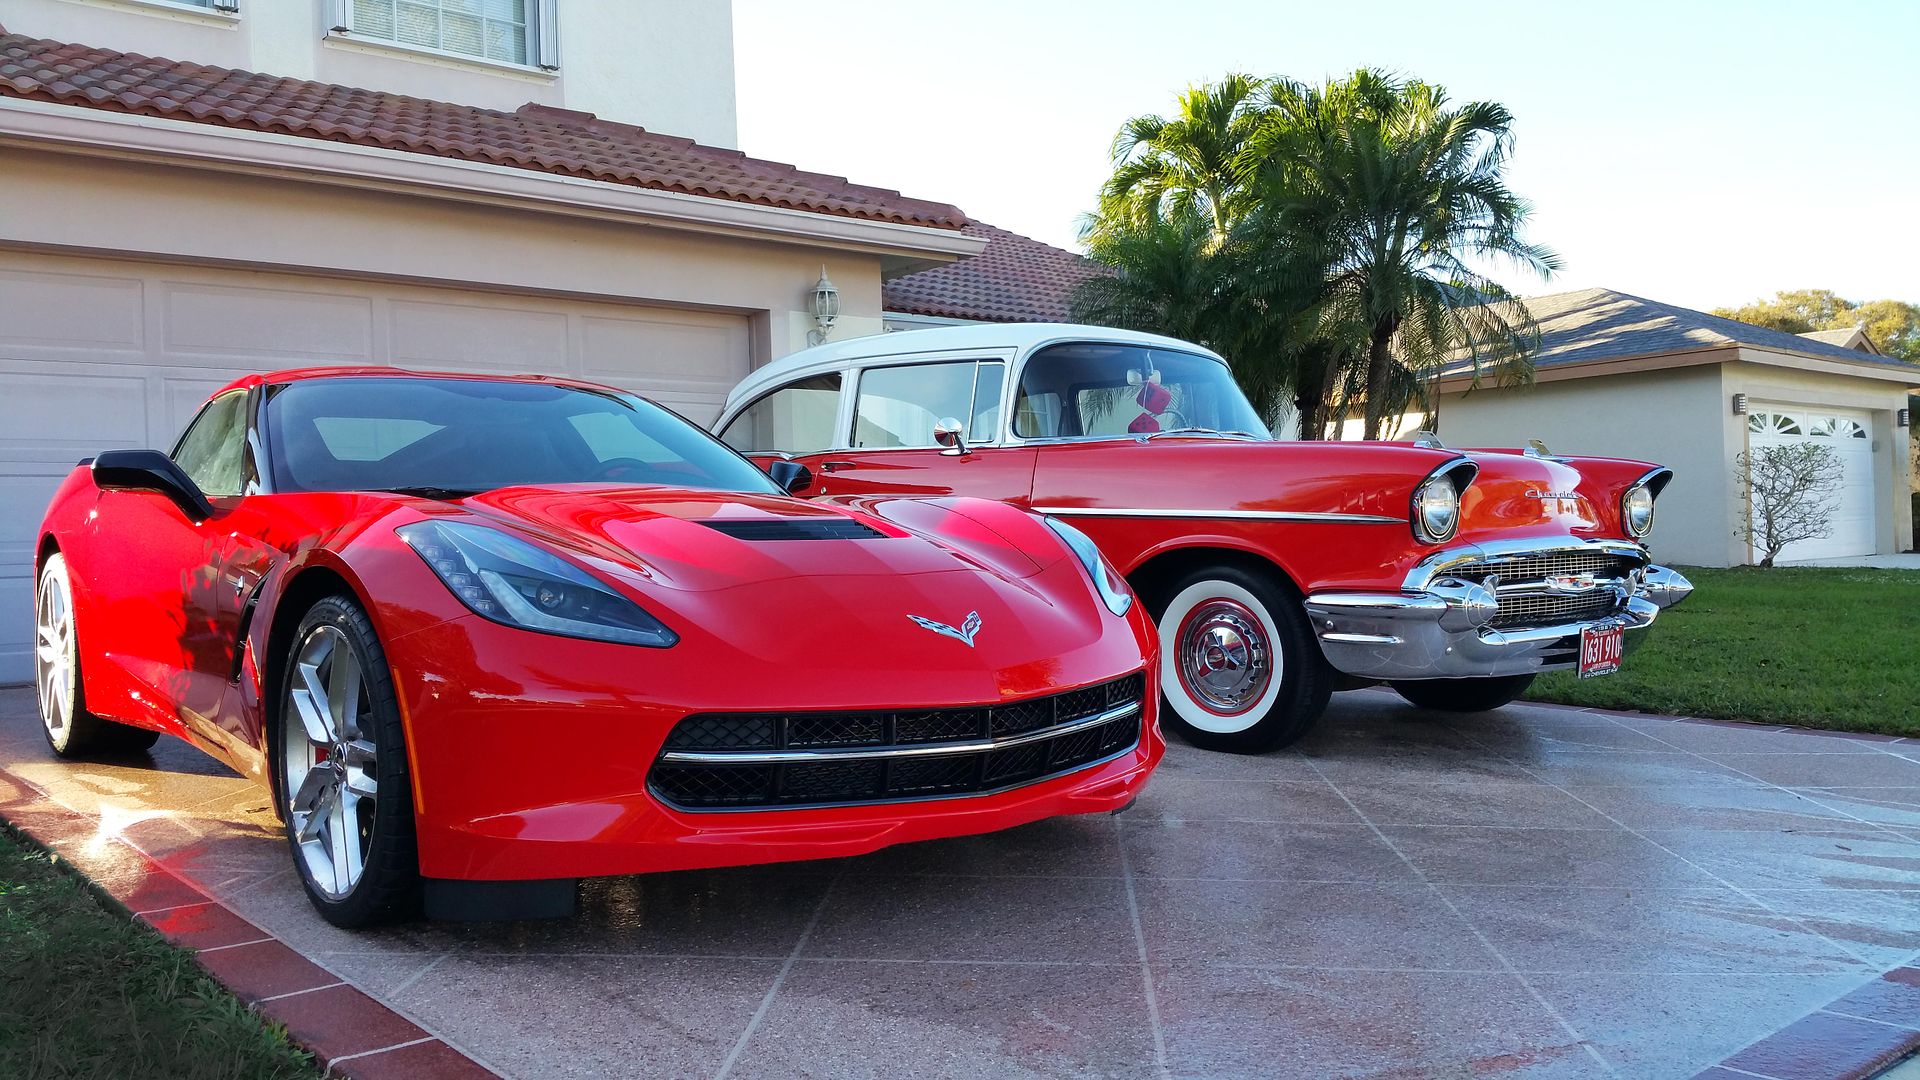
The full write up and more pictures of this vehicle, including process and products used, can be found... CLICK HERE to read more about the 57' Chevy 210.
Thanks for looking.
Coming Soon...His new little brother.
The full write up and more pictures of this vehicle, including process and products used, can be found... CLICK HERE to read more about the 57' Chevy 210.
Thanks for looking.
Coming Soon...His new little brother.
01-19-15, 09:23 AM
#15
Lexus Champion

Both cars look great. I have fond memories of the '57 Chevy. I learned to drive in a '57 Bel Aire. I believe the exterior colors were Sierra Gold and Adobe Beige.