Not happy with results on detailing black car, experts chime in!
 04-10-13, 06:48 PM
#1
Lexus Champion
Thread Starter

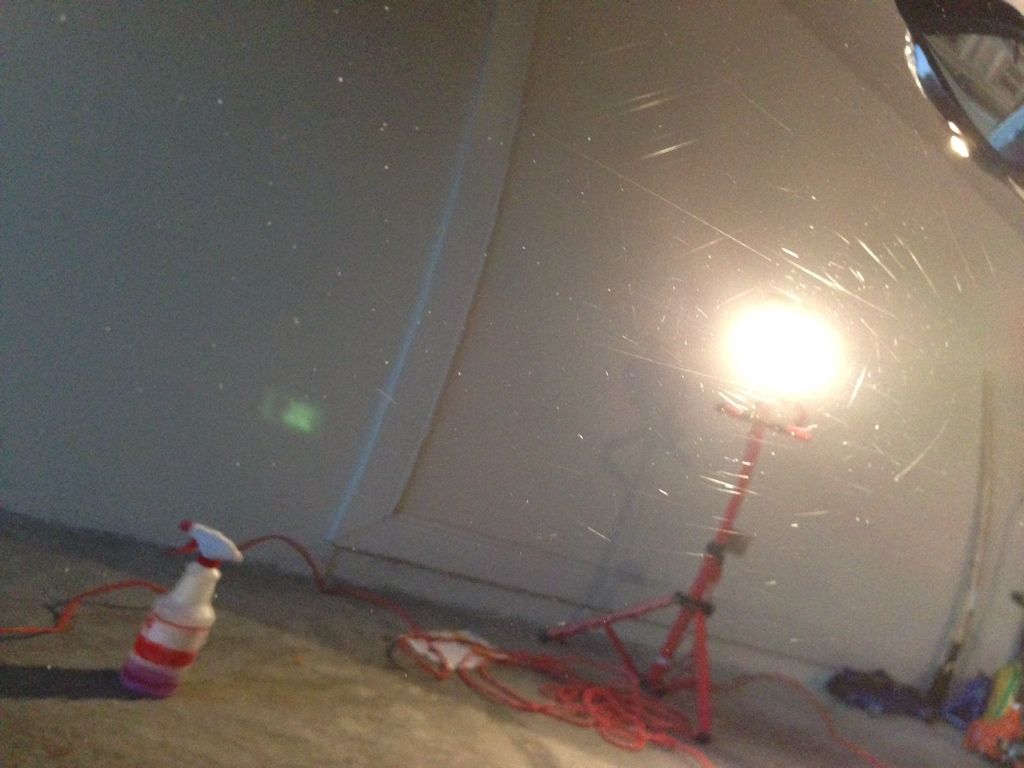
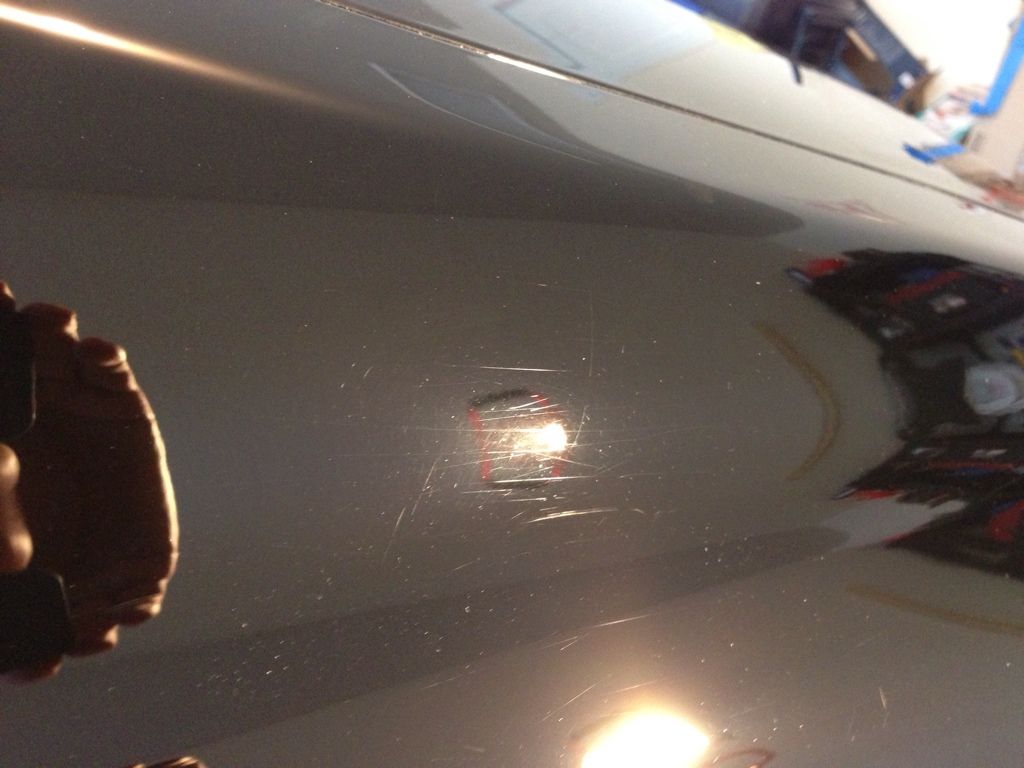
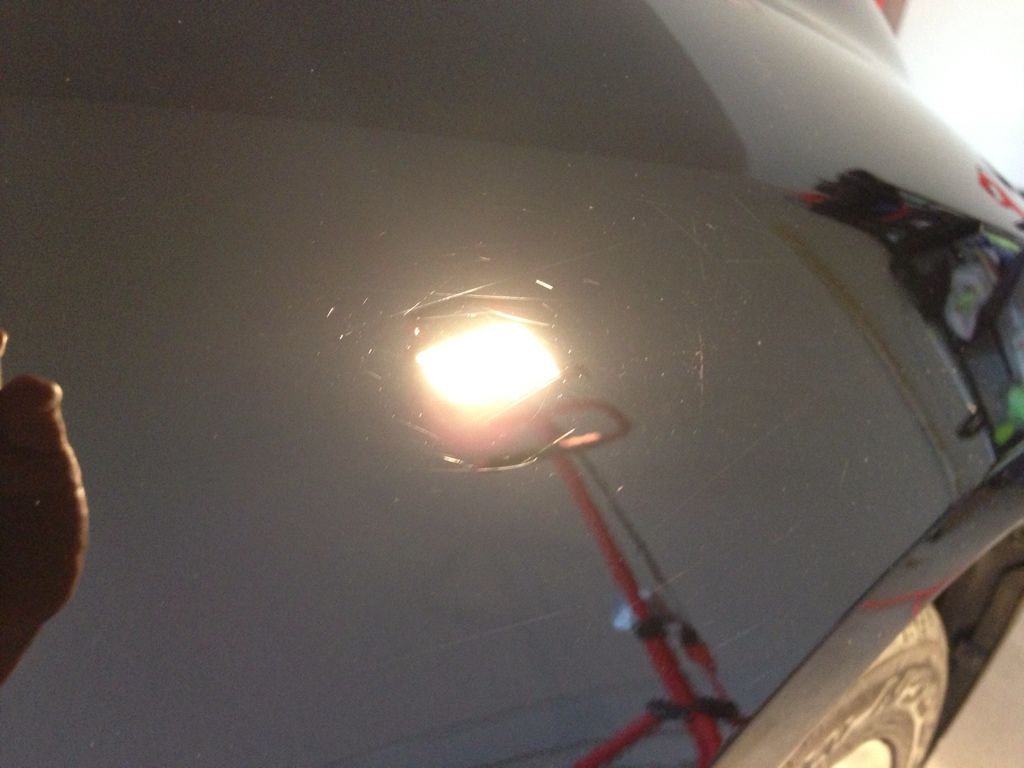
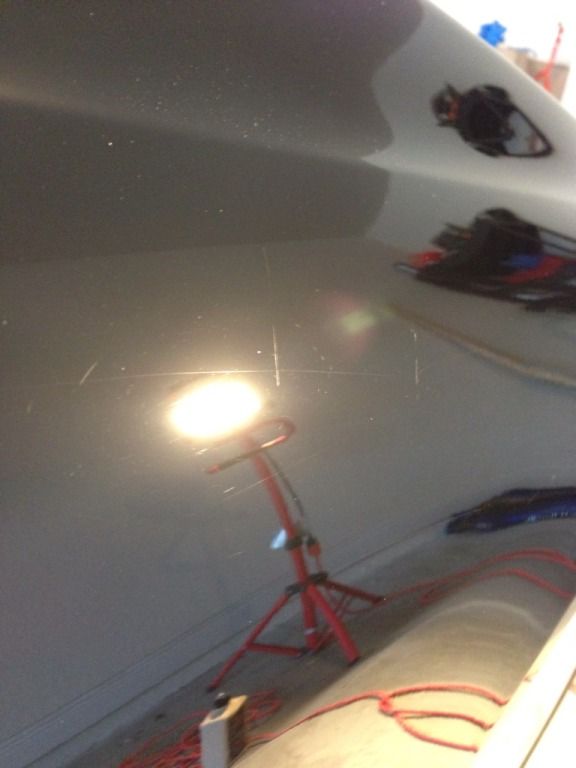
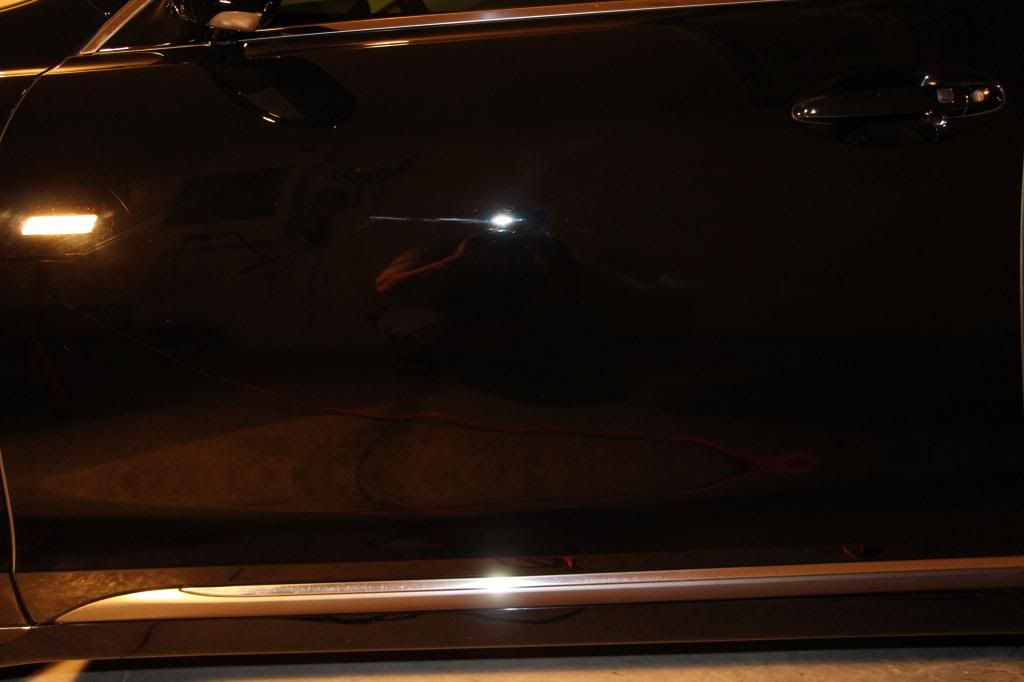
So I did a full detail on a GS350 I just bought off an old lady and the paint is in terrible condition. I did a full wash, Clay bar, polished with Porter Cable with Megiuars 105 cut compound on a Yellow Lake Country Pad at a 6 setting, then moved to Meguiars 205 finishing polish with a Blue Lake Country pad on 5 setting and then finished off with Blackfire Wet Diamond Sealant but I could not get alot of the fine scratches out. Do I need to make more passes or use more pressure when using the porter cable or do I just need to use heavier polishing compound in combination with a more aggressive pad to get better results in getting rid of the imperfections and scratches?
See below.
See below.
 04-10-13, 08:44 PM
#4
Driver School Candidate

Join Date: Mar 2013
Location: WI
Posts: 44
Likes: 0
Received 0 Likes
on
0 Posts
205 with white pad should take care of it. I find the tangerine LC Hydrotech works the best, but from experience, the pads don't last as long. Blue pad is more for a wax/sealant.
With 205, i haven't had much problem with "too much" much polish compared with 105. A little too much 205, i find everything still works, no fuss. Too much 105, and it will be a pita to remove.
With 205, i haven't had much problem with "too much" much polish compared with 105. A little too much 205, i find everything still works, no fuss. Too much 105, and it will be a pita to remove.
04-11-13, 06:45 AM
#6
If needed, I would cut with MF cutting pads and M105 and then finish with M205 on black (or white if needed)... MF cutting pads are much better than foam, IMO. Also, I think your yellow cut and blue finish is too big of a "jump" between aggressive and finishing.
Things to consider, as it does not seem like you are getting the results I would expect from M105 on soft paint.
-Use moderate to heavy pressure
-Use a SLOW arm speed! (< this is one of the biggest mistakes made by amateurs... most people have the tendency to move much too quickly which does not allow the product and machine to do enough work, leaving sub-par results)
-Make sure your pads are lubricated (prime them properly, and it wouldn't hurt to spritz them with QD spray if you are using M105 as it will increase the working time a bit)
-Clean your pads often! Cleaning the pad on the fly should be done at least every panel to ensure your pad is clean and working properly.
-Make sure you are doing enough passes, I would recommend between 4-8 passes (as needed) in a crosshatch pattern. Make your last pass or two with much less pressure so that the product finishes down to the best of its abilities... this will make your finishing step quicker and easier!
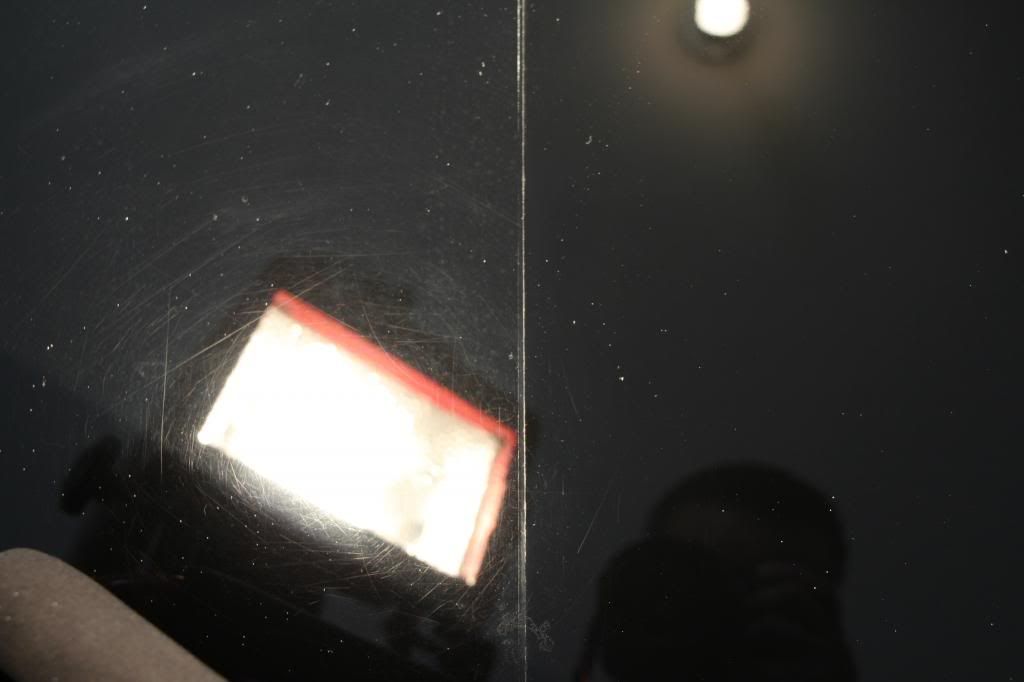
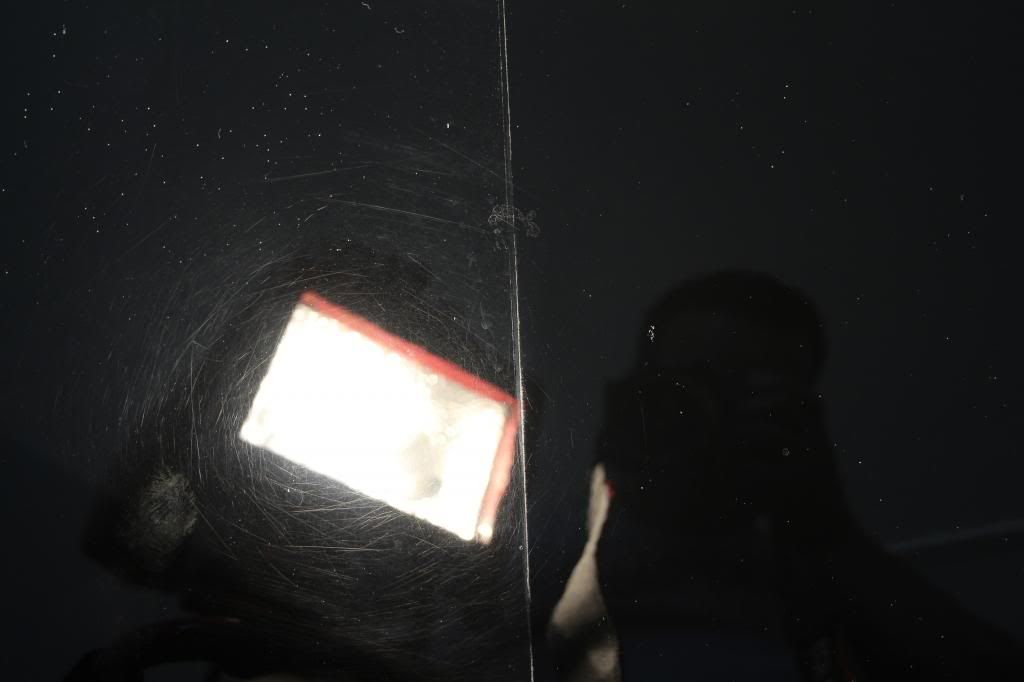
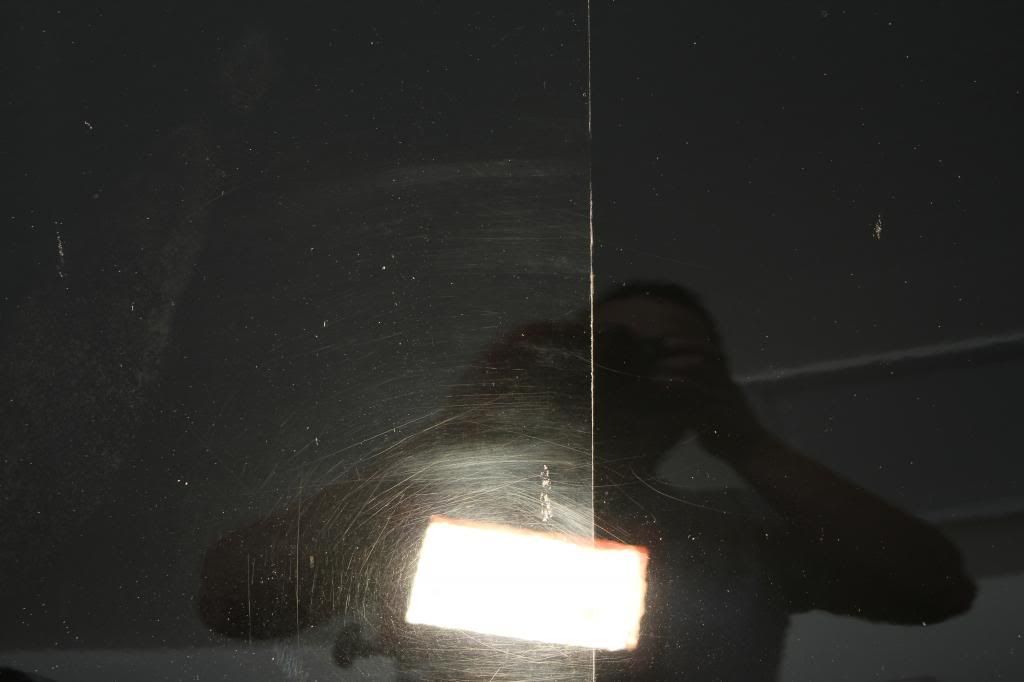
Below is an image of a Mazda CX-7 passenger door. It was corrected with Menzerna FG400 (slightly less aggressive than M105 IMO) with an orange light cutting pad. I did 4 passes (2 horizontal and 2 vertical) using the Rupes LHR21ES, so maybe equivalent to doing 6 or so passes with the PC7424. You will see that it is basically 99% corrected (compounding haze still remains, it was removed with M205 + black pad at a later time)... and this was with a less aggressive combo on harder paint... so you should be getting better results.

Just remember to
Be patient, take your time, use proper technique.
Things to consider, as it does not seem like you are getting the results I would expect from M105 on soft paint.
-Use moderate to heavy pressure
-Use a SLOW arm speed! (< this is one of the biggest mistakes made by amateurs... most people have the tendency to move much too quickly which does not allow the product and machine to do enough work, leaving sub-par results)
-Make sure your pads are lubricated (prime them properly, and it wouldn't hurt to spritz them with QD spray if you are using M105 as it will increase the working time a bit)
-Clean your pads often! Cleaning the pad on the fly should be done at least every panel to ensure your pad is clean and working properly.
-Make sure you are doing enough passes, I would recommend between 4-8 passes (as needed) in a crosshatch pattern. Make your last pass or two with much less pressure so that the product finishes down to the best of its abilities... this will make your finishing step quicker and easier!
Below is an image of a Mazda CX-7 passenger door. It was corrected with Menzerna FG400 (slightly less aggressive than M105 IMO) with an orange light cutting pad. I did 4 passes (2 horizontal and 2 vertical) using the Rupes LHR21ES, so maybe equivalent to doing 6 or so passes with the PC7424. You will see that it is basically 99% corrected (compounding haze still remains, it was removed with M205 + black pad at a later time)... and this was with a less aggressive combo on harder paint... so you should be getting better results.
Just remember to
Be patient, take your time, use proper technique.
04-11-13, 07:05 AM
#7
Lexus Champion
Thread Starter
If needed, I would cut with MF cutting pads and M105 and then finish with M205 on black (or white if needed)... MF cutting pads are much better than foam, IMO. Also, I think your yellow cut and blue finish is too big of a "jump" between aggressive and finishing.
Things to consider, as it does not seem like you are getting the results I would expect from M105 on soft paint.
-Use moderate to heavy pressure
-Use a SLOW arm speed! (< this is one of the biggest mistakes made by amateurs... most people have the tendency to move much too quickly which does not allow the product and machine to do enough work, leaving sub-par results)
-Make sure your pads are lubricated (prime them properly, and it wouldn't hurt to spritz them with QD spray if you are using M105 as it will increase the working time a bit)
-Clean your pads often! Cleaning the pad on the fly should be done at least every panel to ensure your pad is clean and working properly.
-Make sure you are doing enough passes, I would recommend between 4-8 passes (as needed) in a crosshatch pattern. Make your last pass or two with much less pressure so that the product finishes down to the best of its abilities... this will make your finishing step quicker and easier!
Below is an image of a Mazda CX-7 passenger door. It was corrected with Menzerna FG400 (slightly less aggressive than M105 IMO) with an orange light cutting pad. I did 4 passes (2 horizontal and 2 vertical) using the Rupes LHR21ES, so maybe equivalent to doing 6 or so passes with the PC7424. You will see that it is basically 99% corrected (compounding haze still remains, it was removed with M205 + black pad at a later time)... and this was with a less aggressive combo on harder paint... so you should be getting better
Just remember to
Be patient, take your time, use proper technique.
Trending Topics
04-11-13, 07:19 AM
#8
I would hold off on resorting to Surbuf+M105 until you are certain you have exhausted all other options.
Good luck!
Last edited by zmcgovern4; 04-11-13 at 07:23 AM.
04-11-13, 07:20 AM
#9
+ 1 to what zmcgovern4 said.
I'd probably use Meguiar's Microfiber Correction System with the M300/M301 compound and finishing polish or the M105/M205 compound and polish pair. It is vital to clean the pad after every pass or two. I use compressed air to blow the pad clean, removing spent polish, paint and to refluff the fibers. You can use a pad brush as well.
Here is a video of the process:
04-26-13, 01:57 PM
#10
If needed, I would cut with MF cutting pads and M105 and then finish with M205 on black (or white if needed)... MF cutting pads are much better than foam, IMO. Also, I think your yellow cut and blue finish is too big of a "jump" between aggressive and finishing.
Things to consider, as it does not seem like you are getting the results I would expect from M105 on soft paint.
-Use moderate to heavy pressure
-Use a SLOW arm speed! (< this is one of the biggest mistakes made by amateurs... most people have the tendency to move much too quickly which does not allow the product and machine to do enough work, leaving sub-par results)
-Make sure your pads are lubricated (prime them properly, and it wouldn't hurt to spritz them with QD spray if you are using M105 as it will increase the working time a bit)
-Clean your pads often! Cleaning the pad on the fly should be done at least every panel to ensure your pad is clean and working properly.
-Make sure you are doing enough passes, I would recommend between 4-8 passes (as needed) in a crosshatch pattern. Make your last pass or two with much less pressure so that the product finishes down to the best of its abilities... this will make your finishing step quicker and easier!
Below is an image of a Mazda CX-7 passenger door. It was corrected with Menzerna FG400 (slightly less aggressive than M105 IMO) with an orange light cutting pad. I did 4 passes (2 horizontal and 2 vertical) using the Rupes LHR21ES, so maybe equivalent to doing 6 or so passes with the PC7424. You will see that it is basically 99% corrected (compounding haze still remains, it was removed with M205 + black pad at a later time)... and this was with a less aggressive combo on harder paint... so you should be getting better results.
Just remember to
Be patient, take your time, use proper technique.
04-27-13, 08:35 AM
#11
Keep in mind you will not remove ALL of those scratches and deeper defects unless you spend a hell of alot of time either doing more passes or wetsanding certain areas, which in my opinion is worse for the long run as you'll remove alof of paint in surrounding areas while trying to minimize that one deep scratch. From the pictures, it looks like a hell of an improvement.
That Onyx black paint all looks like that... every one I've worked on looked ****ty like that with marring and straight "scratches" everywhere, because it is such soft paint and the majority of people don't care to take extra precautions to reduce adding in swirls and scratches during a wash.
That Onyx black paint all looks like that... every one I've worked on looked ****ty like that with marring and straight "scratches" everywhere, because it is such soft paint and the majority of people don't care to take extra precautions to reduce adding in swirls and scratches during a wash.

Thread
Thread Starter
Forum
Replies
Last Post
ISF001
Automotive Care & Detailing
73
08-22-17 05:49 AM
boostinsc
Automotive Care & Detailing
15
10-30-11 10:17 PM
Vi-Tuyen
Automotive Care & Detailing
29
02-20-09 08:22 PM
O. L. T.
Automotive Care & Detailing
12
10-04-03 10:37 PM