
 01-07-15, 04:39 PM
Last edit by: IB Advertising
See related guides and technical advice from our community experts:
Browse all: Cleaning and Detailing Guides
- How to Remove Swirls in Black Paint
Step by step instructions for do-it-yourself repairs
Browse all: Cleaning and Detailing Guides

Swirl Marks on Obsidian Paint
04-14-11, 06:44 PM
#1
Driver
Thread Starter

Join Date: Jan 2009
Location: FL
Posts: 155
Likes: 0
Received 0 Likes
on
0 Posts
What do you guys use to get the swirl marks out on the black cars? I have the ISF with obsidian and im noticing all these swirls after washing... I would prefer not using any electronic wheels or polishers... is there anything I can use by hand that will get them out?
 04-14-11, 07:04 PM
#2

A buffer is going to be pretty critical because it has the power to work in the appropriate polishes with the necessary power for optimal results. It's near impossible to duplicate such results by hand. If you are going to do the job by hand I usually just recommend one coat of polish with medium pressure. I'd suggest the Meguiar's Ultra Finishing Polish M205 and a clean foam applicator. If you really want the best results by hand use the DI Accessories Polishing Pal with a Lake Country White Polishing Pad.
I understand buffers may seem intimidating at first but there are actually some highly effective options out there now that are completely safe. I'd highly recommend checking out one of the two kits if you want a more complete polishing job:
DI Packages Porter Cable 7424XP, Meguiar's Polishes and Hydro Pads Basic Kit
DI Packages Porter Cable 7424 XP, Meguiar's Polish and Hydro Pads
These kits give you everything you need to permanently and safely remove the surface imperfections. If you have any questions please don't hesitate to ask.
Greg @ DI
04-14-11, 07:15 PM
#3
Driver
Thread Starter
Join Date: Jan 2009
Location: FL
Posts: 155
Likes: 0
Received 0 Likes
on
0 Posts
A buffer is going to be pretty critical because it has the power to work in the appropriate polishes with the necessary power for optimal results. It's near impossible to duplicate such results by hand. If you are going to do the job by hand I usually just recommend one coat of polish with medium pressure. I'd suggest the Meguiar's Ultra Finishing Polish M205 and a clean foam applicator. If you really want the best results by hand use the DI Accessories Polishing Pal with a Lake Country White Polishing Pad.
I understand buffers may seem intimidating at first but there are actually some highly effective options out there now that are completely safe. I'd highly recommend checking out one of the two kits if you want a more complete polishing job:
DI Packages Porter Cable 7424XP, Meguiar's Polishes and Hydro Pads Basic Kit
DI Packages Porter Cable 7424 XP, Meguiar's Polish and Hydro Pads
These kits give you everything you need to permanently and safely remove the surface imperfections. If you have any questions please don't hesitate to ask.
Greg @ DI
I understand buffers may seem intimidating at first but there are actually some highly effective options out there now that are completely safe. I'd highly recommend checking out one of the two kits if you want a more complete polishing job:
DI Packages Porter Cable 7424XP, Meguiar's Polishes and Hydro Pads Basic Kit
DI Packages Porter Cable 7424 XP, Meguiar's Polish and Hydro Pads
These kits give you everything you need to permanently and safely remove the surface imperfections. If you have any questions please don't hesitate to ask.
Greg @ DI
04-14-11, 09:23 PM
#4

There are 3 main DA's to consider really. The porter Cable xp, Griots Garage, and the Meguiars DA (i think they are on backorder). Then there's the big poppa of them all the Flex. All have their strengths and weaknesses. Can't go wrong with any of them though. If you can, take a class to get the feel of each of them before you make your decision.
Once you get the swirls out, you will need to change the way you wash and dry your car to minimize their reoccurence. That means no automatic car washes, never letting the dealer wash your car, proper mf's for drying etc etc...
Once you get the swirls out, you will need to change the way you wash and dry your car to minimize their reoccurence. That means no automatic car washes, never letting the dealer wash your car, proper mf's for drying etc etc...
04-17-11, 05:03 AM
#5
Former Sponsor

Join Date: Nov 2009
Location: FL
Posts: 209
Likes: 0
Received 0 Likes
on
0 Posts
Wash your car using these guidelines.
Frequent and proper washing of your vehicle is necessary to preserving that show car shine. Classic Motoring Accessories and Proper Auto Care have been teaching proper cleaner techniques since 1988. Sadly, most swirl marks and light scratches are caused by the wash process, as grit and road grime are scrubbed against the surface. Over time these micro scratches reduce the gloss by diffusing reflected light and will thin the paint.
Products Needed For a Proper Auto Wash.
Wheel Cleaning Supplies
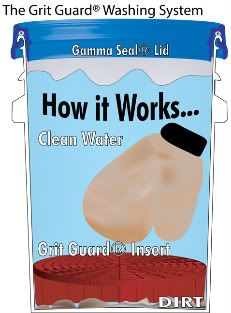
2 Five Gallon Wash Buckets with 2 Grit Guards
High Quality, Wax Friendly Car Soap
High Quality Wash Media such as Natural Sea Sponge, Lamb's Wool Mitt, or High Tech UltiMitt
2 Big Blue Waffle Weave Microfiber Drying Towels
Optional: Quick Detailing Spray an Bug/Tar Remover
Basics
Proper Auto Care recommends washing the wheels, tires, and wheel wheels first. This prevents wheel cleaner from spraying on a clean surface. Properly cleaning the wheels is also time consuming can lead to water spots if the rinse water from washing the car is still on the paint. For proper wheel care please click here.
It is best to wash your vehicle in the shade when the surface is cool to the touch. A hot surface will dry up the water or soap solution, leading to water spots. If you have shade available take advantage of it. If you cannot find shade, try to limit your car washing to first thing in the morning or later in the evening when the sun is close to the horizon and sun's rays are much less direct. After washing and rinsing, the standing water needs to be removed as quickly as possible to avoid leaving mineral deposits that cause water spots, which will actually etch or 'eat into' the paint.
The Two Bucket Method
Most people wouldn't drive to the beach and fill their wash bucket with a shovel full of sand before adding soap and water. Sadly, most of the dirt removed during washing is released into the soap bucket each time the mitt or sponge is reloaded with soap. After washing a couple of sections the soap solution becomes gritty and contaminated, and that grit is scrubbed against the paint. Even rinsing out the wash media after effect section is ineffective. Flowing water may remove some of the grit, but most of it is pushed back into the mitt or sponge. It is much easier, and far more effective, to use a second bucket to rinse the wash media in prior to loading it with more soap solution. Two buckets: The soap bucket and the rinse bucket.
Grit Guards � are an ingenious design that uses a grate and vane system to allow released dirt to sink to the bottom and prevents them from remixing into the water or soap solution. Proper Auto Care recommends using one Grit Guard � per bucket to give the best possible protection against scratching the paint with contaminated soap solution. When rising the wash media out in the rinse bucket, you should lightly scrub it against the grating of the Grit Guard � to help release grit.
Use a High Quality Car Soap Designed for Automotive Finishes.
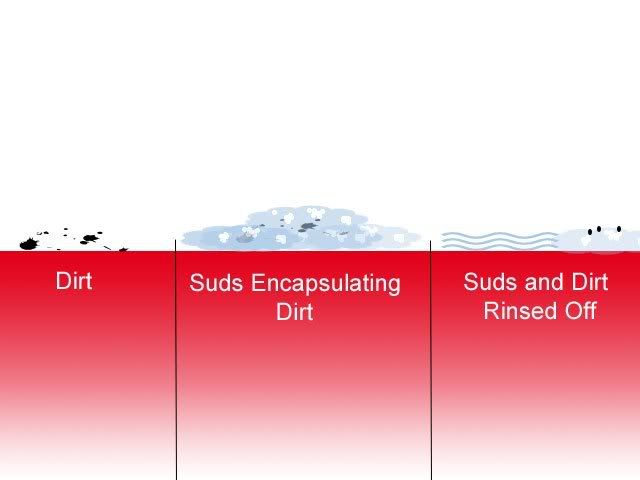
Automotive soap is designed to remove dirty and road grime safely from the paint, with stripping the existing wax or sealant and will out scratching. Automotive soaps use surfactants to break the surface tension of water, allowing the lubricated solution to penetrate and encapsulate the dirt, reducing the potential for marring. Soap's such as Eimann Fabrik's Auto Spa and Blackfire's Gloss Shampoo are gentle enough to use repeatedly without stripping wax.
Use 5 gallon wash buckets to ensure plenty of soap solution is available to flood the dirt safely off the car. Fill the soap bucket about 4/5th's or 80% full of water before adding the recommended amount of soap to the bucket. Adding soap first results in too many suds and not enough water! Finish filling the water bucket with a stream of water to mix the solution fully. Place a Grit Guard � in the bottom of both the soap bucket and the rinse bucket.
Before washing, pre-rinse your vehicle with a steady stream of water to float as much dirt away as possible before getting started. Pre-treat any bugs and tar with a light mist of 1Z einszett Ant Insekt and Pre-Cleaner.
Wash with a Clean High Quality Wash Media.
Classic Motoring Accessories offers several different types of wash media: Natural Sheep Skin Mitts, Natural Sea Spongers, and the ultra soft UltiMitt, as well as various microfiber sponges and boar's hair brushes. Three of the most popular:
Sheep Skin (Lamb's Wool) Mitts are extremely soft and provide a long nap that prevents removed dirt from scouring the paint. Sheep Skin mitts require a more thorough rinse because they are so effective at holding dirt. High quality Sheep Skin mitts last about 6-12 months on average. There ability to clean paint gently and prevent swirl marks has proven through out the years.
Sea Sponges are incredibly durable if washed out after each use. I personally know of several people who have been using the same natural sponge for over 3 years!! Sea Sponges are very soft and will not paint. They also hod a lot of solution, but can be bulky and difficult to get into tight spots.
UltiMitts are a synthetic foam wash mitt, and they are my personal favorite. They release dirty extremely easily and hold a HUGE amount of soap solution, ideal for flooding the paint with soap during the wash. Proper Auto Care's UltiMitt is made out select Lake Country Concours foam, which is the softest available
Wash your vehicle a section at at time, start with the highest areas. Wash in straight lines, from front to back on horizontal surfaces such as the hood, roof, and trunk, and up and down on vertical sections such as the doors, fenders, and rear bumper to minimize the appearance of any accidental marring that may occur. Flood the section with soap water squeezed from the wash media before lightly washing the section in straight lines, rinsing with water after each section. Rinse the wash media in the rinse bucket before reloading it with more soap solution from the soap bucket.
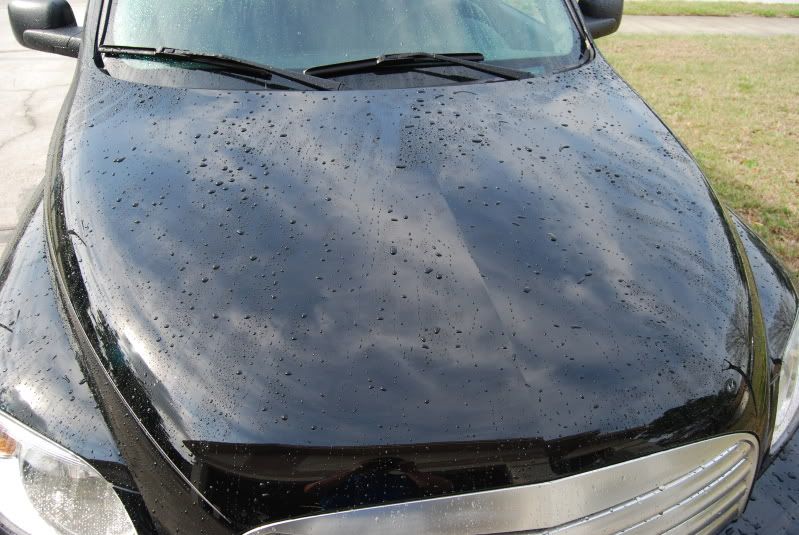
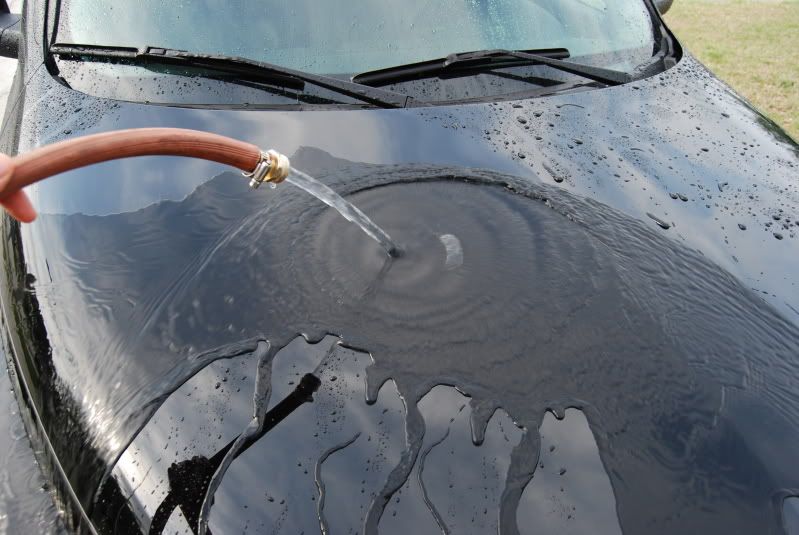
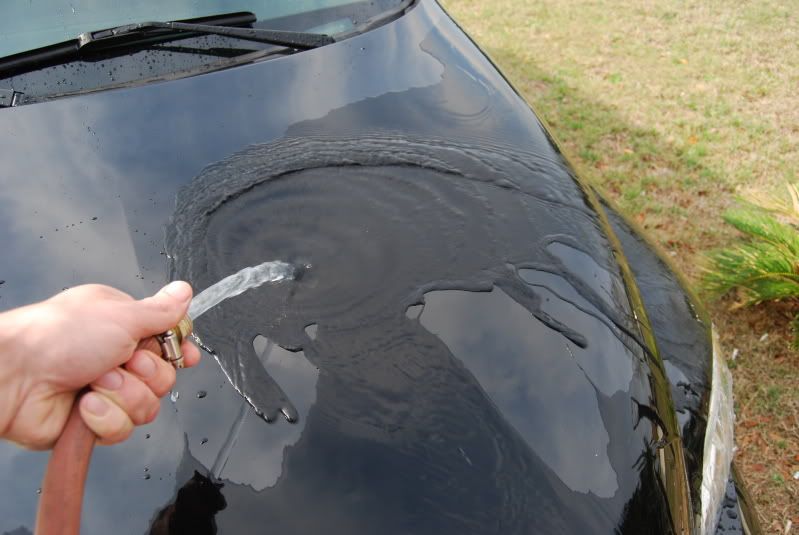
Make it wet to dry it faster!
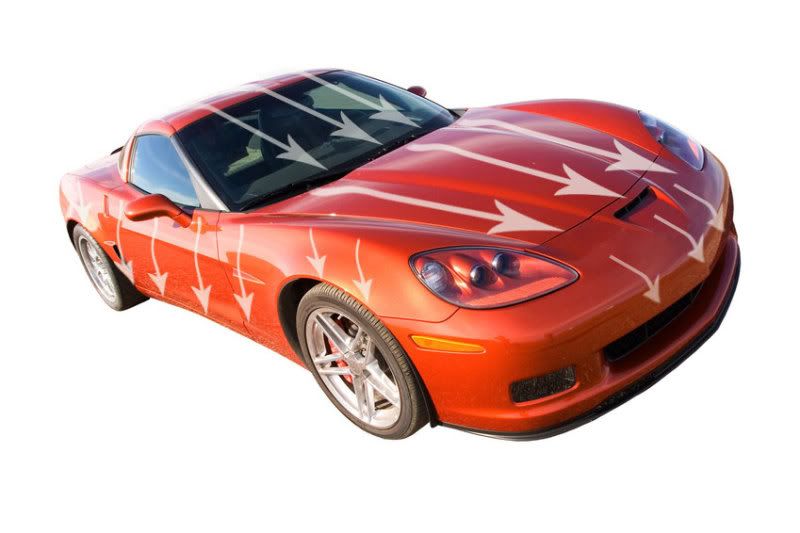
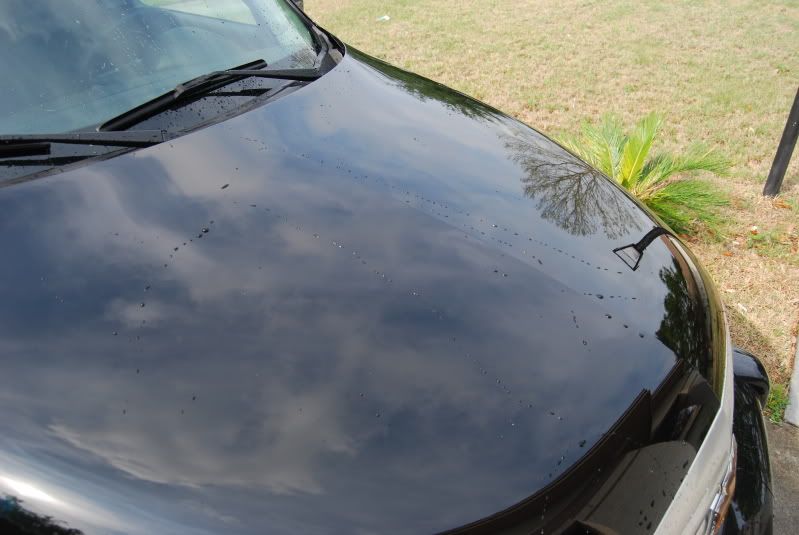
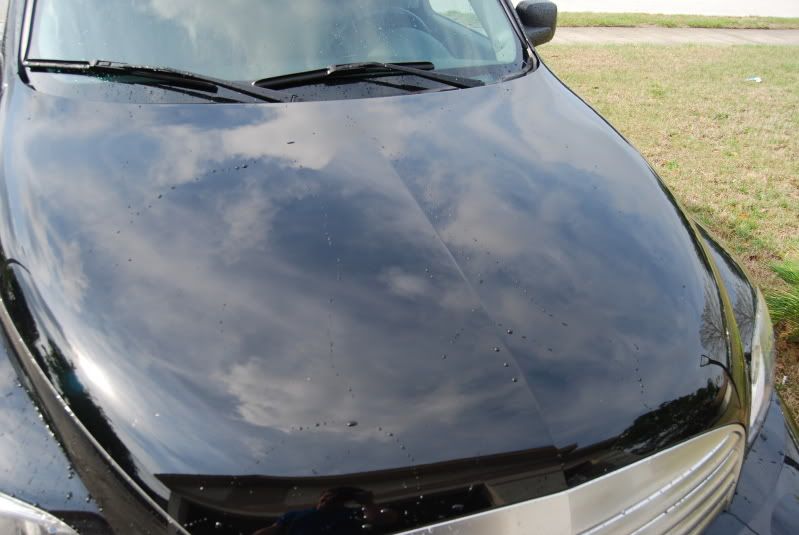
After washing and rinsing your vehicle a section at a time, remove the nozzle from the hose and do a final rinse with a gentle stream of water. Water has a natural viscosity, and by flooding the paint, it is possible to sheet off a majority of the standing water.
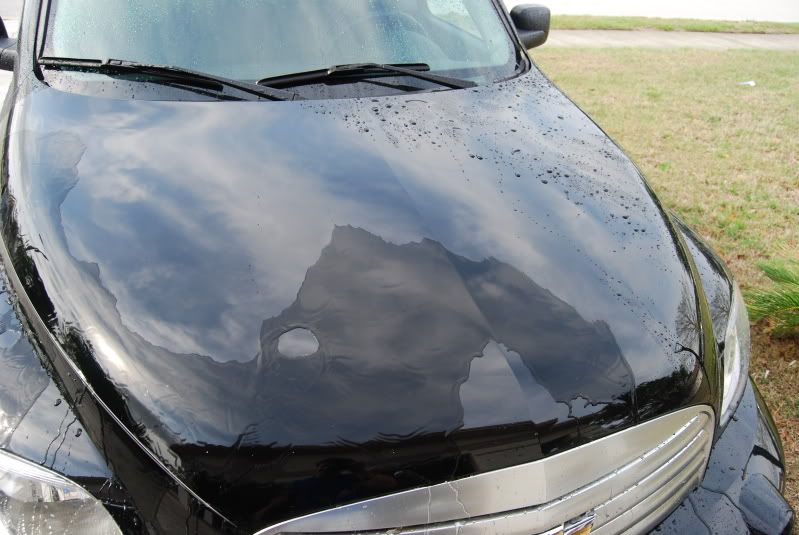
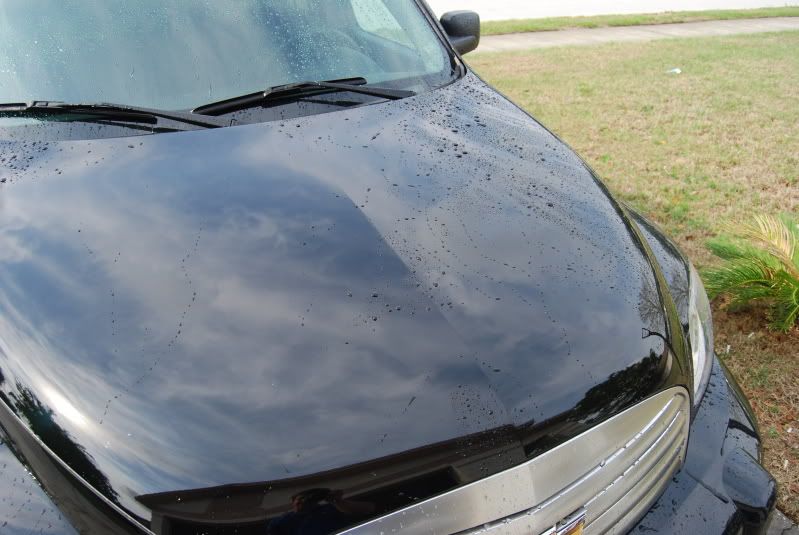
Big Blue III Microfiber Waffle Weave Drying Towels.
To remove the remaining water after flooding the paint toweling the surface is necessary. While a chamois or synthetic chamois do a great job of removing water, they lack a nap. Any dust or dirt that has settled on the paint will become trapped and rubbed against the surface. Big Blue III drying towels feature a woven microfiber that gives them the absorbency of a chamois while featuring a nap of fiber that hold any dust away from the paint. Although optional, using a detail spray such as Meguiar's M135 Synthetic Detail Spray offers many benefits during the final towel drying of the car. A light mist per panel (while it is still wet) will reintroduce some lubricity to the surface an prevent surface marring. The synthetic polymers will make the water easier to remove and clean any water spots. Wipe gently in the same directions as you washed, to minimize the appearance of any marring that may accidentally occur. Quality quick detailers will also boost the shine of the paint, helping to maintain that just waxed look!
CLIFF NOTES
Always wash when the vehicle is cool to the touch and avoid washing in direct sunlight if possible.
Pre-rinse your vehicle to remove loose soiling.
Pre-treat any bugs or tar with 1Z Anti Insekt and Pre-Cleaner
Wash, using the two bucket method with Grit Guards �, a quality soap, an a high quality wash media. Wash in straight line motions a section at a time. Thoroughly rinse the section before moving on to the next section. Rinse the wash media in the rinse bucket often to prevent contaminating the soap solution.
After washing each section of the vehicle, do a final rinse with just a steady stream of water. This will cause the majority of the standing water to sheet off.
Dry remaining water with a Big Blue Microfiber and a detail spray such as Meguiar's M135.
04-17-11, 05:05 AM
#6
Former Sponsor
Join Date: Nov 2009
Location: FL
Posts: 209
Likes: 0
Received 0 Likes
on
0 Posts
Now lets address those swirl marks. It is important to understand what paint defects (swirl marks) really are.
How do you restore or improve your car�s shine? It is a common question, and the answer is one of the most misunderstood in car care! From the second the automobile is painted it begins to age. Modern paint systems are scratch sensitive and must be washed with the proficiency of a brain surgeon. They often are not leaving even brand new cars at the dealership as victims of paint defects.
When a car is first painted, the surface is relatively smooth and uniform. Like a smooth mirror, the paint reflects maximum light. From the first incorrect wash (often at the factory) the surface becomes scoured. Thousands of small scratches are ground into the surface. As the car faces it�s life on the road and in the environment it is attacked with fall out from rain, parking lot scratches, the neighbor�s cat, and little Johnny using it as a Hot-Wheels race trace.
The once ocean smooth surface of the paint now looks like a mountain range under a microscope. The uniform surface that reflected light perfectly is so uneven that light scatters away in different directions. The paint no longer is as wet or glossy looking.
This penetrating damage that causes the degradation in appearance is known as Paint Defects. Paint Defects are areas where paint has been removed, creating a rough surface.
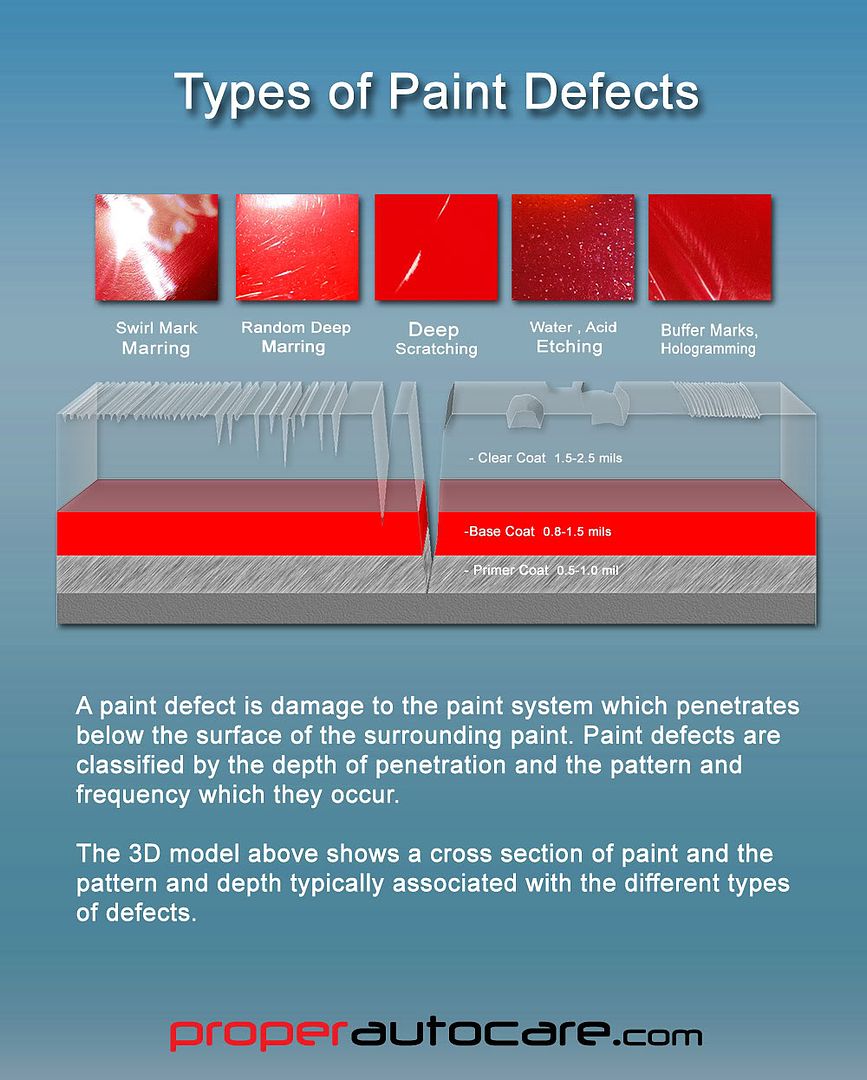
Paint Defects are characterized by the by the depth which the penetrate the surface, as well as the frequency which they occur and the pattern they created.
Marring
Marring is often a term often used to frequently occurring, shallow paint defects.
Swirl Mark Marring- Swirl Mark marring is likely the most common type of defect. It is extremely shallow in depth and is very frequent in occurrence. Most swirl mark marring is wash induced and caused by incorrect washing and drying techniques. Because these paint defects are so easy to get and thus occur so frequently, they forum a circle pattern of scratches that reflect outwards from a central light source giving this marring it�s name sake: Swirl Marks or Spider Webbing.
Random Deep Marring is often wash induced but with a greater degree of force implicating more damage to the paint�s surface. A piece of grit stuck in a wash mitt or drying towel can cause isolated spots of deep marring; Washing a car with a shop brush or using an automated car wash can cause frequent spots of deep marring. Incorrect sanding of the vehicle�s paint can cause very deep marring also known as sanding tracers. Random Deep Marring occurs in different patterns and frequency, but is characterized by the depth of damage: Deep enough to see, but not deep enough to feel. In frequent deep marring is often referred to as Random Isolated Deeper Scratching or RIDS.
Scratching
Scratches are paint defects where a significant amount of paint has been removed and the defect is not only visible but can be felt to the touch. In general scratching/deep scratching penetrates too deeply into the paint�s surface to be completely removed, although the appearance may be lessened.
Etching
An etching is a type of paint defect that can very in depth and frequency, but creates a unique pattern dependant on how it is created. Etching is caused by chemical reaction on that paint�s surface that eats dissolves the surface at a fairly consistent rate of a relatively large area, creating depressions on the surface that appear like empty swimming pools. The most common forms of etching are from acid rain, acidic insect remains and bird bombs, and from the residual minerals found in water.
Machine Created Polish Marks
Holograms are extremely consistent, extremely shallow frequently occurring paint defects created by the machine polishing of paint. These defects are so frequent and shallow that they reflect light in their own unique pattern, creating a three dimensional appearance in the paint, hence the name hologramming. Hologramming is must often created by a high speed rotary polisher, allow dual action polishers can create a similar pattern if the pad is rotating fast enough. The pattern of ultra fine marks created by dual action polishers is often more random in nature and creates a pattern known as micro-marring or micro haze.
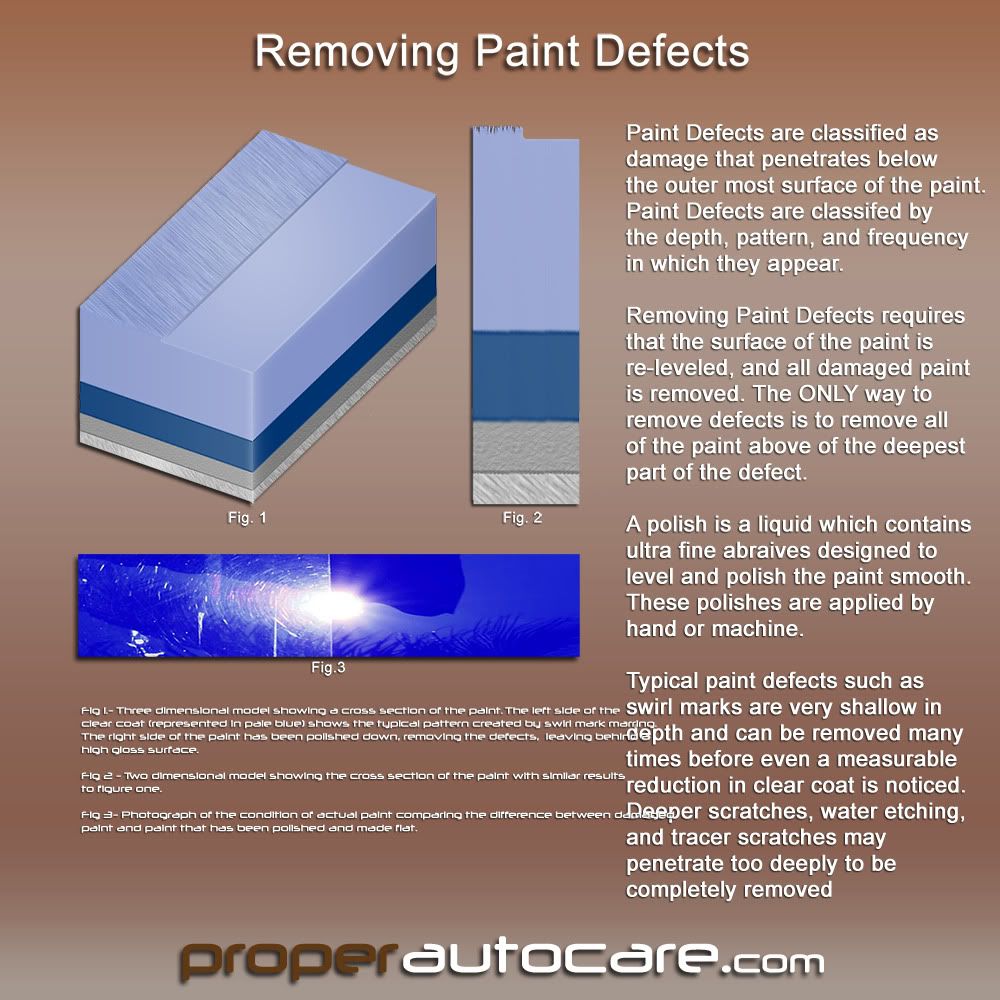
Paint Defect Removal
To remove a paint defect itself is impossible cause a paint defect is area where the paint has already been removed. To remove a paint defect means that all of the surrounding paint above the deepest part of the defect needs to be removed in order to create a more level surface. This new surface will be smooth and reflect maximum light. Because new cars are frequently damaged at the dealership, often this new fresh, smooth surface will improve the appearance of new vehicles dramatically as well.
The diagram below illustrates the difference between paint with paint defects and what removing them means.
Methods for Paint Defect Removal
By hand: Modern clear coats are much harder then their older, single stage counter parts. However modern technology increases have made it more possible to remove paint defects by hand. Keep in mind that the polishes used to remove paint evenly require a lot of work and this is the slowest method possible.
By machine: With the rise in popularity of Dual Action polishers, many enthusiast have taken to machine polishing their cars themselves. Machine polishing with a Dual Action is very safe and affords great results with a great margin of safety. Some enthusiasts and many professionals use a Rotary Polisher to polish paint. These powerful machines are capable of quickly removing the deepest marring marks but can also damage paint in the hands of an inexperienced user.
Removing Swirl Mark Marring: Swirl Mark Marring is very shallow by definition and usually requires only a light polishing step with a machine. Some harder paints may require a moderate polishing step followed by a finer polishing step for complete removal. These marks can often be removed by hand polishing.
Removing Random Deep Marring: Random Deep Marring can be the most frustrating paint defect to work with and usually requires several moderate to aggressive polishing steps for complete removal. Random Deep Marring is often the most difficult defect to diagnose with a visual inspection as it can occur frequently enough to look like typical Swirl Mark Marring. This is the case with vehicles that have been frequently washed with shop brushes, dirty rags, and dried with dirty towels or have been scrubbed clean at a drive thru car wash.
If these defects resemble typical swirl marks because of the frequency in which they occur they are often called Deep Swirls or Bad Swirls, and the detailer or enthusiastic has a long day a head of him.
If the Random Deep Marring occurs sporadically, it may not even be noticeable until the swirl marks have been removed. After polishing a couple of steps, the surface will show a dramatic improvement in gloss but deeper marks will remain visible, although infrequent. This pattern of occurring Random Deep Marring is also known as Random Isolated Deeper Scratching. The method of correction is the same regardless of the frequency and dependant on the depth.
Extreme cases of Random Deep Marring may require heavy compound polishing or wet sanding for complete removal.
Removing Scratching/Deep Scratching: Scratches can often be felt with your finger nail on the paint�s surface. This indicates that the defect has a significant amount of penetration and removal may not be completely possible or may require that too much paint is removed for its removal.
For scratching it is best to polish the edges of the scratch in order to blend the sharp edges and reduce the visibility of the scratch. This can be accomplished by hand or machine.
Removing Etching: Etching, because of the width of the defect, is difficult to remove. Complete removal often requires wet sanding the surface flat with a stiff backing plate because of a polishing pad�s tendency to travel into the defect itself. Deep etching often requires experience or a professional for removal.
Removing Buff Marks/Hologramming: Buffer marks are often caused by using too aggressive of a polish or pad as the last step in machine polishing, or using incorrect technique. Most buffer marks are extremely shallow and can be removed in a manner similar to removing swirl marks, requiring a finer polish and/or pad.
How do you restore or improve your car�s shine? It is a common question, and the answer is one of the most misunderstood in car care! From the second the automobile is painted it begins to age. Modern paint systems are scratch sensitive and must be washed with the proficiency of a brain surgeon. They often are not leaving even brand new cars at the dealership as victims of paint defects.
When a car is first painted, the surface is relatively smooth and uniform. Like a smooth mirror, the paint reflects maximum light. From the first incorrect wash (often at the factory) the surface becomes scoured. Thousands of small scratches are ground into the surface. As the car faces it�s life on the road and in the environment it is attacked with fall out from rain, parking lot scratches, the neighbor�s cat, and little Johnny using it as a Hot-Wheels race trace.
The once ocean smooth surface of the paint now looks like a mountain range under a microscope. The uniform surface that reflected light perfectly is so uneven that light scatters away in different directions. The paint no longer is as wet or glossy looking.
This penetrating damage that causes the degradation in appearance is known as Paint Defects. Paint Defects are areas where paint has been removed, creating a rough surface.
Paint Defects are characterized by the by the depth which the penetrate the surface, as well as the frequency which they occur and the pattern they created.
Marring
Marring is often a term often used to frequently occurring, shallow paint defects.
Swirl Mark Marring- Swirl Mark marring is likely the most common type of defect. It is extremely shallow in depth and is very frequent in occurrence. Most swirl mark marring is wash induced and caused by incorrect washing and drying techniques. Because these paint defects are so easy to get and thus occur so frequently, they forum a circle pattern of scratches that reflect outwards from a central light source giving this marring it�s name sake: Swirl Marks or Spider Webbing.
Random Deep Marring is often wash induced but with a greater degree of force implicating more damage to the paint�s surface. A piece of grit stuck in a wash mitt or drying towel can cause isolated spots of deep marring; Washing a car with a shop brush or using an automated car wash can cause frequent spots of deep marring. Incorrect sanding of the vehicle�s paint can cause very deep marring also known as sanding tracers. Random Deep Marring occurs in different patterns and frequency, but is characterized by the depth of damage: Deep enough to see, but not deep enough to feel. In frequent deep marring is often referred to as Random Isolated Deeper Scratching or RIDS.
Scratching
Scratches are paint defects where a significant amount of paint has been removed and the defect is not only visible but can be felt to the touch. In general scratching/deep scratching penetrates too deeply into the paint�s surface to be completely removed, although the appearance may be lessened.
Etching
An etching is a type of paint defect that can very in depth and frequency, but creates a unique pattern dependant on how it is created. Etching is caused by chemical reaction on that paint�s surface that eats dissolves the surface at a fairly consistent rate of a relatively large area, creating depressions on the surface that appear like empty swimming pools. The most common forms of etching are from acid rain, acidic insect remains and bird bombs, and from the residual minerals found in water.
Machine Created Polish Marks
Holograms are extremely consistent, extremely shallow frequently occurring paint defects created by the machine polishing of paint. These defects are so frequent and shallow that they reflect light in their own unique pattern, creating a three dimensional appearance in the paint, hence the name hologramming. Hologramming is must often created by a high speed rotary polisher, allow dual action polishers can create a similar pattern if the pad is rotating fast enough. The pattern of ultra fine marks created by dual action polishers is often more random in nature and creates a pattern known as micro-marring or micro haze.
Paint Defect Removal
To remove a paint defect itself is impossible cause a paint defect is area where the paint has already been removed. To remove a paint defect means that all of the surrounding paint above the deepest part of the defect needs to be removed in order to create a more level surface. This new surface will be smooth and reflect maximum light. Because new cars are frequently damaged at the dealership, often this new fresh, smooth surface will improve the appearance of new vehicles dramatically as well.
The diagram below illustrates the difference between paint with paint defects and what removing them means.
Methods for Paint Defect Removal
By hand: Modern clear coats are much harder then their older, single stage counter parts. However modern technology increases have made it more possible to remove paint defects by hand. Keep in mind that the polishes used to remove paint evenly require a lot of work and this is the slowest method possible.
By machine: With the rise in popularity of Dual Action polishers, many enthusiast have taken to machine polishing their cars themselves. Machine polishing with a Dual Action is very safe and affords great results with a great margin of safety. Some enthusiasts and many professionals use a Rotary Polisher to polish paint. These powerful machines are capable of quickly removing the deepest marring marks but can also damage paint in the hands of an inexperienced user.
Removing Swirl Mark Marring: Swirl Mark Marring is very shallow by definition and usually requires only a light polishing step with a machine. Some harder paints may require a moderate polishing step followed by a finer polishing step for complete removal. These marks can often be removed by hand polishing.
Removing Random Deep Marring: Random Deep Marring can be the most frustrating paint defect to work with and usually requires several moderate to aggressive polishing steps for complete removal. Random Deep Marring is often the most difficult defect to diagnose with a visual inspection as it can occur frequently enough to look like typical Swirl Mark Marring. This is the case with vehicles that have been frequently washed with shop brushes, dirty rags, and dried with dirty towels or have been scrubbed clean at a drive thru car wash.
If these defects resemble typical swirl marks because of the frequency in which they occur they are often called Deep Swirls or Bad Swirls, and the detailer or enthusiastic has a long day a head of him.
If the Random Deep Marring occurs sporadically, it may not even be noticeable until the swirl marks have been removed. After polishing a couple of steps, the surface will show a dramatic improvement in gloss but deeper marks will remain visible, although infrequent. This pattern of occurring Random Deep Marring is also known as Random Isolated Deeper Scratching. The method of correction is the same regardless of the frequency and dependant on the depth.
Extreme cases of Random Deep Marring may require heavy compound polishing or wet sanding for complete removal.
Removing Scratching/Deep Scratching: Scratches can often be felt with your finger nail on the paint�s surface. This indicates that the defect has a significant amount of penetration and removal may not be completely possible or may require that too much paint is removed for its removal.
For scratching it is best to polish the edges of the scratch in order to blend the sharp edges and reduce the visibility of the scratch. This can be accomplished by hand or machine.
Removing Etching: Etching, because of the width of the defect, is difficult to remove. Complete removal often requires wet sanding the surface flat with a stiff backing plate because of a polishing pad�s tendency to travel into the defect itself. Deep etching often requires experience or a professional for removal.
Removing Buff Marks/Hologramming: Buffer marks are often caused by using too aggressive of a polish or pad as the last step in machine polishing, or using incorrect technique. Most buffer marks are extremely shallow and can be removed in a manner similar to removing swirl marks, requiring a finer polish and/or pad.
04-17-11, 05:12 AM
#7
Former Sponsor
Join Date: Nov 2009
Location: FL
Posts: 209
Likes: 0
Received 0 Likes
on
0 Posts
And finally using Meguiar's M105/M205 to remove the defects...
We are now ready to test a spot of paint and polish it to our liking. All too often enthusiasts (and professionals!) will spend hours polishing a whole car, only to pull it out in the sunlight and find out that they are not happy with the results. Doing a test spot will help us dial in a process so we can figure out what exact procedure is going to give us the best result possible, then stamp that process over the entire car. I like to tape off a rough square in the paint, about 18� by 18�, which is the around the optimal working section.
You should always start polishing with the least aggressive method possible. In our case, this would be Meguair's M205 Ultra Finishing Polish using a Lake Country White Polishing pad on the Flex.
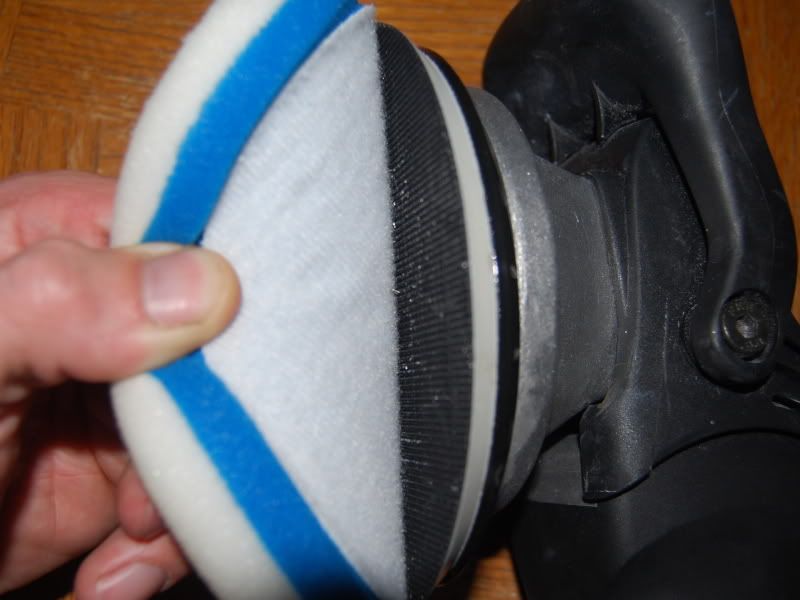
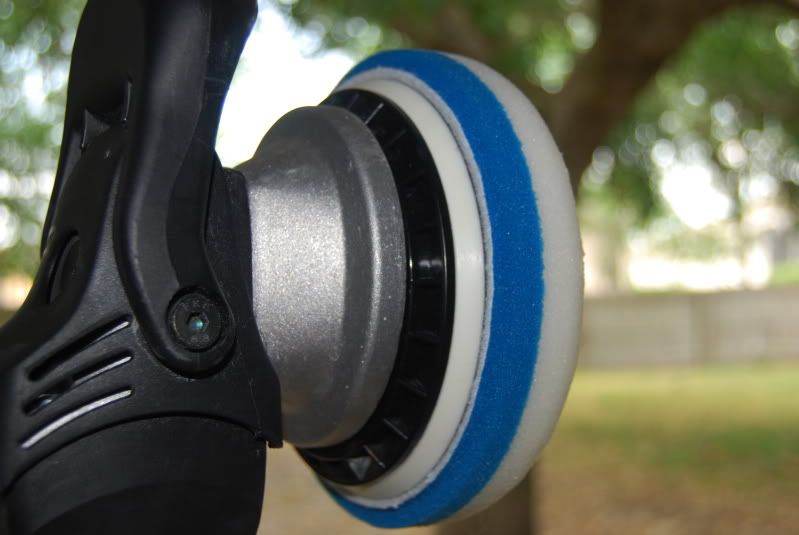
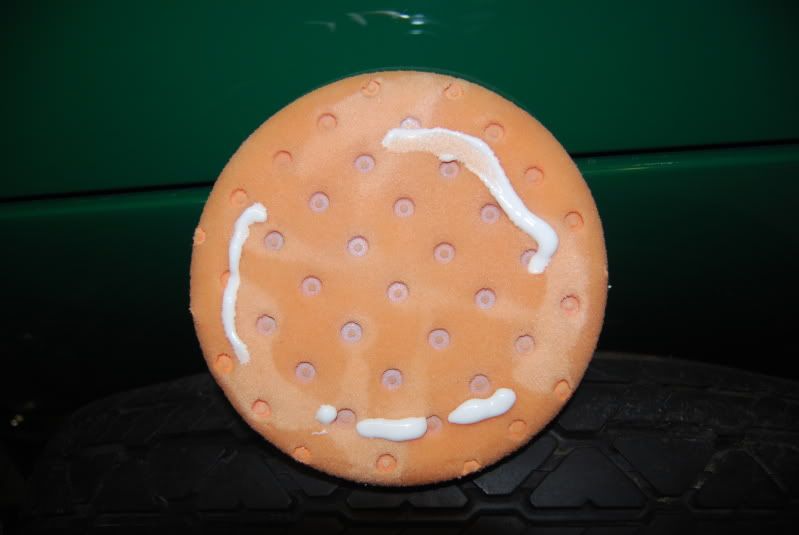
When ever you are about to start polishing for the first time it is a good idea to 'prime' the dry pad. Meguiar's recommends using M34 Final Inspection Quick Detail Spray for priming when using M105 or M205. M34 Final Inspection does not feature any silicones, waxes, polymers, oils, or gloss enhancers found in other quick detail sprays which could negatively effect the polishing process. Center the Flex's hook-and-loop backing plate over the backing of the pad and press firmly to secure. Give the dry pad a mist of Meguiar's M34 to prime it.
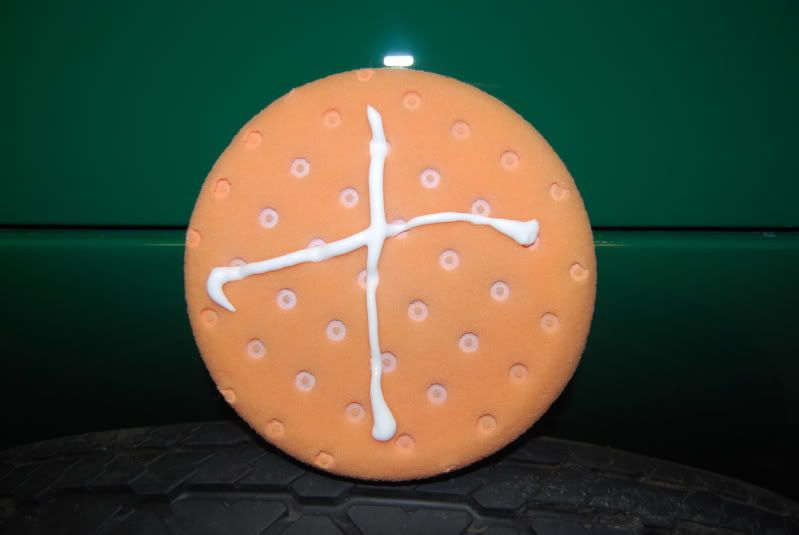
The first time you apply polish to the pad draw an X across the face. This is more polish then is necessary to on subsequent steps, but will ensure that the product is evenly distributed across the pad.
On random orbital and dual action polishers the polish will tend to migrate towards the center of the pad. Once the first section has been polisher, it is not necessary to re-prime with additional M34 or too much polish. Three small lines around the outside, about as much material as one line across the face of the pad, is more then enough. Applying too much polish to the pad will over saturate the pours, increasing buff time an lessening results.
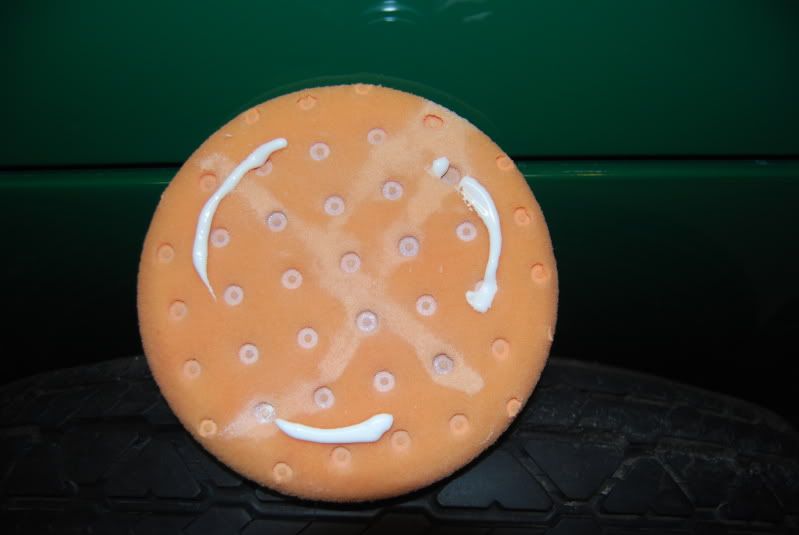
After every two applications I like to brush the pad on the machine before adding fresh polish. Once the pad is primed, three small lines, in alternating spots, is that is needed.
Polishing Technique
The four most common mistakes made when polishing with a dual action or random orbital polisher are moving too quickly across the paint, not using enough pressure on the machine, using too much polish, or polishing a section too quickly.
Arm Speed- Because both a Dual Action and a Random Orbital Polisher deliver most of the their cutting power from the oscillating movement of the pad, they require slow arm speed to allow the abrasives in the polish to work against the paint. Too often novices will move the machine far too quickly. With a Dual Action such as the Flex, move the pad about 2-3 inches per second. With a Random Orbital Polisher such as a Porter Cable 7242 or Meguiar's G100 1 inch per second is a little better.
Pressure- Again the Dual Action and Random Orbital Polisher require down force to get the best results and the most even cut. The weight over either machine applies about 5 lbs of down force on the head. In my experience with the Flex, adding an additional 5-10lbs of pressure will not only increase the action of the machine, but it will make the Flex easier to control. The Porter Cable requires an additional 10 to 15 lbs of pressure to get maximum benefit. If you are not sure how hard you are pressing use a bathroom scale and press down. 10-15 lbs of total pressure for the Flex or Makita Two Mode and about 5 lbs more for a Porter Cable 7242 or Meguiar's G110.
Polish Amount: As discussed previously, draw two lines across the pad to begin and about half that for additional sections. Adding too much polish will decrease the cut of the polish, weight down the machine, and make residue removal difficult. Clean the pad by brushing after every couple of sections. Over time the pad will begin to become saturated, at this point switch to a fresh pad. It can take 2-4 pads to properly remove swirl marks, and an additional 1-2 pads for final polishing.
Polishing Time Per Section- An 18� x 18� square is generally the ideal size to polish per application. Too large a section requires additional polish on the pad for coverage, decreasing efficiency, and makes it more difficult make sure all areas have been equally polished. When you polish you want to work in overlapping strokes, by about 50%. With slow arm speed, and a six inch pad (over lapping passes by 50%) it will take 6 strokes to cover the entire polishing section. Moving at 2 inches per second, it should take about 6 seconds to make each stroke (18 inches � 6 inches for the pad = 12 inches, divided by 2 inches per second= 6 seconds). So starting in the upper right corner and moving left, make one stroke across the paint, then make second stroke from left to right, overlapping the pass about 50%. After six strokes you should have covered the entire section (one pass) in about 36 seconds. Now make a pass (a series of strokes covering the same section) moving up and down, creating a cross hatch pattern. The goal in uniform material removal. This second pass will again take about 36 seconds. Repeat the horizontal and vertical passes one more time, then make a third pass over the paint in both directions reducing the pressure and moving with a slightly quicker arm speed. It should take about 2 minutes and 30 seconds per section (roughly).
With the commonly made mistakes in memory, lets get started. To recap the paint has been completely washed and clayed. All trim and edges have been taped, and the car is inside or in shade and the paint is cool to the touch. The pad has been primed with M34 and a line has been drawn across the pad with M205.
Now place the machine on the paint and drape the power cord over your shoulder to keep it from rubbing on the paint. The Flex has a speed dial that sets maximum power and a variable trigger which allows for percentages of the maximum to be controlled. For beginners a speed in the 3.5-4 range is plenty. As you grow more comfortable you may need want more power and find yourself polishing in the 5 or 6 ranges.
Get a comfortable grip on the bail handle and the trigger handle and squeeze the trigger half way with the pad flat on the paint. Quickly spread the paint over the section to be polished, then press the trigger completely and press down with an additional 5-10 lbs of pressure.
Work in slow, overlapping strokes, from the left to right and right to left, until the entire section has been polished. This is one pass. Now make a pass using up and down motions, steady pressure and slow arm speed. Focus on keeping even pressure and keeping the pad flat and moving slow, about 2 inches per second. Once you are back to your starting position, repeat the horizontal pass and vertical pass, again with overlapping strokes and slow arm speed. The film of polish on the paint should be begin to clear during these repeating passes. Now reduce pressure and increase arm speed, going over the section with two more passes (for a total of three in each direction).
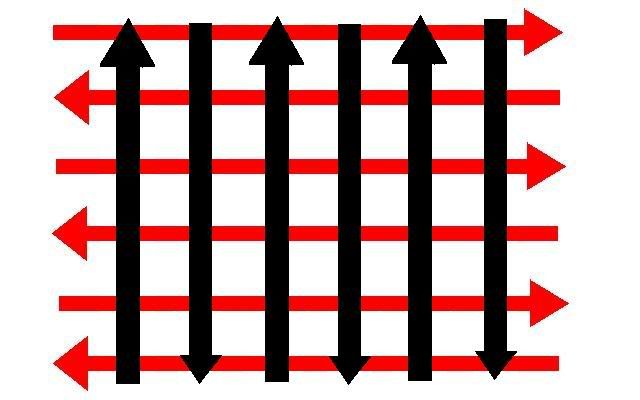
Note: A stroke is a movement from left to right, right to left, up to down, or down to up. A series of overlapping strokes that covers the entire section is known as a pass. Here is an illustrated picture of a pass, comprised of overlapping strokes from left to right and right to left.

To ensure uniform material removal, make the second pass in verticle motions. This cross hatching effect will make sure that area of the section is polished uniformaly. Here the second pass is going up and down.
Never polish dry. Always make sure a wet film remains on the paint to provide the pad from scouring the surface. Remove the residual film immediately with a clean microfiber polishing cloth such as a Dragon Fiber Perfect Shine Buffing Towel. Inspect the test section in direct sunlight and check to see if you got the results you where after. Chances are with the harder paint on the C5 and C6 Corvette's you will need the additional cutting power of Meguiar's M105 and the Orange Power Pad.
Attach the pad and prime the same as above. Using the same application techniques for M205, repeat with M105. Remove the residue and once again inspect the section in good light. Very deep swirl marks may require several applications with M105 and the Orange Pad, and while it is possible to go more aggressive. Keep in mind that the finish left behind from the M105 and Power Pad my have very fine swirl marks know as microswirls or micromarring. Following with M205 and a Power Pad will remove the residual marring and help create that flawless shine.
Once you dial in your system on the test section, simply repeat the process over the entire car, taking your time before each application on each section to make sure you are focusing on your technique and keep your pads clean. Trying to move too quickly will often result in the process taking more time. Some people like to polish an area of their car at a time, such as the hood, then the fender, then the door, etc. Other people like to polish the entire car with a process and section at time. Such as polishing section by section with M105 over the entire car, then repeating if necessary, followed by final polishing the entire car a section at a time with M205. The exact way you do it is going to depend on personal preference.
Remember to keep the basics in mind and always work clean. Use a clean microfiber towel to remove residue immediately after polishing a section before moving to an adjacent section. If the section you are about to polish has dust on it from residual, wipe clean with a spray of M34 Final Inspection and a clean microfiber cloth.
After Care.
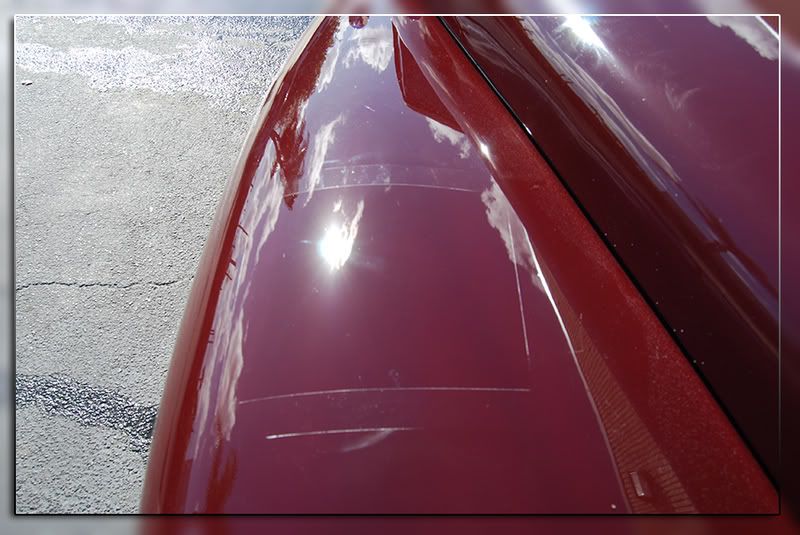
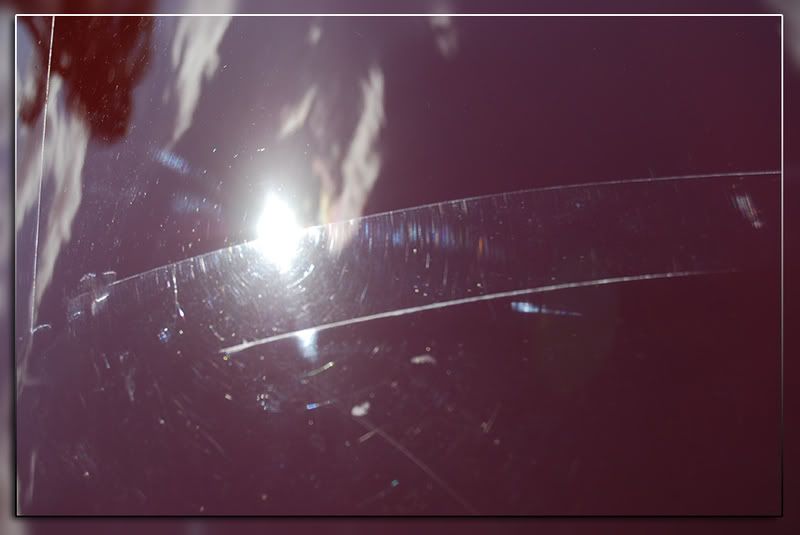
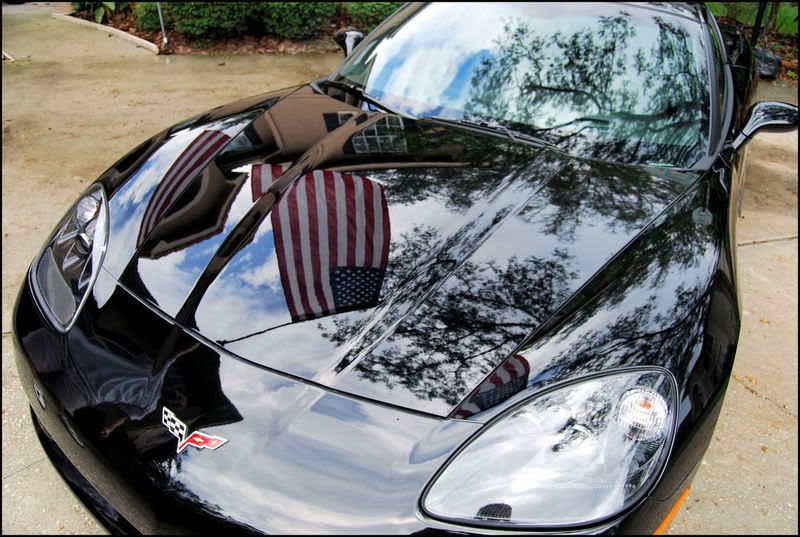
So you have spent the day perfecting your paint, what's next? There will likely be polishing dust in the cracks, crevices, and trim pieces, so begin by washing the car. First removal all of the masking tape, then wash and dry carefully, being certain not to instill any new swirl marks or scratches. After drying you will want to add a couple coats of wax or sealant to protect the paint and keep it looking its best. Selecting a wax or sealant is a personal choice, although I have found nothing better then the Blackfire Wet Ice over Fire combination kit (it is my love of this product that by way of a long story lead to me coming to work for CMA/properautocare). Here are some pictures of cars I have polished then used this kit on.
After the paint is swirl free and re-leveled, proper washing techniques and frequent waxing will keep it looking its best. Over time some light marring might appear. However this marring will often be so shallow that it can be quickly removed with just a final polish. I hope this quick guide helps, as obviously there is so much to polishing that I could write a book on it and still barely scratch the surface (not literally!!).
We are now ready to test a spot of paint and polish it to our liking. All too often enthusiasts (and professionals!) will spend hours polishing a whole car, only to pull it out in the sunlight and find out that they are not happy with the results. Doing a test spot will help us dial in a process so we can figure out what exact procedure is going to give us the best result possible, then stamp that process over the entire car. I like to tape off a rough square in the paint, about 18� by 18�, which is the around the optimal working section.
You should always start polishing with the least aggressive method possible. In our case, this would be Meguair's M205 Ultra Finishing Polish using a Lake Country White Polishing pad on the Flex.
When ever you are about to start polishing for the first time it is a good idea to 'prime' the dry pad. Meguiar's recommends using M34 Final Inspection Quick Detail Spray for priming when using M105 or M205. M34 Final Inspection does not feature any silicones, waxes, polymers, oils, or gloss enhancers found in other quick detail sprays which could negatively effect the polishing process. Center the Flex's hook-and-loop backing plate over the backing of the pad and press firmly to secure. Give the dry pad a mist of Meguiar's M34 to prime it.
The first time you apply polish to the pad draw an X across the face. This is more polish then is necessary to on subsequent steps, but will ensure that the product is evenly distributed across the pad.
On random orbital and dual action polishers the polish will tend to migrate towards the center of the pad. Once the first section has been polisher, it is not necessary to re-prime with additional M34 or too much polish. Three small lines around the outside, about as much material as one line across the face of the pad, is more then enough. Applying too much polish to the pad will over saturate the pours, increasing buff time an lessening results.
After every two applications I like to brush the pad on the machine before adding fresh polish. Once the pad is primed, three small lines, in alternating spots, is that is needed.
Polishing Technique
The four most common mistakes made when polishing with a dual action or random orbital polisher are moving too quickly across the paint, not using enough pressure on the machine, using too much polish, or polishing a section too quickly.
Arm Speed- Because both a Dual Action and a Random Orbital Polisher deliver most of the their cutting power from the oscillating movement of the pad, they require slow arm speed to allow the abrasives in the polish to work against the paint. Too often novices will move the machine far too quickly. With a Dual Action such as the Flex, move the pad about 2-3 inches per second. With a Random Orbital Polisher such as a Porter Cable 7242 or Meguiar's G100 1 inch per second is a little better.
Pressure- Again the Dual Action and Random Orbital Polisher require down force to get the best results and the most even cut. The weight over either machine applies about 5 lbs of down force on the head. In my experience with the Flex, adding an additional 5-10lbs of pressure will not only increase the action of the machine, but it will make the Flex easier to control. The Porter Cable requires an additional 10 to 15 lbs of pressure to get maximum benefit. If you are not sure how hard you are pressing use a bathroom scale and press down. 10-15 lbs of total pressure for the Flex or Makita Two Mode and about 5 lbs more for a Porter Cable 7242 or Meguiar's G110.
Polish Amount: As discussed previously, draw two lines across the pad to begin and about half that for additional sections. Adding too much polish will decrease the cut of the polish, weight down the machine, and make residue removal difficult. Clean the pad by brushing after every couple of sections. Over time the pad will begin to become saturated, at this point switch to a fresh pad. It can take 2-4 pads to properly remove swirl marks, and an additional 1-2 pads for final polishing.
Polishing Time Per Section- An 18� x 18� square is generally the ideal size to polish per application. Too large a section requires additional polish on the pad for coverage, decreasing efficiency, and makes it more difficult make sure all areas have been equally polished. When you polish you want to work in overlapping strokes, by about 50%. With slow arm speed, and a six inch pad (over lapping passes by 50%) it will take 6 strokes to cover the entire polishing section. Moving at 2 inches per second, it should take about 6 seconds to make each stroke (18 inches � 6 inches for the pad = 12 inches, divided by 2 inches per second= 6 seconds). So starting in the upper right corner and moving left, make one stroke across the paint, then make second stroke from left to right, overlapping the pass about 50%. After six strokes you should have covered the entire section (one pass) in about 36 seconds. Now make a pass (a series of strokes covering the same section) moving up and down, creating a cross hatch pattern. The goal in uniform material removal. This second pass will again take about 36 seconds. Repeat the horizontal and vertical passes one more time, then make a third pass over the paint in both directions reducing the pressure and moving with a slightly quicker arm speed. It should take about 2 minutes and 30 seconds per section (roughly).
With the commonly made mistakes in memory, lets get started. To recap the paint has been completely washed and clayed. All trim and edges have been taped, and the car is inside or in shade and the paint is cool to the touch. The pad has been primed with M34 and a line has been drawn across the pad with M205.
Now place the machine on the paint and drape the power cord over your shoulder to keep it from rubbing on the paint. The Flex has a speed dial that sets maximum power and a variable trigger which allows for percentages of the maximum to be controlled. For beginners a speed in the 3.5-4 range is plenty. As you grow more comfortable you may need want more power and find yourself polishing in the 5 or 6 ranges.
Get a comfortable grip on the bail handle and the trigger handle and squeeze the trigger half way with the pad flat on the paint. Quickly spread the paint over the section to be polished, then press the trigger completely and press down with an additional 5-10 lbs of pressure.
Work in slow, overlapping strokes, from the left to right and right to left, until the entire section has been polished. This is one pass. Now make a pass using up and down motions, steady pressure and slow arm speed. Focus on keeping even pressure and keeping the pad flat and moving slow, about 2 inches per second. Once you are back to your starting position, repeat the horizontal pass and vertical pass, again with overlapping strokes and slow arm speed. The film of polish on the paint should be begin to clear during these repeating passes. Now reduce pressure and increase arm speed, going over the section with two more passes (for a total of three in each direction).
Note: A stroke is a movement from left to right, right to left, up to down, or down to up. A series of overlapping strokes that covers the entire section is known as a pass. Here is an illustrated picture of a pass, comprised of overlapping strokes from left to right and right to left.
To ensure uniform material removal, make the second pass in verticle motions. This cross hatching effect will make sure that area of the section is polished uniformaly. Here the second pass is going up and down.
Never polish dry. Always make sure a wet film remains on the paint to provide the pad from scouring the surface. Remove the residual film immediately with a clean microfiber polishing cloth such as a Dragon Fiber Perfect Shine Buffing Towel. Inspect the test section in direct sunlight and check to see if you got the results you where after. Chances are with the harder paint on the C5 and C6 Corvette's you will need the additional cutting power of Meguiar's M105 and the Orange Power Pad.
Attach the pad and prime the same as above. Using the same application techniques for M205, repeat with M105. Remove the residue and once again inspect the section in good light. Very deep swirl marks may require several applications with M105 and the Orange Pad, and while it is possible to go more aggressive. Keep in mind that the finish left behind from the M105 and Power Pad my have very fine swirl marks know as microswirls or micromarring. Following with M205 and a Power Pad will remove the residual marring and help create that flawless shine.
Once you dial in your system on the test section, simply repeat the process over the entire car, taking your time before each application on each section to make sure you are focusing on your technique and keep your pads clean. Trying to move too quickly will often result in the process taking more time. Some people like to polish an area of their car at a time, such as the hood, then the fender, then the door, etc. Other people like to polish the entire car with a process and section at time. Such as polishing section by section with M105 over the entire car, then repeating if necessary, followed by final polishing the entire car a section at a time with M205. The exact way you do it is going to depend on personal preference.
Remember to keep the basics in mind and always work clean. Use a clean microfiber towel to remove residue immediately after polishing a section before moving to an adjacent section. If the section you are about to polish has dust on it from residual, wipe clean with a spray of M34 Final Inspection and a clean microfiber cloth.
After Care.
So you have spent the day perfecting your paint, what's next? There will likely be polishing dust in the cracks, crevices, and trim pieces, so begin by washing the car. First removal all of the masking tape, then wash and dry carefully, being certain not to instill any new swirl marks or scratches. After drying you will want to add a couple coats of wax or sealant to protect the paint and keep it looking its best. Selecting a wax or sealant is a personal choice, although I have found nothing better then the Blackfire Wet Ice over Fire combination kit (it is my love of this product that by way of a long story lead to me coming to work for CMA/properautocare). Here are some pictures of cars I have polished then used this kit on.
After the paint is swirl free and re-leveled, proper washing techniques and frequent waxing will keep it looking its best. Over time some light marring might appear. However this marring will often be so shallow that it can be quickly removed with just a final polish. I hope this quick guide helps, as obviously there is so much to polishing that I could write a book on it and still barely scratch the surface (not literally!!).
Trending Topics
04-20-11, 07:19 AM
#8
I hope this quick guide helps, as obviously there is so much to polishing that I could write a book on it and still barely scratch the surface (not literally!!).
I've had great success with Meguiar's M205 and most recently Meguiar's Ultimate Polish. Swirls are very difficult to keep from getting on obsidian black, but following your extensive recommendations will go a long way to remove them and keep them away.
Thanks again and good luck to the original poster. Obsidian black is an awesome color.
 04-20-11, 11:42 AM
#9
Driver
Thread Starter
Join Date: Jan 2009
Location: FL
Posts: 155
Likes: 0
Received 0 Likes
on
0 Posts
Thank you to everyone! This was way more info than I expected but helps a lot! I am going to buy the polisher from Meguiars as soon as I get the cash and hopefully get to work on this!

Thread
Thread Starter
Forum
Replies
Last Post
Nick@Autogeek
Club Lexus Vendor Marketplace
1
05-14-12 06:24 AM