
 01-07-15, 04:45 PM
Last edit by: IB Advertising
See related guides and technical advice from our community experts:
Browse all: Cleaning and Detailing Guides
- How to Clean Your Engine Bay
Step by step instructions for do-it-yourself repairs
Browse all: Cleaning and Detailing Guides

Proper Auto Care tells how... to clean your engine
02-24-11, 08:47 PM
#1
Former Sponsor
Thread Starter

Join Date: Nov 2009
Location: FL
Posts: 209
Likes: 0
Received 0 Likes
on
0 Posts
Cleaning your engine compartment
A car is never truly detailed unless the engine compartment is clean, free of grease, and well protected! Detailing your engine compartment is not just for vanity or to elicit praise when you bring your automobile in for service, it serves good reason. Today�s engine compartments are getting smaller and more cramped. This concentrates heat and grime closer to the hoses, wires, plastic parts and vinyl trim covers, all of which can degrade and crack over time. A clean engine also makes it easy to spot trouble and leaks and diagnose the problems accordingly. Finally a little time and elbow grease can keep hoses and seals supple; today�s molded radiator hoses can cost as much $200.00!
The following article is for somebody who has a rudimentary understanding of the components of an engine and some knowledge on how they work. If looking under the hood reminds of the first time you learned Trigonometry, then you may want to consider hiring a professional detailer. Also make sure to check with the dealer before cleaning the engine for the first time to determine if there are any special precautions to be taken with your particular make or model of vehicle.
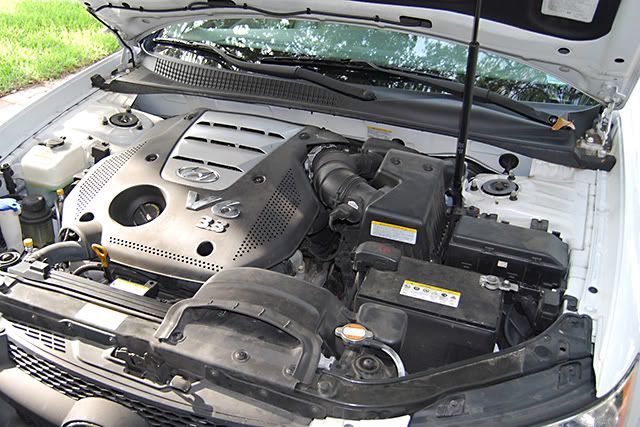
Engine Before
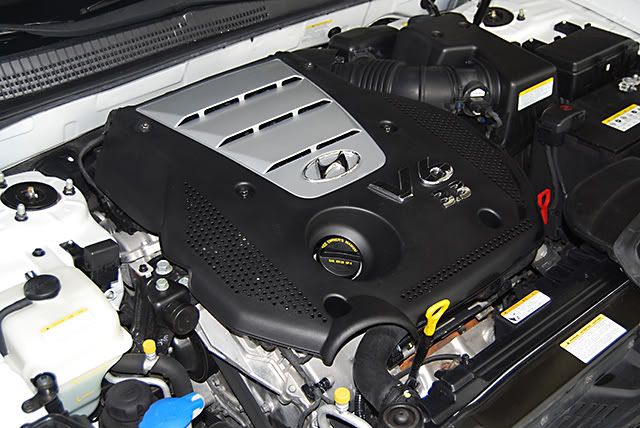
Engine After
You want your engine to be cool; spraying cleaners or degreasers on a hot engine can cause staining. The first step is remove any loose grime, pine needles, leaves, or vermin that are trapped in the crevices, grills, or vents of the engine. Use compressed air, from an air compressor, electric leaf blower, or dedicated car drier such as the Black Baron Dryer. You can also use a powerful vacuum cleaner like the Metro-Vac or a shop-vac (that has adequate lift). Blow (or suck) off any loose debris first.

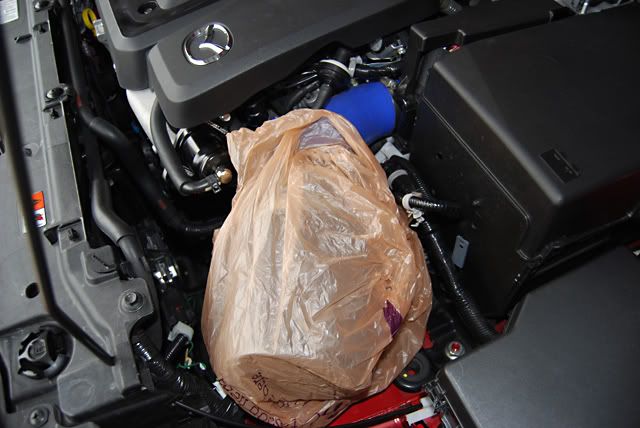
Now take the time to cover any electrical components or intake openings. Household aluminum foil is great for covering items like the alternator and errant connections. Plastic bags work well for sealing off the intake or covering after market air filters. If you own a classic car with carburetors, consider removing the air filter housing and covering the throats of the carburetor. If your vehicle is has a distributor or magneto consider disconnecting the ignition wires and covering it with a plastic bag. You want to seal off any areas that water should not enter.
Newer vehicles have sealed coil packs and ignition modules. Over time the seals can become brittle and crack. If you vehicle is five or more years old, consider covering the coil packs and ignition modules with aluminum foil before cleaning.
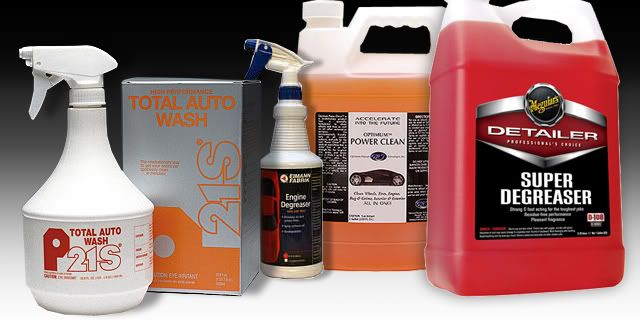
Now spray the engine compartment and engine liberal with a non-acid based cleaning solution. P21s Total Auto Wash, Meguiar�s Super Degreaser, or Eimann Fabrik VOC Engine Degreaser are great choices and will not dull or stain aluminum like many household degreasers. Avoid getting engine cleaners on the exterior paint work as they will remove the wax coating. If you are going to detail your entire car we recommend starting with the engine first so you can clean up any overspray and splash when you detail the exterior.
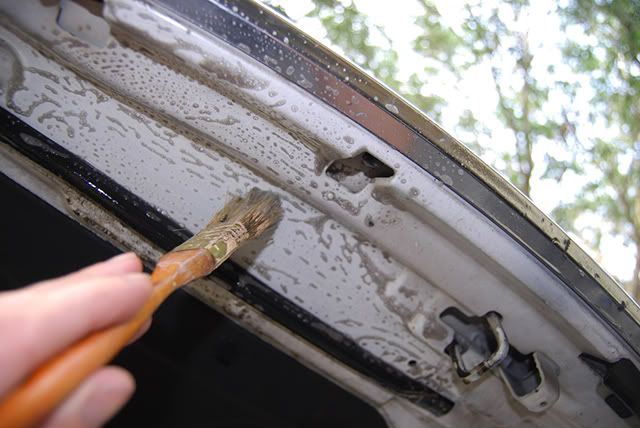
Let the engine cleaner soak on the engine for about three minutes. During this time you can use various brushes, like an old paint brush and an E-Z Detail Brush to get into all the nooks and crannies and agitate spots of stubborn contamination.
Next rinse the engine compartment, avoiding direct high pressure spray on the areas you sealed, until the cleaner is rinsed away. While the engine compartment is still wet, go back and inspect for any missed areas. If you find any, spray a little cleaner on to the area and agitate with a One-Inch Detailing Brush and rinse.
After the final rinse, remove as much of the standing water as possible. Use either a blower, compressed air, or a shop vacuum to dry the engine as much as possible. Use an old micro fiber towel or a value priced General Purpose Micro fiber Towel to dry as much remaining water as possible. NOTE: Remember to remove all baggies, covers, and aluminum foil before starting the engine! Now start the engine and let it idle for at least 5 minutes to warm up to operating temperature and dry any hard to reach spots.
Protect and beautify.
After everything is dry and the engine is cool, apply a protective dressing to the rubber hoses, wires, vinyl and plastic shields. Water based dressing like Meguiar�s Natural Shine, Meguiar�s Ultimate Protectant, or 303 Aerospace Protectant do a great job of keeping the engine looking great while keeping the rubber supple. Spray directly on the top sides of the covers and hoses and apply to the bottom side with a cloth. Allow the protectant to dwell for 3-5 minutes then buff over to a streak fresh shine.
There are popular spray-and-walk-away engine dressing, but we are not a big fan of these produces unless your driving directly to your dealer to sell your car. These dressings stay wet for days and attract dust and dirt. In five minutes your engine compartment is covered in dust and looks worse than when you started!
Finishing Touches.
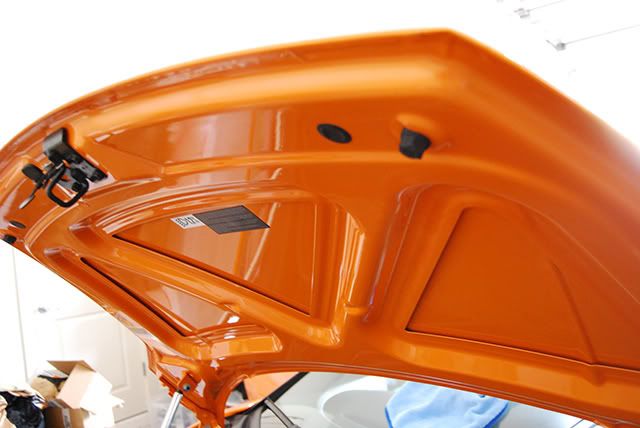
Now that engine is clean and the rubber and black plastic protected it is time to apply some finishing touches to make your engine compartment really stand out. Paint work, including the bottom side of the hood, is often neglected and riddled with water spots. We recommend applying a high quality All-In-One �cleaner/wax� such as Klasse AIO to these area to lightly polish them and make your engine sparkle.
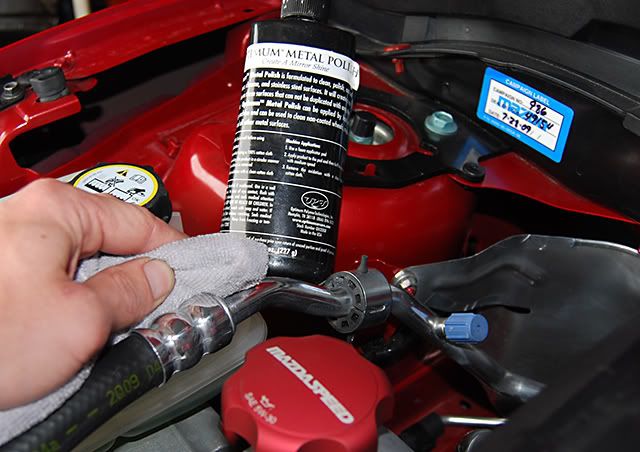
Any exposed, non-textured metal such as air conditioning lines, brackets, and covers and be quickly polished to a high gloss and protected by using something like Optimum�s Metal Polish.
If you have any questions about detailing your engine bay please give us a toll free call at 1(800) 628-7596 and let our detailing experts help you keep your car looking it�s best.
A car is never truly detailed unless the engine compartment is clean, free of grease, and well protected! Detailing your engine compartment is not just for vanity or to elicit praise when you bring your automobile in for service, it serves good reason. Today�s engine compartments are getting smaller and more cramped. This concentrates heat and grime closer to the hoses, wires, plastic parts and vinyl trim covers, all of which can degrade and crack over time. A clean engine also makes it easy to spot trouble and leaks and diagnose the problems accordingly. Finally a little time and elbow grease can keep hoses and seals supple; today�s molded radiator hoses can cost as much $200.00!
The following article is for somebody who has a rudimentary understanding of the components of an engine and some knowledge on how they work. If looking under the hood reminds of the first time you learned Trigonometry, then you may want to consider hiring a professional detailer. Also make sure to check with the dealer before cleaning the engine for the first time to determine if there are any special precautions to be taken with your particular make or model of vehicle.
Engine Before
Engine After
You want your engine to be cool; spraying cleaners or degreasers on a hot engine can cause staining. The first step is remove any loose grime, pine needles, leaves, or vermin that are trapped in the crevices, grills, or vents of the engine. Use compressed air, from an air compressor, electric leaf blower, or dedicated car drier such as the Black Baron Dryer. You can also use a powerful vacuum cleaner like the Metro-Vac or a shop-vac (that has adequate lift). Blow (or suck) off any loose debris first.
Now take the time to cover any electrical components or intake openings. Household aluminum foil is great for covering items like the alternator and errant connections. Plastic bags work well for sealing off the intake or covering after market air filters. If you own a classic car with carburetors, consider removing the air filter housing and covering the throats of the carburetor. If your vehicle is has a distributor or magneto consider disconnecting the ignition wires and covering it with a plastic bag. You want to seal off any areas that water should not enter.
Newer vehicles have sealed coil packs and ignition modules. Over time the seals can become brittle and crack. If you vehicle is five or more years old, consider covering the coil packs and ignition modules with aluminum foil before cleaning.
Now spray the engine compartment and engine liberal with a non-acid based cleaning solution. P21s Total Auto Wash, Meguiar�s Super Degreaser, or Eimann Fabrik VOC Engine Degreaser are great choices and will not dull or stain aluminum like many household degreasers. Avoid getting engine cleaners on the exterior paint work as they will remove the wax coating. If you are going to detail your entire car we recommend starting with the engine first so you can clean up any overspray and splash when you detail the exterior.
Let the engine cleaner soak on the engine for about three minutes. During this time you can use various brushes, like an old paint brush and an E-Z Detail Brush to get into all the nooks and crannies and agitate spots of stubborn contamination.
Next rinse the engine compartment, avoiding direct high pressure spray on the areas you sealed, until the cleaner is rinsed away. While the engine compartment is still wet, go back and inspect for any missed areas. If you find any, spray a little cleaner on to the area and agitate with a One-Inch Detailing Brush and rinse.
After the final rinse, remove as much of the standing water as possible. Use either a blower, compressed air, or a shop vacuum to dry the engine as much as possible. Use an old micro fiber towel or a value priced General Purpose Micro fiber Towel to dry as much remaining water as possible. NOTE: Remember to remove all baggies, covers, and aluminum foil before starting the engine! Now start the engine and let it idle for at least 5 minutes to warm up to operating temperature and dry any hard to reach spots.
Protect and beautify.
After everything is dry and the engine is cool, apply a protective dressing to the rubber hoses, wires, vinyl and plastic shields. Water based dressing like Meguiar�s Natural Shine, Meguiar�s Ultimate Protectant, or 303 Aerospace Protectant do a great job of keeping the engine looking great while keeping the rubber supple. Spray directly on the top sides of the covers and hoses and apply to the bottom side with a cloth. Allow the protectant to dwell for 3-5 minutes then buff over to a streak fresh shine.
There are popular spray-and-walk-away engine dressing, but we are not a big fan of these produces unless your driving directly to your dealer to sell your car. These dressings stay wet for days and attract dust and dirt. In five minutes your engine compartment is covered in dust and looks worse than when you started!
Finishing Touches.
Now that engine is clean and the rubber and black plastic protected it is time to apply some finishing touches to make your engine compartment really stand out. Paint work, including the bottom side of the hood, is often neglected and riddled with water spots. We recommend applying a high quality All-In-One �cleaner/wax� such as Klasse AIO to these area to lightly polish them and make your engine sparkle.
Any exposed, non-textured metal such as air conditioning lines, brackets, and covers and be quickly polished to a high gloss and protected by using something like Optimum�s Metal Polish.
If you have any questions about detailing your engine bay please give us a toll free call at 1(800) 628-7596 and let our detailing experts help you keep your car looking it�s best.
 02-25-11, 12:22 PM
#2
Lexus Test Driver
Join Date: Nov 2009
Location: FLORIDA
Posts: 953
Likes: 0
Received 0 Likes
on
0 Posts
If your vehicle is has a distributor or magneto consider disconnecting the ignition wires and covering it with a plastic bag. You want to seal off any areas that water should not enter.
Newer vehicles have sealed coil packs and ignition modules. Over time the seals can become brittle and crack. If you vehicle is five or more years old, consider covering the coil packs and ignition modules with aluminum foil before cleaning.
 06-10-11, 08:10 PM
#6
i cleaned the engine on my Es300 and next week had an timing belt changed @ Lexus service ..the service manager later mentioned .."did u cleaned the engine?..it looks really clean".. ooyaa!!! ..

Trending Topics


Thread
Thread Starter
Forum
Replies
Last Post