Lexus IS: How to Install HID Headlights on Your Non-HID Equipped Lexus IS
HID headlights are a very popular modification, although many new Lexus IS vehicles come equipped with them. If yours doesn't, follow these instructions to install them yourself.
This article applies to the Lexus IS (2005-2013).
HID headlights are found in newer, higher-end cars because they provide a better look and lighting capabilities. Due to the added cost of a quality set of ballasts, most base models will come with halogen lights instead. If you're considering doing this modification, you need to make sure you have headlights that use projectors. Dropping these into headlight housings made only for halogen bulbs will give poor light output due to the light being directed improperly. This means that instead of lighting up the road, you'll be lighting up the tops of trees and oncoming drivers' eyes. It is also recommended going with a quality set of lights and ballasts; the cheap brands generally will have a start up delay where the lights will flicker until fully warmed up.

Materials Needed
- Phillips head screwdriver
- Flat head screwdriver
- 10mm socket
- Hole saw or large drill bits
- Zip ties
Step 1 - Gain access
- Disconnect the negative battery cable.
- Remove the plastic engine guard over the radiator; it'll be held in with plastic screws or little push pins.

Figure 1. Disconnect the negative cable. 
Figure 2. Remove the radiator cover.
Step 2 - Remove the air box and washer fluid tube
- Disconnect the mass air flow sensor from the air box (Figure 3).
- On the passenger side, remove the air box; it's held in with two 10mm bolts (Figure 4).
- On the driver side, remove the washer fluid fill tube; It's held in with one 10mm bolt (Figure 5).

Figure 3. Remove the MAF sensor. 
Figure 4. Remove the two bolts securing the airbox. 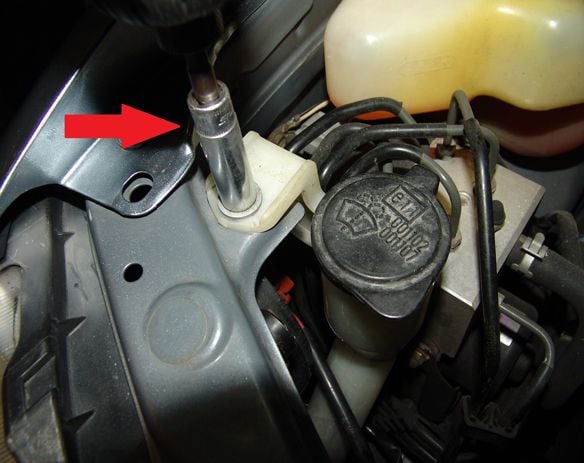
Figure 6. Remove the bolt securing the washer tube.
Step 3 - Install HID wire harness and bulb
The HID kit you purchased should have come with its own wiring harness to power the ballasts. If it doesn't, you'll need to purchase one separately. The wire harness should be completely plug and play with the exception of two wires, the ones that hook to the negative and positive battery posts.
- Remove the light fixture cover and the halogen bulb (Figure 7).
- You'll need to drill a hole through the black plastic cover to run the wires to the ballast through. If your kit didn't come with a wire grommet, you'll need to run silicon around the hole to keep the moisture out (Figure 8).
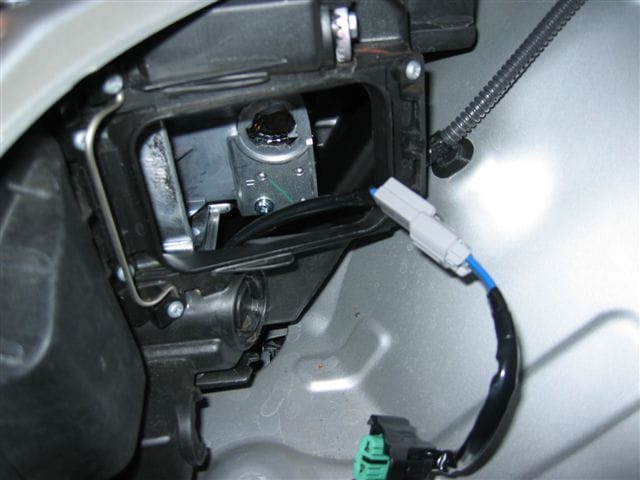
Figure 7. Cover removed. 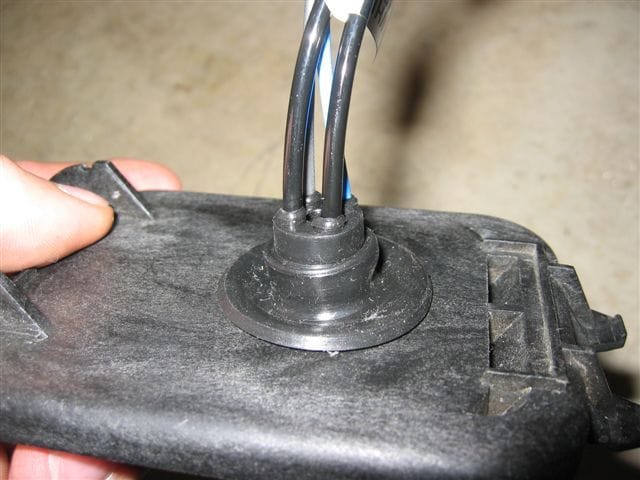
Figure 8. Wires run through cover.
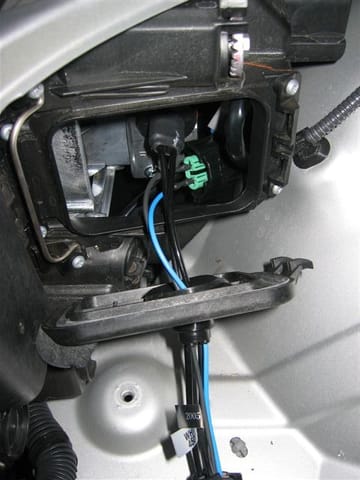
- Plug the light wires from the ballast into the factory positions on the headlight harness (Figure 9).
- Install the new HID bulb into the factory position.
- Repeat this process for the other side.
Step 4 - Finishing up
Before re-installing everything, hook up the negative battery cable again and test the headlights to make sure the lights are functioning. If they aren't, you'll need to go back and double check all the wiring connections you have made. Once you're done testing, re-install the black plastic housing covers, the air box, the mass air flow sensor, and the windshield washer fluid filler tube.

Related Discussions
- Headlight Replacement - ClubLexus.com
- Changing Bulb - ClubLexus.com