Lexus ES: How to Replace Serpentine Belt
Replace the drive belts in a Lexus ES using this guide and stop their squealing.
This article applies to the Lexus ES (2007-2014).
The serpentine belt supplies the power to a lot of key components including the alternator, power steering, and air conditioning. If the belt fails and breaks, you can't go anywhere because you'll lose your alternator. Replacing the belt yourself can be a bit tricky, but can save you a lot of money by not having to go to the dealer. The serpentine belt should be replaced every 50-75k miles or when it starts to lose pieces of itself. Strange sounds like a squealing or chirping are the early warning signs of its potential failure.

Materials Needed
- 14mm socket
- 14mm open ended wrench
- Phillips head screwdriver
- Tire iron
- Jack
- Jack stands
- 5mm hexagon key
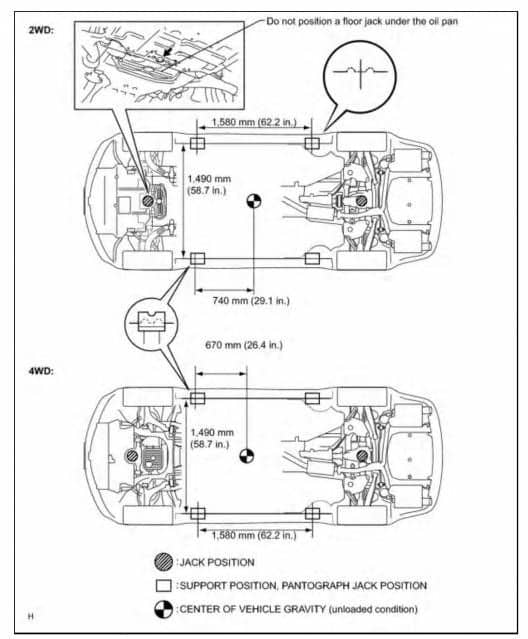
Step 1 - Lift vehicle onto jack stands
The belts are located in a cramped area which makes working on them difficult, so some things need to be removed in order to gain access. Park the car on flat ground. Block the rear wheels with blocks or wheel chocks. Put the car on jack stands and remove the passenger side front wheel.
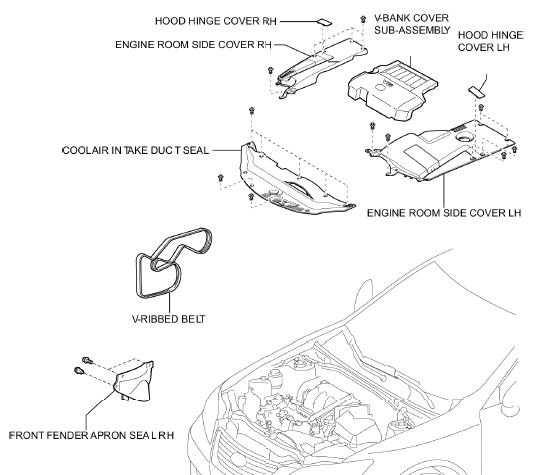
Step 2 - Remove access panels
Remove the two screws holding on the apron seal access cover, located to the right of the shock tower in the passenger side wheel well. Remove the plastic covers from the top of the motor.
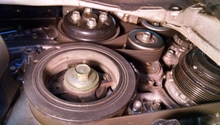
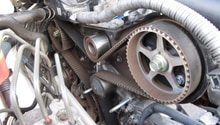
Step 3 - Remove the serpentine belt
This part will be tricky and requires both hands to do two things at once. Be prepared and have your 5mm hex key handy. Working from inside the wheel well, place the 14mm wrench or socket onto the tensioner bolt. Rotate the bolt counter-clockwise towards the front of the car. While holding it rotated, slide the 5mm hex key into the hole below it to lock it into place. Remove the wrench and remove the serpentine belt.
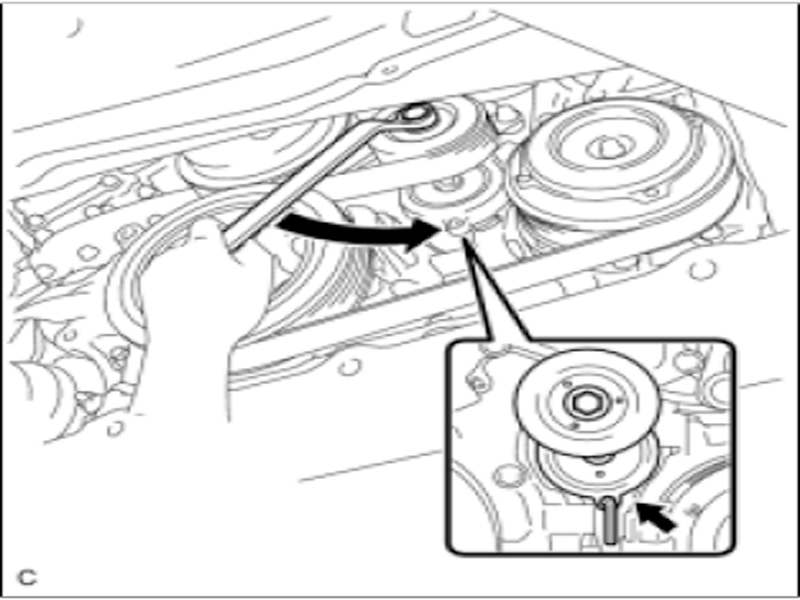
Figure 3. Releasing tension. 
Figure 4. Rotate this bolt counter-clockwise.
Step 4 - Install new belt
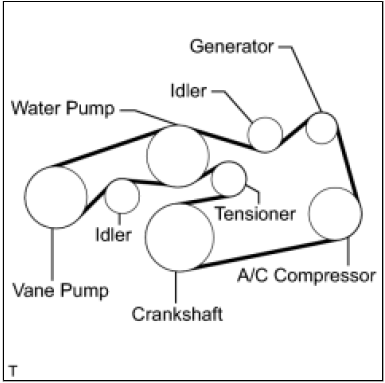
Study the diagram in Figure 5 below to be sure the belt is installed in the correct orientation. Slip the the belt onto all pulleys except the tensioner. Once the belt is on all but that one, you can use the socket to rotate it counter-clockwise again, remove the hex key, and then slide the belt into place more easily.
Step 4 - Finishing up
It's important to listen for any belt slipping when you start the vehicle after changing the belts; any noise can be a sign of too much or too little tension. In about 1,000 miles after doing the change, you'll want to go back and check the tension one more time because the belt will stretch out some.
Featured Video: Serpentine Belt Replacement on the Camry V6
Related Discussion
- Lexus ES Serpentine Belt Replacement - ClubLexus.com