
Tanabe NF210 Springs Installed
 07-02-13, 08:43 PM
#16
Interesting you should ask.
I have a roll up garage door, so I have it marked on the inside of the roll-up door with the car only a few inches from it.
I have to move mine up exactly one inch from the distance I measured at. Do you have a picture of which holes under the hood are the adjustment screws? The icons are kind of vague to me.
The first picture below is "A" in the manual, look for that groove for the screwdriver. I removed the panels/clips before I did it so I could use a shorter screwdriver. The second one is "B." It says to do A first then mimic the turns with B (clockwise raises). The next pic is the aim BEFORE I adjusted them. Then you can see passenger side adjusted followed by filly adjusted to about 3 feet from 10-12 feet from wall.
 07-02-13, 09:31 PM
#17
I adjusted my headlights to about 2-2.5 inches at 25 ft. I like it much better afterward. I can see much farther down the road and standing in front of the car the glare is minimal. Much much less than all SUV's out there.
Here's how I adjusted mine:
Ideally your gas tank should be half full, on a flat surface, and a wall. Start with car next to the wall, turn on lights and mark on the wall the hot spots of your headlights with painter tape. Now back car away 25 ft from wall, 12 ft ok but 25 more accurate.
So on the driver side, when you turn the middle screw (labeled U D L R) CLOCKWISE. It turns the light UP and also to the LEFT. Keep track of the number of turns.
You then turn the fender screw (labeled R L) CLOCKWISE the same number of turns because now it will turn the light back toward the RIGHT. Thus the net effect is the lights go UP while still being centered.
Do the same with other light. To make things easy I bought a long screw driver from home depot in case I need to readjust in the future. No need to remove anything. You can use a flash light and aim down the hole to see where the screwdriver should be inserted.
07-02-13, 11:10 PM
#18
I'm stock everything and at 25ft from the wall, I the lights (hot spots) are 4" below the center of the bulbs/headlights (measured when front of car right next to wall). Most people suggest aiming it 2-2.5" below the center of the headlights. Out of the factory Lexus aimed their lights too low.
I adjusted my headlights to about 2-2.5 inches at 25 ft. I like it much better afterward. I can see much farther down the road and standing in front of the car the glare is minimal. Much much less than all SUV's out there.
Here's how I adjusted mine:
Ideally your gas tank should be half full, on a flat surface, and a wall. Start with car next to the wall, turn on lights and mark on the wall the hot spots of your headlights with painter tape. Now back car away 25 ft from wall, 12 ft ok but 25 more accurate.
So on the driver side, when you turn the middle screw (labeled U D L R) CLOCKWISE. It turns the light UP and also to the LEFT. Keep track of the number of turns.
You then turn the fender screw (labeled R L) CLOCKWISE the same number of turns because now it will turn the light back toward the RIGHT. Thus the net effect is the lights go UP while still being centered.
Do the same with other light. To make things easy I bought a long screw driver from home depot in case I need to readjust in the future. No need to remove anything. You can use a flash light and aim down the hole to see where the screwdriver should be inserted.
I did make sure to mimic every clockwise turn on both headlamps as you mentioned above. On the highway I had a clearly illuminated roadway and a solid peripheral lighting. We will see if I get flashed!

 07-03-13, 09:21 PM
#20
Instructor
Thread Starter

I had some time this afternoon, so I took my car back to the shop that installed my springs and discussed my alignment issue with them. Since the front of my car doesn't have camber adjustment, I wanted them to check it and make sure everything was correctly re-installed. They were cool about it and racked my car up. They checked out the passenger side that was out of spec and compared it to the drivers side that was OK.
They discovered that there might be an orientation to the isolator at the top of the spring. There are 3 possible orientations and one of them looked like it might give the strut slightly more positive camber. The tech pulled the strut, removed the spring, re-oriented the isolator and put everything back together. I'll be going back to get the alignment checked on Friday afternoon so we'll see if the fix made a difference.
In the meantime ... if any of you are doing lowering springs ... be sure to put everything back in exactly the same way it came out .. it can't hurt.
07-03-13, 09:26 PM
#21
Instructor
Thread Starter
As for the headlight aim point, I'm thinking of having the dealer do it since they probably have target screens set up to do this. I'm hoping it will be no charge if I ask them to check my headlight level and don't tell them my car is lowered.
07-05-13, 10:05 PM
#22
Instructor
Thread Starter
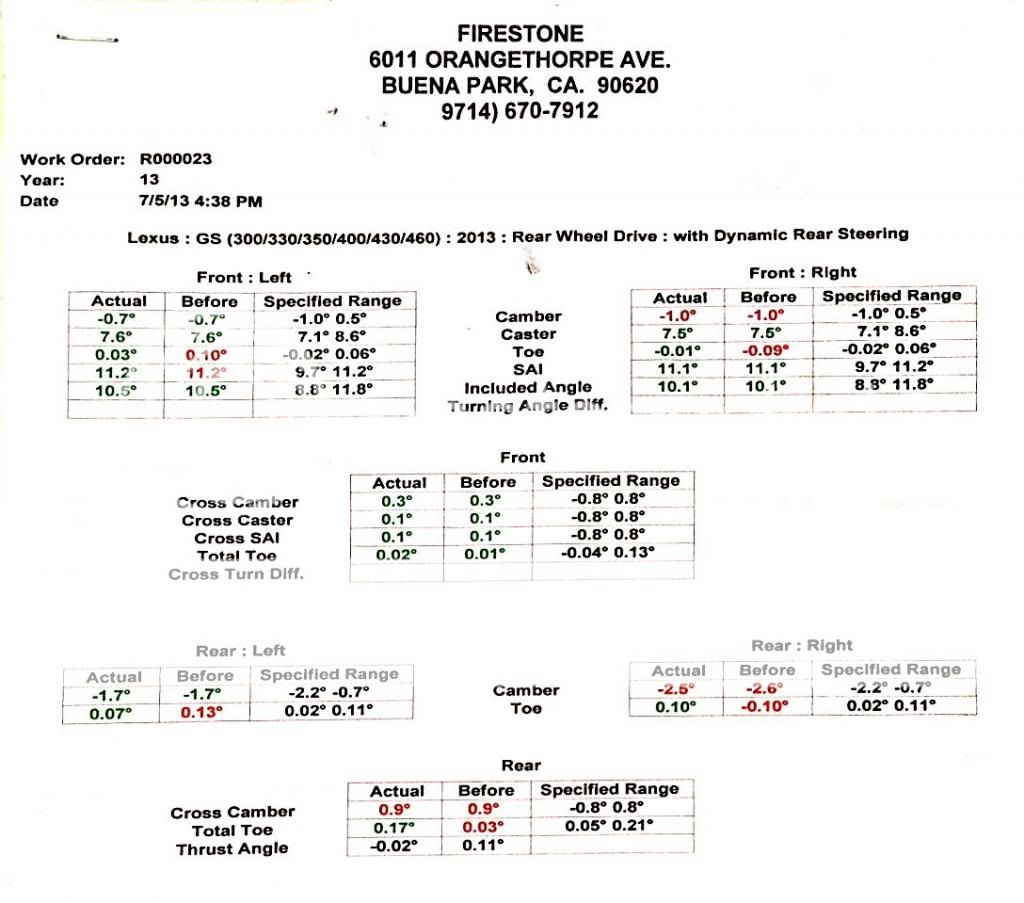
Looks like this is as low as one can lower the car and still keep the alignment at the edge of staying within factory spec.
What's strange is that the right rear camber was within spec last week and the tech that did the spring install didn't touch anything except the front passenger side.
In any case, this is not bad.
What's strange is that the right rear camber was within spec last week and the tech that did the spring install didn't touch anything except the front passenger side.
In any case, this is not bad.


 07-08-13, 05:22 AM
#24

Looks good terrycs. I'm seriously looking at spacers too. I think you should add spacers up front, maybe 15's depending on the look you're going for.
Can you give more detail on which spacers you're using? Did you add longer bolts, or did they bolt on and then the wheels bolt on to the spacers?
Can you give more detail on which spacers you're using? Did you add longer bolts, or did they bolt on and then the wheels bolt on to the spacers?
07-08-13, 09:14 AM
#25
Instructor
Thread Starter
Yes, there is more room for spacers in the front.
If I decide to go with 15mm spacers in front, I would probably want to go with 20mm in the back to keep the front and back uniform.
I am still considering only 5mm or 10mm spacers for several reasons. 1) They are cheap, 2) This may not be my final wheel and tire combination and 3) I am still waiting on an alignment kit even though I technically don't need one.
My alignment is at the edge of still being in spec. I'm kind of **** and prefer my alignment to be at nominal settings. Installing an alignment kit will move the tops of the tires outward for more positive camber which means a thinner spacer is needed.
I have Ichiba V2 spacers in the back which are the ones with built in studs. They are aluminum rings with studs pressed into them and a set of holes to mount them to the studs on the car. They also feature a hubcentric ring which is unique to each car make and sometimes model. The Ichiba V1 spacers are basically thin plates that that may or may not utilize the factory studs for mounting depending on the amount of thread engagement.
Ichiba V2 Spacer supplied with nuts to mount spacer to car:

Ichiba V1 Spacer supplied with extended length studs as needed:

If I decide to go with 15mm spacers in front, I would probably want to go with 20mm in the back to keep the front and back uniform.
I am still considering only 5mm or 10mm spacers for several reasons. 1) They are cheap, 2) This may not be my final wheel and tire combination and 3) I am still waiting on an alignment kit even though I technically don't need one.
My alignment is at the edge of still being in spec. I'm kind of **** and prefer my alignment to be at nominal settings. Installing an alignment kit will move the tops of the tires outward for more positive camber which means a thinner spacer is needed.
I have Ichiba V2 spacers in the back which are the ones with built in studs. They are aluminum rings with studs pressed into them and a set of holes to mount them to the studs on the car. They also feature a hubcentric ring which is unique to each car make and sometimes model. The Ichiba V1 spacers are basically thin plates that that may or may not utilize the factory studs for mounting depending on the amount of thread engagement.
Ichiba V2 Spacer supplied with nuts to mount spacer to car:
Ichiba V1 Spacer supplied with extended length studs as needed:
Looks good terrycs. I'm seriously looking at spacers too. I think you should add spacers up front, maybe 15's depending on the look you're going for.
Can you give more detail on which spacers you're using? Did you add longer bolts, or did they bolt on and then the wheels bolt on to the spacers?
Can you give more detail on which spacers you're using? Did you add longer bolts, or did they bolt on and then the wheels bolt on to the spacers?
07-08-13, 08:04 PM
#26
Thanks for sharing! I can see your point, and agree. I'm on RS*R down springs, so not quite as low as your drop. My alignment turned out all within spec, and I'm leaning to 20mm spacers in the rear, and 15 in front. I'm also settled in with my wheel/tire combo, so I may pull the trigger once I get back from a business trip.
Thanks again.
Thanks again.
07-08-13, 08:55 PM
#27

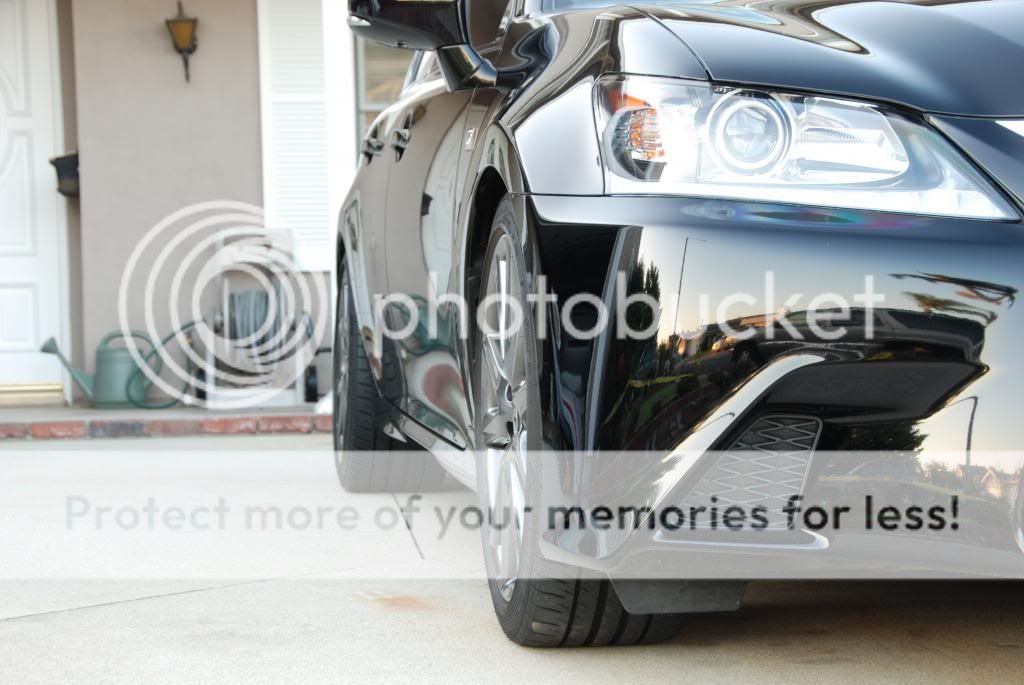
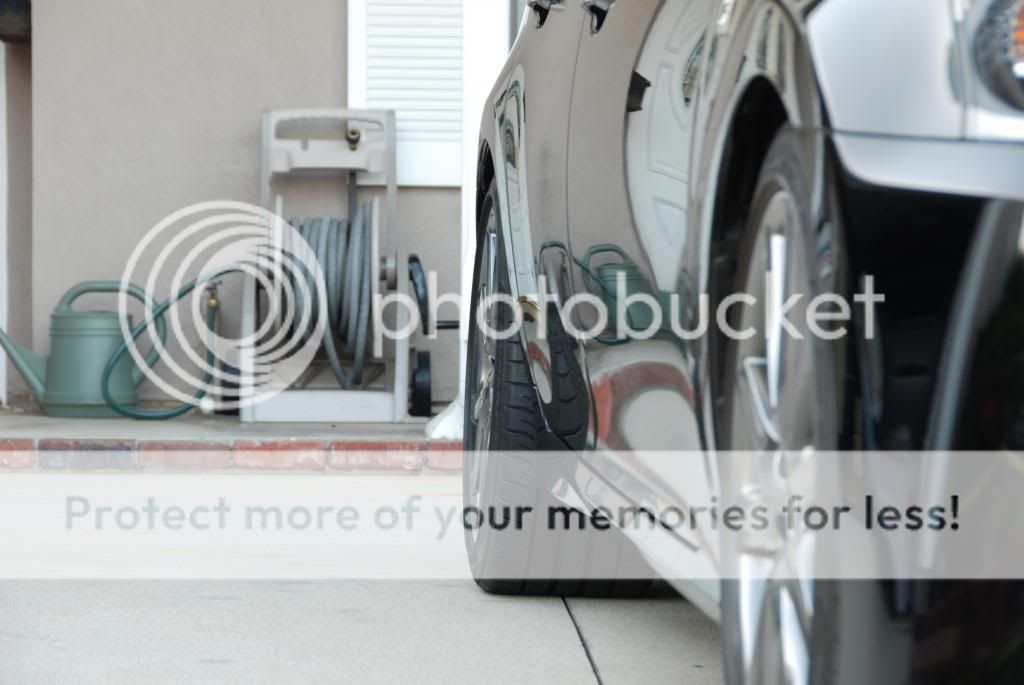
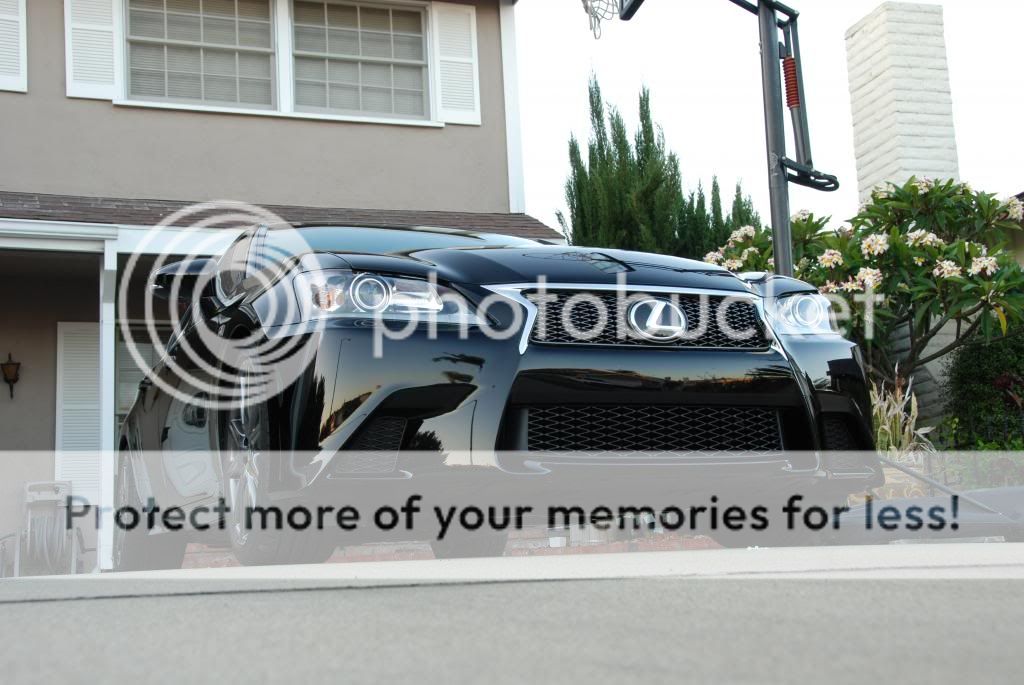
Nice pics! I agree that the look of the car lowered on Tanabe springs is how it should have come from the factory. Our cars look like twins ( I have Obsidian with Cabernet) but I can't tell your interior color.
As fas spacers go I have 25mm in the rear and 15mm in the front. I had 20mm in the front but it would rub slightly on dips. Both front and rear are flush with the 25/15 combo. I'm using H&R in the rear and Project Kics in the rear.
As fas spacers go I have 25mm in the rear and 15mm in the front. I had 20mm in the front but it would rub slightly on dips. Both front and rear are flush with the 25/15 combo. I'm using H&R in the rear and Project Kics in the rear.
07-09-13, 11:11 AM
#28
Instructor
Thread Starter
I have the Cabernet interior as well.
Do you have any pics of your car with the spacers installed?
Do you have any pics of your car with the spacers installed?
Nice pics! I agree that the look of the car lowered on Tanabe springs is how it should have come from the factory. Our cars look like twins ( I have Obsidian with Cabernet) but I can't tell your interior color.
As fas spacers go I have 25mm in the rear and 15mm in the front. I had 20mm in the front but it would rub slightly on dips. Both front and rear are flush with the 25/15 combo. I'm using H&R in the rear and Project Kics in the rear.
As fas spacers go I have 25mm in the rear and 15mm in the front. I had 20mm in the front but it would rub slightly on dips. Both front and rear are flush with the 25/15 combo. I'm using H&R in the rear and Project Kics in the rear.
