A Gixxer-Drew suspension abridged writeup with pictures
 02-28-11, 06:47 PM
#1
PLEASE NOTE: I am not a professional mechanic and do not profess to be. Using this guide wholly or in part to service your car is done at your own risk. I take no responsibility for improper installation of these components into your vehicle or their affect on the original manufacturer's specific intended operation of said vehicle.
-------------------------------------------------------------------------------------
So I thought this would be helpful to anyone interested in doing the Gixxer-Drew suspension for their SC or really any coilover suspension installation.
This writeup is detailed in pictures that clearly show MOST of the major installation steps required but not all. I'm a highly visual person and I do much better with pictures for the nitty-gritty steps.
Also, you may or may not have a full tool kit so this guide will clearly show you exactly what you will need to have on hand to complete a suspension job on a 92-00 SC.
I am typing up a lot of this from memory since this was done a few weeks ago. I did not have an SC300/400 shop manual so I had to look up several installation guides to get this information. Credit goes to Gixxer_Drew himself, Eric on Supraforums and one other very helpful person on either these forums, Supraforums or us.lexusownersclub.com with the phrase "It's really easy..." somewhere in the post who did a true step-by-step process (with no pictures) including torque settings required.
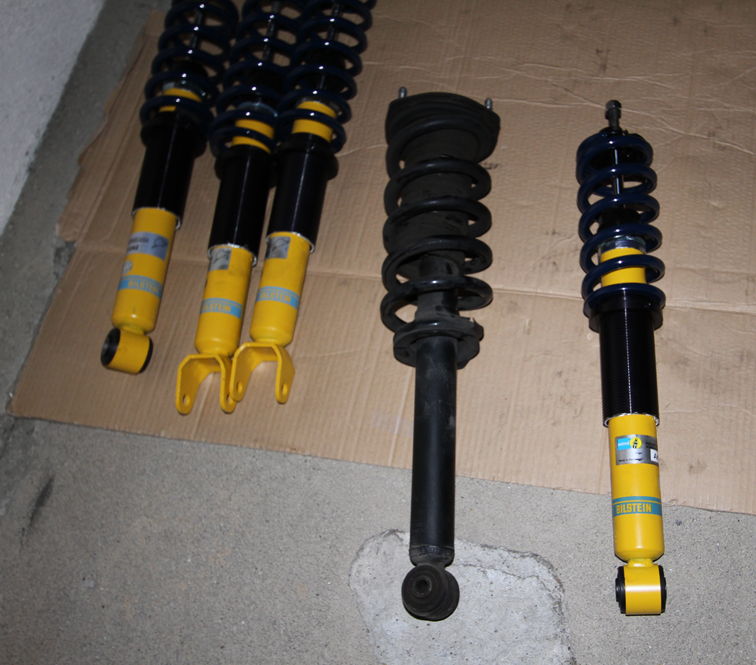
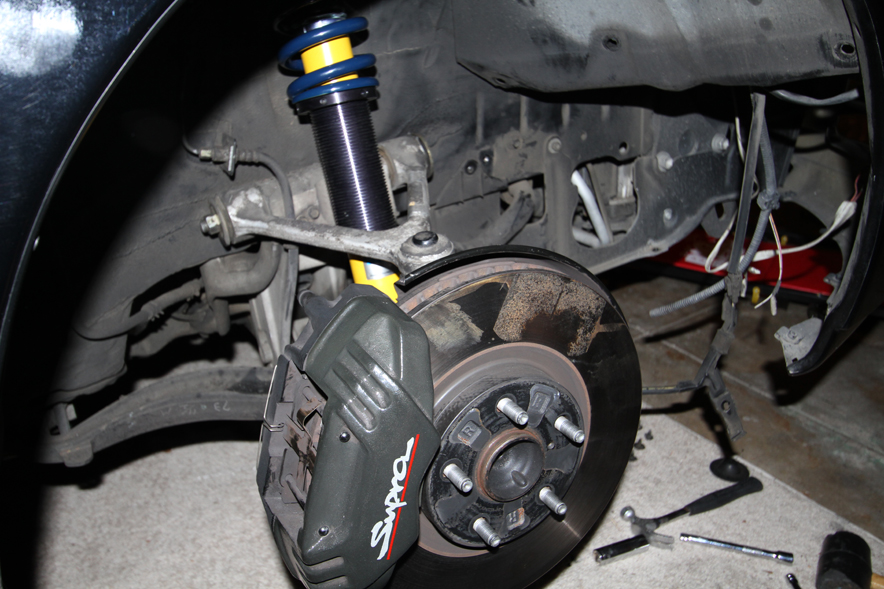
Before you begin you'll want to follow the first few pages of the "manual" on gixxer-drew's suspension thread on supraforums if you haven't already. All appropriate Bilstein, Hypercoil and other parts and where to buy them are listed there. This writeup assumes you've already bought all the parts and have performed the necessary modification to the Bilstein coilover sleeves as required by Drew to use this setup.
I chose to go with the 600fr/325rr version. It's very responsive but while very livable it is much stiffer "Lexus OEM" ride quality. It's more like "OEM sports coupe" ride quality. To reap the benefits of the suspension but have a more comfortable factory ride, go with the 500/250 version.
It took my roommate and I two days to complete this swap with a lot of trial and error, going out to buy tool attachments and bits we did not have, breaking to cook chicken stir fry and getting some sleep. The second day we completed the install between 3pm-9:30pm. Going nonstop with everything on hand I think this would take 1 day. Definitely less time with an impact wrench.
I am open to corrections and suggestions to give this guide updates.
Make sure you have some version of all these tools:
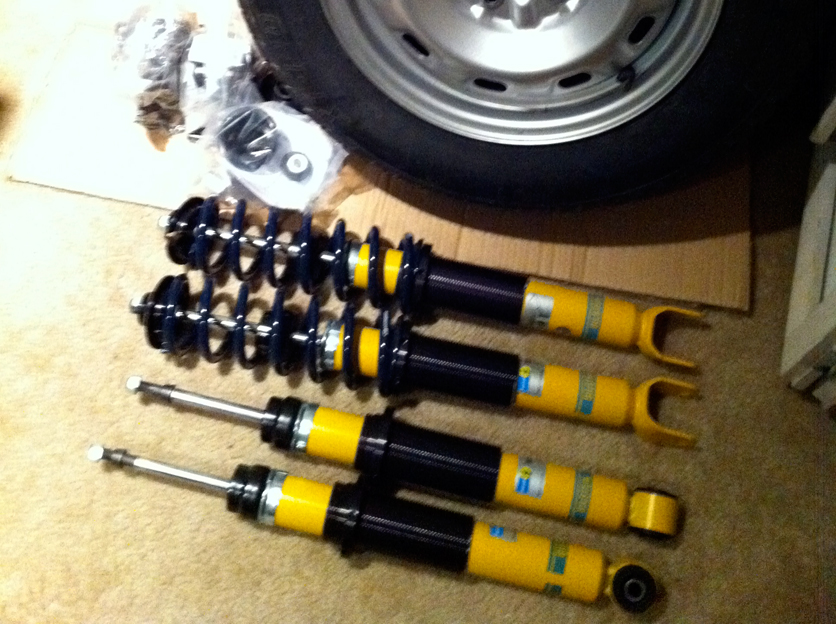
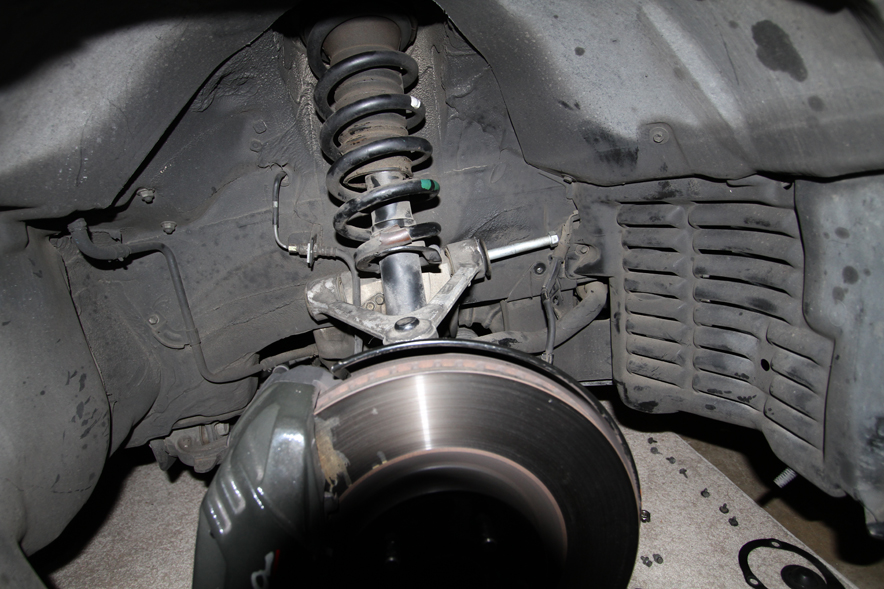
At the time I took this picture, my front Hypercoil springs had not arrived.

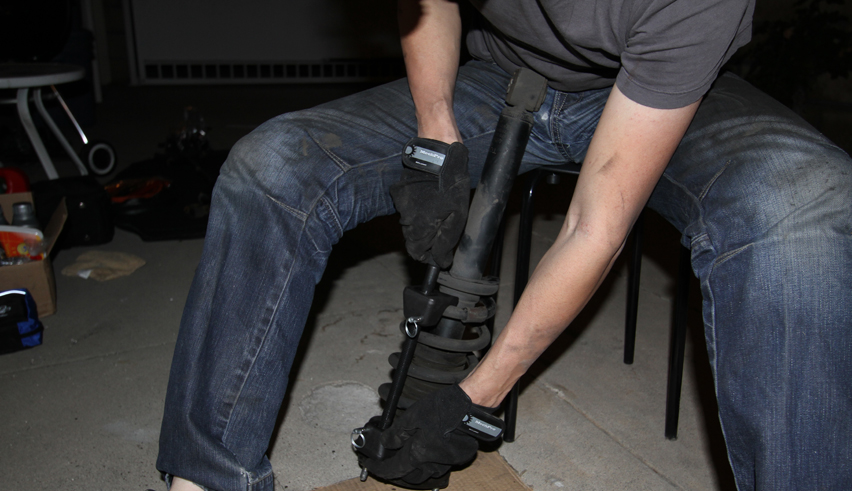
Spring compressor tool. This can be rented from a major auto parts store of your choice for about $50 deposit.

Hydraulic jack lift and two jackstands. A rolling "mechanic's creeper" is also recommended if you have one handy.
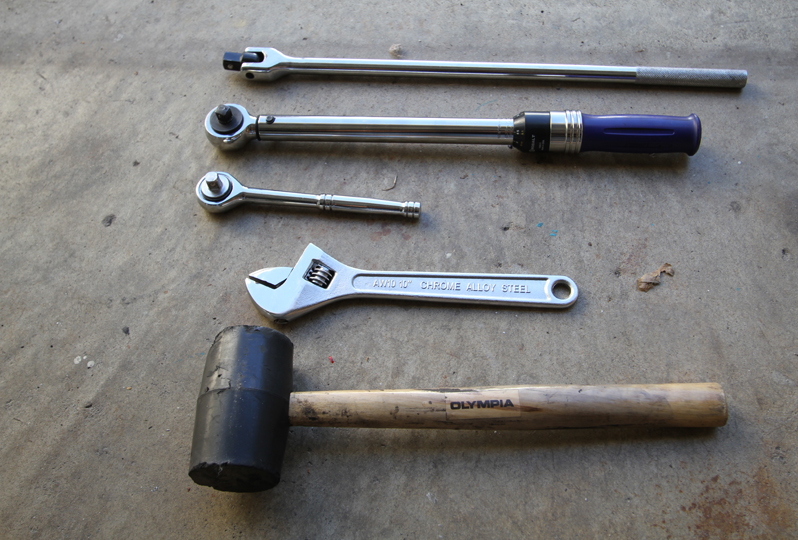
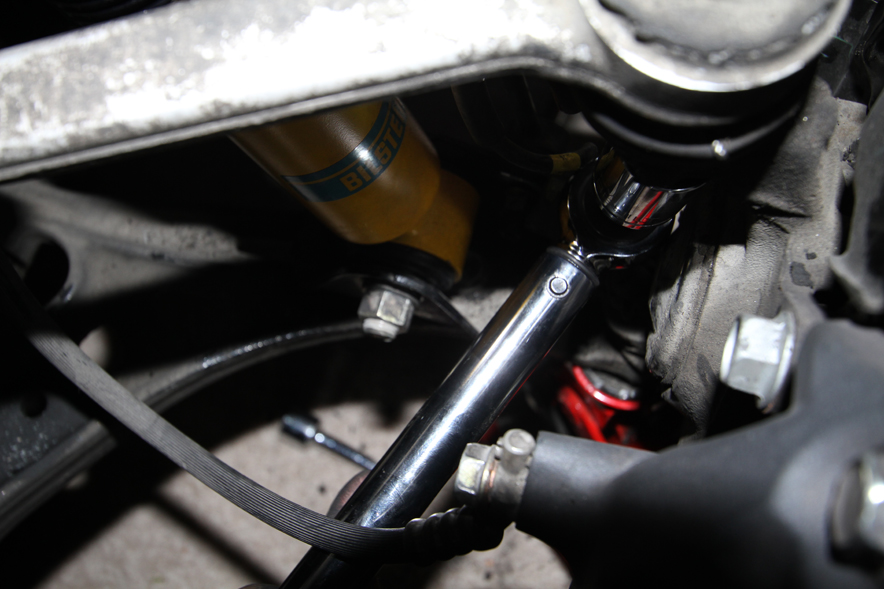
Socket wrenches:
1/2 inch breaker bar, torque wrench rated to 100 ft-lbs.
*Upper control arms supposedly need 121ft-lbs so you can use the breaker bar for that or just purchase a more expensive torque wrench that can handle that much load.
Standard socket wrench
adjustable wrench (optional)
big rubber mallet

Wrenches:
23mm, 22mm, 17mm, 14mm, small 14mm, small 12mm

SOCKETS:
Long: 17mm, 14mm, 12mm, 22mm, 21mm (wheel removal)
Short: 19mm, 19mm (for breaker bar), 17mm, 15mm, 5/8 (or metric equivalent), 12mm, 10mm, 9mm
Other: Appropriate socket sizing adapters, short socket extension, long socket extension, allen wrench set, flat-head screwdriver

Moroso Coilover Adjustment Tool
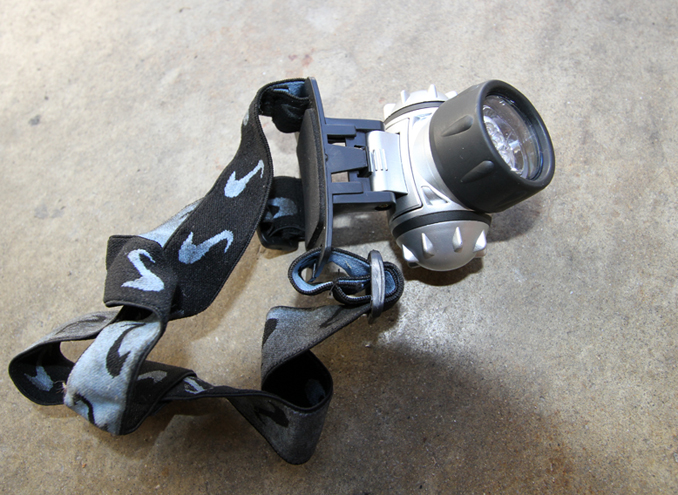
An LED Headlamp that allows angle adjustment can be very handy
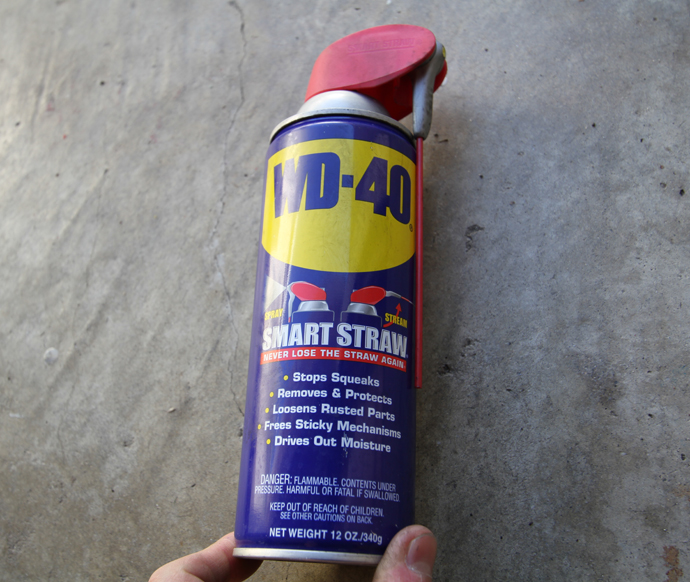
WD-40 to break loose stubborn bolts and nuts.
-------------------------
Continued in next post...
-------------------------------------------------------------------------------------
So I thought this would be helpful to anyone interested in doing the Gixxer-Drew suspension for their SC or really any coilover suspension installation.
This writeup is detailed in pictures that clearly show MOST of the major installation steps required but not all. I'm a highly visual person and I do much better with pictures for the nitty-gritty steps.
Also, you may or may not have a full tool kit so this guide will clearly show you exactly what you will need to have on hand to complete a suspension job on a 92-00 SC.
I am typing up a lot of this from memory since this was done a few weeks ago. I did not have an SC300/400 shop manual so I had to look up several installation guides to get this information. Credit goes to Gixxer_Drew himself, Eric on Supraforums and one other very helpful person on either these forums, Supraforums or us.lexusownersclub.com with the phrase "It's really easy..." somewhere in the post who did a true step-by-step process (with no pictures) including torque settings required.
Before you begin you'll want to follow the first few pages of the "manual" on gixxer-drew's suspension thread on supraforums if you haven't already. All appropriate Bilstein, Hypercoil and other parts and where to buy them are listed there. This writeup assumes you've already bought all the parts and have performed the necessary modification to the Bilstein coilover sleeves as required by Drew to use this setup.
I chose to go with the 600fr/325rr version. It's very responsive but while very livable it is much stiffer "Lexus OEM" ride quality. It's more like "OEM sports coupe" ride quality. To reap the benefits of the suspension but have a more comfortable factory ride, go with the 500/250 version.
It took my roommate and I two days to complete this swap with a lot of trial and error, going out to buy tool attachments and bits we did not have, breaking to cook chicken stir fry and getting some sleep. The second day we completed the install between 3pm-9:30pm. Going nonstop with everything on hand I think this would take 1 day. Definitely less time with an impact wrench.
I am open to corrections and suggestions to give this guide updates.
Make sure you have some version of all these tools:
At the time I took this picture, my front Hypercoil springs had not arrived.
Spring compressor tool. This can be rented from a major auto parts store of your choice for about $50 deposit.
Hydraulic jack lift and two jackstands. A rolling "mechanic's creeper" is also recommended if you have one handy.
Socket wrenches:
1/2 inch breaker bar, torque wrench rated to 100 ft-lbs.
*Upper control arms supposedly need 121ft-lbs so you can use the breaker bar for that or just purchase a more expensive torque wrench that can handle that much load.
Standard socket wrench
adjustable wrench (optional)
big rubber mallet
Wrenches:
23mm, 22mm, 17mm, 14mm, small 14mm, small 12mm
SOCKETS:
Long: 17mm, 14mm, 12mm, 22mm, 21mm (wheel removal)
Short: 19mm, 19mm (for breaker bar), 17mm, 15mm, 5/8 (or metric equivalent), 12mm, 10mm, 9mm
Other: Appropriate socket sizing adapters, short socket extension, long socket extension, allen wrench set, flat-head screwdriver
Moroso Coilover Adjustment Tool
An LED Headlamp that allows angle adjustment can be very handy
WD-40 to break loose stubborn bolts and nuts.
-------------------------
Continued in next post...
Last edited by KahnBB6; 02-28-11 at 07:16 PM.


 02-28-11, 08:34 PM
#3
Driver
Join Date: Jan 2011
Location: KS
Posts: 125
Likes: 0
Received 0 Likes
on
0 Posts
I realize you're still posting pictures and info, but what preload are you running in the front? I'd been following the thread on SF and noticed people having to go to the top to get 1" of preload. Looks like you were at the top of your adjustment range there too.
Saw one guy who made some changes to get around it, but he never replied how it worked out.
Saw one guy who made some changes to get around it, but he never replied how it worked out.
02-28-11, 10:18 PM
#5
I realize you're still posting pictures and info, but what preload are you running in the front? I'd been following the thread on SF and noticed people having to go to the top to get 1" of preload. Looks like you were at the top of your adjustment range there too.
Saw one guy who made some changes to get around it, but he never replied how it worked out.
Saw one guy who made some changes to get around it, but he never replied how it worked out.
I think Gixxer_Drew has said as much but the system wasn't designed for much lowering. I know it can be pushed a little lower but I prefer not to.
Last edited by KahnBB6; 02-28-11 at 10:28 PM.
02-28-11, 10:19 PM
#6
Driver
Join Date: Jan 2011
Location: Kansas
Posts: 152
Likes: 0
Received 0 Likes
on
0 Posts
Trending Topics
02-28-11, 10:49 PM
#8
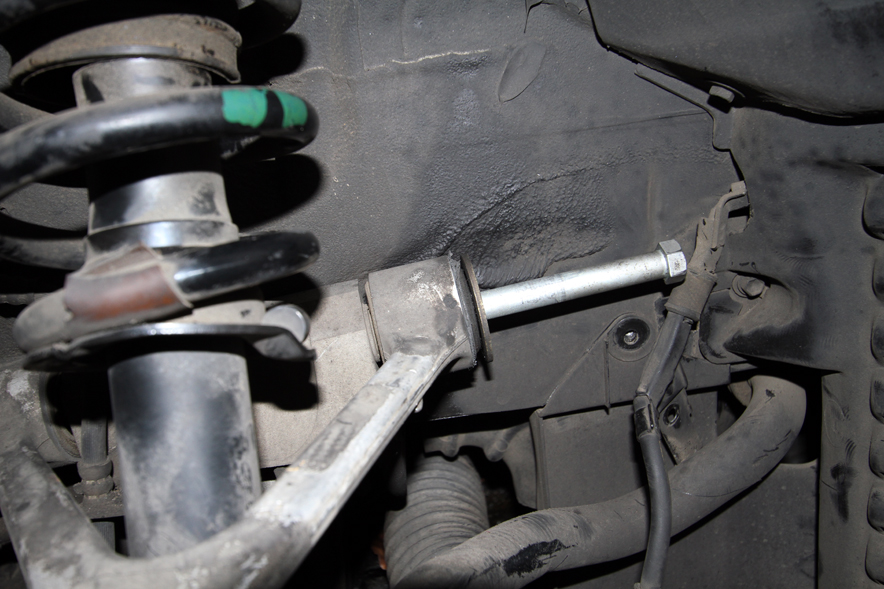
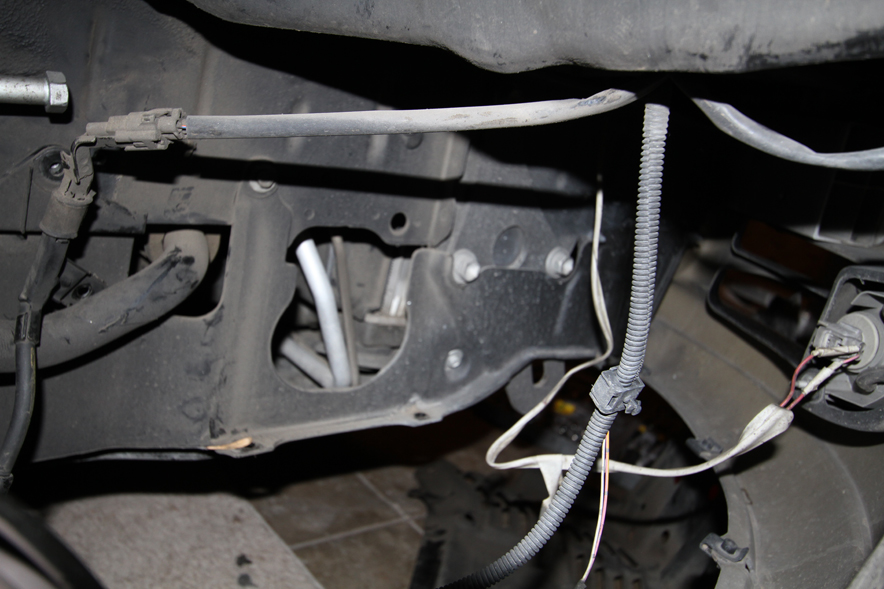
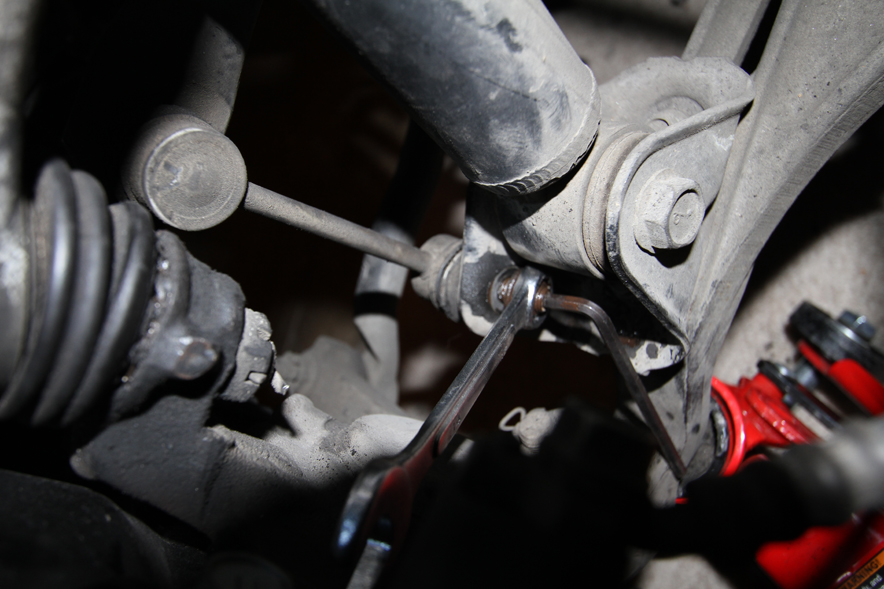
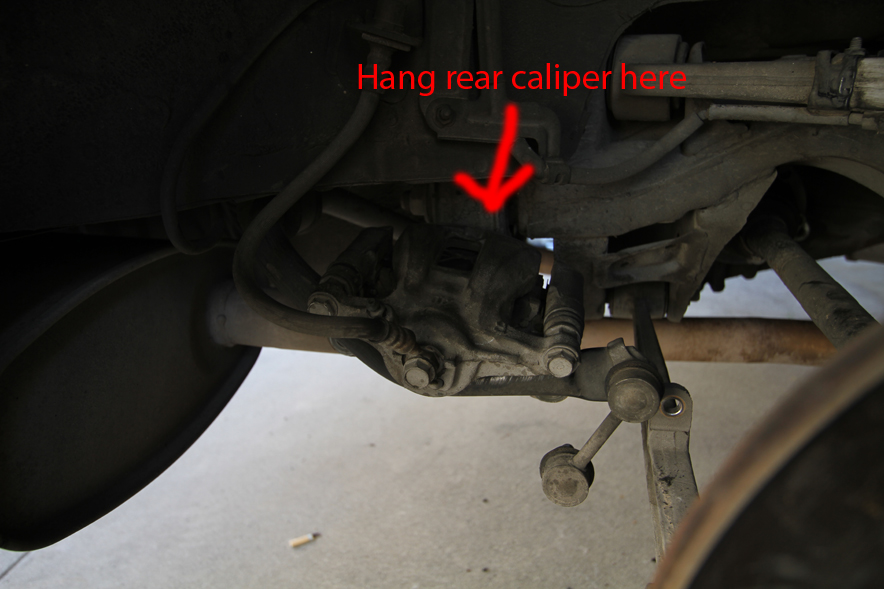
I removed the rear brake calipers partly because the only installation guide I could find (the "It's really easy..." one I can't find the link to) listed that as one of the steps but also because I didn't like the idea of possibly risking any damage to the nineteen year old brake lines. I hadn't put in a suspension before this so I followed the directions. The only thing I didn't do (because I did not know to) was to disconnect the rear lower stabilizer arm to get the shock assembly out.
I don't have a specific picture of that but if I can I will note that in one of the steps.
I don't have a specific picture of that but if I can I will note that in one of the steps.
02-28-11, 11:48 PM
#9
600 front / 325 rear
They're perfect other than on L.A.'s bumpiest and most ill maintained roads. I drove to Death Valley and back for a weekend trip and on the paved roads they're fine too. Out there, I wish I'd put on my TT rear swaybar. I don't notice body roll in L.A. but I did on those curvy desert roads even with these rates. The handling was still very, very satisfying. It just needs swaybars to round it out.
They're perfect other than on L.A.'s bumpiest and most ill maintained roads. I drove to Death Valley and back for a weekend trip and on the paved roads they're fine too. Out there, I wish I'd put on my TT rear swaybar. I don't notice body roll in L.A. but I did on those curvy desert roads even with these rates. The handling was still very, very satisfying. It just needs swaybars to round it out.
Last edited by KahnBB6; 02-28-11 at 11:53 PM.


 04-16-13, 09:45 AM
#15
Thanks Ali SC3. estomax and mattjk, I don't have pictures around right now but I can shoot a couple and post them today if you guys want to see. I wasn't aggressive about lowering, so it looks almost OEM (IE: larger tire/fender gaps). After driving on crappy LA roads and the majority of some roads in lower US states, however, I don't feel this is a bad thing. The SC is a heavy car in general and it needs some suspension travel. The Gixxer suspension ate mountain roads like Mulholland Drive, Latigo Canyon, the northern sections of the Pacific Coast Highway and some bits of Route 66 like butter.
It is true that you risk hitting the bump stops very early if you lower this suspension too much. They are Bilstein AK shocks with a spring+perch that settles very nicely on the SC... but it is not a suspension for someone who wants to lower very much. It's for vastly improved handling within the limits of what near stock suspension geometry provides. An off the shelf coilover setup and camber plates that is designed for greater lowering while modifying the geometry at the same time will accomplish both feats but it will also be more expensive.
I'll get a couple of pictures taken in the daylight.
Last edited by KahnBB6; 04-16-13 at 09:49 AM. Reason: typos