DIY...Lower Your ISx50
 08-04-07, 02:48 PM
#1
Racer
Thread Starter
I lowered my IS250 and took some pix for everyone looking to know how to.
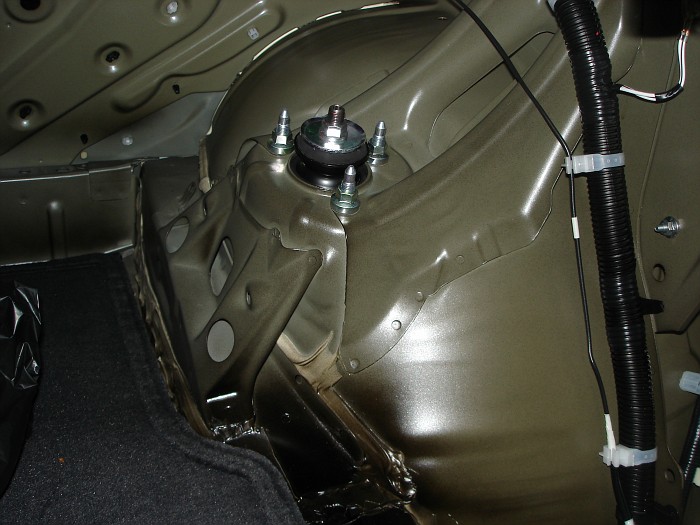
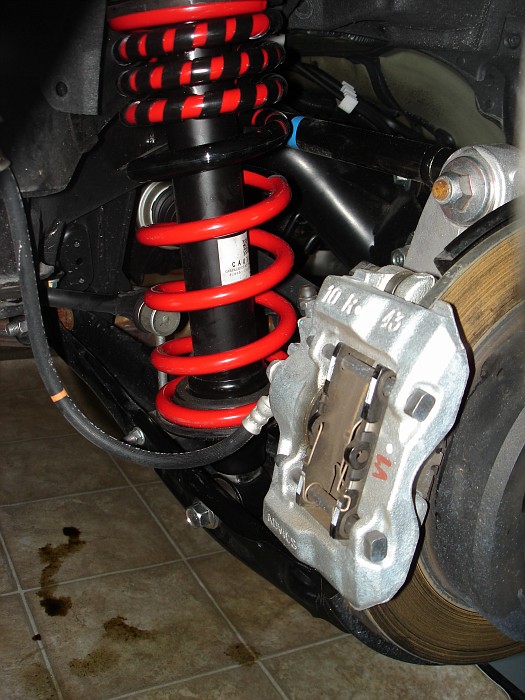
We'll start with the rear. You will need to remove all the inside trunk lining to get to the top bolts of the shock. heres a link to some instructions to remove the lining.
Remove Lining
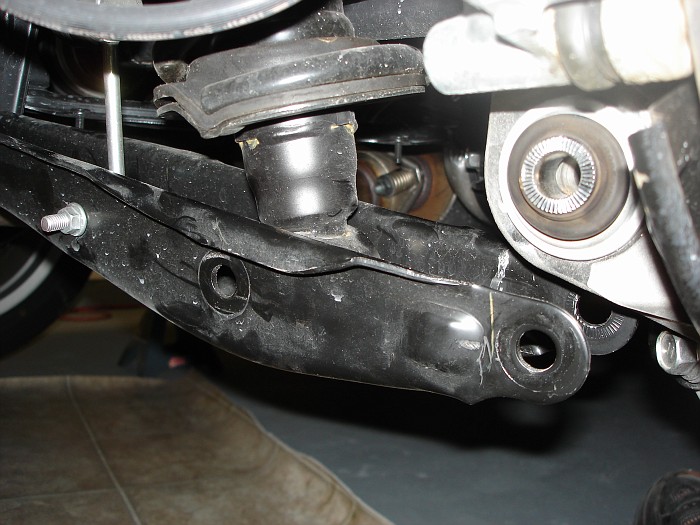
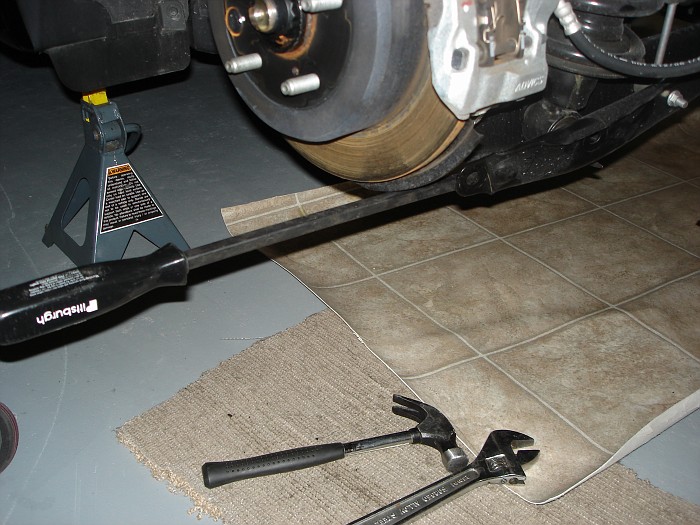
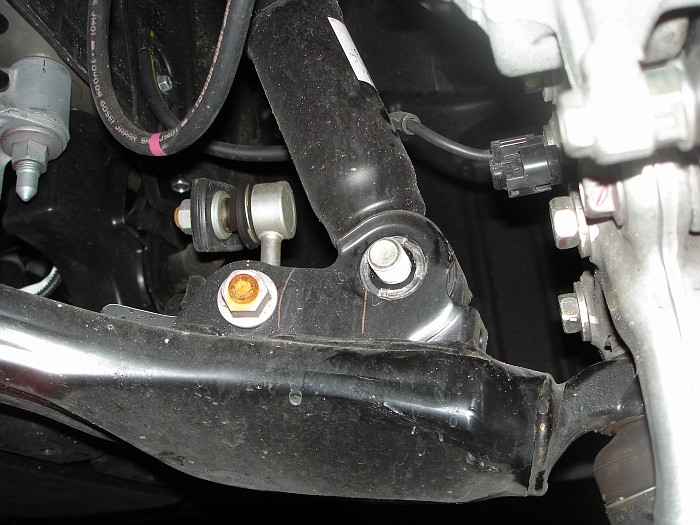
I started by removing the lower 19mm bolt that holds the strut to the LCA (lower control arm). Then I took off the 19mm that holds the LCA to the hub spindle. You may need to tap the bolt thru with a screw driver to get it out of the hole...jack the arm up a lil bit takes a lil bit of pressure off the bolt and hole.
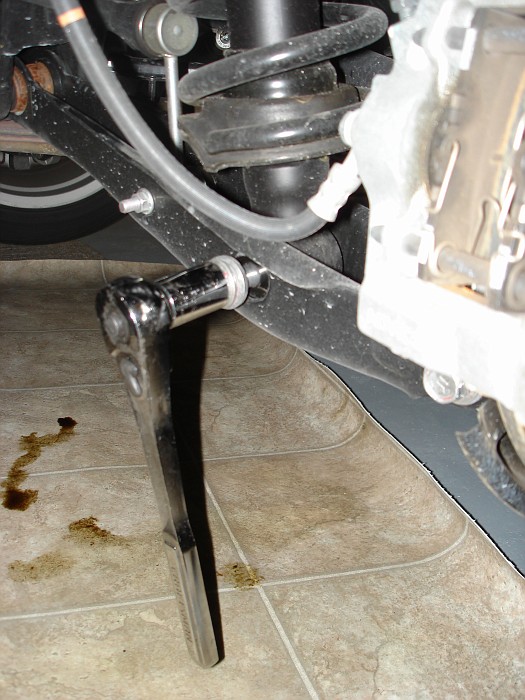
You now need to take off the three 14mm nuts that hold the strut up top.
There are two more 12mm bolts that hold th strut to the side of the car. you need to take off two 10mm nuts that hold the fender lining to get to the bolts.
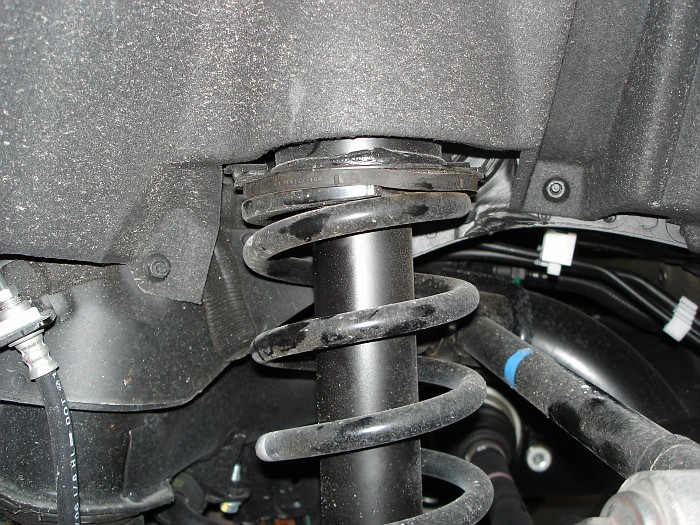
Once you get the 19mm bolts out the control arm drops down a lil bit but you will need a pry bar to push it down. I used the hole in the LCA to get the pry bar in and provide leverage. pull the LCA down and slide the strut off to the side be careful with the brake hose.
It should look this when its out.
We'll start with the rear. You will need to remove all the inside trunk lining to get to the top bolts of the shock. heres a link to some instructions to remove the lining.
Remove Lining
I started by removing the lower 19mm bolt that holds the strut to the LCA (lower control arm). Then I took off the 19mm that holds the LCA to the hub spindle. You may need to tap the bolt thru with a screw driver to get it out of the hole...jack the arm up a lil bit takes a lil bit of pressure off the bolt and hole.
You now need to take off the three 14mm nuts that hold the strut up top.
There are two more 12mm bolts that hold th strut to the side of the car. you need to take off two 10mm nuts that hold the fender lining to get to the bolts.
Once you get the 19mm bolts out the control arm drops down a lil bit but you will need a pry bar to push it down. I used the hole in the LCA to get the pry bar in and provide leverage. pull the LCA down and slide the strut off to the side be careful with the brake hose.
It should look this when its out.
Last edited by sinister2c; 01-29-13 at 08:09 PM.
 08-04-07, 03:03 PM
#2
Racer
Thread Starter
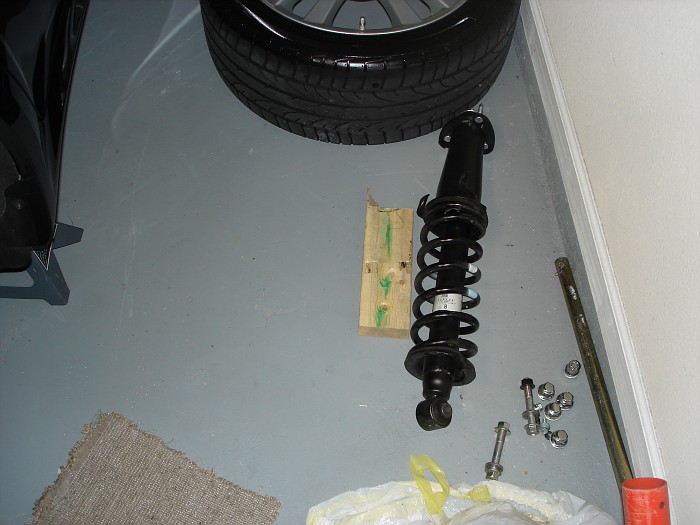
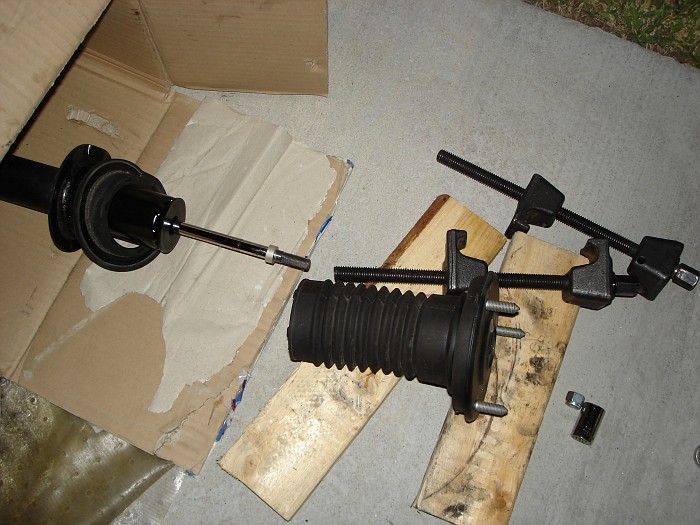
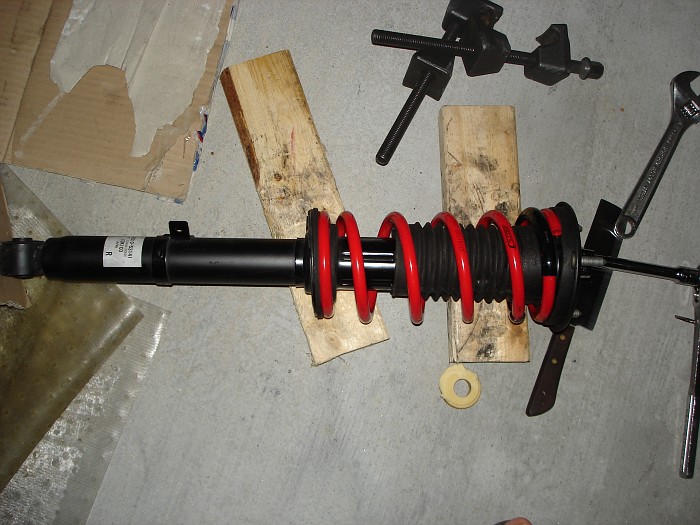
Now we prep the new springs for install. They come with a plastic cushion coil to prevent noise from the dead coils rubbing.
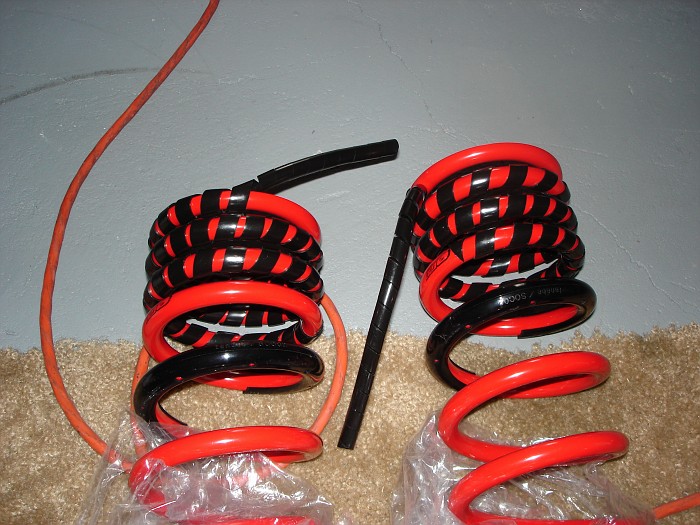
I just popped the rear spring and strut off by shooting the strut into a box. there not that much pressure on the spring. you can use the spring compressor if you want to be safe.
I cut the bump stop in half and used the top half again. (i used a front spring for the pic...it should be a rear spring with more dead coils)
You will need to compress the spring ALOT to get the top cap back on. Its a biatch.
IMPORTANT!!
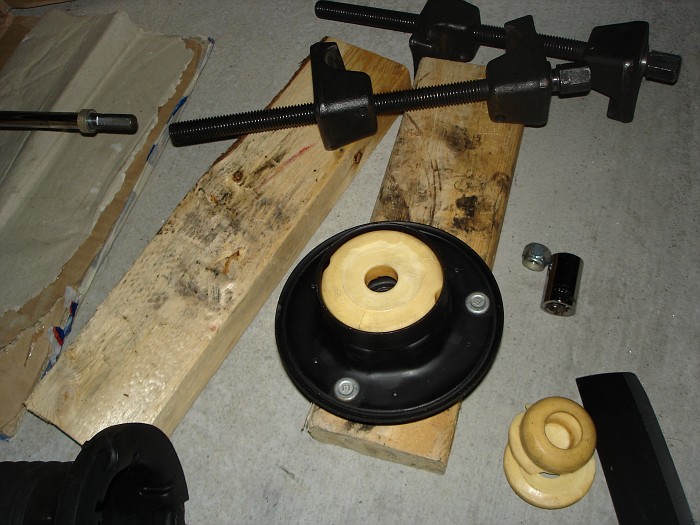
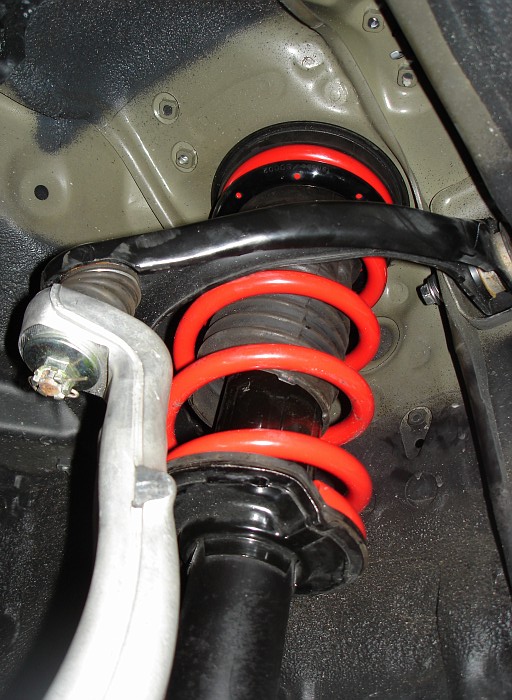
make sure you get the orientation of the upper holes and lower hole correct before take off the spring compressor. This is needed to make sure you can get the holes to line up right. You can not rotate the upper cap with the spring uncompressed.

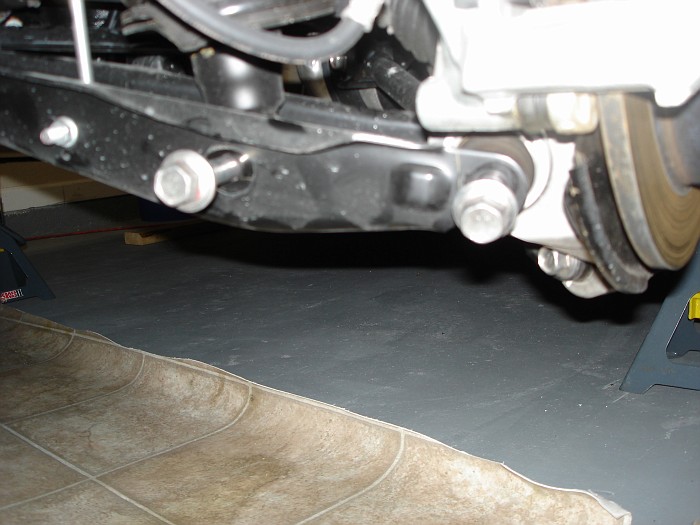
Install is reverse of removal...and repeat for other side. Here is what it should look like.
IMPORTANT!!
Before retightening the 19mm LCA and strut bolts hand tighten and preload the suspension. I just jacked the LCA up with a block of wood cushioning it until the car lifted off the jackstand a lil bit. Tighten the 19mm bolts after that.
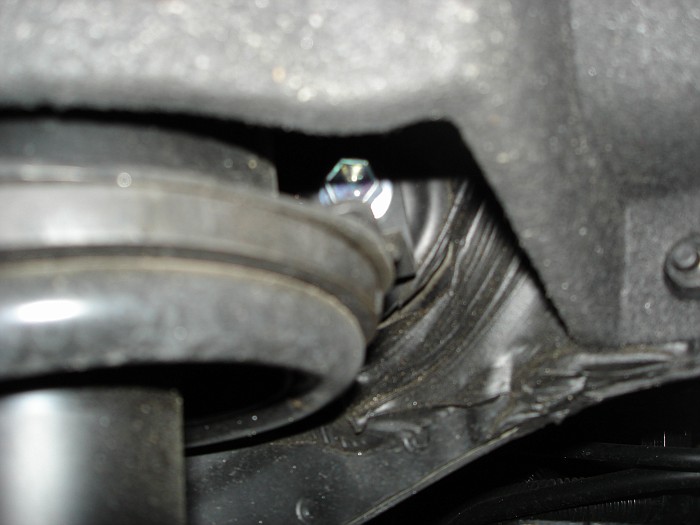
AFS sensor.
make sure you dont mess with the AFS orientation. It should look like this before and after.
I just popped the rear spring and strut off by shooting the strut into a box. there not that much pressure on the spring. you can use the spring compressor if you want to be safe.
I cut the bump stop in half and used the top half again. (i used a front spring for the pic...it should be a rear spring with more dead coils)
You will need to compress the spring ALOT to get the top cap back on. Its a biatch.
IMPORTANT!!
make sure you get the orientation of the upper holes and lower hole correct before take off the spring compressor. This is needed to make sure you can get the holes to line up right. You can not rotate the upper cap with the spring uncompressed.
Install is reverse of removal...and repeat for other side. Here is what it should look like.
IMPORTANT!!
Before retightening the 19mm LCA and strut bolts hand tighten and preload the suspension. I just jacked the LCA up with a block of wood cushioning it until the car lifted off the jackstand a lil bit. Tighten the 19mm bolts after that.
AFS sensor.
make sure you dont mess with the AFS orientation. It should look like this before and after.
Last edited by sinister2c; 01-29-13 at 08:24 PM.
 Thanks! i don't really plan to do it myself but any reference is more that welcome
08-04-07, 03:26 PM
Thanks! i don't really plan to do it myself but any reference is more that welcome
08-04-07, 03:26 PM
#5
Racer
Thread Starter
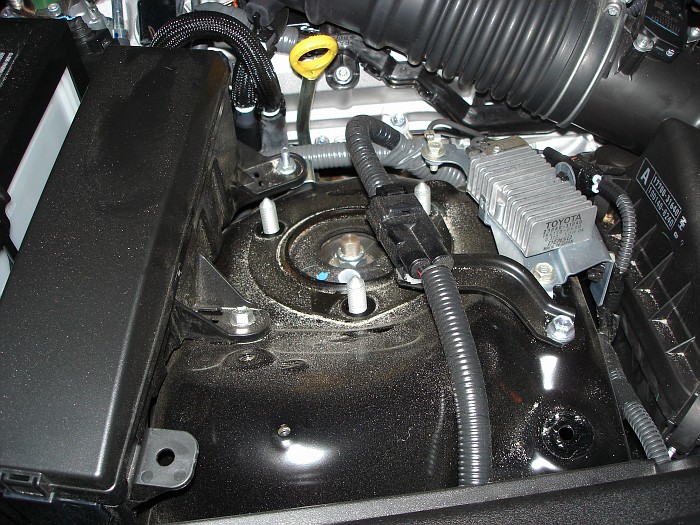
Now the front...remove the side engine covers to access the top strut nuts.
Start at the LCA and strut bolt.
remove the 19mm nut holding the 17mm bolt. I chose to turn the nut because it was on the easier side for leverage. The nut has a locking backing that digs into the LCA metal so its tight as helll. You can try turning the 17mm bolt but its harder to get a hand tool on that side.
after you get the nut off tap the bolt thru the hole like on the rear. the strut won't go anywhere...it will just sit on the LCA.
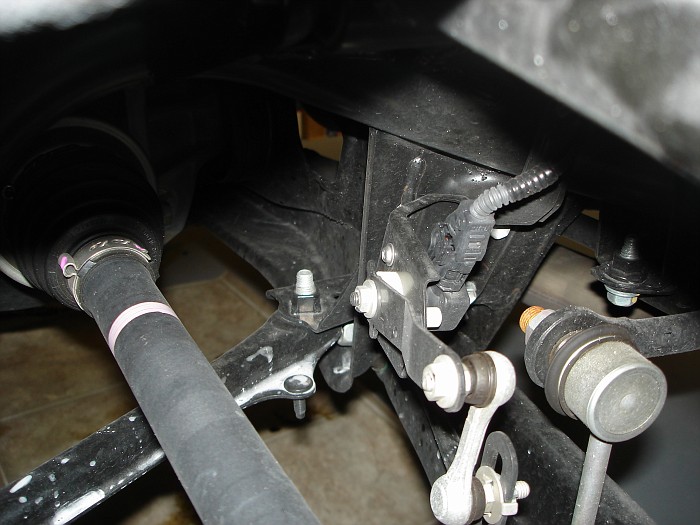
next you will have to do one of two things. remove the spindle from the upper A arm or remove the upper A arm from the car. I chose to remove the A arm from the car since its easier if you have some Gear Wrenches. (the ball joint on the A arm and spindle will require brut force to dislodge.)
The A arm is attached using two 14mm bolts. The nuts on the inside of the engine bay have a holder so they will not go anywhere.
Also remove the two 10mm bolts holding the ABS line to the shock and car.

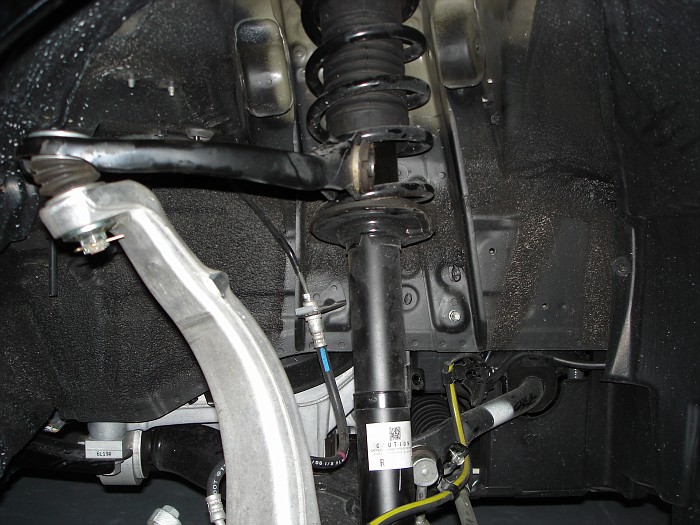
Unbolt the three 14mm nuts on in the engine bay.
Now move the spindle off to the side, being careful with the brake lines, and remove the shock.
Start at the LCA and strut bolt.
remove the 19mm nut holding the 17mm bolt. I chose to turn the nut because it was on the easier side for leverage. The nut has a locking backing that digs into the LCA metal so its tight as helll. You can try turning the 17mm bolt but its harder to get a hand tool on that side.
after you get the nut off tap the bolt thru the hole like on the rear. the strut won't go anywhere...it will just sit on the LCA.
next you will have to do one of two things. remove the spindle from the upper A arm or remove the upper A arm from the car. I chose to remove the A arm from the car since its easier if you have some Gear Wrenches. (the ball joint on the A arm and spindle will require brut force to dislodge.)
The A arm is attached using two 14mm bolts. The nuts on the inside of the engine bay have a holder so they will not go anywhere.
Also remove the two 10mm bolts holding the ABS line to the shock and car.
Unbolt the three 14mm nuts on in the engine bay.
Now move the spindle off to the side, being careful with the brake lines, and remove the shock.
Last edited by sinister2c; 01-30-13 at 09:27 PM.
08-04-07, 03:41 PM
#6
Racer
Thread Starter
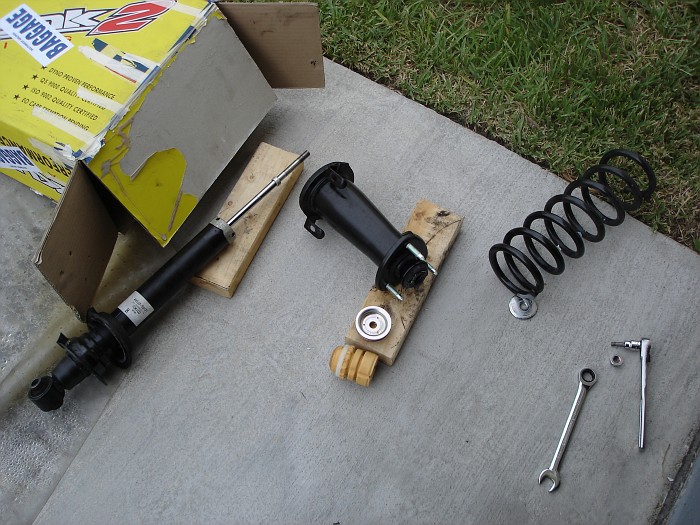
The front shock and spring...I chose to compress them before i loosened the cap since its under more pressure.
The Tanabe DF210 came with a rubber trim on the spring and since theres not no dead coils up front you don't need the plastic coil wrap. The rubber trim is good enough.
I cut the bump stop in half and used the upper half.
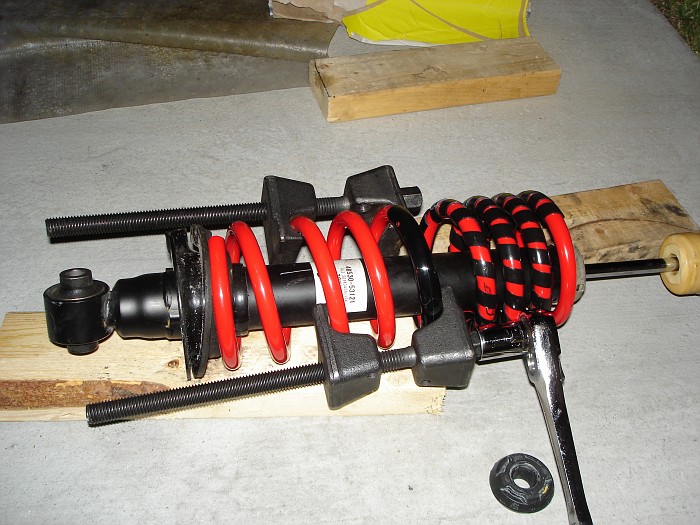
the front required even more compression to get on than the rear. Took me forever to get it right.
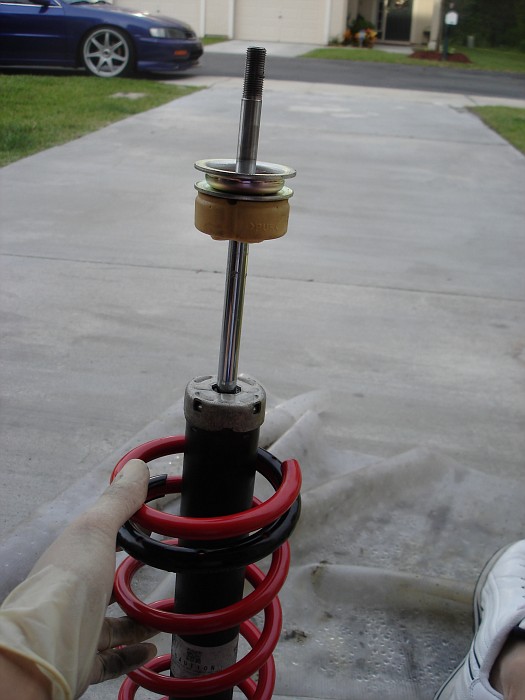
VERY IMPORTANT:
Make sure you get the upper cap and lower hole orientation just right. Make sure the ABS line holder is in the right position to. There are some silver and blue dots on the upper cap pay close attention to where this is before removal. These go on the middle hole closest to the fender. (I dicked around with this for hours getting it right.)
Put the shock back in the same as removal.
I put the top three nuts on first. Then lined up the lower hole and bolt. I did the A arm to the frame last...jacking it up a line bit helps.
Once all bolts are in...tighten until almost tight and PRELOAD THE SUSPENSION like the rear and tighten everything to spec.
AFS Sensor:
You can not really mess up much on the sensor up front.
The Tanabe DF210 came with a rubber trim on the spring and since theres not no dead coils up front you don't need the plastic coil wrap. The rubber trim is good enough.
I cut the bump stop in half and used the upper half.
the front required even more compression to get on than the rear. Took me forever to get it right.
VERY IMPORTANT:
Make sure you get the upper cap and lower hole orientation just right. Make sure the ABS line holder is in the right position to. There are some silver and blue dots on the upper cap pay close attention to where this is before removal. These go on the middle hole closest to the fender. (I dicked around with this for hours getting it right.)
Put the shock back in the same as removal.
I put the top three nuts on first. Then lined up the lower hole and bolt. I did the A arm to the frame last...jacking it up a line bit helps.
Once all bolts are in...tighten until almost tight and PRELOAD THE SUSPENSION like the rear and tighten everything to spec.
AFS Sensor:
You can not really mess up much on the sensor up front.
Last edited by sinister2c; 01-30-13 at 09:36 PM.

Trending Topics
 BUT nice write up
08-04-07, 04:08 PM
BUT nice write up
08-04-07, 04:08 PM
#9
Racer
Thread Starter
08-04-07, 04:42 PM
#11
Tech Info Resource

iTrader: (2)
Nice write up. You're a brave man attacking this task without air tools. I'd never do that again by choice.
 08-04-07, 06:25 PM
#14
Racer
Thread Starter
this took me about 9 hours but i was messing around most of the time and running around locating tools and learning about the cars suspension. I can probably do it in under 2 hours next time and if it wasnt my car.
I have air tools but most of the time its easier just to attack it with hand tools. plus the compressor is too loud especially when it gets late and the neighbors. I've lowered about 15-20 cars over the past 10 years so this was nothing.
Car rides great...I not too picky though.
I have air tools but most of the time its easier just to attack it with hand tools. plus the compressor is too loud especially when it gets late and the neighbors. I've lowered about 15-20 cars over the past 10 years so this was nothing.
Car rides great...I not too picky though.
