
 01-06-15, 05:08 PM
Last edit by: IB Advertising
See related guides and technical advice from our community experts:
Browse all: Exterior Guides
- How to Install Windshield Molding
Step by step instructions for do-it-yourself repairs
Browse all: Exterior Guides

Installing a new windshield myself
07-16-12, 12:17 AM
#1
Over the past years I have become more and more disillusioned with glass installers. I've seen car after car get windshield after windshield poorly installed, with excess adhesive, misalignment, scratches, etc., etc. They just don't care, and they often times get paid per install. Customers want cheap and fast installations, they don't want to leave their car to get taken apart and then wait for the proper curing time, nor do they want to pay for the time it takes to do that.
After having numerous problems with my own various cars, I decided that I would no longer let someone else do for me what I believe I can do myself. I've since installed 3 windshields in various types of cars and am gaining a pretty decent ability. It takes me a long time and a lot of preparation, but it's done right and I know no steps were skipped.
All that being said, I still never look forward to having to replace a windshield, and when I got a large chip 2 weeks ago that spread very quickly before I could get it repaired, I knew I was going to need to install another one. I haven't finished the job yet, I will be installing the new glass tomorrow, but I figured I'd post what I've done so far in case anyone is interested in seeing how Lexus actually says to do the glass versus what most people have probably seen happen when they got their windshield replaced.
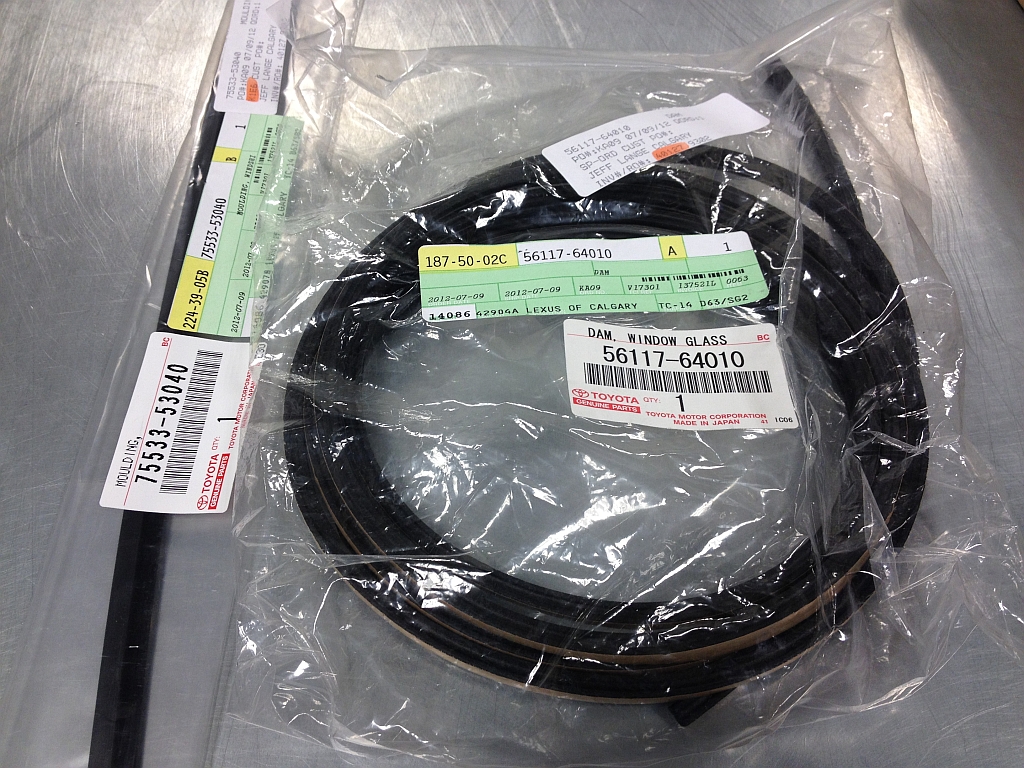
We'll start with a new factory windshield glass from Lexus, heated without auto wipers:
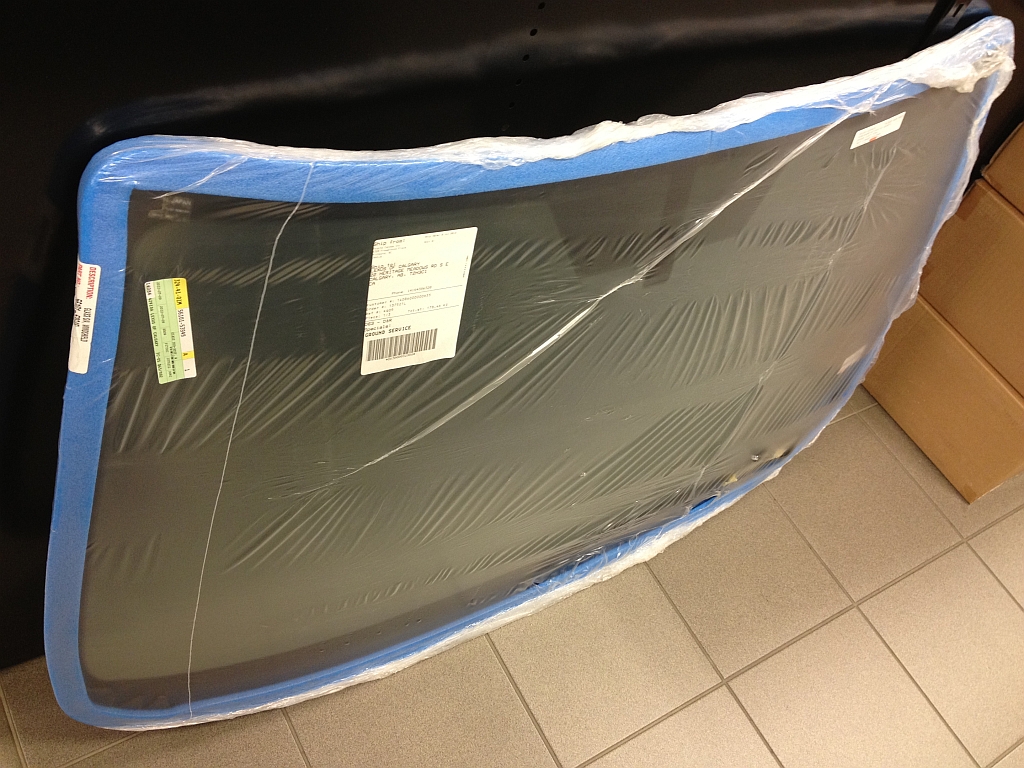
There are also a few other parts you'll need, as most of these are damaged while removing the old glass. This includes the top moulding, adhesive dam, some clips. The side mouldings are reusable if you can get them off without breaking them. I almost did, but there was a bit too much adhesive and it held them on too tightly so they broke.
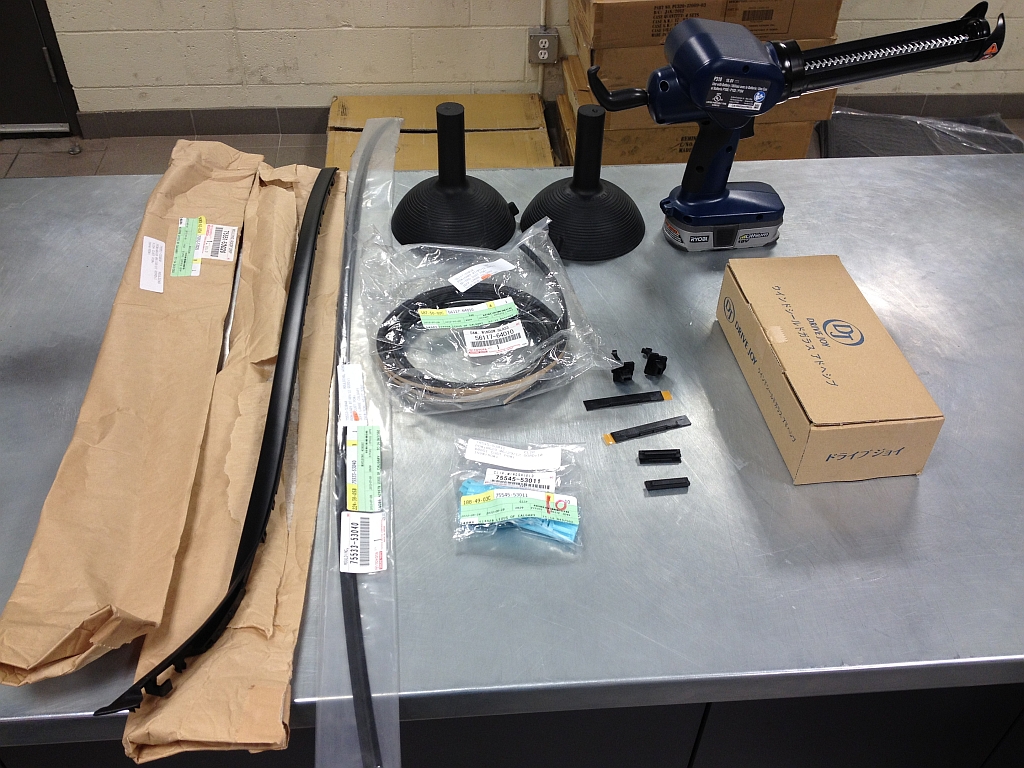
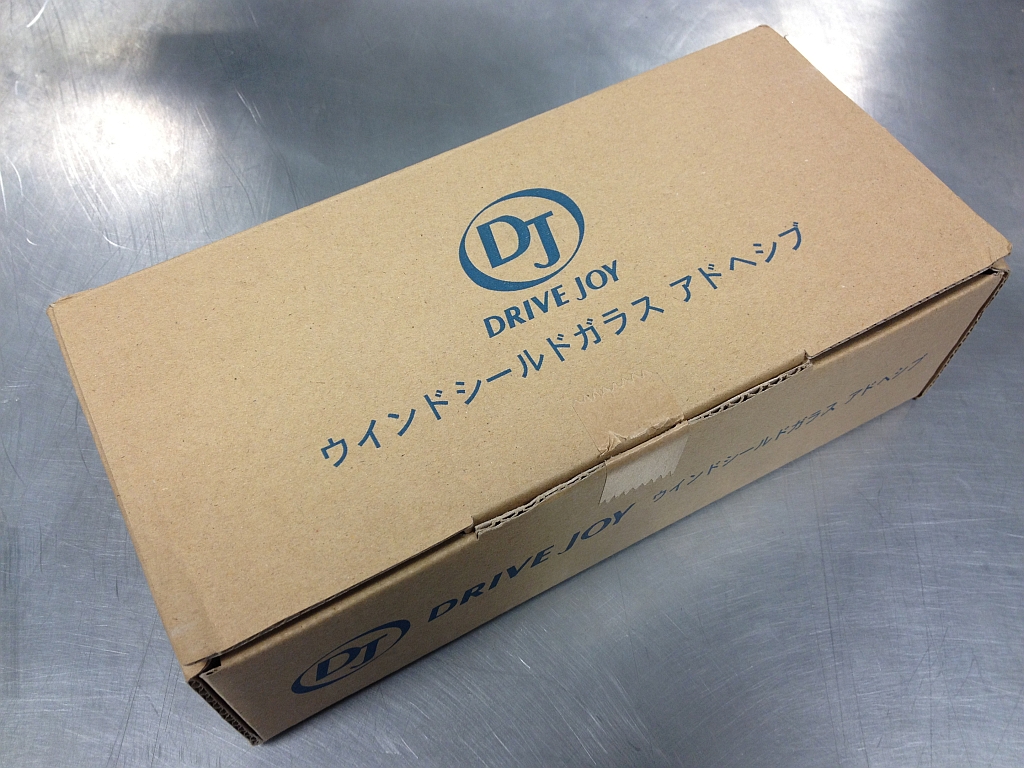
Brought in a windshield glass installation kit from Japan. Drive Joy is Toyota's aftermarket brand in Japan, I tried to get the genuine kit from Toyota, but they don't sell it, had to get the Drive Joy kit.
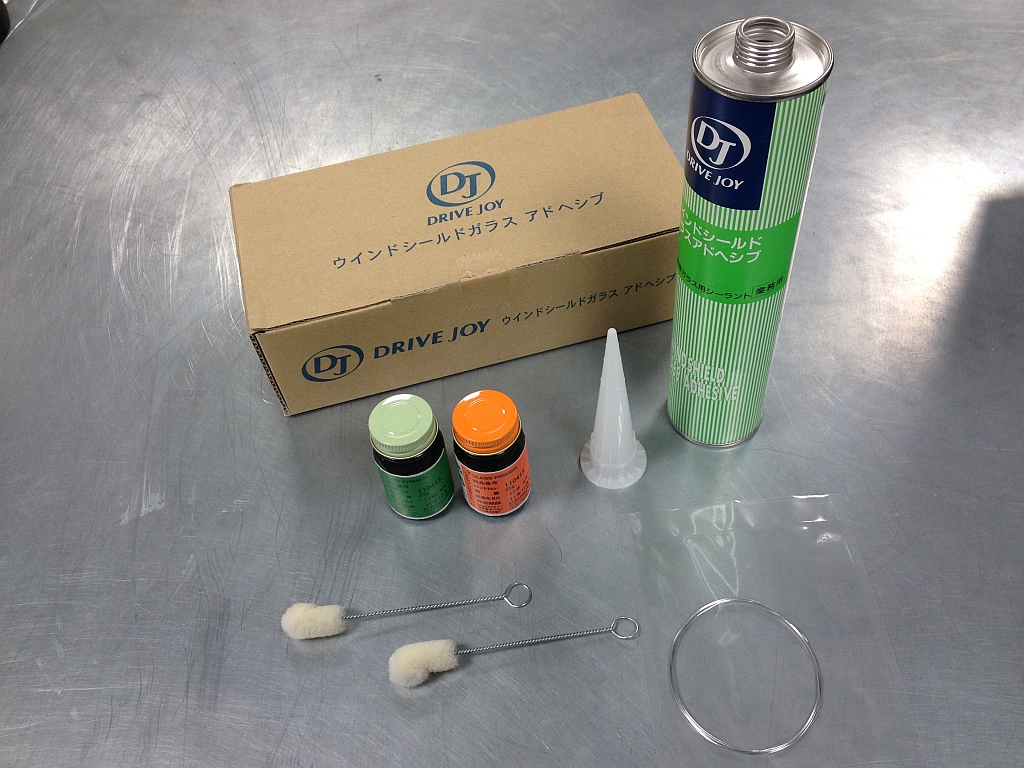
Installation kit includes body primer, glass primer, piano wire and the adhesive itself. Lexus instructions give specific instructions on how the adhesive is to be applied.
No.1 and No.2 upper retainers, on the body and glass to hold it in place while the adhesive cures. Should make sure the glass keeps the 4mm gap between the glass and body at the top. A-pillar interior and exterior trim clips to make sure things are tight.
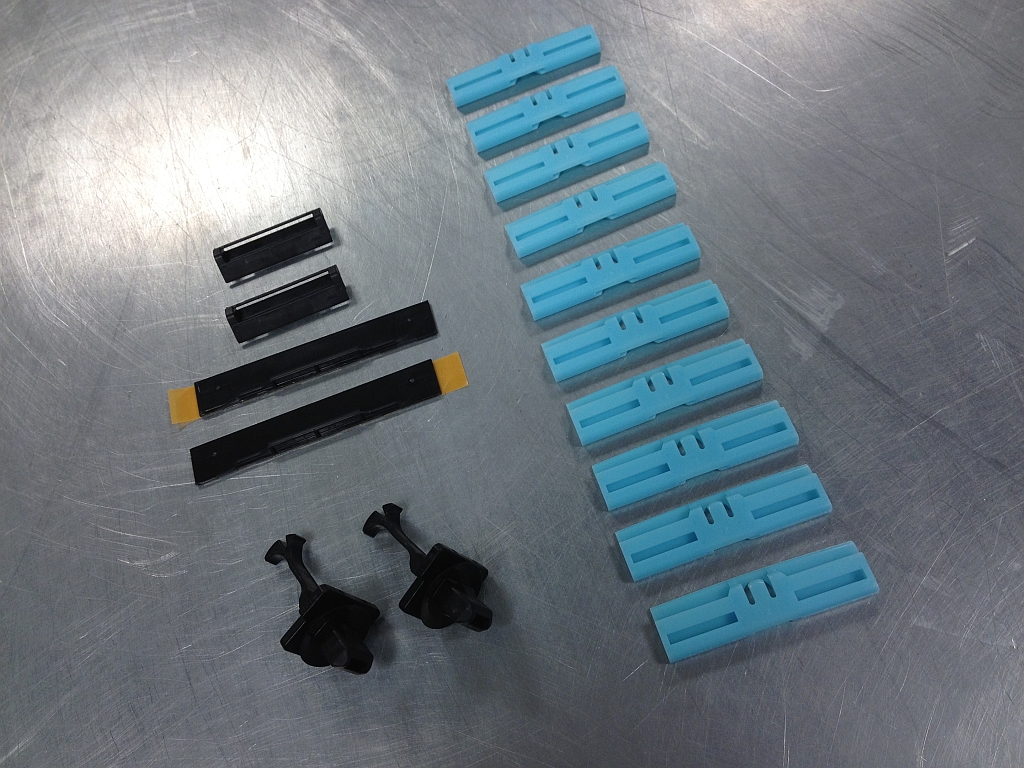
Upper moulding and adhesive dam. The adhesive dam is very rarely used by glass installers I've found. It prevents the adhesive from moving inwards to wards the interior while curing, it also provides a nice guide for laying down the urethane.
Now that I've got all of the parts I'll need, I can start prepping the car to remove the glass, here I've pulled the door sill plates and dash side panels to be able to remove the interior A-pillar trim.
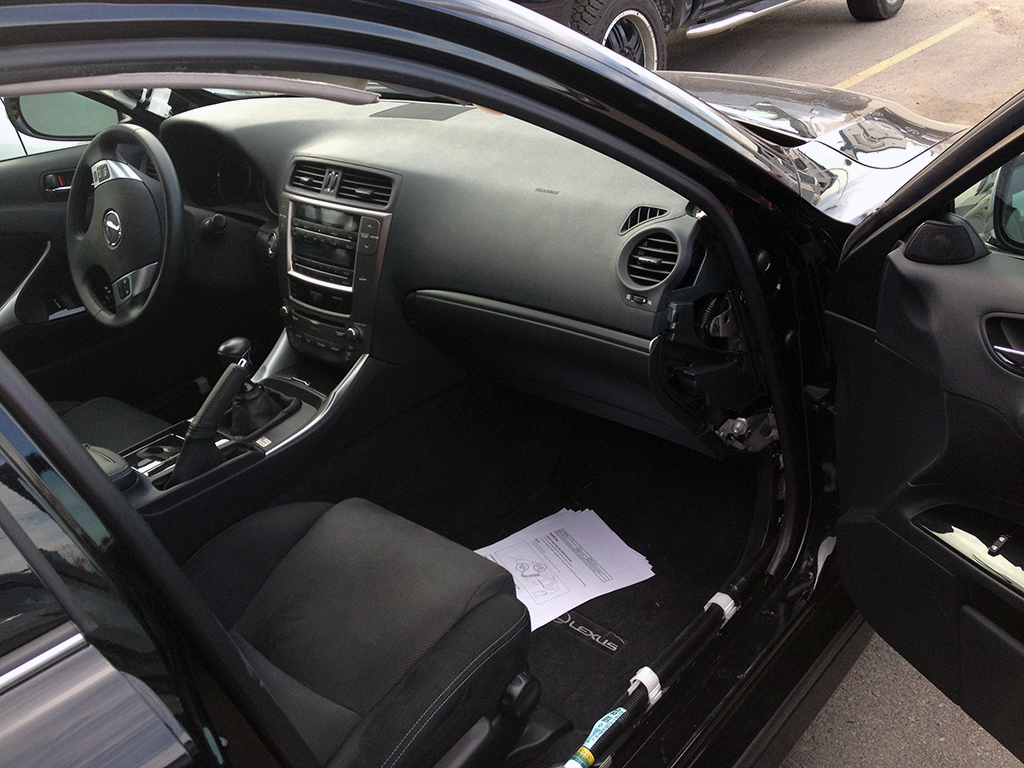
After removing these parts I've taped the door sills, sometimes when trying to get a good angle to cut/remove/install the glass this area is stepped on. I didn't want the factory scuff plates or paint scratched or damaged if this happened.
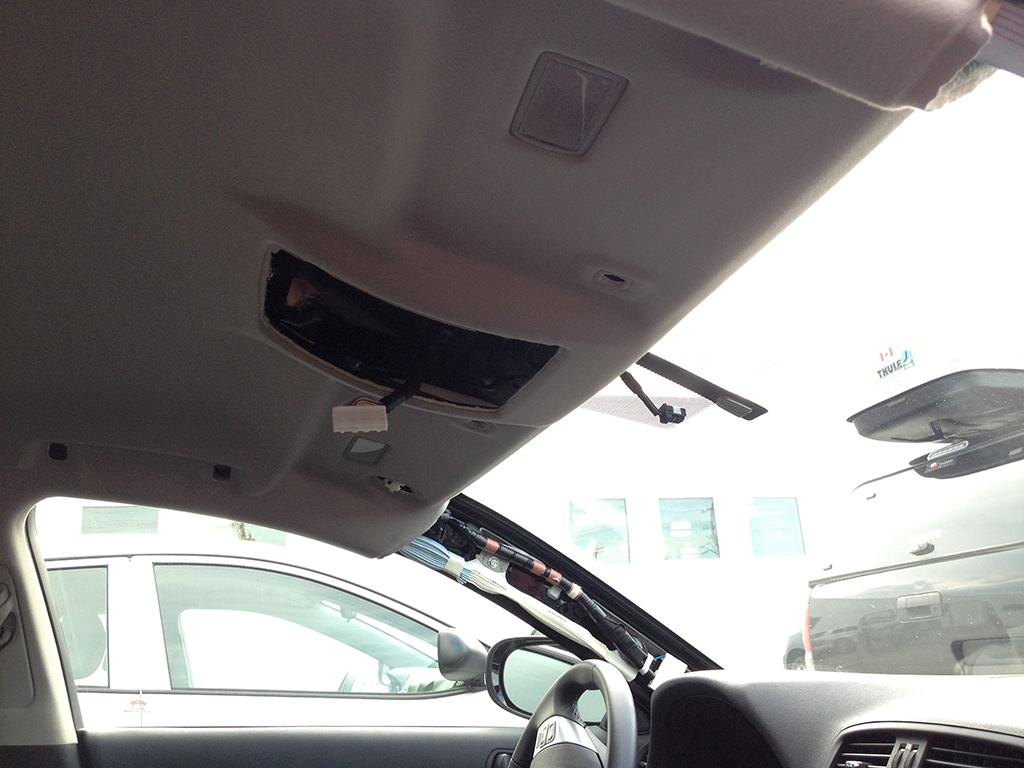
Here I've carefully removed the grab handles, sunvisors, dome light assembly, rear view mirror and interior A-pillar trim to slightly drop the headliner and allow more access to cut out the glass without risking a nick or cut to the headliner.
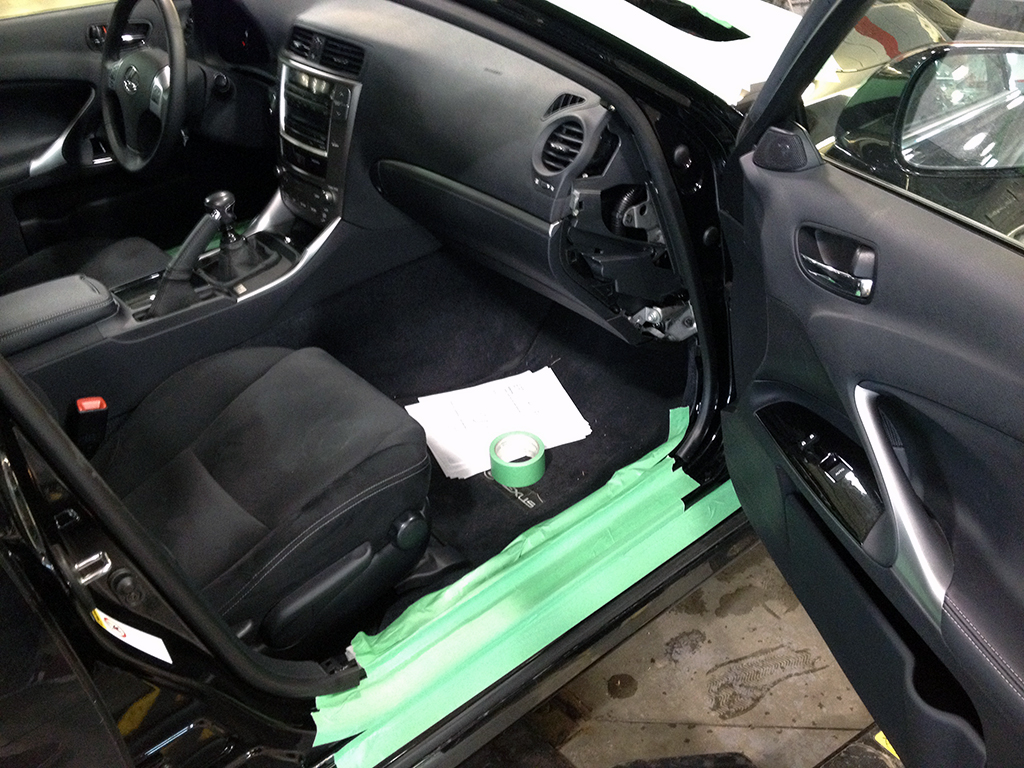
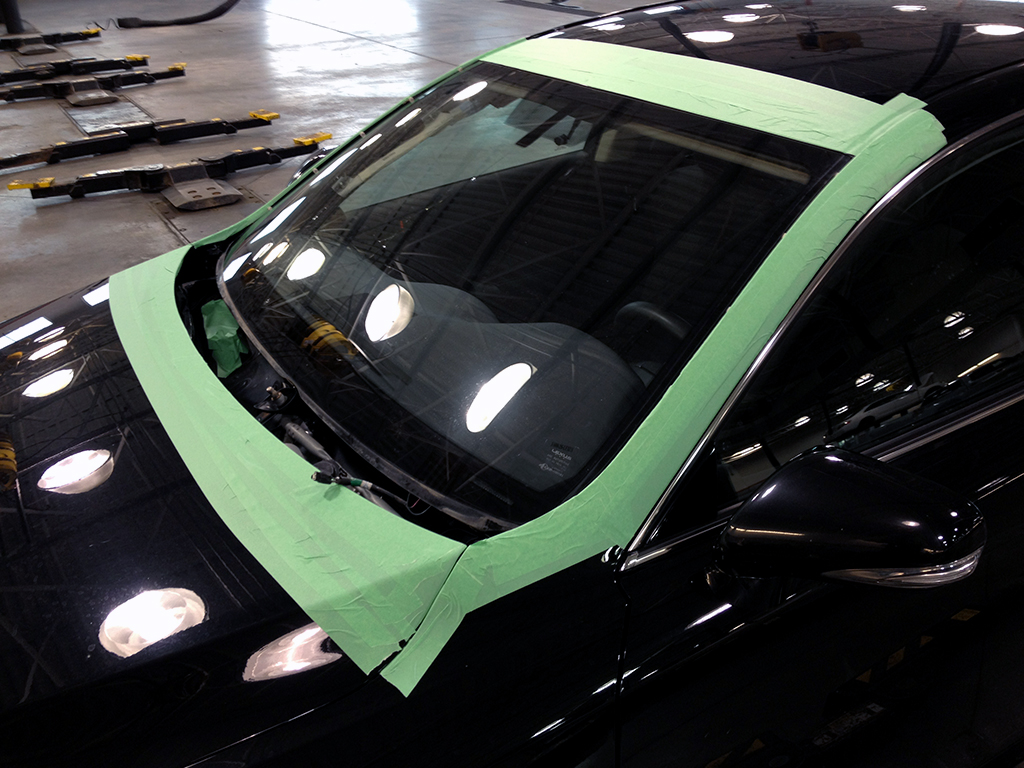
I then taped the exterior A-pillars, roof and hood around the windshield to prevent scratching the paint when removing/installing the mouldings or glass, and to prevent any adhesive from getting on the paint if there is a mistake while installing the glass. The wiper arms and cowl were also removed to allow access to the glass.
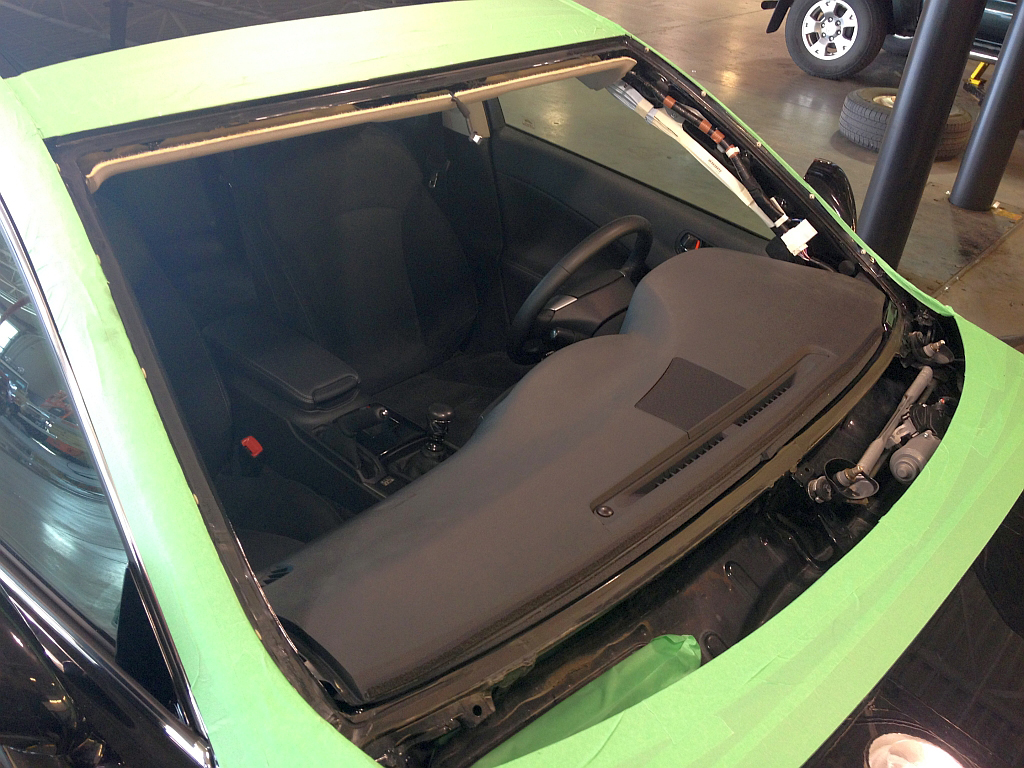
Glass removed. While I have done this myself in the past, I had someone come and do this one step for me. Mainly because of how close the glass is to the body at the top of the windshield (4mm gap) on the Lexus. I didn't want to risk damaging the body, while I don't normally trust glass people, I do know one person with the tools who takes his time and doesn't damage anything, if I wasn't installing it myself, I'd have gotten him to do it for sure.
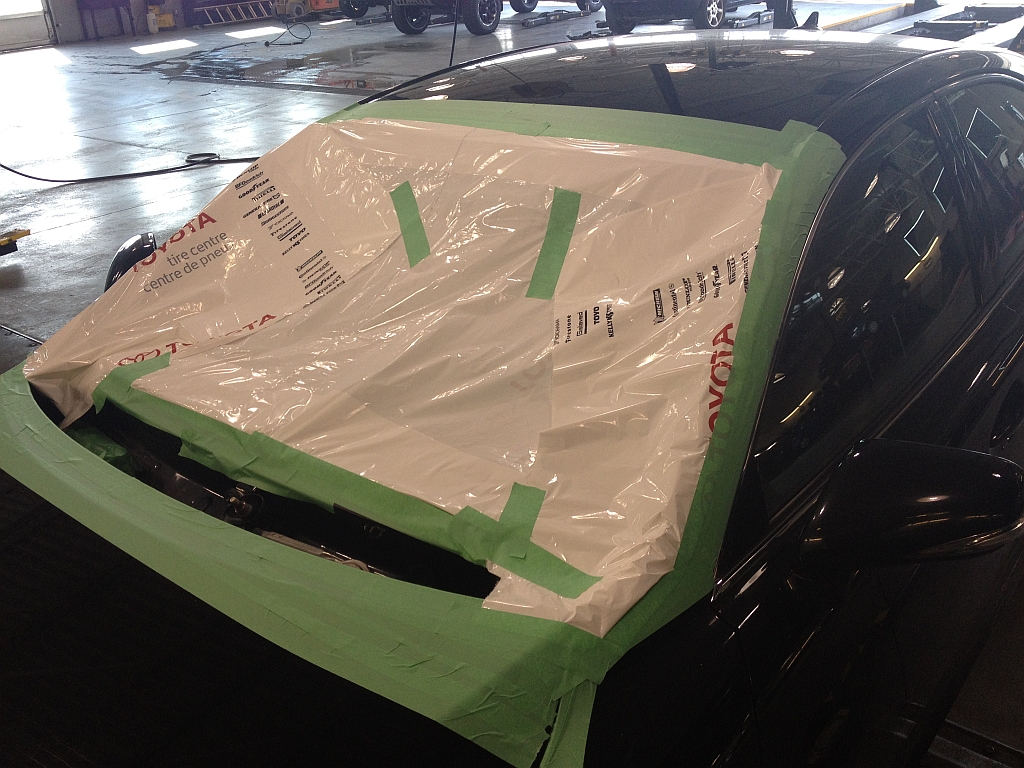
Covered it up for the weekend so nothing gets in. Glass goes in tomorrow.
Hope you enjoyed the read so far.
Jeff
After having numerous problems with my own various cars, I decided that I would no longer let someone else do for me what I believe I can do myself. I've since installed 3 windshields in various types of cars and am gaining a pretty decent ability. It takes me a long time and a lot of preparation, but it's done right and I know no steps were skipped.
All that being said, I still never look forward to having to replace a windshield, and when I got a large chip 2 weeks ago that spread very quickly before I could get it repaired, I knew I was going to need to install another one.
I haven't finished the job yet, I will be installing the new glass tomorrow, but I figured I'd post what I've done so far in case anyone is interested in seeing how Lexus actually says to do the glass versus what most people have probably seen happen when they got their windshield replaced.We'll start with a new factory windshield glass from Lexus, heated without auto wipers:
There are also a few other parts you'll need, as most of these are damaged while removing the old glass. This includes the top moulding, adhesive dam, some clips. The side mouldings are reusable if you can get them off without breaking them. I almost did, but there was a bit too much adhesive and it held them on too tightly so they broke.
Brought in a windshield glass installation kit from Japan. Drive Joy is Toyota's aftermarket brand in Japan, I tried to get the genuine kit from Toyota, but they don't sell it, had to get the Drive Joy kit.
Installation kit includes body primer, glass primer, piano wire and the adhesive itself. Lexus instructions give specific instructions on how the adhesive is to be applied.
No.1 and No.2 upper retainers, on the body and glass to hold it in place while the adhesive cures. Should make sure the glass keeps the 4mm gap between the glass and body at the top. A-pillar interior and exterior trim clips to make sure things are tight.
Upper moulding and adhesive dam. The adhesive dam is very rarely used by glass installers I've found. It prevents the adhesive from moving inwards to wards the interior while curing, it also provides a nice guide for laying down the urethane.
Now that I've got all of the parts I'll need, I can start prepping the car to remove the glass, here I've pulled the door sill plates and dash side panels to be able to remove the interior A-pillar trim.
After removing these parts I've taped the door sills, sometimes when trying to get a good angle to cut/remove/install the glass this area is stepped on. I didn't want the factory scuff plates or paint scratched or damaged if this happened.
Here I've carefully removed the grab handles, sunvisors, dome light assembly, rear view mirror and interior A-pillar trim to slightly drop the headliner and allow more access to cut out the glass without risking a nick or cut to the headliner.
I then taped the exterior A-pillars, roof and hood around the windshield to prevent scratching the paint when removing/installing the mouldings or glass, and to prevent any adhesive from getting on the paint if there is a mistake while installing the glass. The wiper arms and cowl were also removed to allow access to the glass.
Glass removed. While I have done this myself in the past, I had someone come and do this one step for me. Mainly because of how close the glass is to the body at the top of the windshield (4mm gap) on the Lexus. I didn't want to risk damaging the body, while I don't normally trust glass people, I do know one person with the tools who takes his time and doesn't damage anything, if I wasn't installing it myself, I'd have gotten him to do it for sure.
Covered it up for the weekend so nothing gets in. Glass goes in tomorrow.
Hope you enjoyed the read so far.
Jeff

The following users liked this post:
lobuxracer (07-27-20)
07-16-12, 12:26 AM
#2

What's with the happy face on the cover? lol!
Also in the interior, what's the red marks for? Looks like someone had make up ha ha ha!
Could there be an issue with the snake part in terms of getting the window in tightly? As I understand it, from the factory it's done by machine which uses a lot of force to ensure it's secure and helps with the integrity. Would there be a difference in terms of force doing it by hand without the machine?
07-16-12, 12:32 AM
#3
What red marks? Also what snake part?
I'm confused, lol.
As for the force required to install the windshield, it requires very little force. It is lightly pressed in by hand, any more force than that would squeeze all of the adhesive out. Really gravity is responsible for most of the force once the glass is set in place. You press lightly around the edges to make sure it is evenly set.
Jeff
Last edited by Jeff Lange; 07-16-12 at 12:39 AM.
07-16-12, 01:05 AM
#4
I guess this looks like a bit of red, the line that's going where the dome light assembly is.
It's one of the components which acts as a form of anti-roll bar or something if I recall correctly incase of a crash as it as as a safety structure; my co-worker was referring it as the snake. At the factory, the machine pushes the windsheild against the so-called snake with a good amount of force. Usually replacing it as he saids, it may not be as structually strong because the machine isn't there to press against windshield.
It's one of the components which acts as a form of anti-roll bar or something if I recall correctly incase of a crash as it as as a safety structure; my co-worker was referring it as the snake. At the factory, the machine pushes the windsheild against the so-called snake with a good amount of force. Usually replacing it as he saids, it may not be as structually strong because the machine isn't there to press against windshield.
07-16-12, 01:10 AM
#5
You mean the side curtain airbag? It's clipped to the A-pillar/roof, it doesn't even touch the glass, or come near it.
There is nothing pressed against the glass, at the factory or otherwise, and the glass is held in with cured urethane to the body's paint, nothing more. Unless your friend is thinking of really old cars (from like, pre-1960), or other glass on some older cars on the sides/back that is held in differently. No modern cars use anything like that.
So anyway, not sure what your co-worker was referring to. There are no safety features that are affected when replacing a windshield.
Jeff
Last edited by Jeff Lange; 07-16-12 at 01:13 AM.
07-16-12, 03:58 AM
#6
Lead Lap
iTrader: (1)
Join Date: Mar 2006
Location: Florida
Posts: 510
Likes: 0
Received 0 Likes
on
0 Posts
This thread has excellent information...
Looks like your guy wasn't so careful. Look at the dash at the bottom in the middle. I know my dash didn't have that when I saw it removed.
I had my dash replaced by safelite due to something similar. hence safelite is a bunch of amateurs. I will only trust a man and wife combo that does all lexus windshields at lexus of tampa bay. 2 OEM lexus windshields in the last 5 years by them and never a scratch or a problem.
Looks like your guy wasn't so careful.
Look at the dash at the bottom in the middle. I know my dash didn't have that when I saw it removed.I had my dash replaced by safelite due to something similar. hence safelite is a bunch of amateurs. I will only trust a man and wife combo that does all lexus windshields at lexus of tampa bay. 2 OEM lexus windshields in the last 5 years by them and never a scratch or a problem.
Trending Topics

 07-16-12, 10:40 AM
#11

My windshield is sooooooo pitted its not even funny. I need to get it replaced asap. I apply a coat of wax to it and it will help. But in three days it just goes away. Im just scared of the crappy things I hear of all theses places replacing windshields. My biggest delema is I want to go OEM because I hear that it has a special coating??? But who knows I just dont want a crappy install with road noise to come with it,.....if anybody can chime in on this please do. Your install looks clean as F@(%!!! you have ***** sir. Thumbs up
07-16-12, 10:49 AM
#12
My windshield is sooooooo pitted its not even funny. I need to get it replaced asap. I apply a coat of wax to it and it will help. But in three days it just goes away. Im just scared of the crappy things I hear of all theses places replacing windshields. My biggest delema is I want to go OEM because I hear that it has a special coating??? But who knows I just dont want a crappy install with road noise to come with it,.....if anybody can chime in on this please do. Your install looks clean as F@(%!!! you have ***** sir. Thumbs up
From Sewell's site:
The IS 250 features heat-absorbing, ultraviolet-reducing green-tint glass on all windows, helping keep the interior cool and protecting cabin materials from heat damage and fading -- helps keep the interior cool and maximizes air conditioner performance, while helping preserve the interior materials from heat damage and fading. In addition, the acoustic-control windshield glass is laminated with low-durometer plastic safety film and features high noise-dampening characteristics to reduce cabin noise.
If you're replacing it on your own, I would just buy the OEM windshield from Sewell with the CL discount. Works out to about $800 shipped for where I am. When I had it replaced at the dealer under insurance it was $1100+ for the part alone I believe.
http://is.sewellparts.com/accessorie...2007/4662.html
Last edited by KillaIS250; 07-16-12 at 10:55 AM.
