DIY: Sticky Window Buttons/switch
 11-12-08, 05:36 PM
#1

Dont you hate it when your buttons feel sticky whenever you press on them? And no I'm not talking about your keyboard 
I bought my car a few years ago and I've always noticed that the buttons for the windows had a good amount of friction to it. They did not operate smoothly at all because you could hear squeaks whenever you pressed them or tried to roll up the windows. It didn't really bother my until I tried rolling down my windows using all the other switches in the car. They were smooth, quiet, and practically felt like new.
I took out my door to see if I could fix it. Buying a new master switch was out of the question as I only buy things that can't be fixed. Enough rambling, here is a short DIY on how to fix those pesky buttons
I'm going to assume you already know how to take off the door panel. If you dont, there are plenty of threads on here that will show you how to do so.
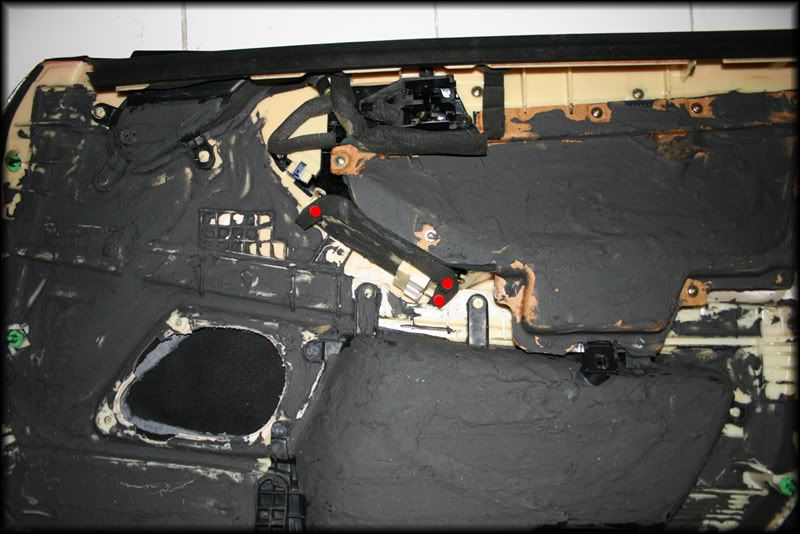
For those who are wondering, the black/gray stuff on my door is liquid sound deadener so ignore that. It's not part of the DIY
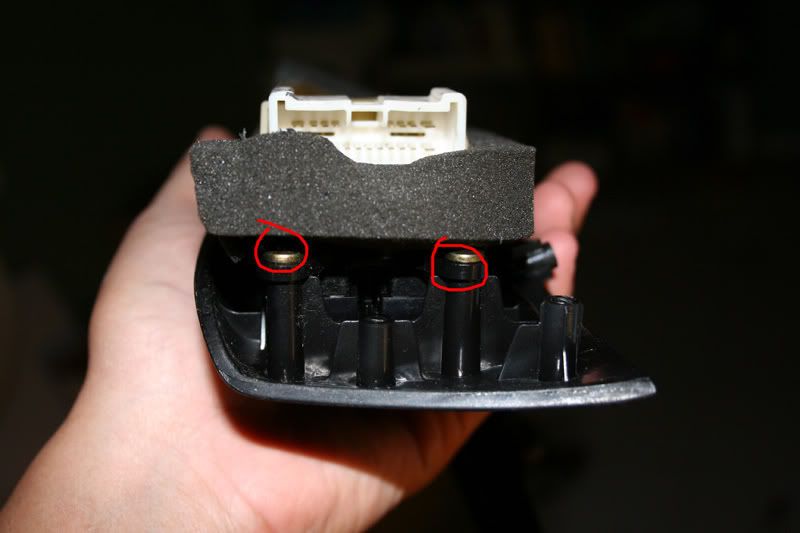
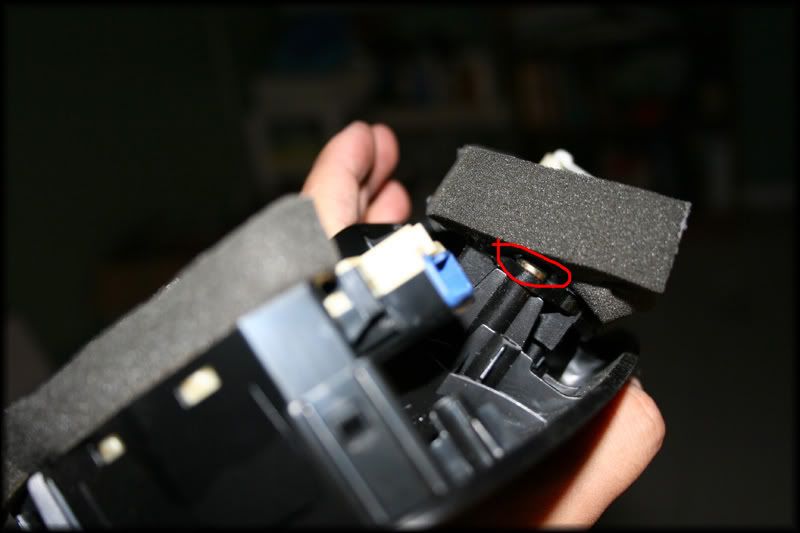
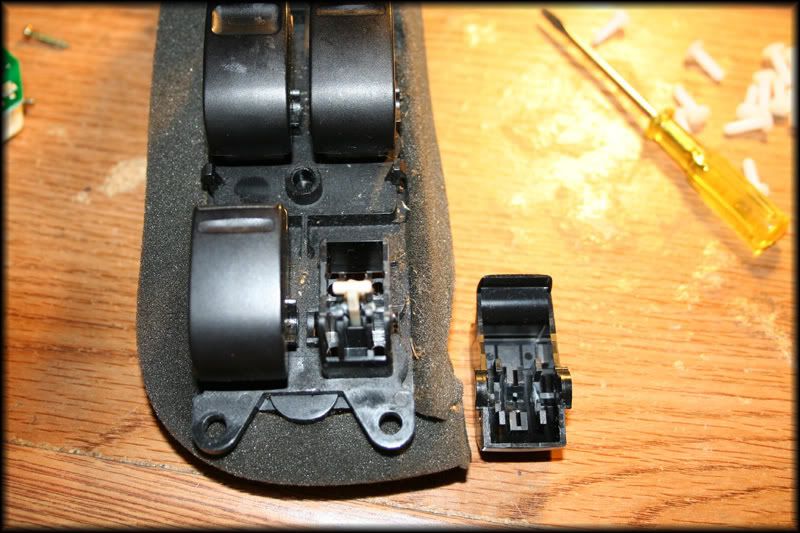
1) Locate the 3 red dots in the picture. There are 3 screws you need to remove. You may need to look under the foam piece to find it.
In case you dont know what the screws look like, I took a picture of them as reference:
You should be able to pull out the switch assembly out by now.
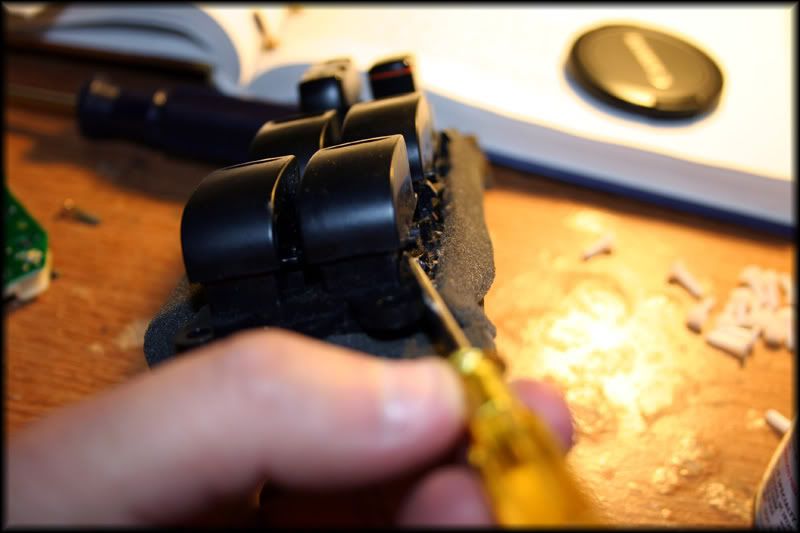
2) Next, get a small flathead screwdriver and try to pry the buttons off. Obviously you dont want to break the buttons so be careful. You'll need to do the same thing on the other side of the switch. Remove the two lower buttons first before you try to remove the front switches otherwise you wont have enough room to pry the inner part of the front switches.
I recommend removing all the buttons first to make life easier. Also make sure you pry it out without having the button fly out because there are parts inside that are pretty small. You dont want to lose them.
This is what the internal looks like. Very little grease inside from the factory. In fact, some of my other switches didn't really have grease left.
3) Remove the inner white plastic piece and the spring inside. Grease them up. Remember the orientation of the plastic piece so you'll know which way to put it back in.
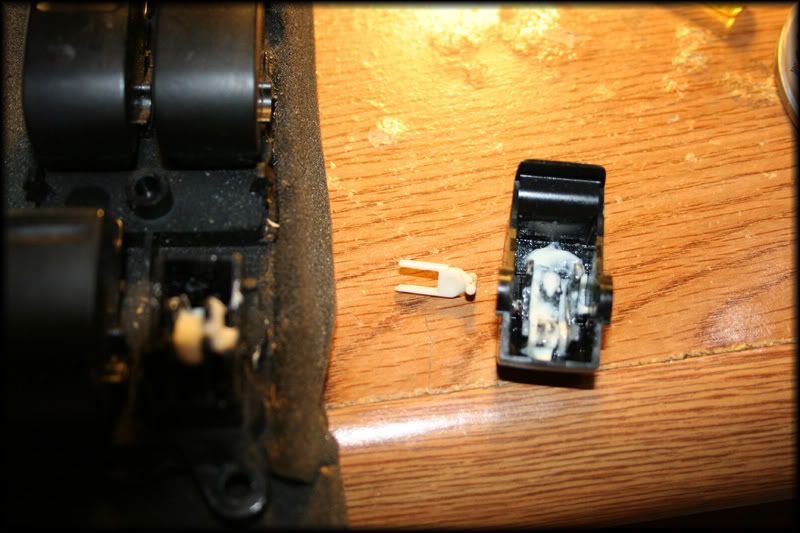
I went a bit too liberal with the grease in this one.
4) Snap one button back on. Move the switch up and down many times to get the grease distributed. If it's still really sticky, then take out the button and make sure you've hit most internal moving parts. Once it's good, proceed with the next button. Make sure the buttons are fully snapped back onto the assembly.
5) Reverse the steps to install.
Note:
-In the above pictured, I used white lithium grease in a spray can. I removed the grease in favor of using the same grease in CV joints (found in tubes). Reason is, the cv joint grease is a bit thicker so it wont run off, and it'll adhere to the moving parts. The white liquid grease was too thin. You also dont want grease that's too thick (like the Daizen suspension grease) otherwise you'll make the switch very sticky.
Conclusion:
-The switch works MUCH better. I dont know what it feels like brand new but they are just as good as the rest of my switch. I have a hunch that the problem lies within the white plastic piece inside the switch. When I took mine out, they were pretty worn out, but still very useable with grease. Hopefully they dont stick anymore. I have a feeling they wont However, should they ever get sticky again, I'll probably have a machine shop make new ones in aluminum.
I bought my car a few years ago and I've always noticed that the buttons for the windows had a good amount of friction to it. They did not operate smoothly at all because you could hear squeaks whenever you pressed them or tried to roll up the windows. It didn't really bother my until I tried rolling down my windows using all the other switches in the car. They were smooth, quiet, and practically felt like new.
I took out my door to see if I could fix it. Buying a new master switch was out of the question as I only buy things that can't be fixed. Enough rambling, here is a short DIY on how to fix those pesky buttons
I'm going to assume you already know how to take off the door panel. If you dont, there are plenty of threads on here that will show you how to do so.
For those who are wondering, the black/gray stuff on my door is liquid sound deadener so ignore that. It's not part of the DIY
1) Locate the 3 red dots in the picture. There are 3 screws you need to remove. You may need to look under the foam piece to find it.
In case you dont know what the screws look like, I took a picture of them as reference:
You should be able to pull out the switch assembly out by now.
2) Next, get a small flathead screwdriver and try to pry the buttons off. Obviously you dont want to break the buttons so be careful. You'll need to do the same thing on the other side of the switch. Remove the two lower buttons first before you try to remove the front switches otherwise you wont have enough room to pry the inner part of the front switches.
I recommend removing all the buttons first to make life easier. Also make sure you pry it out without having the button fly out because there are parts inside that are pretty small. You dont want to lose them.
This is what the internal looks like. Very little grease inside from the factory. In fact, some of my other switches didn't really have grease left.
3) Remove the inner white plastic piece and the spring inside. Grease them up. Remember the orientation of the plastic piece so you'll know which way to put it back in.
I went a bit too liberal with the grease in this one.
4) Snap one button back on. Move the switch up and down many times to get the grease distributed. If it's still really sticky, then take out the button and make sure you've hit most internal moving parts. Once it's good, proceed with the next button. Make sure the buttons are fully snapped back onto the assembly.
5) Reverse the steps to install.
Note:
-In the above pictured, I used white lithium grease in a spray can. I removed the grease in favor of using the same grease in CV joints (found in tubes). Reason is, the cv joint grease is a bit thicker so it wont run off, and it'll adhere to the moving parts. The white liquid grease was too thin. You also dont want grease that's too thick (like the Daizen suspension grease) otherwise you'll make the switch very sticky.
Conclusion:
-The switch works MUCH better. I dont know what it feels like brand new but they are just as good as the rest of my switch. I have a hunch that the problem lies within the white plastic piece inside the switch. When I took mine out, they were pretty worn out, but still very useable with grease. Hopefully they dont stick anymore. I have a feeling they wont
However, should they ever get sticky again, I'll probably have a machine shop make new ones in aluminum.
 11-13-08, 12:52 AM
#4


Trending Topics

 03-12-09, 01:06 AM
#11
Master Thread Closer!!
iTrader: (33)
Join Date: Jul 2002
Location: Waipahu, Waikele, HI
Posts: 9,859
Likes: 0
Received 9 Likes
on
9 Posts
Hey Henry....my front driver door window seems to have a mind of its own...sometimes it wont roll up at all....and sometimes when I want it to roll up...it rolls down about 3 inches....hit it again to roll up....and it goes down another 3 inches.
You think this DIY could solve my problem?
You think this DIY could solve my problem?
Last edited by PHML; 03-12-09 at 01:20 AM.
03-12-09, 01:32 AM
#13
Hey Henry....my front driver door window seems to have a mind of its own...sometimes it wont roll up at all....and sometimes when I want it to roll up...it rolls down about 3 inches....hit it again to roll up....and it goes down another 3 inches.
You think this DIY could solve my problem?
You think this DIY could solve my problem?
 Perhaps you can swap the door panel with Chris. At least you can try to isolate something.
07-06-10, 09:52 PM
Perhaps you can swap the door panel with Chris. At least you can try to isolate something.
07-06-10, 09:52 PM
#14
Driver School Candidate

Join Date: Aug 2009
Location: FL
Posts: 5
Likes: 0
Received 0 Likes
on
0 Posts
Can anybody help here--if my drivers window switch was only working intermittingly and has now stopped working altogether, do you think the DIY might fix it or is it a part replacement? The window never seemed to have an issue is going up/down or with sticking. It seems like it might be electrical, judging by the symptoms but I am not sure. If i have to replace parts any idea how much i am looking at from Lexus?? Thanks.
07-06-10, 10:41 PM
#15
The 'sticky' buttons is just how they feel when pressing them. They don't actually stay down/up. The DIY was meant for those who were looking for a smoother switch.
As far as your problem is concern, you should take off the door panel to check if the wire harness is loose or not.
As far as your problem is concern, you should take off the door panel to check if the wire harness is loose or not.

Thread
Thread Starter
Forum
Replies
Last Post