My new LED DRL's installed

 06-26-13, 03:30 PM
#17
 06-26-13, 03:31 PM
#18
Lead Lap
Thread Starter
06-26-13, 04:12 PM
#19
Should work!!!!


 06-26-13, 04:13 PM
#20
Ordered my set of LED and the Remote!!!!
Thanks StillLine!
Thanks StillLine!
Last edited by mandyfig; 06-26-13 at 04:17 PM.
06-26-13, 04:27 PM
#21
Driver

Join Date: Dec 2004
Location: North Carolina
Posts: 181
Likes: 0
Received 0 Likes
on
0 Posts
I am anxious to see how yours look when you get them in. On my eyebrow lights I connected them to the radio 2 fuse at the kick panel of the passenger side. I used a piggyback buss fuse so they turn on with the switch. The radio 2 has a 20 Amp fuse and the piggyback I used a 5 am fuse. Works find so far.
06-26-13, 05:28 PM
#22
StillLine has a better idea on his install.
He used the a live (on all the time) fuse connection. Hence he can turn the LEDs on or off on demand, with or without the car being on.
Awesome idea. On nights you can hit the on on your remote and your LEDs are shining bright! And since they are LEDs there should not be a huge load on the battery.
He used the a live (on all the time) fuse connection. Hence he can turn the LEDs on or off on demand, with or without the car being on.
Awesome idea. On nights you can hit the on on your remote and your LEDs are shining bright! And since they are LEDs there should not be a huge load on the battery.
06-26-13, 08:10 PM
#23
Lead Lap
Thread Starter
StillLine has a better idea on his install.
He used the a live (on all the time) fuse connection. Hence he can turn the LEDs on or off on demand, with or without the car being on.
Awesome idea. On nights you can hit the on on your remote and your LEDs are shining bright! And since they are LEDs there should not be a huge load on the battery.
He used the a live (on all the time) fuse connection. Hence he can turn the LEDs on or off on demand, with or without the car being on.
Awesome idea. On nights you can hit the on on your remote and your LEDs are shining bright! And since they are LEDs there should not be a huge load on the battery.

StillLine
06-26-13, 08:32 PM
#24
Lead Lap
Thread Starter
mandyfig,
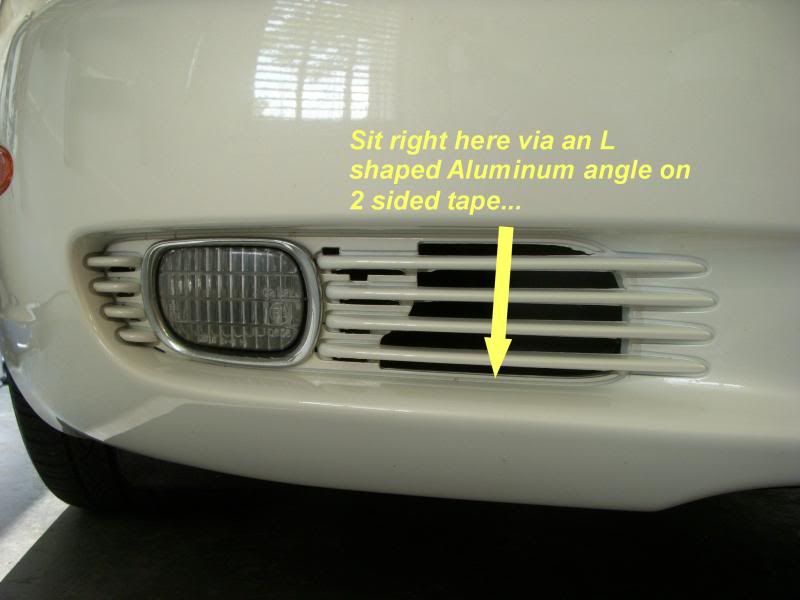
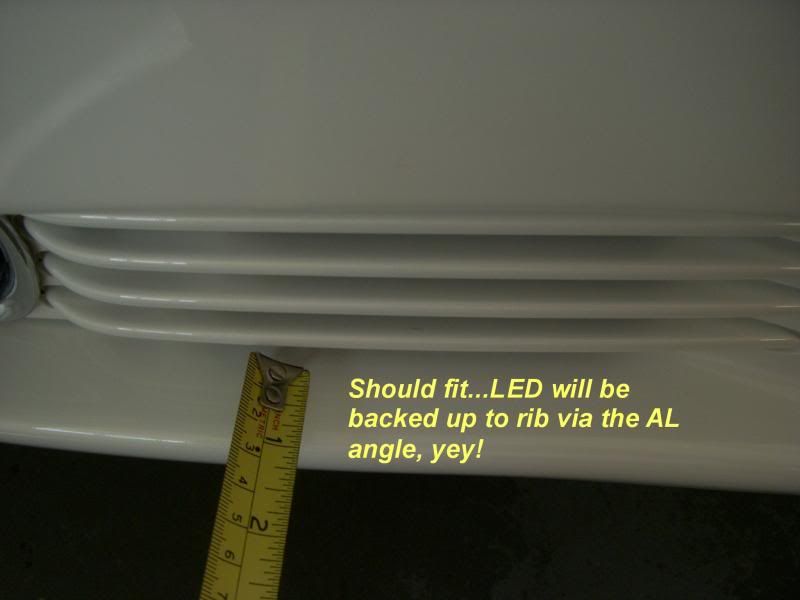
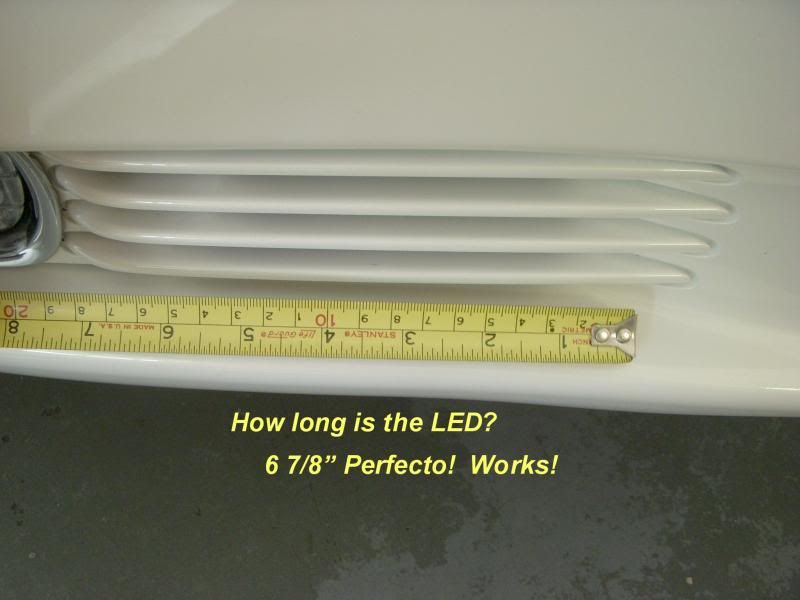
So, what about simply sticking the strips to the middle two ribs? If you desire more surface area for the tape on the back of the strip to stick to, fabricate your "L" bracket to stick between the two ribs flush with the leading edges of the ribs, and there you go. Just my 2 cents.
StillLine

So, what about simply sticking the strips to the middle two ribs? If you desire more surface area for the tape on the back of the strip to stick to, fabricate your "L" bracket to stick between the two ribs flush with the leading edges of the ribs, and there you go. Just my 2 cents.
StillLine
06-27-13, 06:41 AM
#25
Wow, why did I not think of that! Just stick the LED on the 2 ribs, making it it higher actually and probably more OEM'sh.
Thanks.
Thanks.
06-27-13, 06:56 AM
#26
Another rendition, thanks StillLine!
06-27-13, 06:57 AM
#27
Sold! My stuff should be here before the 4th!
Thanks again StillLine!
Thanks again StillLine!
06-27-13, 12:18 PM
#28
Pole Position
Join Date: Jun 2007
Location: Sunny Prestwick in Avon, IN
Posts: 283
Received 0 Likes
on
0 Posts
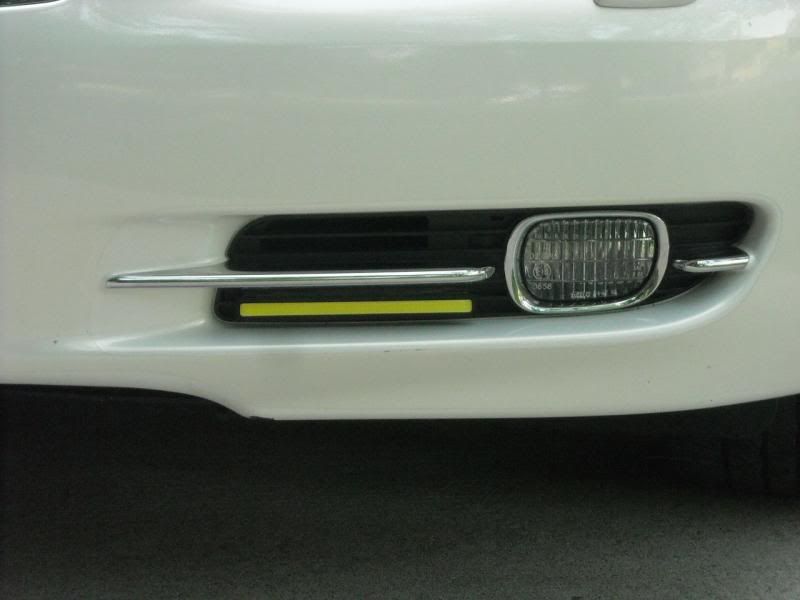
StillLine, I like what you've done here and thanks for making it so simple to install. I'm going to try this as well. I do have a question.....Is there anything that can be done to the "yellow" of the LEDs when they're turned off? Also, any suggestion on how to hide the black border?
Thanks again for the information,
lar
Thanks again for the information,
lar
06-27-13, 07:01 PM
#29
Hide the Black frame...good observation. Perhaps paint it? Matching color of the body?