DIY Gen4 Navigation Upgrade *PICS INSIDE*
 03-21-11, 01:55 PM
#1

So I received my 06+ tail lights and also my gen4 nav so I decided to install and do a DIY guide for anyone else interested. below you will find the guide.
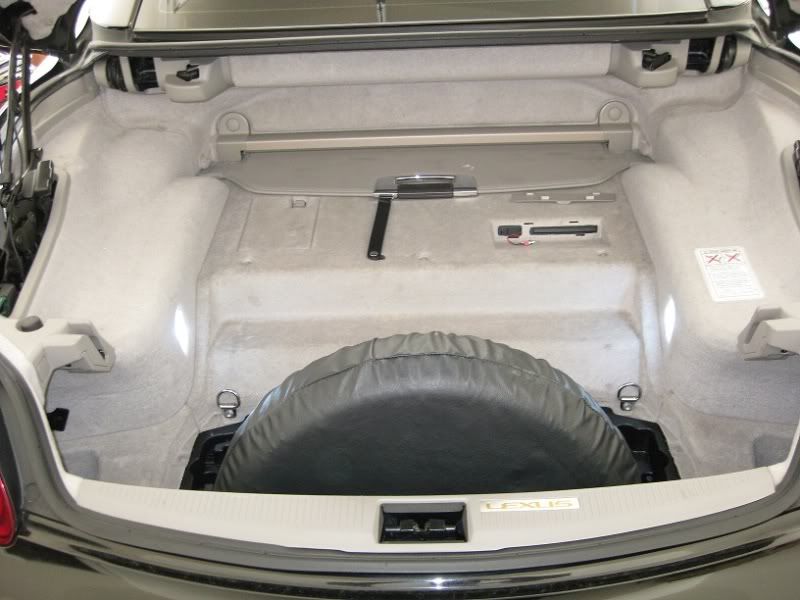
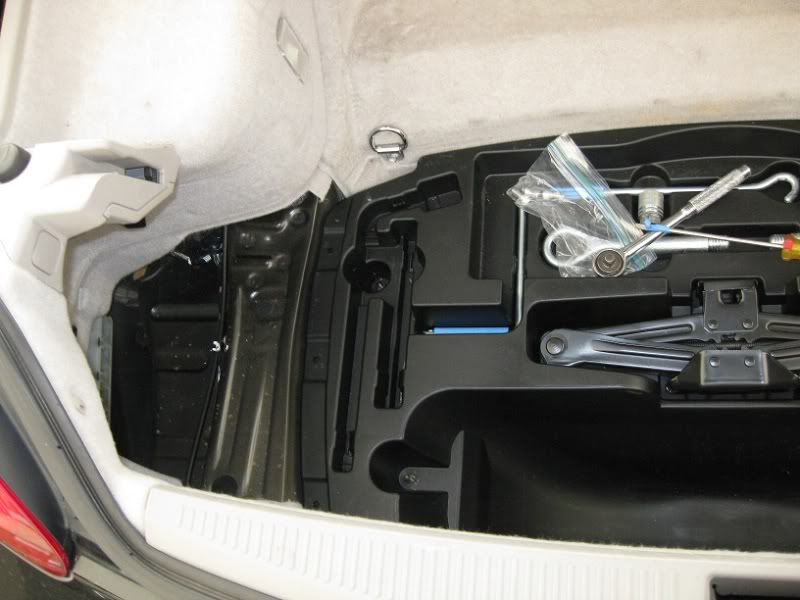
Here is a pic of the trunk before removing anything.
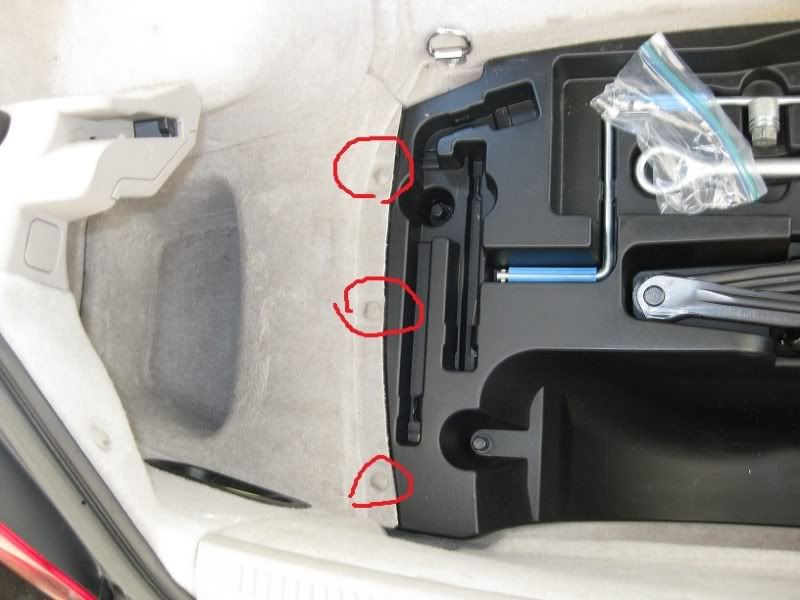
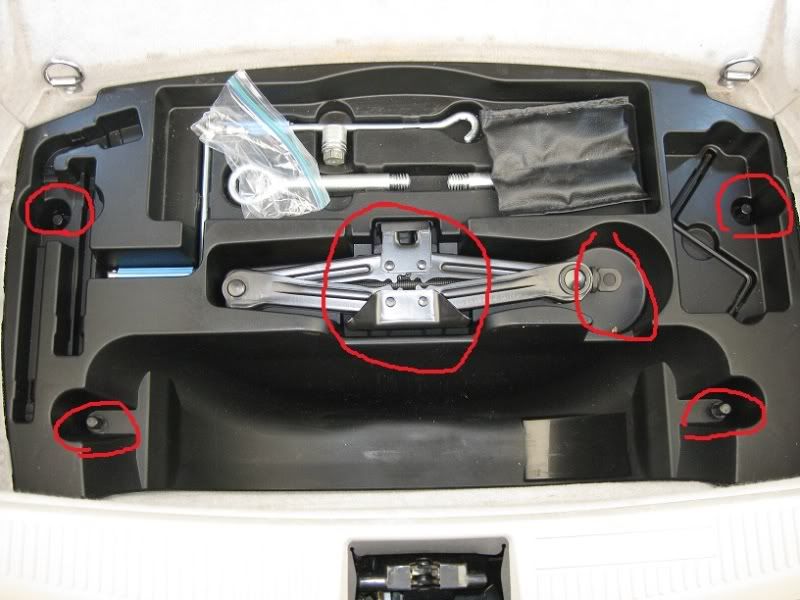
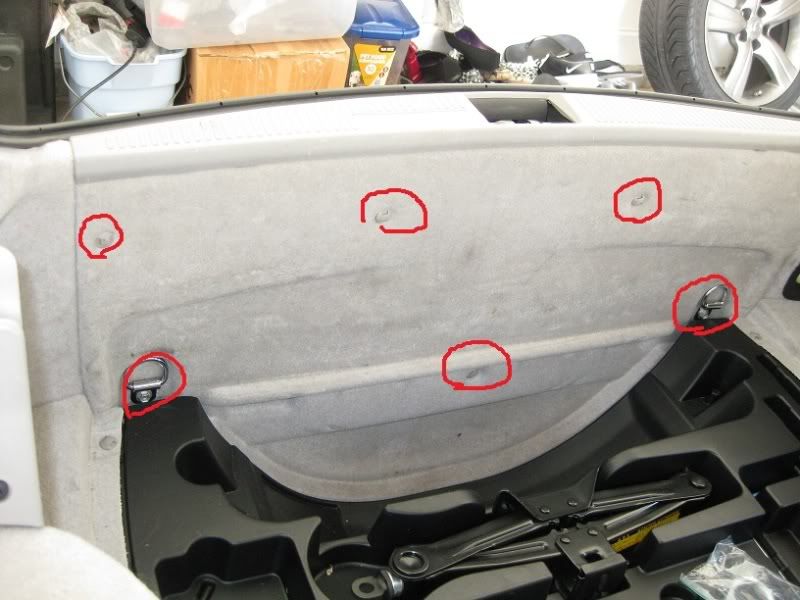
Now you want to go ahead and remove your spare tire if you have one and then remove the 3 clips circled.
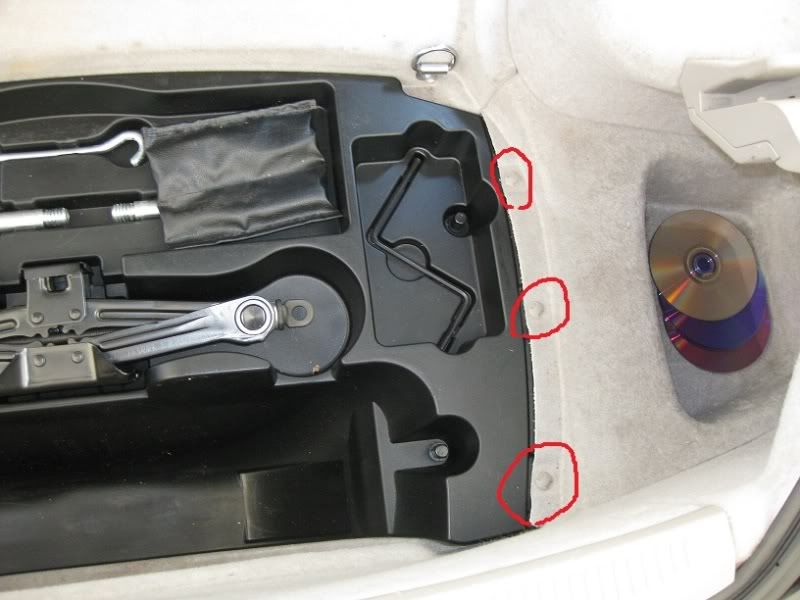
Same thing for the other side.
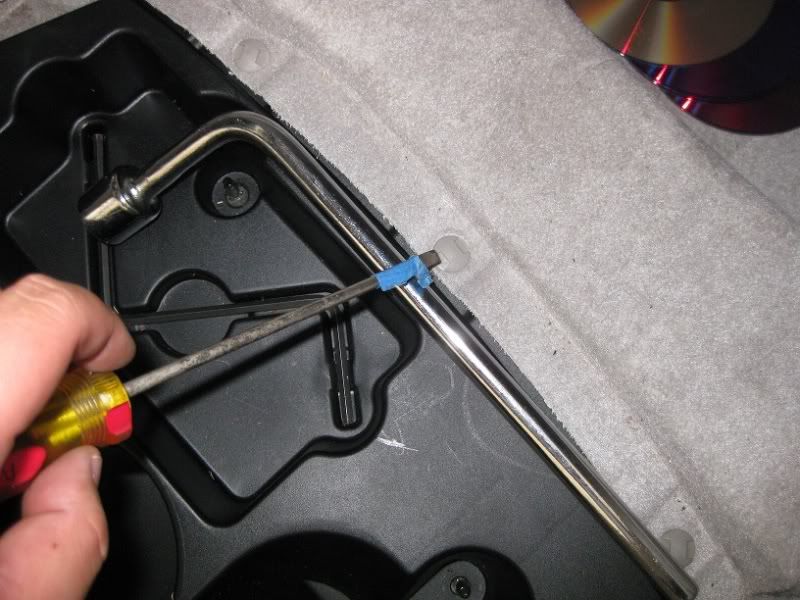
It helps to use your tire iron as leverage to pop these suckers out like below.
Now you will find the tool carrier for the spare. You will want to remove the two black clips on each side. Once those are removed then you want to turn your spare jack counter-clockwise to break free from the mount. You will see what I mean when you turn it counter-clockwise.
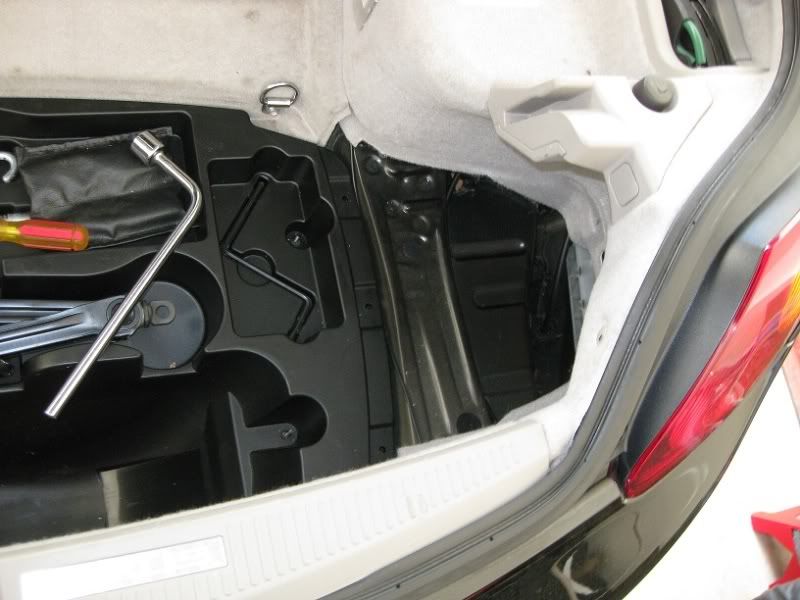
Next you will want to remove the left panel.
Then remove the right panel.
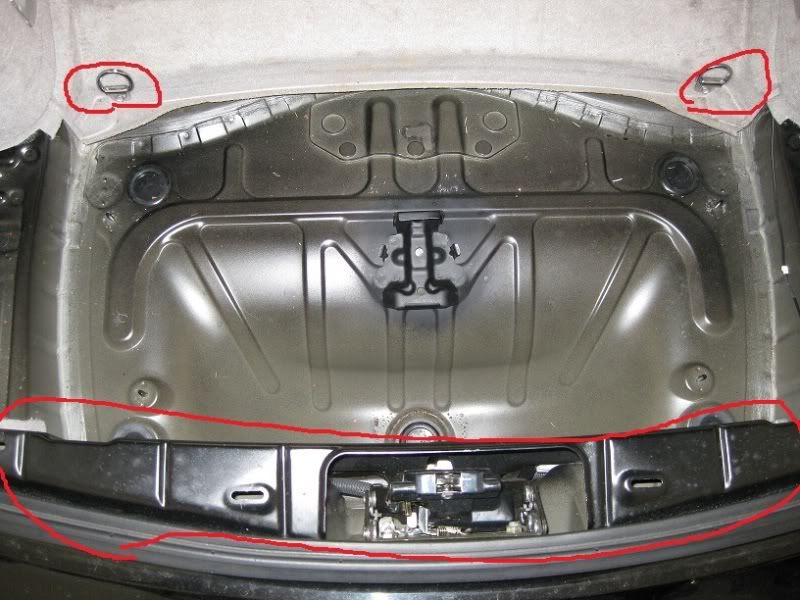
Then remove the spare tire tray and your trunk should look like this. Go ahead and remove those two bolts. Then pop off the plastic piece circled at the bottom. It should pop out if pulled straight up. it is held on by clips.
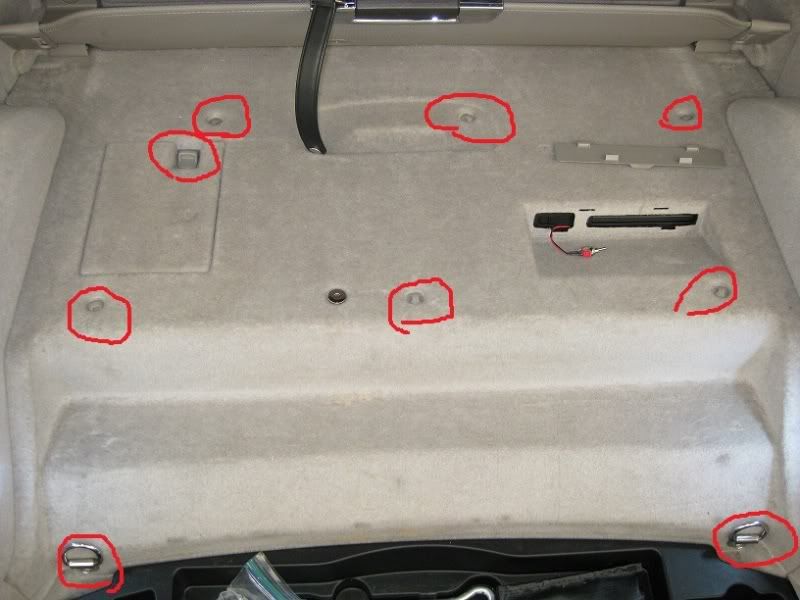
Then go ahead and remove the panel in the back of the trunk. Two bolts at bottom and the rest are clips. Once again you can use the tire iron to help you remove the clips. **DISREGARD THE PICTURE OF THE TOOL TRAY STILL BEING THERE. IT SHOULD OF BEEN REMOVED FOR THIS PICTURE**
You will next want to remove this piece so take out all the clips and if you havent done so, remove those two bolts at bottom too..**DISREGARD THE PICTURE OF THE TOOL TRAY STILL BEING THERE. IT SHOULD OF BEEN REMOVED FOR THIS PICTURE**
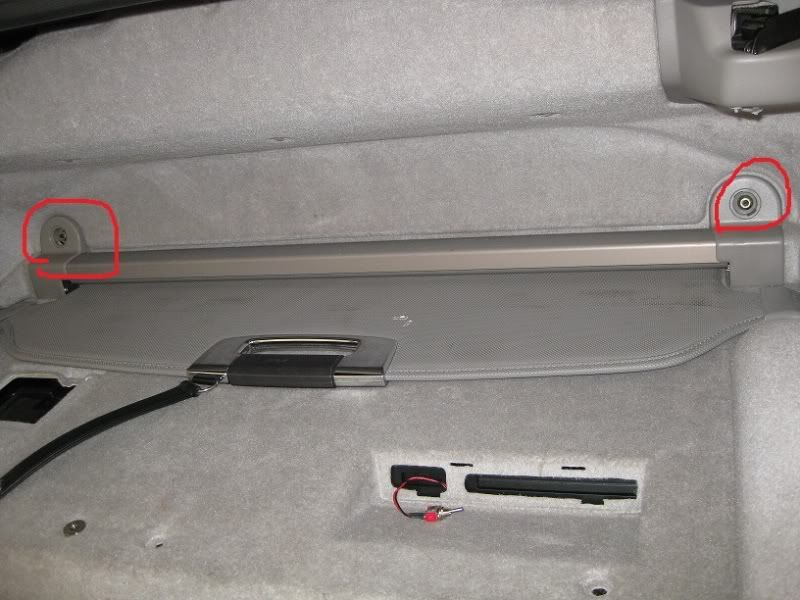
Next you want to remove the tonneu cover. there are two plastic caps that pop off using a flat screw driver. Once its off then there is (1) 10mm nut on each side. Once nuts are removed then it comes right off.
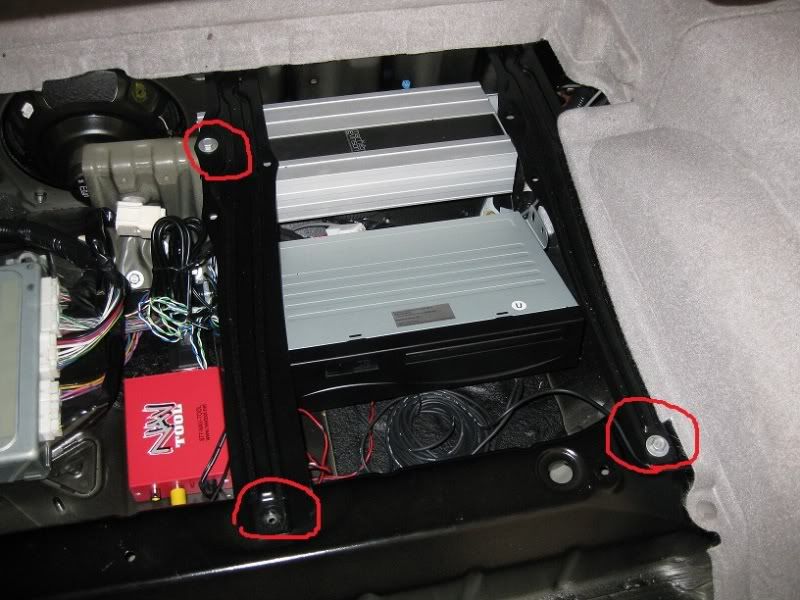
Remove the carpet and Now your trunk should look like this.
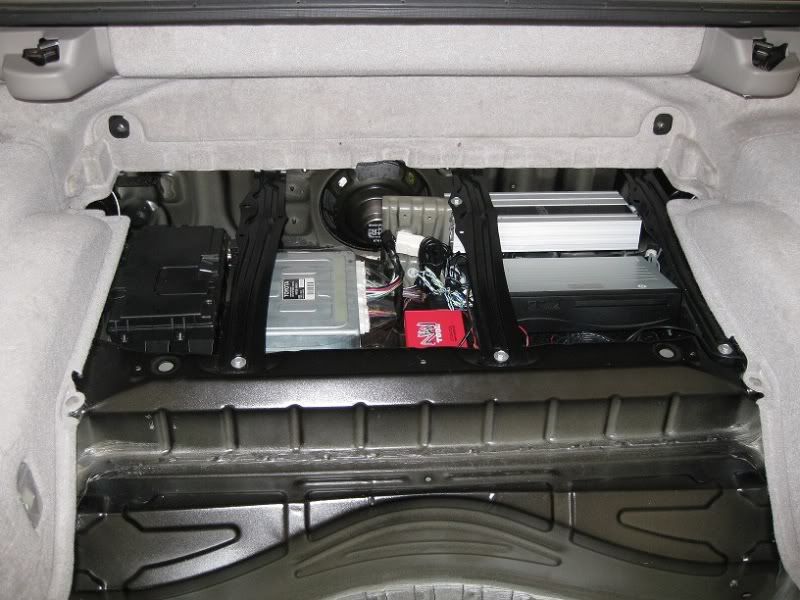
Now remove these bolts and they will give a little play in the bracket allowing you to reach the brackets holding down the player a lot easier.
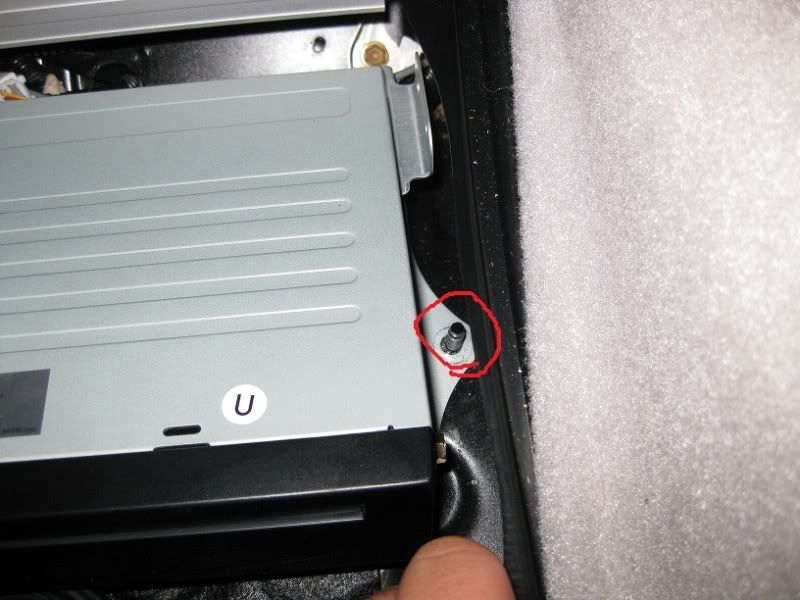
Theres one nut on the right side that needs to be removed.
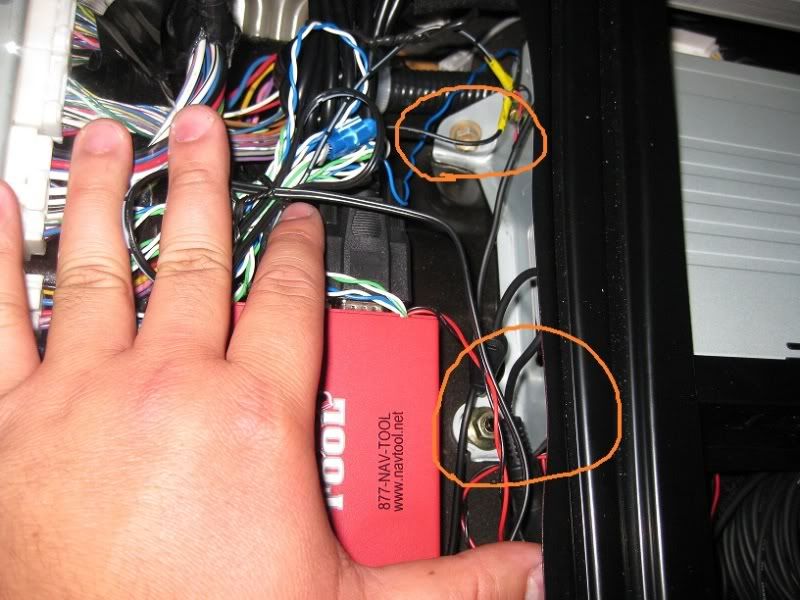
Then on the left there is (1) nut and (1) screw. Once you remove those screws then unplug everything on the back of the player/drive and take it out.
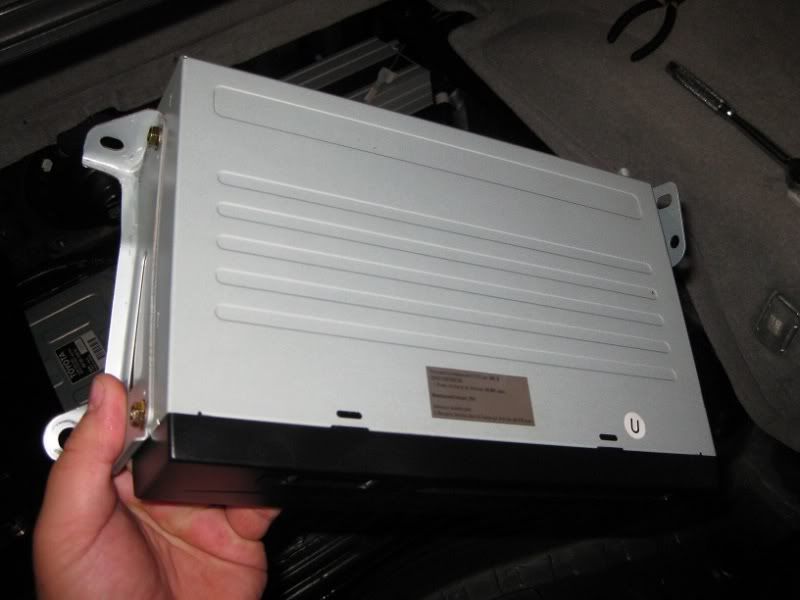
Now here is the drive removed. Go ahead and swap the brackets over to the new drive, reinstall everything in reverse order.
THE END!
Here is a pic of the trunk before removing anything.
Now you want to go ahead and remove your spare tire if you have one and then remove the 3 clips circled.
Same thing for the other side.
It helps to use your tire iron as leverage to pop these suckers out like below.
Now you will find the tool carrier for the spare. You will want to remove the two black clips on each side. Once those are removed then you want to turn your spare jack counter-clockwise to break free from the mount. You will see what I mean when you turn it counter-clockwise.
Next you will want to remove the left panel.
Then remove the right panel.
Then remove the spare tire tray and your trunk should look like this. Go ahead and remove those two bolts. Then pop off the plastic piece circled at the bottom. It should pop out if pulled straight up. it is held on by clips.
Then go ahead and remove the panel in the back of the trunk. Two bolts at bottom and the rest are clips. Once again you can use the tire iron to help you remove the clips. **DISREGARD THE PICTURE OF THE TOOL TRAY STILL BEING THERE. IT SHOULD OF BEEN REMOVED FOR THIS PICTURE**
You will next want to remove this piece so take out all the clips and if you havent done so, remove those two bolts at bottom too..**DISREGARD THE PICTURE OF THE TOOL TRAY STILL BEING THERE. IT SHOULD OF BEEN REMOVED FOR THIS PICTURE**
Next you want to remove the tonneu cover. there are two plastic caps that pop off using a flat screw driver. Once its off then there is (1) 10mm nut on each side. Once nuts are removed then it comes right off.
Remove the carpet and Now your trunk should look like this.
Now remove these bolts and they will give a little play in the bracket allowing you to reach the brackets holding down the player a lot easier.
Theres one nut on the right side that needs to be removed.
Then on the left there is (1) nut and (1) screw. Once you remove those screws then unplug everything on the back of the player/drive and take it out.
Now here is the drive removed. Go ahead and swap the brackets over to the new drive, reinstall everything in reverse order.
THE END!
Last edited by VIPNiSS; 03-21-11 at 01:59 PM.

The following 3 users liked this post by VIPNiSS:
03-21-11, 02:01 PM
#2

Great DIY with PICs. Fantastic.
Now which of these apply to the LED tail upgrade? Would have been great if you did your LED tail and NAV upgrade at the same time.
Good job!
Now which of these apply to the LED tail upgrade? Would have been great if you did your LED tail and NAV upgrade at the same time.
Good job!
 .. will be posted shortly.
03-21-11, 02:12 PM
.. will be posted shortly.
03-21-11, 02:12 PM
#4

nice write up BUT DON'T use a flathead to remove those clips, the flathead can/will tear them. either buy a $12 interior panel puller tool or use a zip tie and feed it through and pull it up.....
i bought that navtool also like 3 years ago on the GB. im happy with my GEN 4 unit and the custom prestigious society override....def better than my gen 2/3 unit
i bought that navtool also like 3 years ago on the GB. im happy with my GEN 4 unit and the custom prestigious society override....def better than my gen 2/3 unit
03-22-11, 04:03 AM
#7
Instructor
iTrader: (1)

Join Date: Mar 2009
Location: Formerly Easton, Pa. Bradenton FL, now Osprey Fl.
Posts: 877
Likes: 0
Received 5 Likes
on
5 Posts
Very nice write up. You made it look so simple. The pictures were great. A couple of questions, I guess the first thing to do is disconnect the negitive side of the battery? And what is the red wire sticking out of the nav. compartment? And what does it do?Thanks
Trending Topics
03-22-11, 06:20 AM
#8
As far as the red wire sticking it out, it is the toggle switch for the navtool. This is for the RCA Input 1, you would flip this switch if you had a DVD player connected to it and wanted to watch it.
03-22-11, 06:54 AM
#9
You were one happy camper...getting the Gen 4 NAV AND the LED tails...must have felt like hitting the jackpot or something. With what you paid fro the 2 best upgrades fopr the SC, I say you qualify as winner!
Congrats again man!
And thanks for the DIY.
Congrats again man!
And thanks for the DIY.
03-22-11, 08:17 AM
#11
 03-23-11, 12:59 PM
#14

yes you need a VAIS Tech SLU which is connected up front under your head unit. It gives you two audio inputs, i use one for my ipod (via headphone jack to RCA) and the 2nd one for my WD TV but you could hook up a ps3, xbox 360, or dvd player. The audio is controleld via your stock head unit. Look at my thread about my slu - wd tv- nav tool install there is a video showing how it works.