
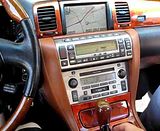
Navtool Installed with Back Up Camera. DIY Inside with Pictures
 03-13-11, 12:10 PM
#1

Here are the pictures...
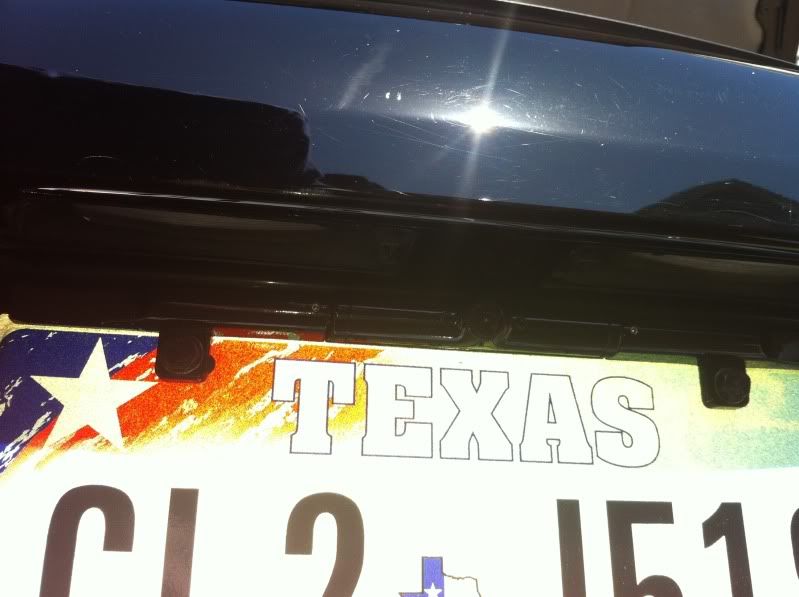
Camera installed.. i had to drill a whole next to the original right bolt hole to feed the camera wire thru.
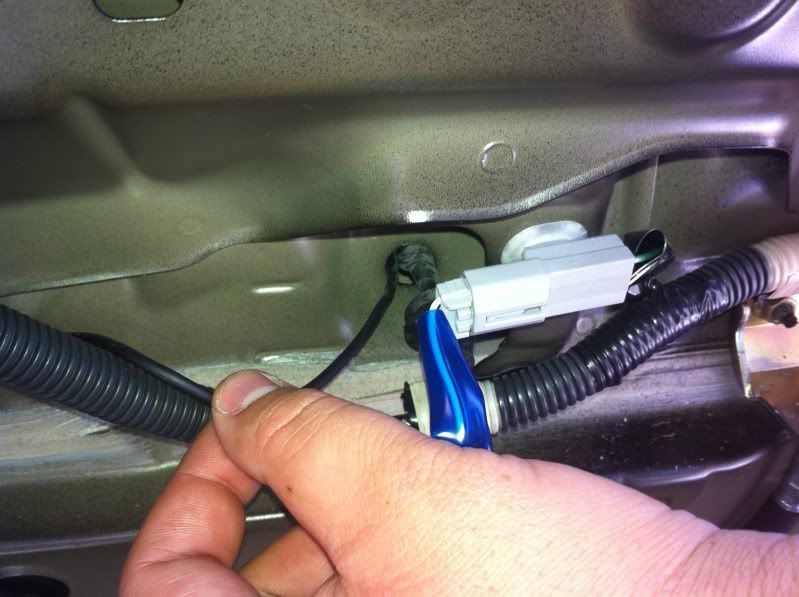
Next I found a spot to feed the camera wire in to the trunk.. i pulled out this rubber piece and cut a bit off the side to accomdate the wire when I put it back in place.(picture is from the view of sitting inside the trunk looking at the back of the car)
Now here is all the wires! LOL you can see the Navtool unit there with all the wires coming out of it. It only comes with the plug and play harness for one of the connections but you have to splice the rest which is a 12v accessory power, ground, and reverse signal which lets the navtool automatically switch to the camera when you place the car in reverse..
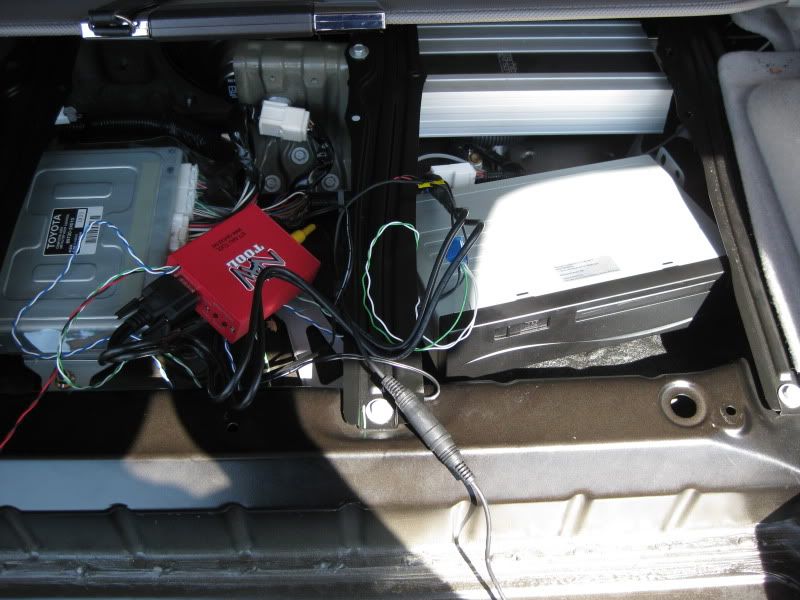
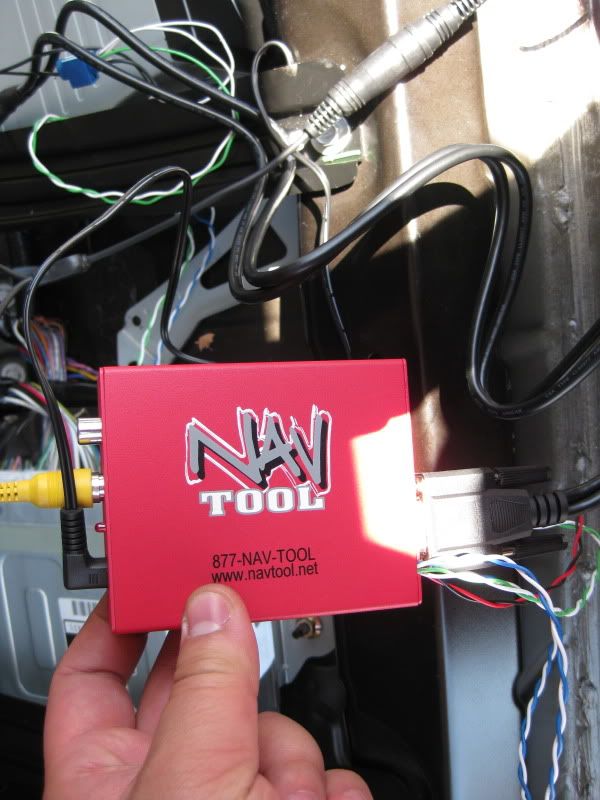
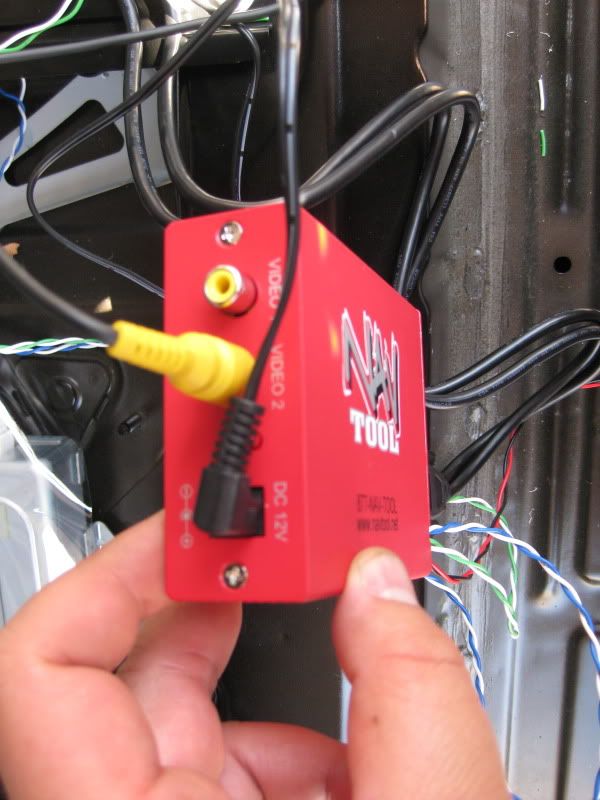
Here you can see the plugs on the back of the navunit. One which is a plug and play on the right and the one on the left is where you have to splice your accesory 12volt, ground, and reverse signal wire.
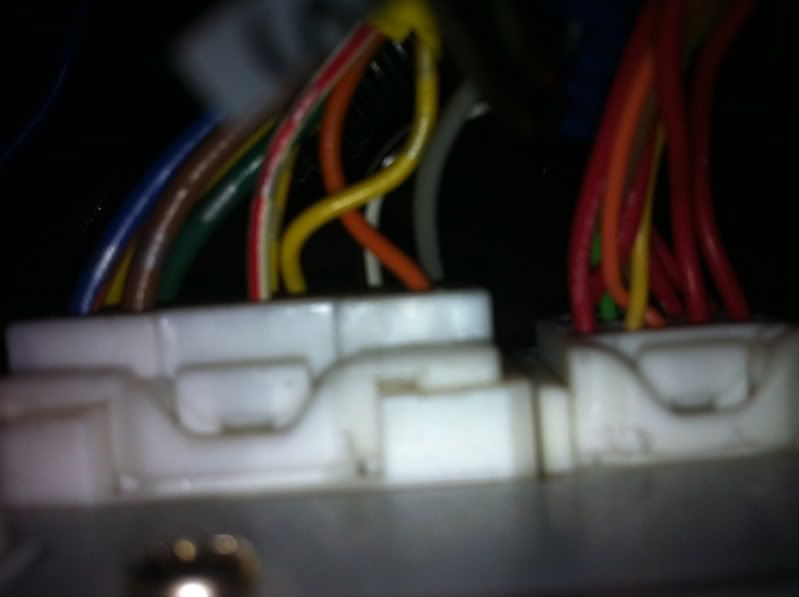
Now if look on the big 18 pin plug on the left you will find a Gray wire which is a accessory 12v volt wire. You want to splice that in to the power plug of the navtool with the sticker that says "12V" on it. Then you want to find the white wire with black stripe which is the ground wire on the plug and splice it in to your ground wire(other wire) on power plug to nav tool.
Next on your navtool you will find a blue wire labeled "camera" and a white wire with it which is the ground. You want to take the blue wire and splice in to that same harness. You want to splice it in to the reverse wire on that harness which is yellow with a red stripe. The white wire you will also want to ground.
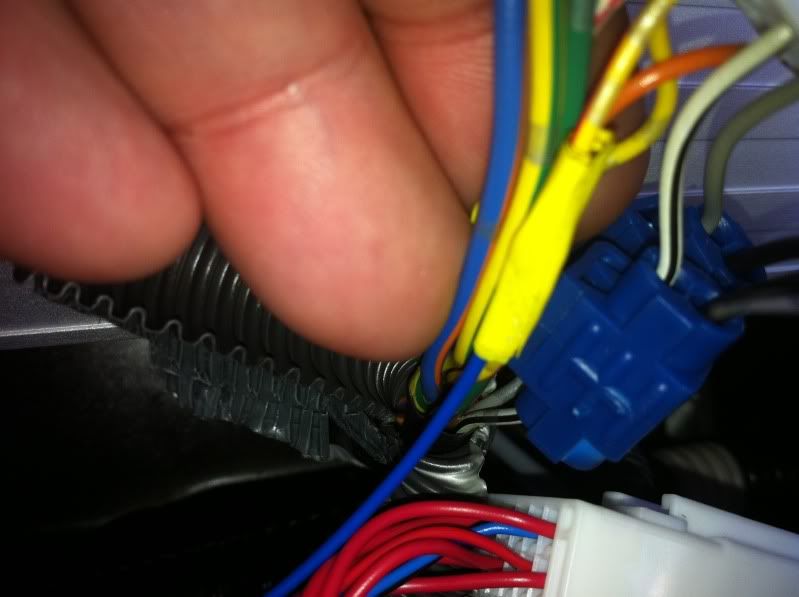
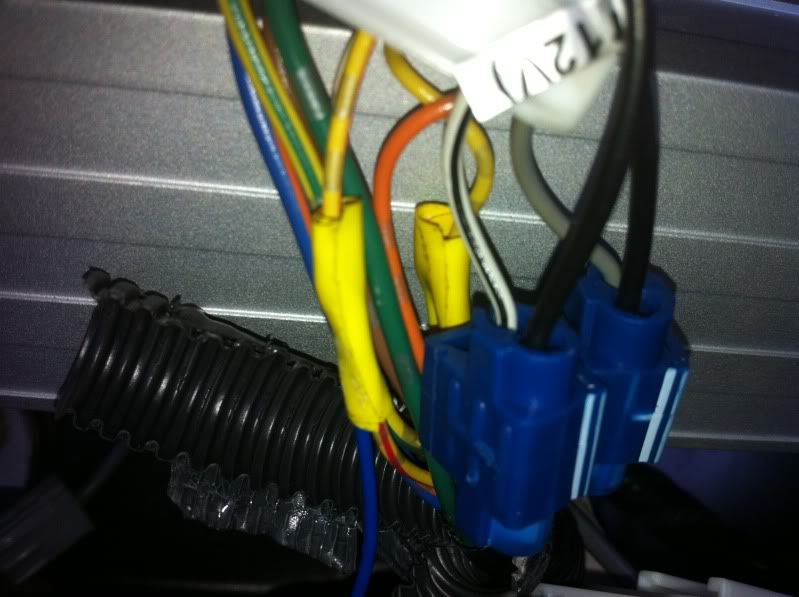
The only wires you should have left on the navtool is another white wire and a green handbrake wire. If you want to ground those both as well if you would like to operate the DVD if you choose to install one without having the handbrake up.
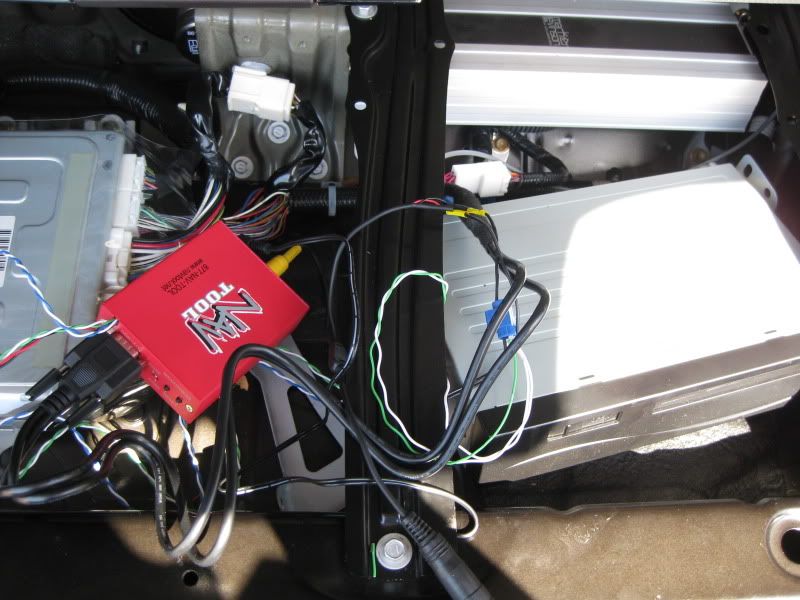
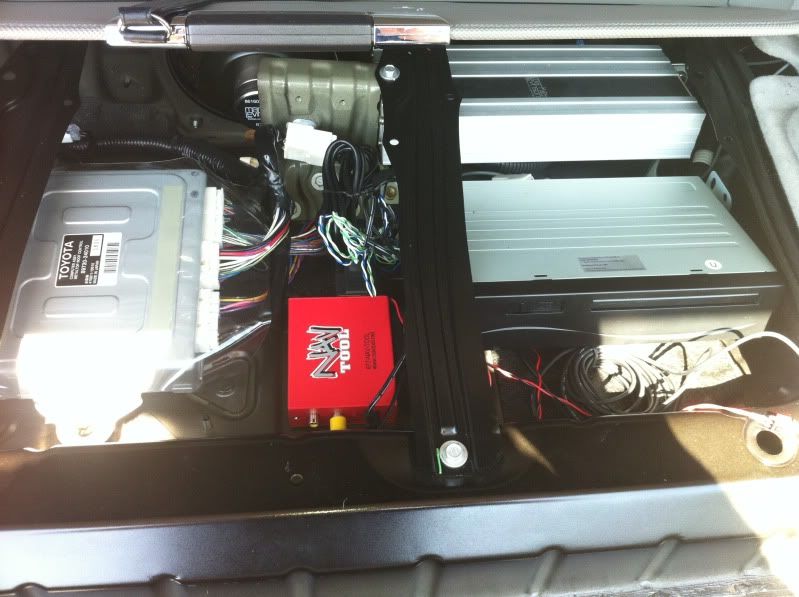
thats it.. make sure everything else is plugged us and neatly tuck and mount everything.
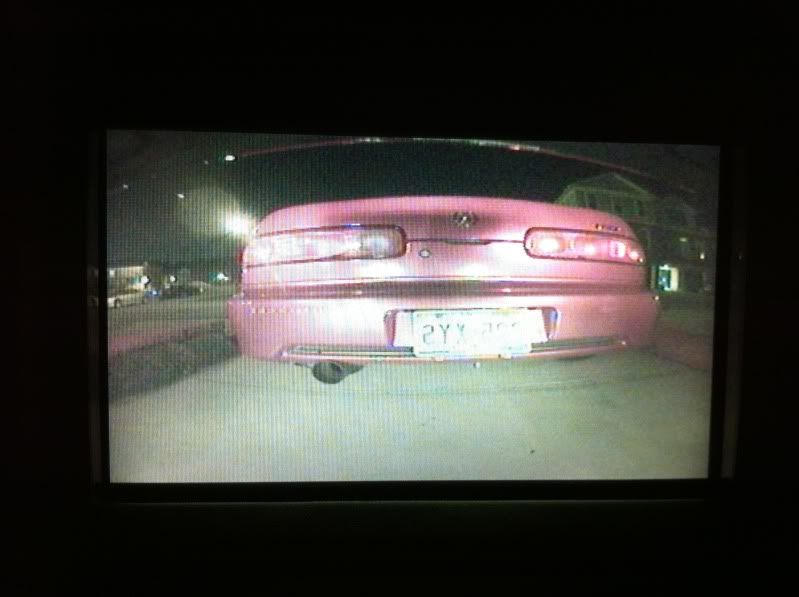
heres a video of it in action.. click picture to view.
LASTLY here is what mine looks like when wires and cleaned up and navtool mounted with two way tape..
Camera installed.. i had to drill a whole next to the original right bolt hole to feed the camera wire thru.
Next I found a spot to feed the camera wire in to the trunk.. i pulled out this rubber piece and cut a bit off the side to accomdate the wire when I put it back in place.(picture is from the view of sitting inside the trunk looking at the back of the car)
Now here is all the wires! LOL you can see the Navtool unit there with all the wires coming out of it. It only comes with the plug and play harness for one of the connections but you have to splice the rest which is a 12v accessory power, ground, and reverse signal which lets the navtool automatically switch to the camera when you place the car in reverse..
Here you can see the plugs on the back of the navunit. One which is a plug and play on the right and the one on the left is where you have to splice your accesory 12volt, ground, and reverse signal wire.
Now if look on the big 18 pin plug on the left you will find a Gray wire which is a accessory 12v volt wire. You want to splice that in to the power plug of the navtool with the sticker that says "12V" on it. Then you want to find the white wire with black stripe which is the ground wire on the plug and splice it in to your ground wire(other wire) on power plug to nav tool.
Next on your navtool you will find a blue wire labeled "camera" and a white wire with it which is the ground. You want to take the blue wire and splice in to that same harness. You want to splice it in to the reverse wire on that harness which is yellow with a red stripe. The white wire you will also want to ground.
The only wires you should have left on the navtool is another white wire and a green handbrake wire. If you want to ground those both as well if you would like to operate the DVD if you choose to install one without having the handbrake up.
thats it.. make sure everything else is plugged us and neatly tuck and mount everything.
heres a video of it in action.. click picture to view.
LASTLY here is what mine looks like when wires and cleaned up and navtool mounted with two way tape..
Last edited by VIPNiSS; 03-13-11 at 12:11 PM. Reason: title

 03-13-11, 08:01 PM
#4
Driver
Join Date: Jan 2011
Location: Va
Posts: 114
Likes: 0
Received 0 Likes
on
0 Posts
Nice job VIP!!!! I am so glad that everything eventually worked out so well  . I have hit a totally different kind of snag
  .Everything was going well and I was not paying attention and I ended up cutting one of the wires when splicing it and to make matters worse it is very close to the harness. So I have been battling with the harness trying to remove the pin and reconnect the wire. Lesson learned, embarassing!
. I have hit a totally different kind of snag .Everything was going well and I was not paying attention and I ended up cutting one of the wires when splicing it and to make matters worse it is very close to the harness. So I have been battling with the harness trying to remove the pin and reconnect the wire. Lesson learned, embarassing!
03-13-11, 08:05 PM
#5
Nice job VIP!!!! I am so glad that everything eventually worked out so well . I have hit a totally different kind of snag .Everything was going well and I was not paying attention and I ended up cutting one of the wires when splicing it and to make matters worse it is very close to the harness. So I have been battling with the harness trying to remove the pin and reconnect the wire. Lesson learned, embarassing!
. I have hit a totally different kind of snag .Everything was going well and I was not paying attention and I ended up cutting one of the wires when splicing it and to make matters worse it is very close to the harness. So I have been battling with the harness trying to remove the pin and reconnect the wire. Lesson learned, embarassing! Trending Topics
 05-18-11, 03:29 PM
#11
Instructor
iTrader: (1)

Join Date: Mar 2009
Location: Formerly Easton, Pa. Bradenton FL, now Osprey Fl.
Posts: 879
Likes: 0
Received 7 Likes
on
7 Posts
Help !! Help!! I tried to install the navtool. And it doesn't work. Does anyone know which black wire is the power and which one is the ground? One is black and the other is black with a white strip. Mine weren't marked. They also had the blue wire with 12v on it, but it you looked at the other side it said camera. Also I have three wires from my camera, one red one black and the other has the jack on it. I guessed where that one went. What about the other two. Spent the whole darn day in the trunk and nothing to show for it. I'm bummed!!! Any and all help will be appreciated. Thanks
05-18-11, 04:03 PM
#12
The black wire with the white stripe is your 12v on the navtool, you want to splice this with the gray wire on the harness of the navunit. The other black wire is the ground and can be grounded to a bolt or the ground on the nav unit harness.
The blue wire marked 12v/camera should be connected to yellow wire with the red stripe on the harness, this is the wire that switches your screen when you put the car in reverse.
The red wire on your camera is the 12v. You can also connect this to the gray wire on your harness which is the 12v wire. The black wire is ground..
05-18-11, 04:35 PM
#13
 Def. worth looking into.
 Contact Beltsville Auto Recyclers
Questions/Concerns Contact us
Monday - Friday 8am to 5pm EST
Toll Free: 800-249-1681
Baltimore Area 410-355-1722
Metro DC Area 301-937-7333
Email: Andy@beltsvilleautoparts.com
Click on the individual items under the "Year and Model" or "Part Class, Condition and Option" columns in the grid to see part details.
Year and Model Part Class Cond & Option Grade Mileage Stock# Price Sorted in Ascending order. Click again to sort in Descending order Qty Contact Buy Online Image
06 SC430 Tail Lamp (Right) CLIP 2DR 10/05 100218 175.00 1 eMail
06 SC430 Tail Lamp (Left) CLIP 2DR 10/05 100218 175.00 1 eMail
Last edited by Emackny; 05-18-11 at 04:49 PM.
05-18-11, 05:00 PM
#14
Instructor
iTrader: (1)
Join Date: Mar 2009
Location: Formerly Easton, Pa. Bradenton FL, now Osprey Fl.
Posts: 879
Likes: 0
Received 7 Likes
on
7 Posts
Thank you! Thank you! I don't think I had one wire right. I guess that's why it didn't work. Now I'll get it right and it still won't work cause I blew it up. I knew something wasn't right cause I never could get the red light on the navtool to light. I did have power at the gray wire. I didn't check for power on the yellow-red wire to see if there was power when I put it in reverse. Tomorrow I'll try again, when my legs and my back have recovered.
Again thank you much, for the info and the quick response. This forum has the greatest members. IMHO
Again thank you much, for the info and the quick response. This forum has the greatest members. IMHO
The black wire with the white stripe is your 12v on the navtool, you want to splice this with the gray wire on the harness of the navunit. The other black wire is the ground and can be grounded to a bolt or the ground on the nav unit harness.
The blue wire marked 12v/camera should be connected to yellow wire with the red stripe on the harness, this is the wire that switches your screen when you put the car in reverse.
The red wire on your camera is the 12v. You can also connect this to the gray wire on your harness which is the 12v wire. The black wire is ground..
The blue wire marked 12v/camera should be connected to yellow wire with the red stripe on the harness, this is the wire that switches your screen when you put the car in reverse.
The red wire on your camera is the 12v. You can also connect this to the gray wire on your harness which is the 12v wire. The black wire is ground..
05-18-11, 06:19 PM
#15
You might want to jump on it before someone else does.. Def. worth looking into.
Contact Beltsville Auto Recyclers
Questions/Concerns Contact us
Monday - Friday 8am to 5pm EST
Toll Free: 800-249-1681
Baltimore Area 410-355-1722
Metro DC Area 301-937-7333
Email: Andy@beltsvilleautoparts.com
Click on the individual items under the "Year and Model" or "Part Class, Condition and Option" columns in the grid to see part details.
Year and Model Part Class Cond & Option Grade Mileage Stock# Price Sorted in Ascending order. Click again to sort in Descending order Qty Contact Buy Online Image
06 SC430 Tail Lamp (Right) CLIP 2DR 10/05 100218 175.00 1 eMail
06 SC430 Tail Lamp (Left) CLIP 2DR 10/05 100218 175.00 1 eMail
Def. worth looking into. Contact Beltsville Auto Recyclers
Questions/Concerns Contact us
Monday - Friday 8am to 5pm EST
Toll Free: 800-249-1681
Baltimore Area 410-355-1722
Metro DC Area 301-937-7333
Email: Andy@beltsvilleautoparts.com
Click on the individual items under the "Year and Model" or "Part Class, Condition and Option" columns in the grid to see part details.
Year and Model Part Class Cond & Option Grade Mileage Stock# Price Sorted in Ascending order. Click again to sort in Descending order Qty Contact Buy Online Image
06 SC430 Tail Lamp (Right) CLIP 2DR 10/05 100218 175.00 1 eMail
06 SC430 Tail Lamp (Left) CLIP 2DR 10/05 100218 175.00 1 eMail