When you click on links to various merchants on this site and make a purchase, this can result in this site earning a commission. Affiliate programs and affiliations include, but are not limited to, the eBay Partner Network.
Good and tight.. I used a little blue loctite and got it 'goodandtight'. I used a 1/2" impact, so don't think it's getting tighter. Didn't find any torque specs myself. Did not reuse the o-rings had new ones, oiled those up and installed it. Hopefully I wont have any leaking issues. I did talk to a couple of people who have rebuilt calipers and they said the same thing 'goodandtight' they haven't had any issues so I'm hoping for the same.
Thanks for the info. I am also wondering what rebuild kit did you use? The kit I got from Lexus did not come with the o-rings that go in between the 2 halves if the calipers.
Thanks for the info. I am also wondering what rebuild kit did you use? The kit I got from Lexus did not come with the o-rings that go in between the 2 halves if the calipers.
Got the centric rebuild kit because it came complete with o-rings etc.
I've been hearing a kind of clunking noise when I crank up the car in the morning. The more I paid attention to it I could kind of see the front of the car kind of lifting on one side followed by a clunk. I was also feeling vibrations at a stop light and slight intermittent vibrations at highway speeds. With all the other suspension components addressed, I had a strong feeling it was a mount related issue.
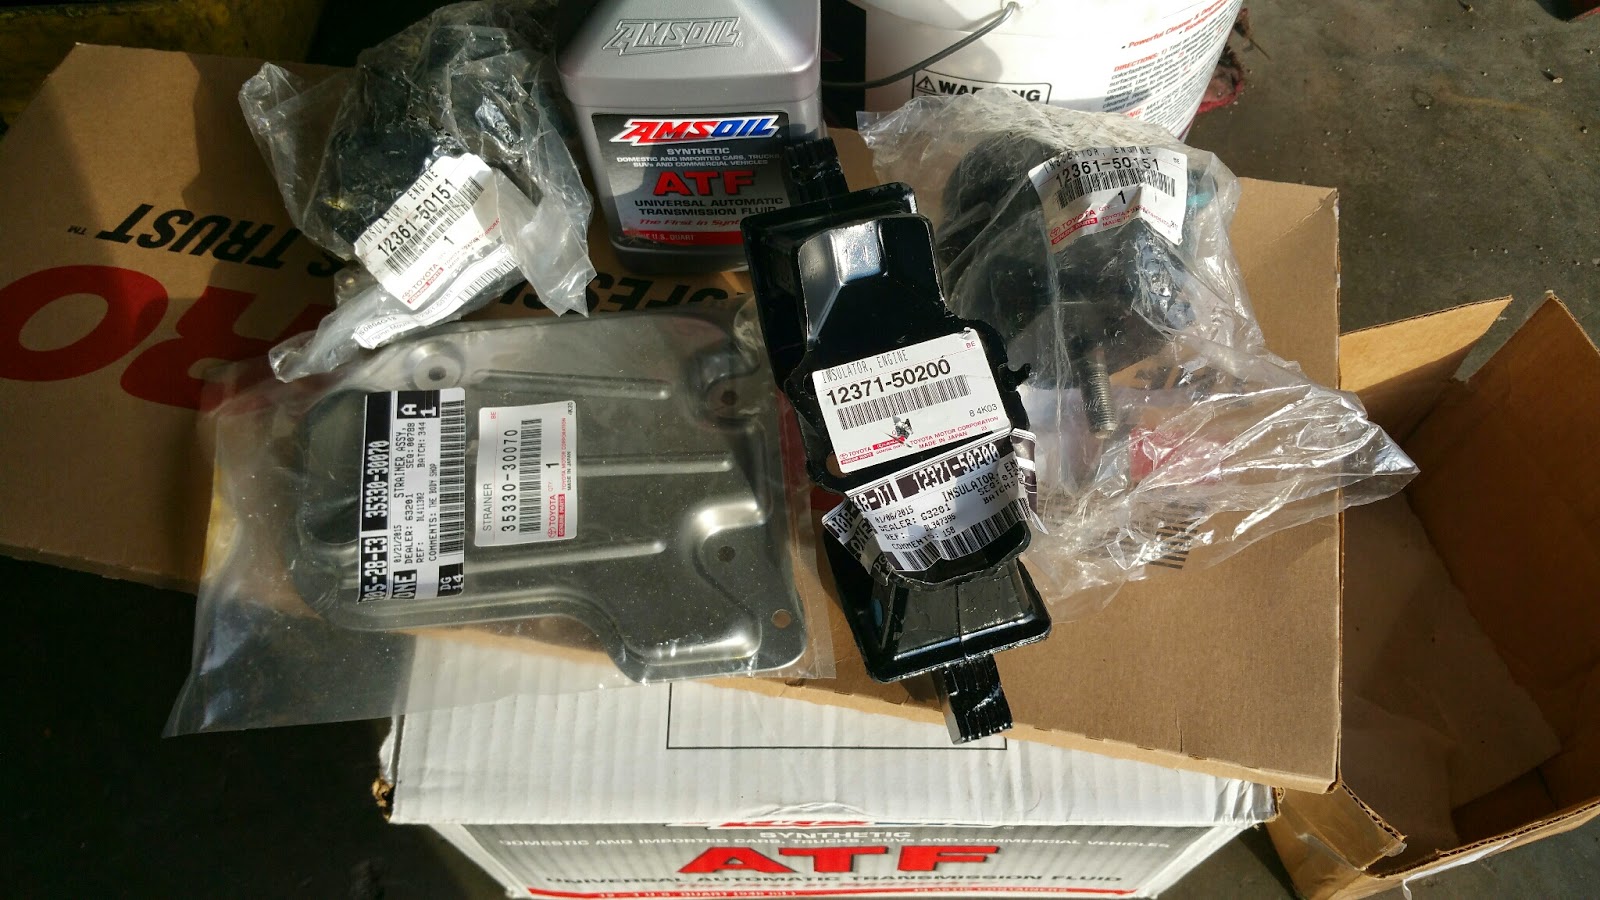
All new mounts were ordered, two engine and one transmission.
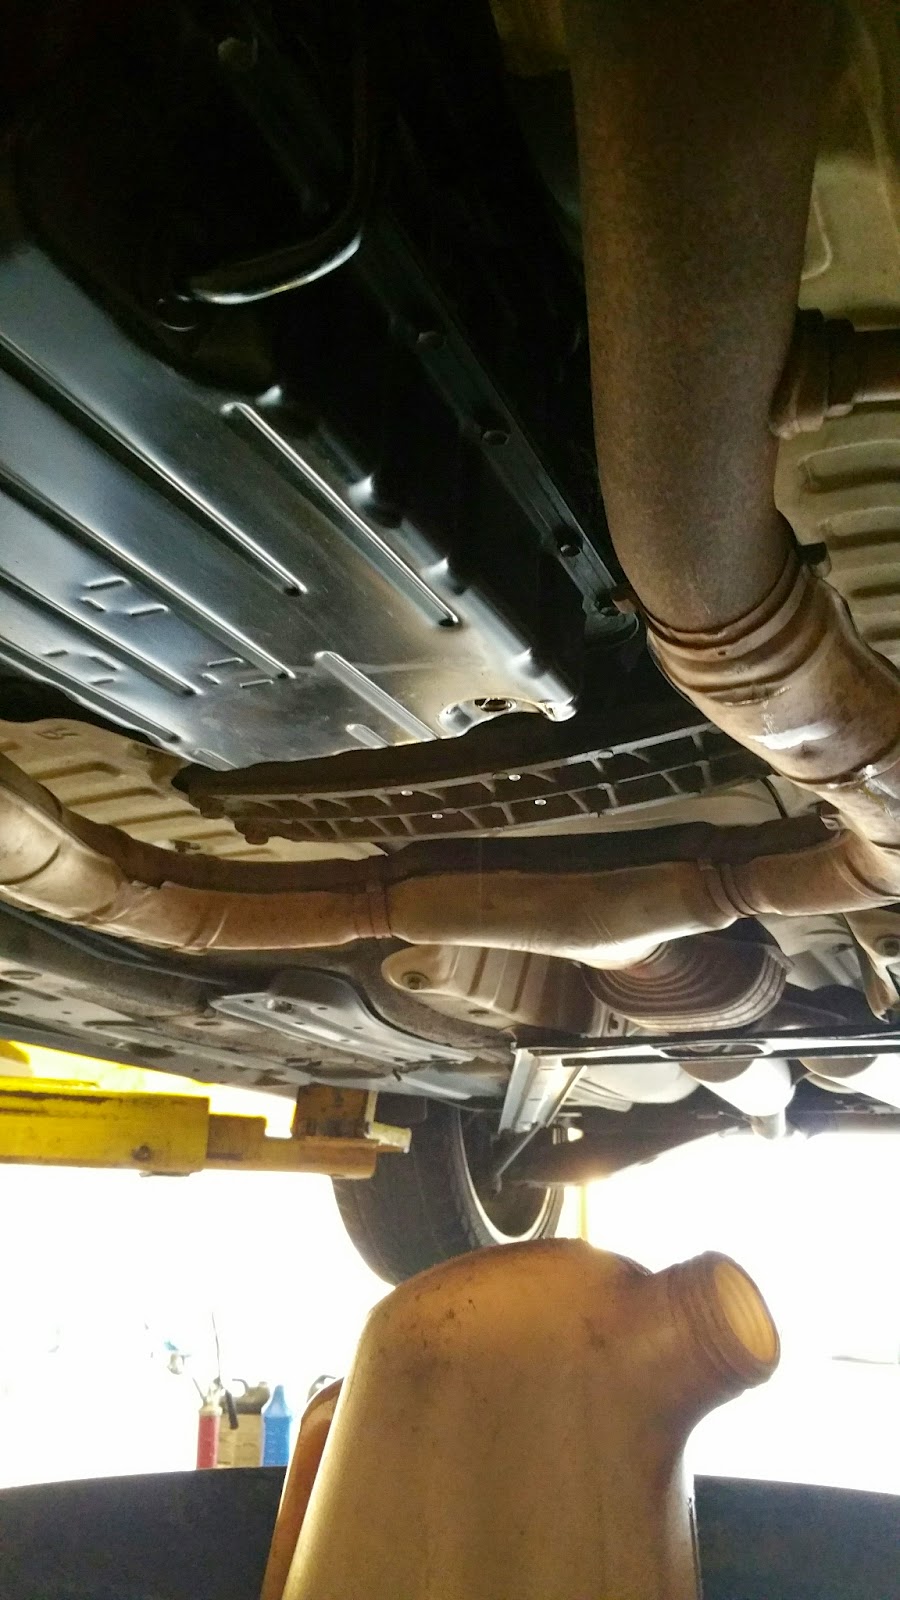
A buddy of mine Mark helped me with this one. His shop had a transmission flush machine to do the flush as well.
With the car on the lift, a transmission jack was used at the edge of the oil pan to support the engine.
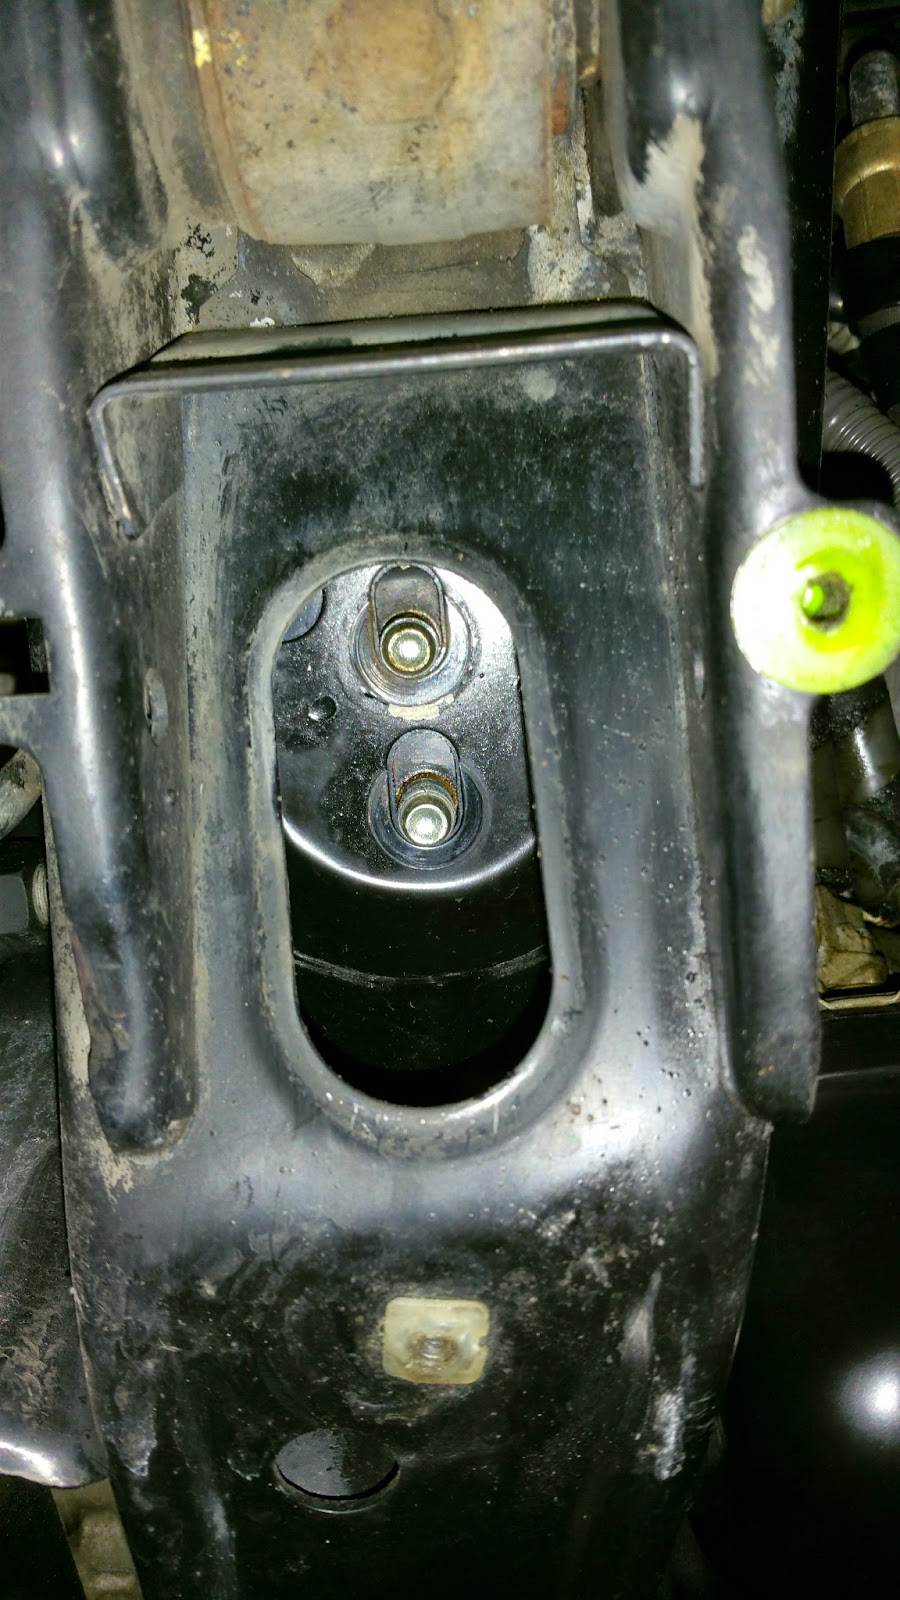
Undo the two bolts holding the motor mount onto the sub-frame and the four bolts that hold the complete mount to the engine block. It was easier to remove the complete mount as opposed to trying to loosen the one bolt up top for the engine mount itself. Once loose you will have to use the transmission jack to lift the motor about an inch and a half so that the mounts can slide out.
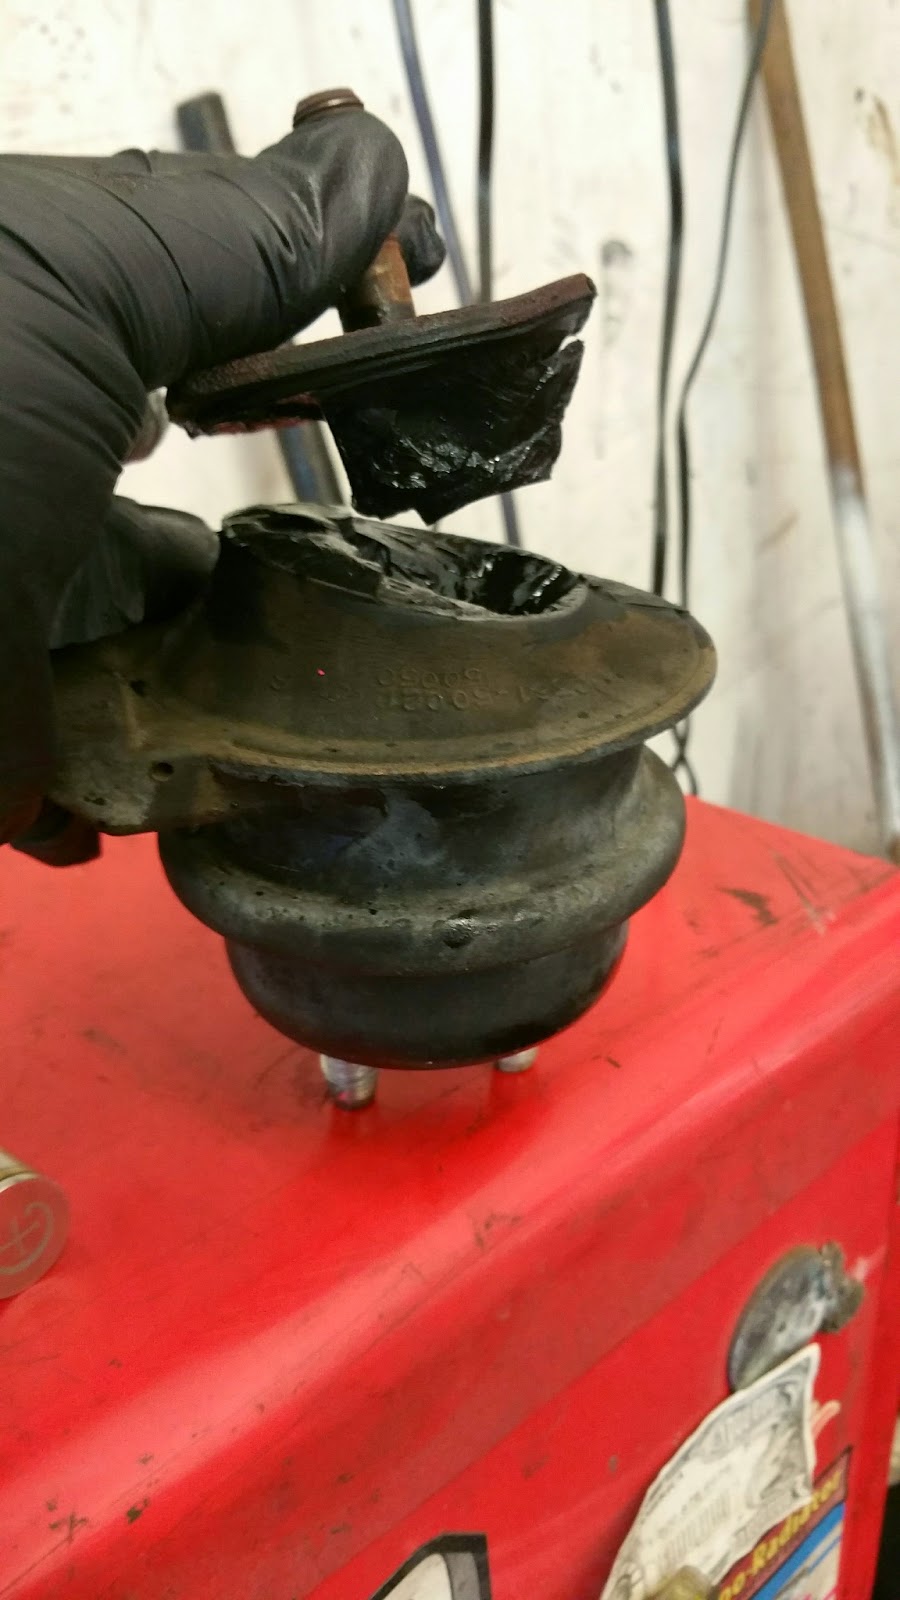
The driver side mount was completely shot, as you can tell by the picture.
The passenger side mount was on it's way out, might not be visible in the picture but the top had a rip in it and was starting to separate.
Replaced the engine mounts and did the same for the transmission mount. Used the transmission jack to support the transmission. Undid the 4 bolts and removed the transmission bracket and the 4 bolts that hold the mount to the transmission.
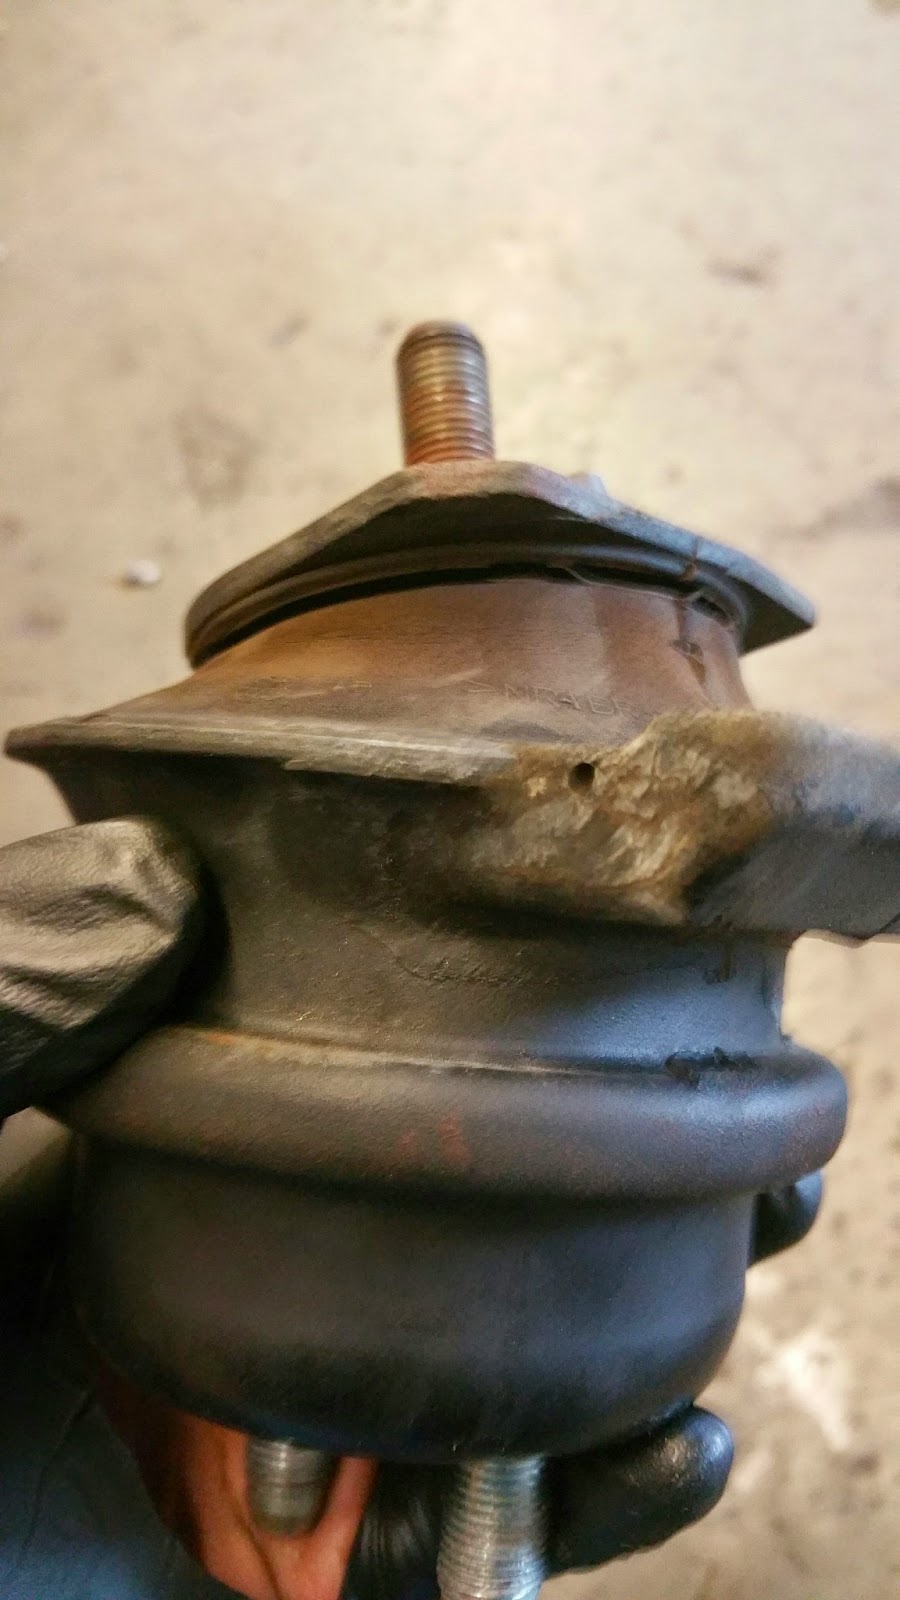
The transmission mount didn't look bad on a visual inspection. There was some sort of coating that was flaking as you can see in the pic but didn't look torn, or see any stress cracks etc.
Replaced the transmission mount and then onto the transmission flush.
Drained the oil from the pan first, collected the oil in a measuring jar so that I could make a note of how much fluid was coming out. About 2 quarts came out from the drain plug and then proceeded to take the pan off.
Put the drain plug back in because there is still oil in the drain pan. I learnt from the last time a flush was done on my other car. With the pan off poured the oil in the pan into the measuring jar as well, there was about 1.5 quarts of oil in the pan.
The oil was a dark brown and not the red it is supposed to be. Also two days prior to this I had put in 0.5 pints of Seafoam trans tune to help break down any build up etc in the transmission.
The transmission pan is held in place by Toyota Fipg so it'll take a little yanking to get the pan off. Cleaned up all the fipg off including the 3 magnets in the pan along with the pan itself. I didn't use fipg to put the pan back, instead Felpro makes a transmission pan gasket for it and that's what I used. I've used this method before and have had no issues. Just make sure you don't go ham on the bolts, snug it up there to about 15-18ft/lb where you see the gasket just starting to squeeze away from the pan a little.
Installed a new transmission filter as well.
Also adjusted the pressure regulator on the tranny so it shifts faster. The pic shows the factory setting but pressing it in and turning it clockwise to the third setting increases the pressure resulting in faster shifts. Firmer faster shifts result in longer tranny life and has been well documented on Club Lexus.
With the pan back in place filled fresh ATF through the dip stick. Just the 3.5 quarts that came out of the pan.
Once filled, hooked up the transmission flush machine to the transmission cooler lines, feed and return.
Switched the car on and the machine beeps to verify the right connections. If it doesn't beep then the lines are on backwards. With everything hooked up right initiating the flush on the machine drains the old oil out and replaces it with fresh ATF. I used Amsoil ATF for this. Went through 12.5 quarts on the machine till the old fluid coming out was cherry red as well. So a total of 16 quarts, 12.5 using the machine and 3.5 that was filled in the pan after it was drained and emptied.
While we were there went ahead and changed the differential fluid out as well with the Amsoil 75W-90 Long Life Synthetic Gear Lube.
Buttoned everything back up and took it for a spin. The fresh tranny fluid always seem to smoothen out the shifts from previous experience, and it did so this time too, even after increasing the pressure sensitivity. The tranny does shift faster but I don't feel it, I can tell more so by looking at the RPM dip as it changes gear.
I don't have the engine lift on start up nor the vibrations at stop lights etc. Even the intermittent vibrations at highway speeds are gone.
I'll check on the transmission pan gasket in a couple of days to make sure everything is good and there are no leaks just to be on the safe side.
Great job kuWuPt! Great documentation also. I knew you could do it. It sure is nice having friends like your friend with the lifts and proper jacks, eh?
Great job kuWuPt! Great documentation also. I knew you could do it. It sure is nice having friends like your friend with the lifts and proper jacks, eh?
Thanks Harold. Right tools make all the difference in the world. Couldn't have done it without help really. I sit in front of a computer all day, without knowing I had friends to call if I mess up or need assistance I would've never tackled all this.
Finally got a chance to flush my radiator that was filled with distilled water and the preston radiator flush for the past week. Took the thermostat out, stuck a garden hose in there ran water through it, till it came out clean. Same with the radiator, also took the coolant overflow container out and rinsed that clean. I then aired out all the water out of the system, you'll need a compressor for this and an air chuck for this. Threw in a new thermostat and filled it back up with Toyota coolant. Good to go.
Since all the maintenance was done in the engine bay did a final wash down with engine gunk and a sprayed some gunk shine on a microfiber rag and brushed up all the hoses and plastics.
I'm pretty happy everything is done, now can plan for some actual visible mods.
Last edited by kuWuPt; 01-24-15 at 09:52 PM.
Reason: Coolant flush & Engine bay clean up.
Fantastic pics once again sir. Wow increasing the trans pressure is that easy and better for it, its not often you get win win scenarios like that with out some sort of trade off. How is the drive now?
Car feels awesome to drive now and don't know if it is mental but I find my self driving faster..lol.. drive-ability is great.. need to get the sway bar for the rear to tighten that up but otherwise it feels awesome! Some new suspensions would complete it too I feel.
Car feels awesome to drive now and don't know if it is mental but I find my self driving faster..lol.. drive-ability is great.. need to get the sway bar for the rear to tighten that up but otherwise it feels awesome! Some new suspensions would complete it too I feel.
Thank you sir!
You will love the rear sway bar, especially after all the work you've already completed! It completely changes the driving experience. SC430 just hugs the corners with the rear bar.
Finally got a chance to flush my radiator that was filled with distilled water and the preston radiator flush for the past week. Took the thermostat out, stuck a garden hose in there ran water through it, till it came out clean. Same with the radiator, also took the coolant overflow container out and rinsed that clean. I then aired out all the water out of the system, you'll need a compressor for this and an air chuck for this. Threw in a new thermostat and filled it back up with Toyota coolant. Good to go.
Since all the maintenance was done in the engine bay did a final wash down with engine gunk and a sprayed some gunk shine on a microfiber rag and brushed up all the hoses and plastics.
I'm pretty happy everything is done, now can plan for some actual visible mods.
Looking fantastic! Did you do that purple paint? I like it. What kind of paint did you use? Looks metalic. Might do blue though on mine - it's painted silver now. Another member polished these parts as they are aluminum and they looked great.
You will love the rear sway bar, especially after all the work you've already completed! It completely changes the driving experience. SC430 just hugs the corners with the rear bar.
I'm excited to get it, read nothing but good things!!
Originally Posted by pynky01
Thank you... great write up and gives me confidence to try it myself... WWII
Not a problem. Glad it gave you the confidence to do it.
Originally Posted by SlvBullet
Looking fantastic! Did you do that purple paint? I like it. What kind of paint did you use? Looks metalic. Might do blue though on mine - it's painted silver now. Another member polished these parts as they are aluminum and they looked great.
Thanks Greg, yeah its purple paint. When the valve covers and the cam covers were out, it got sanded, etch primed and painted. The paint is a car paint and is metallic, it's the D2 purple color. Since the car is Amethyst figured the D2 purple will be a good accent color and plus D2 suspensions are going on my car too.
Did the engine cover as well, was going to go with a purple and gold color scheme but I dont know the Gold is a little too bright with the purple so want to change that.
This is the bay in my GS , the gold works there I feel because everything else is dark.
Should get that Carbing cooling plate, then paint it purple!
And yea the gold, not to sure about the gold... What about a carbon fiber look instead?
Painted carbing plate, thats a good idea. Have to look into that. I like the carbon fiber look but don't see it on this. I think I want to stick with a wood grain like a black woodgrain with the purple.
 01-22-15, 05:01 AM


 Wow increasing the trans pressure is that easy and better for it, its not often you get win win scenarios like that with out some sort of trade off. How is the drive now?