Shifter/Power Switch/VSC Switch/LED Mod


 01-13-15, 07:51 AM
#47
Thank you Harold, but the brown stuff you can see close to the R52 is just flux thats used when soldering. It gets brown because of the heat. That's normal. Also the spots at the R52 is one of the green LED's so cant have anything to do with that. Really don't know how to find out what causes the problem
But i have searched for the part number thats on my control unit which is 55900-24260 and actually found one for sale in USA. So i wonder if i can purchase that one and it then shows the clock in 24h and temperature in celcius or the part number can be the same in Europe and USA but still have differences. Btw i found out that the missing letters i have is not at the clock but at the temperature numbers. (Its a long time since i looked at it turned on).
Congrats on your new ride DarthSid. And yeah thank for the tip with the 3528 LEDs. Will use them if the 0603 isnt bright enough.
01-13-15, 09:09 AM
#48
Ok, just got a answer from the seller and its 12H and Fahrenheit 
i wonder if the display itself is the same of if there is difference. Otherwise i could just solder in the other one. Hmm... is the difference in the display or in some e-prom circuit on the board hmm..
i wonder if the display itself is the same of if there is difference. Otherwise i could just solder in the other one. Hmm... is the difference in the display or in some e-prom circuit on the board hmm..
01-13-15, 12:39 PM
#49
Pole Position
Thread Starter
Thank you Harold, but the brown stuff you can see close to the R52 is just flux thats used when soldering. It gets brown because of the heat. That's normal. Also the spots at the R52 is one of the green LED's so cant have anything to do with that. Really don't know how to find out what causes the problem
But i have searched for the part number thats on my control unit which is 55900-24260 and actually found one for sale in USA. So i wonder if i can purchase that one and it then shows the clock in 24h and temperature in celcius or the part number can be the same in Europe and USA but still have differences. Btw i found out that the missing letters i have is not at the clock but at the temperature numbers. (Its a long time since i looked at it turned on).
Congrats on your new ride DarthSid. And yeah thank for the tip with the 3528 LEDs. Will use them if the 0603 isnt bright enough.
But i have searched for the part number thats on my control unit which is 55900-24260 and actually found one for sale in USA. So i wonder if i can purchase that one and it then shows the clock in 24h and temperature in celcius or the part number can be the same in Europe and USA but still have differences. Btw i found out that the missing letters i have is not at the clock but at the temperature numbers. (Its a long time since i looked at it turned on).
Congrats on your new ride DarthSid. And yeah thank for the tip with the 3528 LEDs. Will use them if the 0603 isnt bright enough.
01-13-15, 03:15 PM
#50
Lead Lap

Thank you Harold, but the brown stuff you can see close to the R52 is just flux thats used when soldering. It gets brown because of the heat. That's normal. Also the spots at the R52 is one of the green LED's so cant have anything to do with that. Really don't know how to find out what causes the problem
For low speed electronics, flux most likely won't cause a problem. Now if it were in a high humidity location, then the flux might be an issue or used in a high frequency circuit, but neither should be the situation here. So if they look okay, then just move on.
01-14-15, 10:27 AM
#51
cant wait to see how it turns out rollaboy! I hate the green.
And Congratulations DarthSid, i'm really quite happy to see your upgrade, absolutely beautiful. You will definitely be missed, and thank you for all your help, couldn't have done certain mods without your help! who ever the new owner of that SC will be, they are going to get a great car.
I think I may be moving on from the SC soon too... I LOVE the SC's looks, but i never really stayed with a car too long but maybe itll be replaced for a newer one.
Porsche's are a blast to drive and very well built, the quality is just over the top. This car will be a surprise and bring a smile to your face every time you drive it

Enjoy and keep in touch!
And Congratulations DarthSid, i'm really quite happy to see your upgrade, absolutely beautiful. You will definitely be missed, and thank you for all your help, couldn't have done certain mods without your help! who ever the new owner of that SC will be, they are going to get a great car.
I think I may be moving on from the SC soon too... I LOVE the SC's looks, but i never really stayed with a car too long but maybe itll be replaced for a newer one.
Porsche's are a blast to drive and very well built, the quality is just over the top. This car will be a surprise and bring a smile to your face every time you drive it
Enjoy and keep in touch!
01-19-15, 08:19 PM
#52
Ok, so just finished the install. Much thanks for the instructions from DarthSid. A few notes I will add... I had the hardest time removing the PWR switch. The photos below should help anyone having trouble. (as you can see i broke one of the walls circled in red). The clips were really tough to release. But with patience, the switches will remove. Use a few small blade screwdrivers to wedge the edges out until the switch actually pries loose. Neither surface rocker will actually come out. Only the "guts" will be removed. Once you have the switches installed and the LED's in place, CHECK YOUR CONNECTIONS! I found that the PWR switch actually runs in reverse polarity also. So when the headlights are on it receives normal power, but when the headlights are off they are powered in reverse polarity (and thus illuminate when not supposed to be illuminated ie. daytime)! I recommend to have the headlights on when checking polarity and before actually clipping the switches back into the mounting spots on the back of the flat shifter panel. Good luck to all, and thanks again DarthSid!
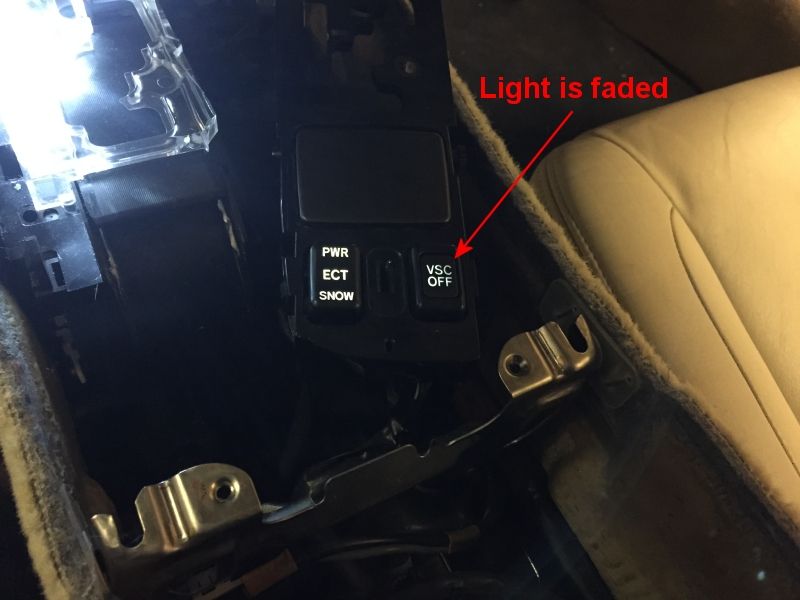
>>Also, I had to cut a small part of the "wall" around the inner side of the VSC switch to allow more light to illuminate the letters. Didn't mess up any of the function but did allow more light to fill the letters.
>>Also, I had to cut a small part of the "wall" around the inner side of the VSC switch to allow more light to illuminate the letters. Didn't mess up any of the function but did allow more light to fill the letters.
Darthsid - great mod but I'm not quite finished ... I think I blew a fuse when pulling out the shift bulb - that bulb, the two switches and the radio door switch and bulb do not work. The seat warmer switch and bulbs do still work. It's not a polarization issue given that I tested again with the original bulbs. Any ideas?
I'll check fuses in the morning but any tips would be great.
 Did it myself once.
01-21-15, 08:53 AM
Did it myself once.
01-21-15, 08:53 AM
#55
Some of my progress
Got the 0603 SMD's but they are smaller than the ones installed. Very hard to solder these little badboys. I would strongly recommend to choose some bigger size like the 3528 as DarthSid said.
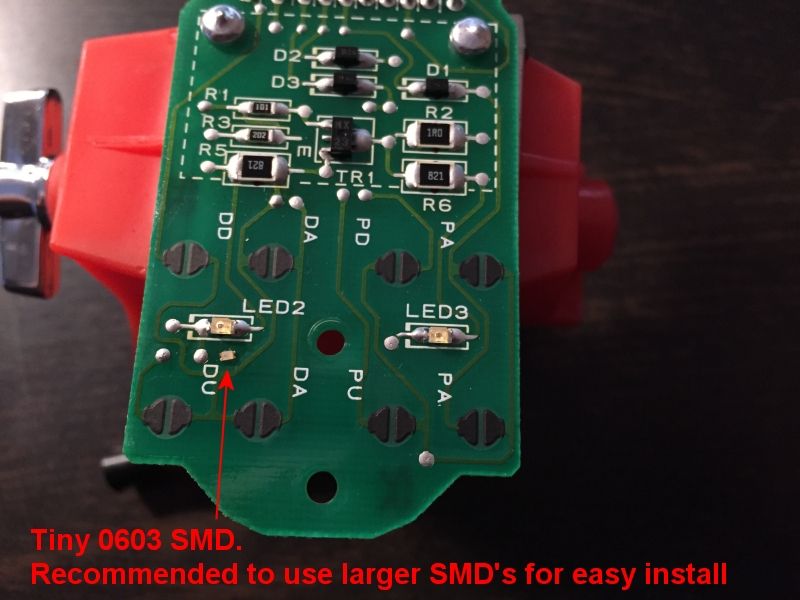
I used a piece of tape to hold the tiny 0603 SMD into place
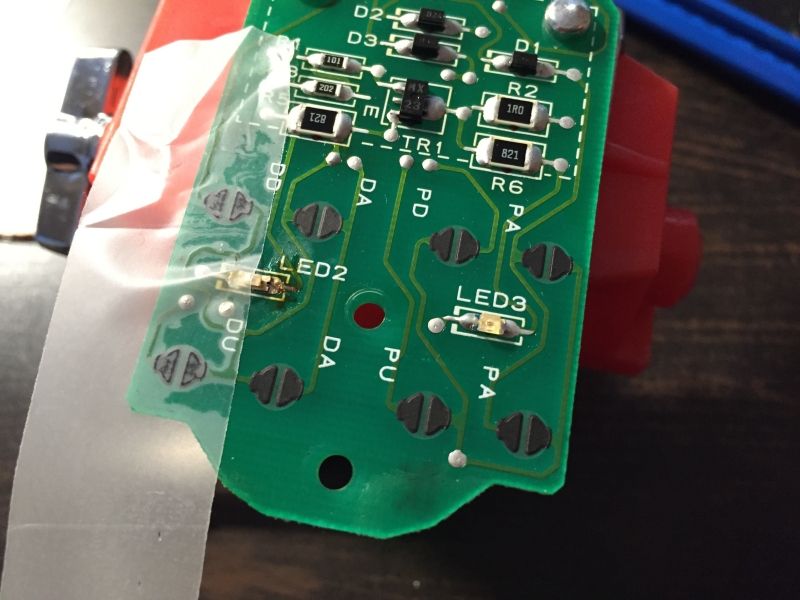
Not the prettiest but it works
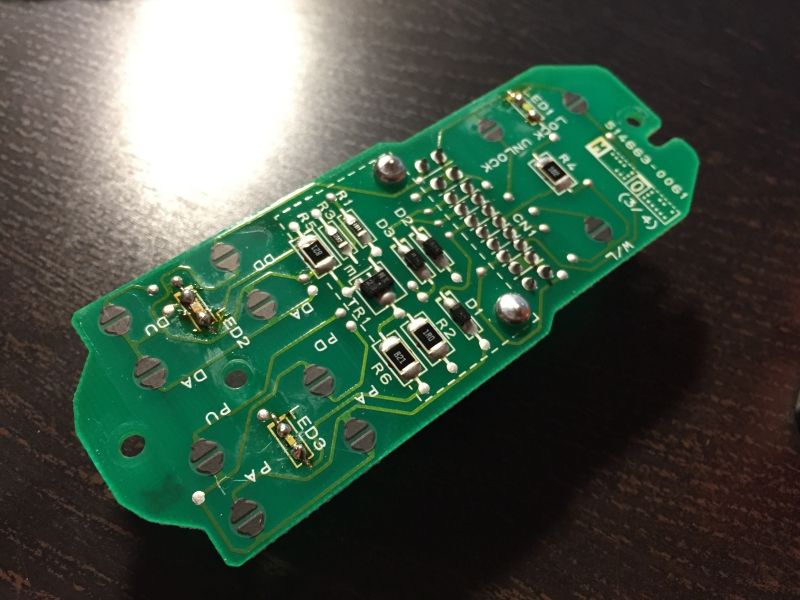
Then for the VSC button. When installing the SMD is not lightning everything up
So i had to mod the SMD and twist it 90 degrees in the T3 socket so its pointing upwards.
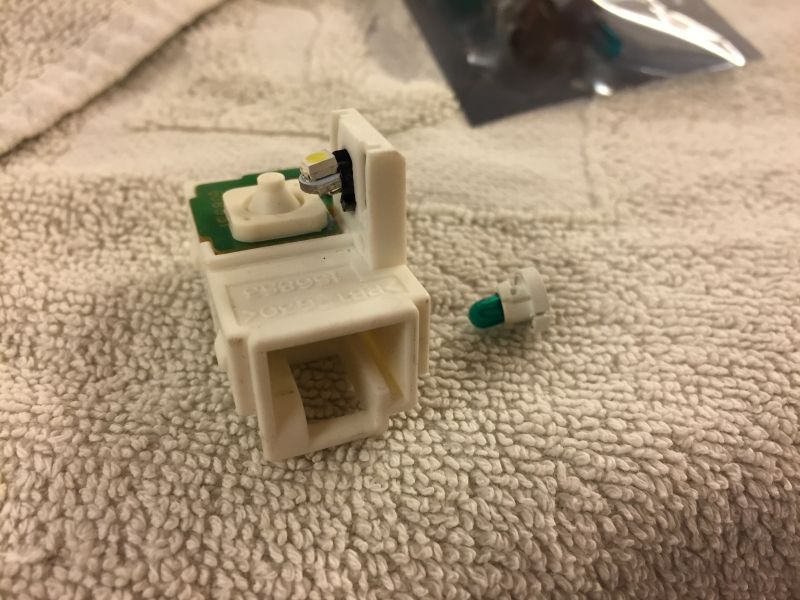
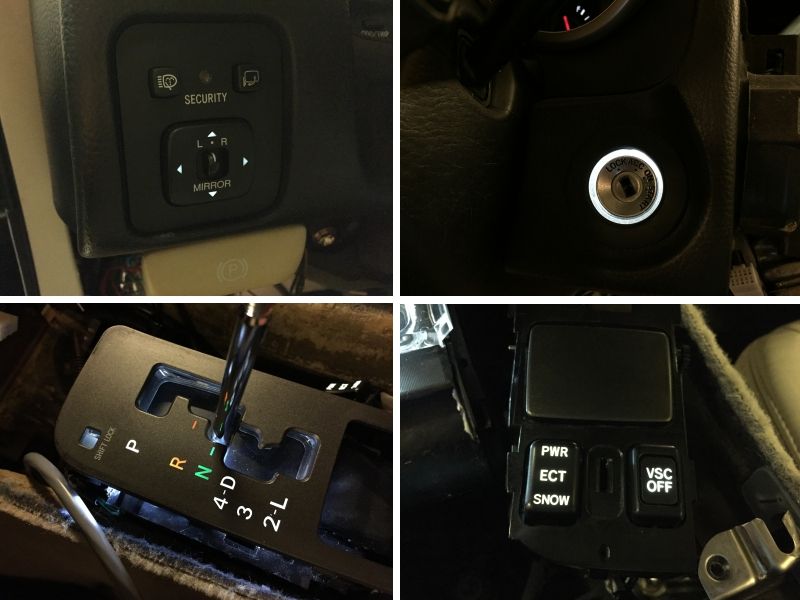
Works great now Also added the T4 LED 1210 SMD for the mirror adjustment and T5 LED 3-SMD 1210 for the circle around the key ignition.
Passenger side:
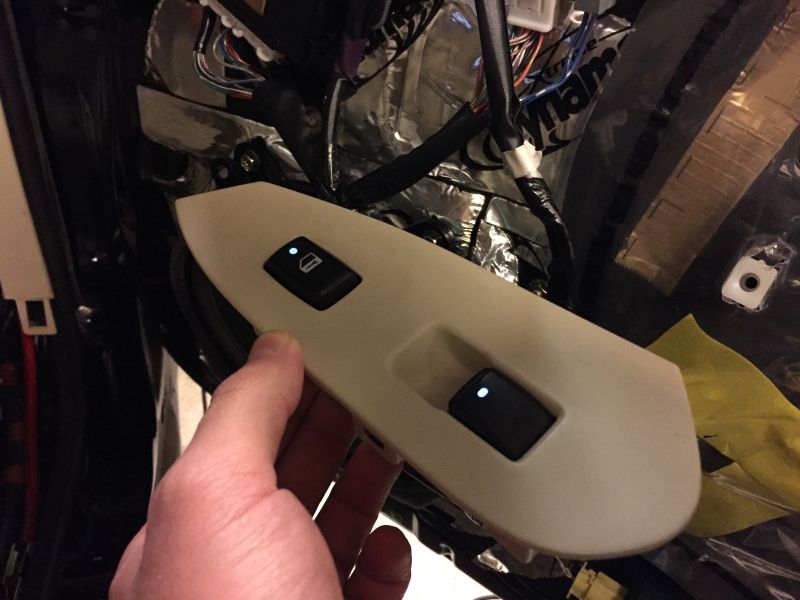
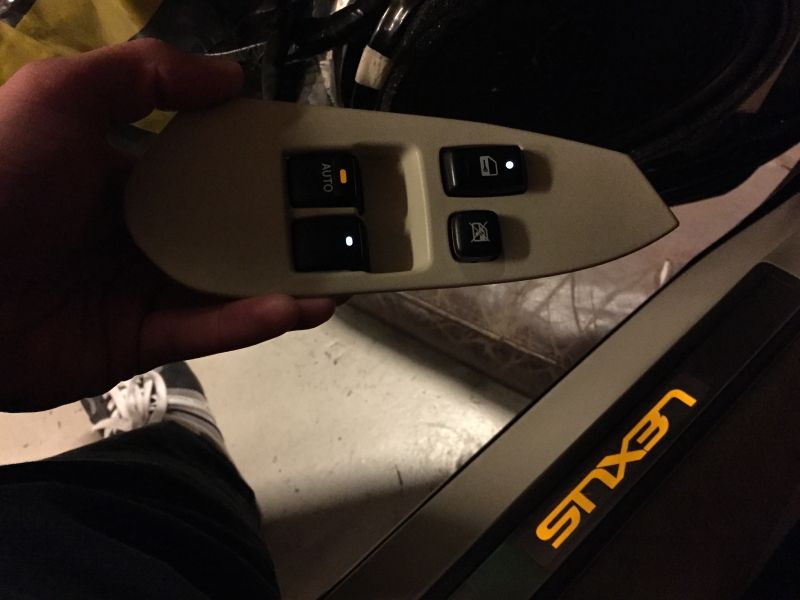
And the drivers side. Added an amber SMD for the driver AUTO control switch to make something a little different
Next is the Climate control unit. Just got the LED's in the mail.
Got the 0603 SMD's but they are smaller than the ones installed. Very hard to solder these little badboys. I would strongly recommend to choose some bigger size like the 3528 as DarthSid said.
I used a piece of tape to hold the tiny 0603 SMD into place
Not the prettiest but it works
Then for the VSC button. When installing the SMD is not lightning everything up
So i had to mod the SMD and twist it 90 degrees in the T3 socket so its pointing upwards.
Works great now
Also added the T4 LED 1210 SMD for the mirror adjustment and T5 LED 3-SMD 1210 for the circle around the key ignition.Passenger side:
And the drivers side. Added an amber SMD for the driver AUTO control switch to make something a little different
Next is the Climate control unit. Just got the LED's in the mail.
Last edited by Rollaboy; 01-31-15 at 01:52 PM.
01-21-15, 04:00 PM
#57
Lead Lap
Nice job Rollaboy!
01-23-15, 08:58 AM
#59
Well here's some news
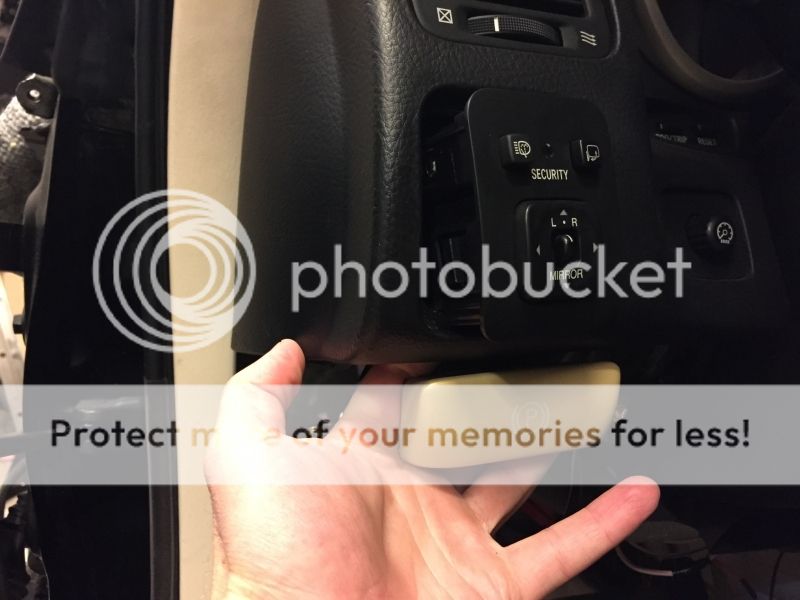
The mirror buttons: You just reach under and pop it out.
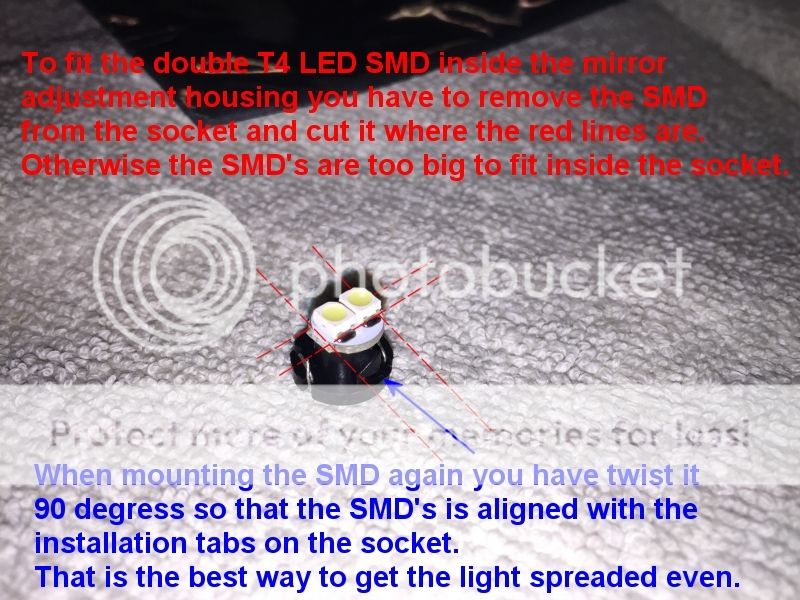
The T4 SMD LED needs a bit of work to fit inside the housing and spread the light so all four arrows lights up even.
While playing around testing different angles i somehow blew the fuse for the interior light. Its the 5a in the driverside kickpanel.

The T5 LED 3-SMD 1210 for the circle around the key ignition is difficult because there is almost no space. So you need small fingers but you can almost only touch the socket with on finger while laying on you back over the doorsill and the driver seat. The best way was to take a flat screwdriver and there is a small recess in the socket where you can manage to get the socket unscrewed. It takes alot of patience. Also the other way when installing it again. But its worth the trouble
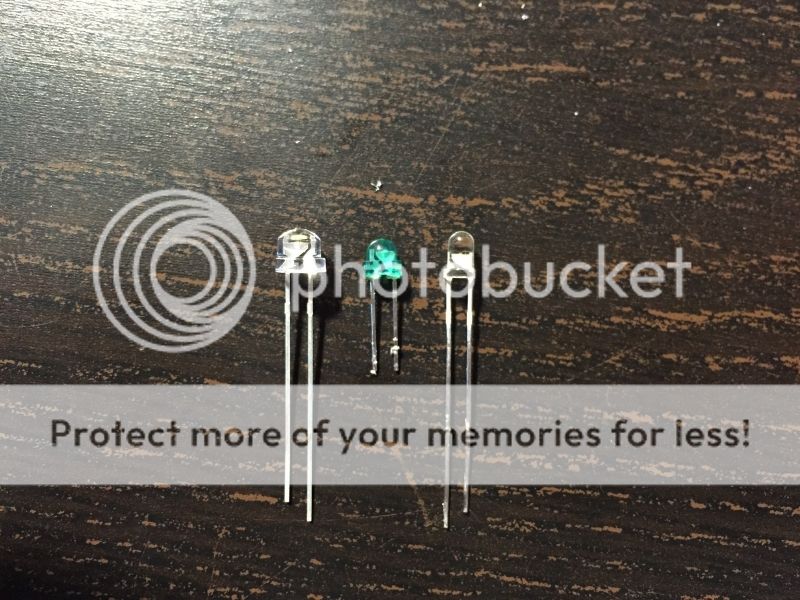
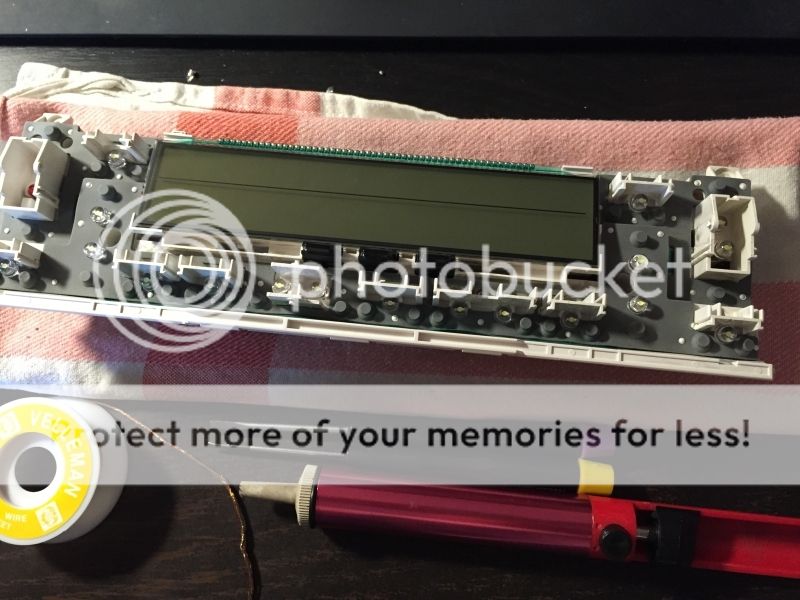
Got the new white LED's for the climate control unit. I tested the 3mm but they are way to bright and the light is centered on the middle so it does not look good on the buttons. So instead of the 3,5mm green LED's i fitted 5mm LED straw hats with much more wide light. It works perfect, so thats the way to go.
Took some hours to do the job. The hardest part was to get the old LED's out. Again, patience patience patience. You don't want to rush this and ruin something. I don't wanna call myself an expert but if you don't have any skills in soldering advanced stuff then this is not something for you.
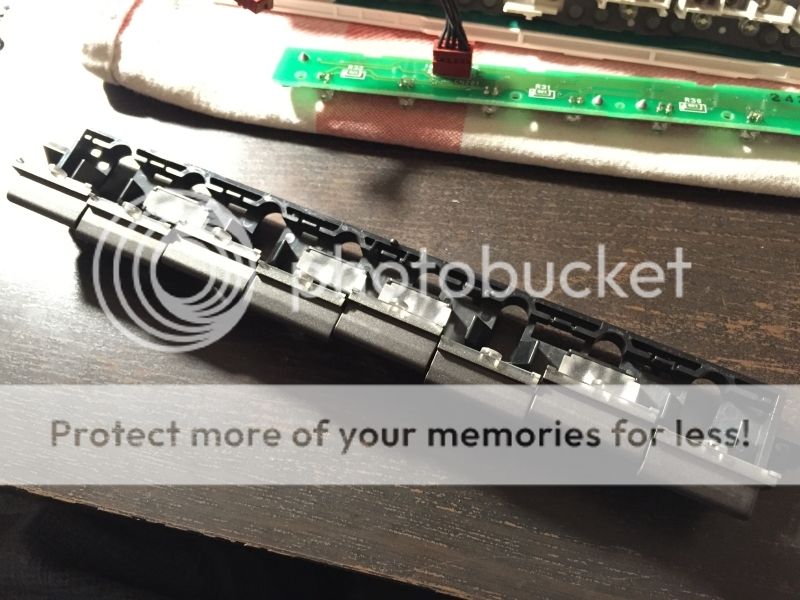
Because of the bigger 5mm LED's the mechanism for the fan adjustment button is not working. So you have to "shave" the LED's to fit before soldering.
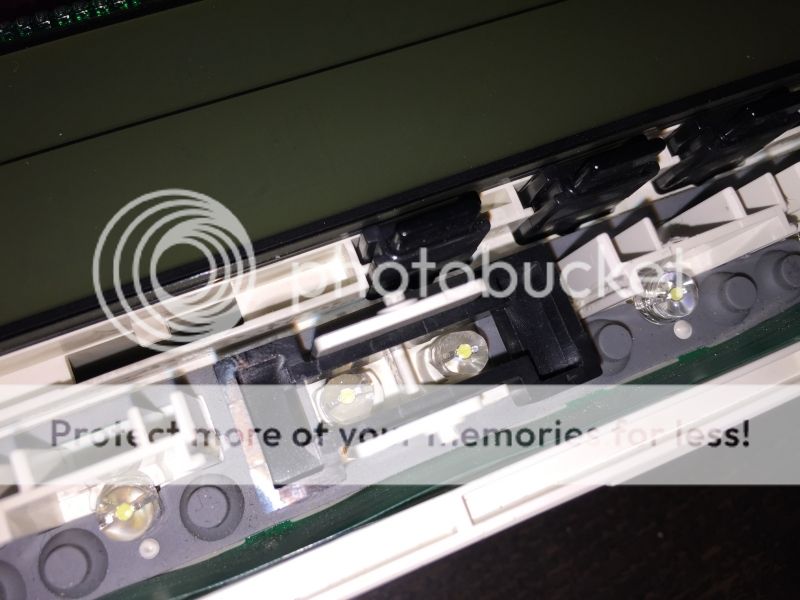
Here you can see how i removed the base of the LED so there is enough space for the mechanism to work.

Here is the LED's mounted for the navigation control bar.
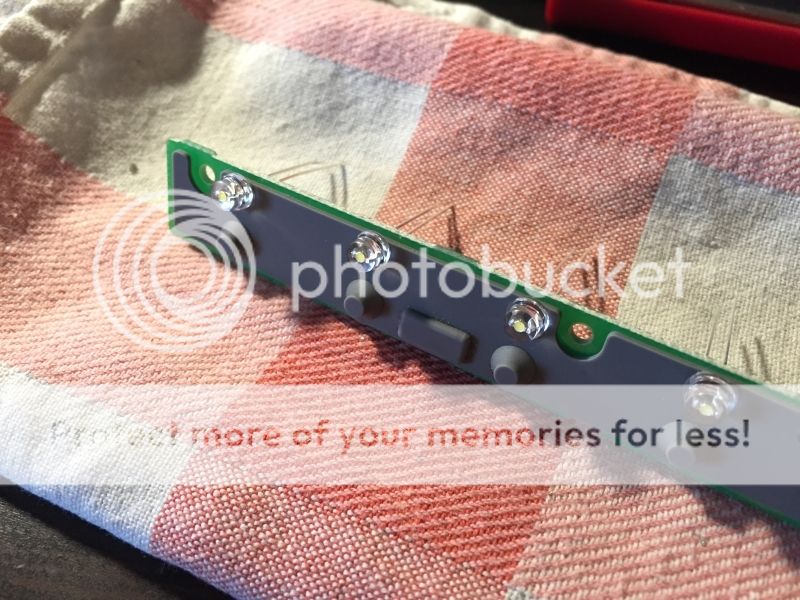
Had to cut of the rubber because the new LED's are bigger. Not a big deal.
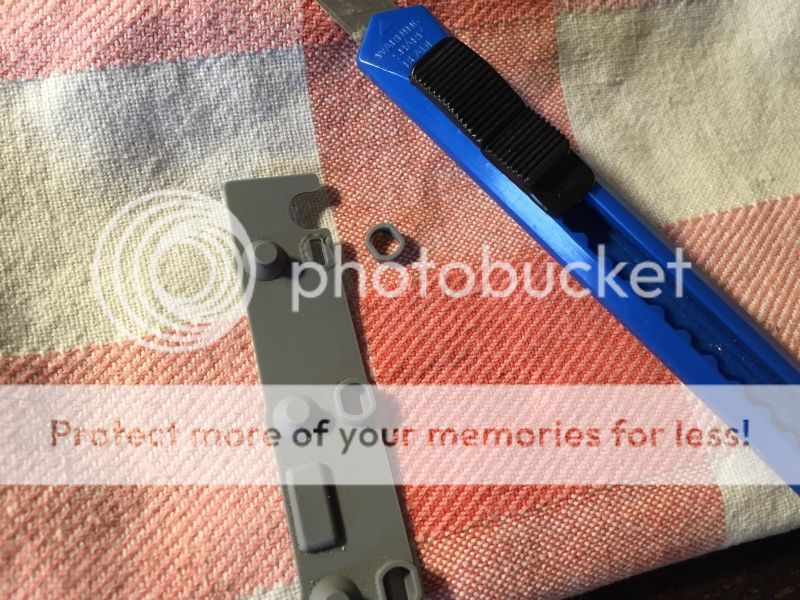
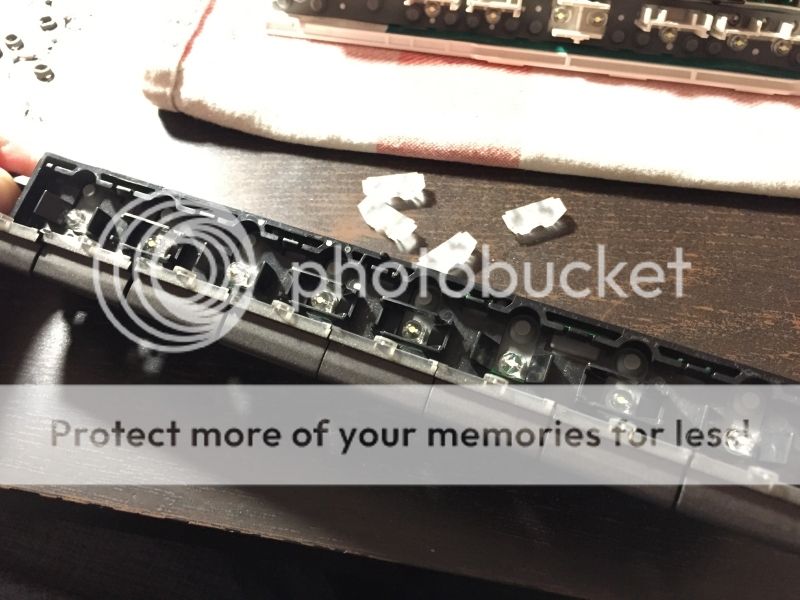
Behind 4 of the buttons there is located frosted plastic pieces. I don't know exactly why they are there but i removed them to get a even light.
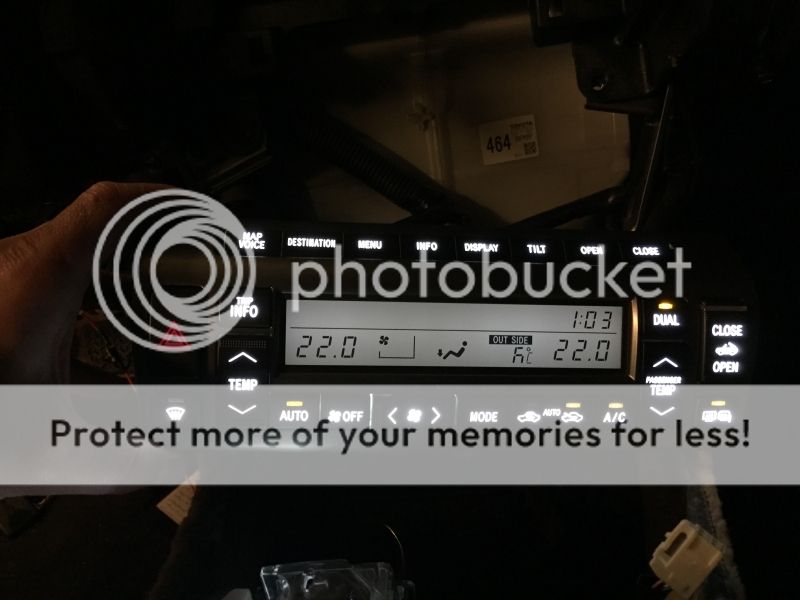
And here you have it. The final product i only need a new display so the temperature digits are showing correctly. No more green inside this Lexus!
The mirror buttons: You just reach under and pop it out.
The T4 SMD LED needs a bit of work to fit inside the housing and spread the light so all four arrows lights up even.
While playing around testing different angles i somehow blew the fuse for the interior light. Its the 5a in the driverside kickpanel.
The T5 LED 3-SMD 1210 for the circle around the key ignition is difficult because there is almost no space. So you need small fingers but you can almost only touch the socket with on finger while laying on you back over the doorsill and the driver seat. The best way was to take a flat screwdriver and there is a small recess in the socket where you can manage to get the socket unscrewed. It takes alot of patience. Also the other way when installing it again. But its worth the trouble
Got the new white LED's for the climate control unit. I tested the 3mm but they are way to bright and the light is centered on the middle so it does not look good on the buttons. So instead of the 3,5mm green LED's i fitted 5mm LED straw hats with much more wide light. It works perfect, so thats the way to go.
Took some hours to do the job. The hardest part was to get the old LED's out. Again, patience patience patience. You don't want to rush this and ruin something. I don't wanna call myself an expert but if you don't have any skills in soldering advanced stuff then this is not something for you.
Because of the bigger 5mm LED's the mechanism for the fan adjustment button is not working. So you have to "shave" the LED's to fit before soldering.
Here you can see how i removed the base of the LED so there is enough space for the mechanism to work.
Here is the LED's mounted for the navigation control bar.
Had to cut of the rubber because the new LED's are bigger. Not a big deal.
Behind 4 of the buttons there is located frosted plastic pieces. I don't know exactly why they are there but i removed them to get a even light.
And here you have it. The final product
i only need a new display so the temperature digits are showing correctly. No more green inside this Lexus!
Last edited by Rollaboy; 01-31-15 at 01:55 PM.
01-23-15, 09:37 AM
#60
Rollaboy, that is awesome! I wish you lived here in the US! I would def want to have the AC modification done on my SC430! Another question, i don't think my mirror adjustment has any lights as it is. So was this something you added or was there originally a light in yours? Maybe they changed this option on certain years? Also, did you change the green light on the push button to move the radio door? If, so... any DIY? Are you still running the OEM headunit? Thanks and great work!