Megan EZ Coil-over install
 12-10-10, 05:41 PM
#1
Lead Lap
Thread Starter

Just received a set of Megan EZ coil-overs. Though I'd share my experience with the install. Got the fronts installed today and the trunk liner removed so I can install the rears tomorrow.
Here they are right out of the box.

step 1 is to seperate the steering knuckle from the upper suspension arm:

close-up of joint:

special tool needed. Borrowed tool from Advanced Auto Parts for free.

note: arrow at bottom torsion bar disconnected to get bottom shock bolt out. Getting the bolt back in was a pita. Top arrow shows top joint disconnected from steering knuckle.


I'll add pictures of the car after I get the rears installed and the height adjusted. Lowering just a little, but not slamming it.
Though I'd share my experience with the install. Got the fronts installed today and the trunk liner removed so I can install the rears tomorrow.Here they are right out of the box.
step 1 is to seperate the steering knuckle from the upper suspension arm:
close-up of joint:
special tool needed. Borrowed tool from Advanced Auto Parts for free.
note: arrow at bottom torsion bar disconnected to get bottom shock bolt out. Getting the bolt back in was a pita. Top arrow shows top joint disconnected from steering knuckle.
I'll add pictures of the car after I get the rears installed and the height adjusted. Lowering just a little, but not slamming it.
Last edited by Poqman; 12-10-10 at 05:47 PM.

 12-10-10, 08:00 PM
#3
Very nice!!! I like how you split up the rear...removed the trunk stuff today so you don't have to all that in one day. Can't wait to see it all done. I love my LP's. They've changed my car. If I would have know these would have made the SC430 ride so much better I would have done it years ago...and with both SC's too!
 12-11-10, 05:35 AM
#5
Lead Lap
Thread Starter
Putting both left and right sides up on jack stands takes all the tension out of the sway bar links and makes it easy to remove/reinstall the sway bar bolts.
what awesome person did you get those coilovers from? and how did you get some so quickly!?!?!?

 12-11-10, 05:03 PM
#7
Lead Lap
Thread Starter
Installed the rear coil-overs today. Was pretty uneventful. Here's the start:

You need to drop the lower support arm. Here are the three bolts to remove. Make sure to mark the location of the camber adjustment cam before removing.

Here's the new coil-over installed.

Finally, if you ever decide to cut a hole in your trunk liner to adjust the dampening, here is a reference dimension.

It was raining and cold today, so no pictures of the car yet. I currently have 1-1/4" clearance between the top of the tire and the bottom of the fender liner. This was about a 2" drop. The tire rubbed the fender once today and the bottom of the car dragged going across a dip to enter a parking lot. Will probably raise the car 1/2" tomorrow before taking it for alignment.
You need to drop the lower support arm. Here are the three bolts to remove. Make sure to mark the location of the camber adjustment cam before removing.
Here's the new coil-over installed.
Finally, if you ever decide to cut a hole in your trunk liner to adjust the dampening, here is a reference dimension.
It was raining and cold today, so no pictures of the car yet. I currently have 1-1/4" clearance between the top of the tire and the bottom of the fender liner. This was about a 2" drop. The tire rubbed the fender once today and the bottom of the car dragged going across a dip to enter a parking lot. Will probably raise the car 1/2" tomorrow before taking it for alignment.
Trending Topics
12-11-10, 05:32 PM
#8
Your wheel specs are the same as oem 18x8 +45. https://www.clublexus.com/forums/mem...25-poqman.html
Even you slam it to the ground, the tire will not hit the fender, not even close.
EDIT:
My guess is your tire rubbing is more likely still at wheel well/fender lining, it can be checked if you put some maksing tape there.
This is not a wheel fitment thread, so I am not going to show you why your stock spec wheels shouldn't rub at fender even doing a full lock turn over a dip at 10 mph.
Last edited by talwang; 12-12-10 at 09:56 AM. Reason: adding info
12-11-10, 05:39 PM
#9
Lead Lap
Thread Starter
How was it possible that your tire will rub the fender?
Last edited by Poqman; 12-11-10 at 07:24 PM.
12-11-10, 05:47 PM
#10
Lead Lap
Thread Starter
You can also install these without removing the knuckle from the upper suspension arm. You just have to maneuver the coil-over in from the bottom
12-11-10, 07:10 PM
#11
The part I hated most about the install was having to keep unbolting everything to adjust height. I will never buy coil-overs again that require the body of the strut to be spun to adjust height.
12-11-10, 07:22 PM
#12
Lead Lap
Thread Starter
The part I hated most about the install was having to keep unbolting everything to adjust height.
12-11-10, 10:07 PM
#13
Yea, I don't have a car lift, so I have to jack up each wheel individually and make adjustments, then drive around for awhile and start adjusting again. Looks like four times will be the magic number to find a sweet spot that is lower than OEM, but not too low to bottom out.
You can still go up 1/2" probably, I started around 2" lower and worked my way up too.
12-12-10, 10:38 AM
#14
heres my car slammed on megan LP's.. LOVE the difference. i enjoy driving the car now

wish i went with the EZ.. would have saved some money. my taste for slamming is out of the picture. i just want it sitting right at the top of the tire now and the EZ coils would have been the way to go. i had to raise the car because the front tire kept bottoming out on the front control arm :O IT DOES NOT BOTTOM OUT ON THE FENDER. the tire hits the control arm. i'm now sitting just right for daily driving.. saving for tires to put my wheels on.. i adjusted my height three times now. one more time i should be good to goo. the rear is lower then the front. i hate uneven drops
wish i went with the EZ.. would have saved some money. my taste for slamming is out of the picture. i just want it sitting right at the top of the tire now and the EZ coils would have been the way to go. i had to raise the car because the front tire kept bottoming out on the front control arm :O IT DOES NOT BOTTOM OUT ON THE FENDER. the tire hits the control arm. i'm now sitting just right for daily driving.. saving for tires to put my wheels on.. i adjusted my height three times now. one more time i should be good to goo. the rear is lower then the front. i hate uneven drops
Last edited by Pnuge88; 12-12-10 at 10:43 AM.
12-12-10, 04:15 PM
#15
Lead Lap
Thread Starter
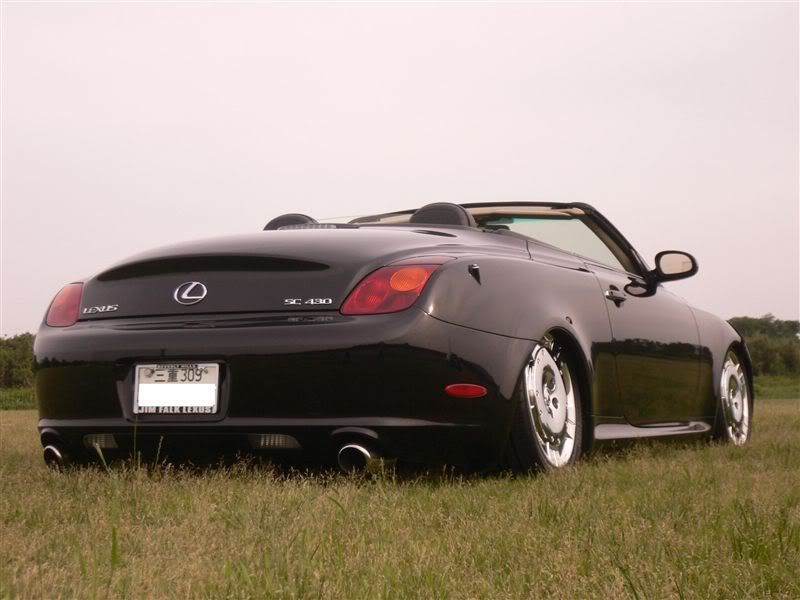
Well, finished the height adjustments today. Just got back from having an alignment done. It's still raining outside so the best I can do is a garage shot. What do you think?


Last edited by Poqman; 01-27-11 at 01:51 PM.

