SC300 D2S MINI retrofit
 08-15-11, 06:05 PM
#1

Hi everyone,
I thought I'd share my D2S mini projector retrofit. This is definitely one of the best mods that I've done to the car thus far. I did my GS retrofit a few weeks back and figured with the experience I gained, I felt comfortable tearing into my other car.
GS300 retrofit thread: https://www.clublexus.com/forums/gs-...xperience.html
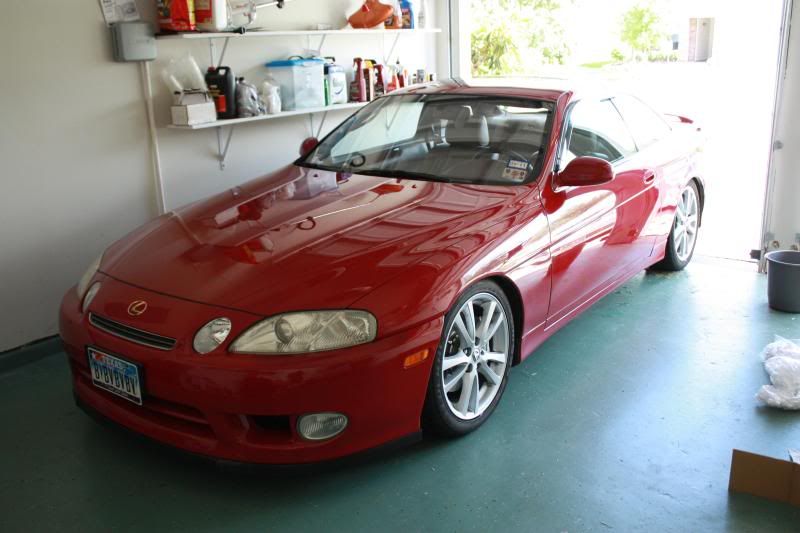
First let me give you what I was trying to accomplish. I drive my SC to work and back 4- 5 days a week with a minimum of 108 miles a day. When I first got my car, it was mint. Every door ding or paint chip used to **** me off, but I've grown to let things slide and focus my **** retentiveness on the interior. I say all of this because, my main goal was to retrofit the SC the easiest way possible. I didn't care how it appeared afterwards, as long as there was a clean cut-off with visibility benefits.
The patient:
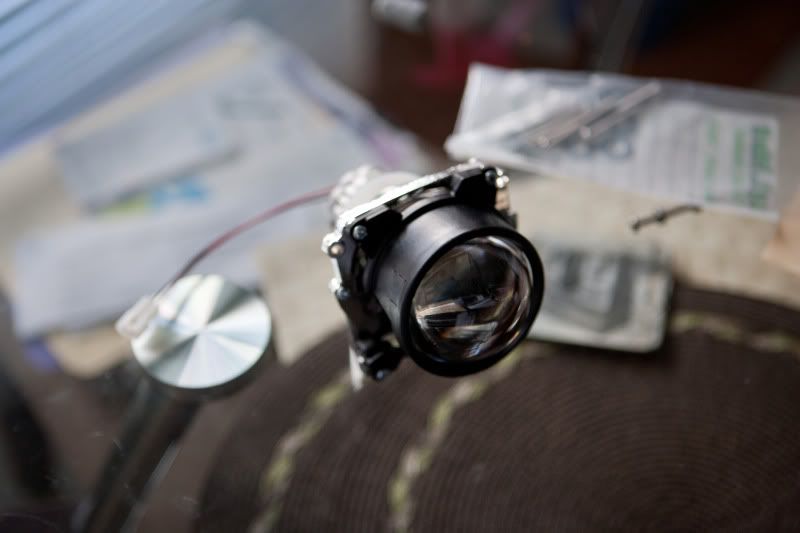
I've read a few threads with TSX retrofits, but wanted bi-xenon capabilities. A lot of projectors don't fit our slivered styled headlights so that weeded out a lot of possibilities. I bought my FX-R projectors to do my GS through a local business Project.ORS.order@gmail.com . I went back to them for advice and they recommended D2S Morimoto Mini's. With a nice compact design, bi-xenon solenoid, and price. I was sold.
I had to buy new bulbs to fit the projectors and found out something new. Most plug and play HID kits have AMP connectors. Those are the two plugs found running off of the ballast that plug into the bulb. D2S is a totally different connector found on many OEM HID equipped cars. If you have an aftermarket plug and play kit wanting to do a D2S retrofit, you can keep your ballast by buying an AMP to D2S connector and D2S bulbs. This is what I thought HAD to buy.
http://www.theretrofitsource.com/pro...fphn190jlvpban
Project.ORS recommended D2H bulbs which fit D2S projectors, but have amp connectors to go into the ballast I already have. This saves me money from buying adapters and gives me more room behind the projector.
http://www.theretrofitsource.com/pro...roducts_id=251
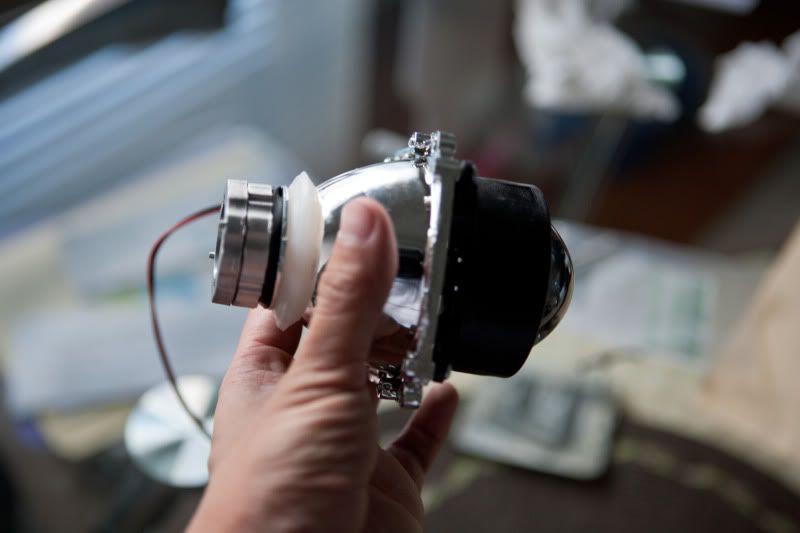
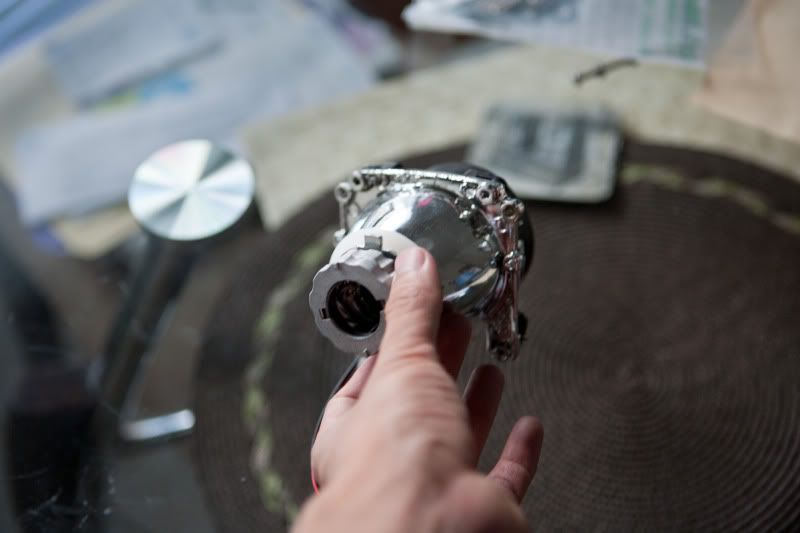
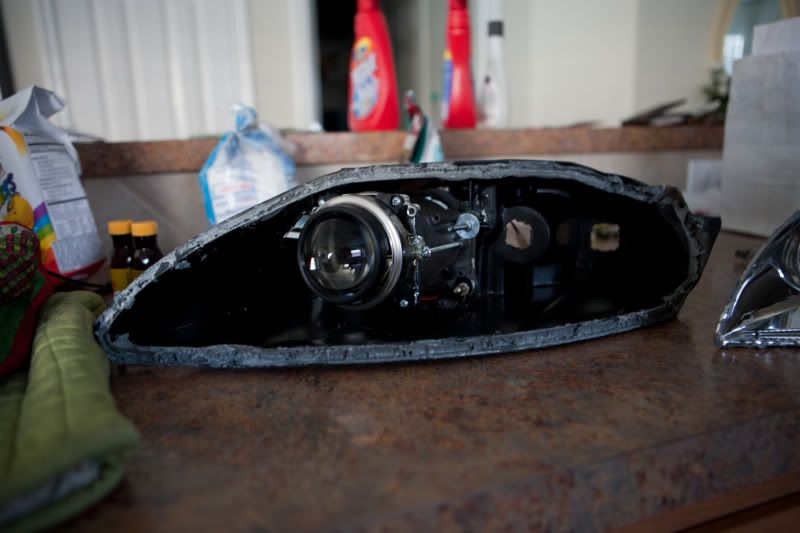
Photos of Project.ORS mini:
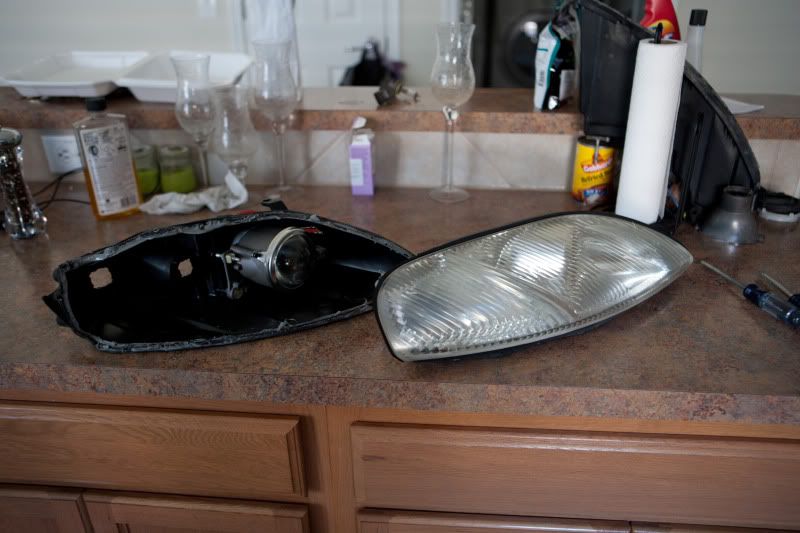
I started off with removing the headlights via instruction of the forums. 2 bolts from behind the fender-well and 1 bolt on top. Really quick and easy.
Before baking, I had to remove three screws and 5 total metal clips that were on the top and bottom of the headlight. I then preheated the oven to 300 and when up to temp placed the headlights in for 3 minutes.
After burning my hands and nipples off, I managed to get the plastic cover off and separated from the chrome bezel.
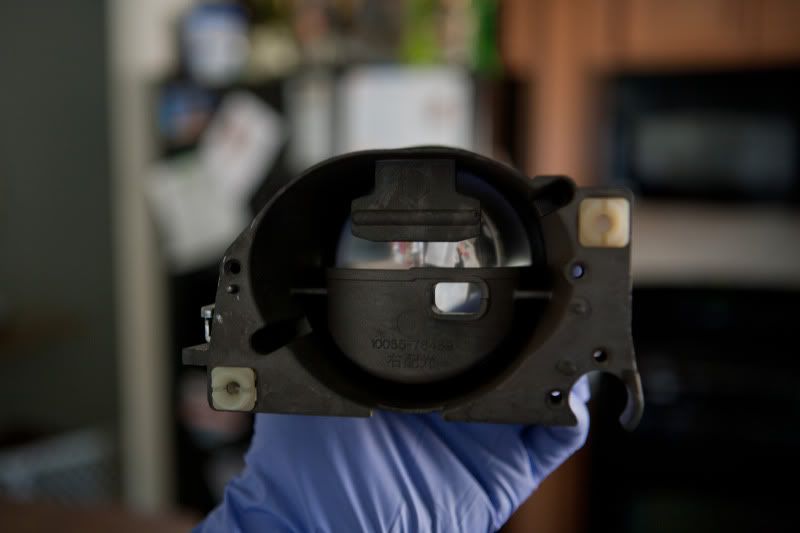
For those of you who have never seen our stock projector, it is made up of two main pieces with a lens held on by a metal ring.
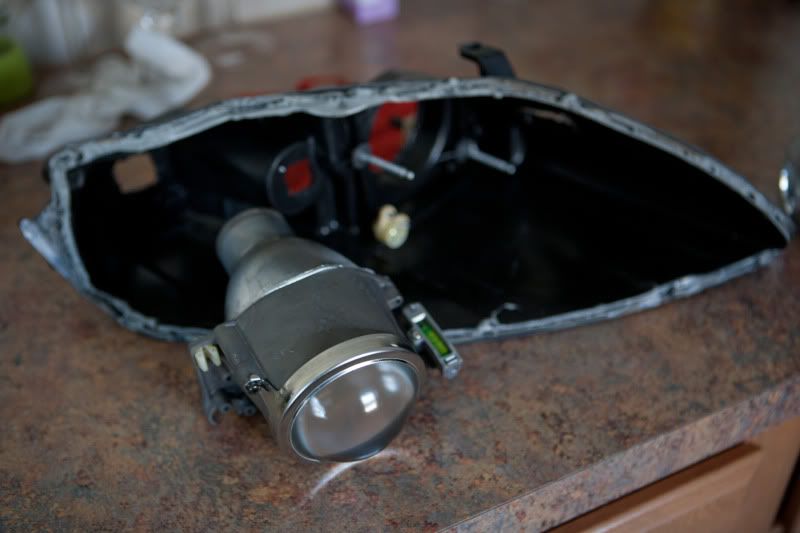
The biggest problem I found during this whole process was figuring out a way to mount the projector into our headlight. Again, the slivered style headlight doesn't give much room to move around and the only attachment points are the adjustment screws. I didn't want to go Mcguyver and make a bracket. I figured, once I have everything set the way I want it, there is no reason to ever adjust again.
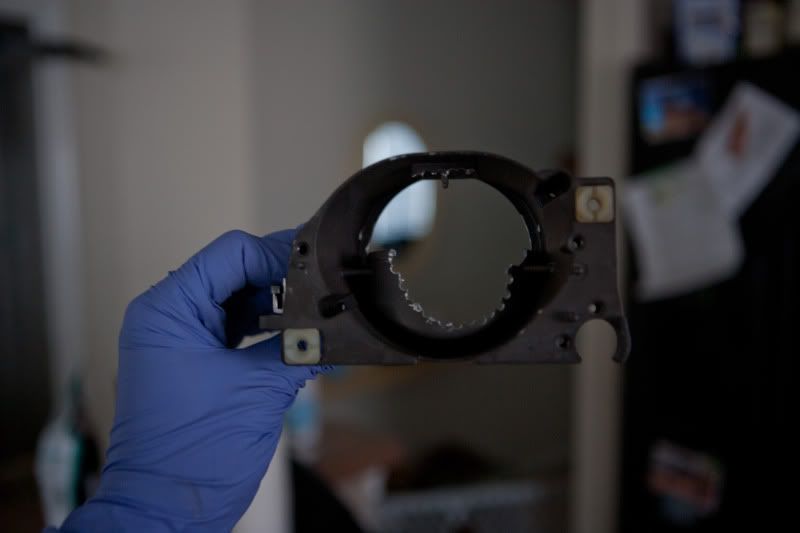
The back piece of the OEM projector serves as mounting points since it holds the adjustment clips. My attack plan was to cut out the back of the OEM projector and place the MINI inside. Since the adjustment clips would hinder how far back I could move the OEM back piece, I decided to rethread the OEM adjustment screws so I could use a nut to lock in how far back or forward I wanted the OEM back piece that held the MINI to sit.
OEM back piece:
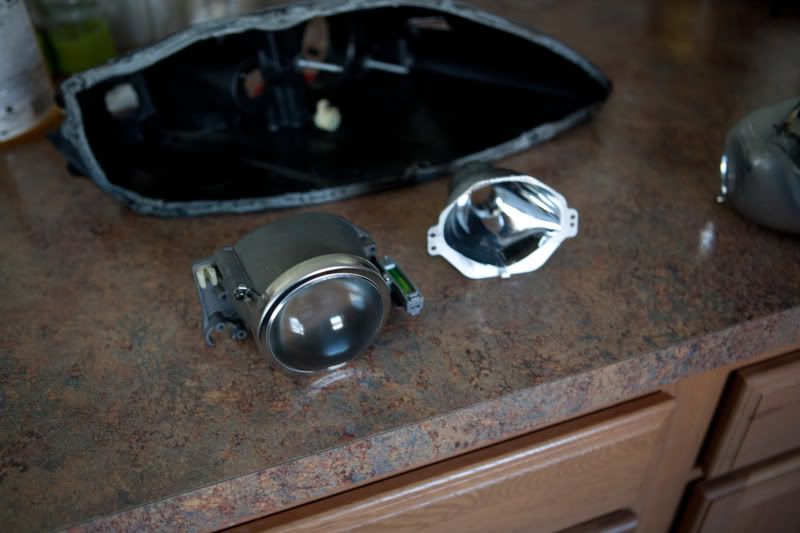
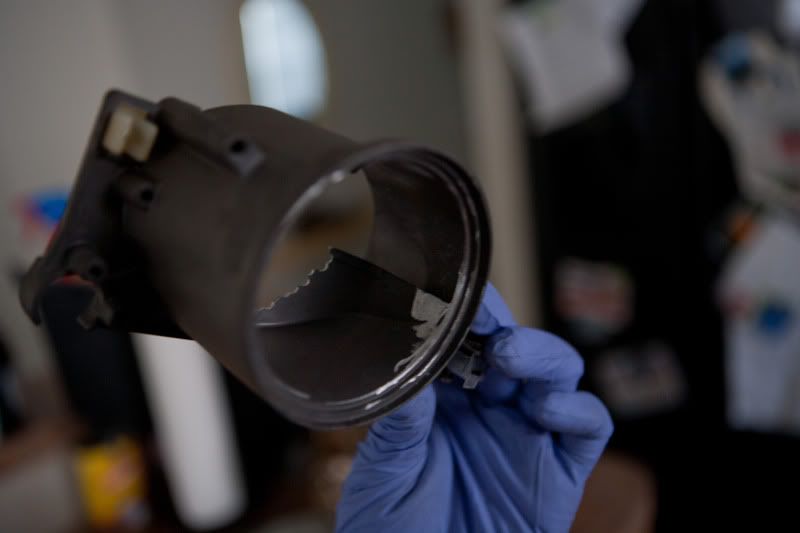
Cut OEM back piece to allow the MINI to fit:
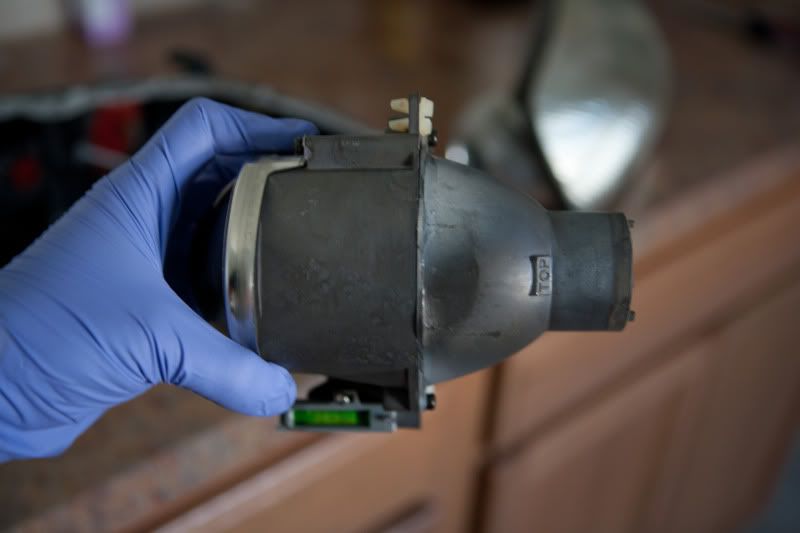
I had to grind down the sides a little bit since the MINI's have a fat reflector bowl:
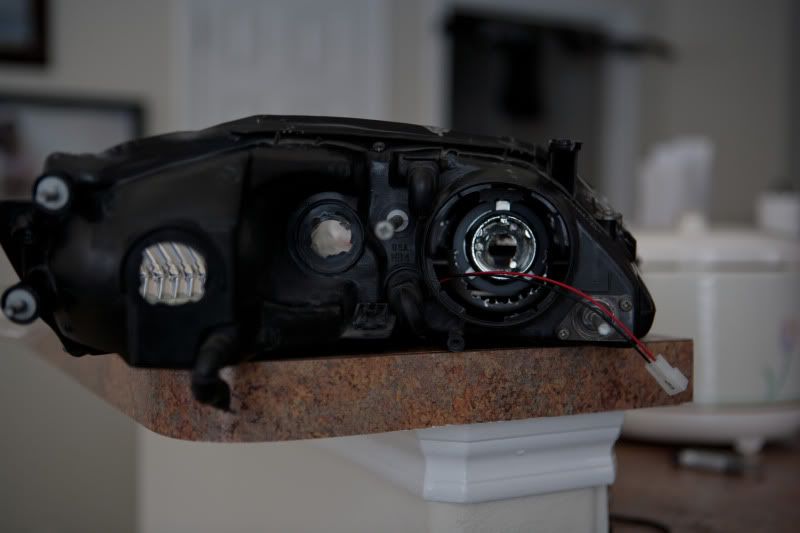
Now that I could fit the MINI inside of the OEM back piece, I needed a way for them to stay together. Luckily, the OEM chrome ring that holds in the lens fits perfectly around the mini. I just bought 2'' screws of the same thread type and screwed them together.
Make sure you level the projector before screwing down. There are three marks on the back of the MINI that help align along with the OEM back piece having horizontal lines.
I had to have the projector sit all the way in the headlight housing. The long OEM adjustment screws are left hand threaded and I could not find any nut that would fit. I proceeded to re-thread the screws to a M5, and used a washer and nut to hold everything in place.
After getting everything situated, I did a few test adjustments to make sure everything was aligned and to the correct height.
*sorry no photos*
The last problem I had was the chrome bezel. Every time I would try to seal the housing, the bezel would push or alter my projector path. Like I said before, I don't care to much about form, just functionality. I hacked away at the chrome bezel until everything fit like stock. If facing the headlight, I cut the outer side of the chrome bezel that surrounds the projector.

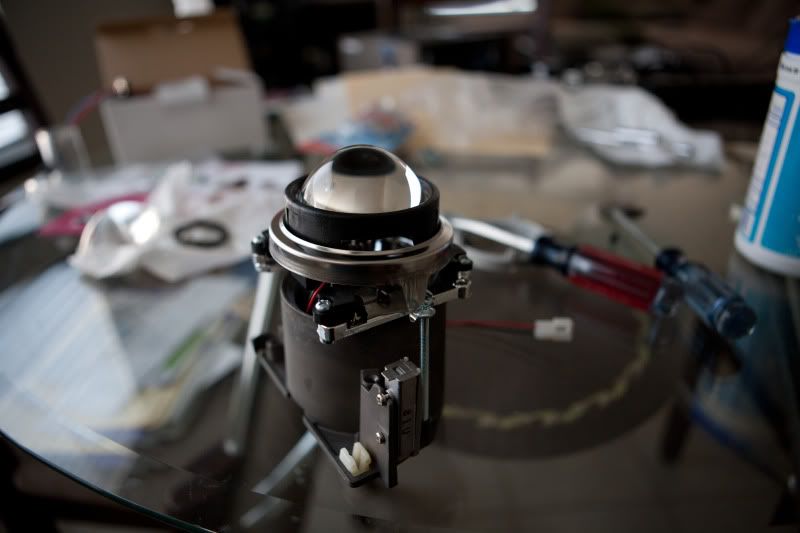
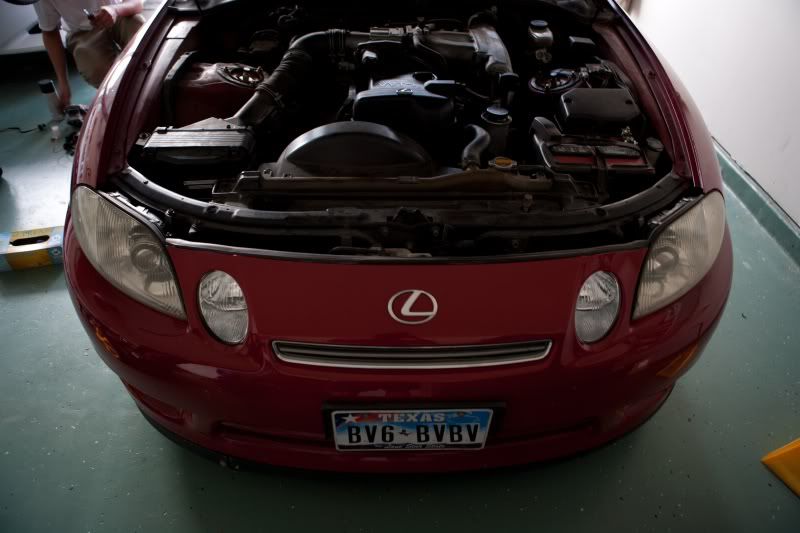
Finished product:
The lined plastic lens/cover hides a lot of my cutting. All in all, I think it still looks good.
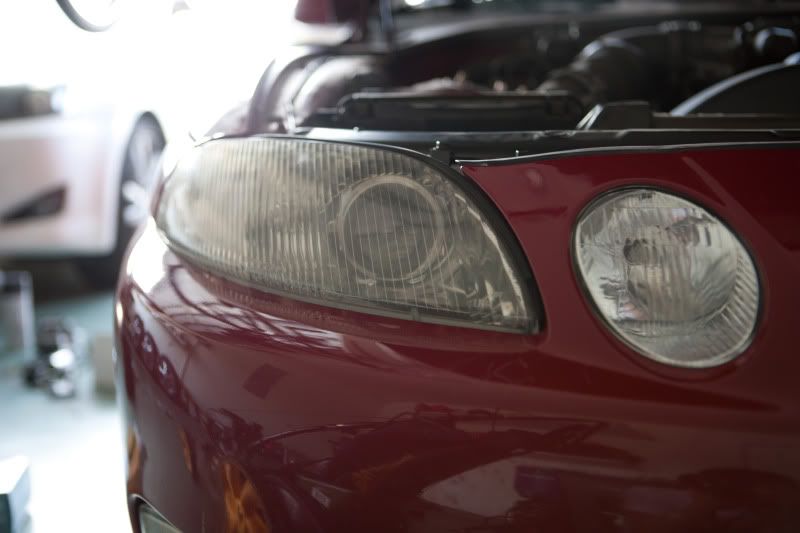
I'm happy with the retrofit and the way it went. Night time driving is like a new experience. If I were to have had all the materials I needed (screws/bolts/misc) in front of me, I think the retrofit may have been done in 3-4 hours. Hope some people enjoyed my retrofit story.
I thought I'd share my D2S mini projector retrofit. This is definitely one of the best mods that I've done to the car thus far. I did my GS retrofit a few weeks back and figured with the experience I gained, I felt comfortable tearing into my other car.
GS300 retrofit thread: https://www.clublexus.com/forums/gs-...xperience.html
First let me give you what I was trying to accomplish. I drive my SC to work and back 4- 5 days a week with a minimum of 108 miles a day. When I first got my car, it was mint. Every door ding or paint chip used to **** me off, but I've grown to let things slide and focus my **** retentiveness on the interior. I say all of this because, my main goal was to retrofit the SC the easiest way possible. I didn't care how it appeared afterwards, as long as there was a clean cut-off with visibility benefits.
The patient:
I've read a few threads with TSX retrofits, but wanted bi-xenon capabilities. A lot of projectors don't fit our slivered styled headlights so that weeded out a lot of possibilities. I bought my FX-R projectors to do my GS through a local business Project.ORS.order@gmail.com . I went back to them for advice and they recommended D2S Morimoto Mini's. With a nice compact design, bi-xenon solenoid, and price. I was sold.
I had to buy new bulbs to fit the projectors and found out something new. Most plug and play HID kits have AMP connectors. Those are the two plugs found running off of the ballast that plug into the bulb. D2S is a totally different connector found on many OEM HID equipped cars. If you have an aftermarket plug and play kit wanting to do a D2S retrofit, you can keep your ballast by buying an AMP to D2S connector and D2S bulbs. This is what I thought HAD to buy.
http://www.theretrofitsource.com/pro...fphn190jlvpban
Project.ORS recommended D2H bulbs which fit D2S projectors, but have amp connectors to go into the ballast I already have. This saves me money from buying adapters and gives me more room behind the projector.
http://www.theretrofitsource.com/pro...roducts_id=251
Photos of Project.ORS mini:
I started off with removing the headlights via instruction of the forums. 2 bolts from behind the fender-well and 1 bolt on top. Really quick and easy.
Before baking, I had to remove three screws and 5 total metal clips that were on the top and bottom of the headlight. I then preheated the oven to 300 and when up to temp placed the headlights in for 3 minutes.
After burning my hands and nipples off, I managed to get the plastic cover off and separated from the chrome bezel.
For those of you who have never seen our stock projector, it is made up of two main pieces with a lens held on by a metal ring.
The biggest problem I found during this whole process was figuring out a way to mount the projector into our headlight. Again, the slivered style headlight doesn't give much room to move around and the only attachment points are the adjustment screws. I didn't want to go Mcguyver and make a bracket. I figured, once I have everything set the way I want it, there is no reason to ever adjust again.
The back piece of the OEM projector serves as mounting points since it holds the adjustment clips. My attack plan was to cut out the back of the OEM projector and place the MINI inside. Since the adjustment clips would hinder how far back I could move the OEM back piece, I decided to rethread the OEM adjustment screws so I could use a nut to lock in how far back or forward I wanted the OEM back piece that held the MINI to sit.
OEM back piece:
Cut OEM back piece to allow the MINI to fit:
I had to grind down the sides a little bit since the MINI's have a fat reflector bowl:
Now that I could fit the MINI inside of the OEM back piece, I needed a way for them to stay together. Luckily, the OEM chrome ring that holds in the lens fits perfectly around the mini. I just bought 2'' screws of the same thread type and screwed them together.
Make sure you level the projector before screwing down. There are three marks on the back of the MINI that help align along with the OEM back piece having horizontal lines.
I had to have the projector sit all the way in the headlight housing. The long OEM adjustment screws are left hand threaded and I could not find any nut that would fit. I proceeded to re-thread the screws to a M5, and used a washer and nut to hold everything in place.
After getting everything situated, I did a few test adjustments to make sure everything was aligned and to the correct height.
*sorry no photos*
The last problem I had was the chrome bezel. Every time I would try to seal the housing, the bezel would push or alter my projector path. Like I said before, I don't care to much about form, just functionality. I hacked away at the chrome bezel until everything fit like stock. If facing the headlight, I cut the outer side of the chrome bezel that surrounds the projector.
Finished product:
The lined plastic lens/cover hides a lot of my cutting. All in all, I think it still looks good.
I'm happy with the retrofit and the way it went. Night time driving is like a new experience. If I were to have had all the materials I needed (screws/bolts/misc) in front of me, I think the retrofit may have been done in 3-4 hours. Hope some people enjoyed my retrofit story.
Last edited by 01gs3; 08-15-11 at 06:14 PM.


Trending Topics
 08-17-11, 02:52 PM
#9

Thats good, what made you choose these projectors vs tsx?
I was originally going to try the FX-R's in the sc300 headlights, but from what i've been told its just too large. Then i decided i was gonna hold them off for my next car

I think i can see the projector from the side, it doesn't bother you at all?
I was originally going to try the FX-R's in the sc300 headlights, but from what i've been told its just too large. Then i decided i was gonna hold them off for my next car
I think i can see the projector from the side, it doesn't bother you at all?
 08-17-11, 06:48 PM
#11

I'm with this guy. I never complain about my light output. I guess you have a lot of free time on your hands. If I told the woman that I needed to install new projectors into my headlights, and it required me to stick them in the oven and several hours of labor...not only would she look at me like I was crazy, but she would probably reject sexual activity for a few days.
08-17-11, 09:07 PM
#12
Pole Position

Join Date: Oct 2010
Location: fl
Posts: 213
Likes: 0
Received 0 Likes
on
0 Posts
I'm with this guy. I never complain about my light output. I guess you have a lot of free time on your hands. If I told the woman that I needed to install new projectors into my headlights, and it required me to stick them in the oven and several hours of labor...not only would she look at me like I was crazy, but she would probably reject sexual activity for a few days.
08-18-11, 05:59 AM
#13
I'm with this guy. I never complain about my light output. I guess you have a lot of free time on your hands. If I told the woman that I needed to install new projectors into my headlights, and it required me to stick them in the oven and several hours of labor...not only would she look at me like I was crazy, but she would probably reject sexual activity for a few days.

Please educate yourself on art of retrofitting. Your eyes will open, and (with retrofitted projector on your SC,) you will see what the buzz is about.


