How to Fix Wet / Leaky Door Panels
 01-22-10, 07:57 PM
#1
How To Fix Wet/Leaky Door Panel
California has been hit with a week long storm that and my 18 year old car did not fare to well against it.
The carpet on the door panel of both sides were soaked and left water stains after it dried. Fortunately, the floor pans in the front and rear were dry so that eliminated the possibility of leakage any where else in the car such as the notorious sunroof drainage tubes.
So in the middle of the week when the storm temporarily subsided for a few hours, Vinh was kind enough to let me use his dry garage and lend a hand.
Step 1.
Check the drain holes underneath the door to see if they are clogged. People usally draw conclusions that the seals outside the window are bad but they were not designed to be watertight. Water is going to enter the door and exit through those holes on the bottom of the door.
Step 2.
So if they are not clogged, proceed to pick up the required materials:
1. Plastic Sheeting
2. Silicone. The black stuff that I bought from Kragen sucked. GE's Silicone II from Home Depot worked much better
3. Duct Tape
Step 3.
Remove the door panels. Instructions: http://soarercentral.com/sc-forum/me...739/53268.html
This is a pretty difficult step since many of our door panels are already falling apart. Removing them and putting them back on just makes it worse each time
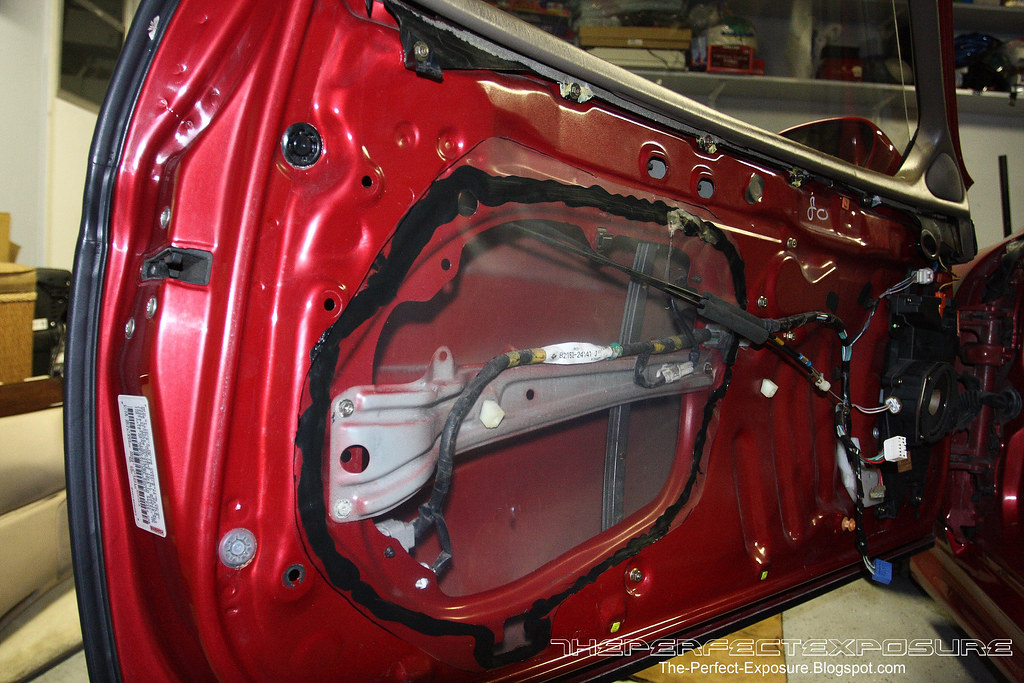
Step 4.
Once the door panel is off you will see the culprit
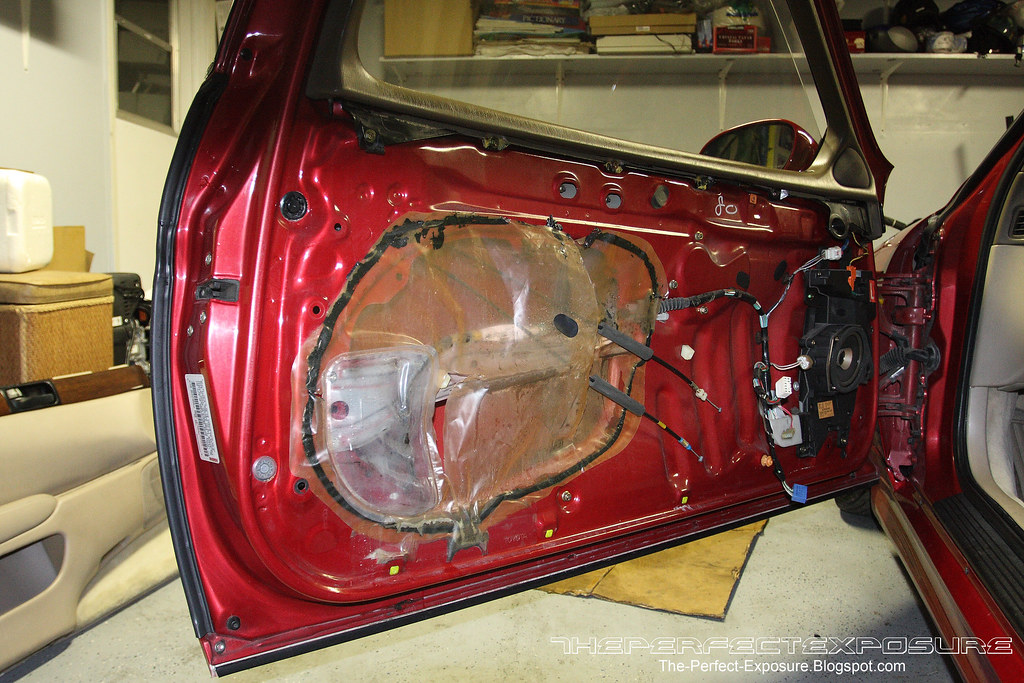
The original sheet is torn and the silicone adhesive at the bottomost part of it, the drainback hole, is no longer watertight.
The water was suppose to trickle in onto the sheet from outside and down to the drain holes. Instead, it trickles down the inside of the door panel and eventually reaches the carpet below the speakers.
Step 5.
Remove the original sheet and scrape off the old silicone adhesive
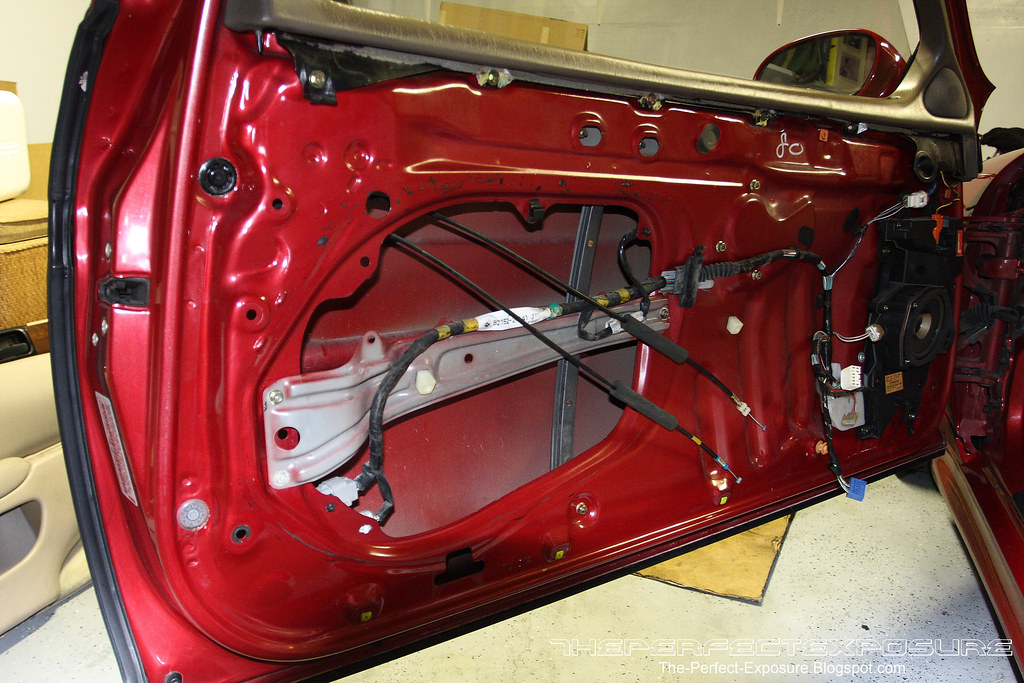
Inside the door, you will find plenty of sludge and along with a bunch of other junk
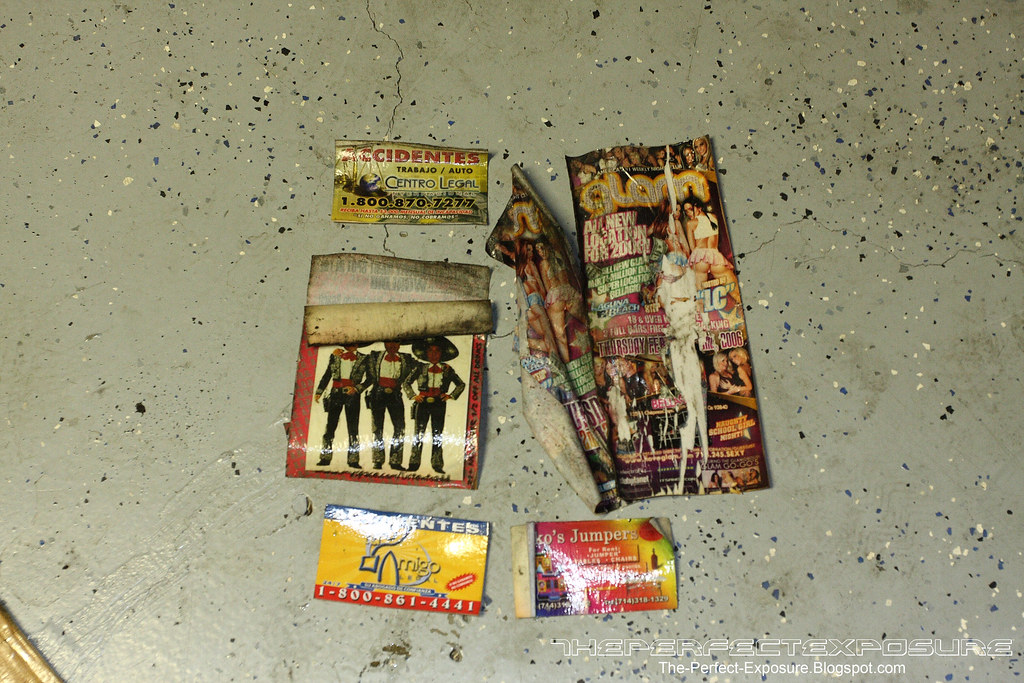
What the hell is up with all of this trash?
Glam flyer from 2006! OMG LC from Laguna Beach at Glam! Naught School Girl Night at Glam!
Step 6
Trace an outline for the new plastic sheet and cut the plastic sheet
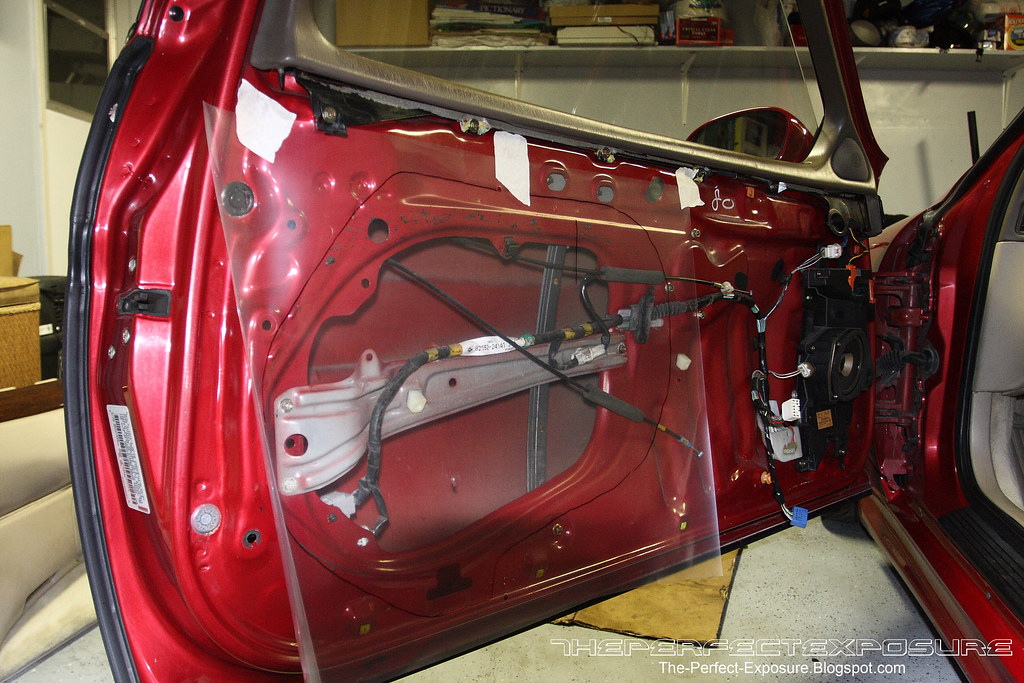
Step 7
Apply the new silcone and slap the new sheet on
This is a critical step because if you don't do it right, all of this work will be futile.
Make sure that the plastic sheet lays flat against the silicone on the lower half of the opening. When you reinstall the door panel, it will push the sheet inwards and stretches out the sheet, ruining your watertight seal. This happened to me and I had to re-do it.
As a result, I used duct tape in addition to the silicone adhesive to secure the lower half of the sheet against the door and left the top portion unsealed.
California has been hit with a week long storm that and my 18 year old car did not fare to well against it.
The carpet on the door panel of both sides were soaked and left water stains after it dried. Fortunately, the floor pans in the front and rear were dry so that eliminated the possibility of leakage any where else in the car such as the notorious sunroof drainage tubes.
So in the middle of the week when the storm temporarily subsided for a few hours, Vinh was kind enough to let me use his dry garage and lend a hand.
Step 1.
Check the drain holes underneath the door to see if they are clogged. People usally draw conclusions that the seals outside the window are bad but they were not designed to be watertight. Water is going to enter the door and exit through those holes on the bottom of the door.
Step 2.
So if they are not clogged, proceed to pick up the required materials:
1. Plastic Sheeting
2. Silicone. The black stuff that I bought from Kragen sucked. GE's Silicone II from Home Depot worked much better
3. Duct Tape
Step 3.
Remove the door panels. Instructions: http://soarercentral.com/sc-forum/me...739/53268.html
This is a pretty difficult step since many of our door panels are already falling apart. Removing them and putting them back on just makes it worse each time
Step 4.
Once the door panel is off you will see the culprit
The original sheet is torn and the silicone adhesive at the bottomost part of it, the drainback hole, is no longer watertight.
The water was suppose to trickle in onto the sheet from outside and down to the drain holes. Instead, it trickles down the inside of the door panel and eventually reaches the carpet below the speakers.
Step 5.
Remove the original sheet and scrape off the old silicone adhesive
Inside the door, you will find plenty of sludge and along with a bunch of other junk
What the hell is up with all of this trash?
Glam flyer from 2006! OMG LC from Laguna Beach at Glam! Naught School Girl Night at Glam!
Step 6
Trace an outline for the new plastic sheet and cut the plastic sheet
Step 7
Apply the new silcone and slap the new sheet on
This is a critical step because if you don't do it right, all of this work will be futile.
Make sure that the plastic sheet lays flat against the silicone on the lower half of the opening. When you reinstall the door panel, it will push the sheet inwards and stretches out the sheet, ruining your watertight seal. This happened to me and I had to re-do it.
As a result, I used duct tape in addition to the silicone adhesive to secure the lower half of the sheet against the door and left the top portion unsealed.

 Glad I'm not experiencing that problem just yet
01-15-14, 05:53 AM
Glad I'm not experiencing that problem just yet
01-15-14, 05:53 AM
#4
Fantastic write up! Just decided to tackle my audio install as this week is actually supposed to be workable as far as temperature is concerned in New York, and I find my minty fresh black door panel with water on the bottom...thankfully no mold or mold smell. I will let it air dry nice while I fix this crapola! Gotta say glad to catch it now then find out after my audio install is complete. Can't tell if it's both doors or just one as of yet.


01-15-14, 06:46 AM
#5
Looks like it's just the drivers door...and I find evidence of tinkering which is weird as my car has stock speakers and no signs of any type of damage or repair/upgrade worth taking the door panel off...
Someone ripped the original plastic and taped it back up with two small pieces of masking tape...half *** indeed. All drain holes are working fine with no signs of clogs either. The speaker box plastic was also ripped off and looks like the speaker box itself was removed once...but no upgrades were made so I wonder why it was ever removed in the first place.
Someone ripped the original plastic and taped it back up with two small pieces of masking tape...half *** indeed. All drain holes are working fine with no signs of clogs either. The speaker box plastic was also ripped off and looks like the speaker box itself was removed once...but no upgrades were made so I wonder why it was ever removed in the first place.
01-15-14, 07:31 AM
#6
Keeper of the light
iTrader: (17)
I like it. Don't forget the rubber seals along the window regulate the amount of water going into the door so worn rubber is a big factor in how much H2O gets into the door to begin with. As well the majority of the time these rubber door seals let water in when they get older. They look good, but you can see fitment issues around the rounded parts of the top of the door if you look closely. This plastic fix will certainly help if the door panel has ever been removed and this is the issue. I have seen water pooling in the door and splashing up in a corner when the plastic was gone. Mainly drilling holes along the bottom of the door will fix the issue as you suggested.
Last edited by O. L. T.; 01-17-14 at 07:45 AM.
Trending Topics
01-15-14, 08:50 AM
#8
I've had similar problems in two different sc's. One was because of the weather striping because the drivers door was hit at some point, and my current sc had a leak coming out of the a pillar because of slag not allowing the oem gasket to seat properly.
Nice write up
Nice write up
01-15-14, 08:54 AM
#9
Hey O.L.T. is their any thread regarding the rubber seals along the window? I noticed just now that on the outside of the door my window molding is loose, perhaps letting more water in and considering it rained all day yesterday....it might be a recent issue as the inner panel doesn't look like it soaked long as theres no evidence of mold.
SSmith that looks awesome. I cannot wait for Second Skin, I actually already went to the store and bought silicone and plastic to do this today as well as the audio install stuff I'm doing. I got Dynamat on the way.
SSmith that looks awesome. I cannot wait for Second Skin, I actually already went to the store and bought silicone and plastic to do this today as well as the audio install stuff I'm doing. I got Dynamat on the way.

Thread
Thread Starter
Forum
Replies
Last Post
ALLWiTE2JZ
SC- 1st Gen (1992-2000)
10
03-23-11 08:25 PM