Rear Deck DIY Question
#1
Hey CL,
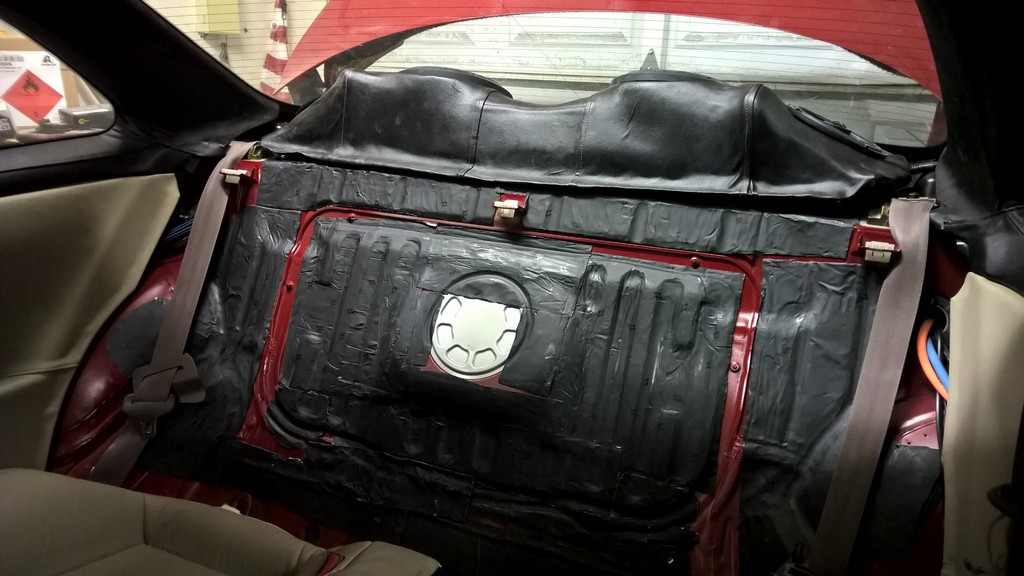
I did a quick search on this and couldn't find anything, I was wondering if anyone has ever made they own rear deck to replace the crap Lexus compressed paper one ? As everyone knows after years of sun the rears decks love to disintegrate. So I was thinking of maybe building one out of thin plywood and carpeting over that.
Thanks !
I did a quick search on this and couldn't find anything, I was wondering if anyone has ever made they own rear deck to replace the crap Lexus compressed paper one ? As everyone knows after years of sun the rears decks love to disintegrate.
 So I was thinking of maybe building one out of thin plywood and carpeting over that.
Thanks !
#7
Driver School Candidate
Join Date: Nov 2013
Location: CA
Posts: 43
Likes: 0
Received 0 Likes
on
0 Posts

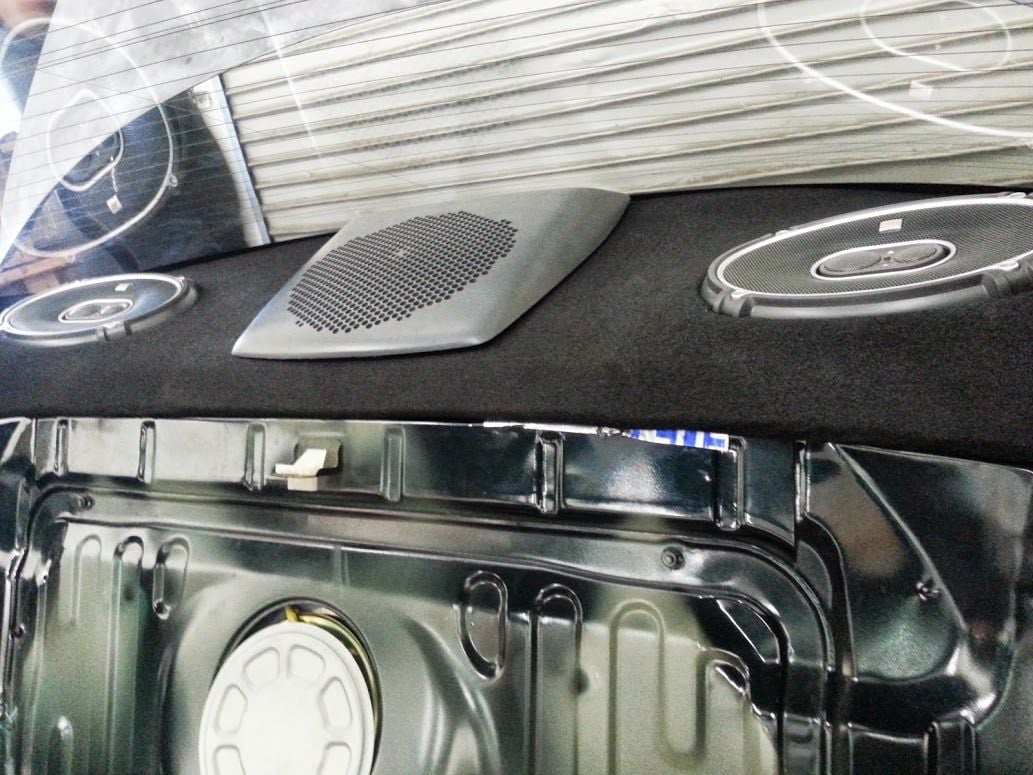
look familiar? lol dont look at your stock one too hard or else this happens
started with a kind of ok stock piece
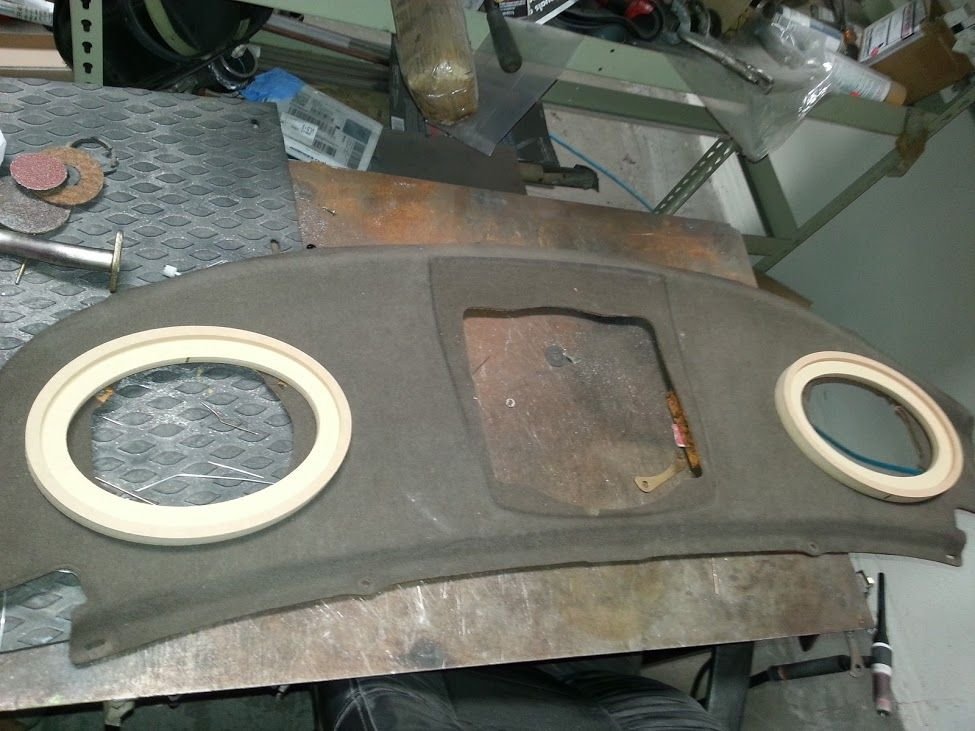
i stapled the speaker ring in place
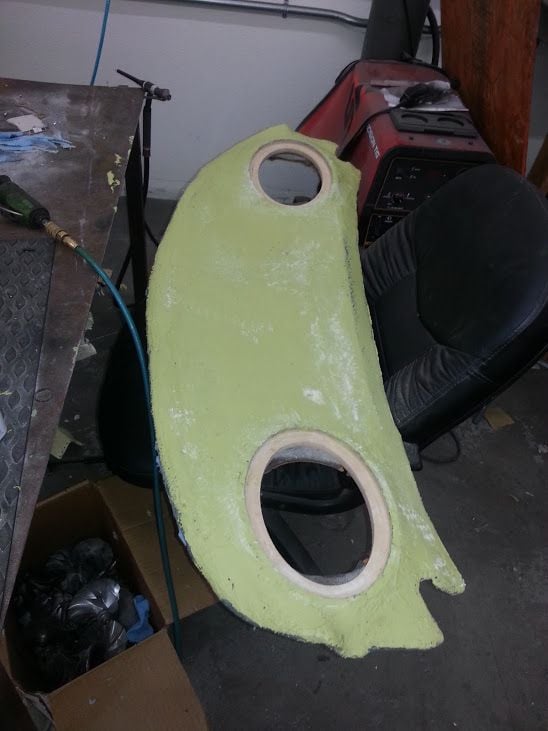
laid a piece of fleece over it and stretched it out nice and taught, then used resin to harden it, added some body filler to smooth it out i didnt know what finish i wanted at this point i guess the body filler and smoothing it out was not really necessary.

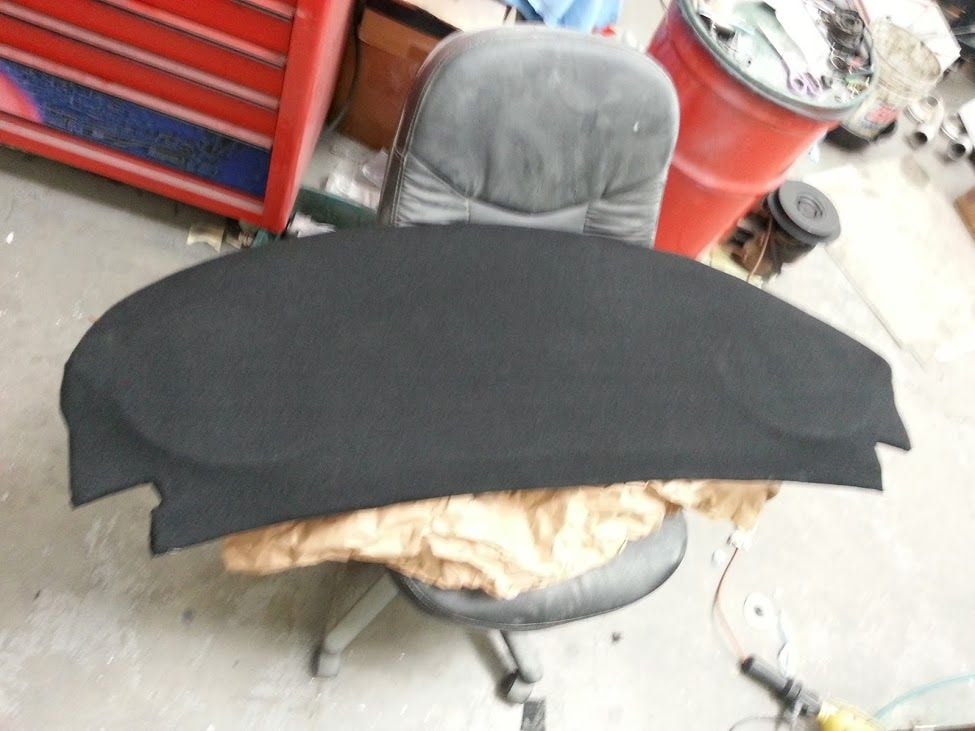
decided to carpet after all

Trending Topics
#10
Intermediate
iTrader: (3)
Have plenty of acetone on hand for cleaning your brushes, rollers and your hands. Wear goggles; you don't want to risk splashing a drop of MEK hardner in your eyes. There isn't much strength in resin, it's all in the glass fibers so don't over-wet your matting. That's what the rollers are for, squeezing out excess resin and air bubbles.
example of roller: http://www.bing.com/images/search?q=...eo0&ajaxhist=0
example of roller: http://www.bing.com/images/search?q=...eo0&ajaxhist=0
#11
Lead Lap
iTrader: (8)
I've only done a couple of fiberglass projects, but I read quite a bit before embarking on it to get the gist of the process, and I can't say I ever saw recommendations for a roller like that. On my first project, I felt like I ended up with way too much resin, resulting in a pretty heavy piece, and was curious how to control that. I'll definitely have to pick up one of those rollers.
#13
Lead Lap
iTrader: (8)
^ I guess I'm not the only one who missed the memo. 
I've just been brushing the resin on, trying to spread it thin that way. Out of curiosity, do you somehow clean the roller between uses or is it considered disposable? The pictures I've seen don't seem to have any replaceable sleeve like on a paint roller. Knowing how messy fiberglass is, I imagine the sleeve would get bonded to the roller, anyway.

I've just been brushing the resin on, trying to spread it thin that way. Out of curiosity, do you somehow clean the roller between uses or is it considered disposable? The pictures I've seen don't seem to have any replaceable sleeve like on a paint roller. Knowing how messy fiberglass is, I imagine the sleeve would get bonded to the roller, anyway.


