When you click on links to various merchants on this site and make a purchase, this can result in this site earning a commission. Affiliate programs and affiliations include, but are not limited to, the eBay Partner Network.
I have the latest firmware on mine and the calibration of the touchscreen is all off. My left control **** only switches controls to the right so I am unable to have it blow out of just the top due to the calibration being off. To shut it off I have to touch somewhere near the bottom left. I was part of the initial group buy so maybe my unit is defective? Short of paying for shipping both ways and being without a climate unit for that time I guess I have to deal with the quirks.
Durrby, I'd recommend contacting Patrick and letting him know what is going on with your unit. He's very good about getting back to his customers and he's conveyed that he's committed to the firmware maintenance and development for them long term.
Just curious, but what problem does this solve? It's not very elegant, and in my opinion, not an aesthetic improvement over the stock controls.
Originally Posted by FSUsucks1
Each one has their own views on what is elegant or aesthetic.
The stock controls are ok for its time but some others like updated looks. And there are other who like the old one.
In the end it comes it all comes down to personal preference
I agree that it is personal preference at the end of the day. The bleeding LCD screens on the factory controllers (actually it's just the face of your controller-- you still use the rest of an original HVAC unit) are their only real flaw and that's easily addressed.
For what it's worth, the benefits I see are a nice updated HVAC control screen which also doubles as a digital gauge display unit for turbo applications. This would be a very simplified version of what R34 or R35 GTR's have in their dash displays. That's my long term reason for getting one.
That way the interior otherwise looks boring and (mostly) stock.
There are also other features coming out for it. Among them are a boost controller function, OBD2 code readout/controller and maybe, possibly some sort of traction control. I'm not holding out for the last one but Patrick owns a RaceLogic TC for one of his vehicles and might... might... go that route in the future as yet another add-on option.
For me, the updated HVAC controls and gauge display are plenty already.
Durrby, I'd recommend contacting Patrick and letting him know what is going on with your unit. He's very good about getting back to his customers and he's conveyed that he's committed to the firmware maintenance and development for them long term.
I spoke to him a while ago and the shipping cost both ways kind of made me not want to even bother. Removing it is no biggie but then dealing without a unit for the turn around time I've just been dealing with it. I mean it technically still works but has it's flaws.
Sorry to hear you are having issues. Sending the unit back and forth is a hassle for sure.
I have kept the stock controller as a back up so not to be without if I have to send mine back again (took the trip once) but that is the risk with such an after market device from a small inventor.
I like the upgraded look. Could the graphics and screen layout be improved? Sure. Are there going to be challenges with reliability? Sure. Goes with the territory.
I've been running my unit since July of 2015 and had no issues but my question is, has anyone hooked up any gauges to this unit?
my intention was to hook all my gauges upto this unit when I boost but haven't seen what this looks like
I don't think many people have hooked up the gauge inputs yet. Patrick mentioned a customer in Australia who had. My plan is to pre-wire my gauges and at least get some of them (non boost related) working when I install the controller.
Here's the only picture I've seen of the gauges, from the LXCC FAQ section of the Popformance website. This looks like it was a shot taken during the R&D phase:
That and the factory LCD dies. The LCD leaks and turns black for some people. Resolves replacing a bad part with one that just hasn't gone bad yet.
It's just the LCD though. That's not so hard to replace and then it's good for another 20 years. I never saw that minor flaw as a big deal. You expect to repair a few common flaws on any classic car.
That said, I'm looking forward to installing my LXCC soon. I still need to pick up a spare OEM HVAC unit for it.
My controller finally came in today! Unfortunately I'm too busy to install it right now. Hopefully very soon. And I still need to pick up a spare OEM climate controller.
Included in this bunch is the new ambient outside temperature sensor that Patrick just revised. I want to get some pre-wiring done for the gauges as well. Have to confer with him on that. He likes Prosport gauges but I've only found a few there for all the functions I'm looking for.
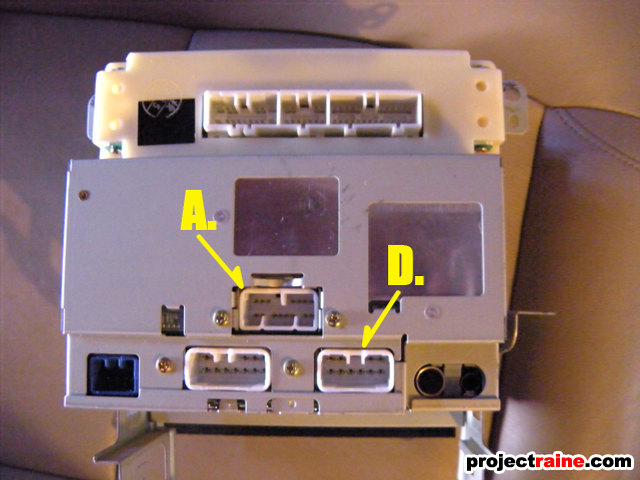
Looking into the wiring connections for the LXCC today and I just want to confirm with everyone that the connections off the OEM stereo body harness are sufficient for this (as labeled in Raine's thread).
In my case I am keeping my OEM Pioneer head unit so I will be figuring out a splice without compromising the connections to the original stereo.
Chassis ground is of course available on the transmission tunnel bolts.
B. MAKE THE MAIN CONNECTIONS (Updated 07.30.12)
All of the main connections below should be universal to whatever aftermarket head unit you are installing, be it CD/Cassette/Digital Media, single-DIN or double-DIN. Make your wire connections clean, I soldered my connections and used shrink tubing to protect the connections (if you do the twist-and-tape method, that’s your choice.)
1. Connect your aftermarket head unit's main harness to the A-Harness as shown below.
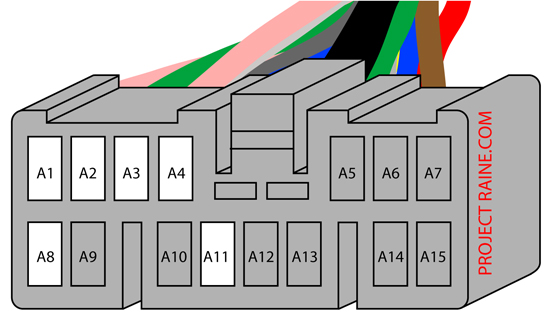
A-Harness
15-pin plug with 14 wires, 7 per row, two rows, as shown below:
A-Harness Wire Color Guide
A1 pink with blue stripe and silver dots
A2 green (thick)
A3 gray
A4 blue with yellow stripe
A5 yellow
A6 blue
A7 red
A8 pink with green stripe
A9 white with green stripe
A10 no wire
A11 brown (thick)
A12 black
A13 green (thin)
A14 white
A15 brown (thin)
Here are the wires in the plug, and what to connect from your aftermarket harness:
A-Harness Connections (pin to aftermarket harness)
A1 - connect to ANTENNA wire (see NOTE 1 below) A2 - connect to DIMMER wire (a.k.a.ILLUMINATION) -- "Headlight Switched"? -- LXCC A3 - connect to ACC wire (12v+ switched) -- LXCC
A3 - OPTIONAL connect to 18ga single wire (see NOTE 2 below) A4 – connect to POWER/BATTERY wire (12v+ constant a.k.a. memory) -- LXCC
A8 - connect to ANTENNA wire (see NOTE 1 below)
A11 - connect to GROUND wire (-) (see NOTE 3 below)
For the gauge inputs he recommends between 22 gauge and 26 gauge wire. He states that the screw terminals will not accept anything larger than a 16 gauge wire.
Regarding Prosport 0-5V gauge sensors, when I showed him some selections for each of my preferred gauge types on their website he asked me to hold off since apparently their inventory (as listed on their website) has changed since he first began using them. He is looking into what their situation is and alternative gauge senders to recommend, possibly including AEM. He might design a few of his own 0-5V sensors as well.
I'm going to pre-wire all eight inputs from my stereo to the engine bay with multiple colors. I'm going to use the same firewall access point I used for my 97+ fog light switch DIY for 92-94 SC's:
Wanted to share this. I prefer my OEM Pioneer head unit and did not want to hack up the original wiring harness into the stereo. So I took a Metra aftermarket headunit harness (the one Raine warns us not to use) and a Metra *repair* harness and fused the connections together to create a patch harness. I tapped into the appropriate wires, soldered and used heat shrink insulation on them.
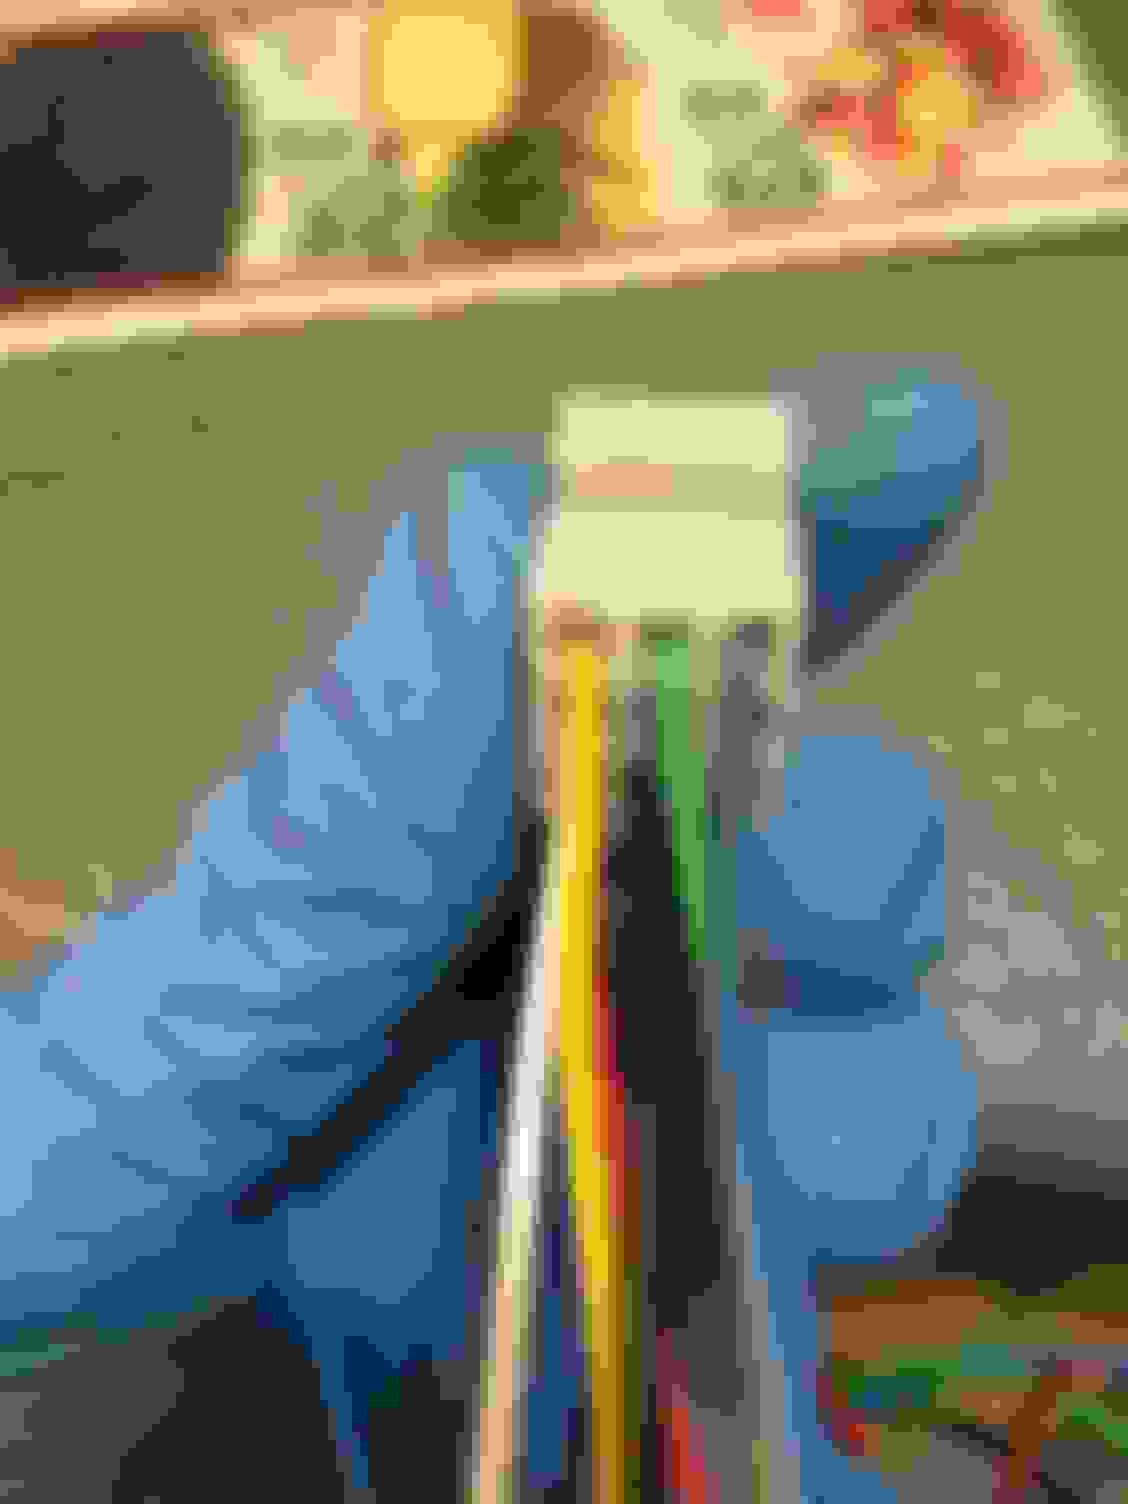
Then I took the LXCC harness and soldered the ends onto a quick disconnect Molex along with a separate ground wire.
It's not quite finished. On the OEM Pioneer side I have no way to connect Pin A11 (diagram lists this above from Raine's thread). I'm trying to determine if it is the factory ground FROM my stereo. If so, I can loop that wire into the LXCC Ground wire. If not, I need to source another connector to get a spare terminal and lead since these are so specific to Toyota/Lexus.
Here's my progress and where I am at so far. It's nearly complete but I won't install until I figure out Pin A11 for the Pioneer.
Next, I will use the 9-pin Molex pictured to create a multi-color-wire quick disconnect for the LXCC gauge inputs. The major length of that bundle in 22ga will feed through the fender well into the same location I have my fog lamp harness switch routed. I'm using Weather Pack universal connectors to eventually feed out to all the gauge inputs in the engine bay.
From Raine's thread and even from the little guide Metra included with their patch harness it seemed clear enough to me that Pin A11 probably is just a ground wire connection.
With that, I fused the A11 connection from the Pioneer OEM deck to the ground wire for the LXCC's harness and routed both into a main chassis ground wire (soldered and heat shrink wrapped again). I'll give it a go and see if my work has paid off. I'm pleased with thevclean harness.
I might use some 3M Super33 self-adhesive tape on it or I might leave it as is.
I'm still waiting on the additional wire spools and connectors to come in for the gauge pre-wire harness to be made. I located a spool of gray 25ft and violet 25ft both in 24ga off Amazon. So I think I'm set with a unique color for each input now, including the teal blue wind of 22ga that Patrick sent me with the LXCC outside temp sensor.
*Please note: the wire colors won't be precisely the same even from one Metra harness to the other. I followed Raine's pin guide and carefully matched each wire one at a time while paying close attention to the orientation of the male and female plugs.
Well, in short I got VERY close and the LXCC works! I even prewired the gauges after all. Unfortunately that damned Pin A11 did NOT respond to being wired into the LXCC's ground (I have now separated them in the custom patch harness). It also did not work as a direct chassis ground. Signal noise on all stereo channels. Not terrible but not what I'd hoped for.
Another Metra harness is on the way (the cheaper one with male spade terminals). When that comes in I will be able to cannibalize a single electrode and complete the patch harness with the A11 ground going back into the SC body harness like the factory connection did.
Thankfully, the controller works until I get that fixed.
Well, I give up. I made a good harness, double checked every wire, rerouted the one pin correctly, tested the harness without the LXCC installed and it worked with no ground noise.
Now once I got the LXCC plugged and bolted everything back together.... bad ground noise again. But this time only when the factory stereo is on.
The LXCC is using a chassis ground. The OEM stereo has a little yellow wire on the left side that is its secondary ground. I guess the feedback must be coming from there.
I'm just about over it though. I may shelve this for later if there is no way to fix the noise. I'd like to enjoy it but after a lot of trouble I can't seem to get past stage 1.
Everyone else using one of these hasn't had this issue but I guess I am the only one using it with a stock stereo head unit.
Edit: I used a factory Toyota repair pin to complete the A11 connection: 82998–12410 "Toyota Non-Waterproof Spade". This, however, will only work if you have an older style Metra harness that uses factory Toyota spades. I bought mine in 2012. If trying this with more current versions of this Metra SC300/400 "aftermarket stereo" harness, you need to buy two of them and steal a pin from one.
Last edited by KahnBB6; 07-25-17 at 03:00 AM.
Reason: Grammatical Correction
 01-16-16, 11:39 PM