
Suprus's 1JZ swap thread

 08-06-11, 07:29 PM
#17
Driver
iTrader: (2)
Join Date: Sep 2010
Location: AZ
Posts: 135
Likes: 0
Received 0 Likes
on
0 Posts
Pretty cool to see a guy locally doing a 1J  Im seriosuly thinking about going 1J also but I feel like I need a break (bank acc.) since I recently built a 7m for my old MK3. If ya need a hand LMK and get a chance to meet some local Lexus people.
Im seriosuly thinking about going 1J also but I feel like I need a break (bank acc.) since I recently built a 7m for my old MK3. If ya need a hand LMK and get a chance to meet some local Lexus people.
08-08-11, 12:53 AM
#18
Driver
Thread Starter
Join Date: Sep 2009
Location: arizona
Posts: 121
Likes: 0
Received 0 Likes
on
0 Posts
Hey everyone,
How was everyone's weekend??
Mine was pretty decent went out, got drunk, and did some work on the car. Cant complain.
Anyway I was able to cross off a few more thing with the motor but at the same time I had to add a few. I feel thats how it constantly is, I always take one step forward and then two steps back.
Big thanks to Arbalist he's a cool dude and came over for a while on Saturday and he took a look at everything and we kinda bounced some ideas off eachother. But this is where I stand right now:
I have the turbos and all accessories taken off as well as the crank pulley, timing belt, hydro fan water pump, and tensioners and stuff. I changed the front main seal and also took off both the old motor mounts. The turbos seem to be ehh ok, they have a little shaft play but I think they will be good enough until I can save up for a single.
I still need to extend the wiring. I read that you only have to extend the body plugs and not the ecu plugs is that correct? It seems like a stretch for the ecu plugs to be able to make it back behing the glovebox or wherevever the ecu is (still havent pulled that apart yet).
Ive been kinda wondering how far I should take it with replacing old seals and stuff you know? I want the motor in but at the same time I feel obligated to change as much stuff as possible while its out of the car and easily accessible. I know thats the right way to do it, but im also kinda worried to tear into it too far because ive never done this before and its already easy to get unorganized and forget how it goes back together. I would love to do headstuds and headgasket and also all the cam seals and vavle cover gaskets and stuff but if it doesnt run right or even start when I finally do drop it in my troubleshooting list is going to be that much more extensive. So here's what my next plans are and you guys tell me if you think I should take it farther or not:
1. Replace valve cover gasket
2. Replace crank pulley and harmonic balancer. (Im debating aftermarket or stock I still have some researching to do).
3. Replace rear main
4. Replace all the turbo lines and pipes and stuff.
5 Maybe sand blast all the turbo pipes and valve cover while they are off for gasket changes.
6. Im also thinking I should rebuild the tranny with all Marlin Crawler parts while its out of the car as well.
7. Im thinking going act extreme for clutch and pressure plate. Maybe a little overkill for now but at least I wont worry about it holding later on when I have more power.
Thats all I can really think of for now. For you guys that have done the swap or dealt with a 1j before let me know what you think. Are there any things you wished you had done that you didnt when the motor was out? I am willing to put up the extra money and delay the swap until I have everything to do this the right way.
I took a crap load of pictures over the weekend I just have to get another camera chord. I keep forgetting but I promise I will get one tomorrow. I know how much everyone on this forum likes pics
08-08-11, 01:03 AM
#20

maybe lost them when you where drunk? haha, just kiddin, i know how darn frustrating that can be, hope you find them man good luck with your build and dont worry about the searching trolls. haters gon' hate. but im subscribed to this, cant wait to see some progress!
haha, just kiddin, i know how darn frustrating that can be, hope you find them man good luck with your build and dont worry about the searching trolls. haters gon' hate. but im subscribed to this, cant wait to see some progress!
08-08-11, 07:29 AM
#21
Lexus Champion
If you only extend the body plugs your ECU will sit above the "natural" position as the wires won't be long enough. Some people are OK with this, others are not. It's truly up to you to decide what your opinion is. People have been running with both solutions successfully.
When you extend your wiring harness make sure not to cut all of the wires in one spot as it will create a large bulge that may inhibit it from going through the firewall easily. Also remember to use shielded wires for the knock & cam sensors
When you extend your wiring harness make sure not to cut all of the wires in one spot as it will create a large bulge that may inhibit it from going through the firewall easily. Also remember to use shielded wires for the knock & cam sensors
08-08-11, 09:15 AM
#22
Driver School Candidate

Join Date: May 2010
Location: AZ
Posts: 16
Likes: 0
Received 0 Likes
on
0 Posts
Sorry about yesterday I got tied up running a bunch of errands so i wasnt able to make it over 
As for the keys, head over to a lexus dealership with your title or registration, and they should be able to cut you a key based on your vin.
Worst case scenario you could always do this: http://www.advancedkeys.com/Prod_AK103B.html. (because i havent given you enough extra things to spend money on)
12-12-11, 11:47 PM
#23
Driver
Thread Starter
Join Date: Sep 2009
Location: arizona
Posts: 121
Likes: 0
Received 0 Likes
on
0 Posts
Hey Everyone,
So wow it has been a long time since I have been on the site or done any updates or anything or even worked on the car for that matter, the project kinda took a back seat for a short amount of time there to some other priorities. But the good news is:
1. I am finally graduating from ASU with a bachelor's degree this coming Thursday after a solid 4 1/2 year run.
2.I am extremely blessed and fortunate to have landed a great paying job that I dont mind doing every day only a short week after graduating.
So basically this means the project is going to be getting a violent shove towards completion.
Now, I have a bunch of pictures that I have yet to post so let me bring you up to date.
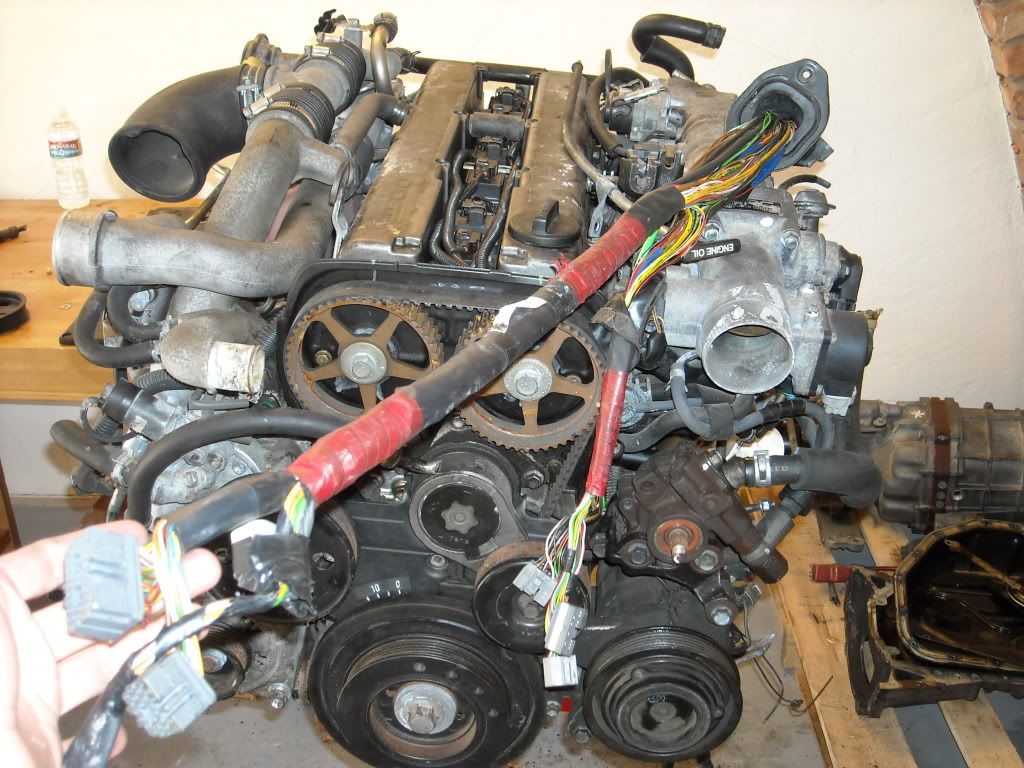
A while back I ordered a complete 1jz-gte with r154 tranny from Jhot i believe. It was okay condition, pretty typical of what I have read about most other peoples experiences.
Here it is, pretty much the way I bought it except for the replaced coil plug connectors. They were pretty dry rotted and would crumble to the touch. I used the ones from drift motion that come with the pigtails and just soldered them on to the old wires.
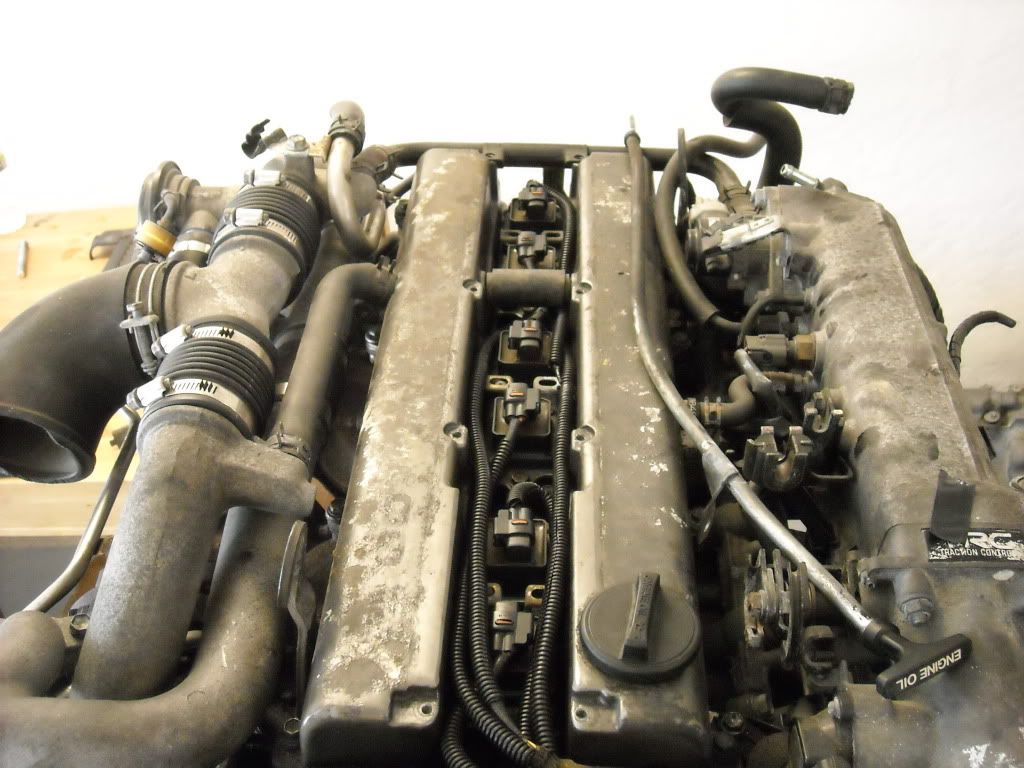
Wiring harness seems to be in pretty decent condition..
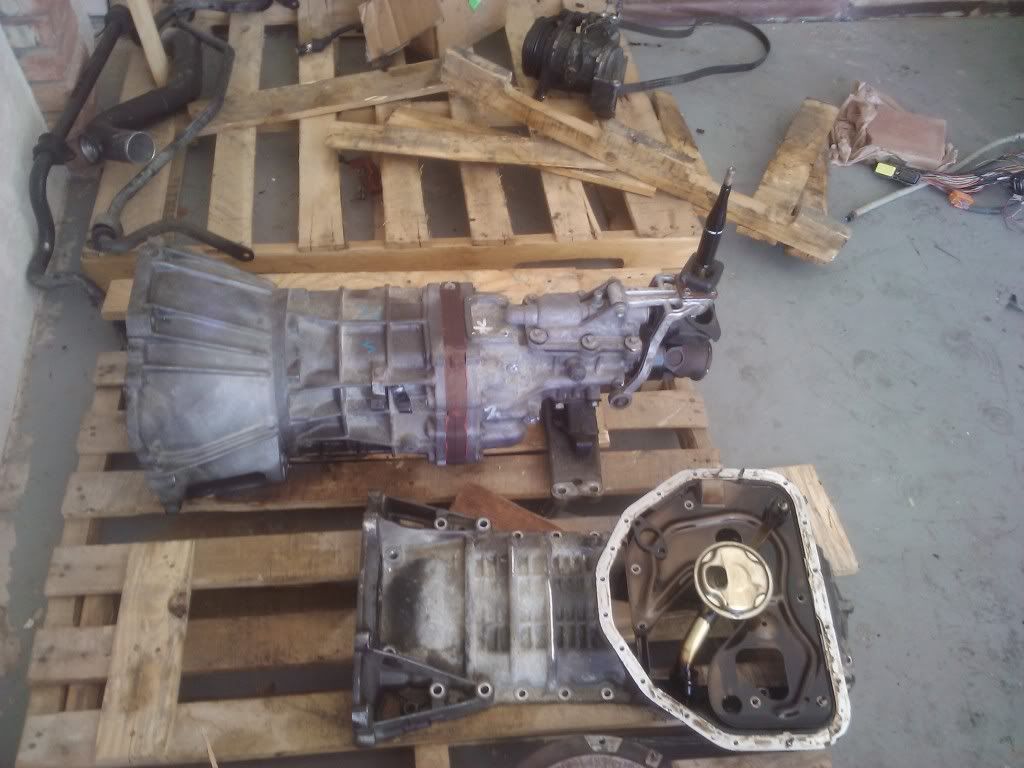
So next I pulled of the front sump oil pan that came with it to check out the internals and see how everything is looking and prepare the rear sump oil pan for installation.
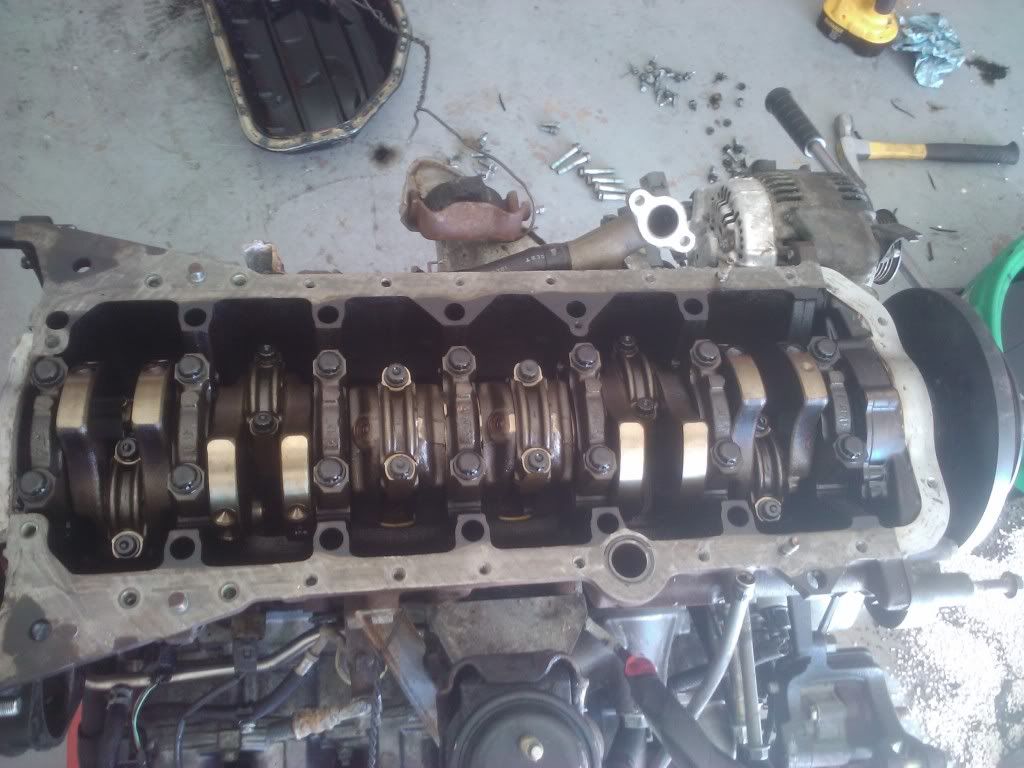
Front sump and the r-154
Then I threw on the rear sump and sealer her back up with the fipg black. I know its not the prettiest but for my first time I think it will get the job done.

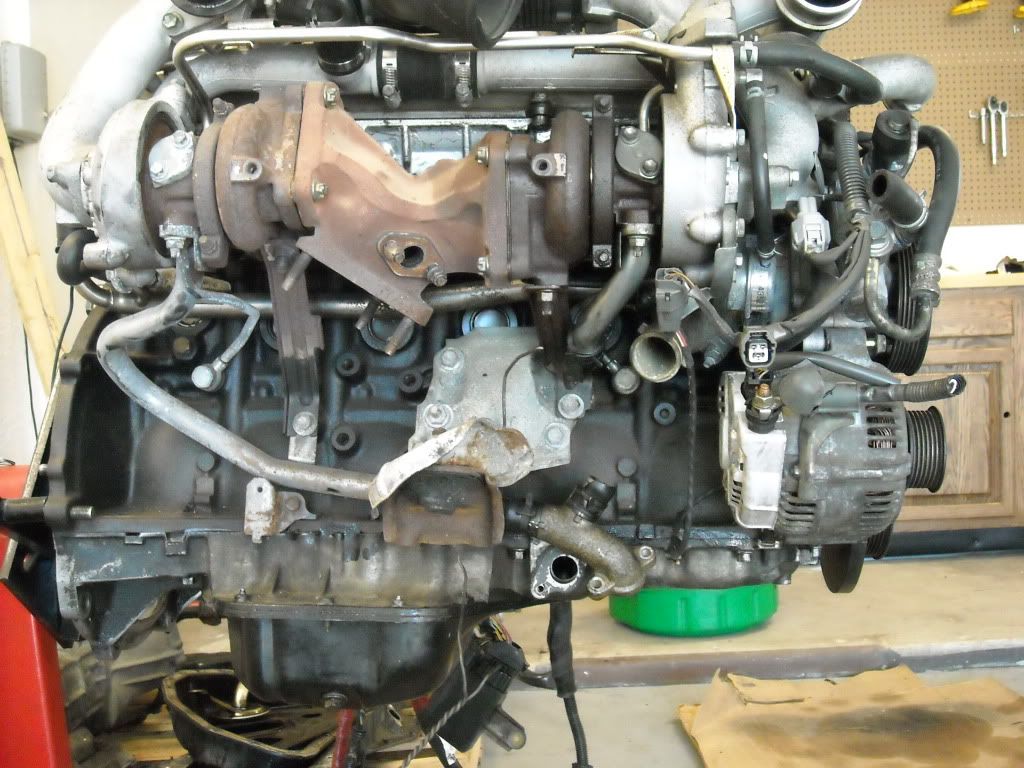
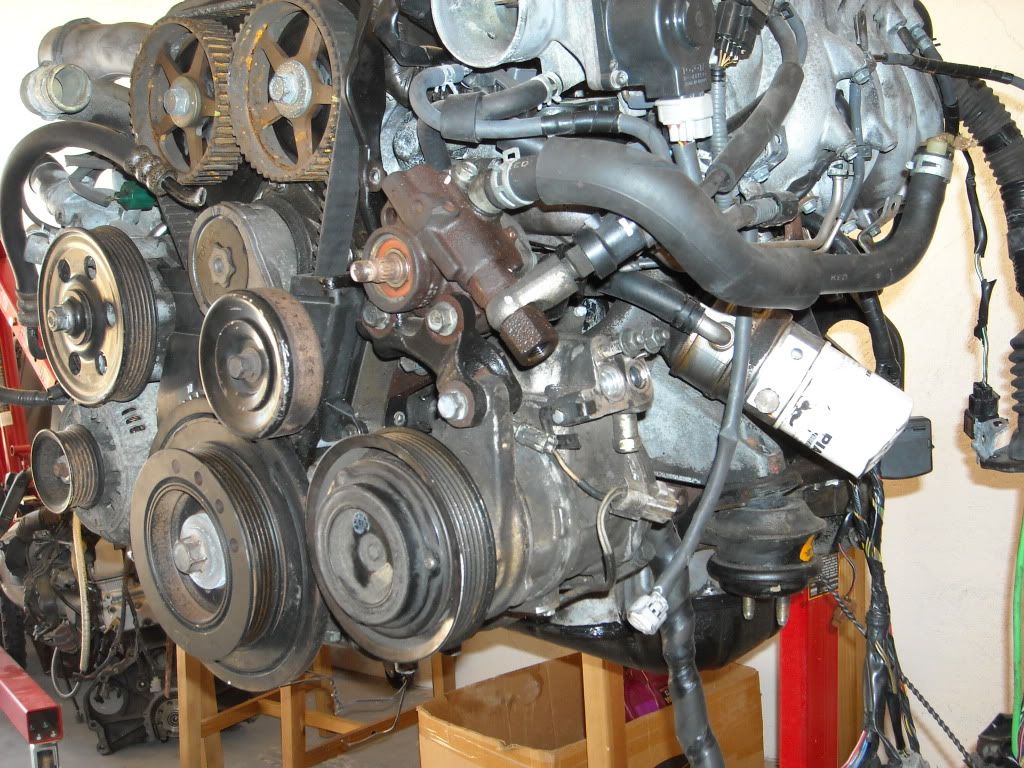
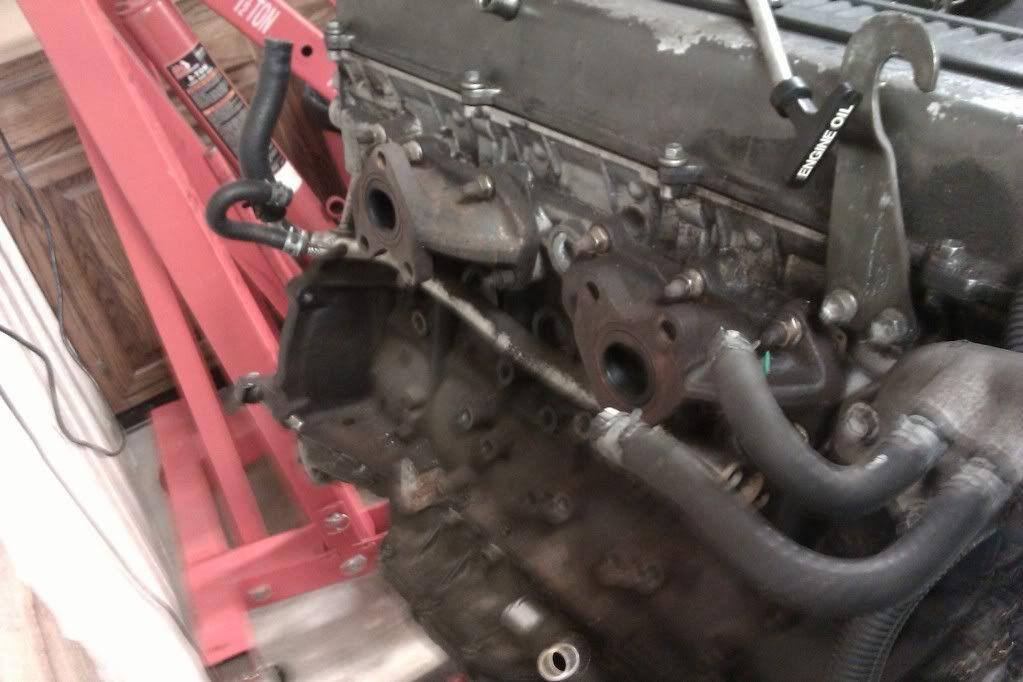
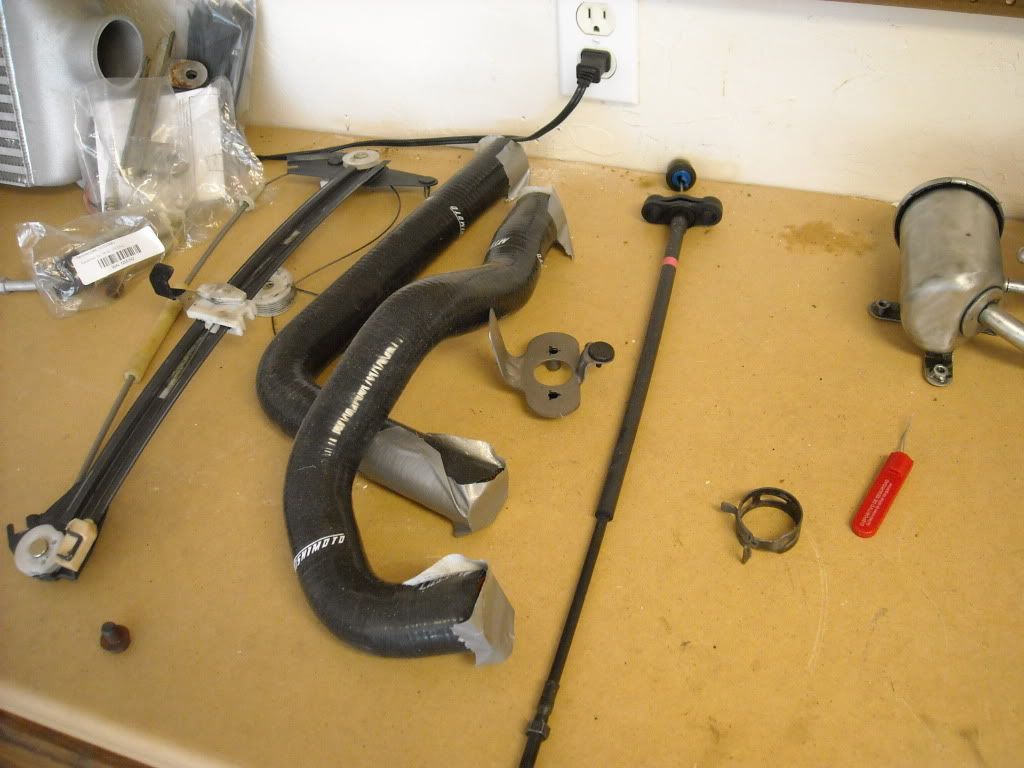
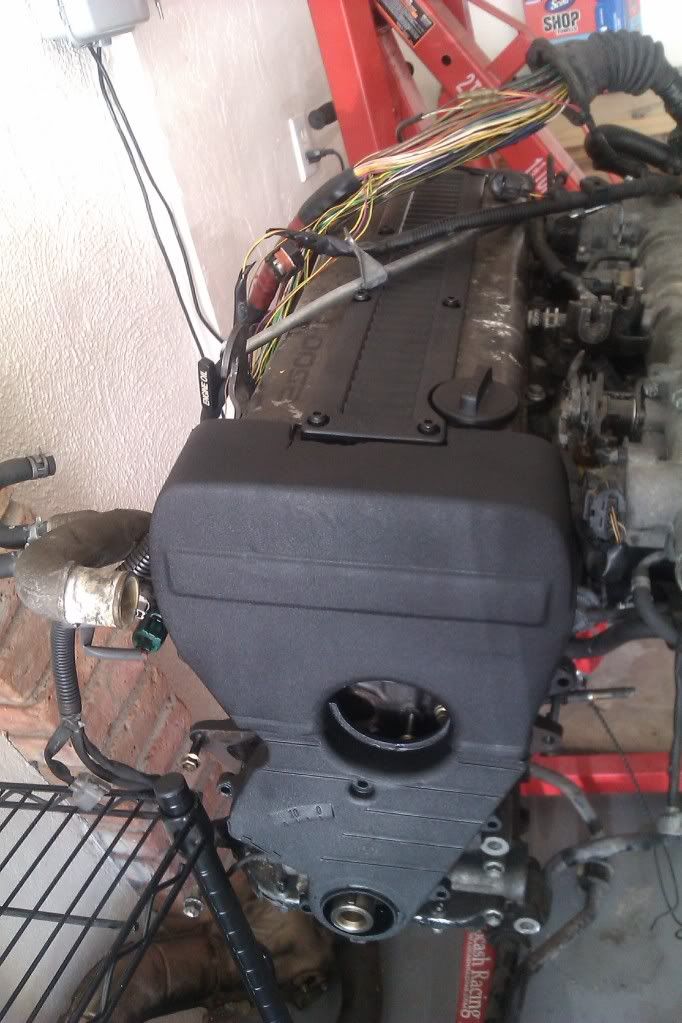
Next, with a big help from Arbalist, we pulled off all the accessories, turbos and lines, harmonic balancer, timing belt, hydro water pump, front main seal, and tensioners for replacement.
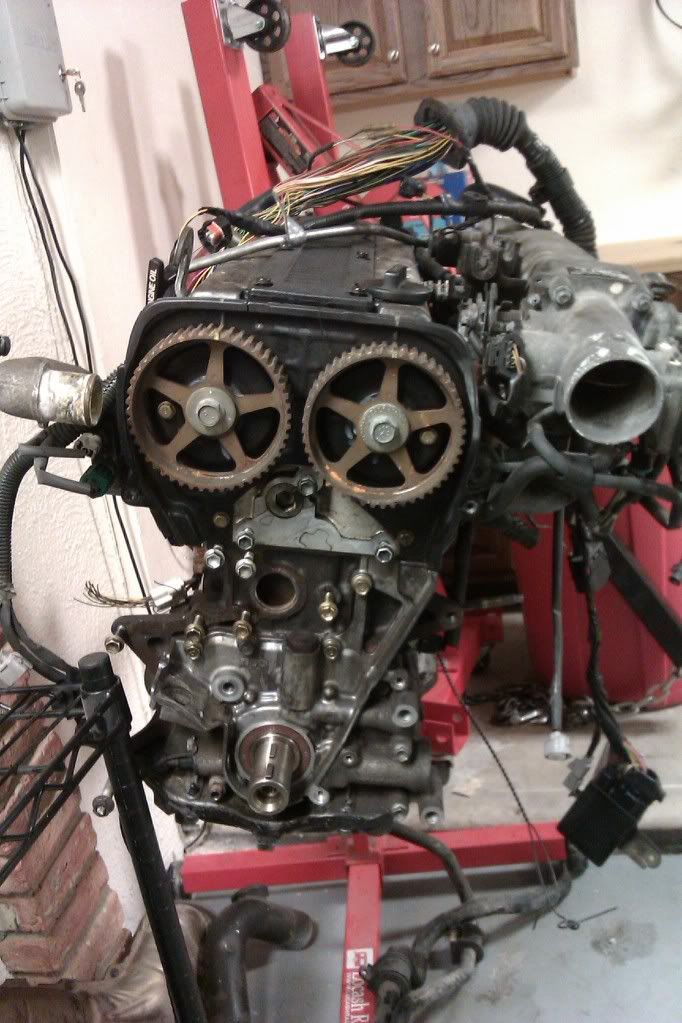
Yes I know she's grimey
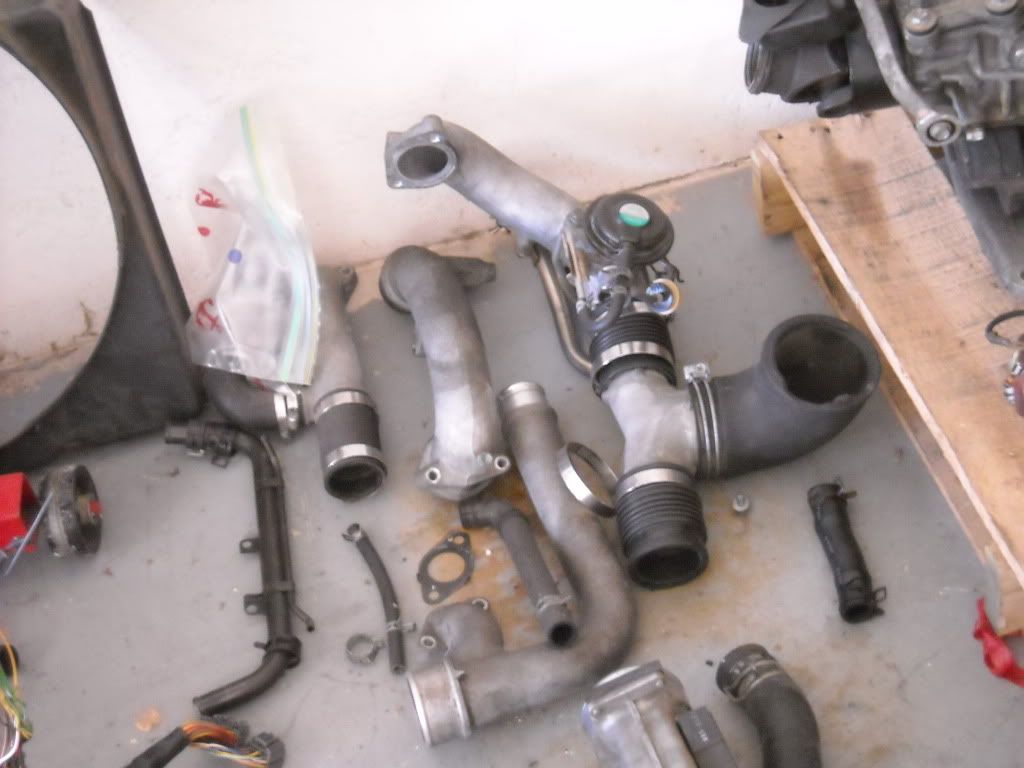
Here's everything in a nice unorganized pile
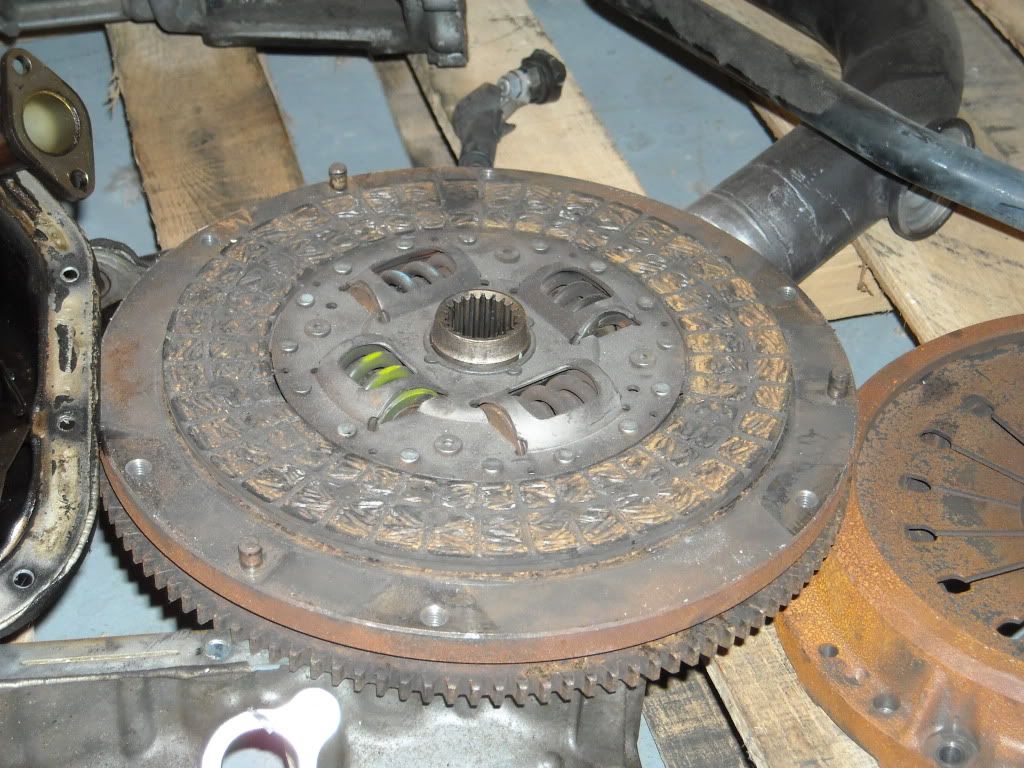
Somewhat worn r154 clutch, I was thinking just going act 6puck sprung or something like that..
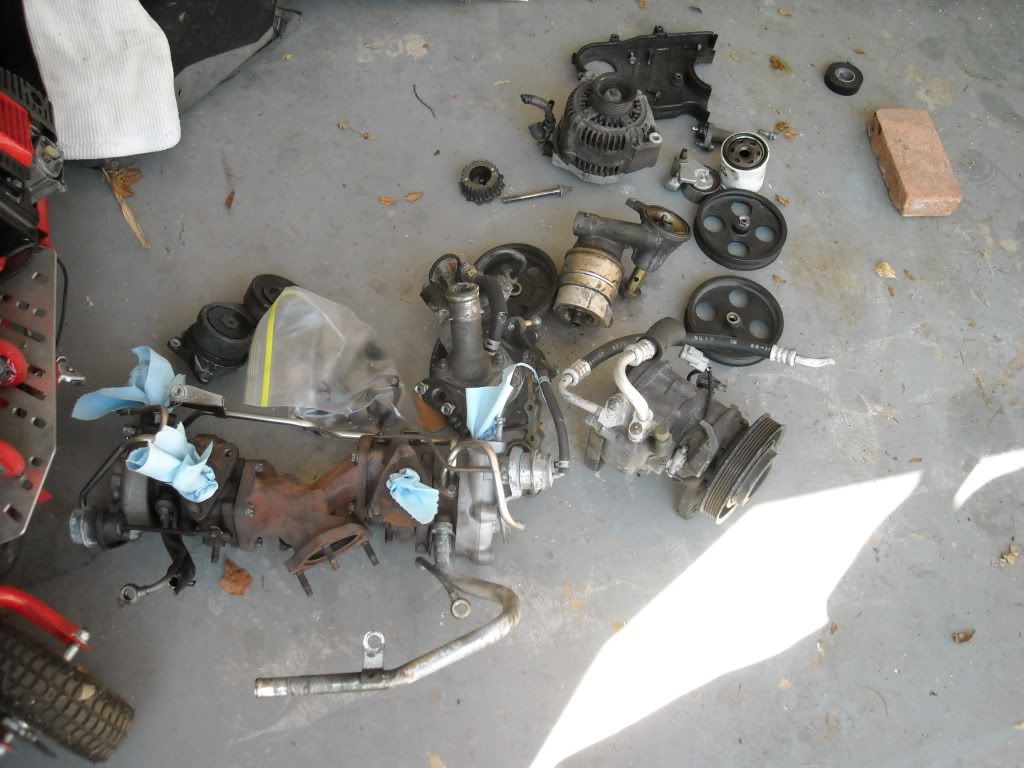
Some parts ive aquired
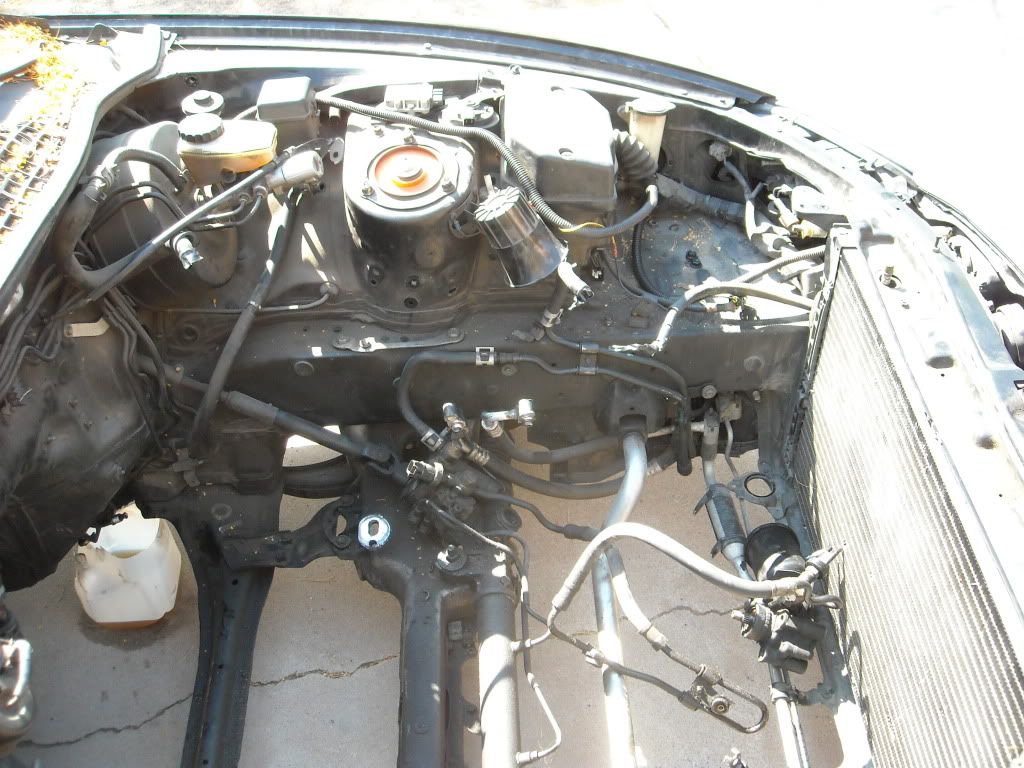
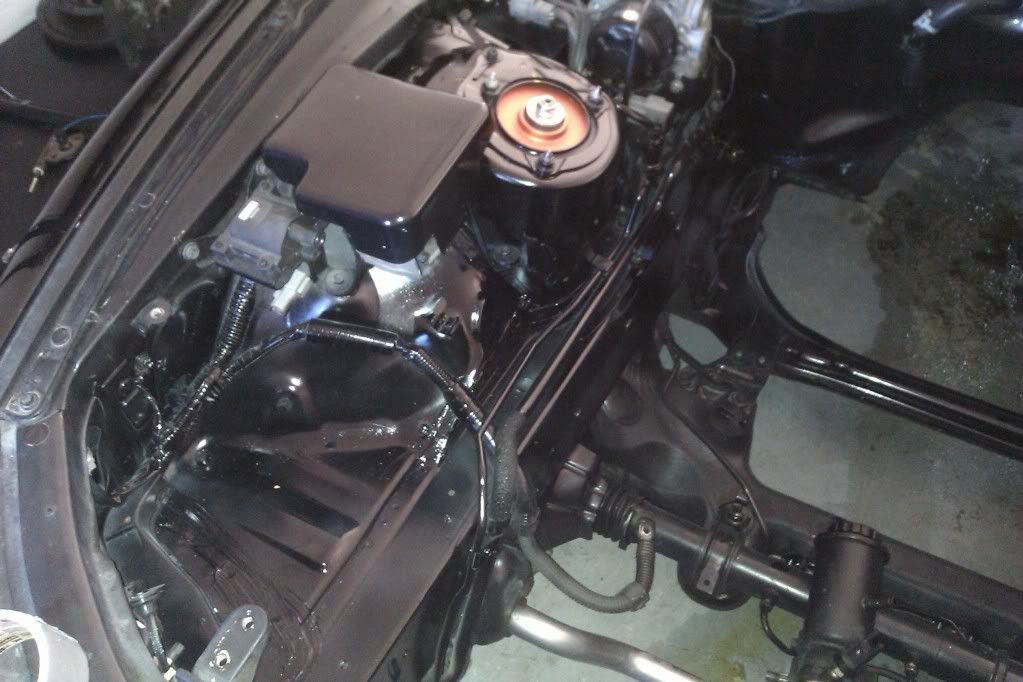
Okay so finally the day came where I decided to yank the old tired 2jz and w58 out of her. Again, another huge hand by Arbalist and a few other friends made it possible. Took a few hours but finally she slid out.
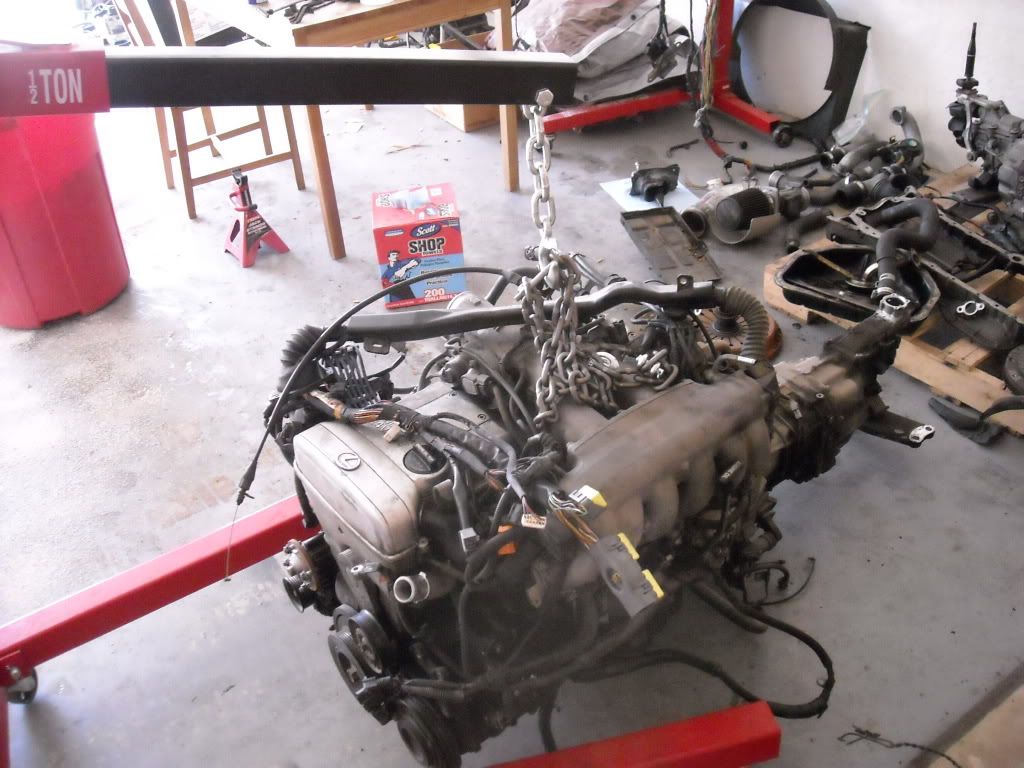
Super super grimey.
Almost 20 years of grime was caked on to every inch of the engine bay.
Before:

So wow it has been a long time since I have been on the site or done any updates or anything or even worked on the car for that matter, the project kinda took a back seat for a short amount of time there to some other priorities. But the good news is:
1. I am finally graduating from ASU with a bachelor's degree this coming Thursday after a solid 4 1/2 year run.
2.I am extremely blessed and fortunate to have landed a great paying job that I dont mind doing every day only a short week after graduating.
So basically this means the project is going to be getting a violent shove towards completion.
Now, I have a bunch of pictures that I have yet to post so let me bring you up to date.
A while back I ordered a complete 1jz-gte with r154 tranny from Jhot i believe. It was okay condition, pretty typical of what I have read about most other peoples experiences.
Here it is, pretty much the way I bought it except for the replaced coil plug connectors. They were pretty dry rotted and would crumble to the touch. I used the ones from drift motion that come with the pigtails and just soldered them on to the old wires.
Wiring harness seems to be in pretty decent condition..
So next I pulled of the front sump oil pan that came with it to check out the internals and see how everything is looking and prepare the rear sump oil pan for installation.
Front sump and the r-154
Then I threw on the rear sump and sealer her back up with the fipg black. I know its not the prettiest but for my first time I think it will get the job done.
Next, with a big help from Arbalist, we pulled off all the accessories, turbos and lines, harmonic balancer, timing belt, hydro water pump, front main seal, and tensioners for replacement.
Yes I know she's grimey
Here's everything in a nice unorganized pile
Somewhat worn r154 clutch, I was thinking just going act 6puck sprung or something like that..
Some parts ive aquired
Okay so finally the day came where I decided to yank the old tired 2jz and w58 out of her. Again, another huge hand by Arbalist and a few other friends made it possible. Took a few hours but finally she slid out.
Super super grimey.
Almost 20 years of grime was caked on to every inch of the engine bay.
Before:
12-13-11, 12:16 AM
#24
Driver
Thread Starter
Join Date: Sep 2009
Location: arizona
Posts: 121
Likes: 0
Received 0 Likes
on
0 Posts
Several cans of engine degreaser and some serious scrub time later:
After:

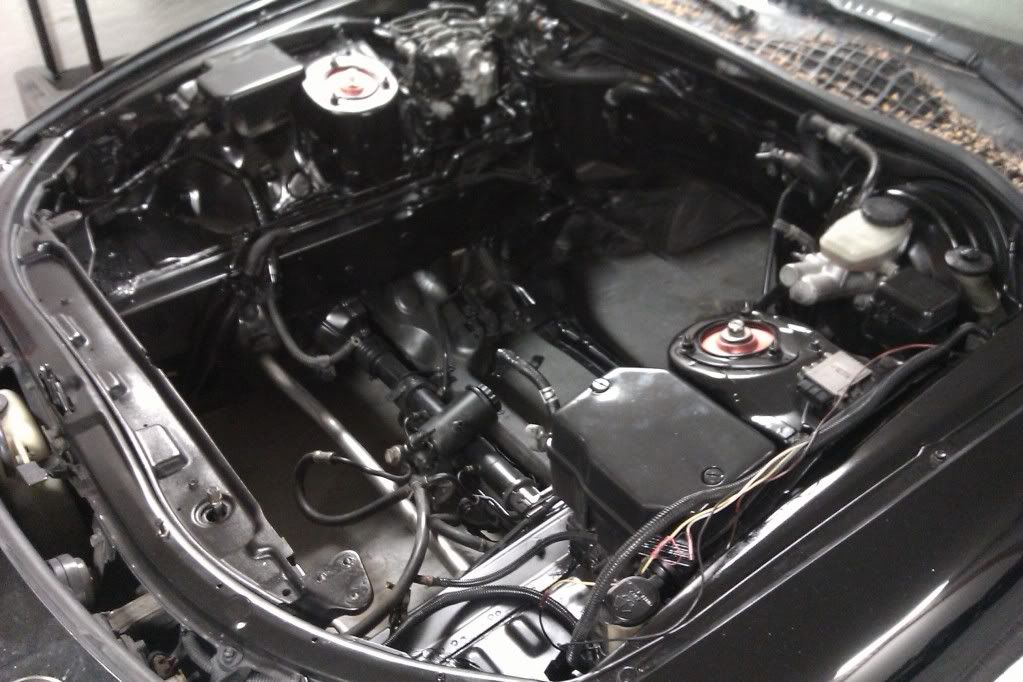
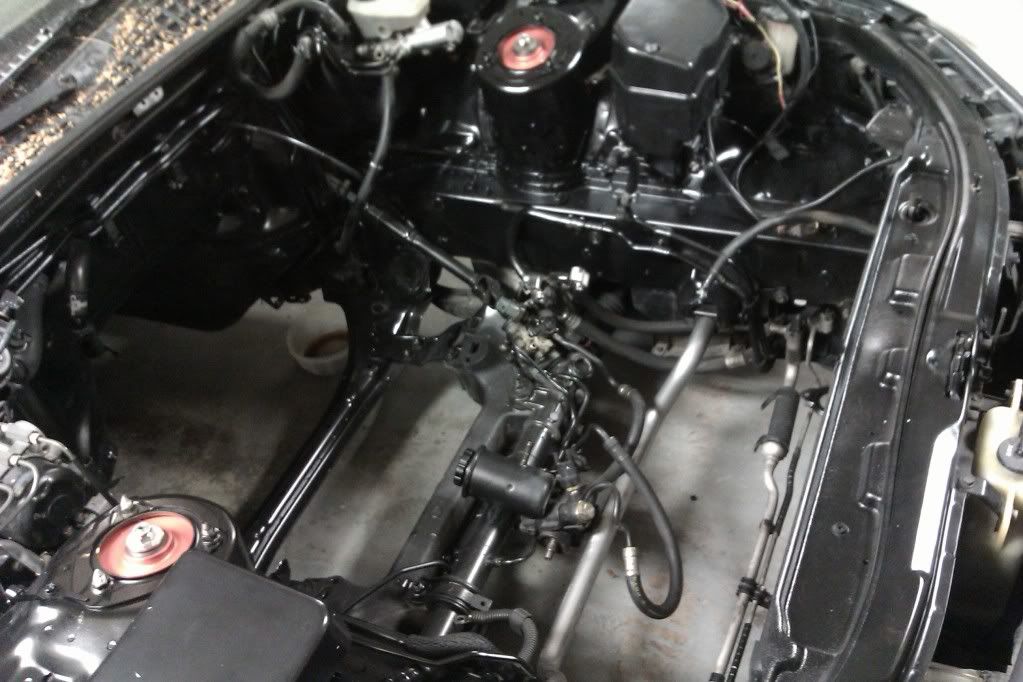
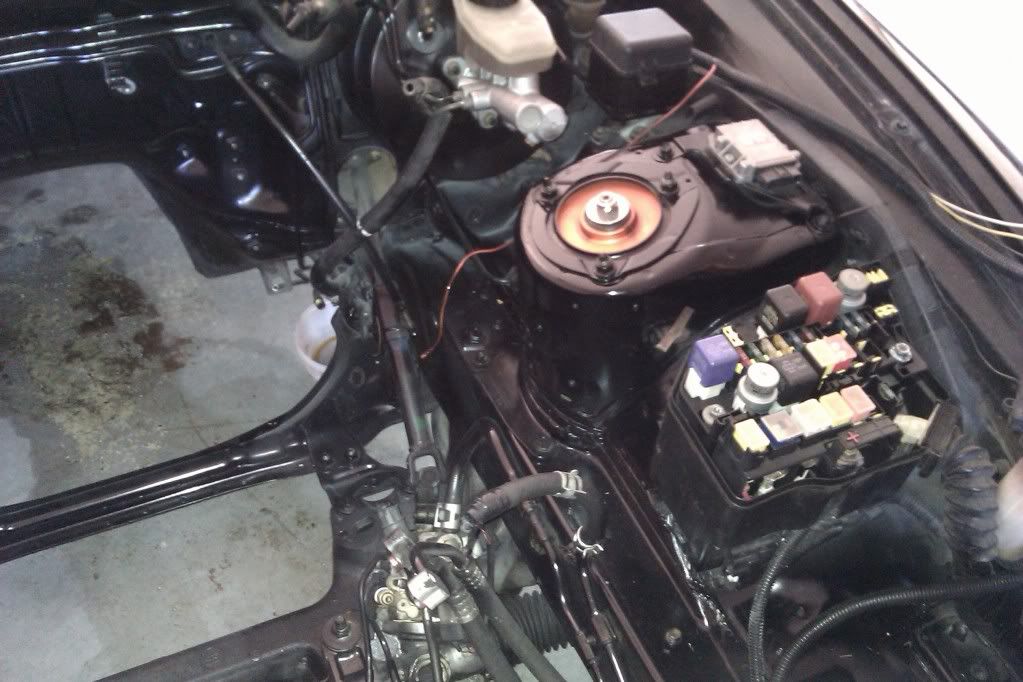
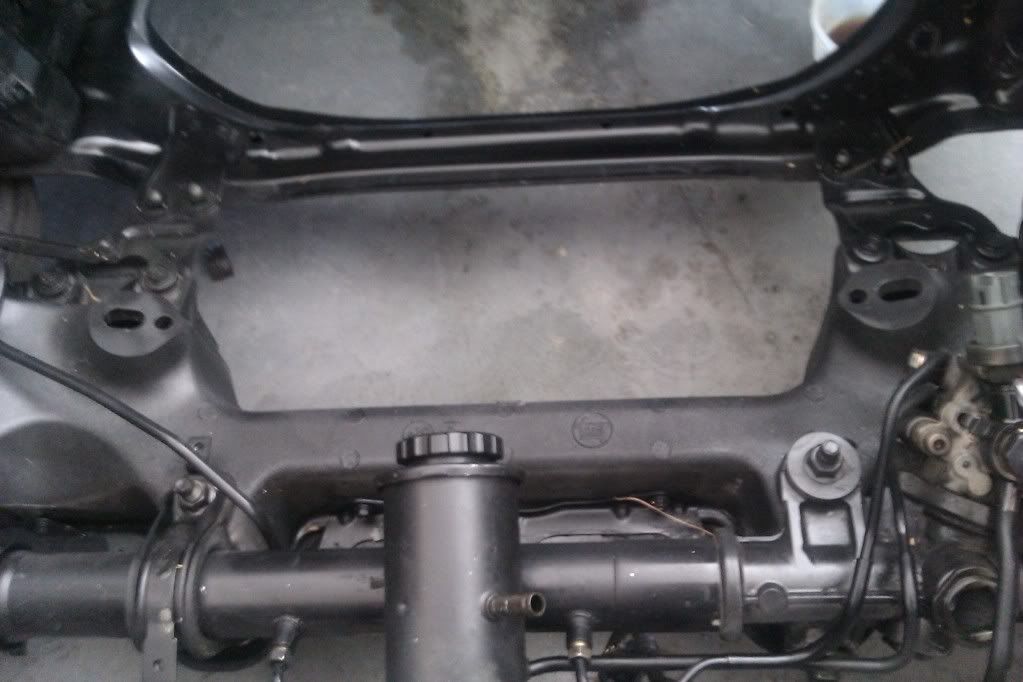

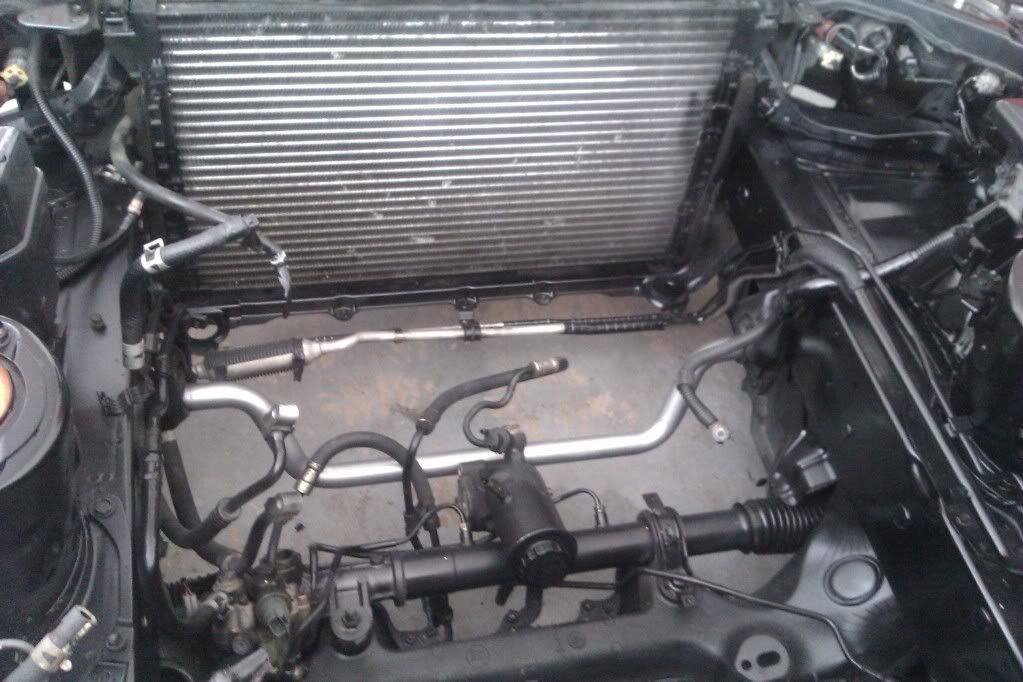
It still blows me away of how big a difference the before and after pictures are. So thats about how she sits right now. I have been out of money so I havent been able to get a new water pump or tensioners or valve cover gasket in order to start putting the engine back together. But like I said in the other message I'm starting my new job next week so those parts should start rolling back in. In the mean time I have been experimenting with a few different things and paints until I decide exactly what direction I want to go as far as aesthetics go.
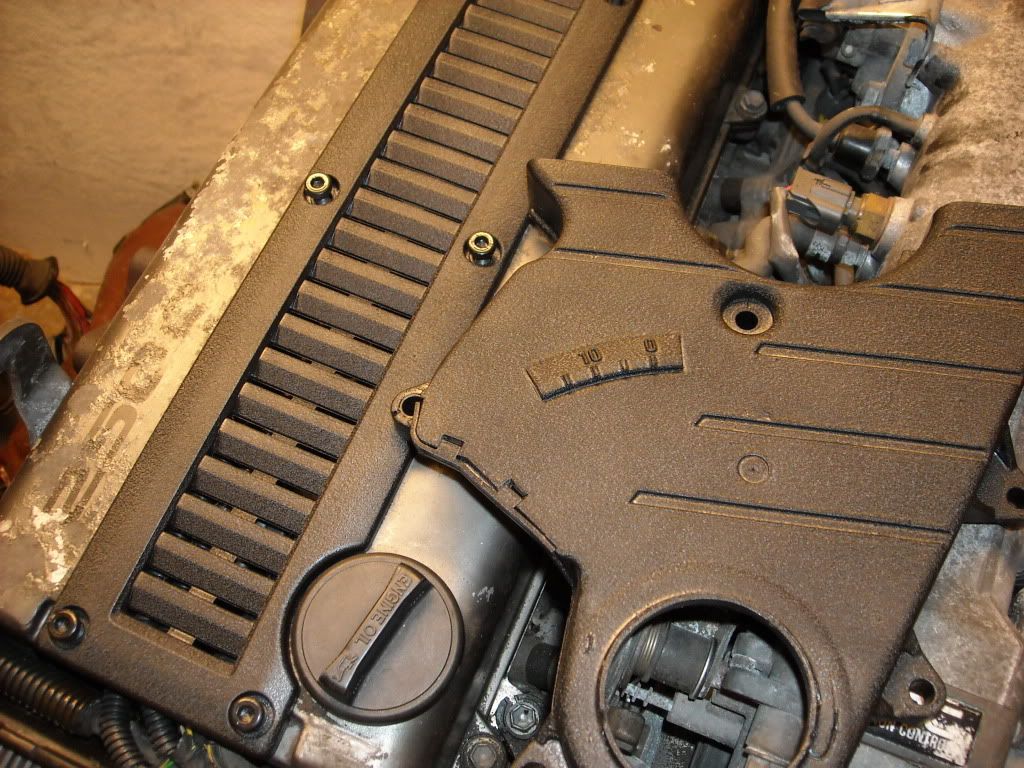
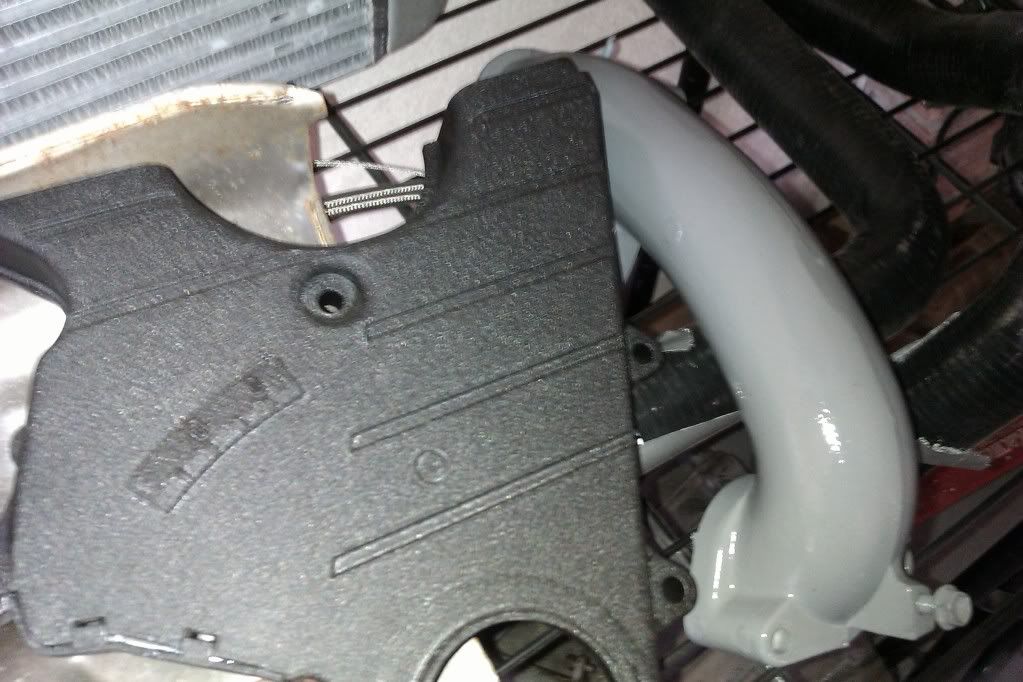
Here is my trial run of the VHT wrinkle plus paint that I think I am going to use for the engine covers ( Timing belt cover, spark plug cover, and cam gear cover) I think it will look rad once its all done but let me know what you guys think.
And this is my experimentation with the turbo piping. I was kind of wanting a more charcoal or gunmetal grey for all of the turbo piping for the twins as well as the valve covers, but here is what a lighter grey looks like on the tubes. Light gloss.
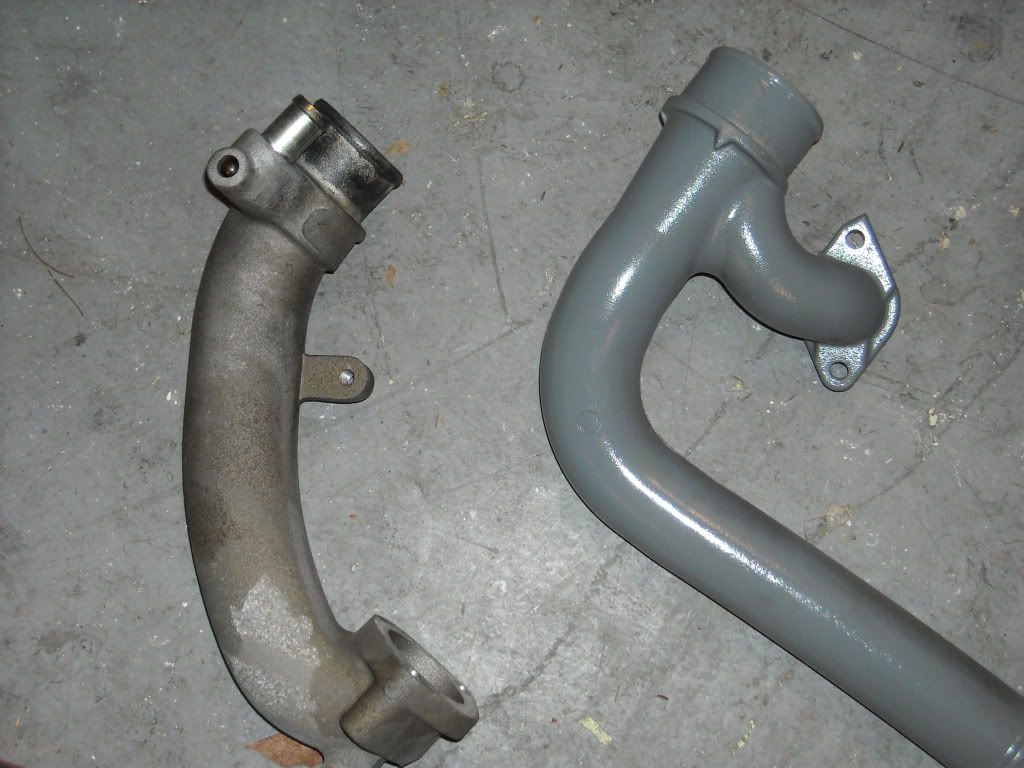
And here is one with a gloss clear coat:
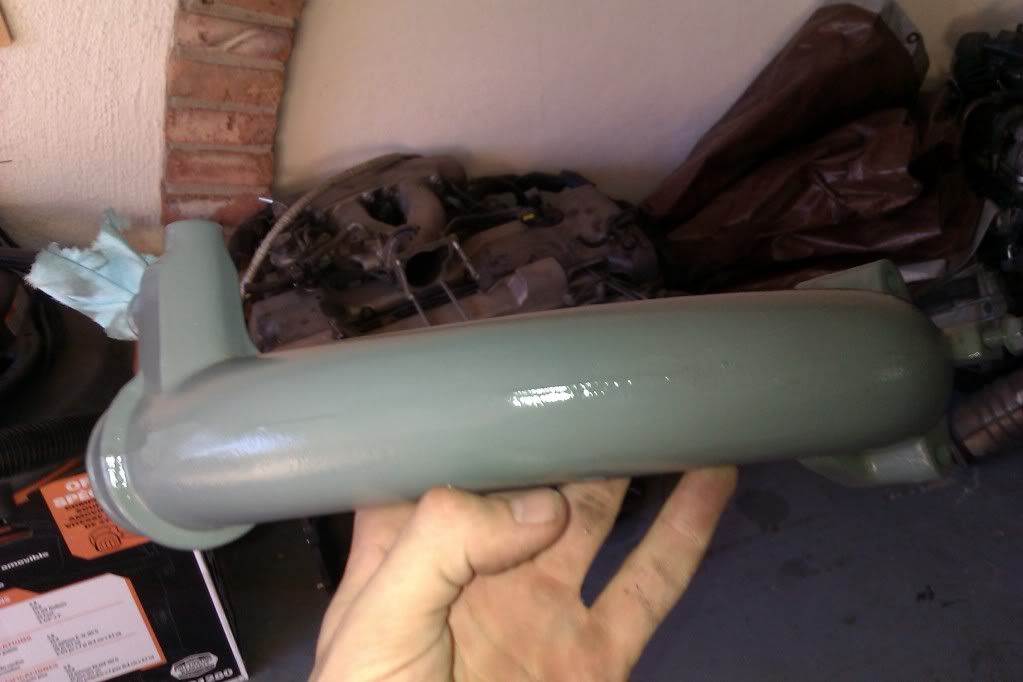
I think it will look okay, its just not quite the look I am looking for. If anyone knows of a Charcoal or gunmetal grey High temp paint let me know where to find it so I can try it out.
Also here is another little sneak peak of a side project I have been messing around with. This took a lot of time of masking and wet sanding and it still needs to be buffed and polished to a nice mirror shine but you get the idea of how it will look on the car. I think it will look even sicker once the car is done and low and squating on my rims and suspension. Mmm mmm mmm.

This is how she used to sit

This is my influence, so what if its a 240

Alright well thats all I got for now so let me know what yall think and I will post again as soon as something happens, hopefully it wont be months again. And also I know a lot of the pictures arent pro quality or anything, most of them were taken with my phone with greasy *** hands so I know some are out of focus so go easy!
After:
It still blows me away of how big a difference the before and after pictures are. So thats about how she sits right now. I have been out of money so I havent been able to get a new water pump or tensioners or valve cover gasket in order to start putting the engine back together. But like I said in the other message I'm starting my new job next week so those parts should start rolling back in. In the mean time I have been experimenting with a few different things and paints until I decide exactly what direction I want to go as far as aesthetics go.
Here is my trial run of the VHT wrinkle plus paint that I think I am going to use for the engine covers ( Timing belt cover, spark plug cover, and cam gear cover) I think it will look rad once its all done but let me know what you guys think.
And this is my experimentation with the turbo piping. I was kind of wanting a more charcoal or gunmetal grey for all of the turbo piping for the twins as well as the valve covers, but here is what a lighter grey looks like on the tubes. Light gloss.
And here is one with a gloss clear coat:
I think it will look okay, its just not quite the look I am looking for. If anyone knows of a Charcoal or gunmetal grey High temp paint let me know where to find it so I can try it out.
Also here is another little sneak peak of a side project I have been messing around with. This took a lot of time of masking and wet sanding and it still needs to be buffed and polished to a nice mirror shine but you get the idea of how it will look on the car. I think it will look even sicker once the car is done and low and squating on my rims and suspension. Mmm mmm mmm.
This is how she used to sit
This is my influence, so what if its a 240
Alright well thats all I got for now so let me know what yall think and I will post again as soon as something happens, hopefully it wont be months again. And also I know a lot of the pictures arent pro quality or anything, most of them were taken with my phone with greasy *** hands so I know some are out of focus so go easy!
12-13-11, 09:08 AM
#25
Lexus Test Driver
iTrader: (44)
Join Date: Jan 2007
Location: Maryland /Germantown
Posts: 5,139
Likes: 0
Received 7 Likes
on
7 Posts
Looks great bro!
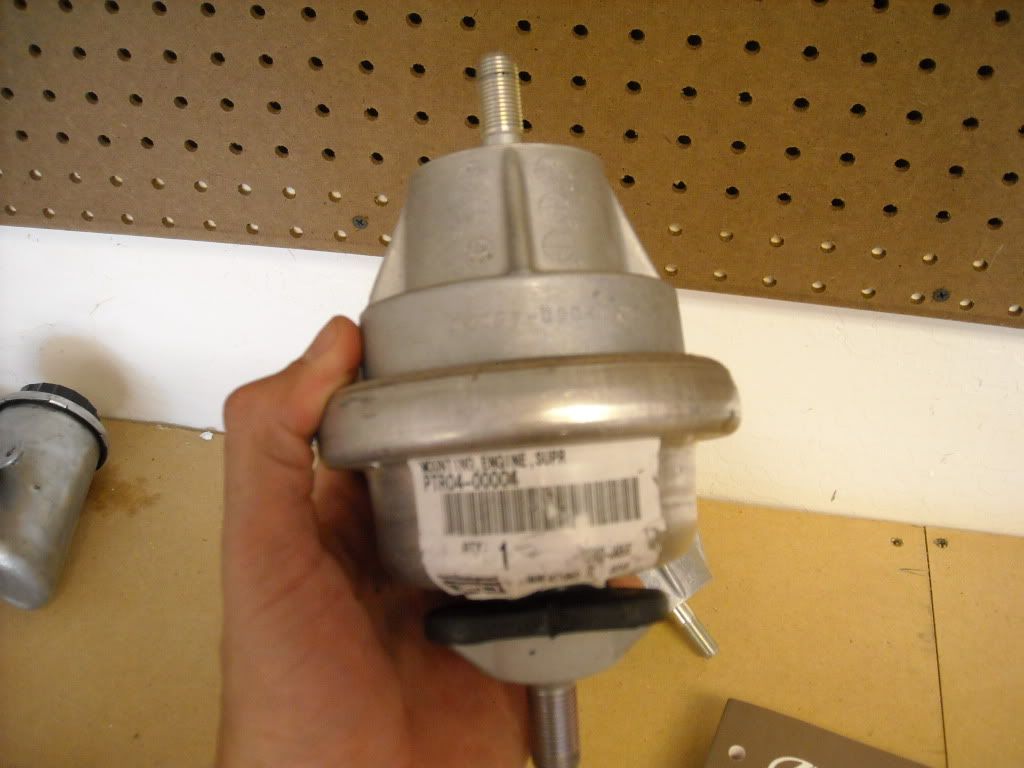
TRD motor mounts will not work with the SC motor mount brackets, you need MK4 supra turbo or non Turbo for 93.5 to 96 brackets they are shorter .
Those mounts are long and they will not work with the long brackets.
TRD motor mounts will not work with the SC motor mount brackets, you need MK4 supra turbo or non Turbo for 93.5 to 96 brackets they are shorter .
Those mounts are long and they will not work with the long brackets.
 12-13-11, 12:14 PM
#28
Driver
Thread Starter
Join Date: Sep 2009
Location: arizona
Posts: 121
Likes: 0
Received 0 Likes
on
0 Posts
12-13-11, 12:19 PM
#29
Driver
Thread Starter
Join Date: Sep 2009
Location: arizona
Posts: 121
Likes: 0
Received 0 Likes
on
0 Posts
Thats what I was thinking by looking at the geometry of the things, but I remember reading some earlier posts by you: https://www.clublexus.com/forums/per...-question.html
You seemed pretty confident that the trd mounts would work with the 92 sc3 brackets before?