Fixing a cracked fiberglass bumper?
 07-07-10, 12:58 AM
#1
Pole Position
Thread Starter
Join Date: Apr 2010
Location: Vancouver
Posts: 200
Likes: 0
Received 0 Likes
on
0 Posts
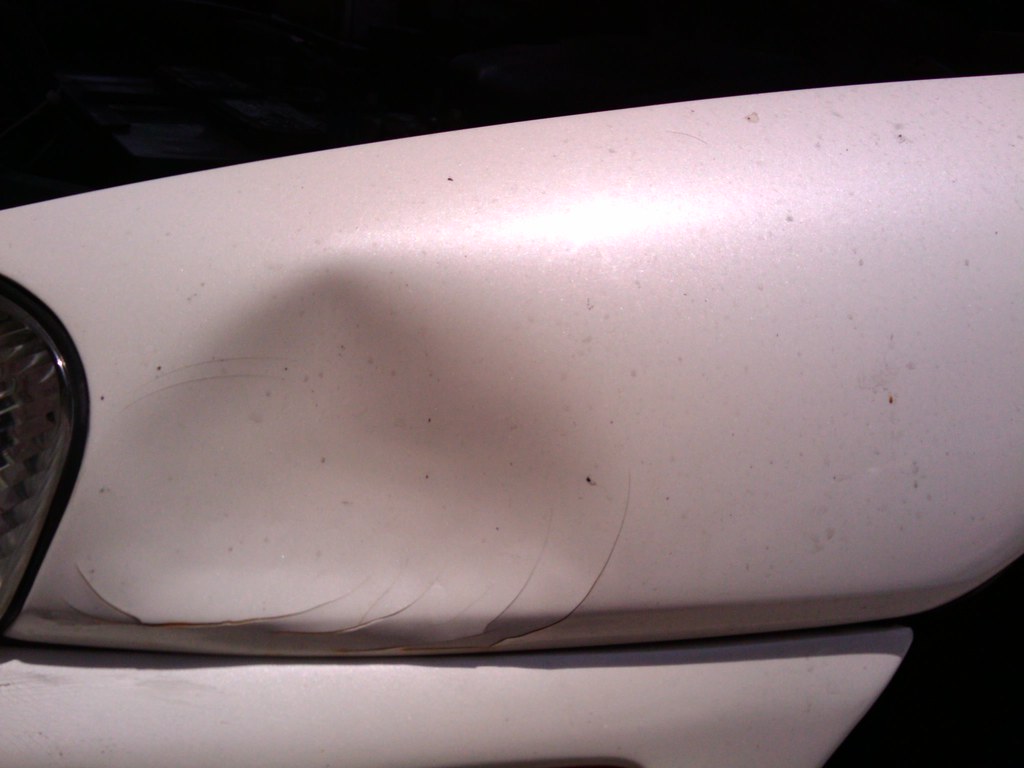
Ok so i drove by a railway crossing. There was construction going on and the crossing was more elevated and the bottom of my bumper, came in contact and hit the road right after. Theres a crack on the bottom and theres a longass crack at the front right below my high beams. Its really noticeable, i dont want to take it to an autobody shop (wanna save). So im thinking.. would bondo work? or like a fiberglass repair kit? And if i paint it after, would it be noticeable where its painted? First two pics show how long and deep the crack is. Last pic to show where the cracks sits on my car.
 07-07-10, 05:21 AM
#2
Lead Lap
iTrader: (3)

Join Date: May 2009
Location: SD, CA
Posts: 409
Likes: 0
Received 0 Likes
on
0 Posts
eesh... hmm....... fiberglass is not easy to work with, but it's also not very hard either. It's just one of those things that come easier the more you work with it.
I can't tell, but is it cracked all the way through?
You would definately want to use fiberglass. Start on the back side, and lay a few strips down. After you have that done, you can spread a light coat (or two) of bondo on the front, then sand it down... but sand down all the paint, or at least most of it on the front area before you spread any bondo...
If you need more help PM me.
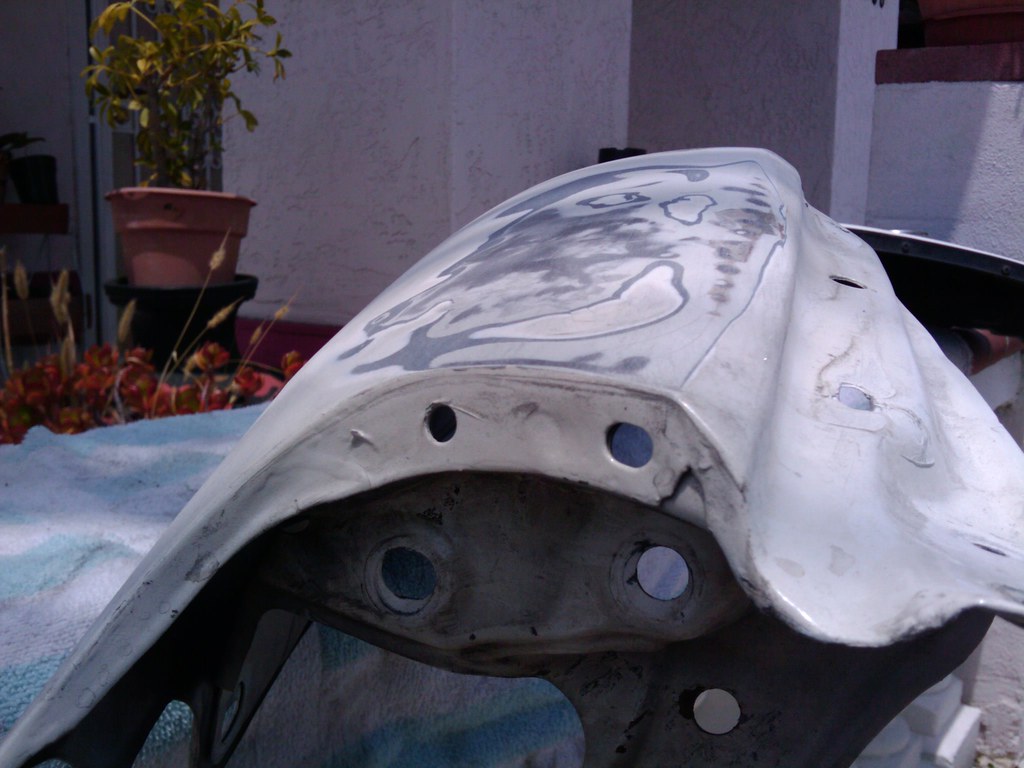
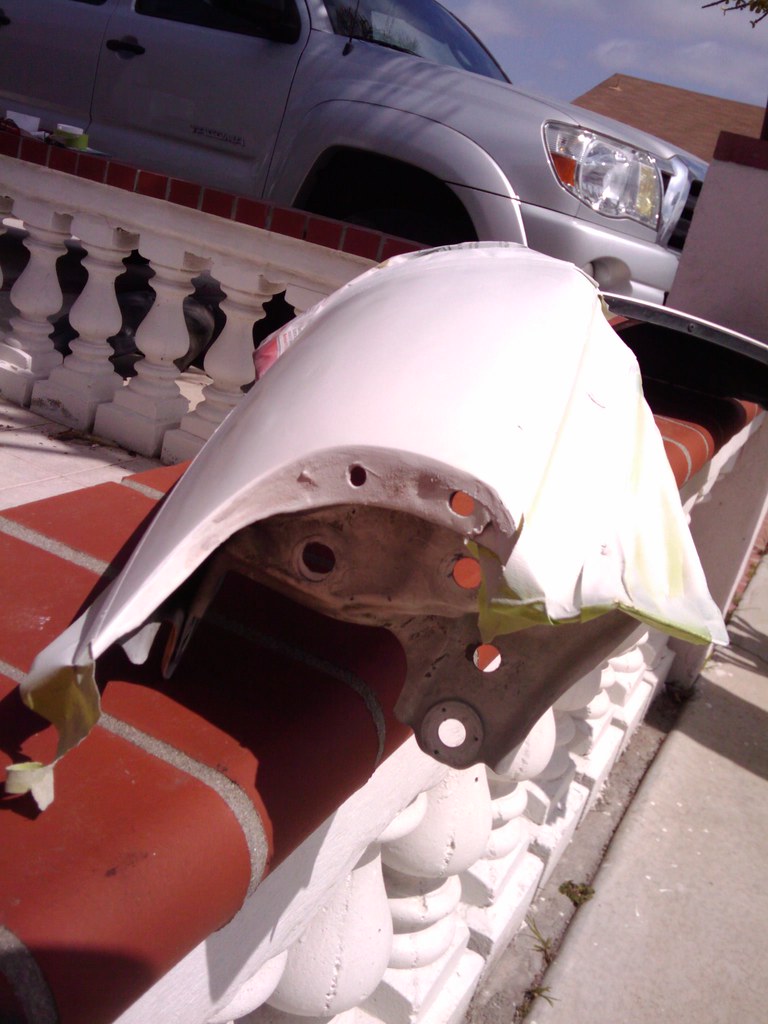
Here's my fender that I did a couple weekends ago. It was just real quick, as I hate having dents.. it's far from perfect though.
It's basically the same process, just add the glassing...

I can't tell, but is it cracked all the way through?
You would definately want to use fiberglass. Start on the back side, and lay a few strips down. After you have that done, you can spread a light coat (or two) of bondo on the front, then sand it down... but sand down all the paint, or at least most of it on the front area before you spread any bondo...
If you need more help PM me.
Here's my fender that I did a couple weekends ago. It was just real quick, as I hate having dents.. it's far from perfect though.
It's basically the same process, just add the glassing...
Last edited by romycha1; 07-07-10 at 05:25 AM.
07-07-10, 04:52 PM
#5
Pole Position
Thread Starter
Join Date: Apr 2010
Location: Vancouver
Posts: 200
Likes: 0
Received 0 Likes
on
0 Posts
i dont think its deep at all. its not cracked all the way through and im kinda uncomfortable cracking it up some more  ill look more into this kitty hair.
ill look more into this kitty hair.
07-10-10, 02:58 PM
#6
Driver
iTrader: (1)
Join Date: Sep 2009
Location: wv
Posts: 145
Likes: 0
Received 0 Likes
on
0 Posts
kitty hair is just a heavier weight bondo with fiberglass strands in it. heres waht you need to do.
1. start the repair on the car, if you dont you could repair it in the wrong position and when you reinstall it, it could just recrack.
2. v-out the crack with a dremel, grinder, etc, pretty much whatever. take a DA with some 80-120 gritpaper and sand about 6-9" away from the crack.
3.go to a body shop supply place, not autozone, or advance. napa sells paint and so does fisher/federated. get some type of fiberglass repair material, fiberall is the only brand i know of, its like fiberglass strands already in the resin and you just add hardener, you could also use a 2 part epoxy, but unless it mixxes up thick itll just run through the crack. also get some flowablepolyester filler. its like super lightweightbody, its runny. dolphin glaze, or keyflow(from keystone autparts) are what i use
4.apply the fiberglass material or epoxy in enough coats that it sticks out just a little further than the bumper.
5.take the bumper off. do all of the same things to the back that you just did to the front, but go about 6" or so beyond the crack for strength
6.take a DA to the front of the bumper where you can with some 150-220 grit paper. on the bottom around the curves its gonna suck to sand. get everything where it feels smooth and straight.
7.apply your flowable filler, it will laydown 100000%better and sand 100000% easier, but it will run all over everything if you let it so be careful.
8.sand with a block where you can. 150-220grit
9.sand the rest of the bumper down with some 320-400grit paper
10.once the repair is straight and has all the correct rounded edges etc. its time for primer. do not be afraid to lay some primer down. the worst thing that can happen is you run it and have to sand it back off, runs take forever to dry though.
11.block the primer till the **** looks nice
12.spray some base
13.spray some clear
14.let dry about 2 days
15. buff
16. reinstall and say nothing ever happened
07-10-10, 07:11 PM
#7

kitty hair is just a heavier weight bondo with fiberglass strands in it. heres waht you need to do.
1. start the repair on the car, if you dont you could repair it in the wrong position and when you reinstall it, it could just recrack.
2. v-out the crack with a dremel, grinder, etc, pretty much whatever. take a DA with some 80-120 gritpaper and sand about 6-9" away from the crack.
3.go to a body shop supply place, not autozone, or advance. napa sells paint and so does fisher/federated. get some type of fiberglass repair material, fiberall is the only brand i know of, its like fiberglass strands already in the resin and you just add hardener, you could also use a 2 part epoxy, but unless it mixxes up thick itll just run through the crack. also get some flowablepolyester filler. its like super lightweightbody, its runny. dolphin glaze, or keyflow(from keystone autparts) are what i use
4.apply the fiberglass material or epoxy in enough coats that it sticks out just a little further than the bumper.
5.take the bumper off. do all of the same things to the back that you just did to the front, but go about 6" or so beyond the crack for strength
6.take a DA to the front of the bumper where you can with some 150-220 grit paper. on the bottom around the curves its gonna suck to sand. get everything where it feels smooth and straight.
7.apply your flowable filler, it will laydown 100000%better and sand 100000% easier, but it will run all over everything if you let it so be careful.
8.sand with a block where you can. 150-220grit
9.sand the rest of the bumper down with some 320-400grit paper
10.once the repair is straight and has all the correct rounded edges etc. its time for primer. do not be afraid to lay some primer down. the worst thing that can happen is you run it and have to sand it back off, runs take forever to dry though.
11.block the primer till the **** looks nice
12.spray some base
13.spray some clear
14.let dry about 2 days
15. buff
16. reinstall and say nothing ever happened
1. start the repair on the car, if you dont you could repair it in the wrong position and when you reinstall it, it could just recrack.
2. v-out the crack with a dremel, grinder, etc, pretty much whatever. take a DA with some 80-120 gritpaper and sand about 6-9" away from the crack.
3.go to a body shop supply place, not autozone, or advance. napa sells paint and so does fisher/federated. get some type of fiberglass repair material, fiberall is the only brand i know of, its like fiberglass strands already in the resin and you just add hardener, you could also use a 2 part epoxy, but unless it mixxes up thick itll just run through the crack. also get some flowablepolyester filler. its like super lightweightbody, its runny. dolphin glaze, or keyflow(from keystone autparts) are what i use
4.apply the fiberglass material or epoxy in enough coats that it sticks out just a little further than the bumper.
5.take the bumper off. do all of the same things to the back that you just did to the front, but go about 6" or so beyond the crack for strength
6.take a DA to the front of the bumper where you can with some 150-220 grit paper. on the bottom around the curves its gonna suck to sand. get everything where it feels smooth and straight.
7.apply your flowable filler, it will laydown 100000%better and sand 100000% easier, but it will run all over everything if you let it so be careful.
8.sand with a block where you can. 150-220grit
9.sand the rest of the bumper down with some 320-400grit paper
10.once the repair is straight and has all the correct rounded edges etc. its time for primer. do not be afraid to lay some primer down. the worst thing that can happen is you run it and have to sand it back off, runs take forever to dry though.
11.block the primer till the **** looks nice
12.spray some base
13.spray some clear
14.let dry about 2 days
15. buff
16. reinstall and say nothing ever happened
oh and OP...first thing to do is to drill a relief hole at the top so it doesn't crack anymore from you driving.
Trending Topics
07-11-10, 12:35 PM
#8
Driver

Join Date: Nov 2007
Location: Texas
Posts: 168
Likes: 0
Received 0 Likes
on
0 Posts
You definitely want to clean up the breaking point as suggested to get a good repair. You can get supplies for all the things you need to do from a boating store for a decent price usually depending on which one you go to. If you want you can just buy a small amount of resin then some mat and a little filler. Basically you can pull apart the mat and add little pieces to some resin to help fill the crack itself then use whole pieces of mat on the rear. After all that is said and done you can use some filler as needed on the front and your done. Obviously there is a lot of sanding and such involved but since you knew that I just wanted to toss out another option.
07-11-10, 03:23 PM
#9
Driver School Candidate

Join Date: Jan 2008
Location: CA
Posts: 15
Likes: 0
Received 0 Likes
on
0 Posts
I just got my new fiberglass body kit, the first thing I did is reinforced it with epoxy fiberglass resin, I used evercoat's everfix epoxy resign
with fiberglass cloth in the middle of the bumper, and fiberglass mat at the bottom. fiberglass cloth is the easiest one to work with it's thiner
then fiberglass mat. let me upload some pictures... the epoxy resin is 2 part, resin and the hardner, once you mix them together you have
about 20 min till it starts curing and gets hard. You have to remove your bumper and line up the cracked area, (bring it together) and position
it in a way that the inside of the cracked bumper is facing up, because the epoxy resin is thin and will run down, it will be a good idea to
tape the outside of the cracked area so the resin doesn't run down. if it's a narrow area I'll use fiberglass cloth, put some resin around the
cracked area (4-5 inch's around to reinforce as well), then put the fiberglass cloth, and spread more epoxy resin with a paint brush.
Make sure you get everything ready before you mix the epoxy resin with the hardner, depanding on the temp it will start curing in 20 min,
if the weather is warm, if the weather is cold it will take longer to start curring and will have lots of run downs of the resin as I learned it
the hard way.
Once it dries in 24hrs it will be very tough to crack or break that area, the only suggestion I have is, after 24hr put another layer(repeat above
steps, cause more epoxy and fiberglass = thicker and stronger layer.
- once the above steps are complete, the cosmetic part of it is easy, sand, poly bondo, sand, polyester primer(very good on fiberglass) ... etc.
hope this was helpfull. if you have more questions, pm me
Last edited by Raffizzz; 07-11-10 at 07:47 PM. Reason: More info
07-12-10, 01:30 PM
#10
Pole Position
Thread Starter
Join Date: Apr 2010
Location: Vancouver
Posts: 200
Likes: 0
Received 0 Likes
on
0 Posts
hey thanks for all the replies but sadly im not that capable of doing all that work and not that comfortable doing it haha..for now i will just put some bandaids on 
07-12-10, 02:45 PM
#11
Lexus Test Driver
iTrader: (14)
Join Date: Jun 2009
Location: CA
Posts: 1,072
Likes: 0
Received 0 Likes
on
0 Posts
get white tape. apply.
if none at your disposal, get duct tape. paint white. apply.
I'm being honest, if i had a white sc and a cracked fg bumper, I'd do this. but then again, my friends call me "ghetto" with all my zip ties and duct tape.
if none at your disposal, get duct tape. paint white. apply.
I'm being honest, if i had a white sc and a cracked fg bumper, I'd do this. but then again, my friends call me "ghetto" with all my zip ties and duct tape.

Thread
Thread Starter
Forum
Replies
Last Post
ALEX_IS350
IS - 2nd Gen (2006-2013)
7
09-06-06 01:49 PM