DIY: Remove condensation from headlamp (temporary)
 03-07-09, 06:52 AM
#1
Moderator
Thread Starter

Had a lot of rain recently and my pass headlamp naturally collected condensation...so I decided to "dry" it out. Fairly easy and takes 30 minutes. You will need 2 hair blowers.
Step 1
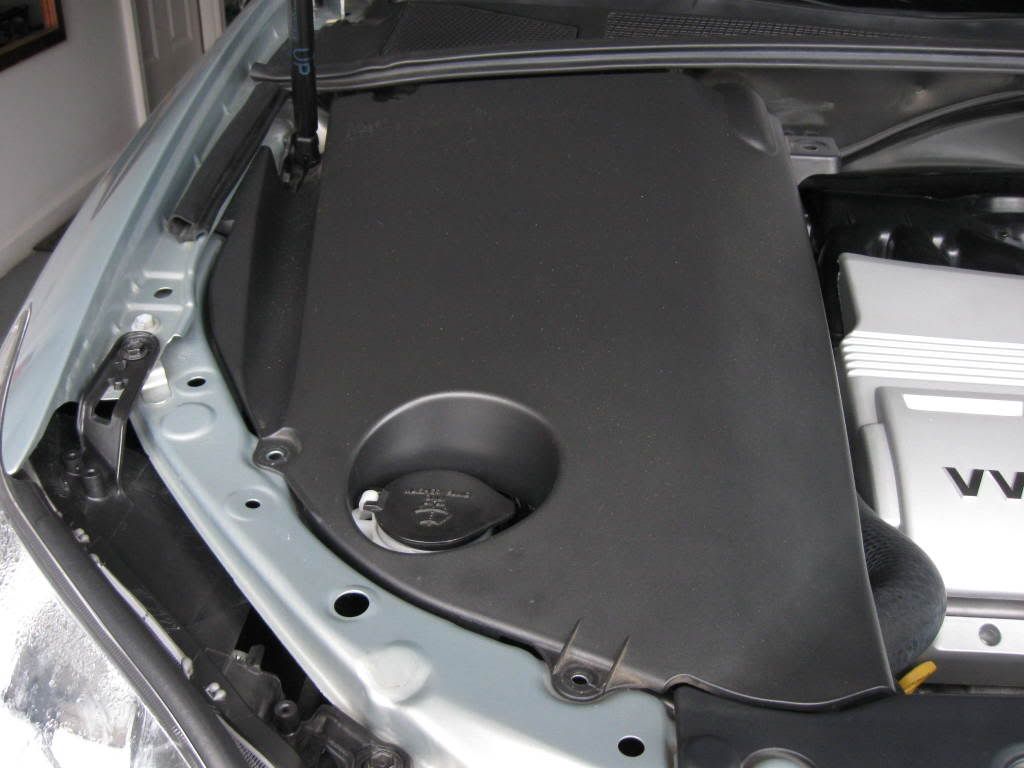
Take off cover, 4 plastic screws, be gentle, they break off easily, take your time.
Step 1
Take off cover, 4 plastic screws, be gentle, they break off easily, take your time.
 03-07-09, 06:54 AM
#2
Moderator
Thread Starter
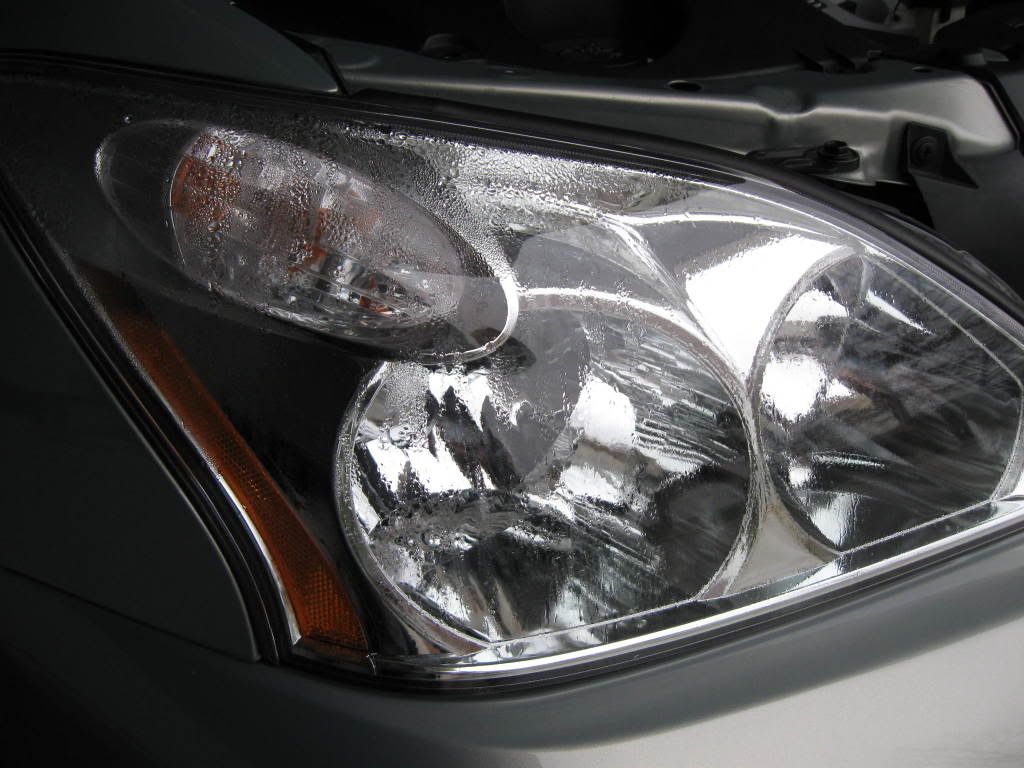
This is the HL before drying:
03-07-09, 06:56 AM
#3
Moderator
Thread Starter
Step 2:
Unbolt the washer filler tube and set aside so you have space to work around the bulb connectors.
Take out the DRL Lamp, be gentle, wrap it up with clean cloth and tie it with rubber band, set it aside:

Unbolt the washer filler tube and set aside so you have space to work around the bulb connectors.
Take out the DRL Lamp, be gentle, wrap it up with clean cloth and tie it with rubber band, set it aside:
03-07-09, 06:58 AM
#4
Moderator
Thread Starter
Step 3:
Take off the Side marker bulb and then the signal light bulb, same, wrap in clean cloth and set aside.
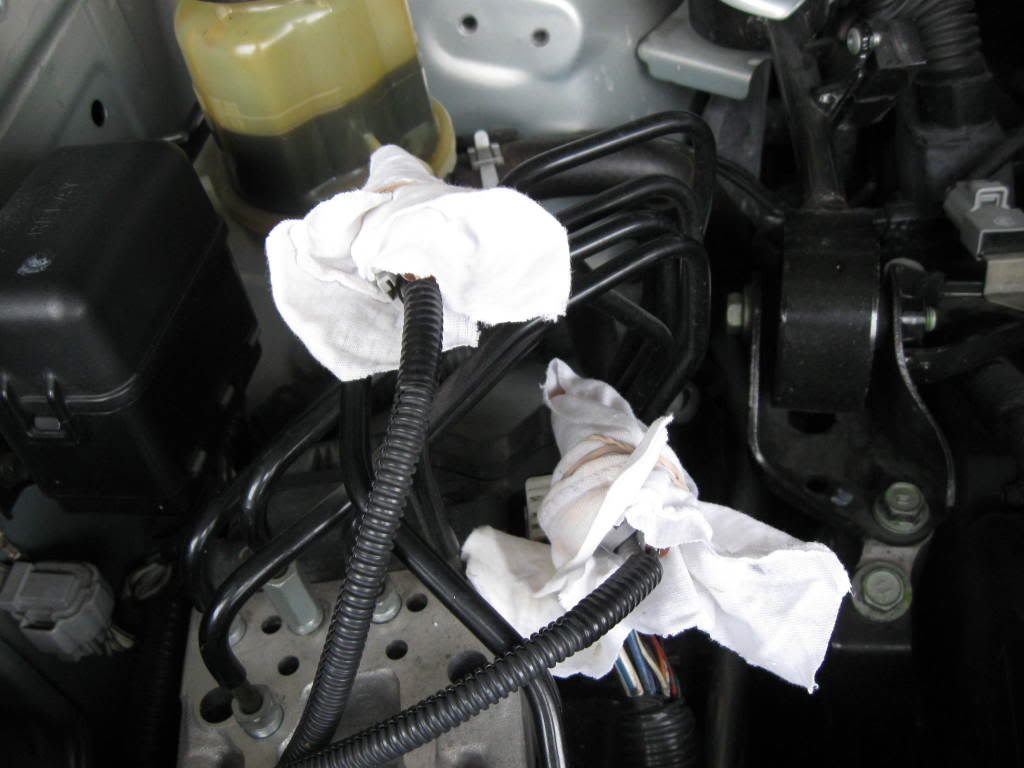
Take off the Side marker bulb and then the signal light bulb, same, wrap in clean cloth and set aside.
03-07-09, 06:59 AM
#5
Moderator
Thread Starter
Step 4:
Get your hair blowers ready, I used a stubby one to blow hot air on the DRL hole. Then another blower aimed at the top of the HL. In 15 minutes, all water collected have evaporated.
See result:
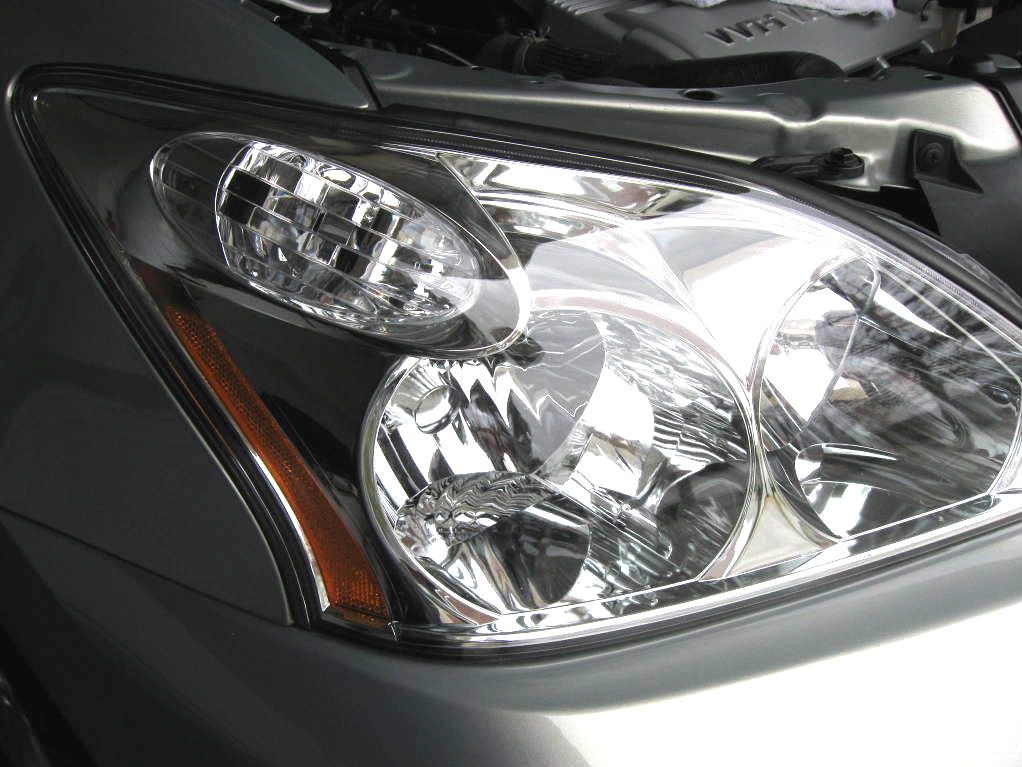
Get your hair blowers ready, I used a stubby one to blow hot air on the DRL hole. Then another blower aimed at the top of the HL. In 15 minutes, all water collected have evaporated.
See result:
03-07-09, 07:03 AM
#6
Moderator
Thread Starter
Step 5:
Carefully re-install bulbs. Re-install washer filler neck and cover.
Then pray you do not get much rain..............
Or else, replace headlamp assembly. Cost is $350.00 plus you have to take down the bumper cover, fender liner. One of these days, maybe I will. For now, 30 minutes will get the water out.
Last year had to do it once.
Good luck with yours.
03-08-09, 10:14 PM
#7
Is yours out of warranty already? Or does the dealership just not want to replace it. I still think it is hard for Lexus to say it is normal when in the past they replace it routinely and in fact the invoice would say warped/damaged headlight seal so that doesn't sound normal too me. Anyway, I'm surprised the heat and water didn't leave some water marks. On mine, when I had condensation and it would dry out, the dealer knew I had a problem because it left some water marks inside the lens. In fact, I knew that would happen so i actually took the hairdryer and purposely dried it out leaving the dried water marks before I took it in
Trending Topics
03-09-09, 05:58 AM
#8
Moderator
Thread Starter
The dealer says out of warranty...I tried. I missed it by 2 months.
03-10-09, 06:48 AM
#9
Moderator
Thread Starter
After 2 days...it is back....with a vengeance...water all over....I am tired of this crap!
03-10-09, 10:13 AM
#10
Try this trick and see if it works for you. After you dry it out again, take some vaseline and line the entire seal area. Use a liberal amount. It is mostly clear so you wont see it, but it does repel water so it might work. I learned this on the BMW forums on how to seal up those aftermarket angel eye headlights that often leak.
03-10-09, 01:34 PM
#11
Moderator
Thread Starter
I will definitely try this out, however the SEAL areas are not that accessible. I will check on it, though. Thanks for the tip, I hope it helps. It is so frustrating to see the water inside the HL.
03-11-09, 04:13 AM
#12

Why not try this before gooping it up:
http://www.acehardware.com/sm-permat...i-1419004.html
You do not have to remove it, just let it flow into the cracks. Obviously, it needs to be dry when applying.
http://www.acehardware.com/sm-permat...i-1419004.html
You do not have to remove it, just let it flow into the cracks. Obviously, it needs to be dry when applying.
03-11-09, 08:40 AM
#13
Lexus Test Driver
iTrader: (1)
Join Date: Aug 2007
Location: VA
Posts: 1,288
Likes: 0
Received 0 Likes
on
0 Posts
Lexus really makes crappy lamp assemblies, over at the SC forums (1st gen) we have this major problem and if you search you'll laugh at all the solutions we came up with. The lamp needs to breathe, there are breather hoses in the back of the unit that get blocked trapping moisture inside. What some did was to open the unit and reseal with silicone, some inserted silica gel packs, some fabricated their own breather hoses with a tiny bov filter, and some drilled holes on the bottom of the housings.
I'm pretty sure I'll encounter the same problem with the rx that's why at 49k miles I'll just have them replaced, leak or no leak
I'm pretty sure I'll encounter the same problem with the rx that's why at 49k miles I'll just have them replaced, leak or no leak
03-12-09, 02:00 PM
#14
Moderator
Thread Starter
That's why it is so confusing...they have to breathe...and yet they are sealed...almost like crazy! I will check the 1st Gen SC though....at least enjoy the stuff ya'll came up with.
But I see this crap all over the place....sometimes they are on tail lamps, side mirrors and of course HL. A co-worker has his Jaguar with the condensation, too....!!
But I see this crap all over the place....sometimes they are on tail lamps, side mirrors and of course HL. A co-worker has his Jaguar with the condensation, too....!!
03-13-09, 07:35 AM
#15
Lexus Test Driver
iTrader: (1)
Join Date: Aug 2007
Location: VA
Posts: 1,288
Likes: 0
Received 0 Likes
on
0 Posts
That's why it is so confusing...they have to breathe...and yet they are sealed...almost like crazy! I will check the 1st Gen SC though....at least enjoy the stuff ya'll came up with.
But I see this crap all over the place....sometimes they are on tail lamps, side mirrors and of course HL. A co-worker has his Jaguar with the condensation, too....!!
But I see this crap all over the place....sometimes they are on tail lamps, side mirrors and of course HL. A co-worker has his Jaguar with the condensation, too....!!